
The ![]() A Candle in the Storm quest in
A Candle in the Storm quest in ![]() Dragon’s Dogma 2 can be acquired from Menella once you meet her at the Volcano Island Camp on Agamen Volcanic Island, in the southeastern part of the world map. You will need to have completed the
Dragon’s Dogma 2 can be acquired from Menella once you meet her at the Volcano Island Camp on Agamen Volcanic Island, in the southeastern part of the world map. You will need to have completed the ![]() Shadowed Prayers quest before you can find Menella here, so be sure to do that first. The quest will continue the story of that quest, and Menella asks you to help her in investigating who might have been behind the assassination attempt on Empress Nadinia’s life. She’ll ask you to question the brigand prisoner named Herman, a member of the
Shadowed Prayers quest before you can find Menella here, so be sure to do that first. The quest will continue the story of that quest, and Menella asks you to help her in investigating who might have been behind the assassination attempt on Empress Nadinia’s life. She’ll ask you to question the brigand prisoner named Herman, a member of the ![]() Coral Snakes gang, who can be found in the
Coral Snakes gang, who can be found in the ![]() Bakbattahl Gaol. On this page, we’ll take you through all the steps of the quest from here, including the best outcome based on whether you choose to support or oppose the empress’s proposal.
Bakbattahl Gaol. On this page, we’ll take you through all the steps of the quest from here, including the best outcome based on whether you choose to support or oppose the empress’s proposal.

Speak with Menella at the Volcano Island Camp to start A Candle in the Storm.
Speak with Menella at the Volcano Island Camp
As mentioned above, to start this quest you’ll first need to complete the Shadowed Prayers quest, and then travel to the Volcano Island Camp in the Agamen Volcanic Island region. So long as you don’t pursue the main story back to the ![]() Excavation Site, this quest should remain open to you, and Menella should remain at the Volcano Island Camp until this quest is completed. You can find her next to the
Excavation Site, this quest should remain open to you, and Menella should remain at the Volcano Island Camp until this quest is completed. You can find her next to the ![]() Volcanic Island Armory shop in the camp.
Volcanic Island Armory shop in the camp.
Question Herman at the Bakbattahl Gaol
The first thing that Menella will ask you to do for this quest is return to the ![]() Bakbattahl Gaol and question Herman, the brigand prisoner there. You’ll have the option to question him outright, but you’ll need to pay the bribe of 5000 gold if you want to get any useful information out of him. Once he’s told you all he knows, you can return to Menella to inform her. At this point, Menella will let you in on another secret plot to assassinate Empress Nadinia, and that to prevent it, Menella has ensured that the empress is safely secured at a location known only to her.
Bakbattahl Gaol and question Herman, the brigand prisoner there. You’ll have the option to question him outright, but you’ll need to pay the bribe of 5000 gold if you want to get any useful information out of him. Once he’s told you all he knows, you can return to Menella to inform her. At this point, Menella will let you in on another secret plot to assassinate Empress Nadinia, and that to prevent it, Menella has ensured that the empress is safely secured at a location known only to her.
Visit Ashe in the Bakbattahl Gaol
The time has come to draw out the betrayer, and to do so you’ll need to pretend to be in league with the Coral Snakes. You’ll do this by going back to the Bakbattahl Gaol, where you’ll inform another imprisoned member of the Coral Snakes (named Ashe, something of a Kratos from God of War look-alike) of a false location of the empress, and that you have her in your custody there. This will be enough to convince Ashe that you’re on their side, and they’ll pass the information on to their contact.
Report Back to Ser Menella
After speaking with Ashe in the Bakbattahl Gaol, you’ll need to report back to Menella, but you’re not given a precise location. All you need to do is go to the westernmost entrance to Bakbattahl, where Menella will greet you and inform you about the next phase of the plan. After this, you’ll need to find her at the secret location where Empress Nadinia is being kept safe, and that’s just to the northwest of Bakbattahl. The location is built within a rocky outcrop, so it can be difficult to spot, but you can see an image of it below.
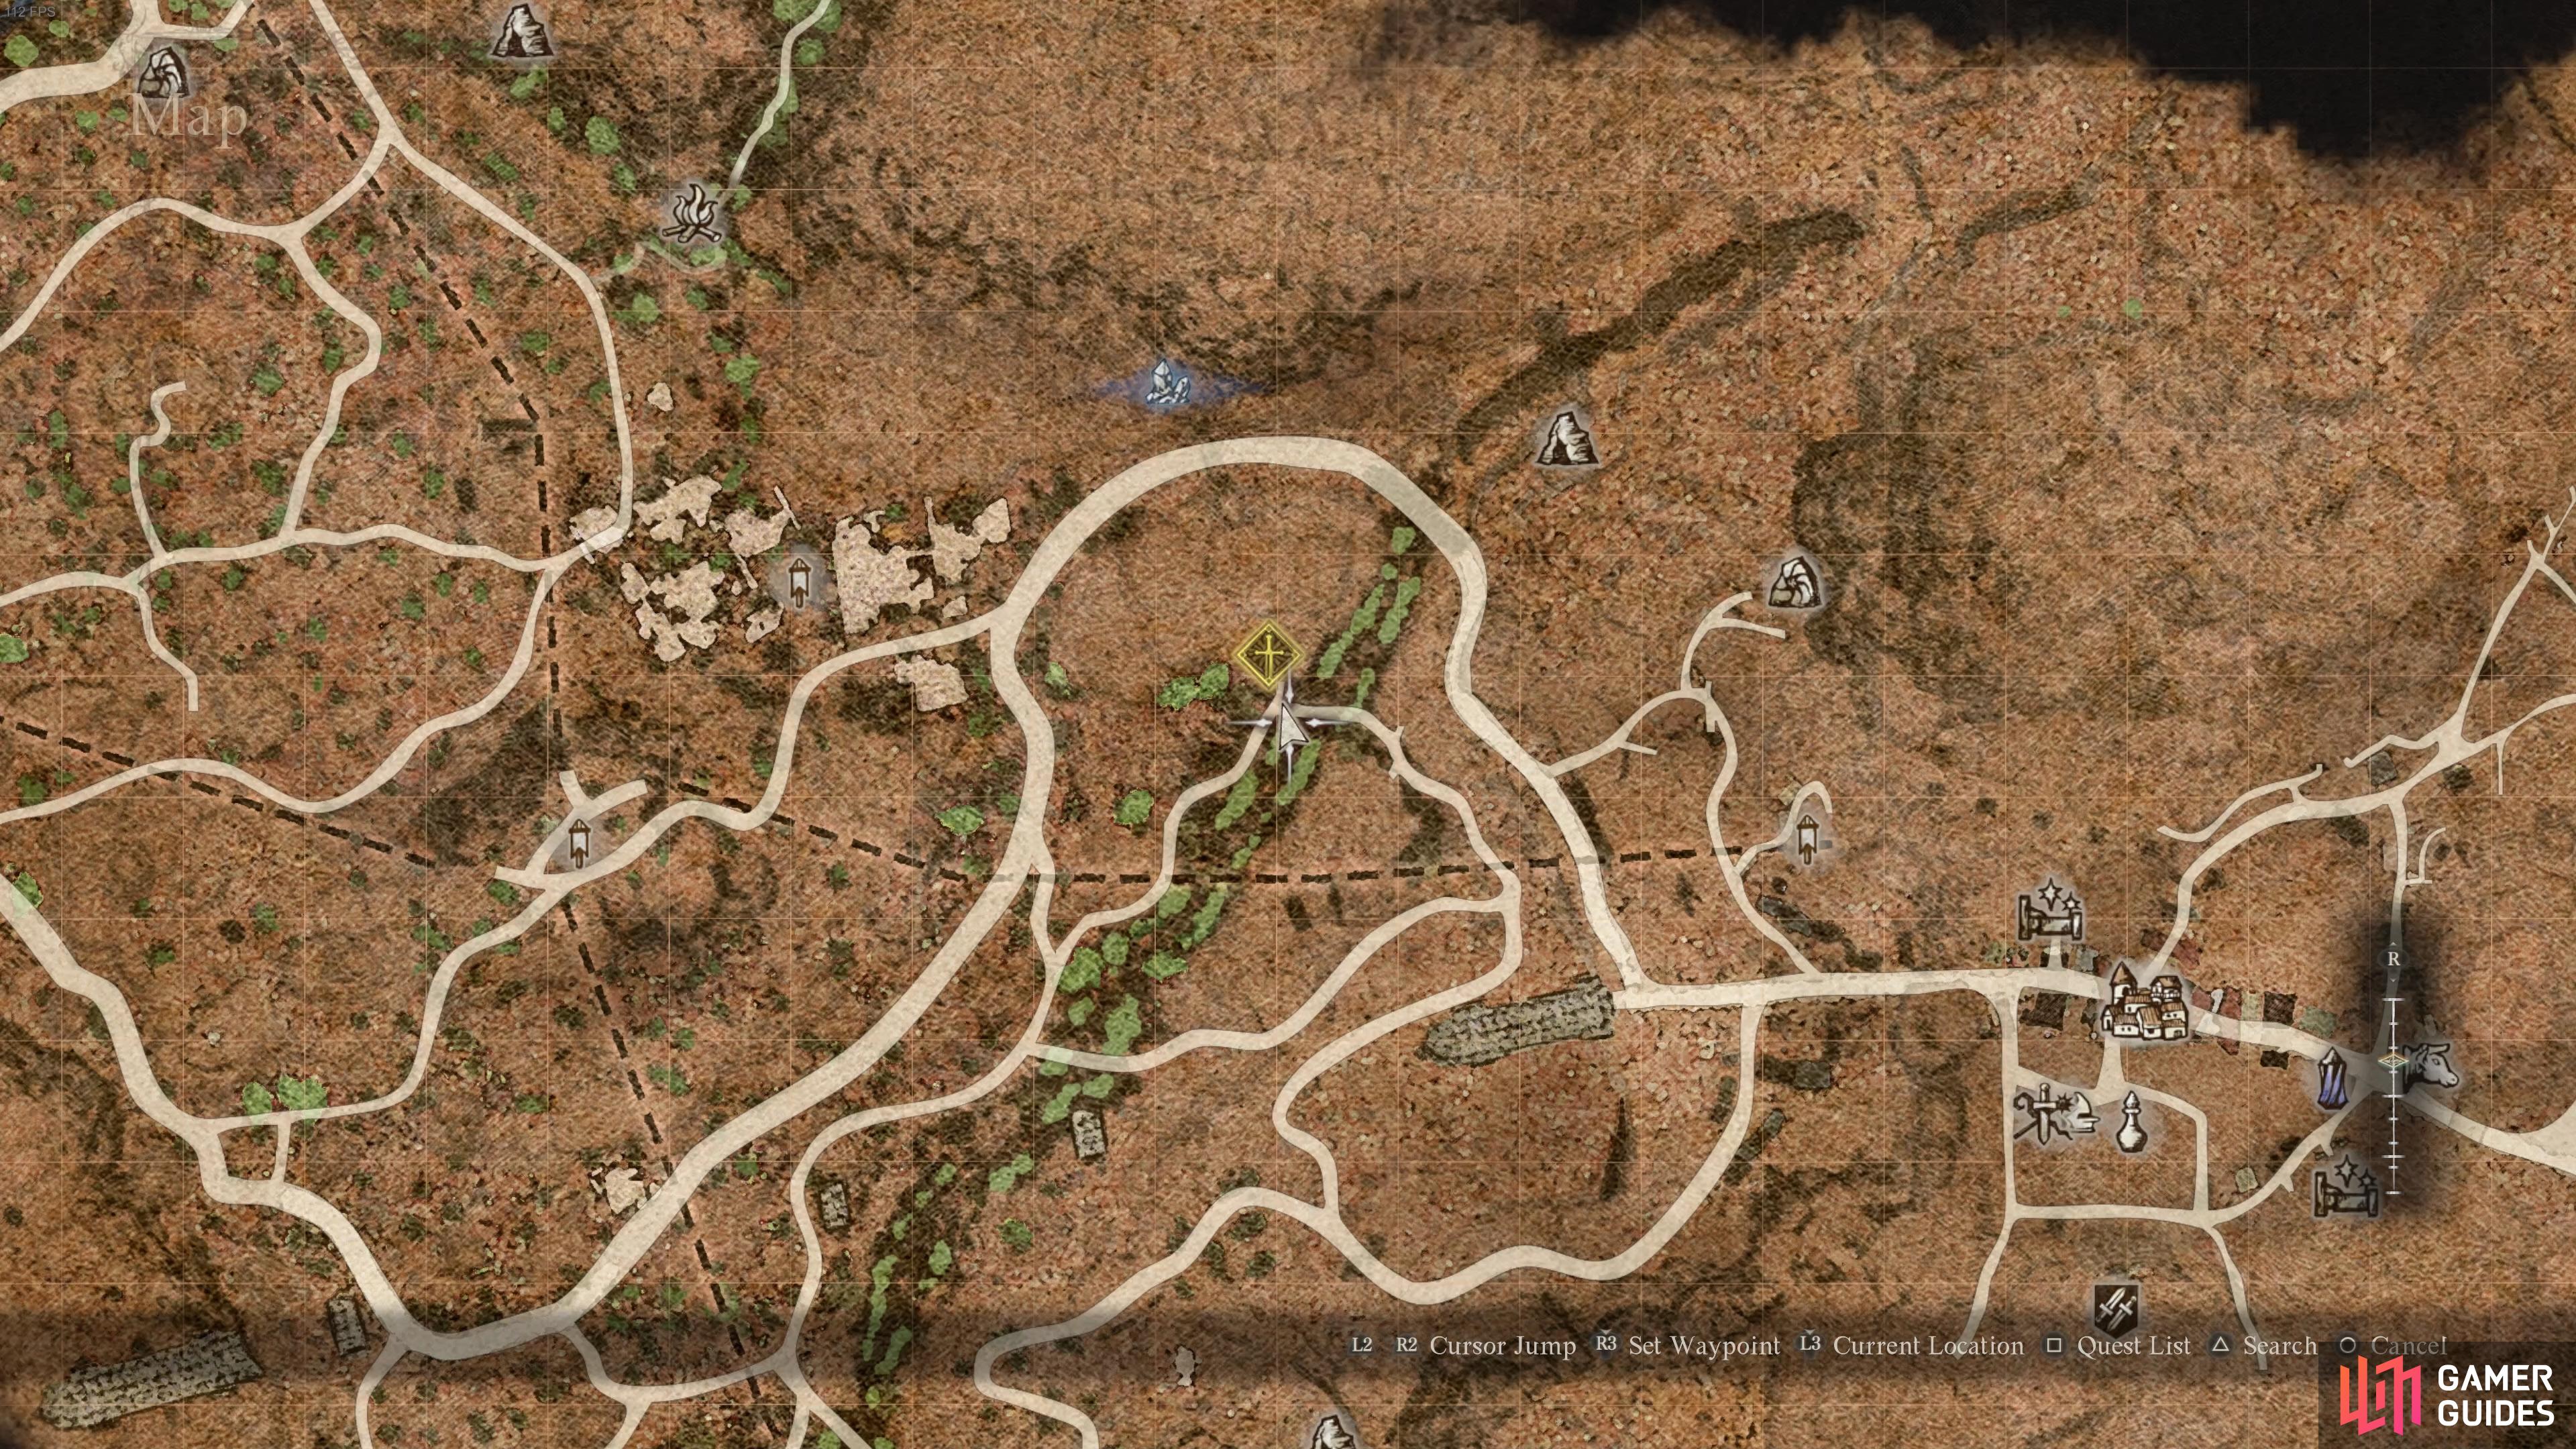

(1 of 2) The location of the secret house where Empress Nadinia can be found.
The location of the secret house where Empress Nadinia can be found. (left), The house is built into the rock, so it can be difficult to spot. (right)
Support or Oppose the Empress’s Proposal?
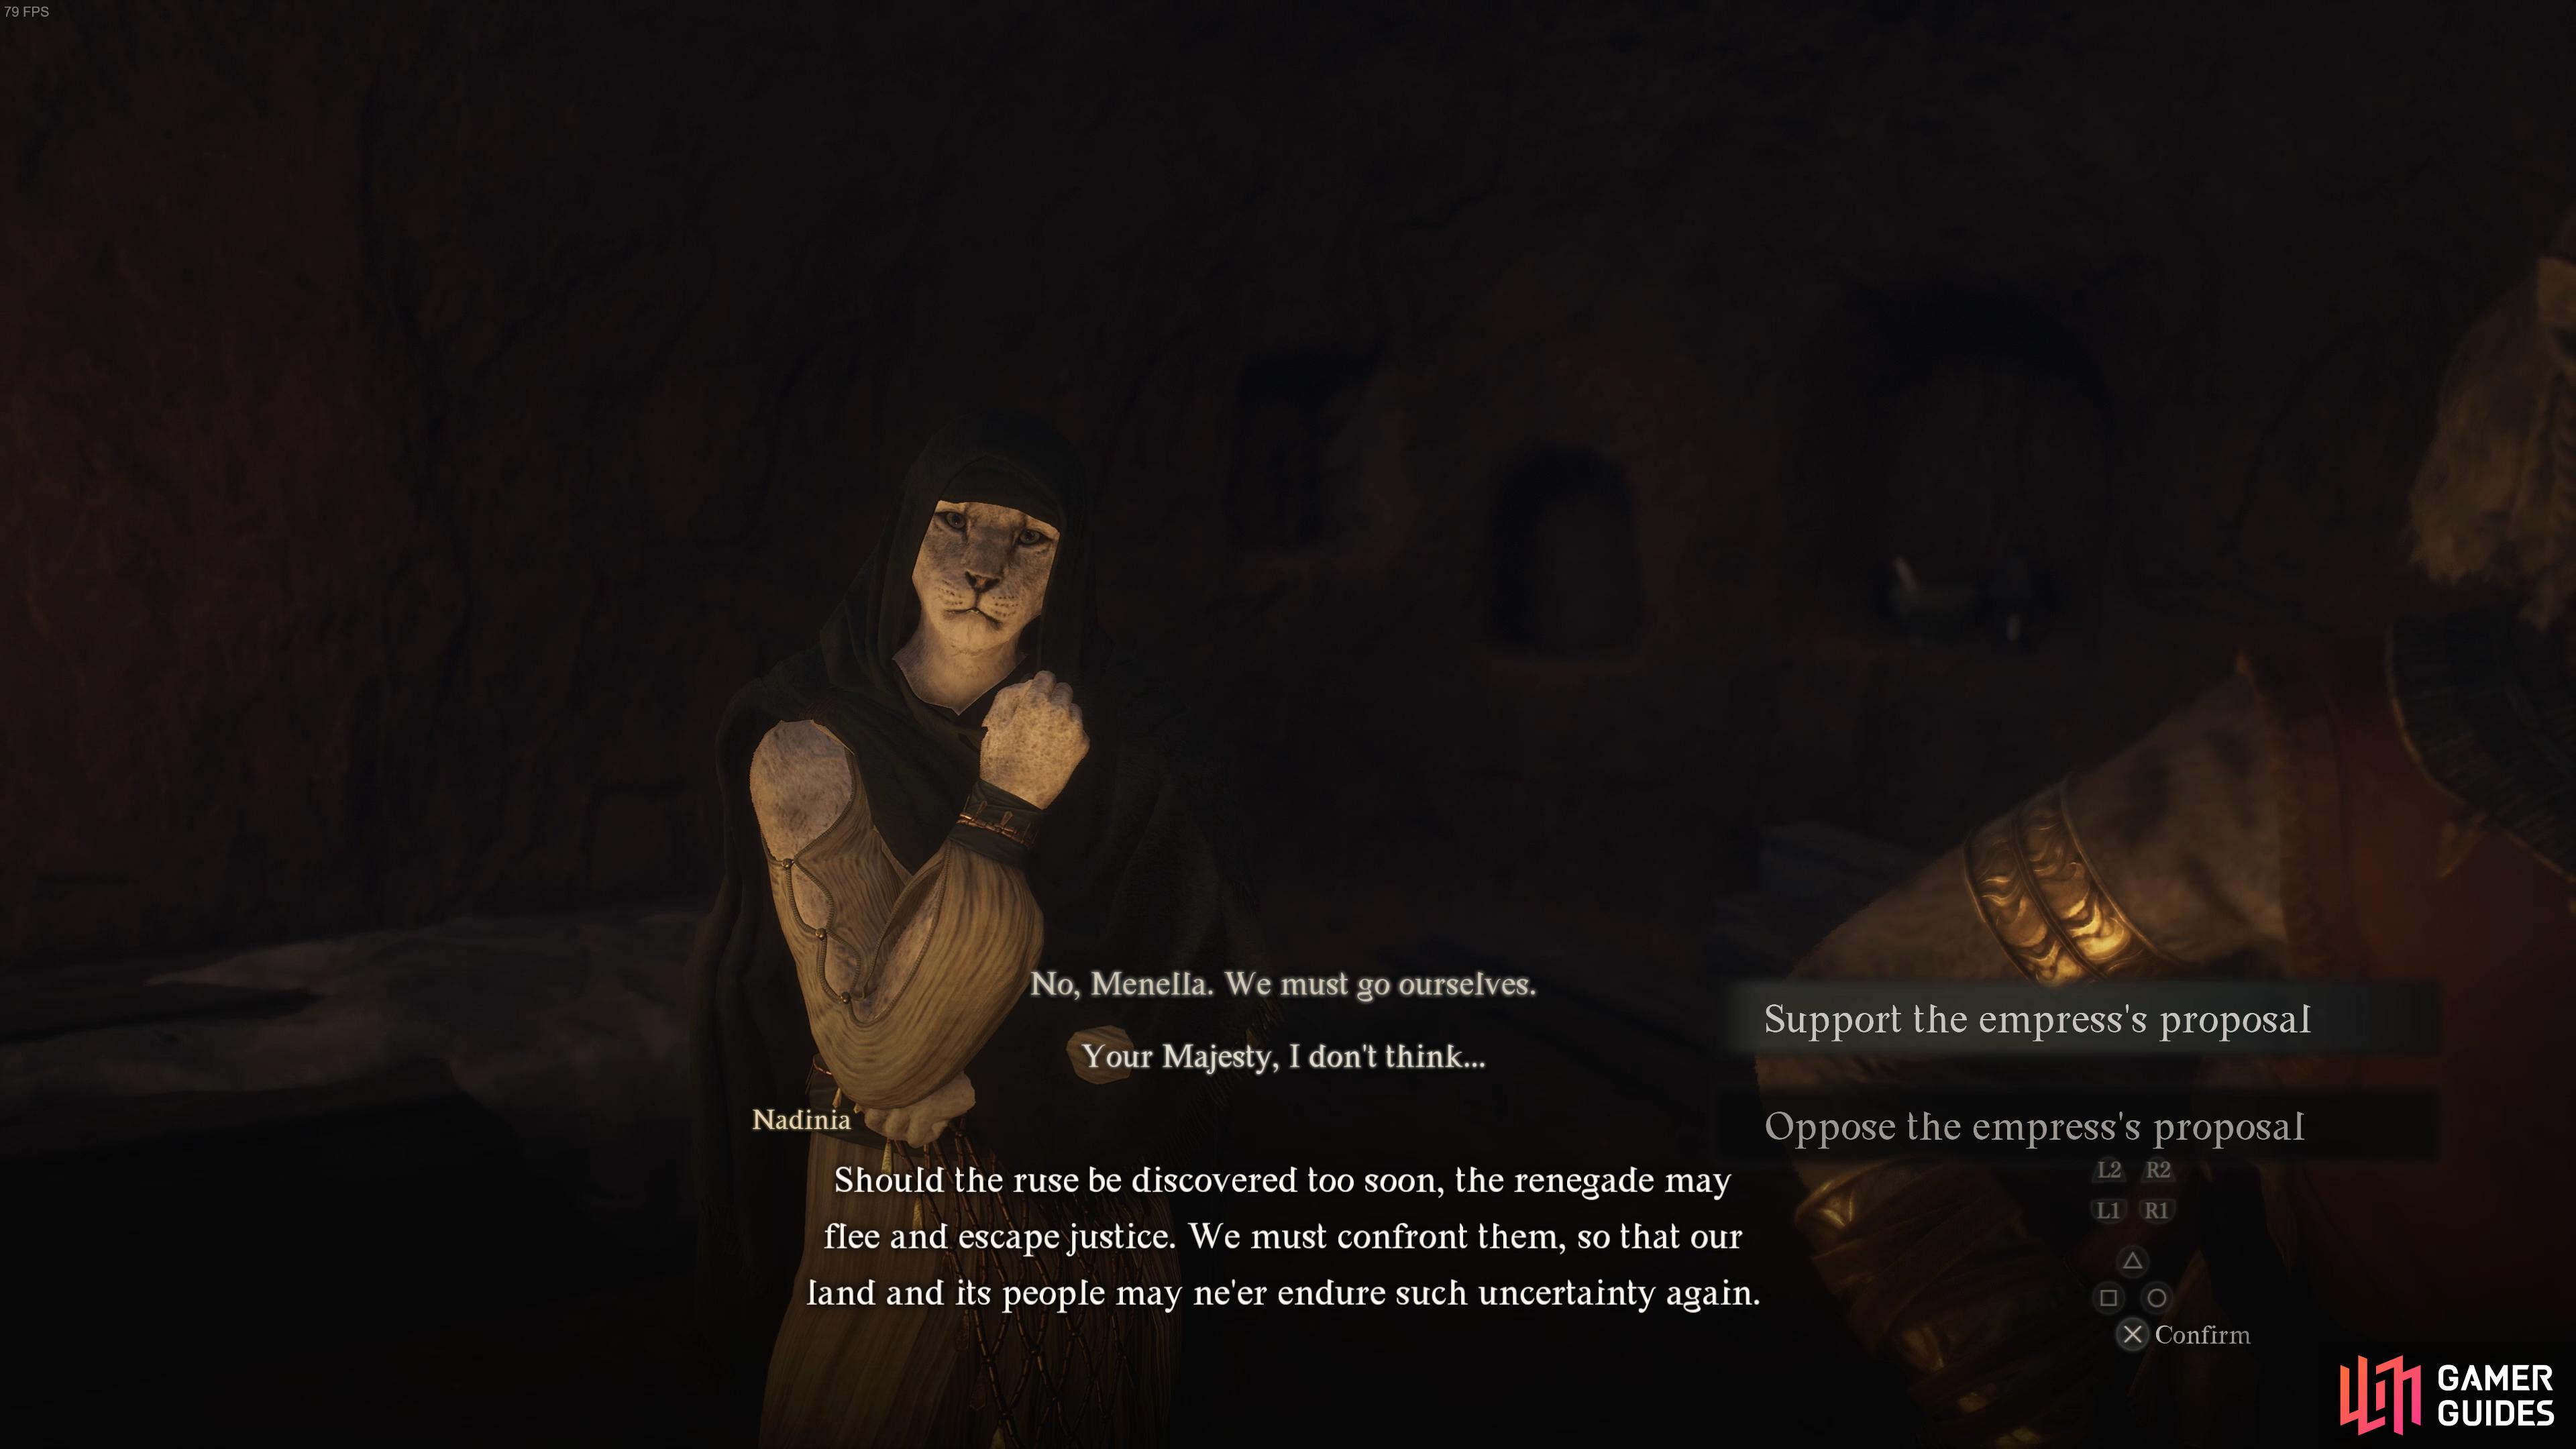
Once you get inside the secret hiding place where Empress Nadinia can be found, a brief discussion between her and Menella will begin. Menalla wants to use a body double to act as the Empress when the Coral Snakes arrive, but Empress Nadinia insists that she be there herself, to avoid any hiccups if the contact discovers the truth. You now have to decide whether to support or oppose Empress Nadinia’s proposal, and we strongly recommend that you support it.
Regardless of whether you choose to support or oppose the proposal, after the scene the Coral Snakes contact will enter the room. At this point, there will be two different outcomes depending on your choice.
What Happens if You Support Empress Nadinia’s Proposal?
If you support Empress Nadinia’s proposal, the Coral Snakes contact will recognize that the person they’re seeing genuinely is empress Nadinia. They’ll ask you to kill the empress, but all you have to do is perform one basic attack towards her (while being careful to avoid hitting the contact) to prove that you’re the real deal. At this point, the contact will reveal the logic behind their desire to kill Empress Nadinia, and at the end of their spiel, Menella will walk in, and the contact will be arrested.
It turns out that the contact working with the Coral Snakes is Ser Irmhild, someone who was pledged to protect Empress Nadinia as part of her court. Exposing her in this way will earn you 4800 XP, 25,000 Gold, and a ![]() Ring of Amplification as a reward for completing the quest.
Ring of Amplification as a reward for completing the quest.
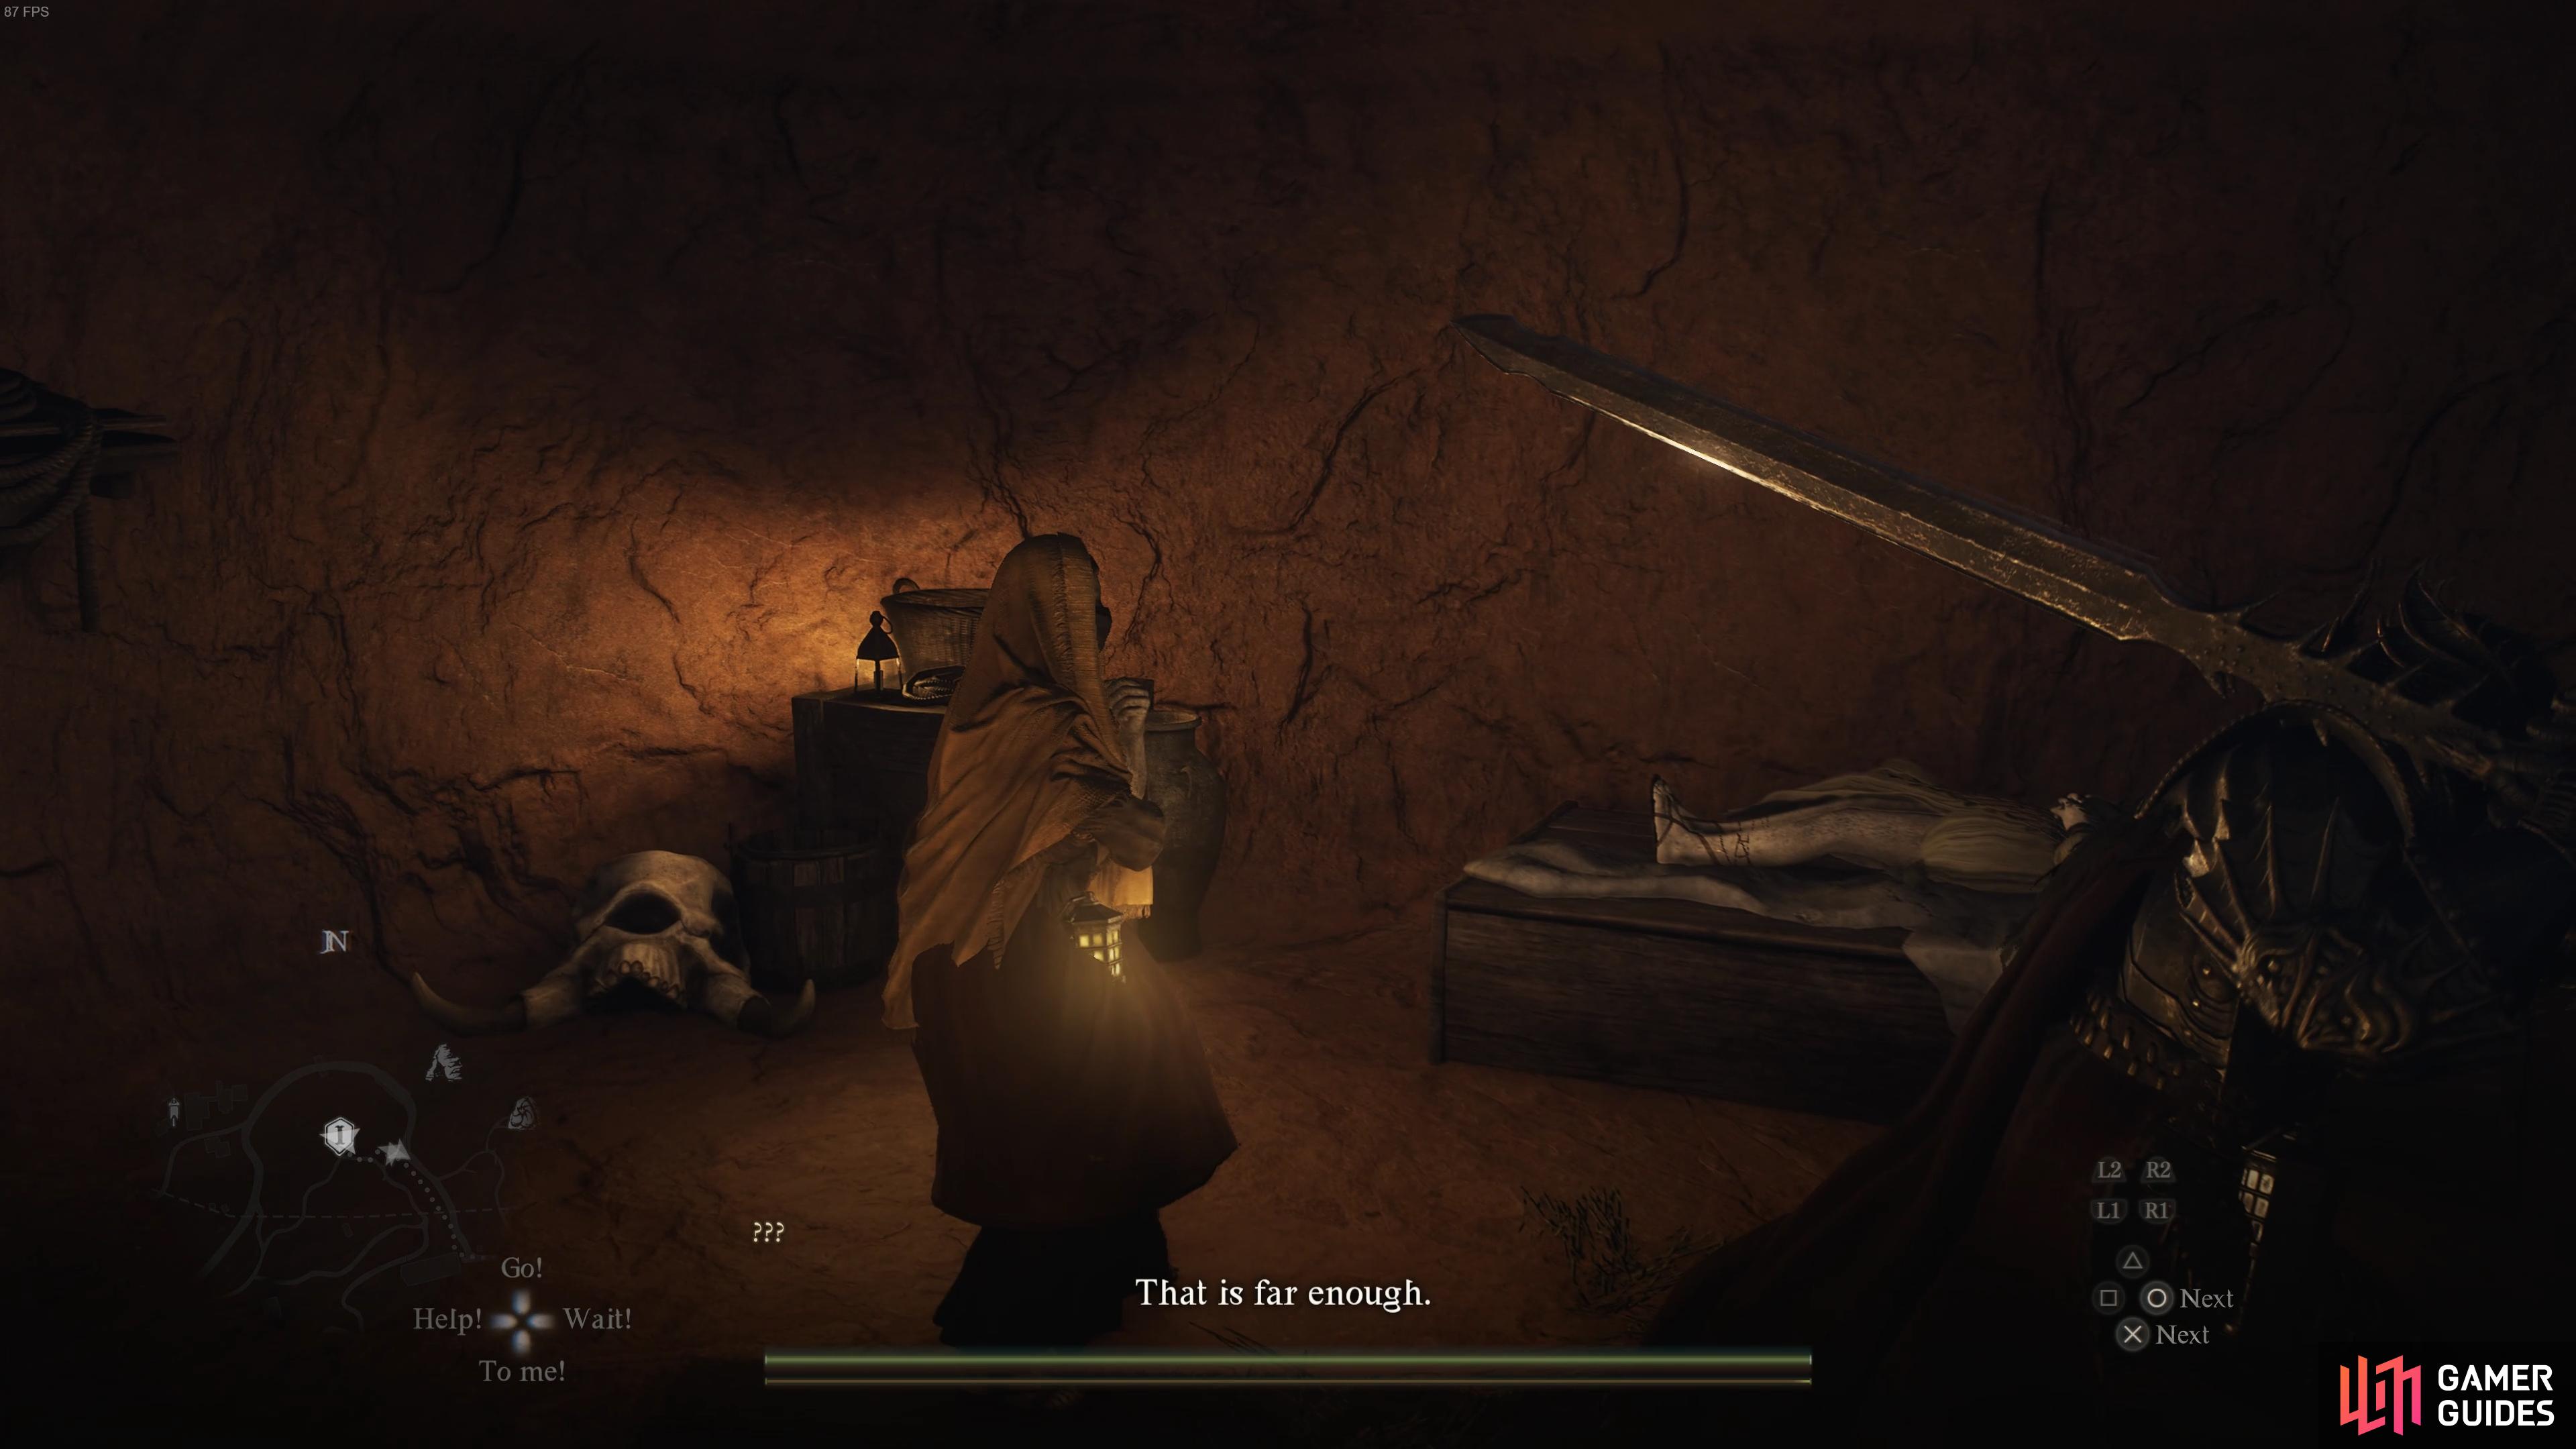
(1 of 2) You can make a hard save before or after you make your decision, to avoid making any mistakes.
You can make a hard save before or after you make your decision, to avoid making any mistakes. (left), You only need to strike the Empress on her bed once for the contact to trust you. (right)
What Happens if You Oppose Empress Nadinia’s Proposal?
If you choose to oppose Empress Nadinia’s proposal, the contact will immediately recognize that a body double is being used, and they’ll quickly flee the room while ordering the Coral Snakes outside to attack. You’ll need to defeat the Coral Snakes while protecting Menella here, and at the end of the fight, you’ll need to attack Ser Irmhild to expose her. From this point, Menella and Empress Nadinia will recognize that Ser Irmhild is behind the plot, but they’ll never find out why as Irmhild kills herself first.
For this outcome, you’ll earn the same amount of XP, but you’ll only get 19,000 Gold and no Ring of Amplification, making it the worse outcome in terms of rewards.
More Dragon’s Dogma 2 Quests
And there you have it - all the outcomes for your choices in the A Candle in the Storm quest in Dragon’s Dogma 2. If you’re looking for more quest guides, you can check our sections for each region via the links below.

 Sign up
No Comments