
Despite its rather straight-forward name, the ![]() Hidden Cavern isn’t all that well hidden. The Hidden Cavern is one of many cavernous dungeons that dot the landscape of Vermund, but it is notable for two things: first, the somewhat uncommon enemies who dwell here and second the locked doors which can be somewhat tricky to open. This page will provide a walkthrough for the Hidden Cavern dungeon in
Hidden Cavern isn’t all that well hidden. The Hidden Cavern is one of many cavernous dungeons that dot the landscape of Vermund, but it is notable for two things: first, the somewhat uncommon enemies who dwell here and second the locked doors which can be somewhat tricky to open. This page will provide a walkthrough for the Hidden Cavern dungeon in ![]() Dragon’s Dogma 2, including how to get the locked doors open.
Dragon’s Dogma 2, including how to get the locked doors open.
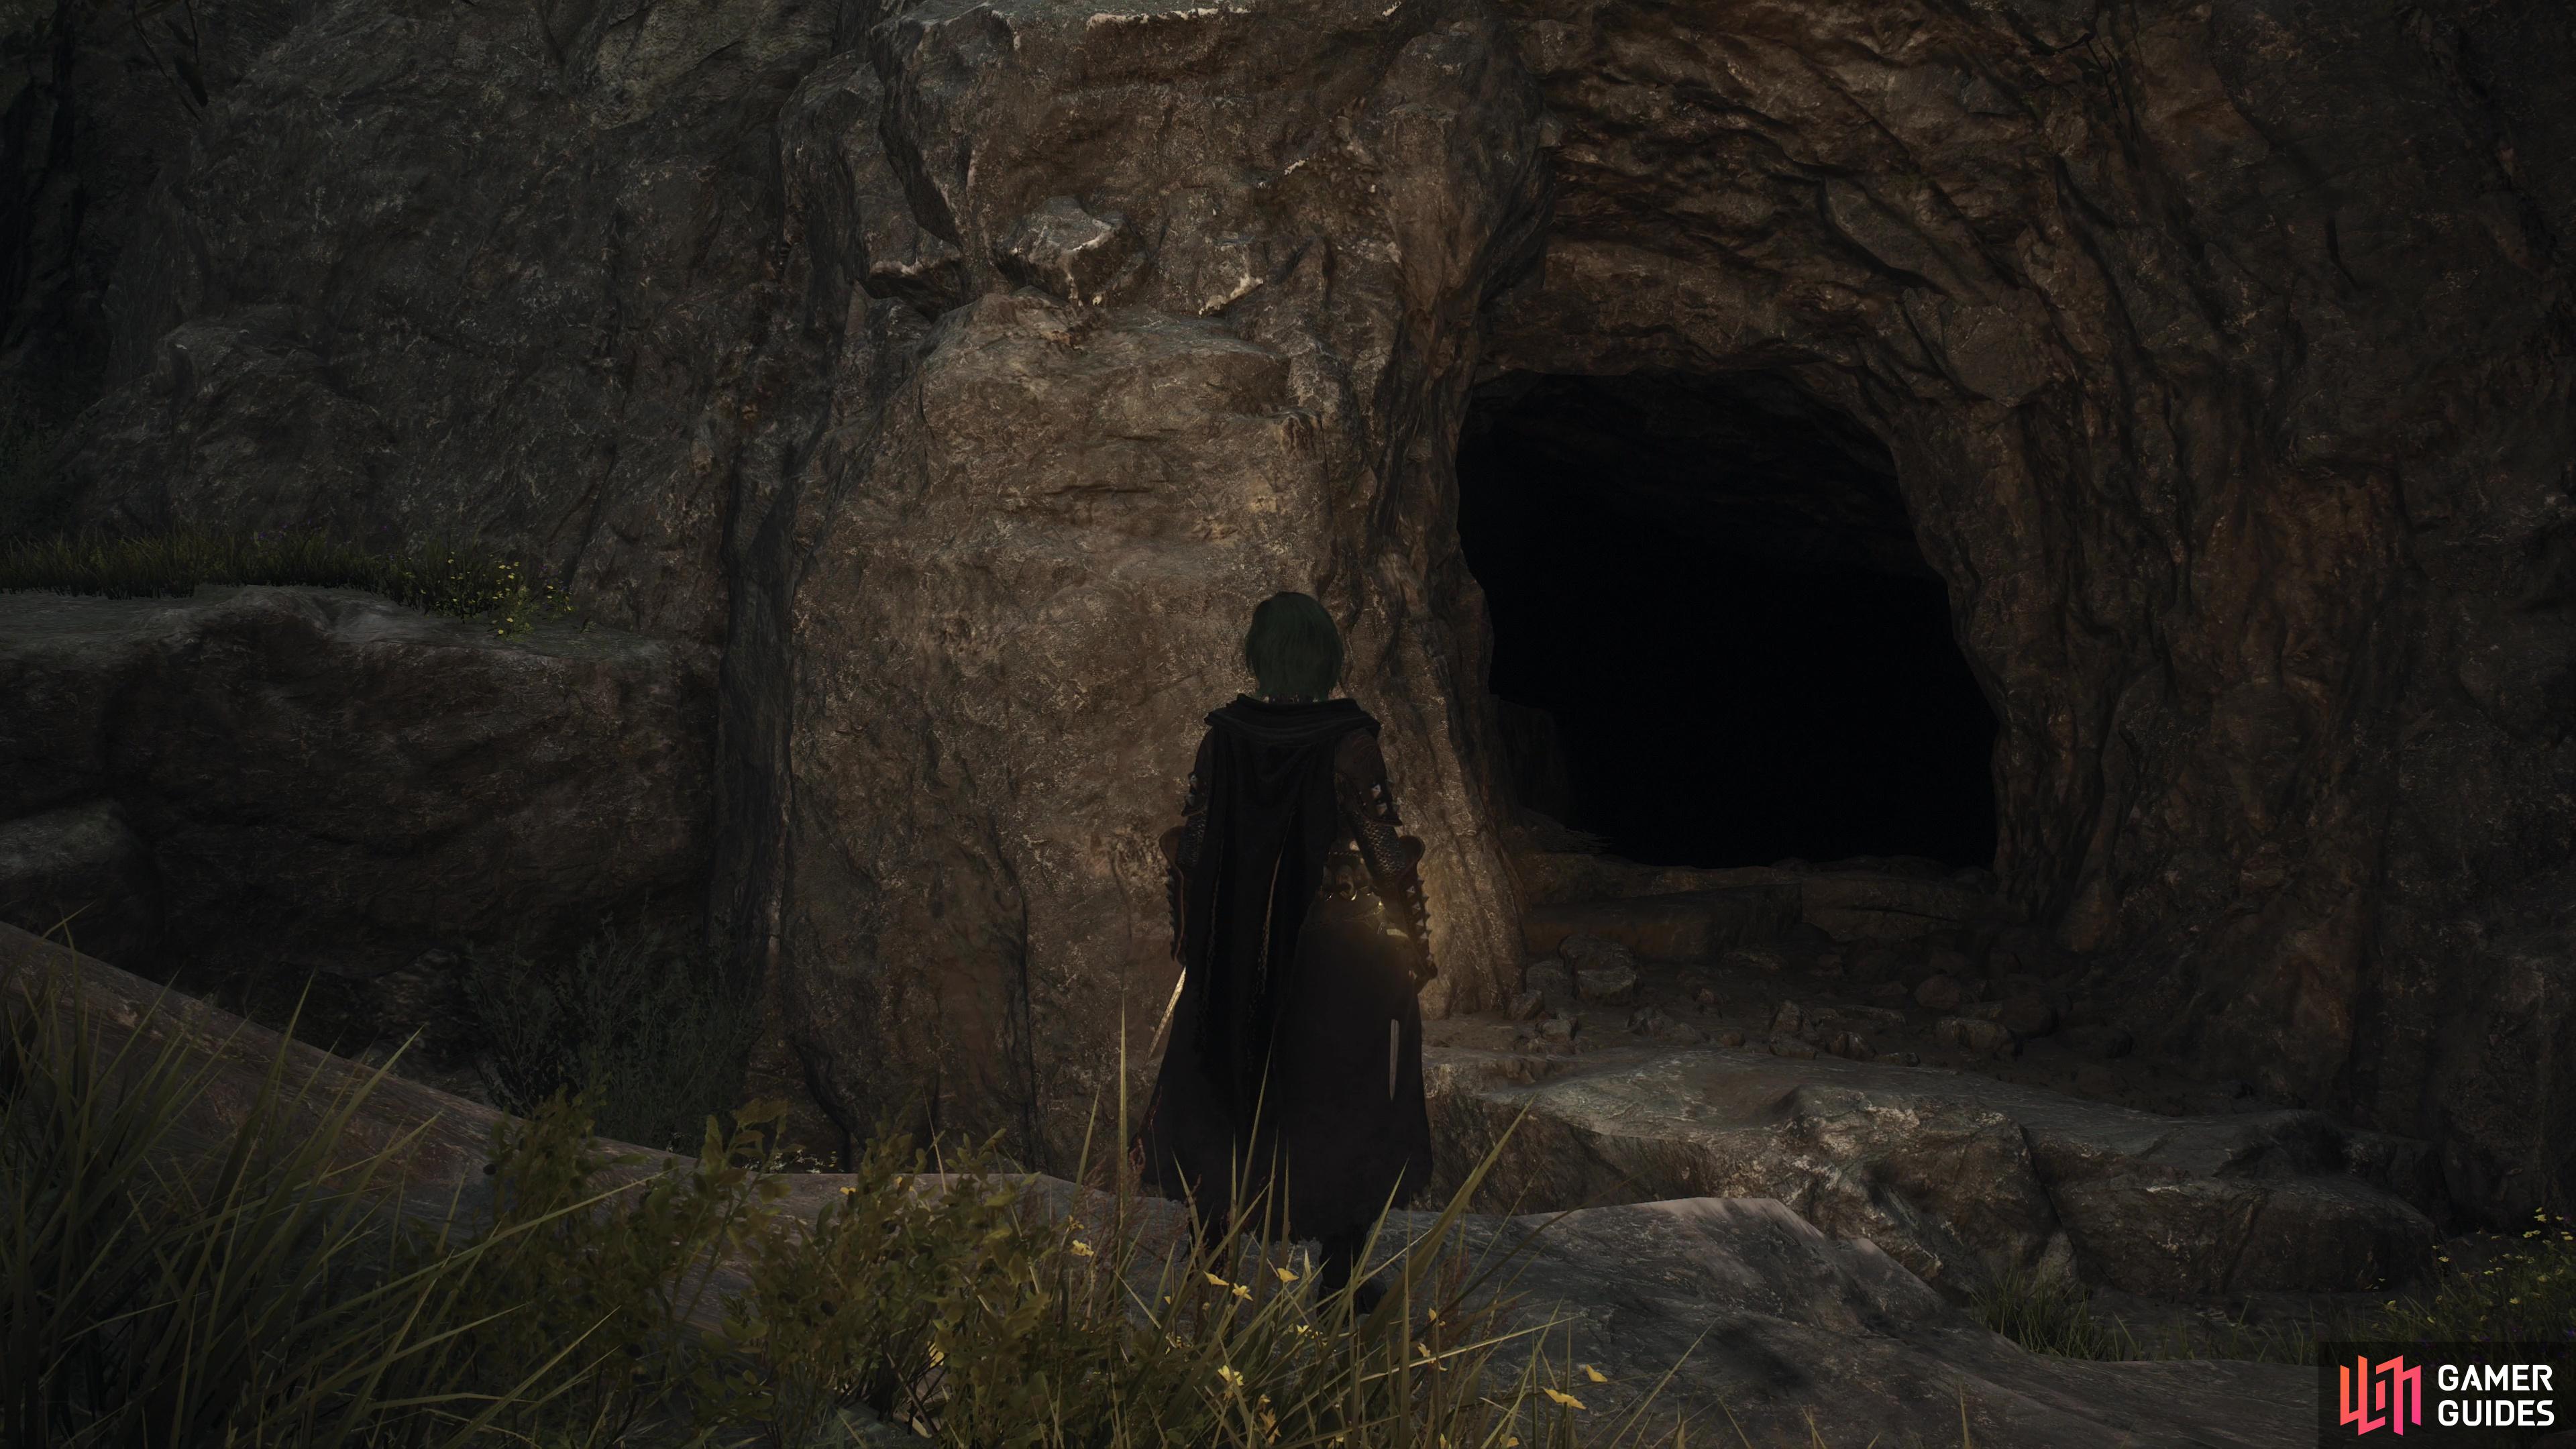
(1 of 2) The entrance to the Hidden Cavern isn’t all that hidden,
The entrance to the Hidden Cavern isn’t all that hidden, (left), but its location - far to the northwest of Vernworth - does make it rather out of the way. (right)
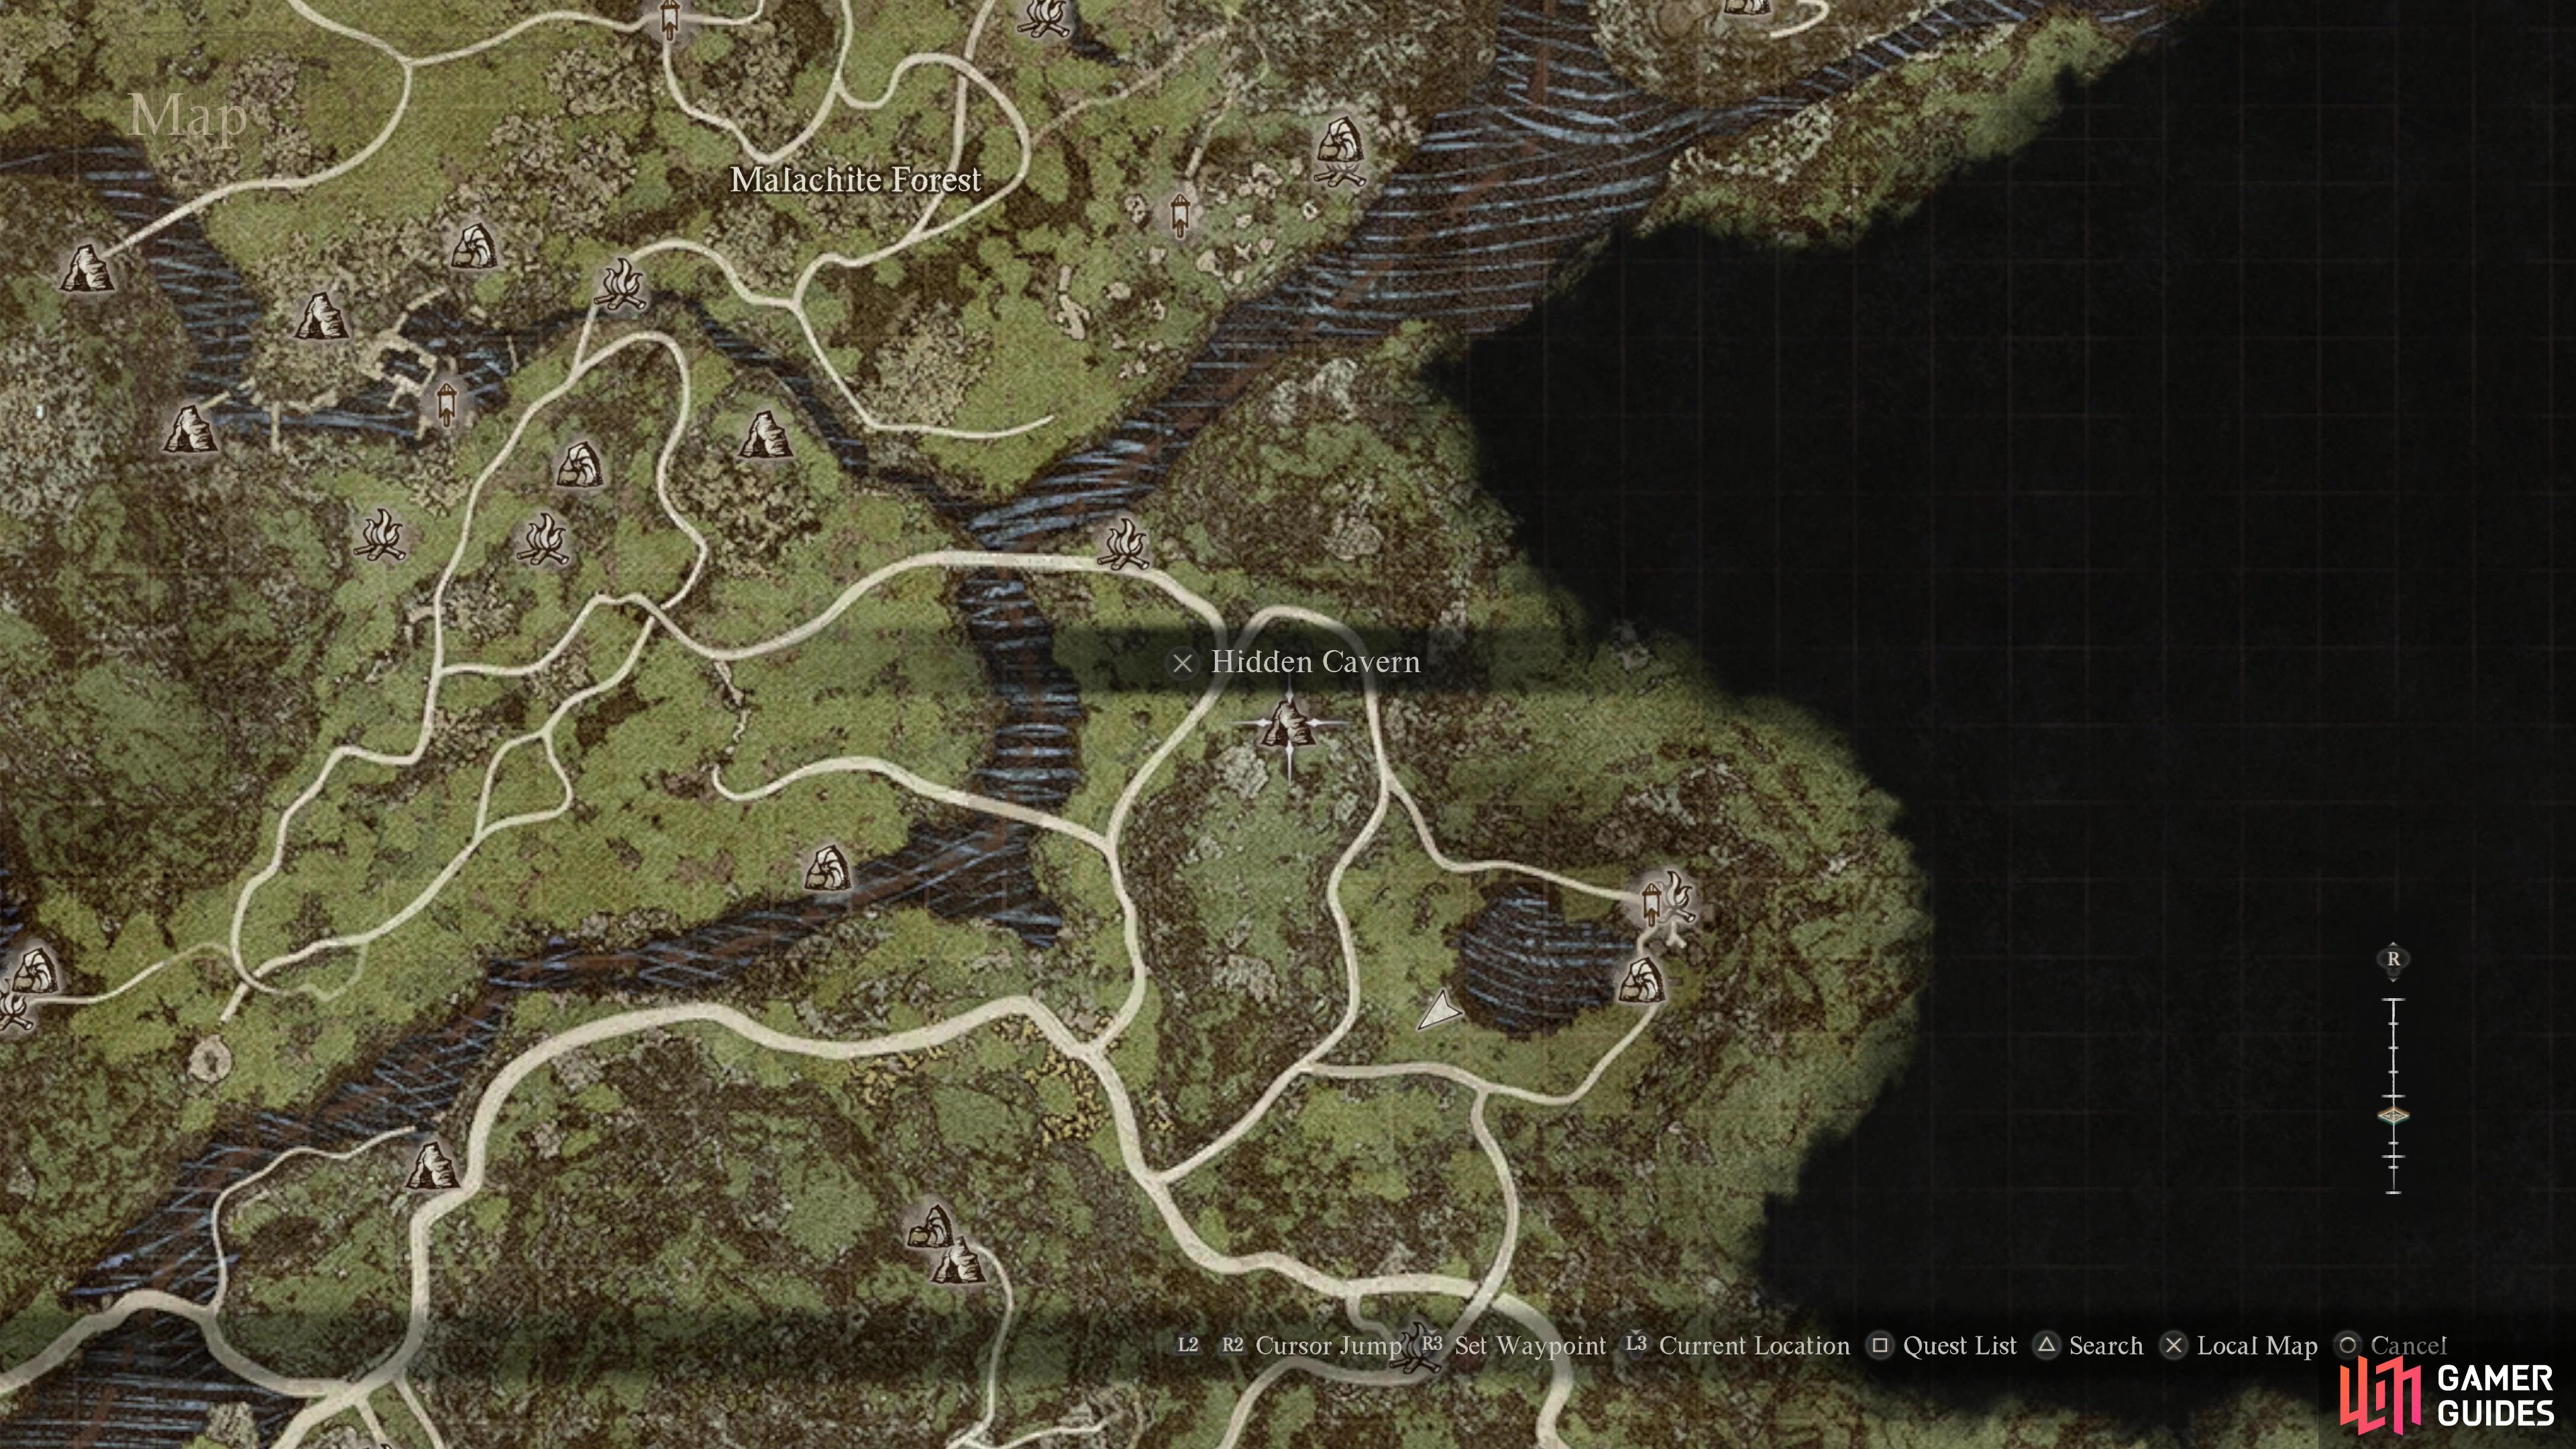
Hidden Cavern Location
The Hidden Cavern is a bit far afield, located a good distance northwest of ![]() Vernworth, northeast of
Vernworth, northeast of ![]() Trevo Mine’s northern exit, within a stone’s throw away from the river that divides the environs round Vernworth and the lands around
Trevo Mine’s northern exit, within a stone’s throw away from the river that divides the environs round Vernworth and the lands around ![]() Sacred Arbor, to the northwest. You’ll likely pass by here en route to the ruins during the quest Gift of the Bow.
Sacred Arbor, to the northwest. You’ll likely pass by here en route to the ruins during the quest Gift of the Bow.
You can find its location on the map here.
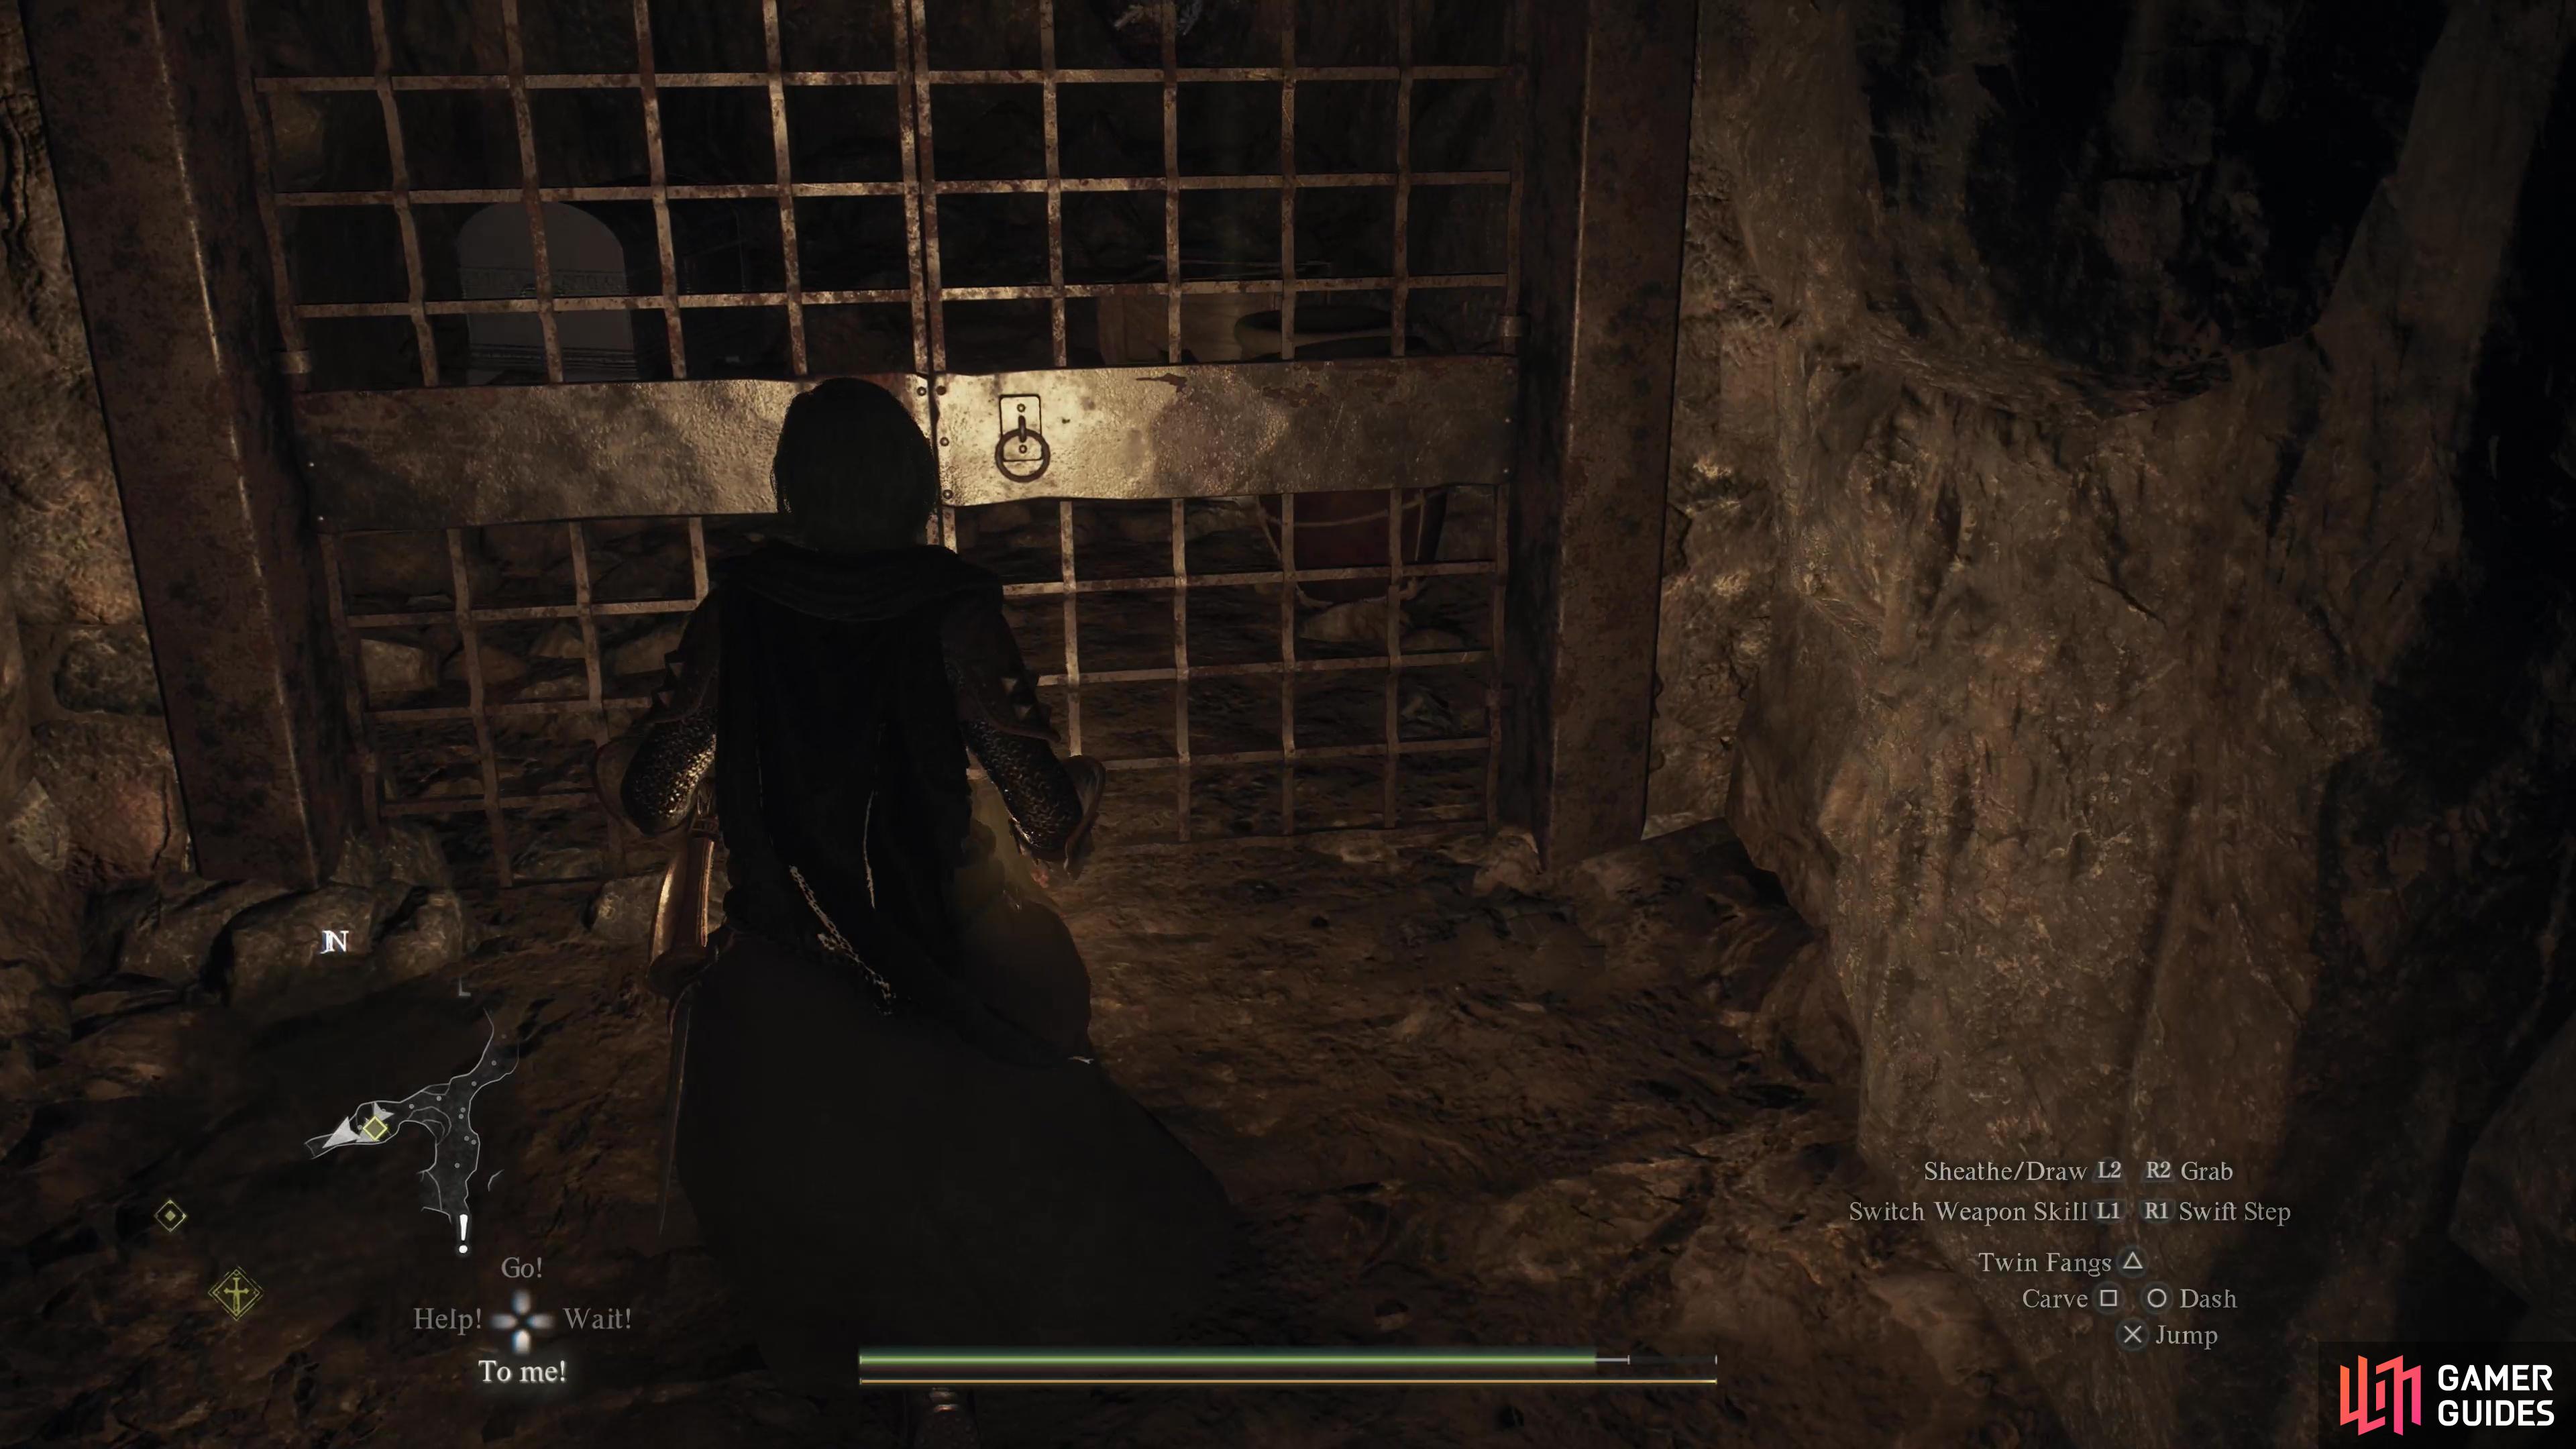
(1 of 4) Go right at the first fork to find a locked door.
Opening Locked Doors Inside Hidden Cavern
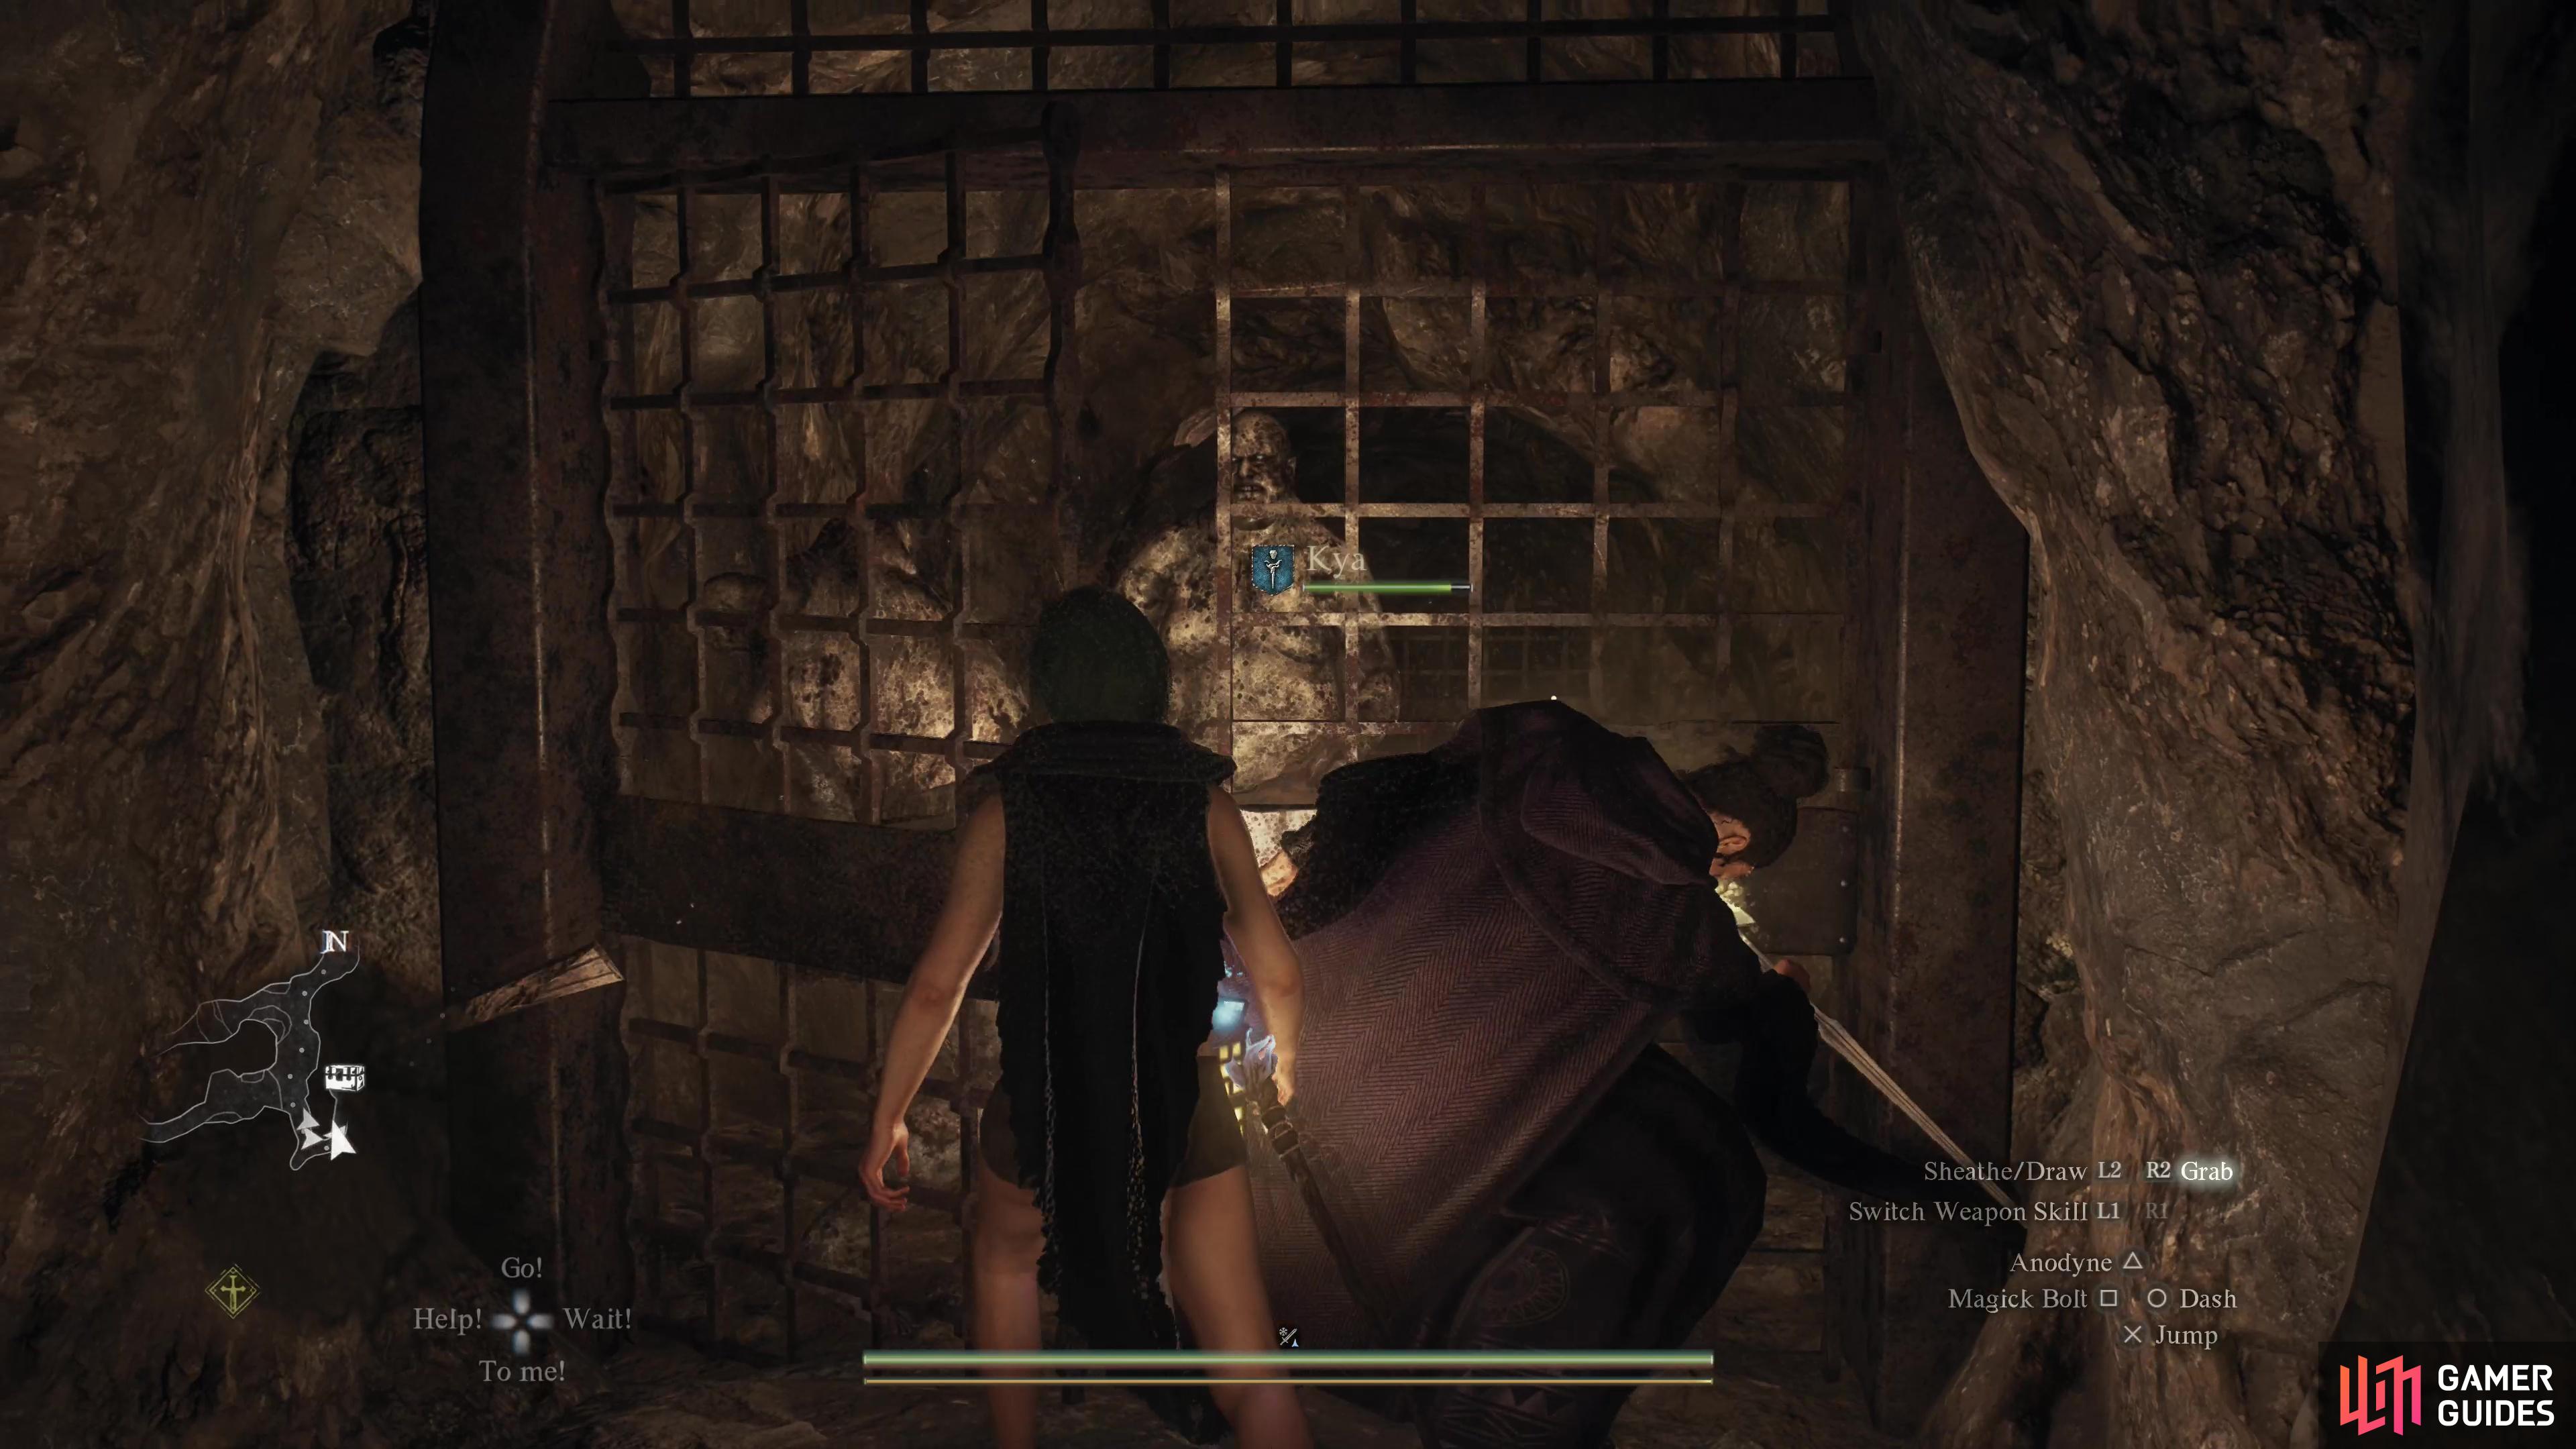
When you arrive, head on inside and make your way south, then southwest until you reach a fork. Hang right and follow the passage southwest until you find a chest, which you can loot to score ![]() Quenching Syrup x2. Drop down some ledges and you’ll find a locked gate, which cannot be opened from this side. This is going to be a theme with this location.
Quenching Syrup x2. Drop down some ledges and you’ll find a locked gate, which cannot be opened from this side. This is going to be a theme with this location.
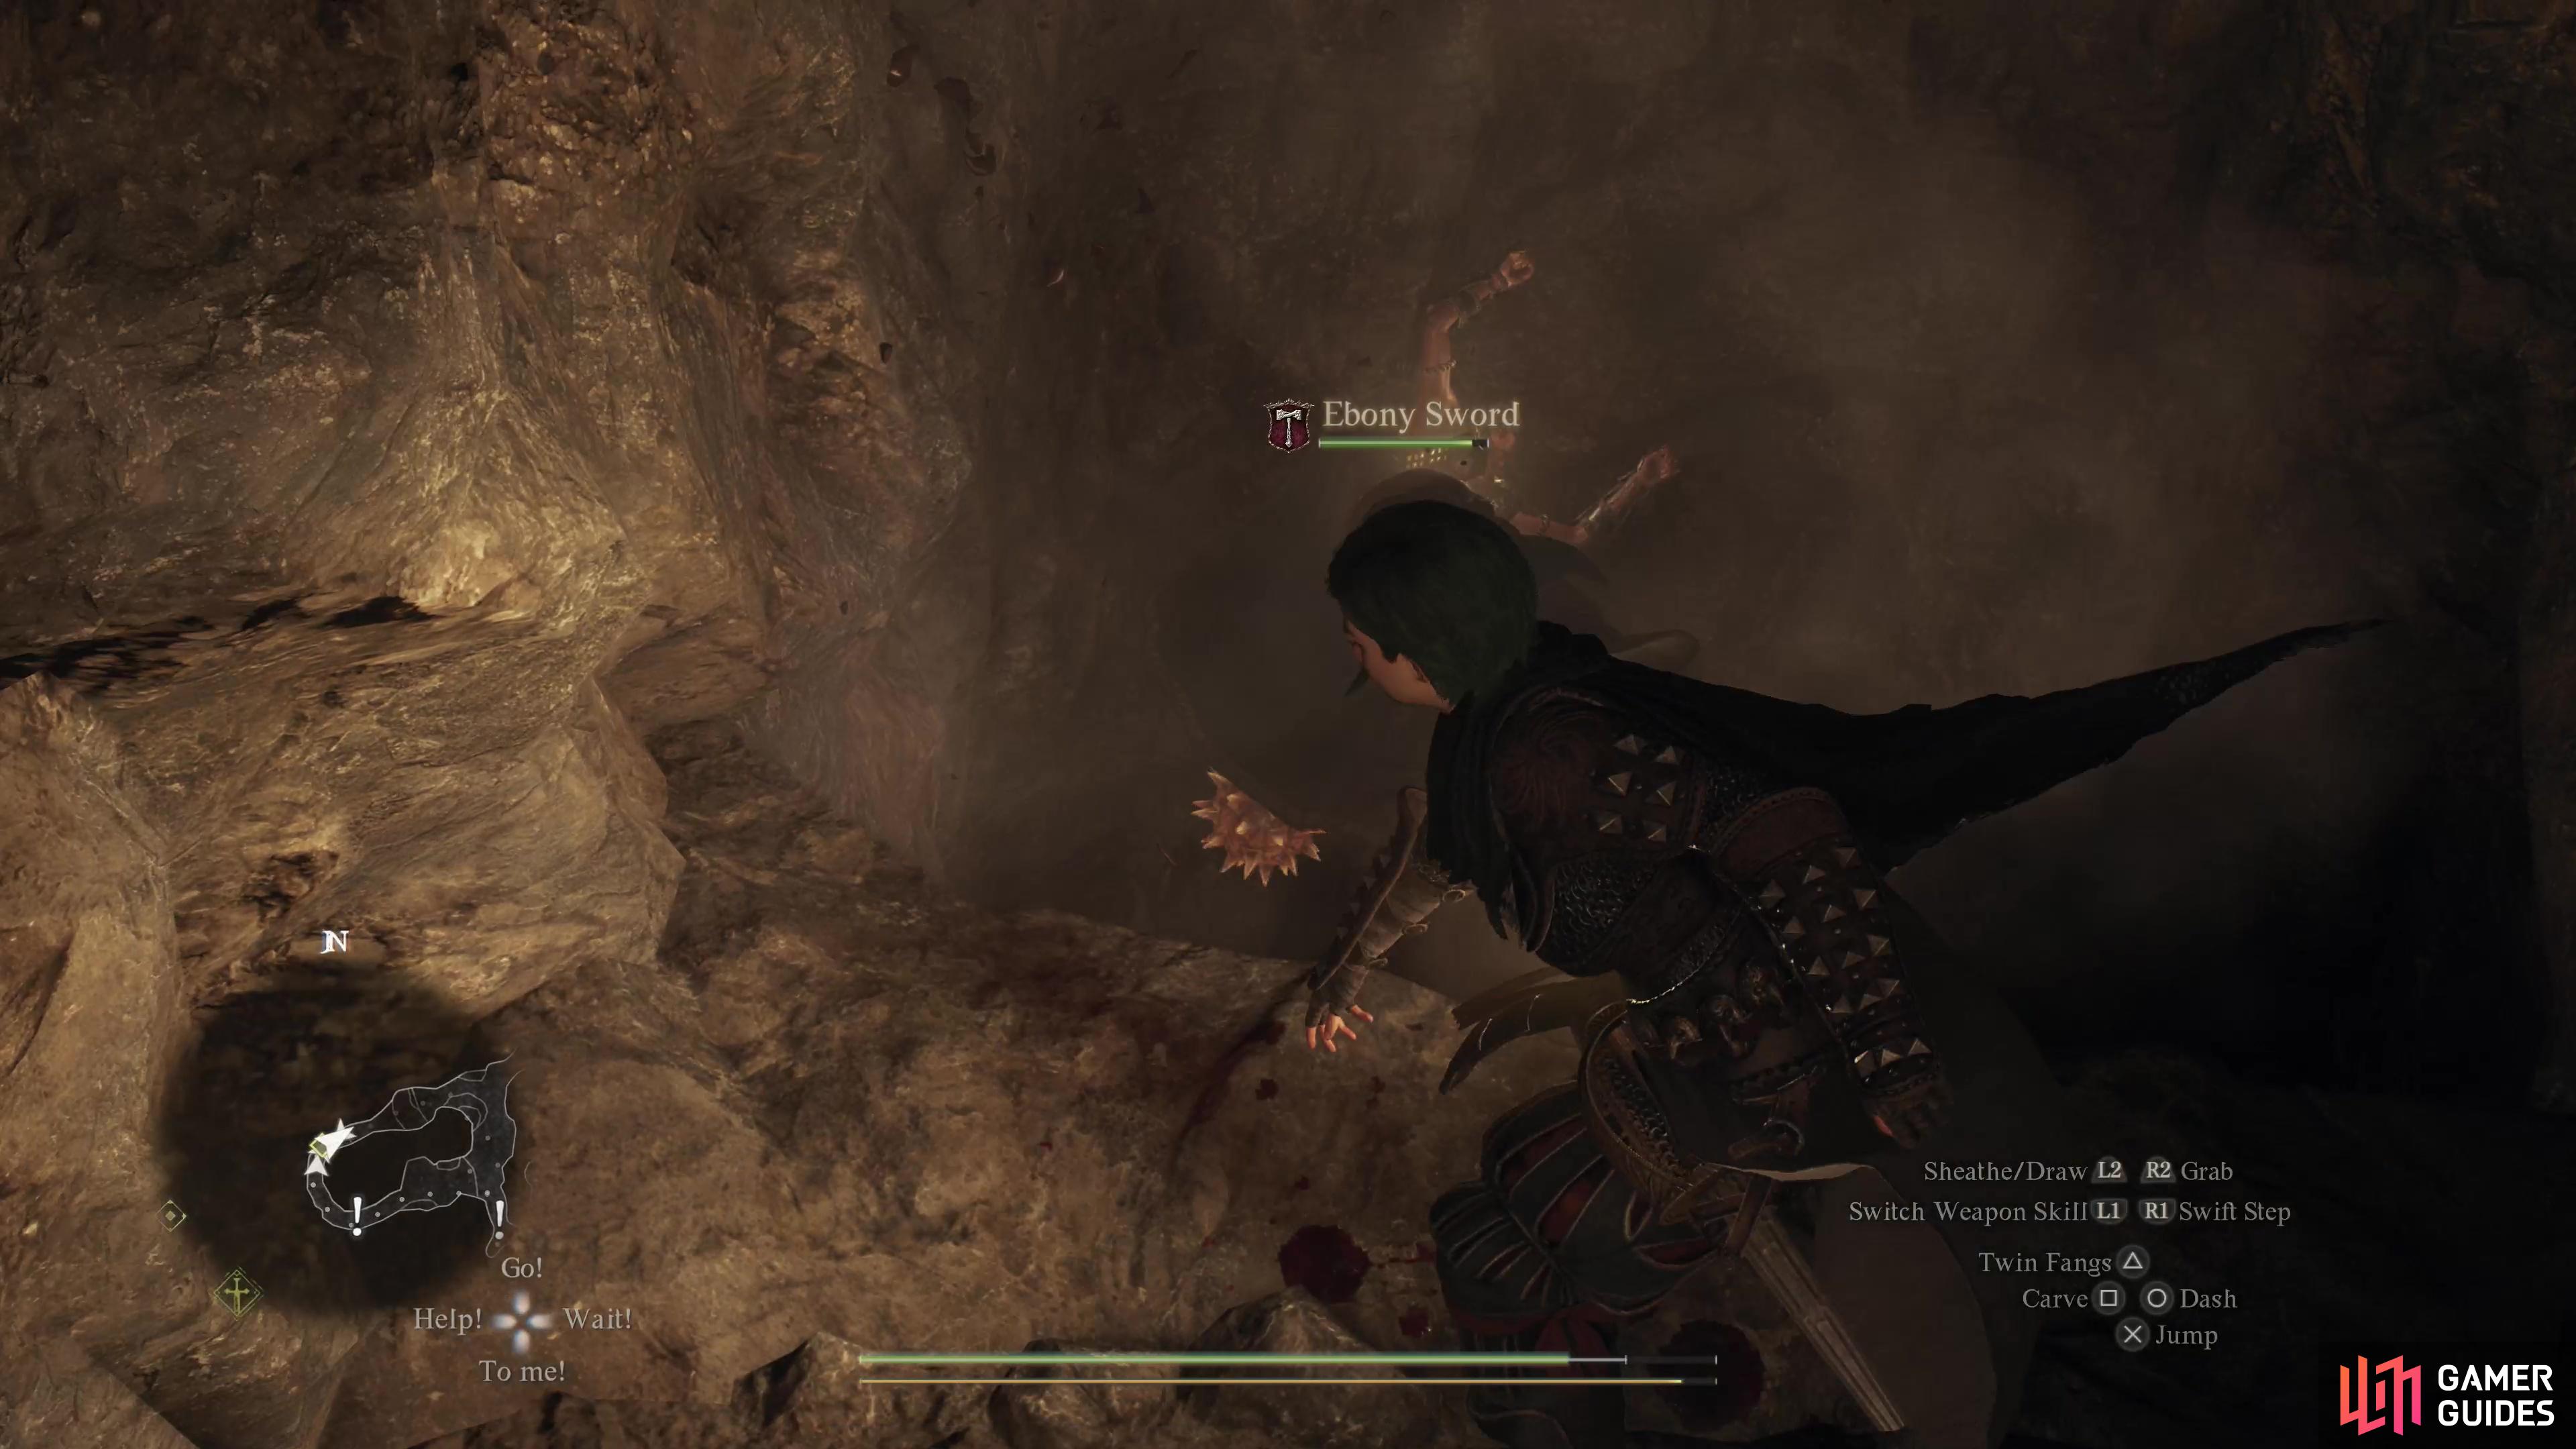
Backtrack to the fork and take the previously neglected path south and you’ll come across another fork, although it may not be readily apparent. Further south is another door, albeit one that can be opened from this side. Ignore it for now and instead climb some rocks to the right (southwest) to find… another door! Smash the beam securing it shut and go through to find some ![]() Oozes, higher tier
Oozes, higher tier ![]() Slime enemies that have the odd property of combusting when sustaining fire damage. Otherwise they’re similar to Slimes in that they deal damage by contact (first to stamina, then health) and are resistant to physical damage. Magical damage is the way to go, but if you hit them with fire damage, create some space before they explode. It may be tempting to throw explosive barrels at them, but you should refrain if at all possible - these barrels can come in handy shortly.
Slime enemies that have the odd property of combusting when sustaining fire damage. Otherwise they’re similar to Slimes in that they deal damage by contact (first to stamina, then health) and are resistant to physical damage. Magical damage is the way to go, but if you hit them with fire damage, create some space before they explode. It may be tempting to throw explosive barrels at them, but you should refrain if at all possible - these barrels can come in handy shortly.
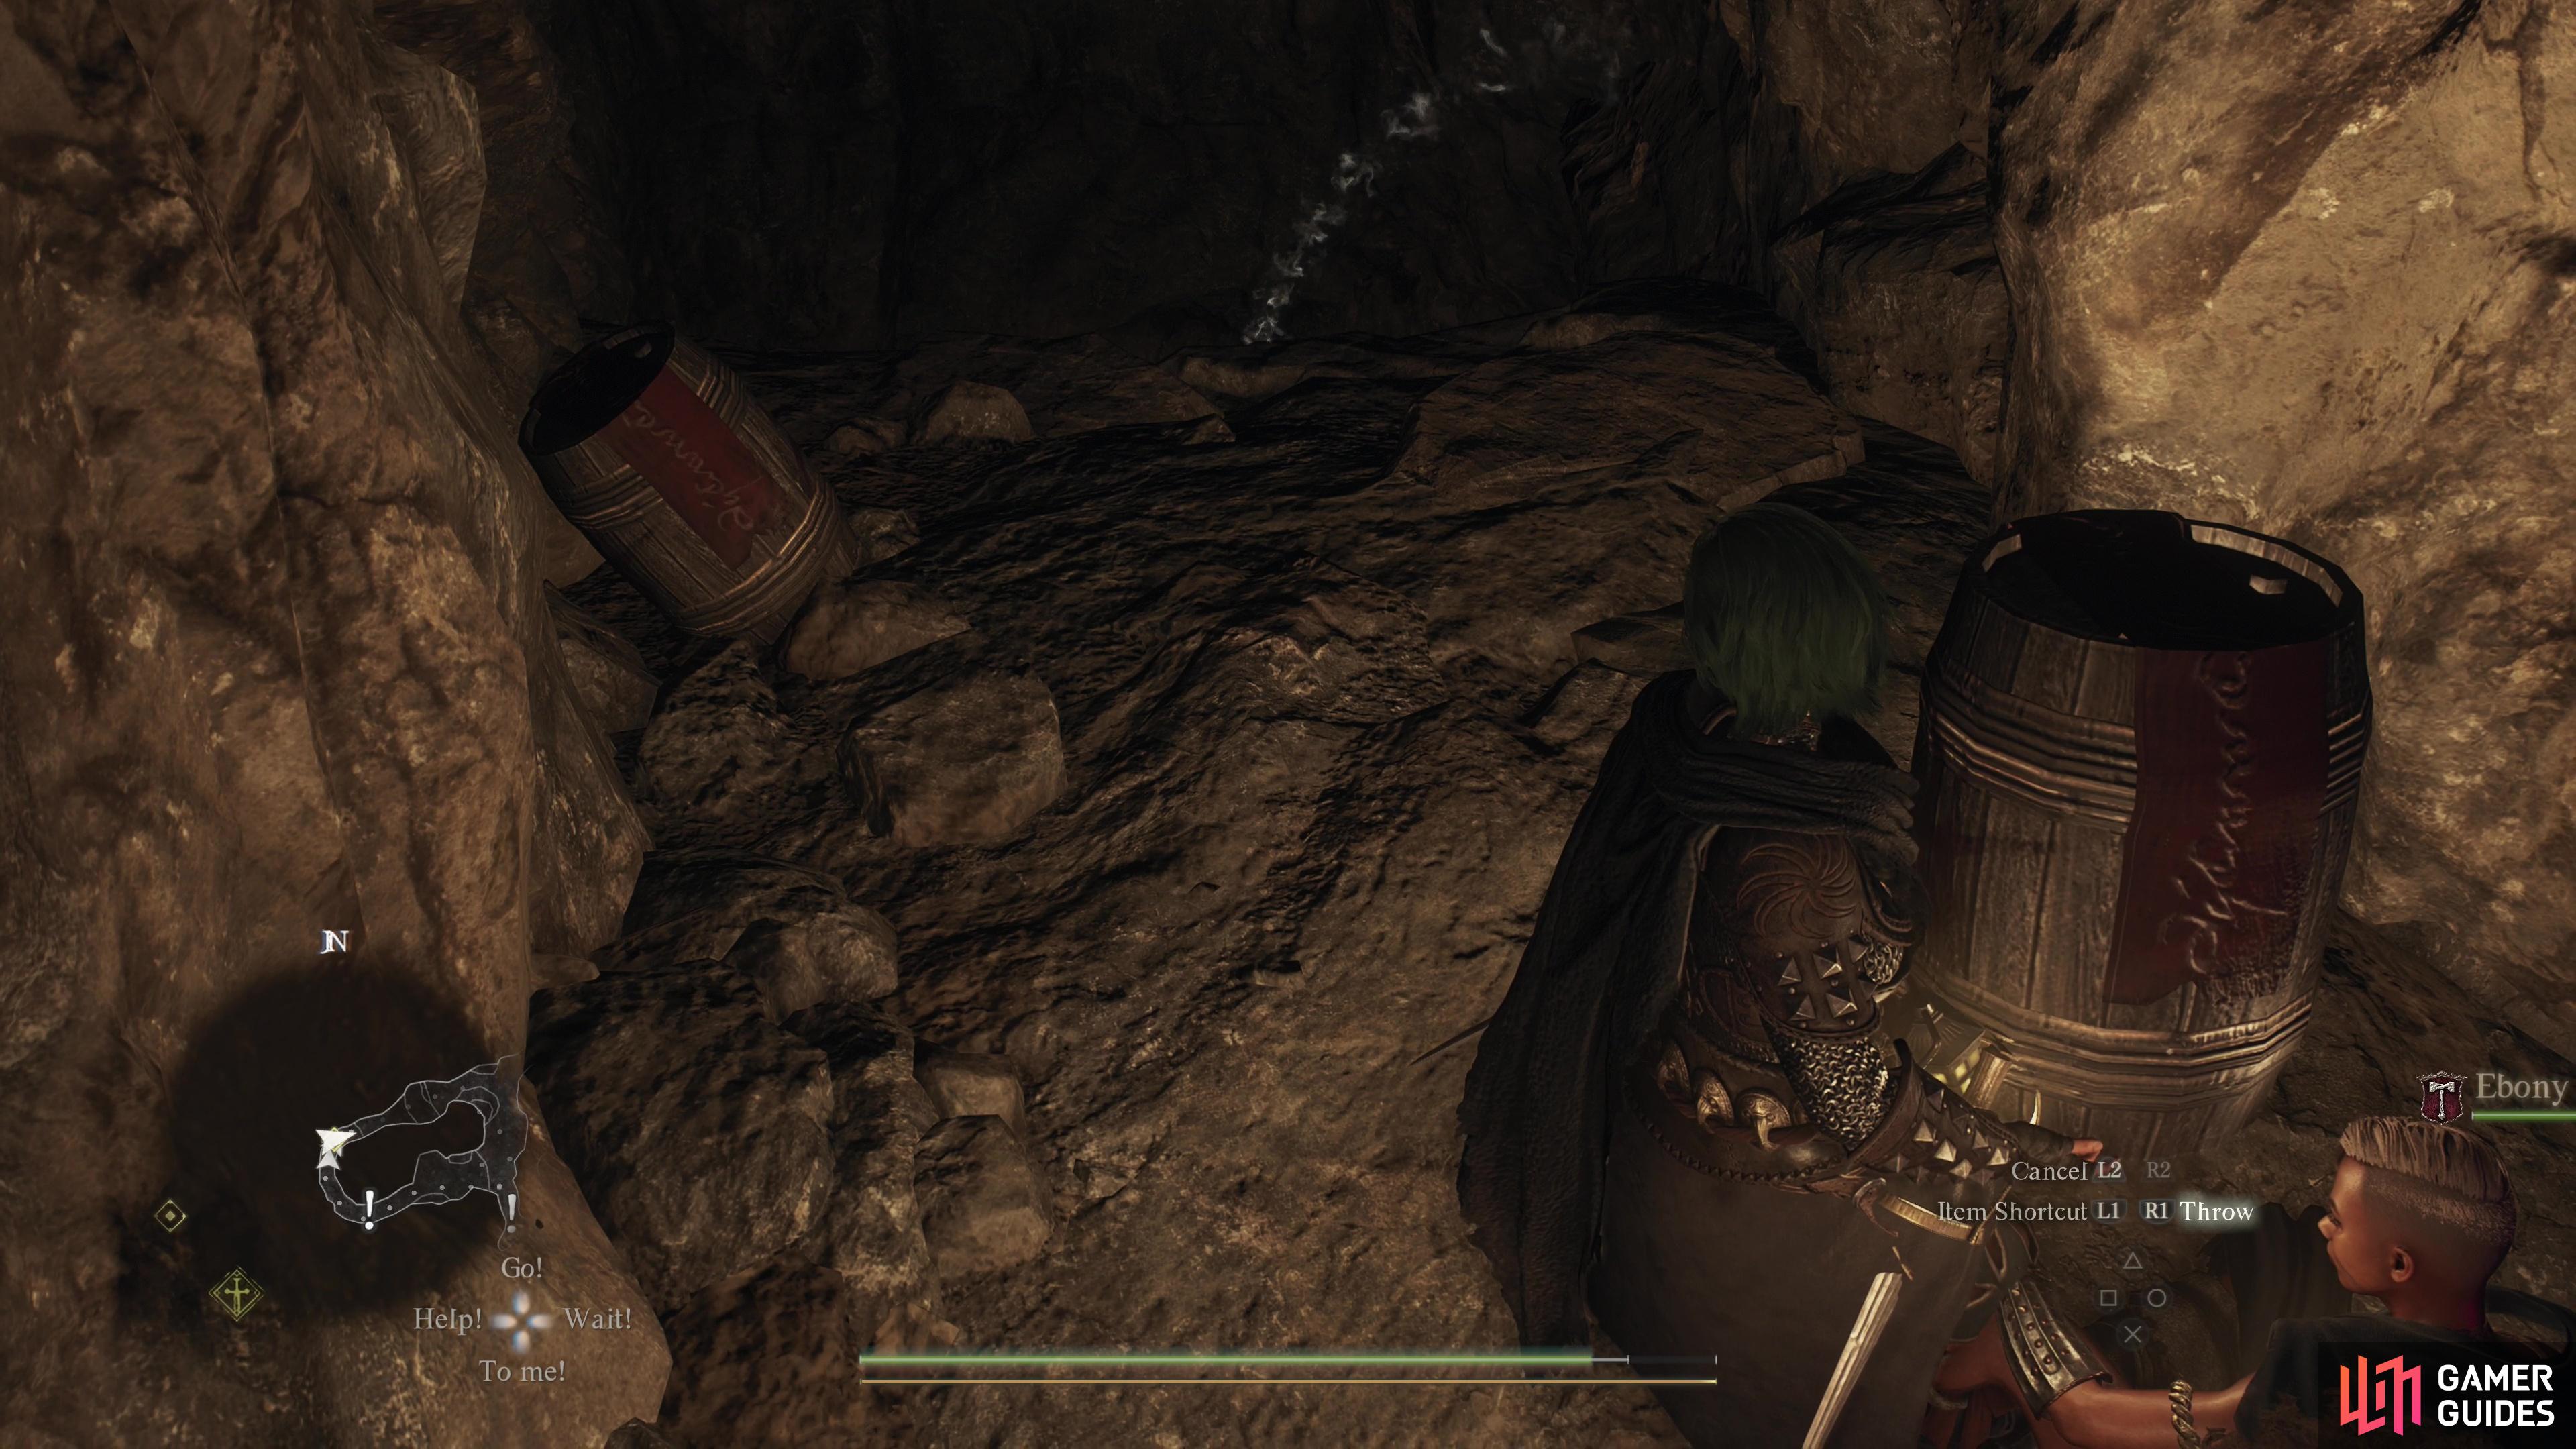
Clear the tunnel and work your way up and around clockwise until you reach a pit. This pit actually leads to below the locked door you found earlier, and there are at least two ways to get the door open. The door isn’t locked in the conventional sense, inasmuch as there’s no key. Instead it’s barred by a stubborn plank of wood, and if you can destroy this device, you’ll render the door powerless to halt your advance. Tossing an explosive barrel down the pit can do this, but it can be surprisingly tricky, as the aim reticle doesn’t accurately display the barrel’s trajectory, making it easy to throw the barrel into a wall. A few tries can’t hurt, however, and if you manage to thread the needle, great! Failing that, find a hardy, loyal pawn and toss them down the pit. If they survive they’ll destroy the door’s barrier to reunite themselves with the Arisen. Choose a ![]() Warrior pawn that hasn’t taken too much damage, if possible, to make their survival more likely.
Warrior pawn that hasn’t taken too much damage, if possible, to make their survival more likely.
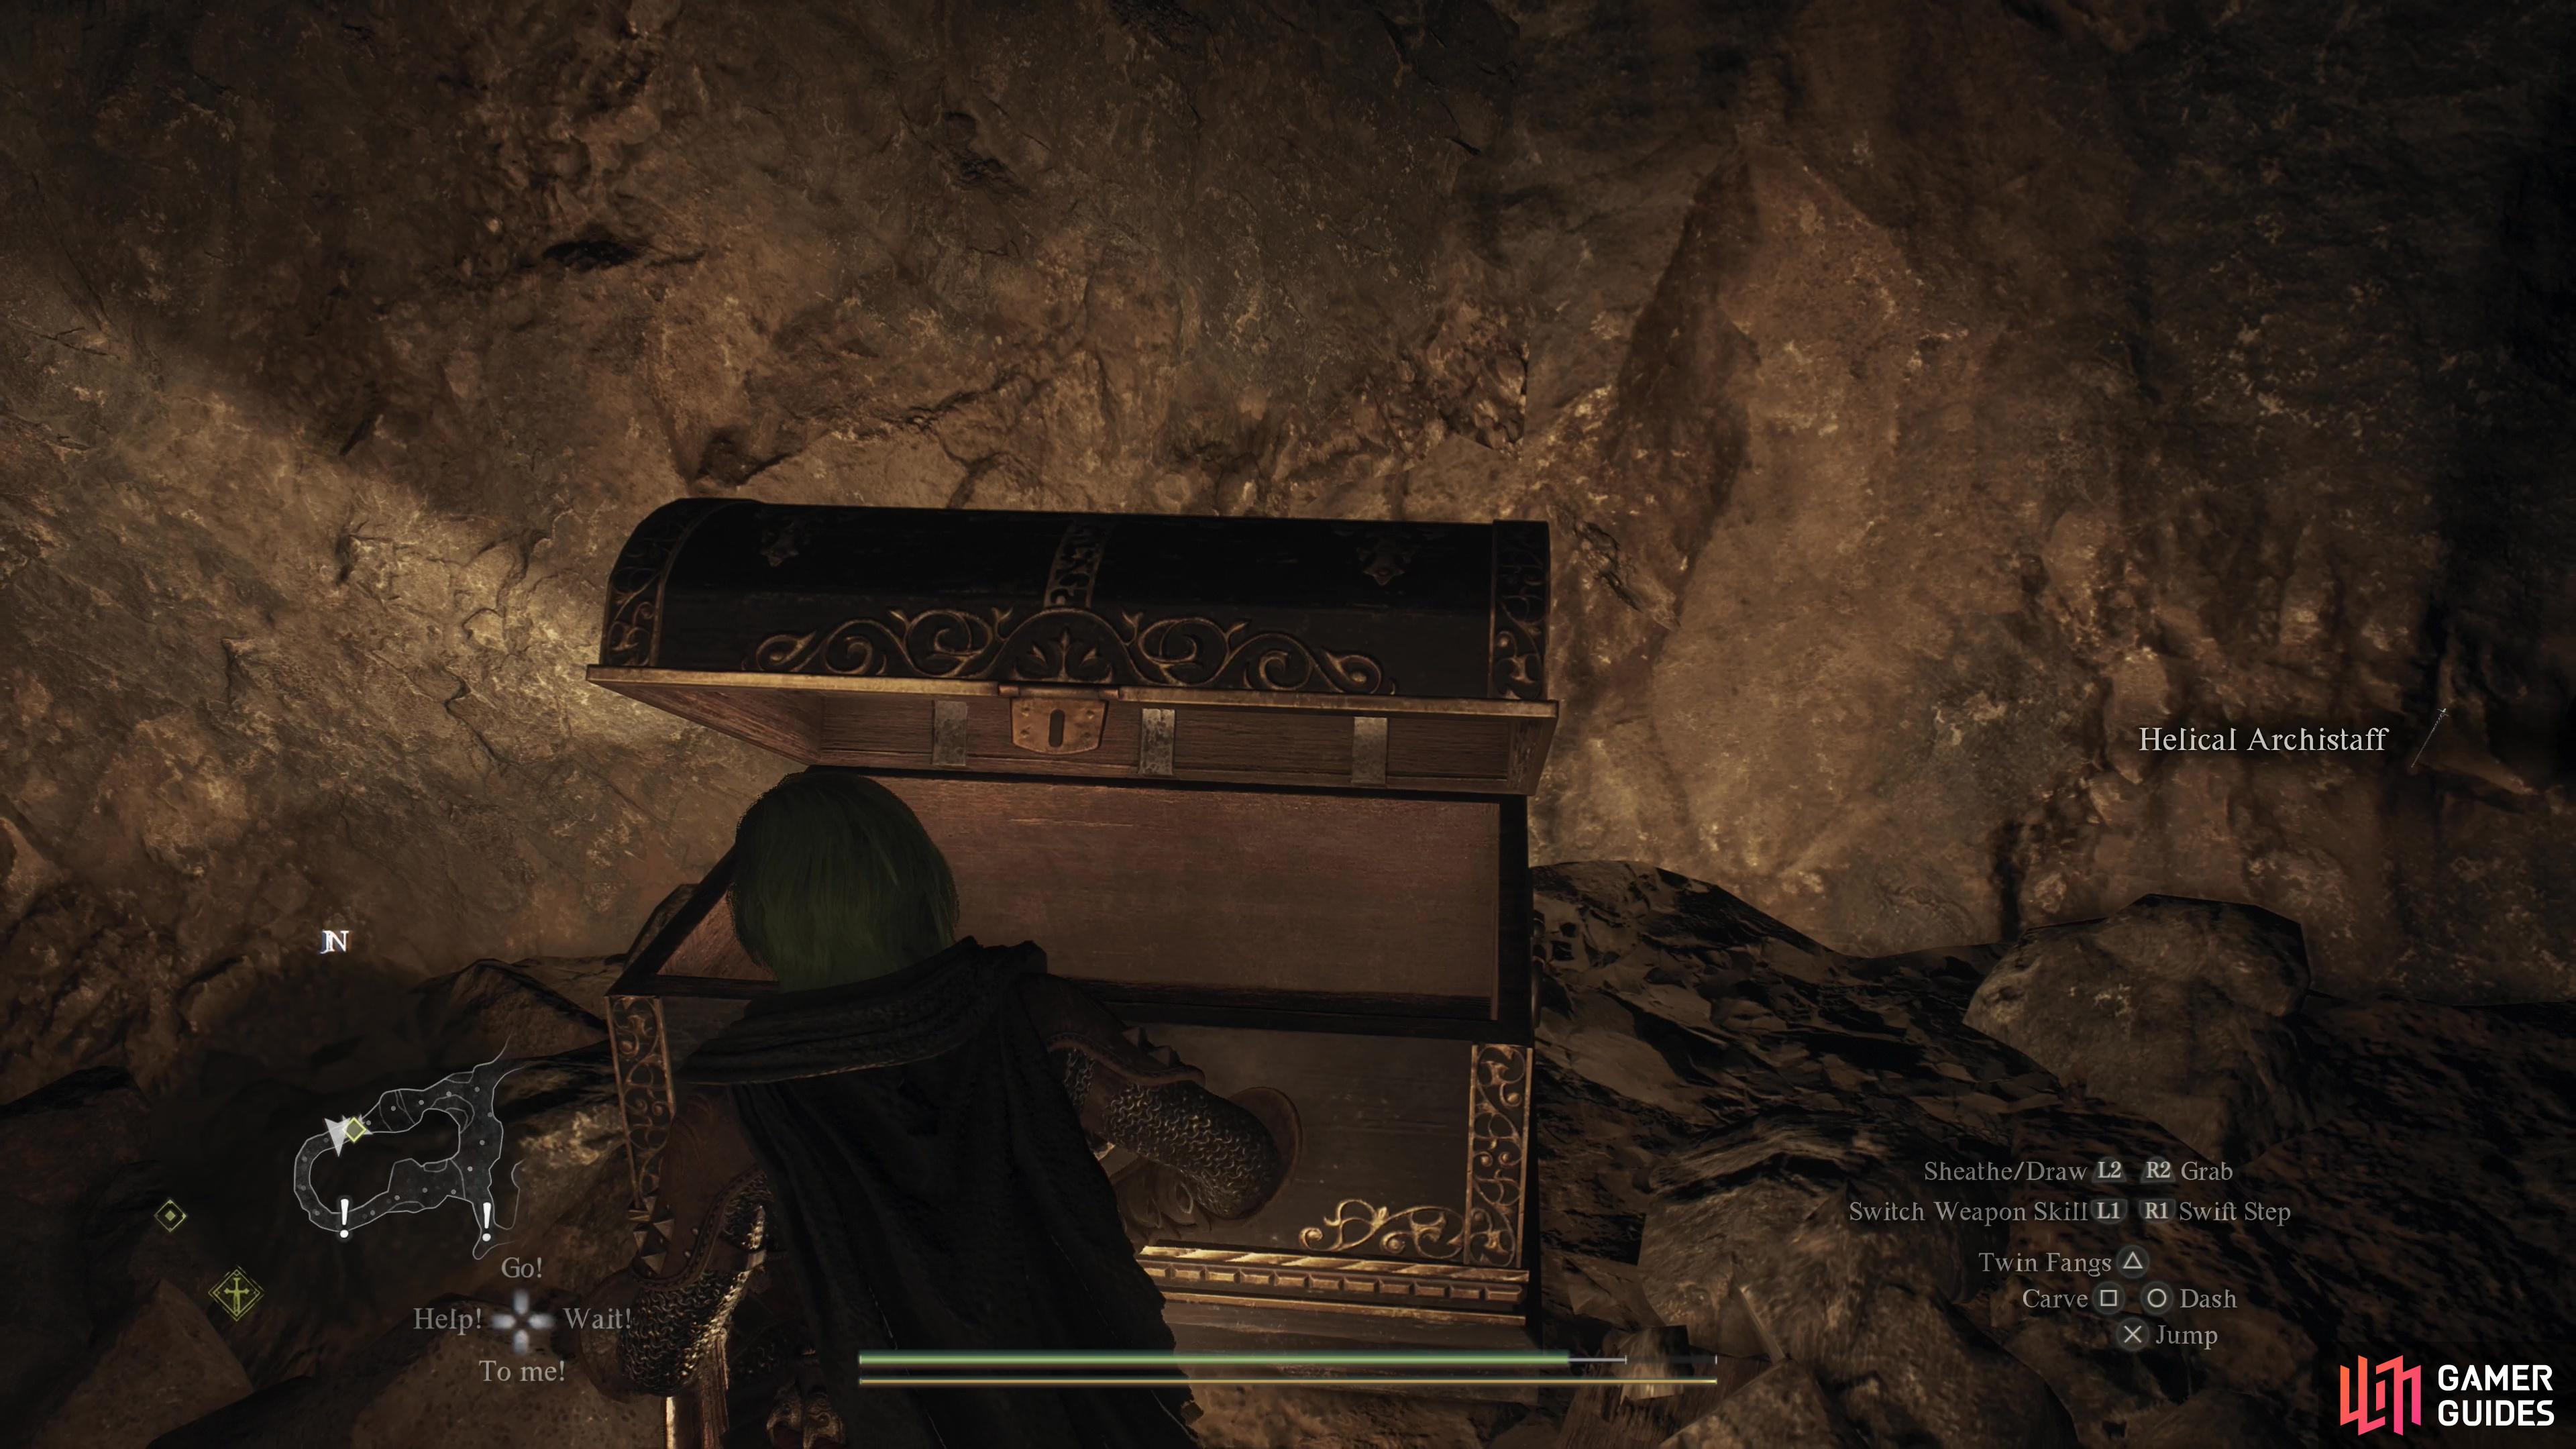
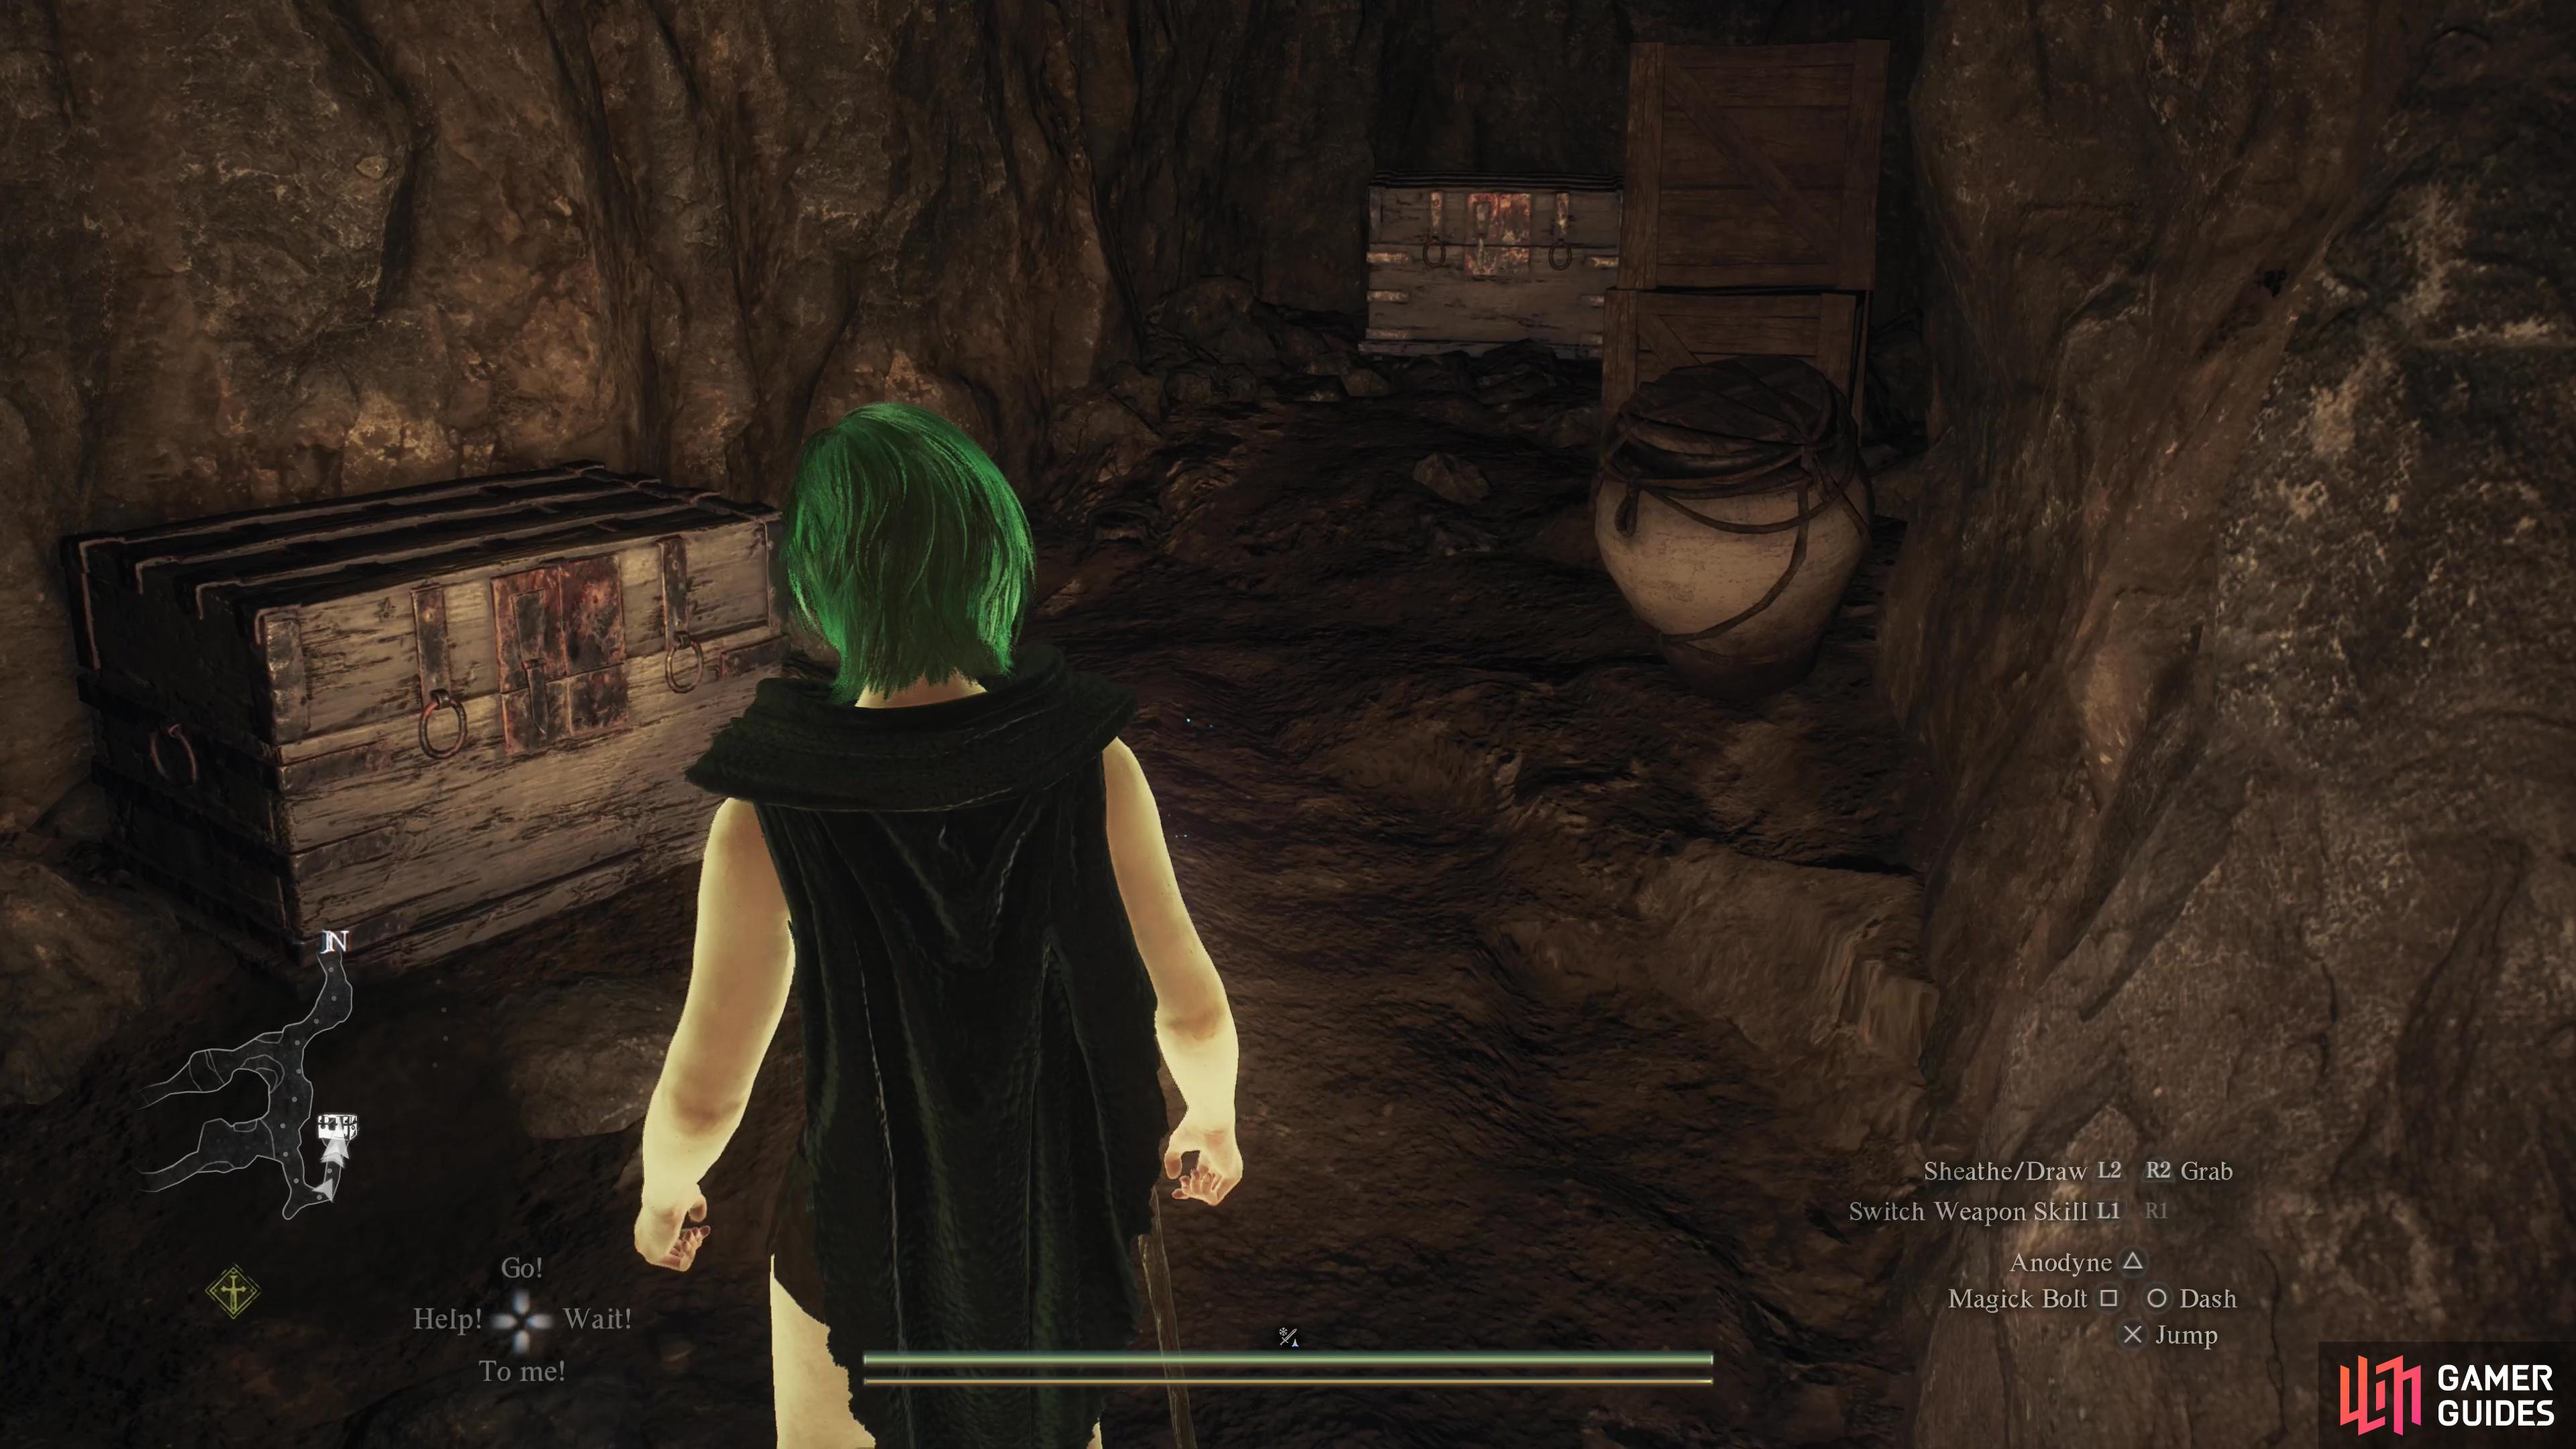
However you manage it, backtrack to the door and go through to find an ornate chest containing a ![]() Helical Archistaff and two bags of gold on the floor totaling 2,000G. There’s also an ore vein you can exploit… because why not?
Helical Archistaff and two bags of gold on the floor totaling 2,000G. There’s also an ore vein you can exploit… because why not?
(1 of 4) In the southeastern corner of the dungeon you’ll find a series of two locked doors.
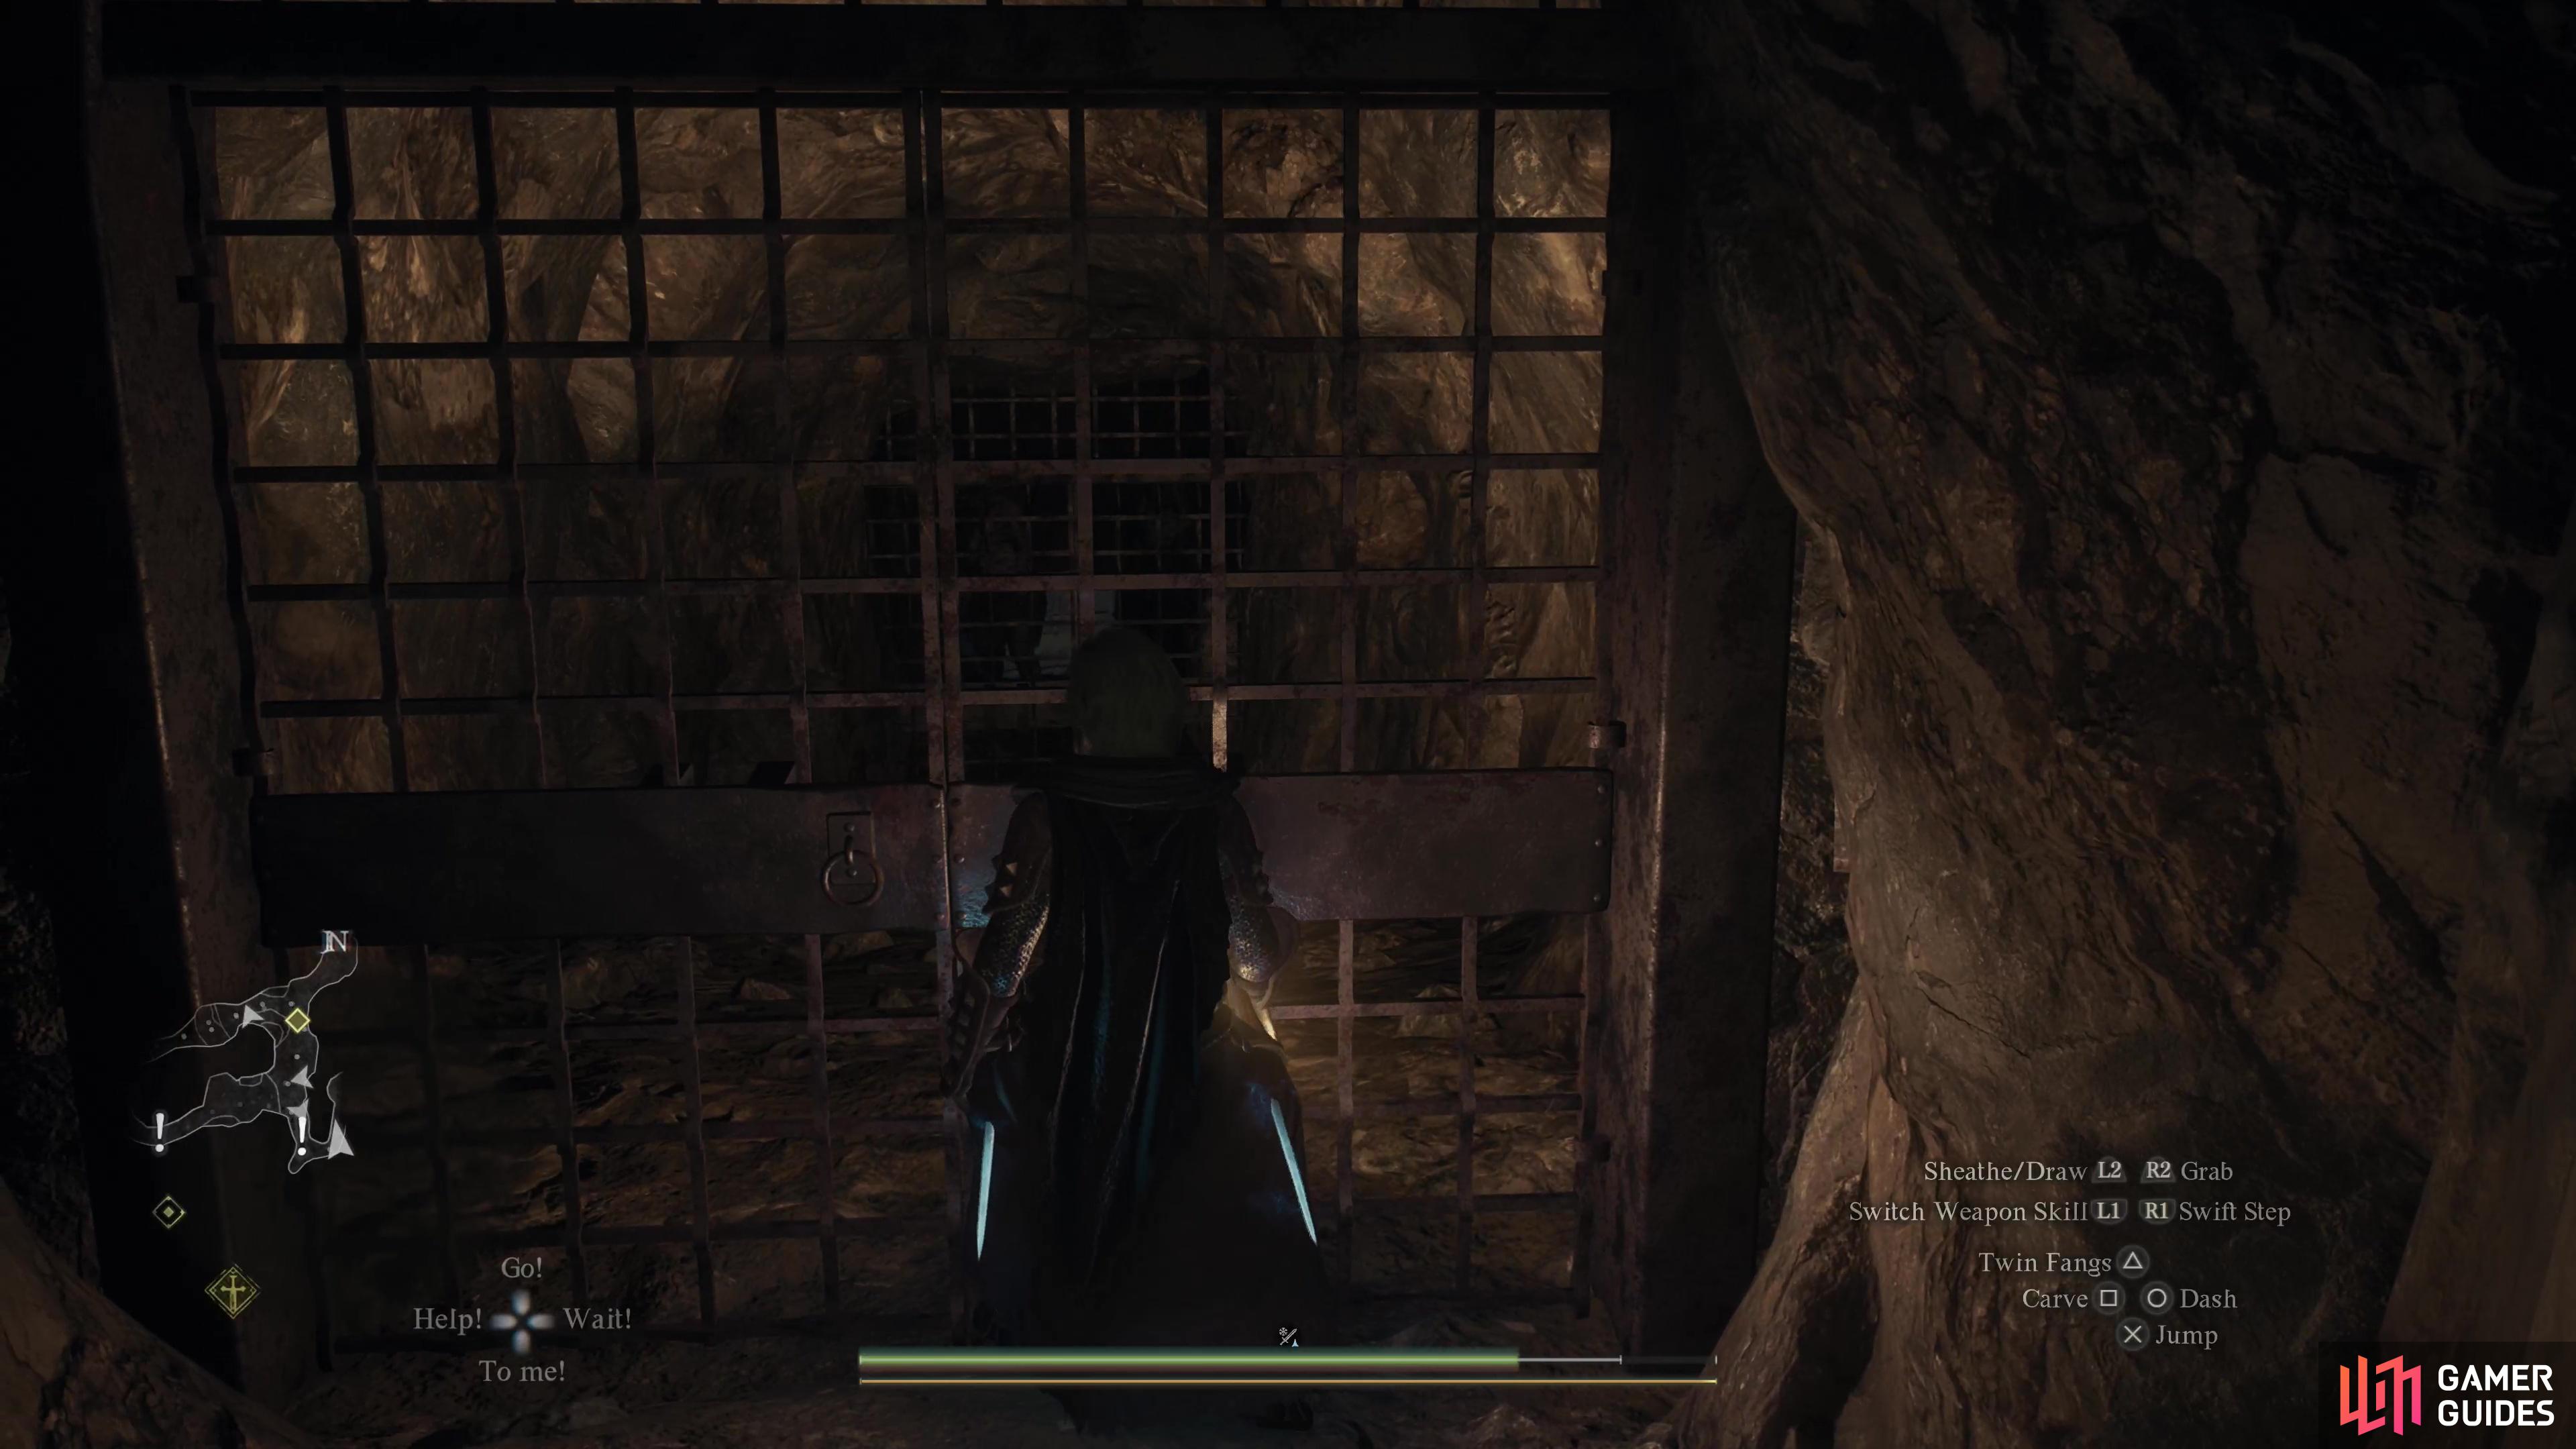
Now backtrack to the second fork and go through the door to the south, smashing the beam holding the door shut if necessary. There are bound to be more Oozes back here, so deal with them accordingly. Once through the door, turn right to find a dead end to find an ore vein, then head down a longer passage to the east to reach another locked door.
This one is trickier, as you’ll need to rely on enemies to get the door (doors technically - there are two ahead of you) open. The two doors barring your way both have beams keeping them shut, and beyond the second door are some ![]() Stout Undead, and they share a property with the Oozes you encountered earlier - hit them with fire and they’ll explode. This can be used to destroy the beams holding the doors shut, but this depends on you possessing a class with spells or ranged attacks capable of hitting these foes through doors. You may also find some stout undead spawn between the two doors, but this isn’t reliable enough to count on, in our experience.
Stout Undead, and they share a property with the Oozes you encountered earlier - hit them with fire and they’ll explode. This can be used to destroy the beams holding the doors shut, but this depends on you possessing a class with spells or ranged attacks capable of hitting these foes through doors. You may also find some stout undead spawn between the two doors, but this isn’t reliable enough to count on, in our experience.
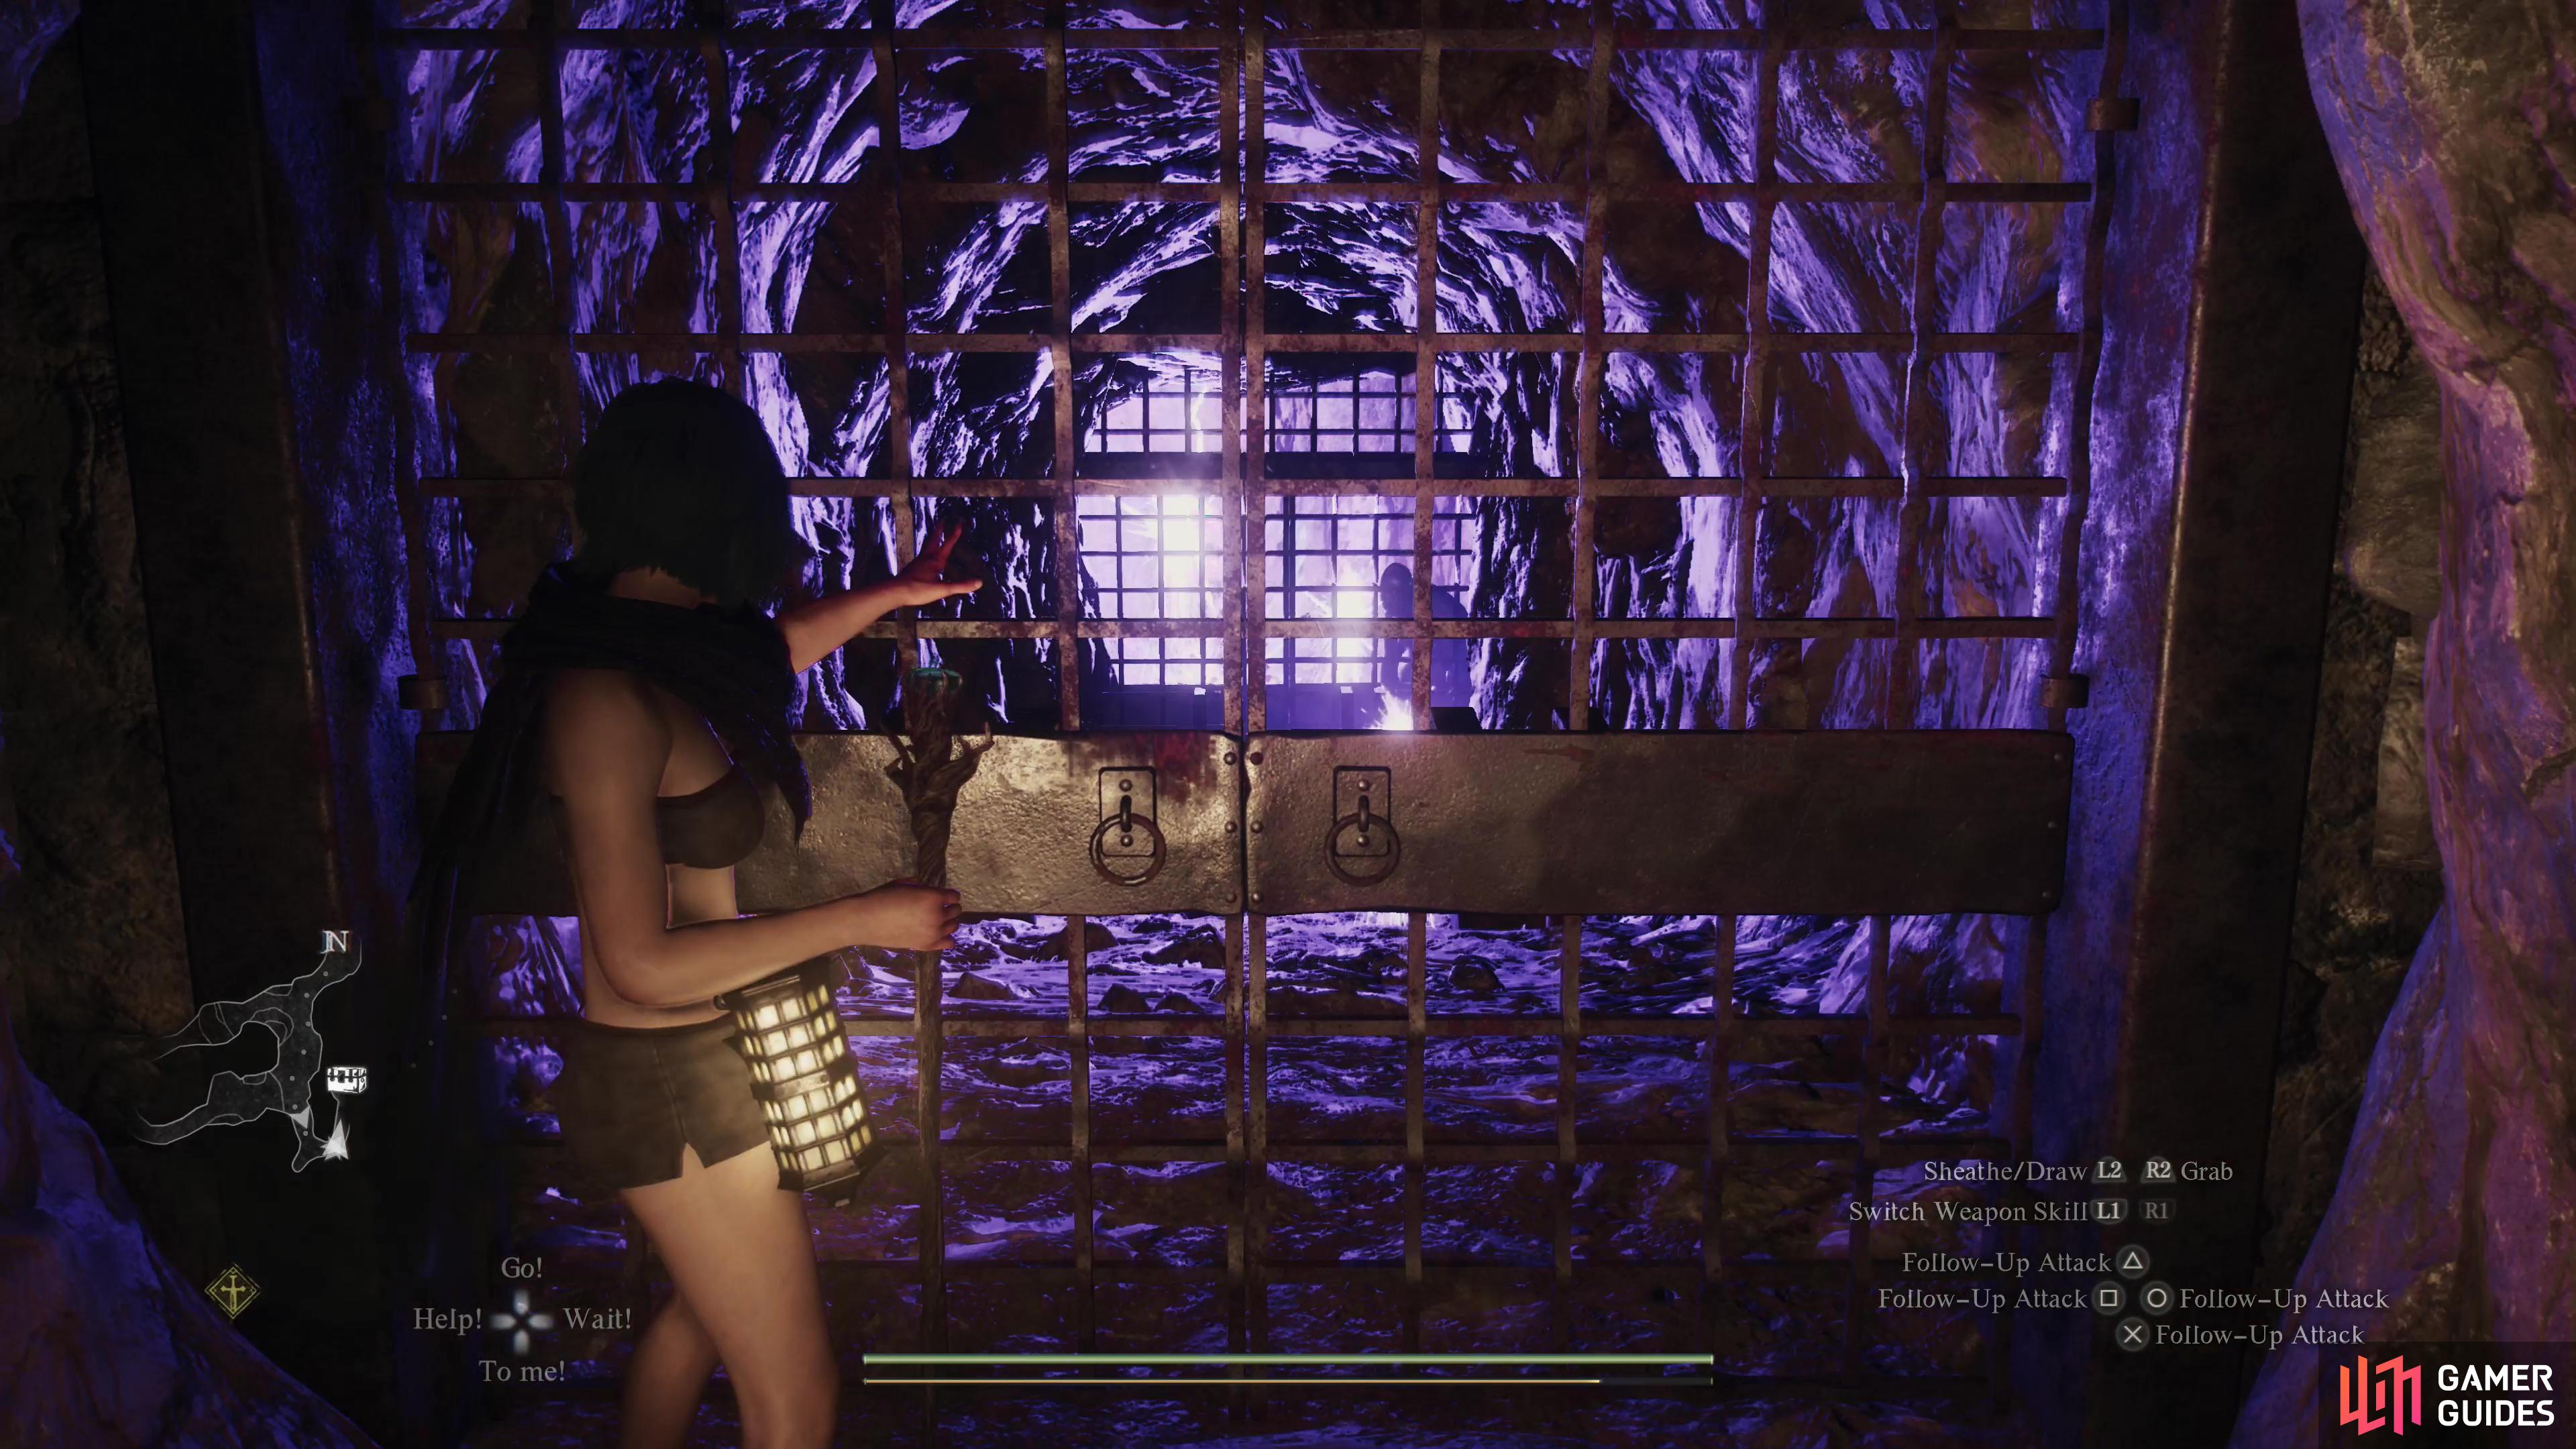
What we ended up doing to get these doors open is change our Arisen’s vocation to ![]() Mage, then cast
Mage, then cast ![]() Levin on the Stout
Levin on the Stout ![]() Undead, who were milling beyond the second door. In our experience,
Undead, who were milling beyond the second door. In our experience, ![]() Flagration didn’t have the range to ignite them from this distance, and we can’t tell if Levin destroyed the beam barring the door due to the proximity of the stout undead, or whether our attack caused them to lash out and destroy the beam themselves. Either way, once they were free from the second door, all we did was stand near the first door, which prompted them to attack, destroying this beam, too. We’ve also heard that using magical tomes can have the desired effect without having to return to town to change vocations.
Flagration didn’t have the range to ignite them from this distance, and we can’t tell if Levin destroyed the beam barring the door due to the proximity of the stout undead, or whether our attack caused them to lash out and destroy the beam themselves. Either way, once they were free from the second door, all we did was stand near the first door, which prompted them to attack, destroying this beam, too. We’ve also heard that using magical tomes can have the desired effect without having to return to town to change vocations.
However you manage it, once both the doors are unbarred and the stout undead have been slimmed down a bit, you’ll be free to advance into the room they guarded, which houses two chests. Loot them for 1,020G and ![]() Jasper x2, which… is something.
Jasper x2, which… is something.

 Sign up
No Comments