
![]() Drakes are among the toughest enemies that you can encounter in
Drakes are among the toughest enemies that you can encounter in ![]() Dragon’s Dogma 2. They have some of the largest health pools and the most damaging attacks, making them particularly dangerous during long, drawn-out fights as your loss gauge becomes increasingly depleted. If you encounter a Drake while you’re still a relatively low level, you’re likely to experience a shock with the jump in difficulty. As a general rule, you’ll be best suited to fight Drakes once you’re at least level 40, and preferably closer to level 50. At this point you should have plenty of stat boosts from levelling, and you’ll have access to the most powerful skills for your preferred vocation. With that said, it is possible to kill Drakes before you reach these higher levels, but you’ll need to be a lot more careful and aware of their special attacks so that you can consistently avoid them. On this page, we’ll take you through the main attacks that you need to look out for, and how to kill Drakes as quickly as possible by hitting their weak points.
Dragon’s Dogma 2. They have some of the largest health pools and the most damaging attacks, making them particularly dangerous during long, drawn-out fights as your loss gauge becomes increasingly depleted. If you encounter a Drake while you’re still a relatively low level, you’re likely to experience a shock with the jump in difficulty. As a general rule, you’ll be best suited to fight Drakes once you’re at least level 40, and preferably closer to level 50. At this point you should have plenty of stat boosts from levelling, and you’ll have access to the most powerful skills for your preferred vocation. With that said, it is possible to kill Drakes before you reach these higher levels, but you’ll need to be a lot more careful and aware of their special attacks so that you can consistently avoid them. On this page, we’ll take you through the main attacks that you need to look out for, and how to kill Drakes as quickly as possible by hitting their weak points.

Drakes are some of the toughest enemies in Dragon’s Dogma 2.
Tips for Killing Drakes in Dragon’s Dogma 2
There are a few things you can do to make your life easier when fighting Drakes in Dragon’s Dogma 2. By way of preparation, we recommend waiting to fight them until you’re at least level 40 so that you have plenty of stat boosts from the levelling process, and by this point you should have access to the most useful skills for your vocation. Aside from your own level, you’ll also need to consider the makeup of your party. It’s a good idea to always have a balanced distribution of vocations with your chosen pawns, and in the most basic terms, that means not having a party comprised entirely of melee or ranged classes.
Bring a Mage to Heal and Cure Debilitations!
The ![]() Mage is arguably the most important class that you need to have in your party, whether played by yourself or by another pawn. This will give you access to consistent healing, which you’ll need plenty of when fighting Drakes, but also the ability to cure debilitations. The last thing you want is to needlessly burn through curative potions, which you should be keeping a handful of in your inventory for when they’re most needed, such as when your Mage is downed or otherwise engaged. Curing a fire debilitation which can quickly eat away your health at key moments in the fight can make the difference between staying alive or dying, and having a Mage doing this regularly will make your life much easier.
Mage is arguably the most important class that you need to have in your party, whether played by yourself or by another pawn. This will give you access to consistent healing, which you’ll need plenty of when fighting Drakes, but also the ability to cure debilitations. The last thing you want is to needlessly burn through curative potions, which you should be keeping a handful of in your inventory for when they’re most needed, such as when your Mage is downed or otherwise engaged. Curing a fire debilitation which can quickly eat away your health at key moments in the fight can make the difference between staying alive or dying, and having a Mage doing this regularly will make your life much easier.
Other Party Vocations – Melee and Ranged Damage
Once you have a reliable Mage in your party, you can essentially choose whatever else you want. However, if you’re a melee class, you should probably focus on having at least one powerful ranged class in your party so that you can complement each other’s fighting styles. ![]() Sorcerers are an excellent source of ranged damage in general, especially if you can find (or make) one with Prescient/
Sorcerers are an excellent source of ranged damage in general, especially if you can find (or make) one with Prescient/![]() Augural Flare, a skill which is capable of quickly taking out a few health bars of any creature when used properly.
Augural Flare, a skill which is capable of quickly taking out a few health bars of any creature when used properly. ![]() Archers can also be handy for their ranged damage, but they’re just not as reliable for quick bursts of damage in the same way that Sorcerers are.
Archers can also be handy for their ranged damage, but they’re just not as reliable for quick bursts of damage in the same way that Sorcerers are.
If you’re a ranged class yourself, you’ll want to consider introducing some form of melee damage to the party. Thieves are excellent sources of burst damage, and they’re great for climbing on monsters to keep them on the ground as they slash away at their wings. ![]() Warriors are also capable of inflicting massive damage, but they’re much slower and more cumbersome, albeit with far greater survivability than a thief. A good
Warriors are also capable of inflicting massive damage, but they’re much slower and more cumbersome, albeit with far greater survivability than a thief. A good ![]() Fighter with the right skillset will keep the Drake away from you most of the time, while remaining tough as a decent tank, but their damage output is significantly weaker than both Warriors and Thieves.
Fighter with the right skillset will keep the Drake away from you most of the time, while remaining tough as a decent tank, but their damage output is significantly weaker than both Warriors and Thieves.
Carry a Random Pawn to the Fight
Another tip for increasing your chances against Drakes (or any tough creature that you find) is bringing a random pawn along for the fight. You’ll often find pawns wandering the roads of the open world, practically begging you to recruit them. Even if you don’t want them in your party, they can still help you in a fight if they’re close enough when it starts. The best way to ensure that they join you is by picking them up and carrying them to whatever enemy you’re planning to fight, then put them down as the battle begins. The pawn should immediately start fighting the Drake in this case, and they’ll be a decent source of extra damage/fodder.
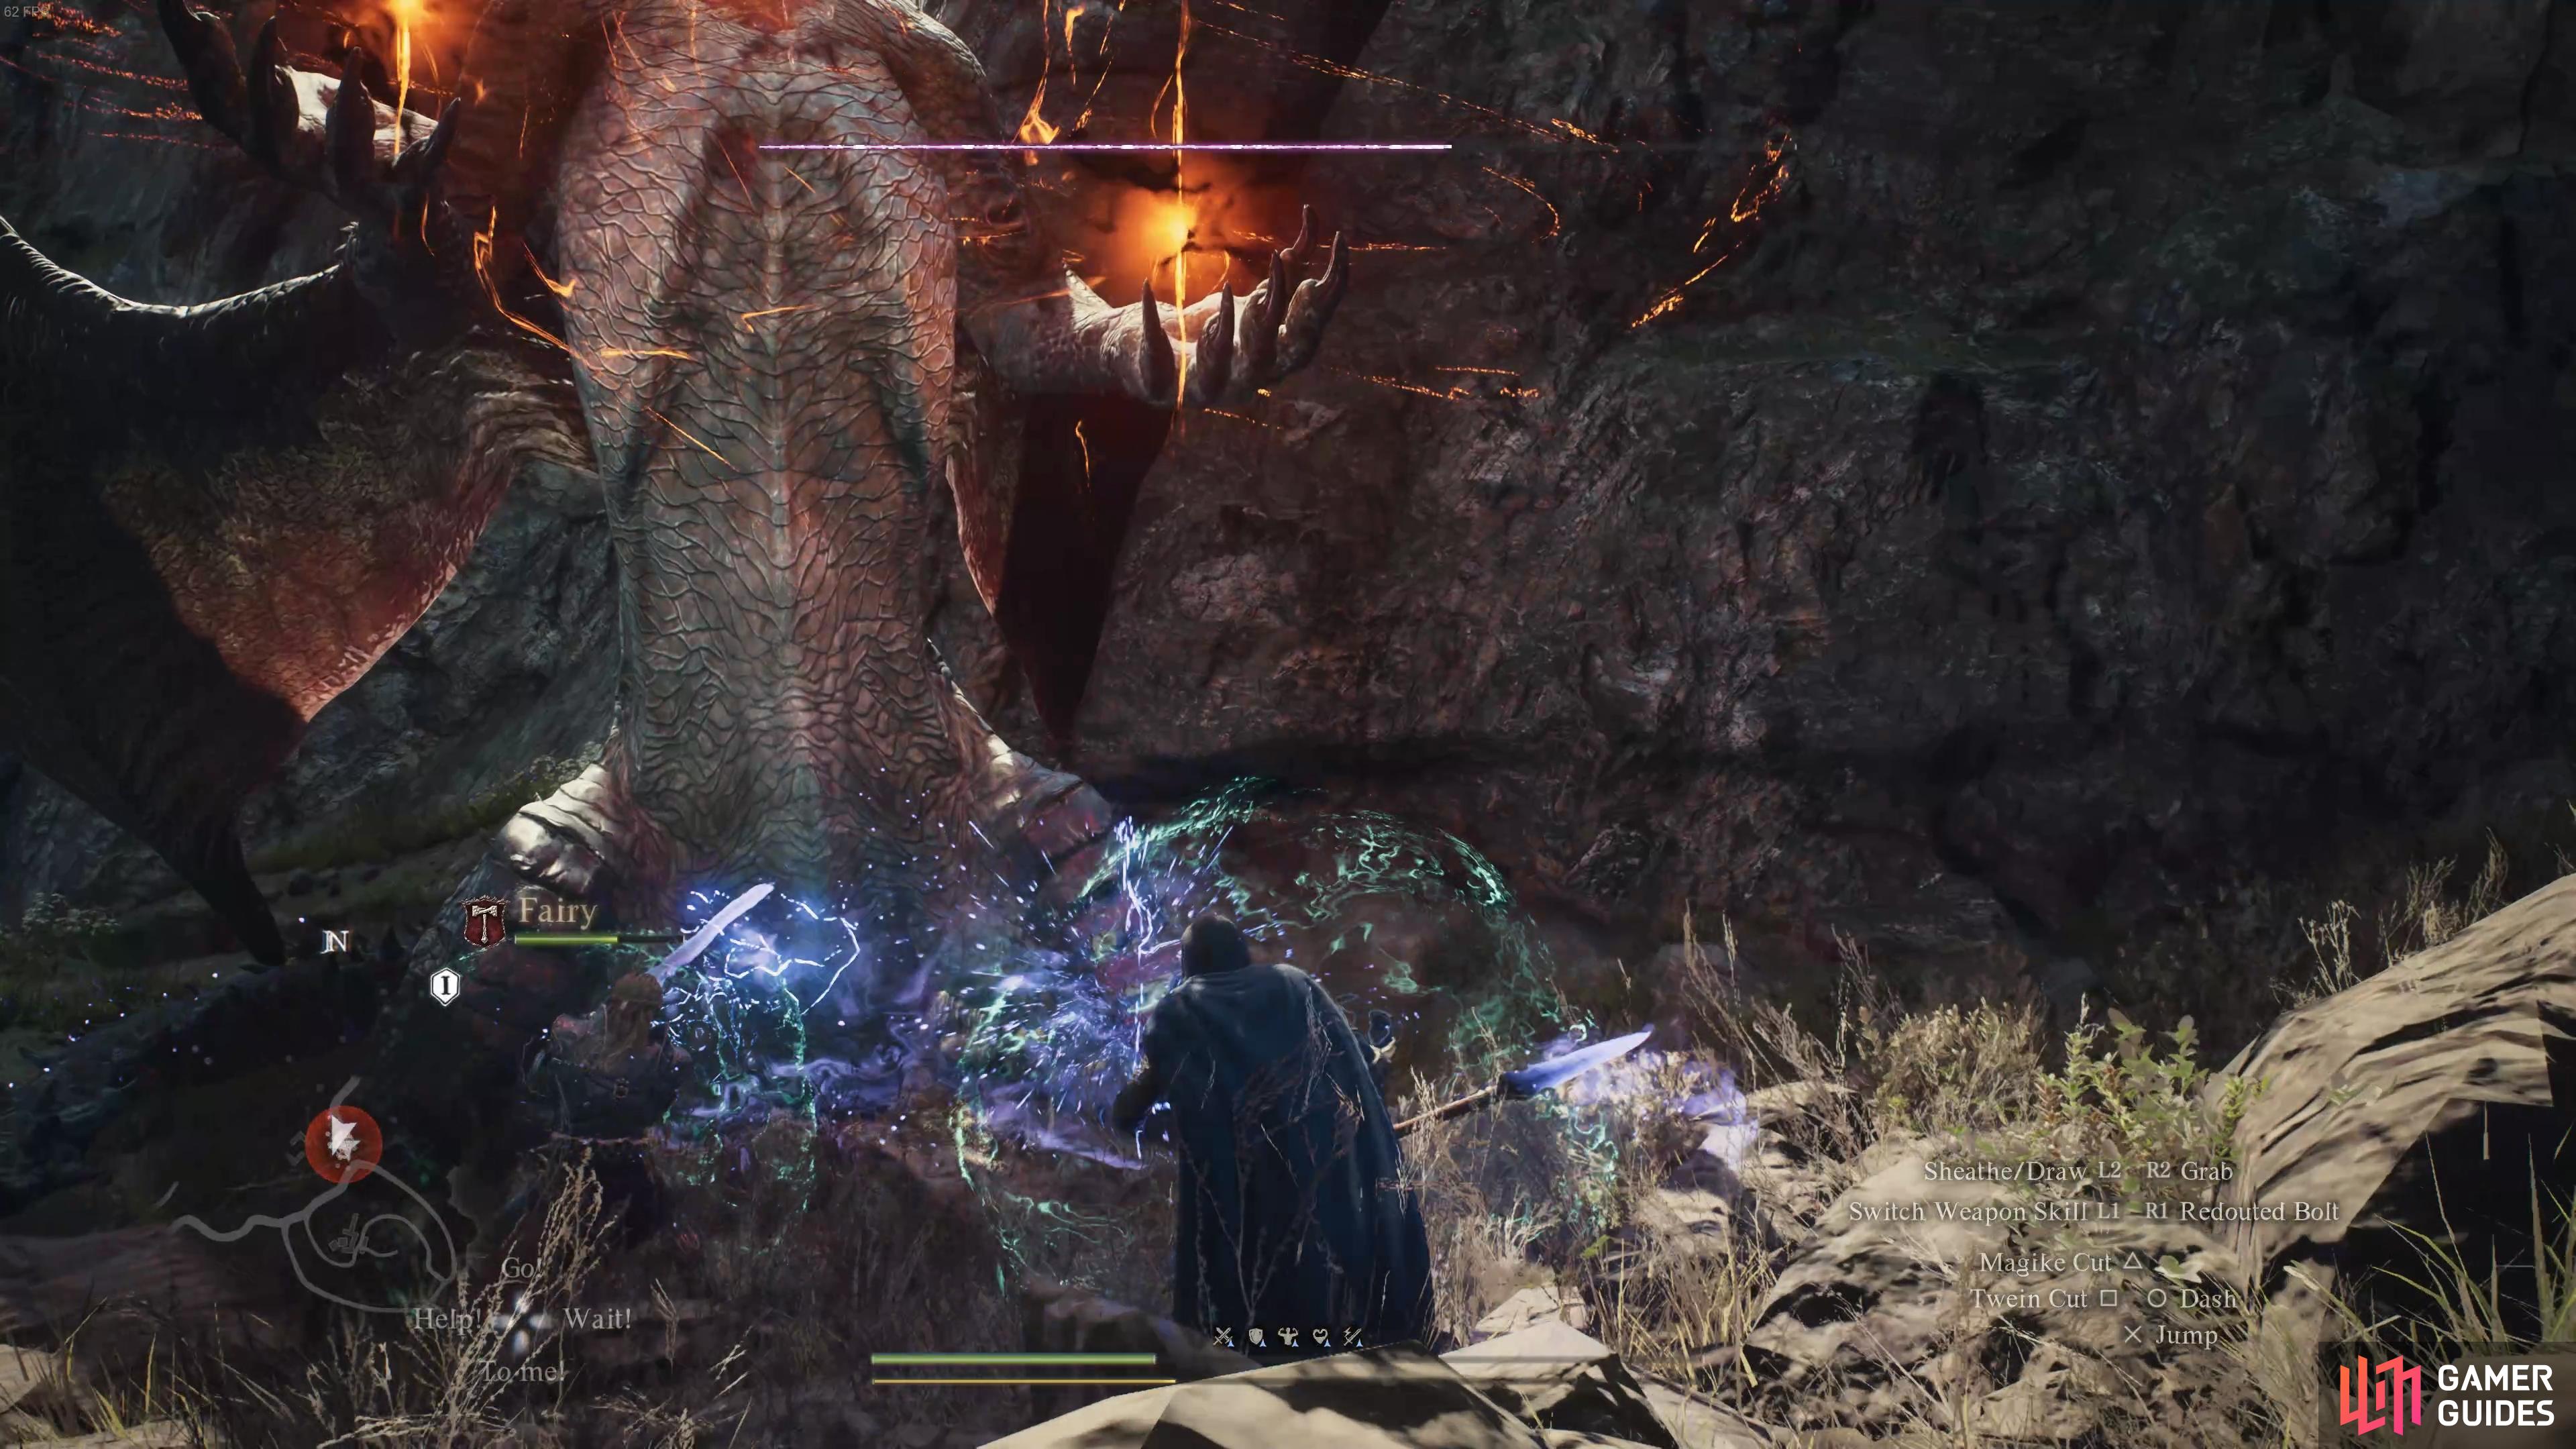
Positioning as a Melee Vocation
As a melee class, whether it be Fighter, Warrior, ![]() Thief, or
Thief, or ![]() Mystic Spearhand, the best place to position yourself during the fight with a Drake is directly beneath their underbelly. This is where you’ll find the glowing heart, which is the greatest weak point for any Drake. Next in line is the head, but you’ll be close enough to both of these so long as you’re around the underbelly. At the beginning of the fight, the glowing heart weak point won’t be visible, but once you inflict enough damage (roughly one health bar’s worth), you’ll be able to see and attack it continuously. If you’re finding it difficult to attack the heart on foot, you can try climbing the Drake so that you’re positioned directly on top of it.
Mystic Spearhand, the best place to position yourself during the fight with a Drake is directly beneath their underbelly. This is where you’ll find the glowing heart, which is the greatest weak point for any Drake. Next in line is the head, but you’ll be close enough to both of these so long as you’re around the underbelly. At the beginning of the fight, the glowing heart weak point won’t be visible, but once you inflict enough damage (roughly one health bar’s worth), you’ll be able to see and attack it continuously. If you’re finding it difficult to attack the heart on foot, you can try climbing the Drake so that you’re positioned directly on top of it.

(1 of 2) Try to stay under the belly of the Drake at all times as a melee vocation.
Try to stay under the belly of the Drake at all times as a melee vocation. (left), You should aim to hit the Drake’s heart to inflict more damage. (right)
It’s worth trying to remain on foot while you attack the heart, mostly because you won’t consume any stamina while doing this, whereas you’ll consume stamina quickly if you climb and grab the Drake to hit the weak point. It’s worth doing if you find it works better for you, but you’ll need to consider the recovery phase as you regain stamina between each bout of attacks, and be sure to jump off before you reach around 1 / 4 of your stamina so that you don’t become exhausted, leaving you vulnerable and unable to move quickly. Other than positioning in this way, the basic principles of fighting the Drake are the same regardless of class; just spam attacks at the weak points of the heart or head.
Best Melee Vocation Against Drakes
The Mystic Spearhand vocation is arguably the most powerful against Drakes, not only because it has a decent balance of melee and ranged damage, but it also has one of the most powerful skills in the game in the form of ![]() Mirour Vesture (or its upgraded version,
Mirour Vesture (or its upgraded version, ![]() Mirour Shelde). This skill allows you to generate an individual bubble shield for you and any pawns within range which will protect you from all sources of damage and knockback. In short: it makes you invulnerable to attacks so long as you keep spamming it. The only downside is that it costs roughly 10% of your stamina per cast, but when you consider that you don’t have to worry about positioning or any Drake attacks for as long as you maintain the bubble, it’s certainly worthwhile.
Mirour Shelde). This skill allows you to generate an individual bubble shield for you and any pawns within range which will protect you from all sources of damage and knockback. In short: it makes you invulnerable to attacks so long as you keep spamming it. The only downside is that it costs roughly 10% of your stamina per cast, but when you consider that you don’t have to worry about positioning or any Drake attacks for as long as you maintain the bubble, it’s certainly worthwhile.
The Mirour Vesture/Shelde skill can allow you to kill Drakes at a much lower level than you might otherwise be capable of, and all you need to worry about is maintaining a balance between casting the skill and recovering stamina. The bubble of invulnerability lasts for roughly 6 seconds, so you’ll have plenty of time to recover stamina, and even throw in some attacks of your own in the meantime, but you may find that you come to rely on your pawns to do most of the damage if you insist on spamming it. If nothing else, the skill is there to be used when you most need it, and it’s especially useful to make yourself invulnerable while reviving an ally.
Positioning as a Ranged Vocation
As a ranged vocation, such as Sorcerer, Archer, or even Mystic Archer if you have access to it, you’ll be better off staying away from the underbelly of the Drake, keeping your distance and preferably with the Drake facing away from you. You’ll be much more vulnerable to attacks as a ranged class, with lesser defensive stats and gear, so any attack that you succumb to from the Drake will inflict massive damage. You can easily die from just one or two hits from a Drake, especially if you’re under level 40. The best thing you can do is support your melee pawns by aiming for the easiest weak point to hit from range: the head.
Aside from hitting the head, there are some skills that you can use to aim at the heart, but you’ll need to be quick to avoid the attention of the Drake as you face it. Prescient/Augural Flare is ideal for this if you’re playing as a Sorcerer, but a pawn with the skill will also use it. If you manage to hit the heart or the head with this skill, any subsequent attack on the same spot will extend the duration of the ticks, and each hit translates to an additional explosion when the flare expires. Using this properly can result in the Drake losing 1 – 2 health bars (or even more!) in just a few seconds when the explosions go off.
Best Ranged Class Against Drakes
Other than the Sorcerer, the ![]() Magick Archer is a much more powerful version of the basic Archer, and it can essentially one-shot Drakes with its Marty’s Bolt skill, making the fight incredibly easy. However, it’s worth remembering that using Marty’s Bolt to its full potential will deplete almost all your health (and loss gauge!), making you vulnerable to being one-shot by anything else that you come across until you rest. So, be sure to find a campsite to rest as soon as possible if you plan to use this method. The Magick Archer is still a great choice against Drakes even if you don’t plan on using its Marty’s Bolt skill – it’ll inflict more damage than the regular Archer and it also has some support skills to help your fellow pawns.
Magick Archer is a much more powerful version of the basic Archer, and it can essentially one-shot Drakes with its Marty’s Bolt skill, making the fight incredibly easy. However, it’s worth remembering that using Marty’s Bolt to its full potential will deplete almost all your health (and loss gauge!), making you vulnerable to being one-shot by anything else that you come across until you rest. So, be sure to find a campsite to rest as soon as possible if you plan to use this method. The Magick Archer is still a great choice against Drakes even if you don’t plan on using its Marty’s Bolt skill – it’ll inflict more damage than the regular Archer and it also has some support skills to help your fellow pawns.
How to Avoid Drake Attacks
There are a few main attacks that any Drake will spam throughout a fight. Knowing how to recognize when these attacks are about to be used, and how to avoid them, is key to staying alive and eventually defeating it. We’ll list the main attacks below with a few tips for each.
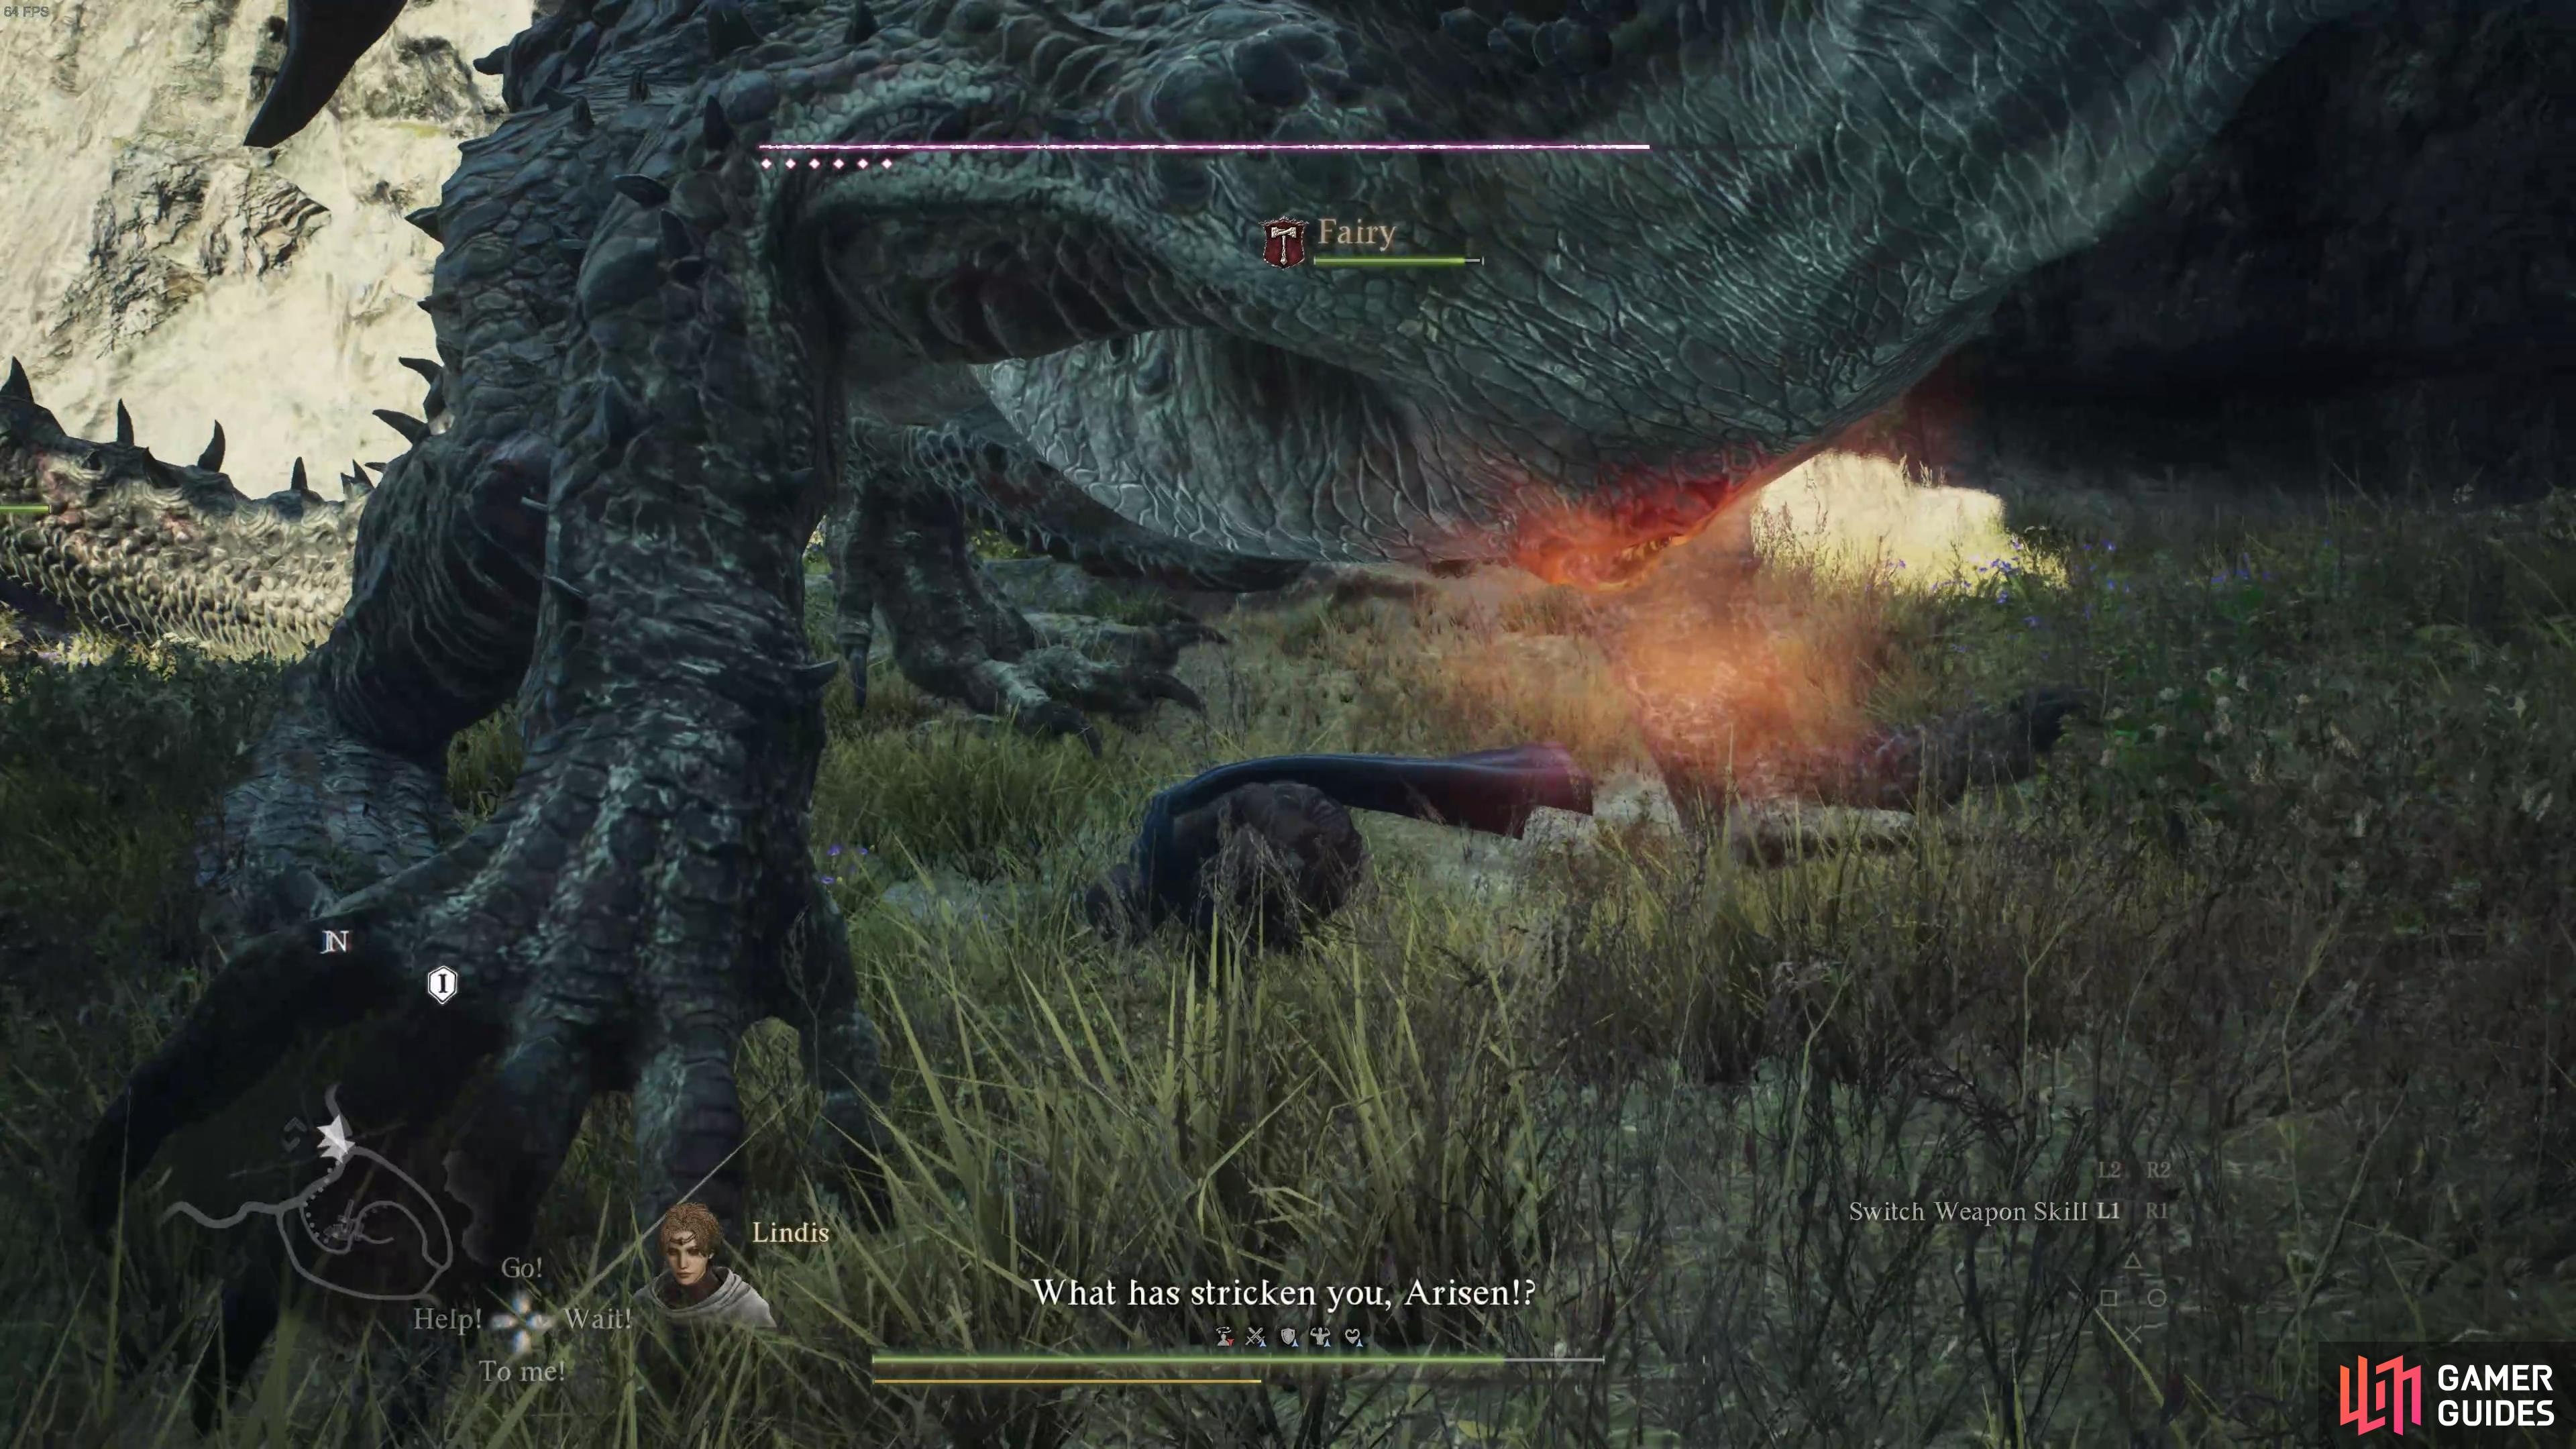
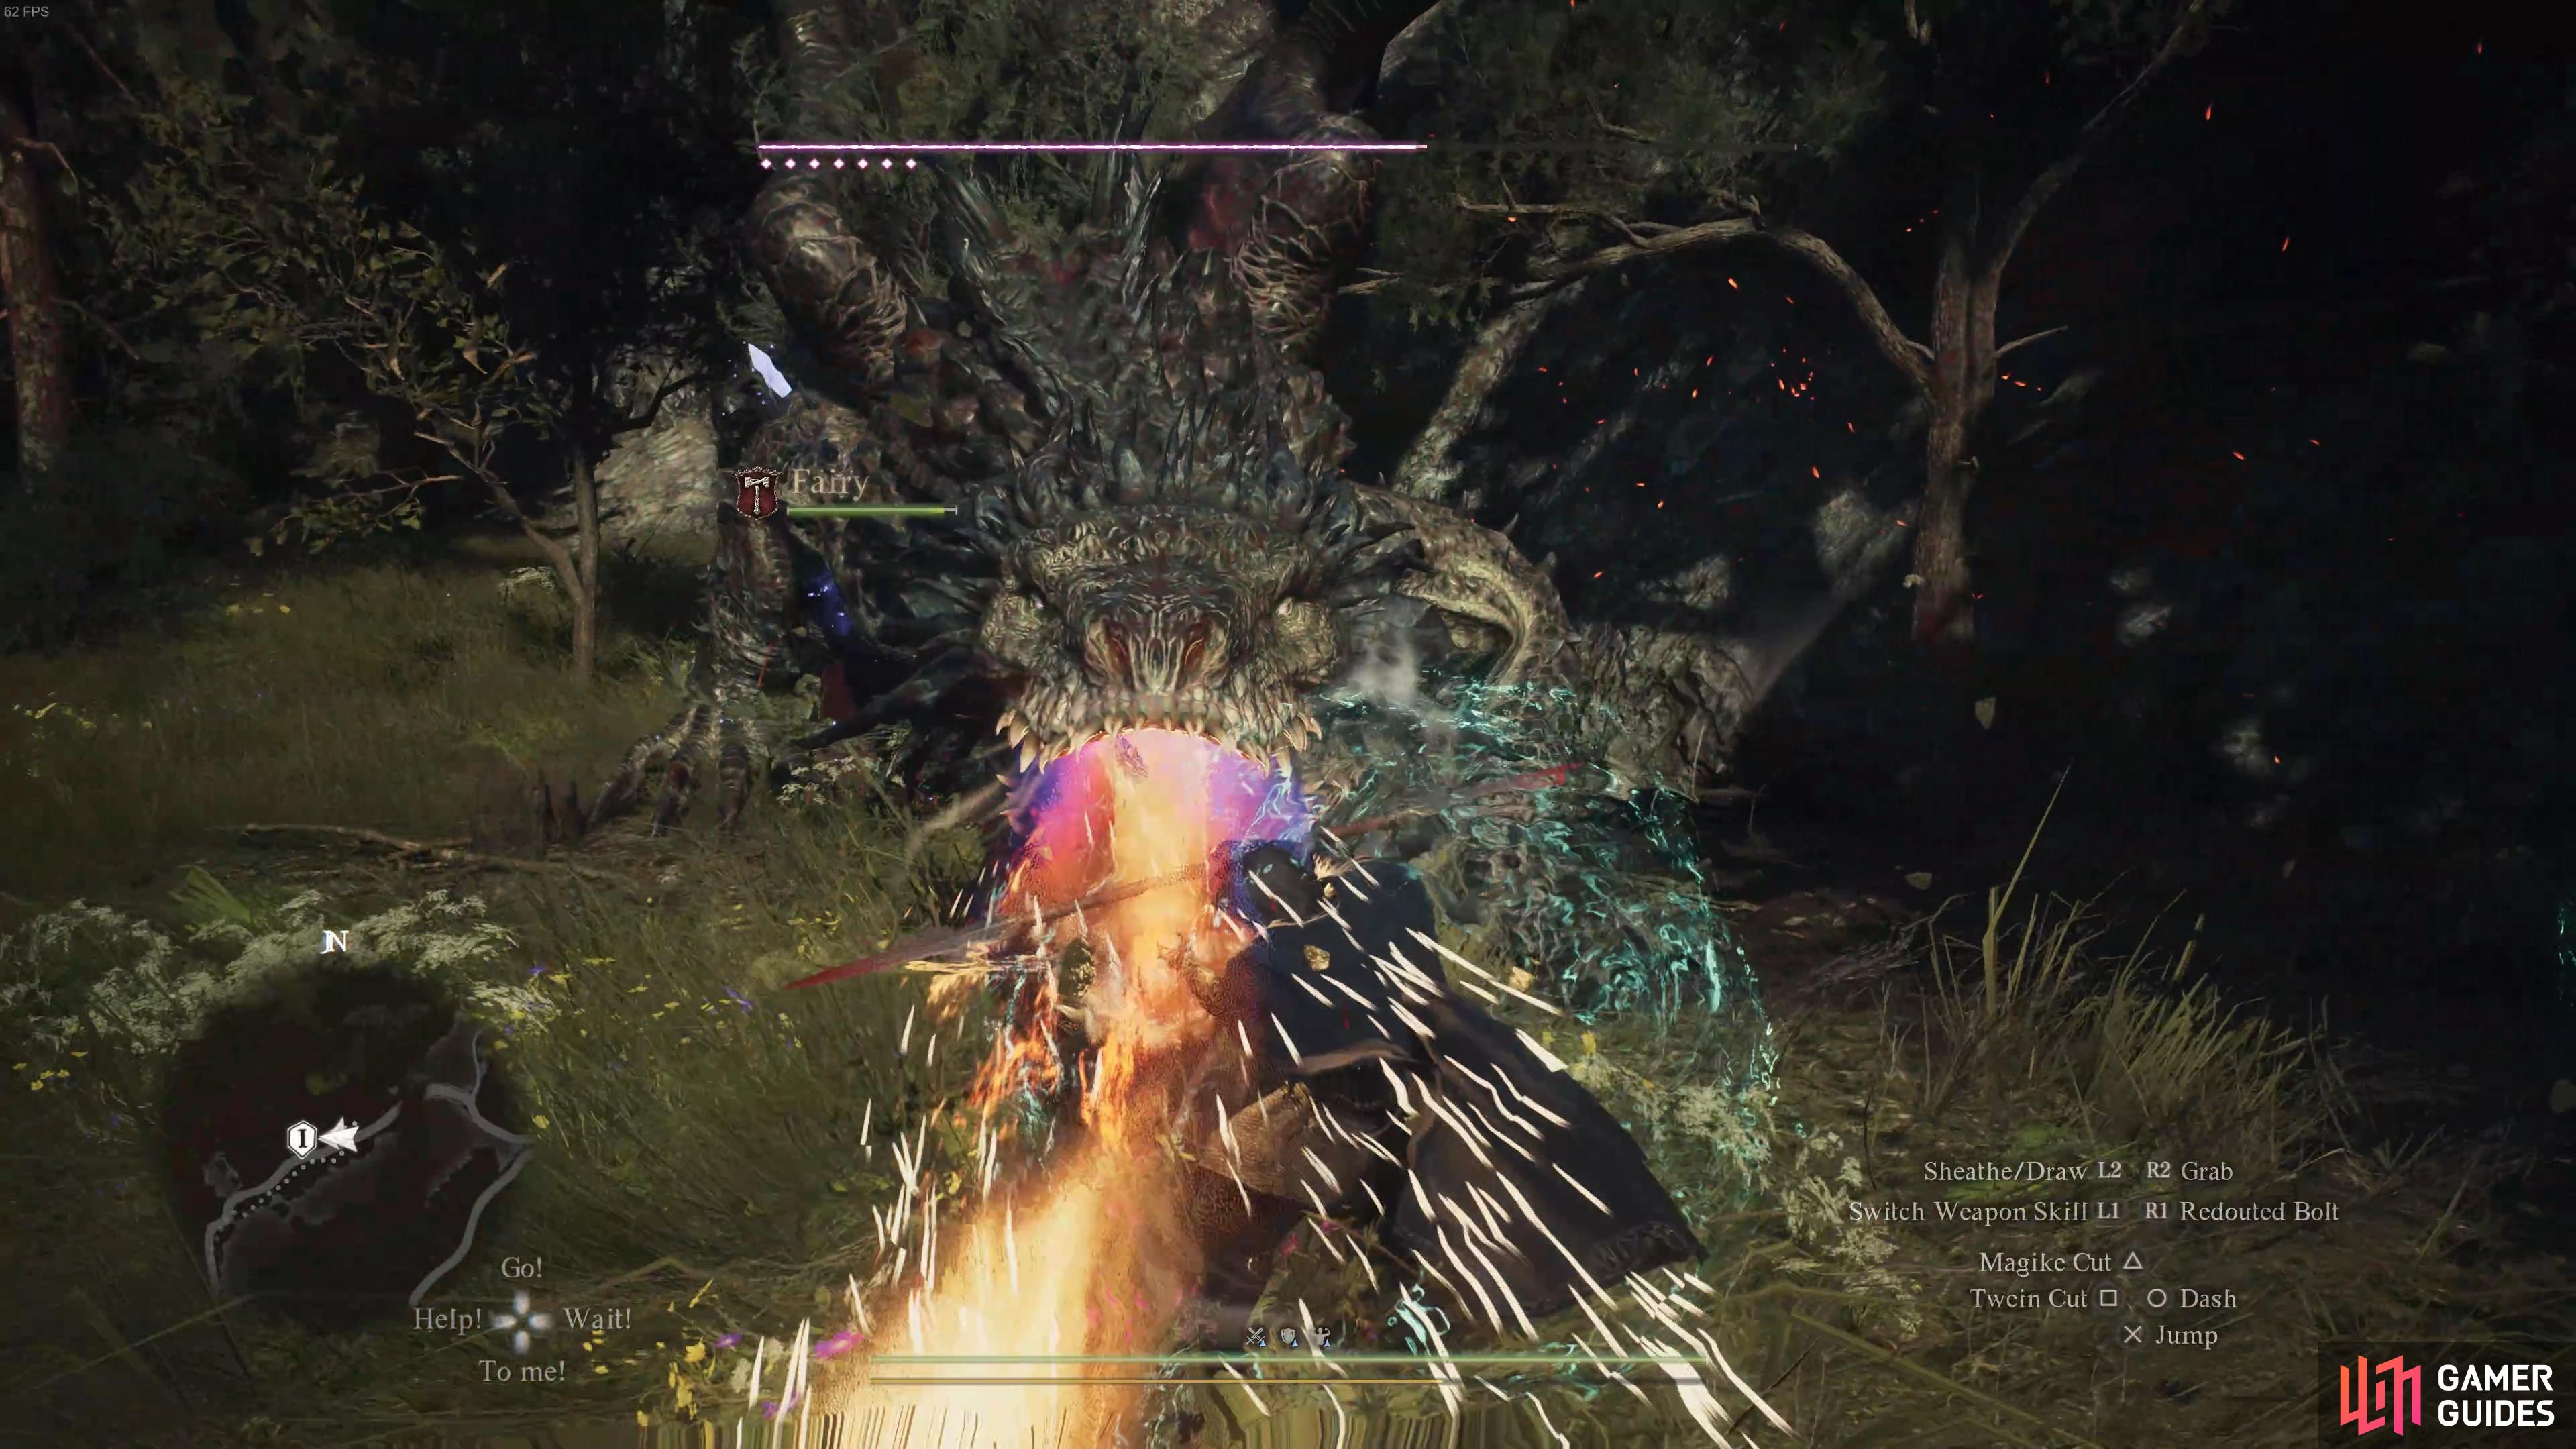
Fire Breath
The fire breath attack is one of the easiest to avoid. The Drake will lower its head to the ground just before the attack begins, and it will slowly step backwards as it breathes fire in an arc in front of it. You can either stay to the side of the Drake while this is happening, get behind it, or jump onto its back and try to hit the head directly. If you manage to hit the head while the Drake is breathing fire, you’ll inflict more damage than usual, so it’s worth doing. It goes without saying that if you’re playing as a Mystic Spearhand, this is the perfect time to use Mirour Vesture/Shelde, both to make yourself invulnerable to the attack while also giving you easy access to hitting the head.
The fire breath attack can also be used by the Drake when it’s in the air, but it’s much easier to avoid this as it usually hits one small patch of the ground. If you happen to be targeted by it, just run in any direction away from the fire until the attack ends.
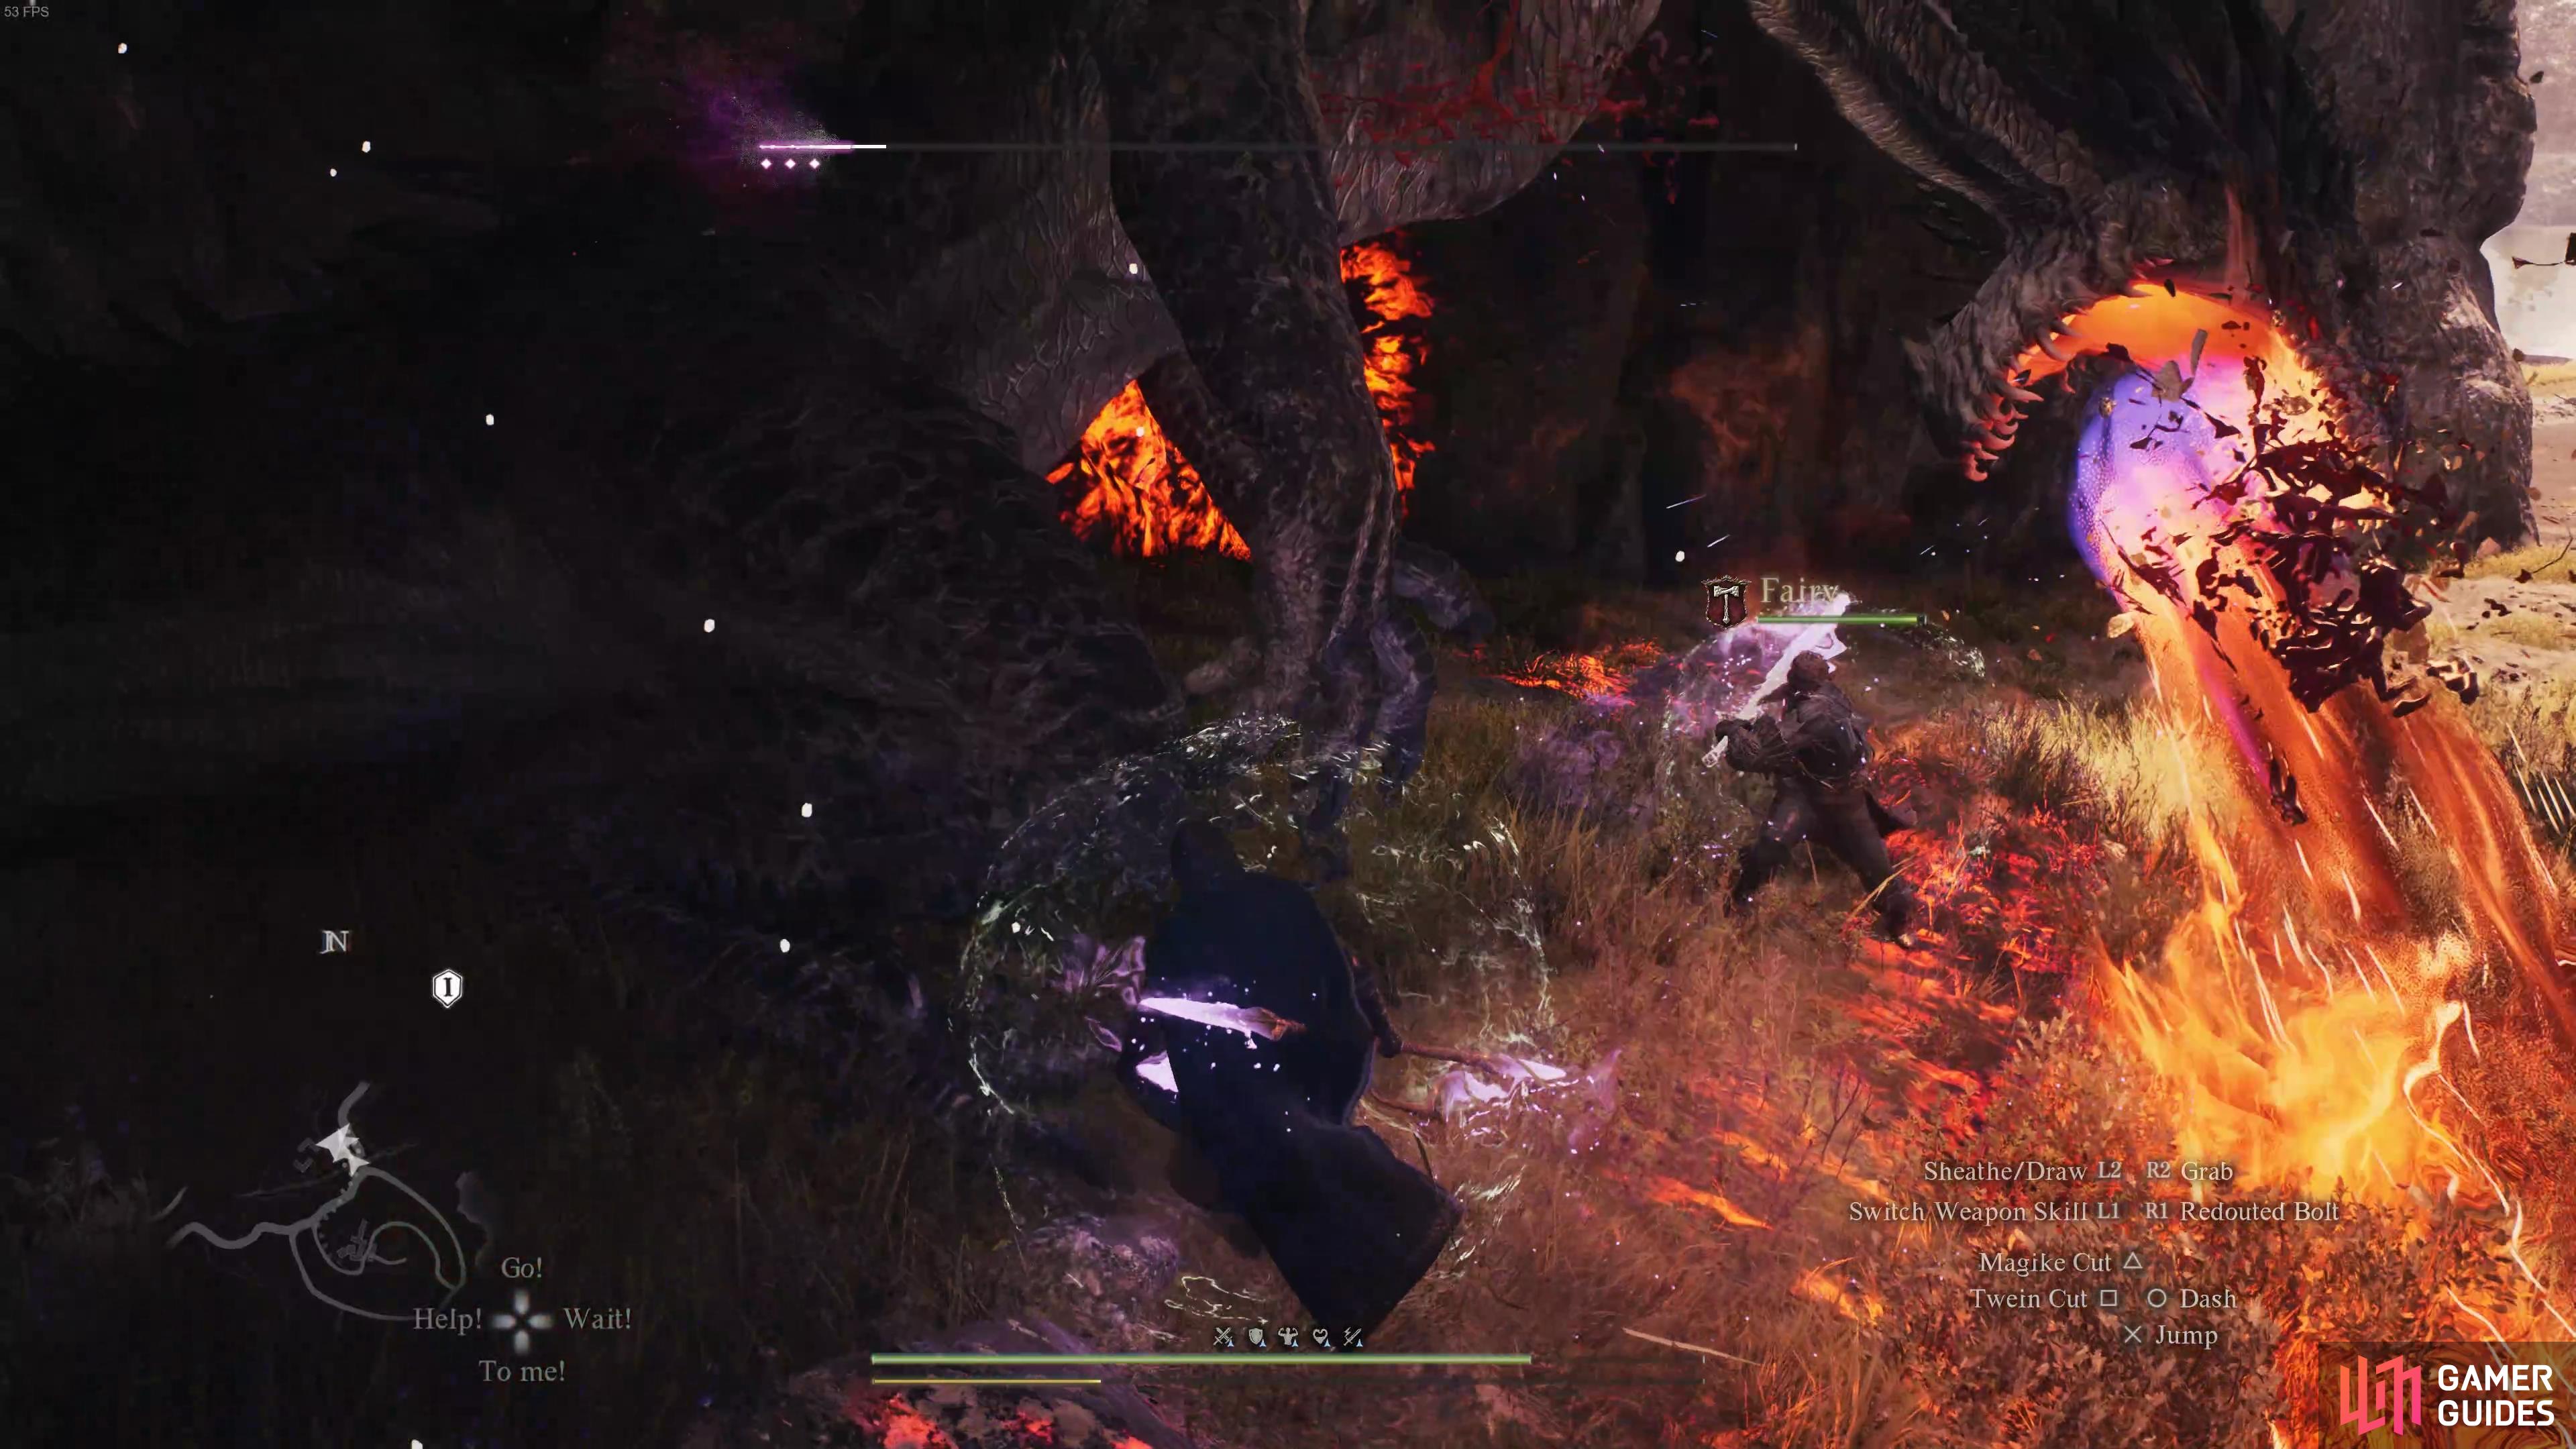
(1 of 2) Stay at the side or behind the Drake as it uses the fire breath attack.
Stay at the side or behind the Drake as it uses the fire breath attack. (left), If you’re playing as Mystic Spearhand, you can use Mirour Vesture/Shelde and ignore the fire while hitting the head. (right)
Bite Attack
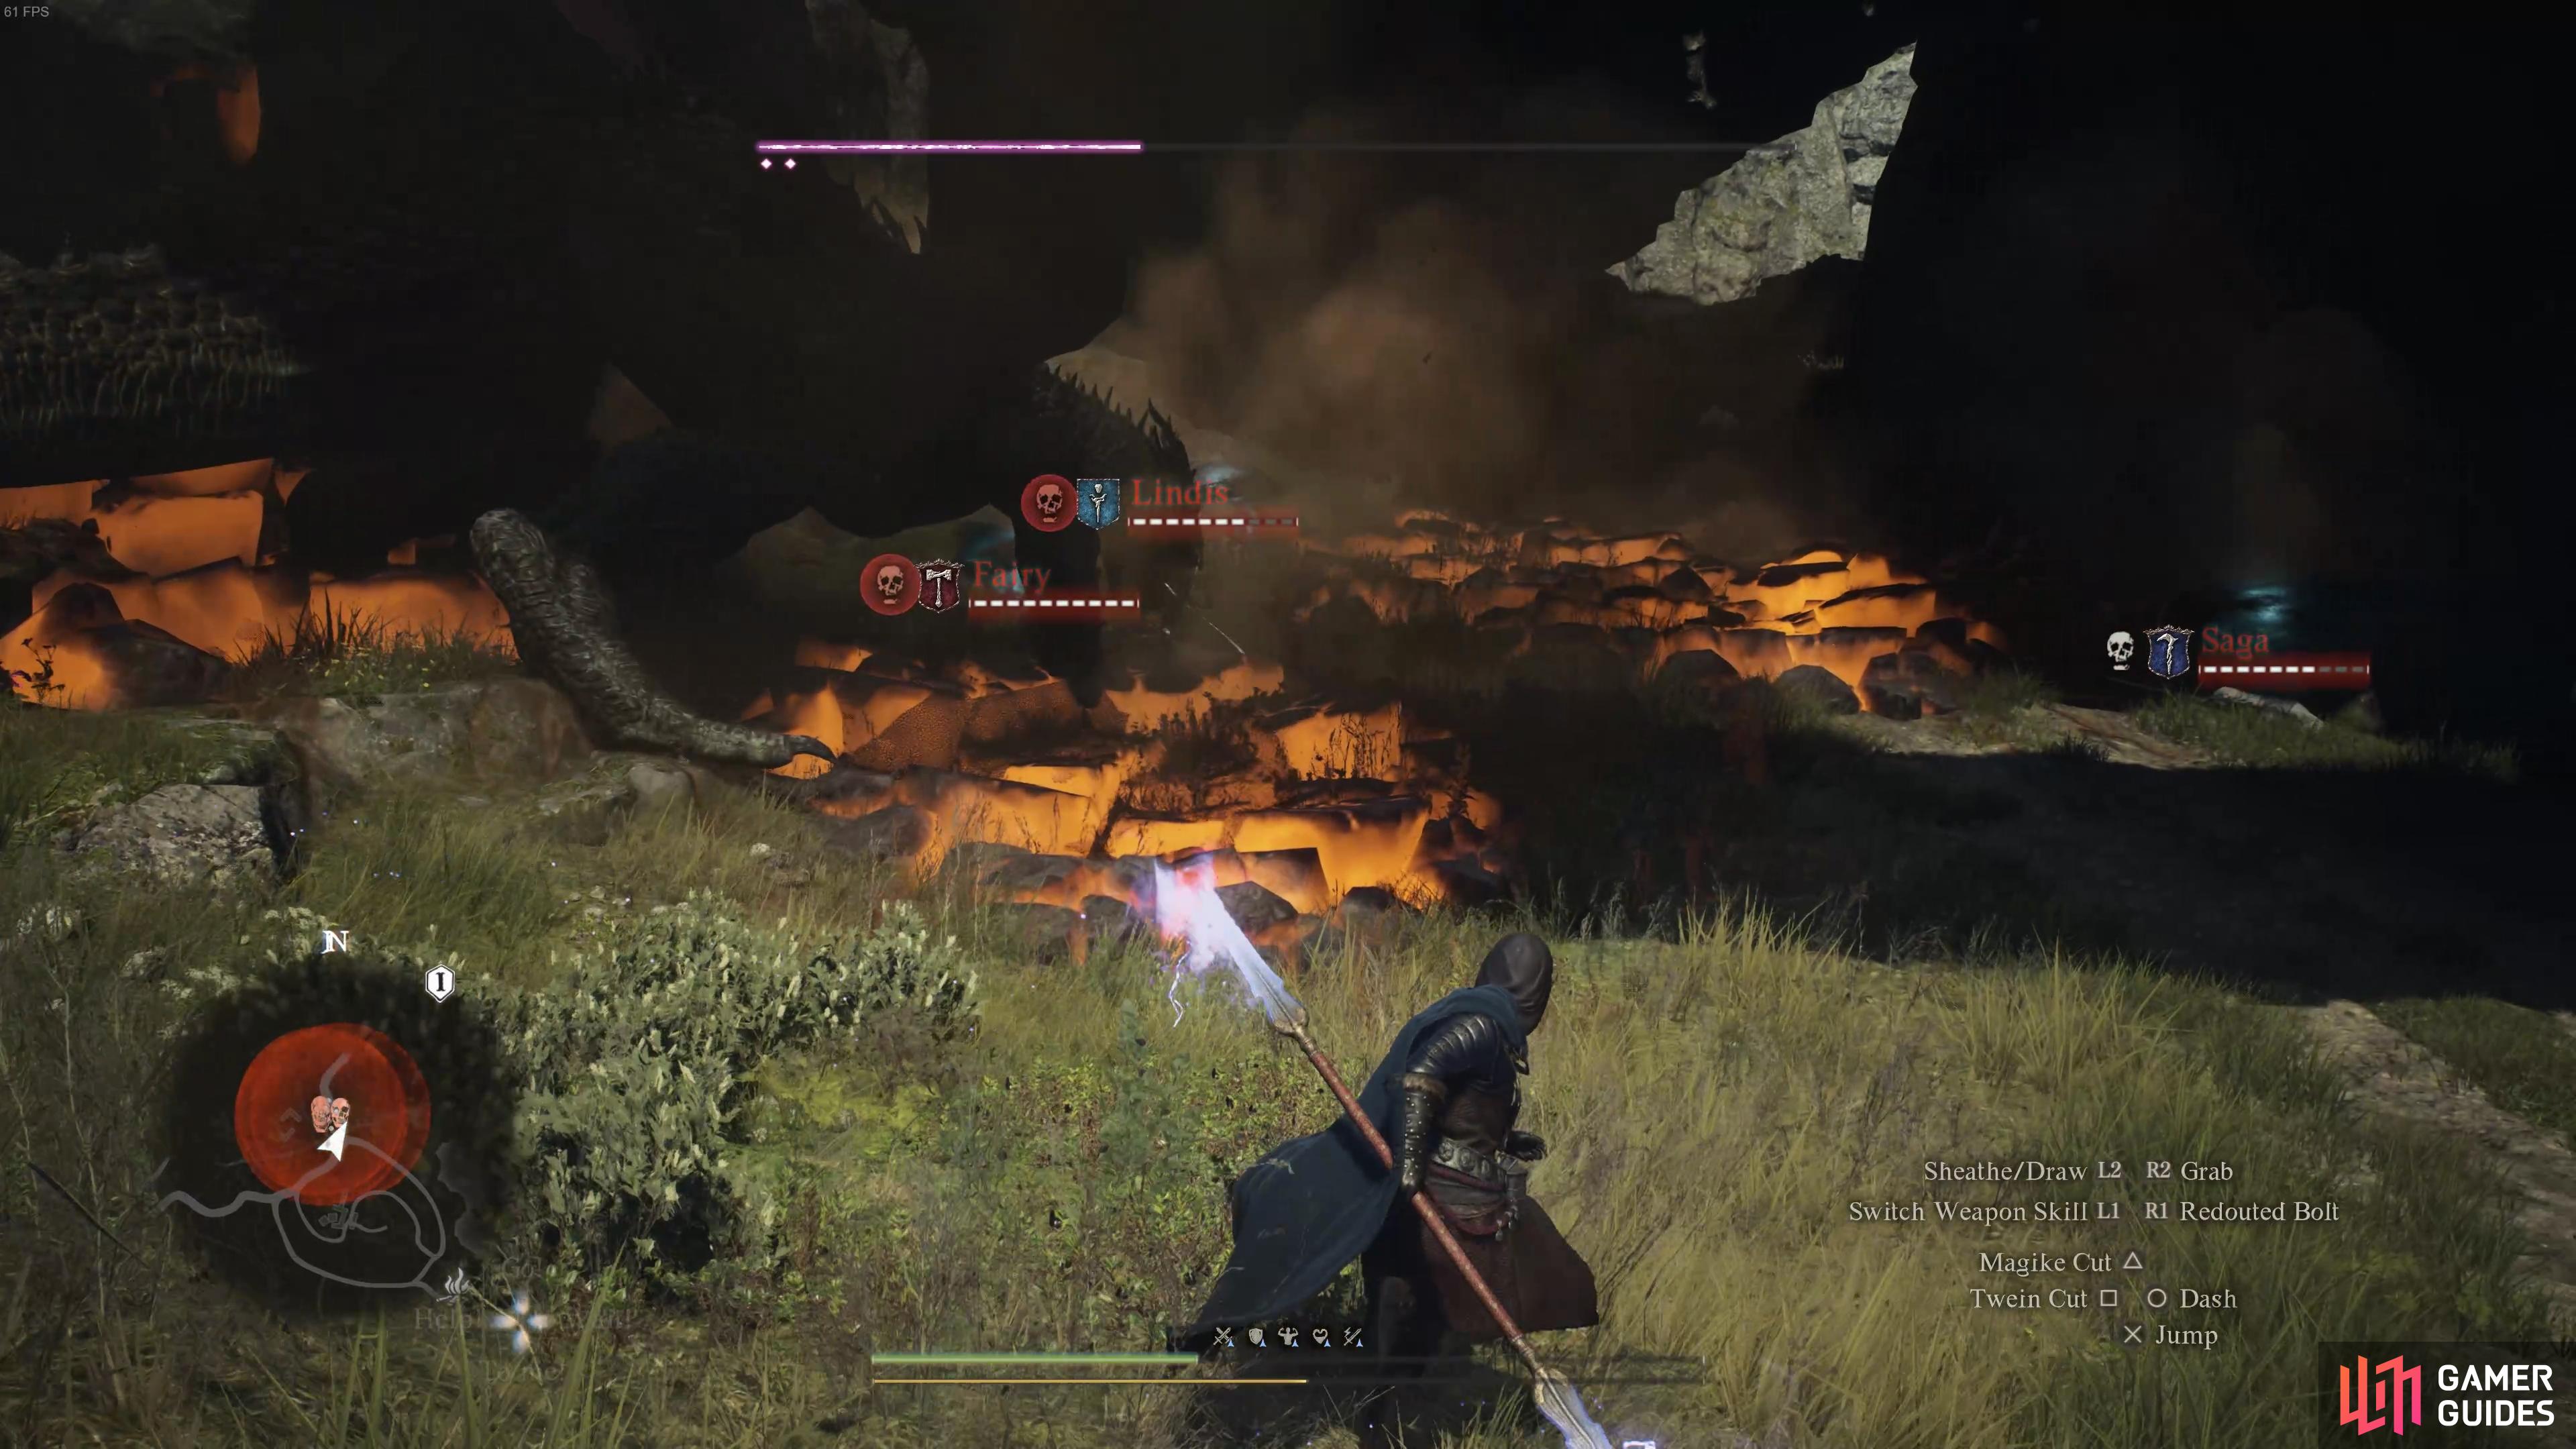
The bite attack can quickly turn into an “eat” attack, and this does exactly what you might expect: the Drake will consume whoever it bites unless you hit the head with your most damaging attacks as quickly as possible. If this happens to your own character, there’s a chance that the Drake will spit you out, but you’ll probably need to use healing potions to keep yourself alive while your health bar is continually depleted. If it happens to a pawn, you need to hit the head as quickly as possible to save them. If you don’t do this, you can lose the pawn forever and the fight will become much harder. Thankfully, this attack is quite rare, but it’s worth keeping in mind throughout the fight.
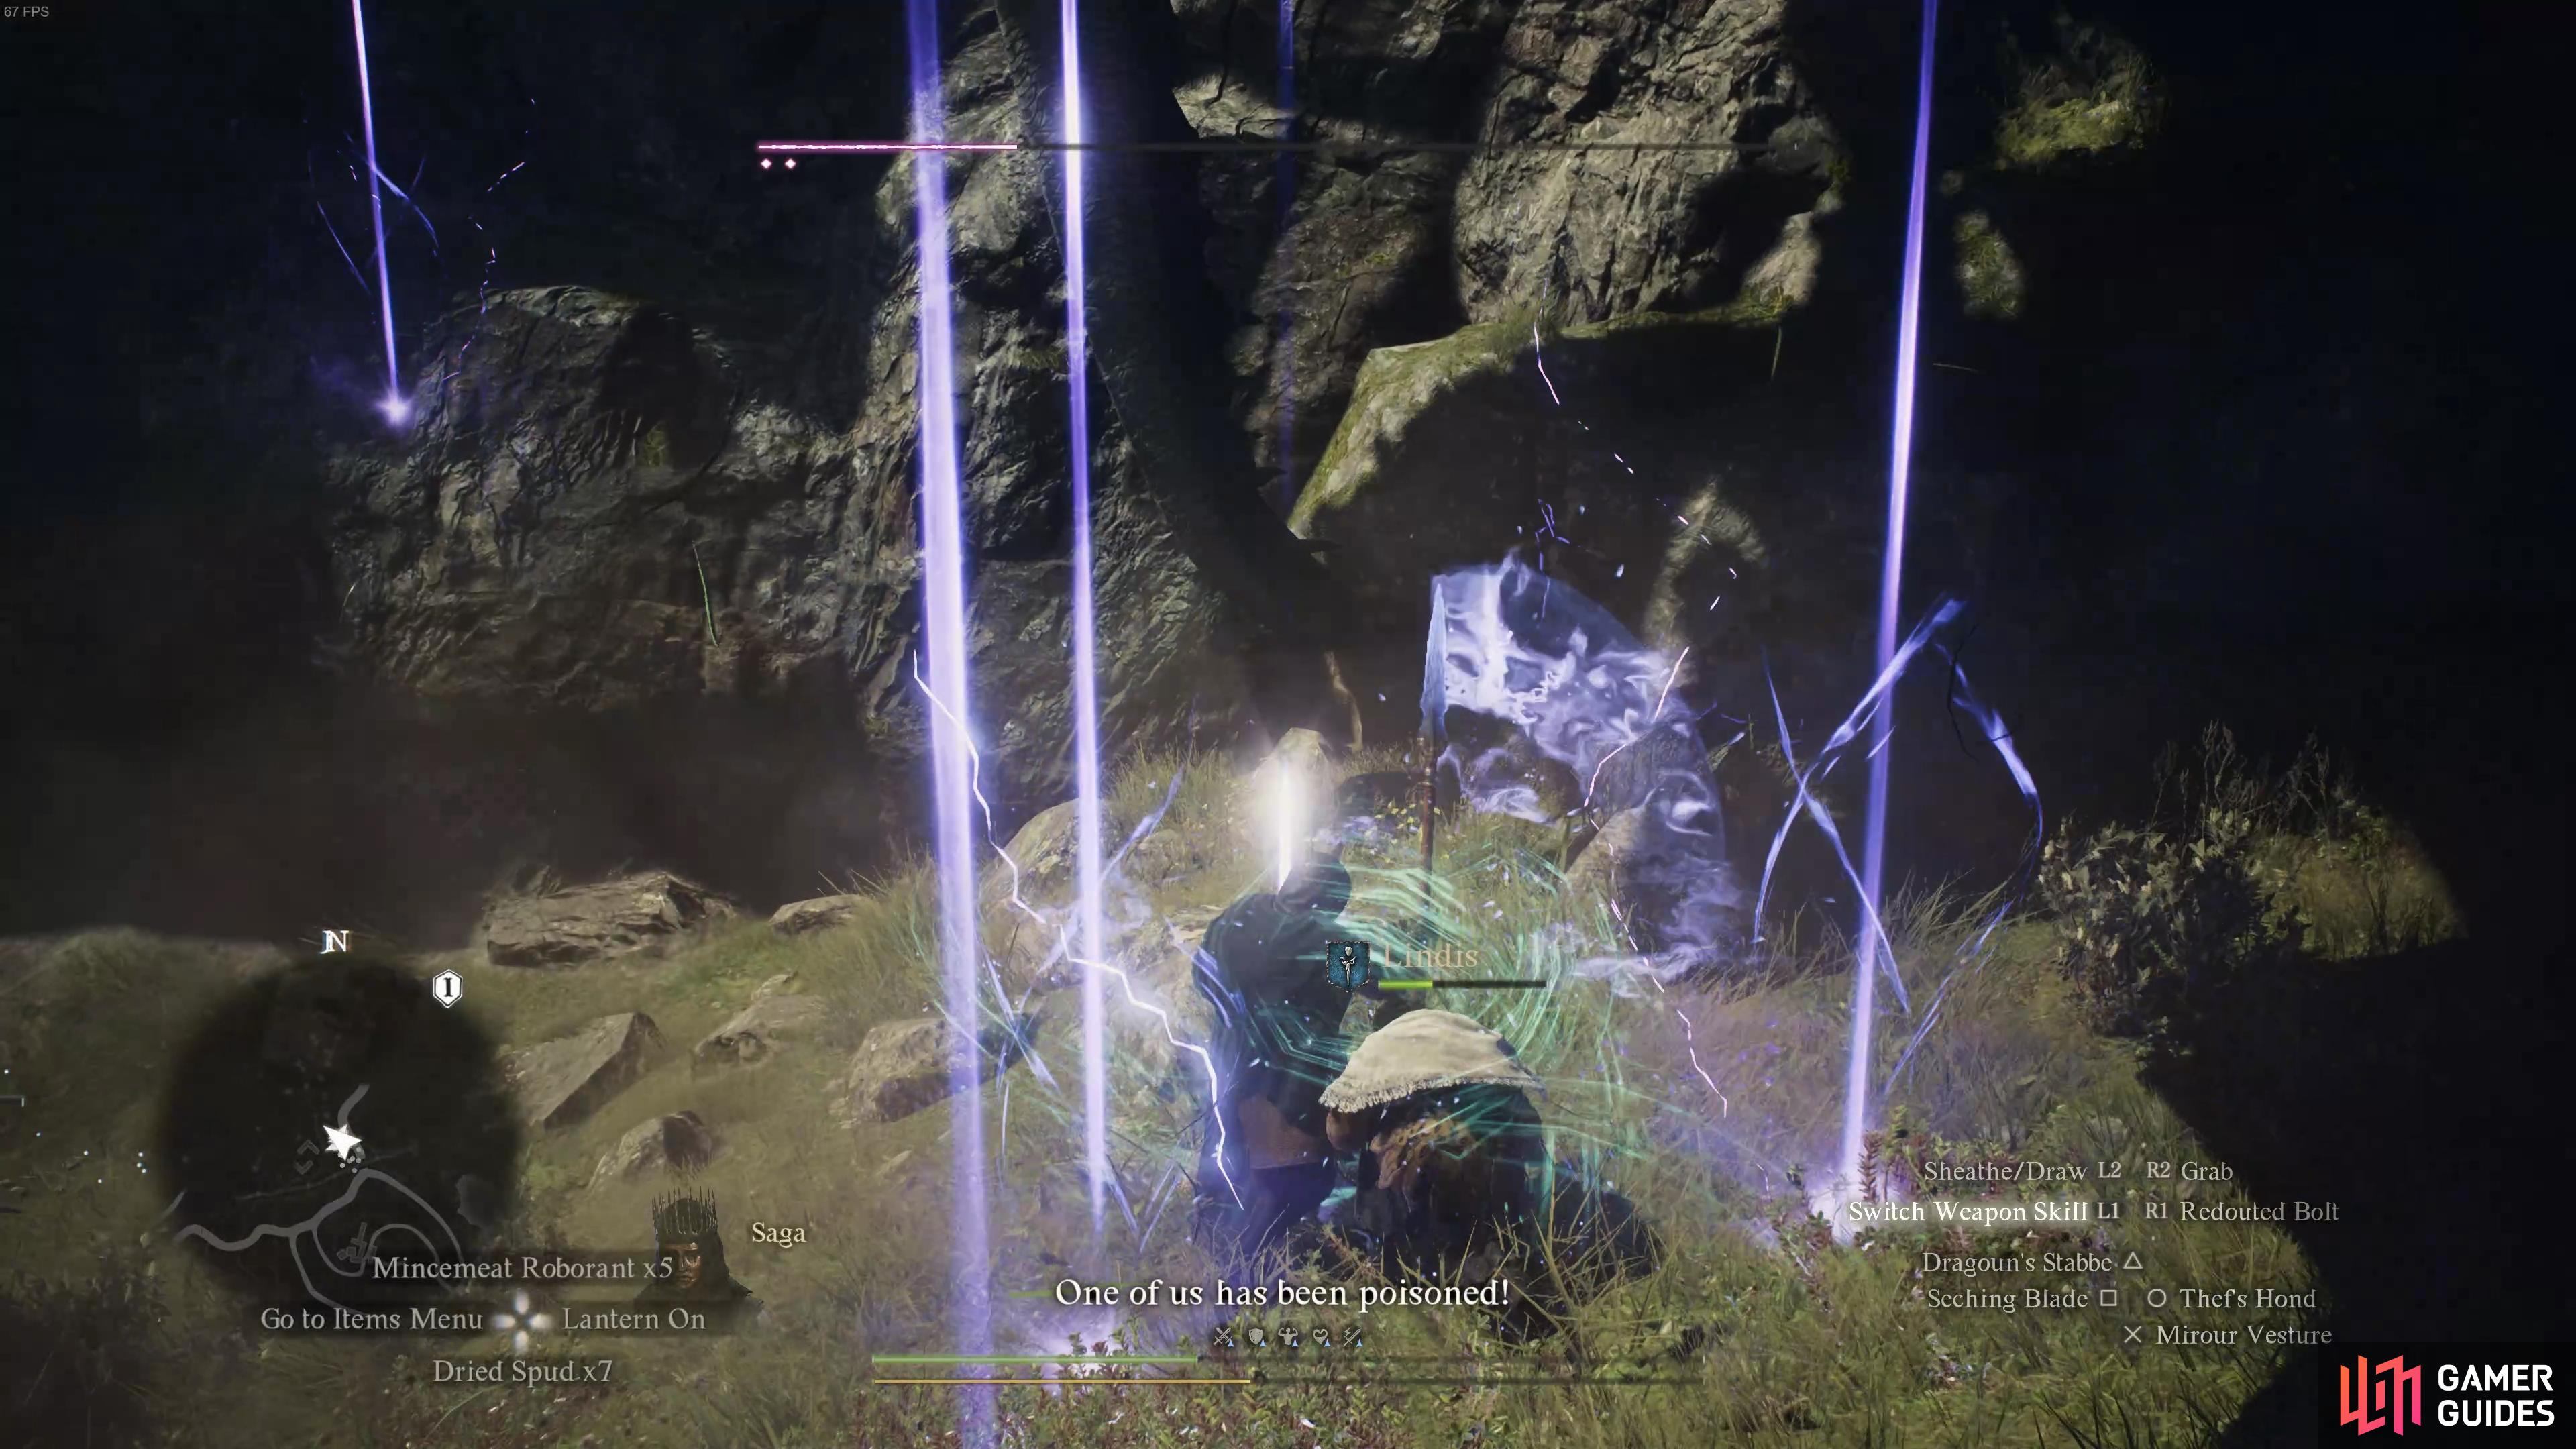
Lightning Strike
The lightning strike attack is one of the easiest to recognize and avoid, which is good news for you since it’s also one of the deadliest. You can see when this attack is being charged as small patches of the ground begin to emit lighting, and you’ll have a few seconds to run away from these before the attack is executed. It doesn’t matter where you run to, so long as you’re away from the lightning strikes when they hit. The Drake will usually cast this attack when it’s in the air, so you should be extra cautious of it whenever this happens.
Although the lightning strike attack is often used when the Drake is in flight, it can be used when stationary on the ground as well. The best way to recognize it when this is about to happen is to keep an eye on the claws of the Drake, which it will raise and face upwards while charging a bolt of lightning. If you see this, run away from the Drake and avoid any lightning patches on the ground along the way.
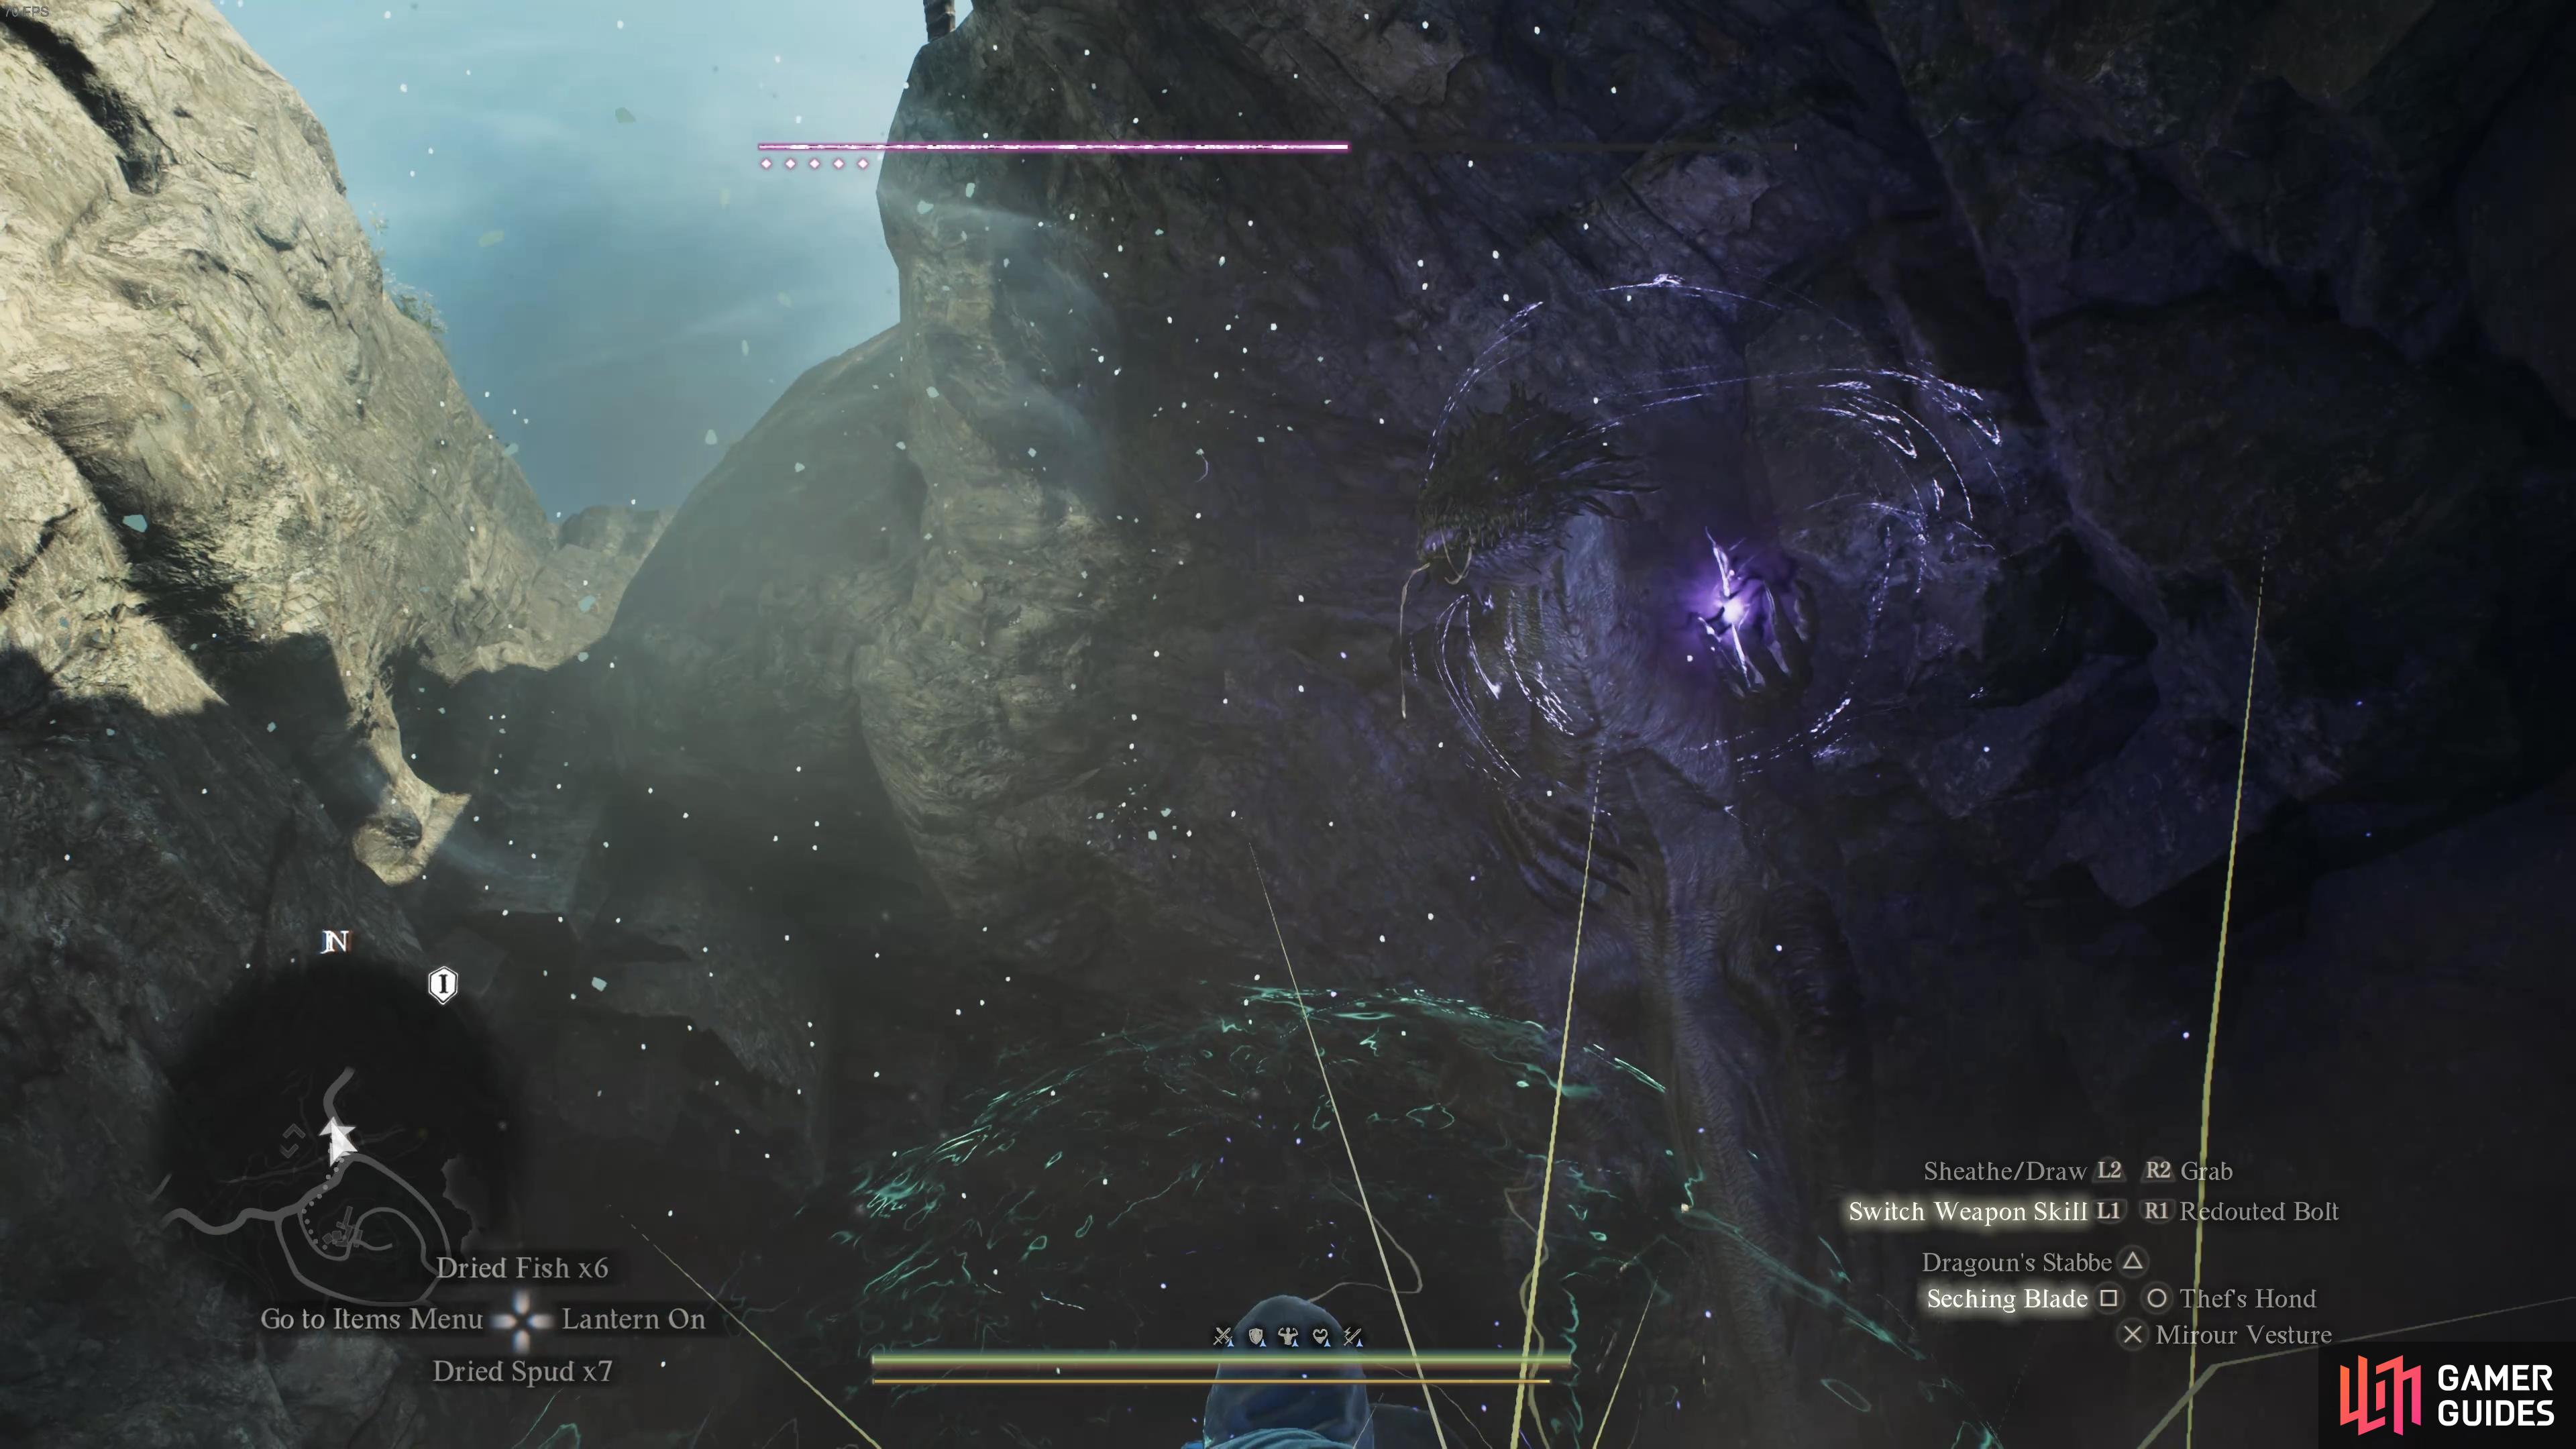
(1 of 2) The Drake will hold an element of lightning in its claw just before casting the attack.
The Drake will hold an element of lightning in its claw just before casting the attack. (left), The lighting strikes will rain down beneath the Drake. (right)
Belly Flop
The belly flop attack can easily catch you off guard. It occurs when the Drake briefly takes flight, but it will only fly directly above the area where it was on the ground, and after just one or two seconds it will come crashing down. If you get hit by this attack there’s a good chance that you’ll be knocked down, making you vulnerable to subsequent attacks. The best thing to do if this happens is to use any skill that you have at your disposal which allows you to get up quickly (such as ![]() Revivify for Warrior), or if you don’t have one of these, use the Help command to ask one of your pawns to pick you up. Better still, you can avoid the attack entirely if you pay attention to when the Drake takes flight, and immediately run away before it lands before rejoining the fight.
Revivify for Warrior), or if you don’t have one of these, use the Help command to ask one of your pawns to pick you up. Better still, you can avoid the attack entirely if you pay attention to when the Drake takes flight, and immediately run away before it lands before rejoining the fight.
Meteor Shower
The meteor shower is probably the deadliest attack that any Drake will use. You can see it coming when the Drake stands on its hind legs while holding a ball of fire in its claws, and you’ll have a few seconds to get the hell out of there by running in any direction away from the Drake. If you remain nearby while this attack is being cast, there’s a good chance that all your health will be lost by the time it ends, so it’s important that you don’t take any risks with this one. Keep in mind that the meteor shower will track your location up to the point where it’s first cast, so you need to keep running to make sure that you avoid it.
(1 of 2) Look out for when the Drake stands on its hind legs, then get out of there.
Look out for when the Drake stands on its hind legs, then get out of there. (left), The meteor shower can be devastating to all those caught in it. (right)
Claw Swipe
The claw swipe attack will usually only be used if you’re standing directly in front of a Drake, so if you remain around the underbelly as a melee class, or keep your distance as a ranged class, you shouldn’t need to worry about this one too much. That said, the Drake will lower its head slightly before executing the attack, so you should get away from the arc in front of its head to avoid the attack. You won’t have much warning for it, and the claw swipe is one of the weakest attacks, but it’s still worth being aware of.
And there you have it, a detailed guide for killing Drakes in Dragon’s Dogma 2. We hope you find this useful, regardless of the class you use, but don’t be deterred if you have some trouble during your first few encounters with these creatures - it can take a while to adjust to their attack patterns. If you’re looking for more guides to the tougher enemies, be sure to check the links below.

 Sign up
No Comments