
![]() The Dragonforged makes a return in
The Dragonforged makes a return in ![]() Dragon’s Dogma 2, and he’ll have unique items to sell to you. You can first find The Dragonforged at the
Dragon’s Dogma 2, and he’ll have unique items to sell to you. You can first find The Dragonforged at the ![]() Bay Wayside Shrine off the
Bay Wayside Shrine off the ![]() Olta’Battahl Coastline, northeast of
Olta’Battahl Coastline, northeast of ![]() Bakbattahl. You’ll first meet him during the
Bakbattahl. You’ll first meet him during the ![]() Flickering Shadows main quest, which is around halfway through the story. However, you can get there early by heading through
Flickering Shadows main quest, which is around halfway through the story. However, you can get there early by heading through ![]() Guerco Cavern, situated northwest of
Guerco Cavern, situated northwest of ![]() Harve Village. During the post-game, you’ll find him elsewhere with an entirely new inventory to sell you. Read on to find out exactly how to reach The Dragonforged and what he has for sale.
Harve Village. During the post-game, you’ll find him elsewhere with an entirely new inventory to sell you. Read on to find out exactly how to reach The Dragonforged and what he has for sale.
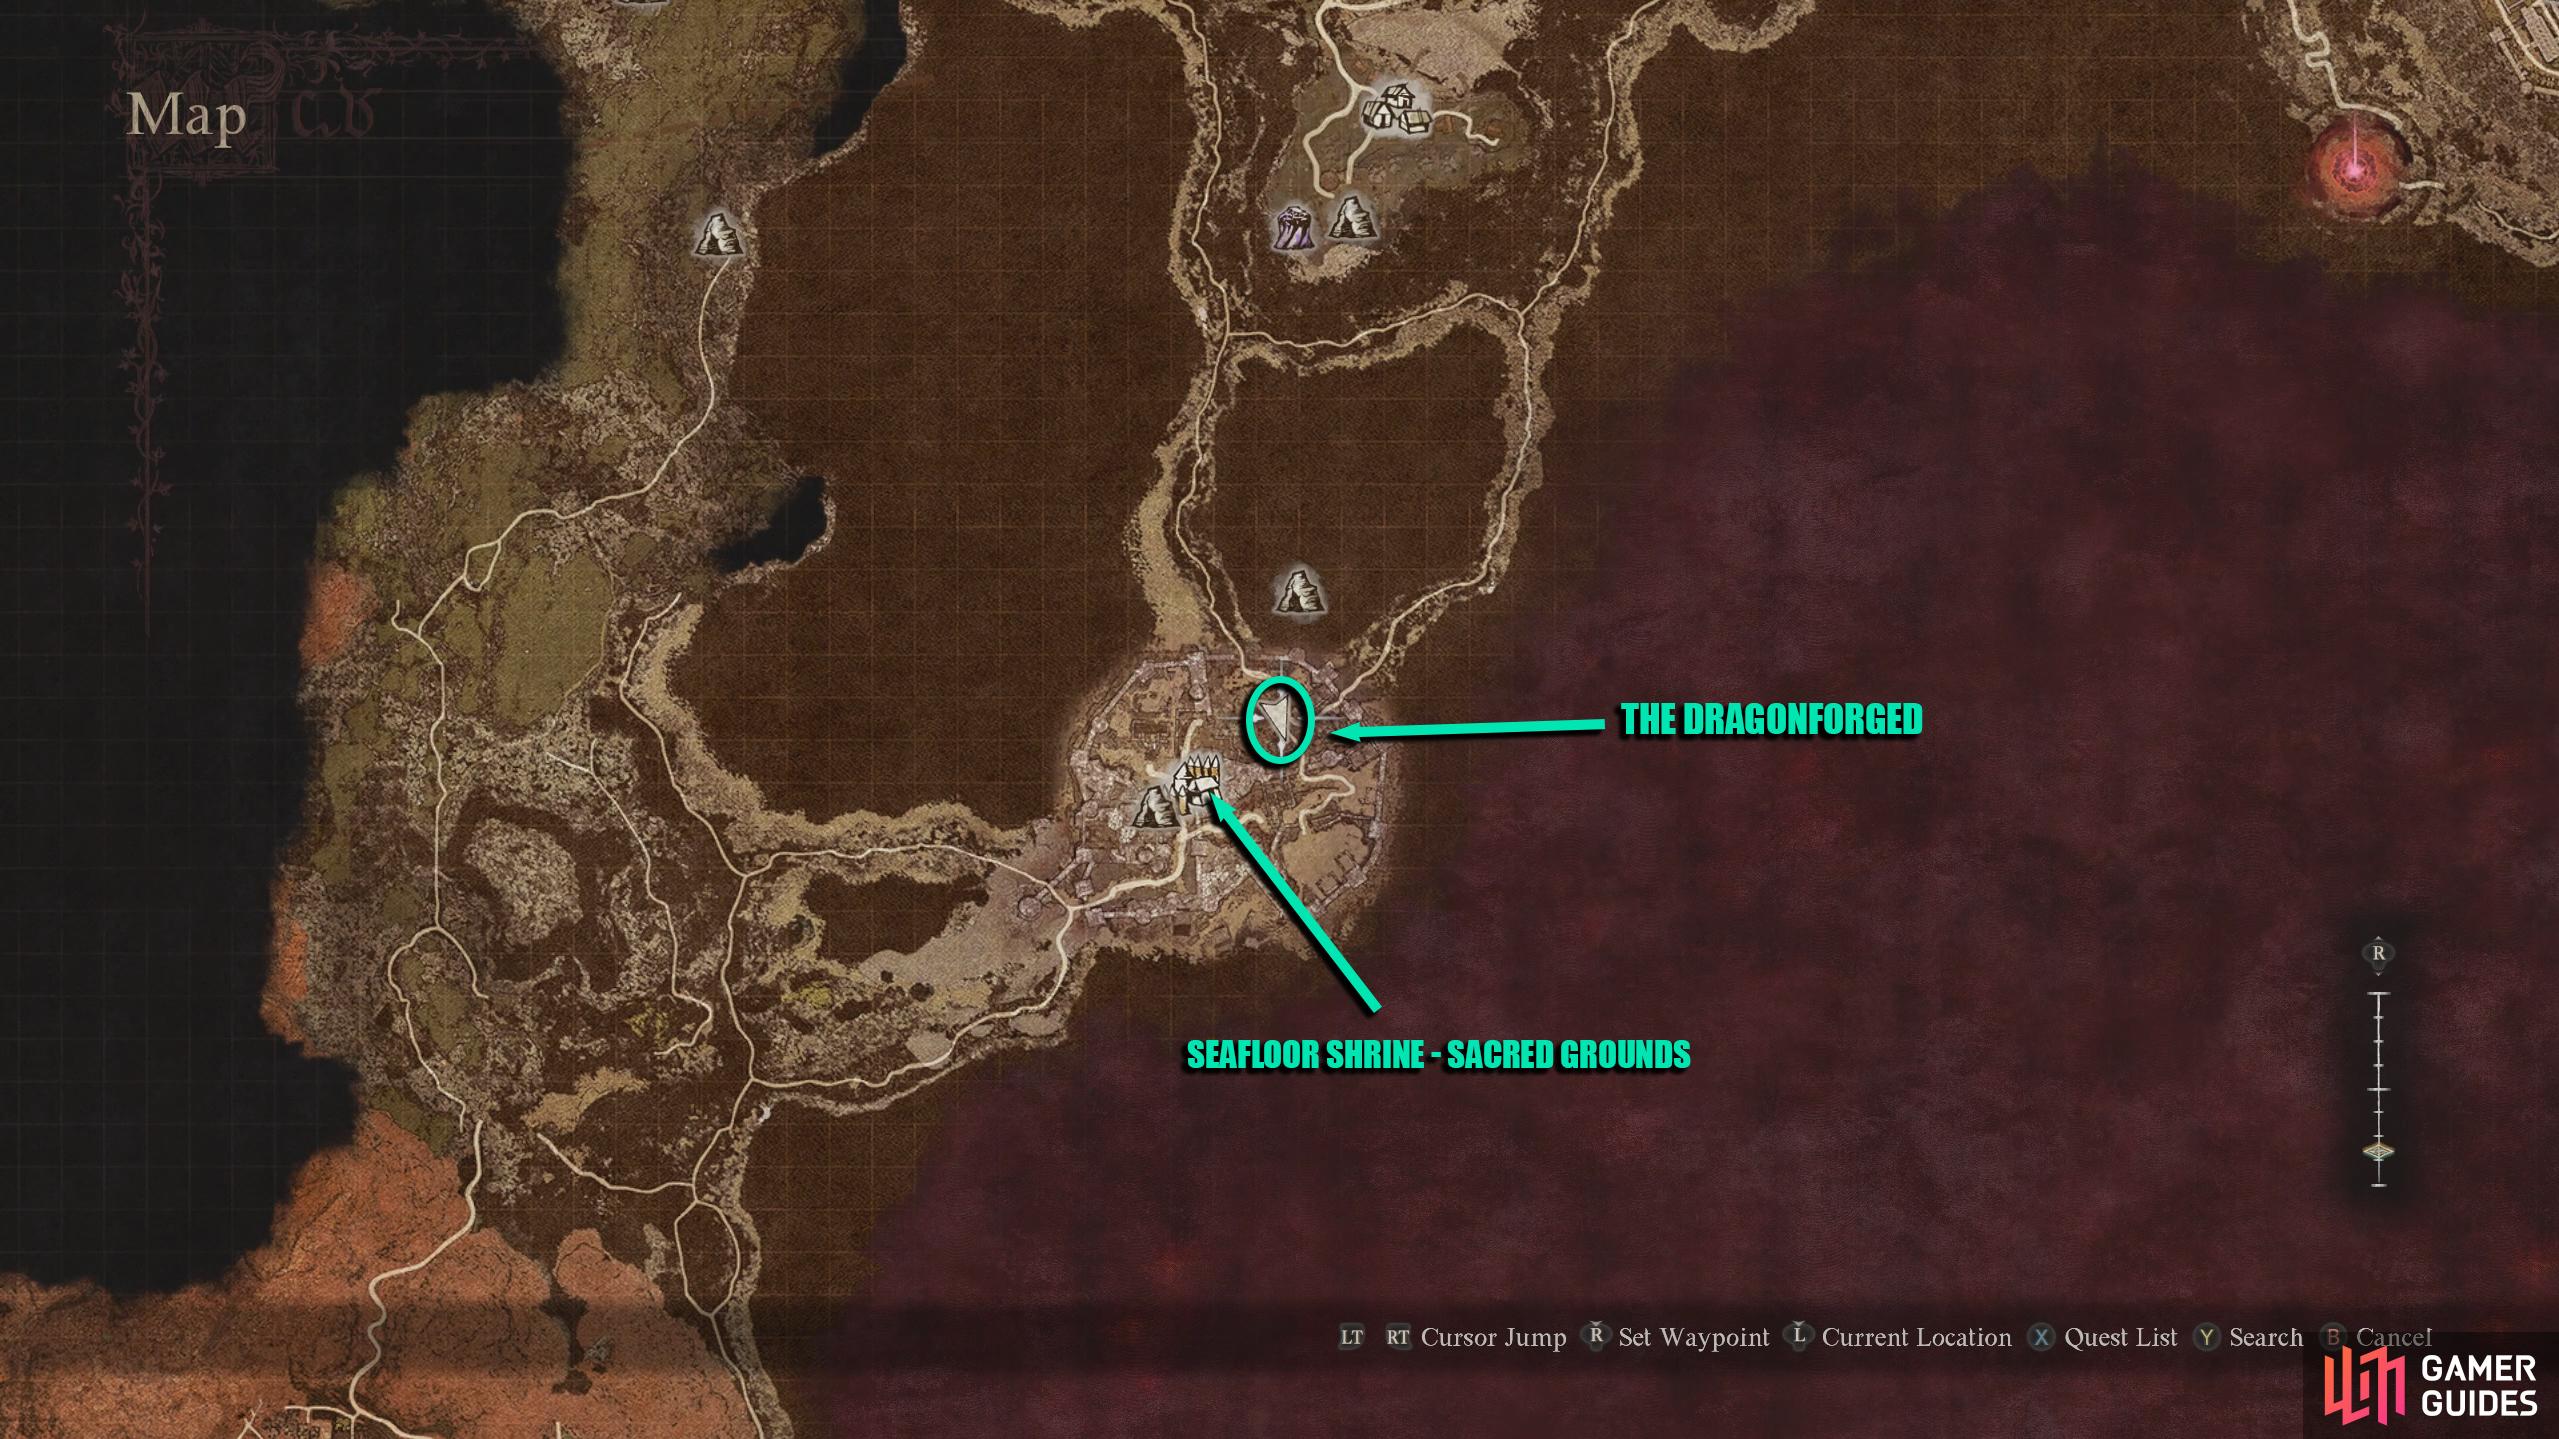
The Dragonforged resides in the Bay Wayside Shrine on the Olta’Battahl Coastline.
The Dragonforged Bay Wayside Shrine Location
Throughout the main game, The Dragonforged will be found in the Bay Wayside Shrine. If you follow the main quest Flickering Shadows, it will take you to him. As this quest only takes place once you reach Battahl, it can take a while to reach him. However, there is a method to get to him early, but you’ll need to brave the dangerous Guerco Cavern, which is full of nasty enemies, especially at a low level, but you can still get there with a bit of luck and a lot of running. From ![]() Checkpoint Rest Town, exit the town via the northern road and take the eastern path past the intersection.
Checkpoint Rest Town, exit the town via the northern road and take the eastern path past the intersection.
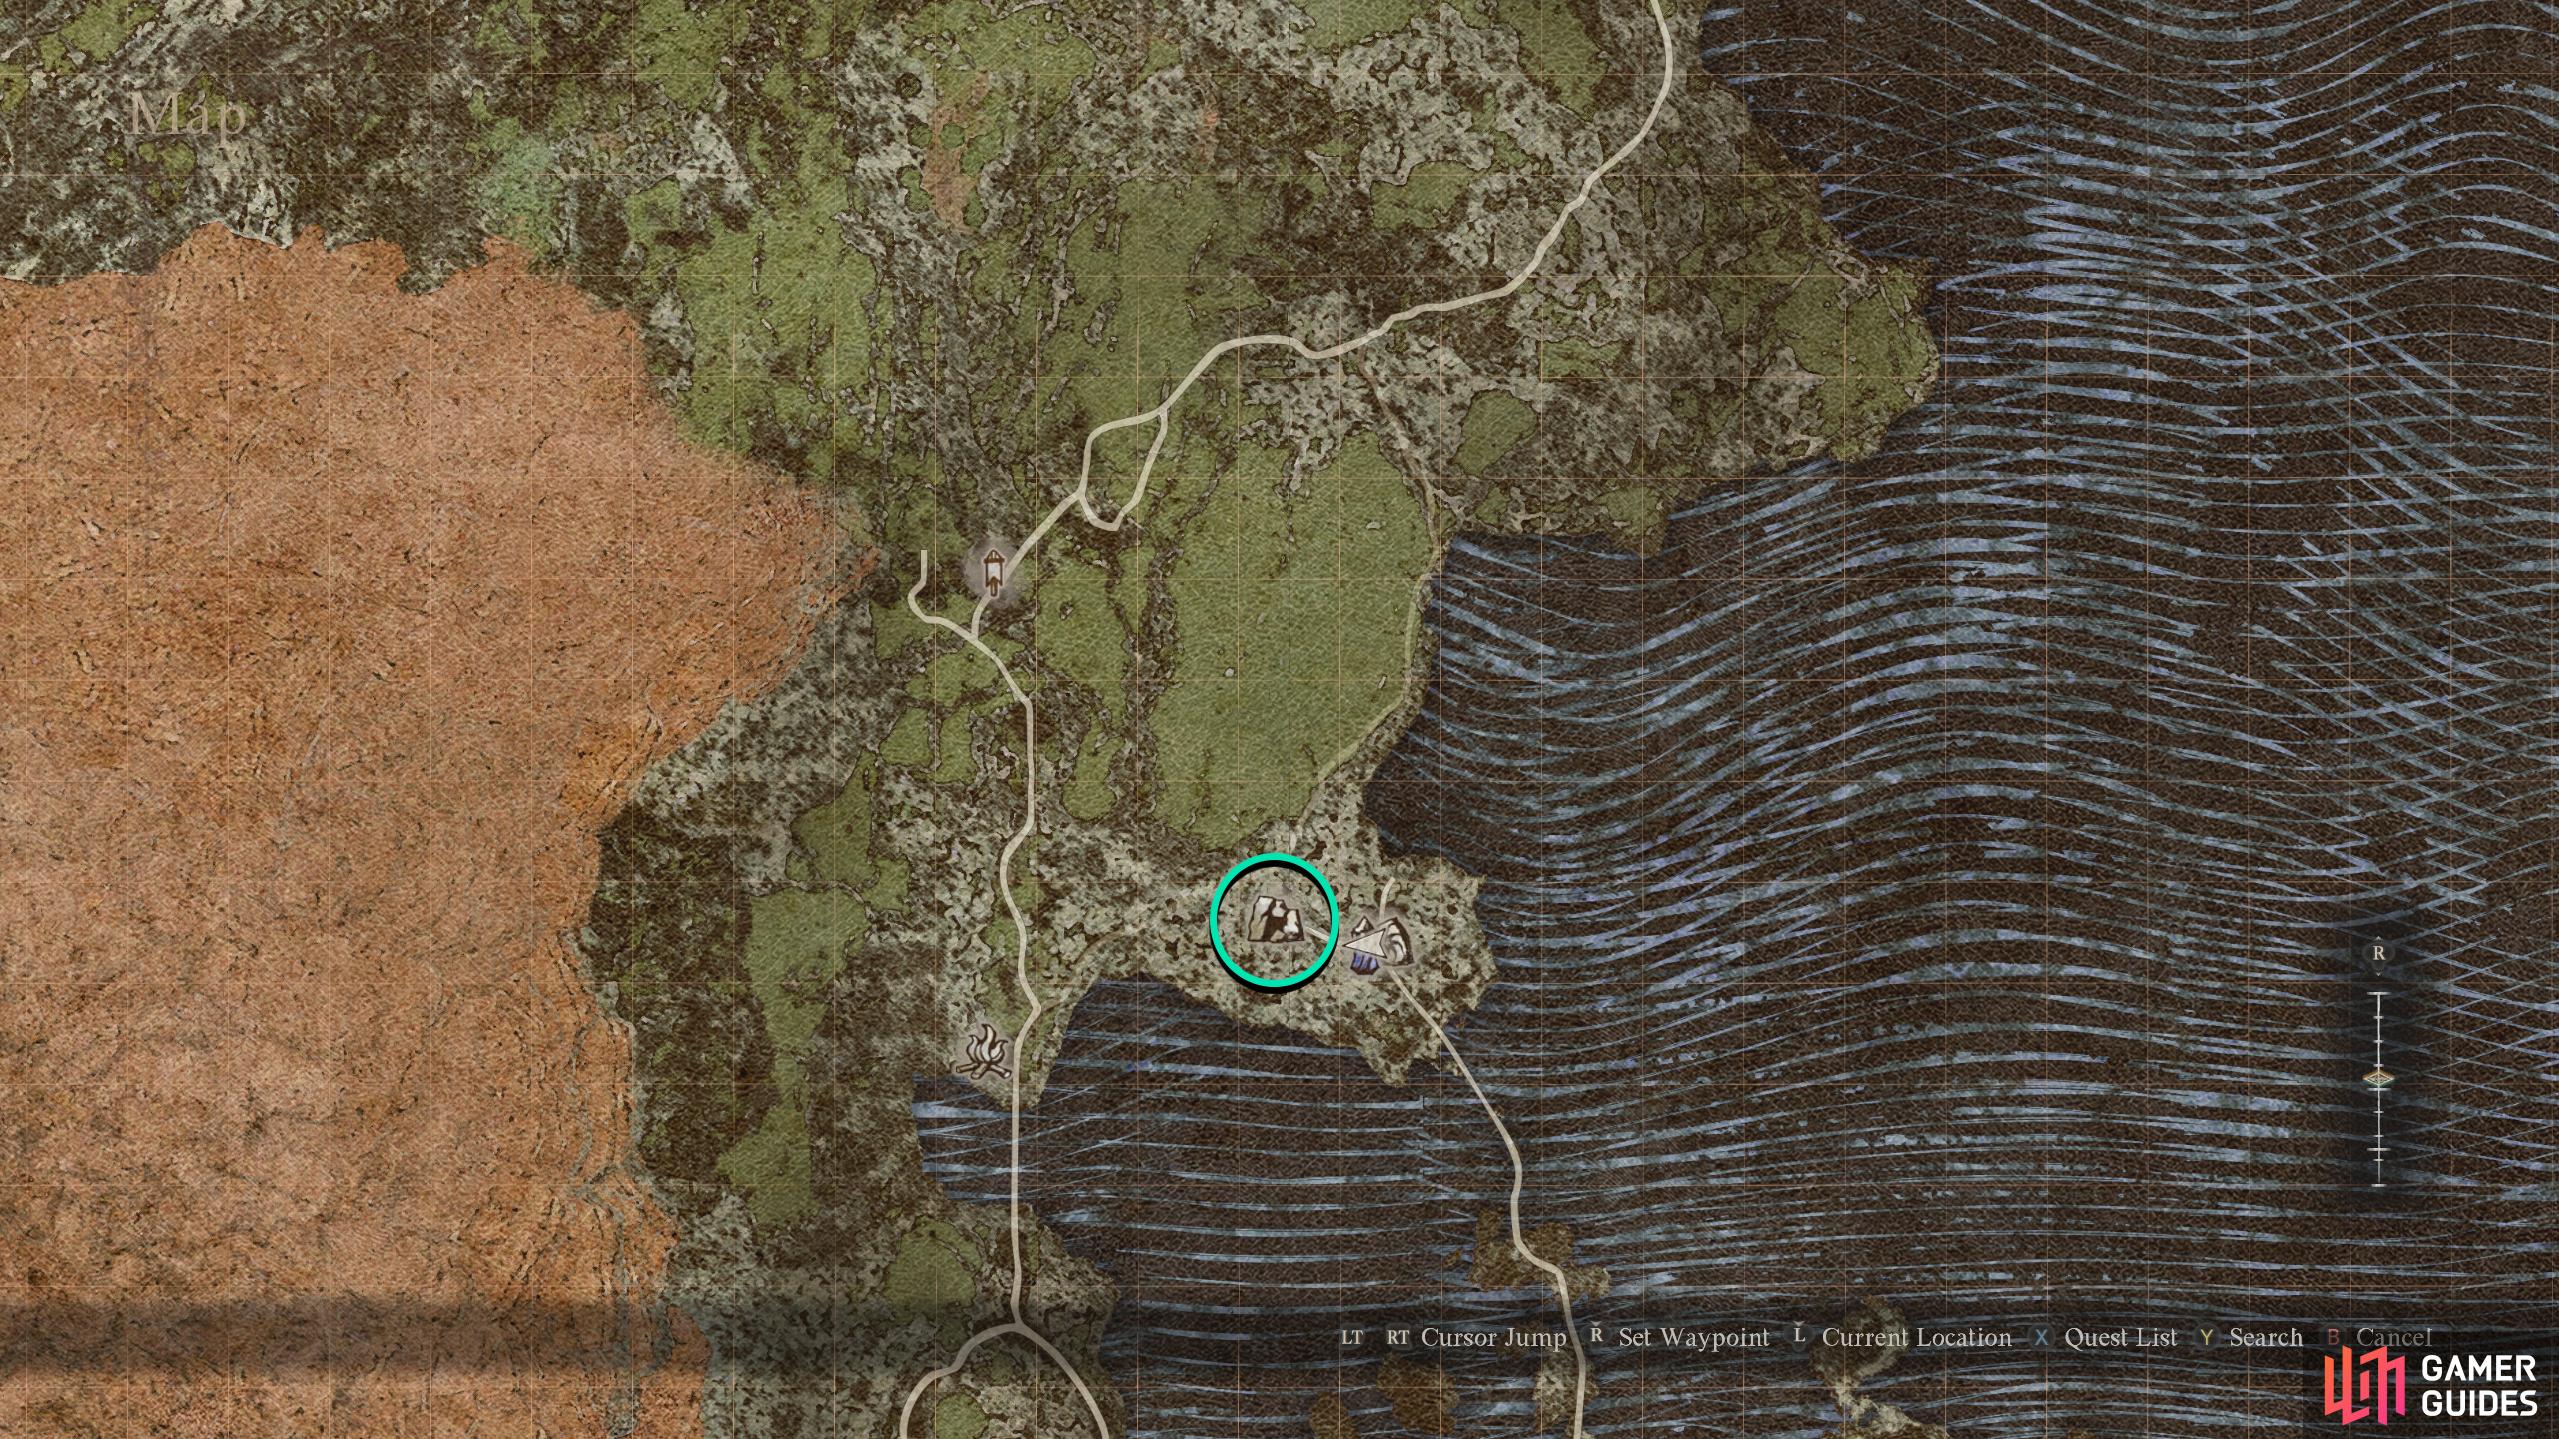
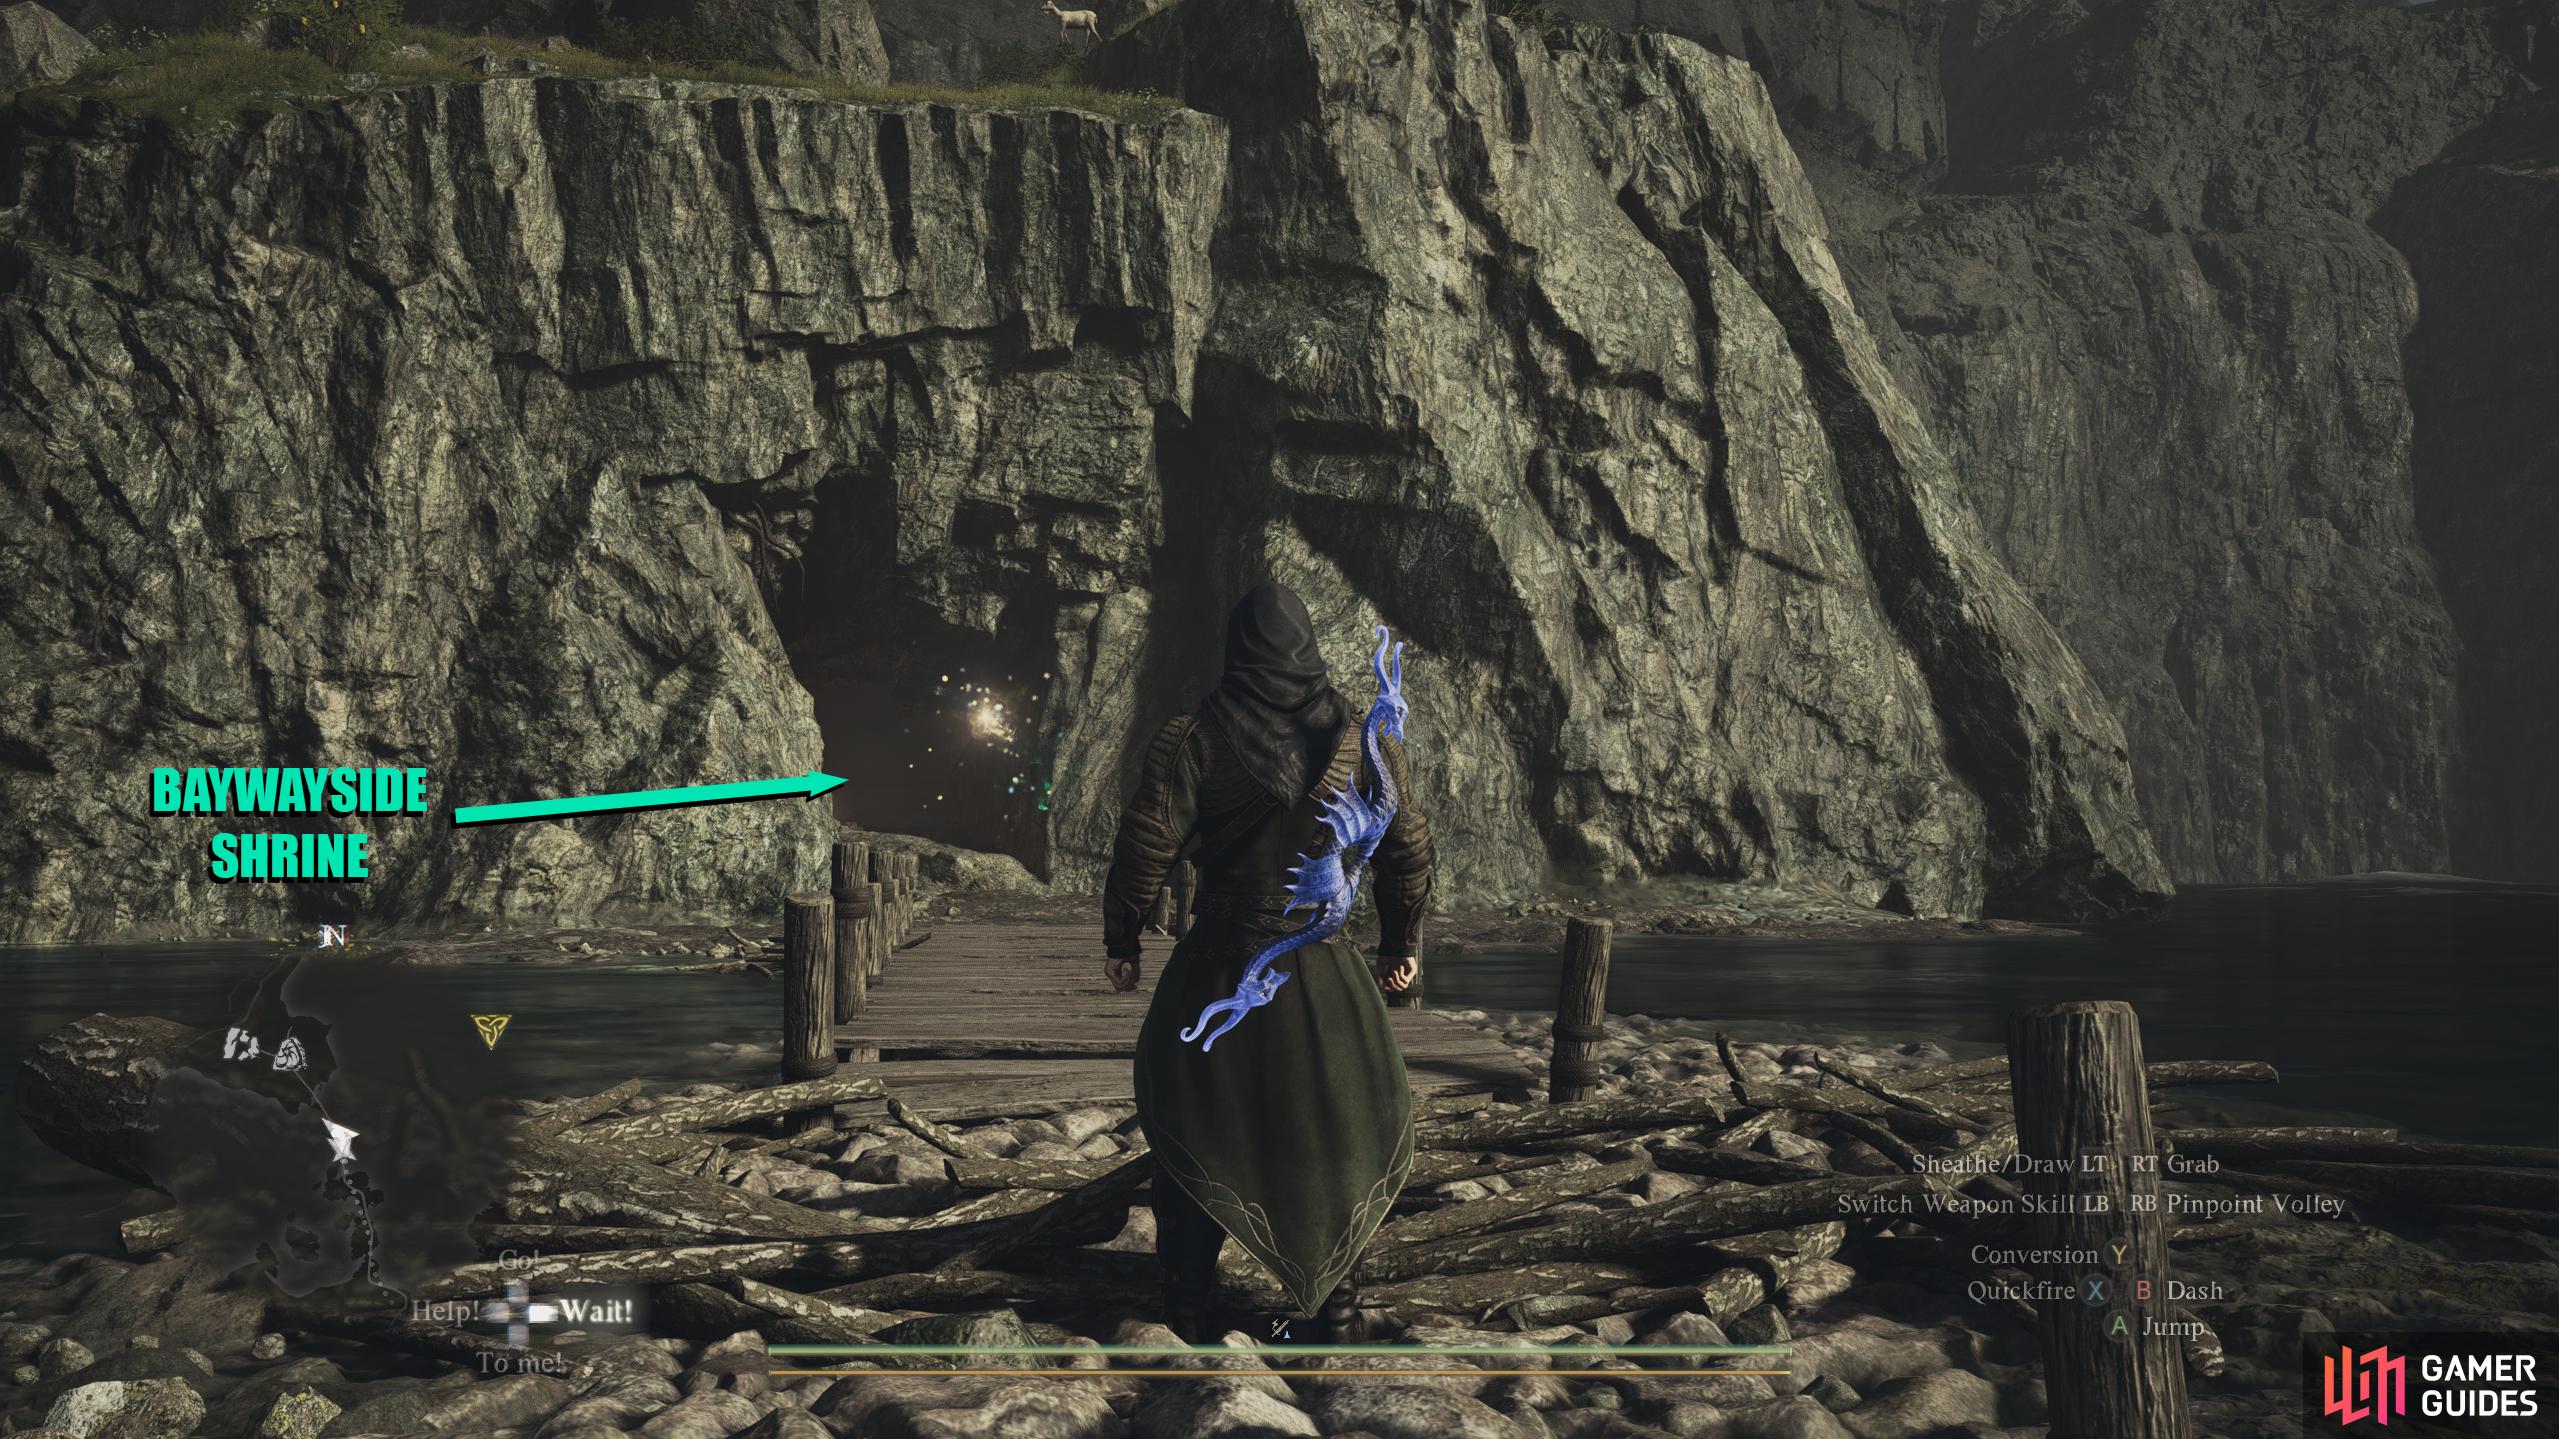
(1 of 2) You can reach Bay Wayside Shrine by heading south through Guerco Cavern or northeast from Bakbattahl.
You can reach Bay Wayside Shrine by heading south through Guerco Cavern or northeast from Bakbattahl. (left), The entrance to the cave is across the wooden bridge on the Olta’Battahl Coastline. (right)
Follow this path east until you reach a bridge to the north and then go across it. Continue following the winding eastern road past the first intersection, and stay on the path ignoring any side path you come across. Eventually, you’ll reach a bridge called “![]() Bridge of Theodracus the Second”. Backtrack a little, and then head south, where you’ll find Guerco Cavern. This cavern is basically a straight tunnel south, but it is filled with many enemies from stun-locking
Bridge of Theodracus the Second”. Backtrack a little, and then head south, where you’ll find Guerco Cavern. This cavern is basically a straight tunnel south, but it is filled with many enemies from stun-locking ![]() Goblins, to Bandits and
Goblins, to Bandits and ![]() Golems. Fortunately, you can run past them all, providing they don’t catch you with a loose attack. Read our in-depth Guerco Cavern Guide if you want to know more about the area including how to get through it.
Golems. Fortunately, you can run past them all, providing they don’t catch you with a loose attack. Read our in-depth Guerco Cavern Guide if you want to know more about the area including how to get through it.
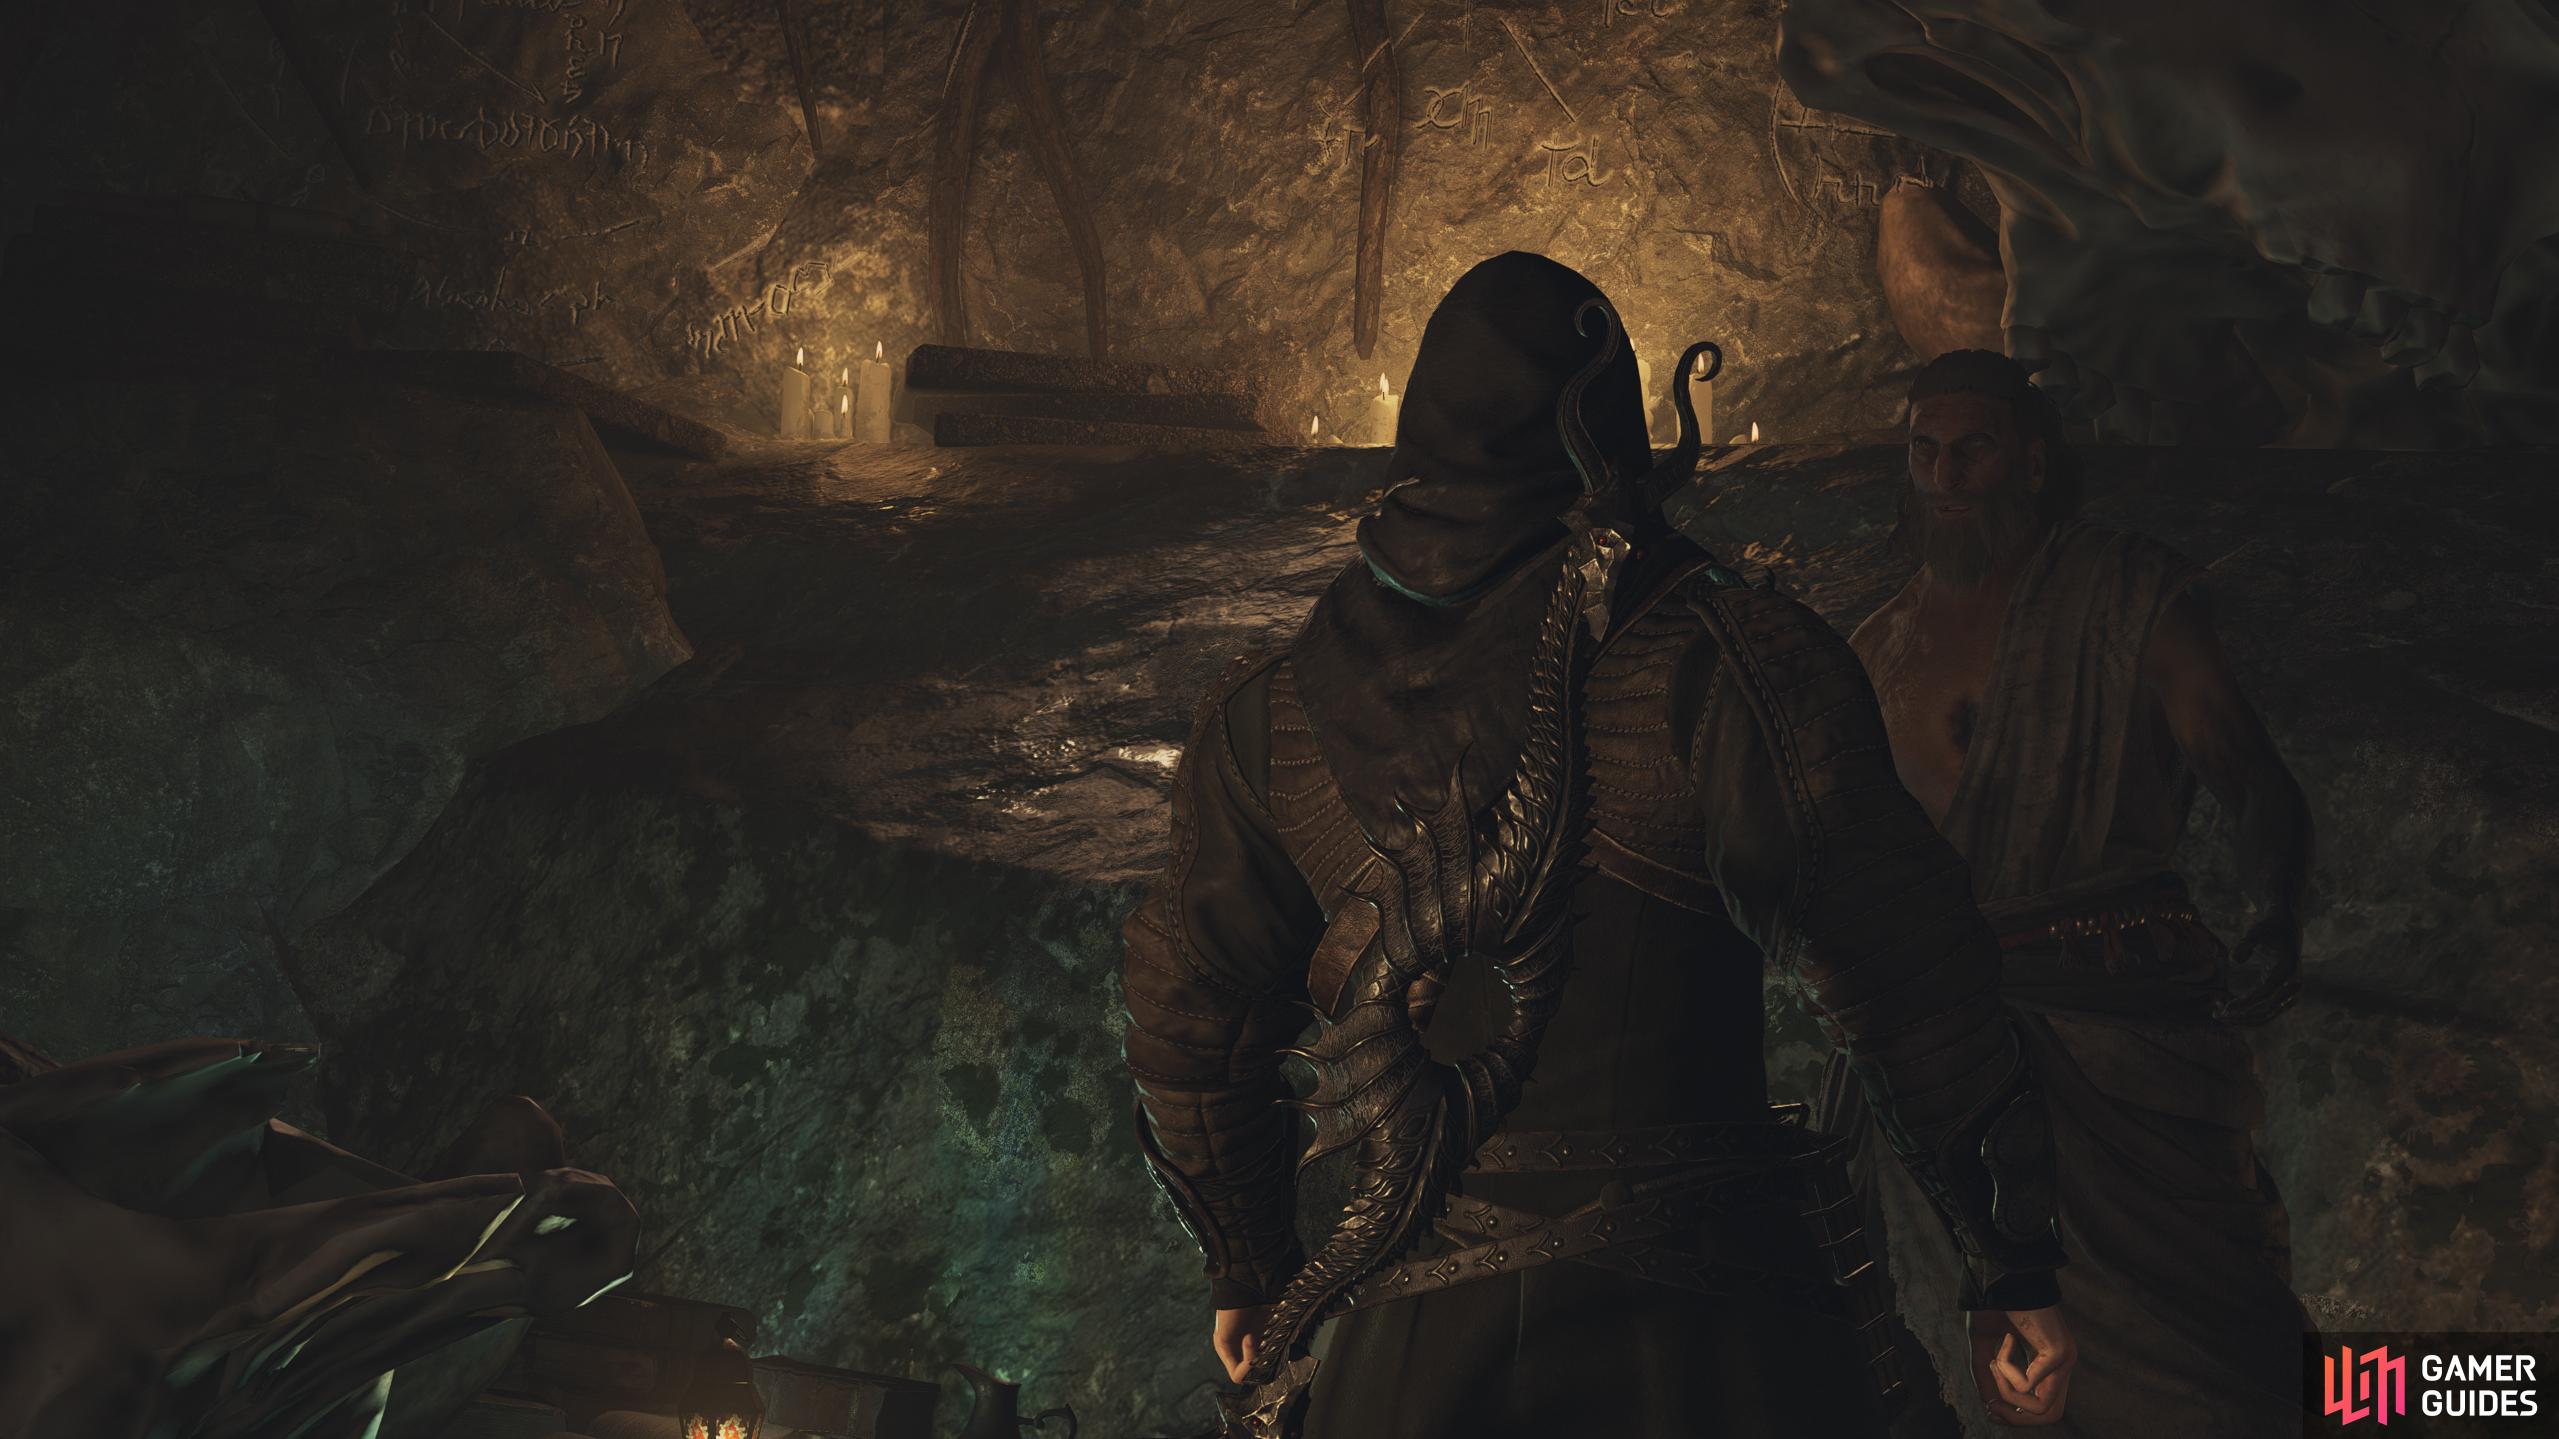
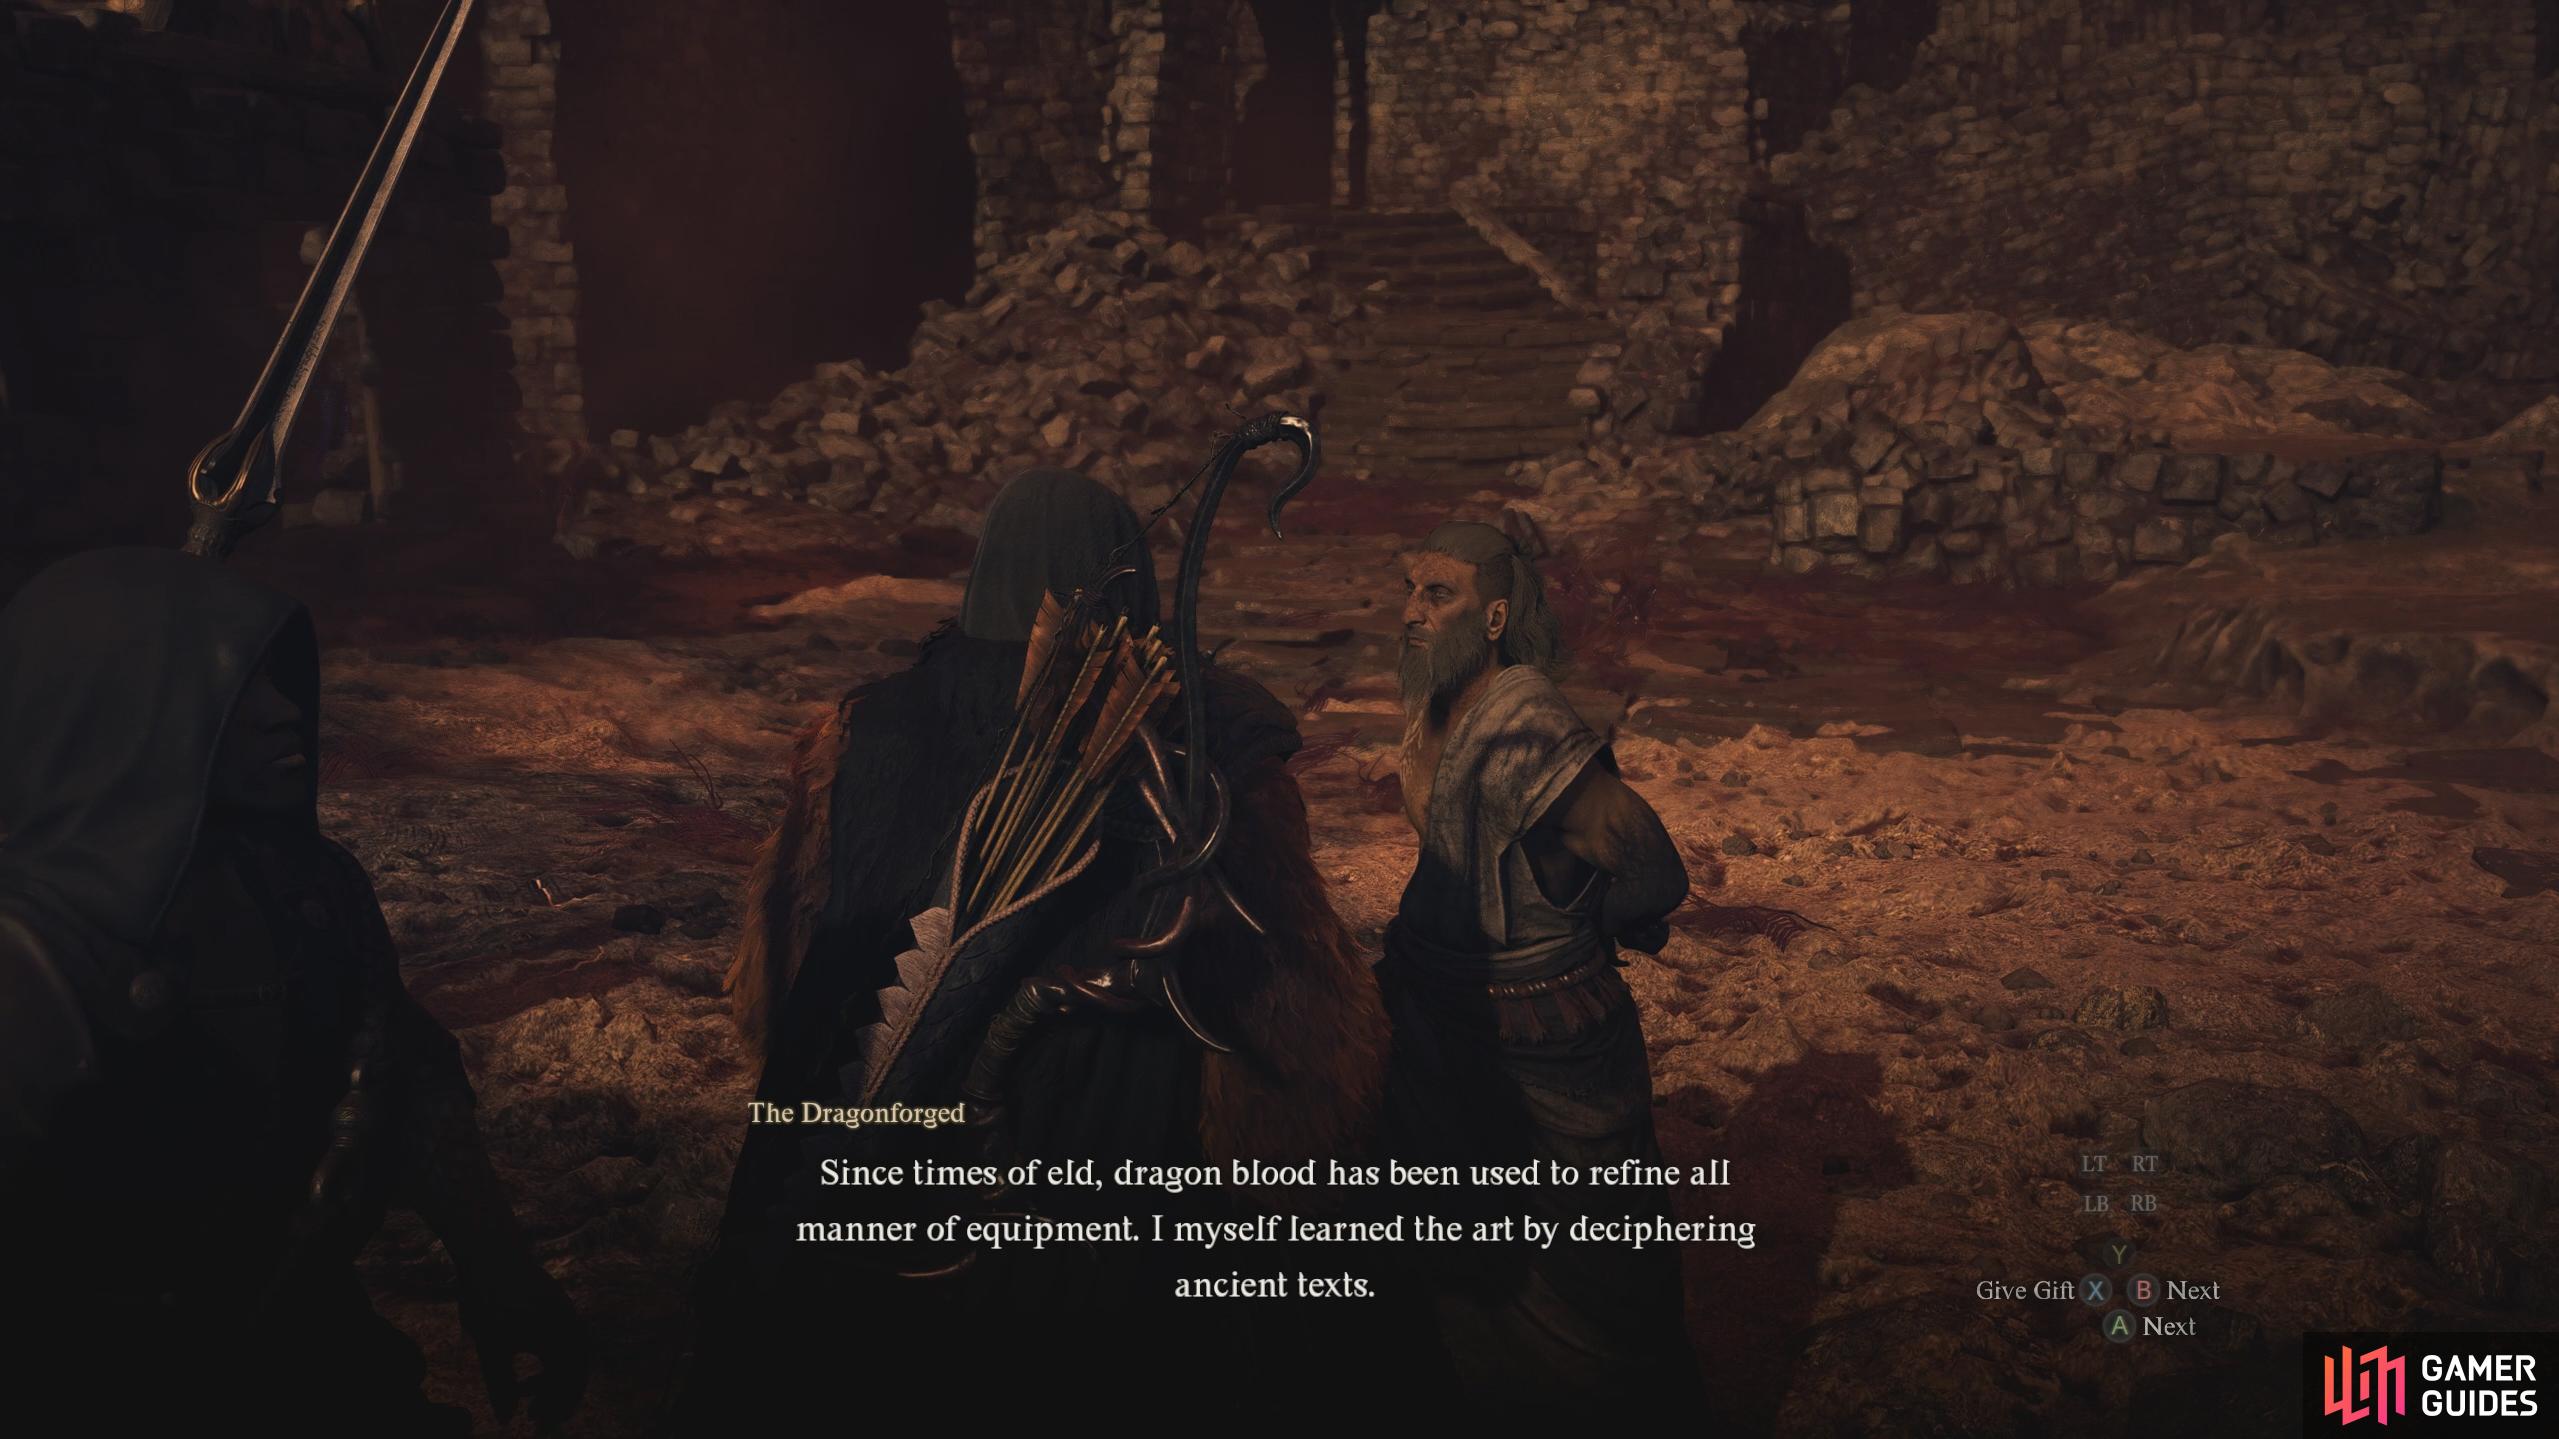
When you exit the ![]() Cliffside Cave, an extension of Guerco Cavern, you’ll reach an area with a few houses and bandits. Hang a left behind the first house on your left, and head up the slope of the grassy bank. Continue east, and you’ll find a large hole in the center. Walk past it and head to the eastern edge of the cliff to find some ledges leading down. This will take you to the Bay Wayside Shrine. Head into the cave, and take the west path further into the shrine, where you’ll find The Dragonforged. Here is what items he currently sells; this won’t change until post-game when he’ll be at a different place.
Cliffside Cave, an extension of Guerco Cavern, you’ll reach an area with a few houses and bandits. Hang a left behind the first house on your left, and head up the slope of the grassy bank. Continue east, and you’ll find a large hole in the center. Walk past it and head to the eastern edge of the cliff to find some ledges leading down. This will take you to the Bay Wayside Shrine. Head into the cave, and take the west path further into the shrine, where you’ll find The Dragonforged. Here is what items he currently sells; this won’t change until post-game when he’ll be at a different place.

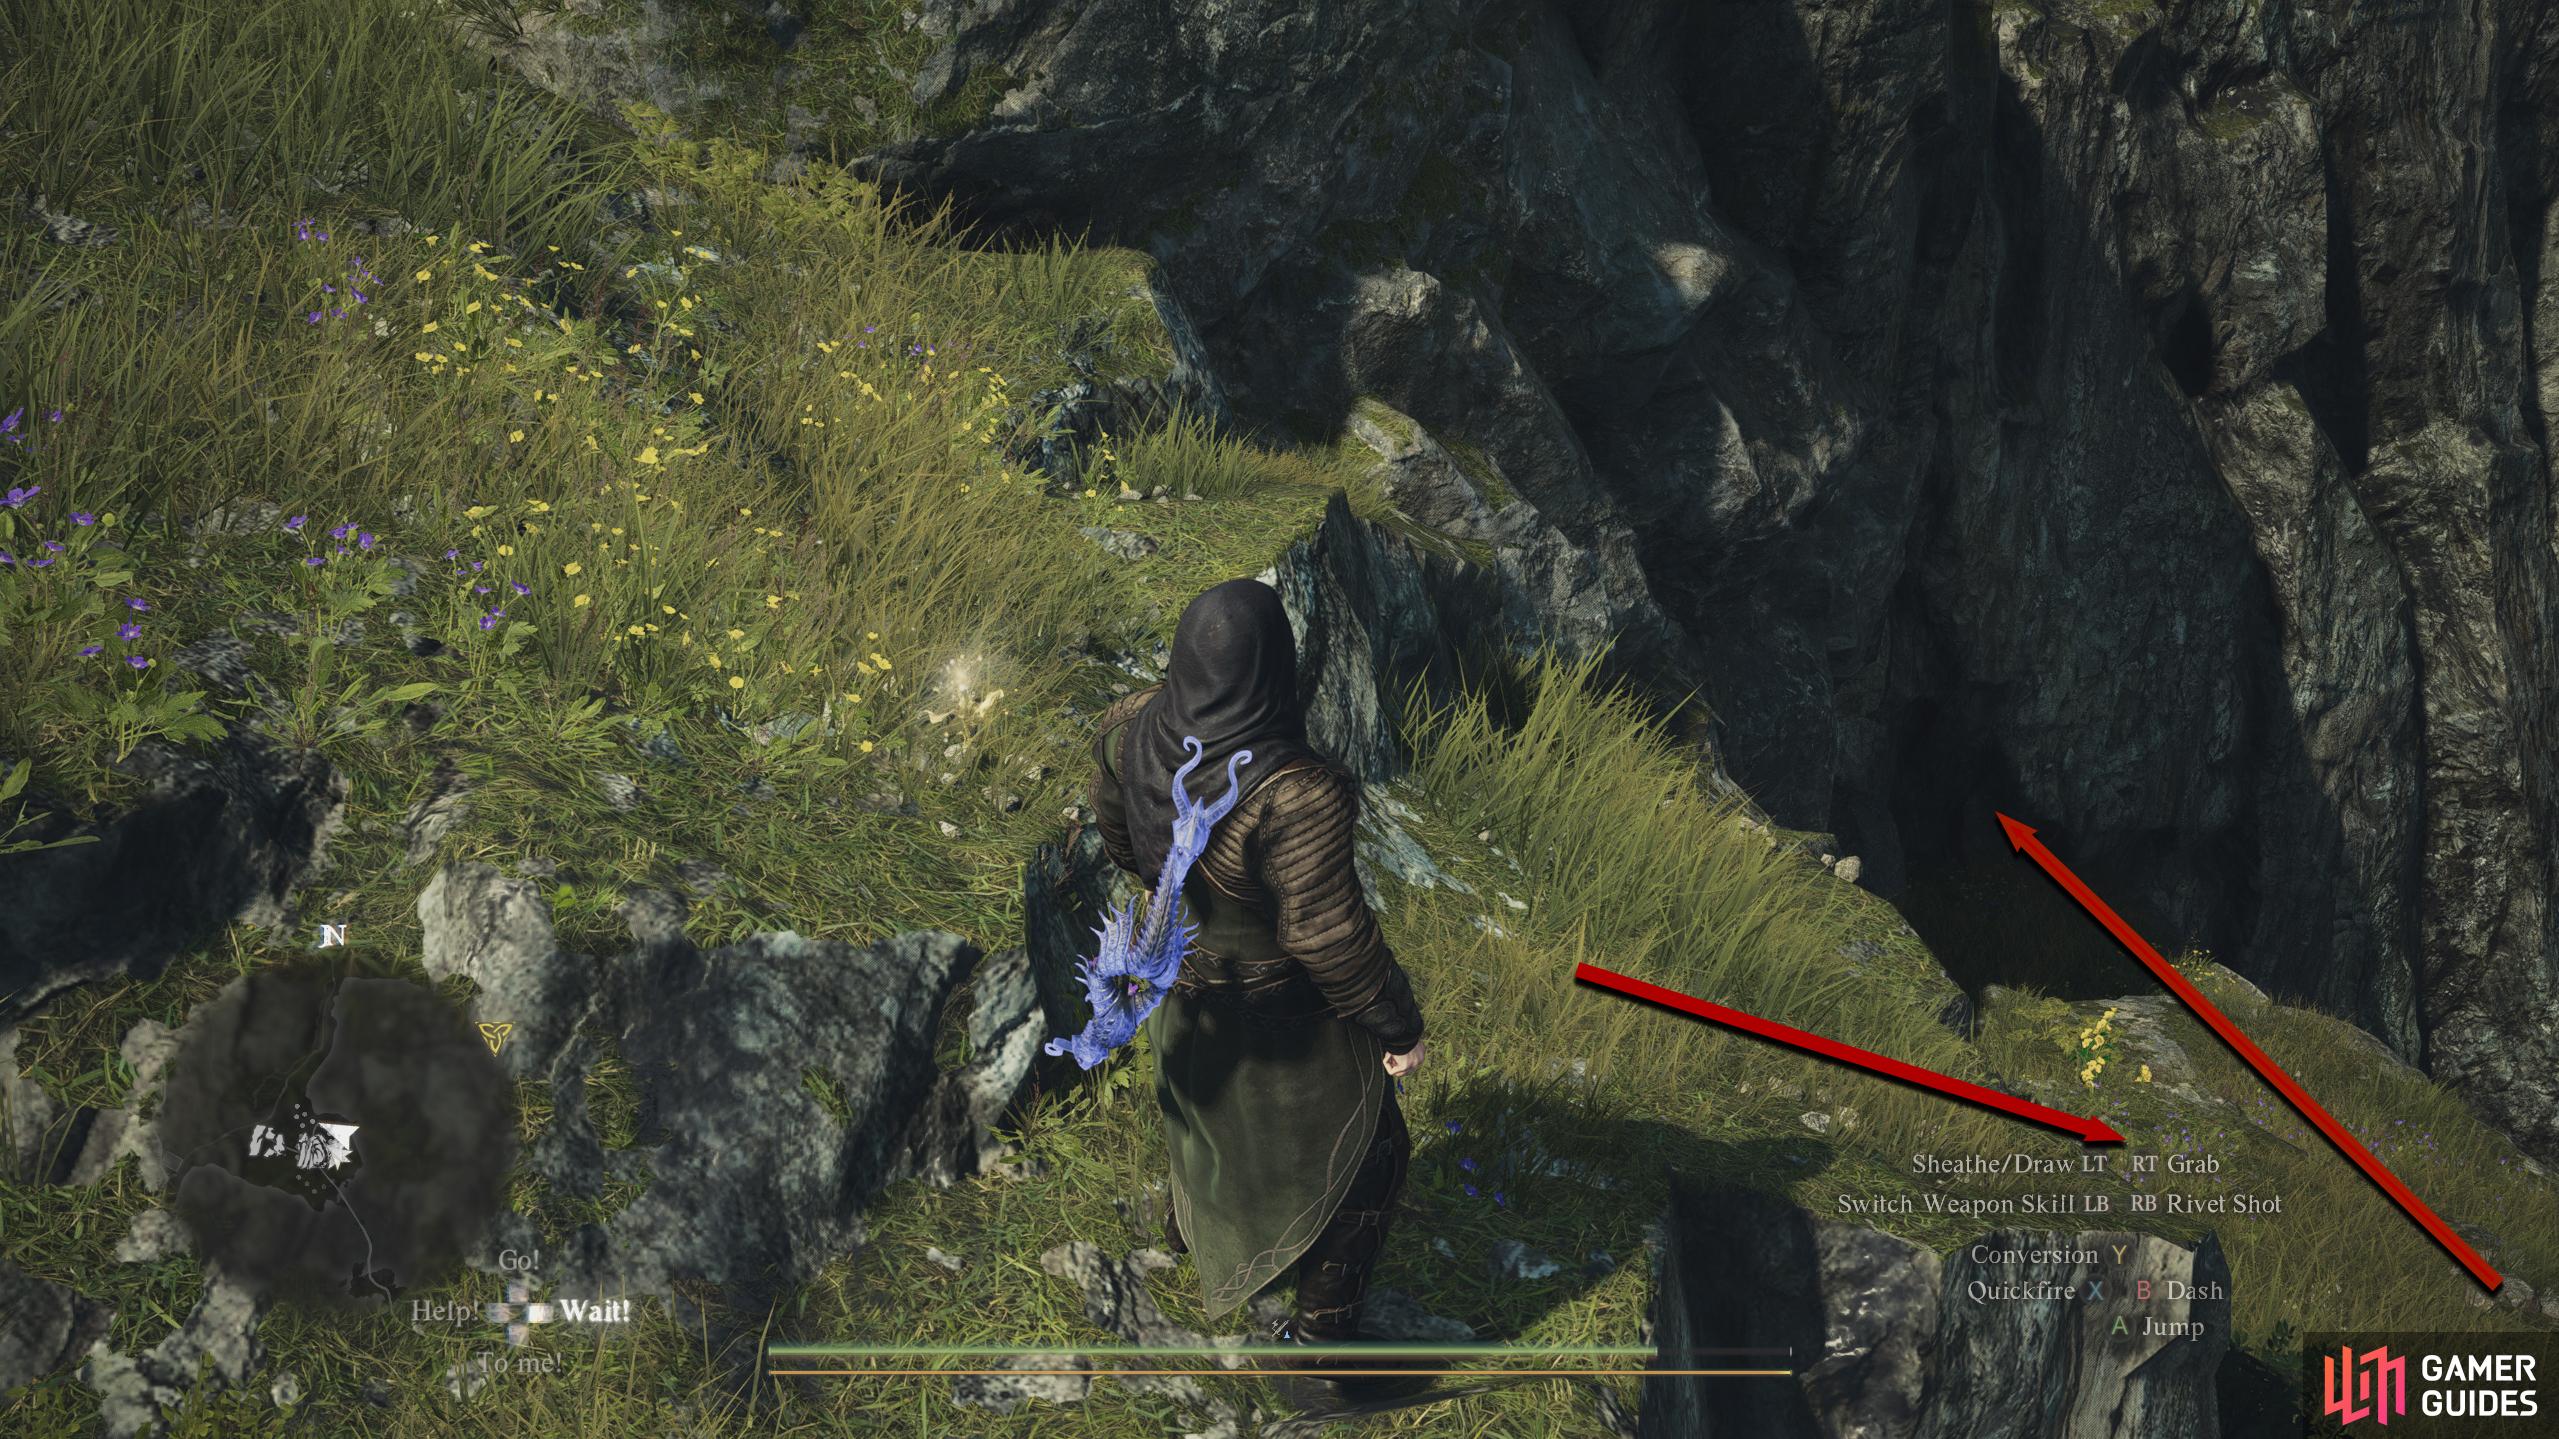


(1 of 4) When you exit Cliffside Cave, hang a left behind the house and go up the slope.
| Item | Cost |
|---|---|
| 3 WLC | |
| 20 WLC | |
| 8 WLC |
One last thing that The Dragonforged can do is enhance your equipment one rank past max (three ranks) with Wyrmfire Smithing. This will greatly enhance the equipment’s efficacy while also reducing the weight by half.
The Dragonforged Post-Game Location
When you enter The Unmoored World for the first time, you’ll appear on the path west of the ![]() Seafloor Shrine. Since the post-game, this area has changed with the water disappearing. The
Seafloor Shrine. Since the post-game, this area has changed with the water disappearing. The ![]() Halls of the First Dawn quest will lead you to the new hub area called
Halls of the First Dawn quest will lead you to the new hub area called ![]() Seafloor Shrine - Sacred Grounds. After you complete the first step of the quest (speak to Rothais), the hub will open up, and The Dragonforged will appear in the center of the area. This shop contains the best equipment in the game.
Seafloor Shrine - Sacred Grounds. After you complete the first step of the quest (speak to Rothais), the hub will open up, and The Dragonforged will appear in the center of the area. This shop contains the best equipment in the game.
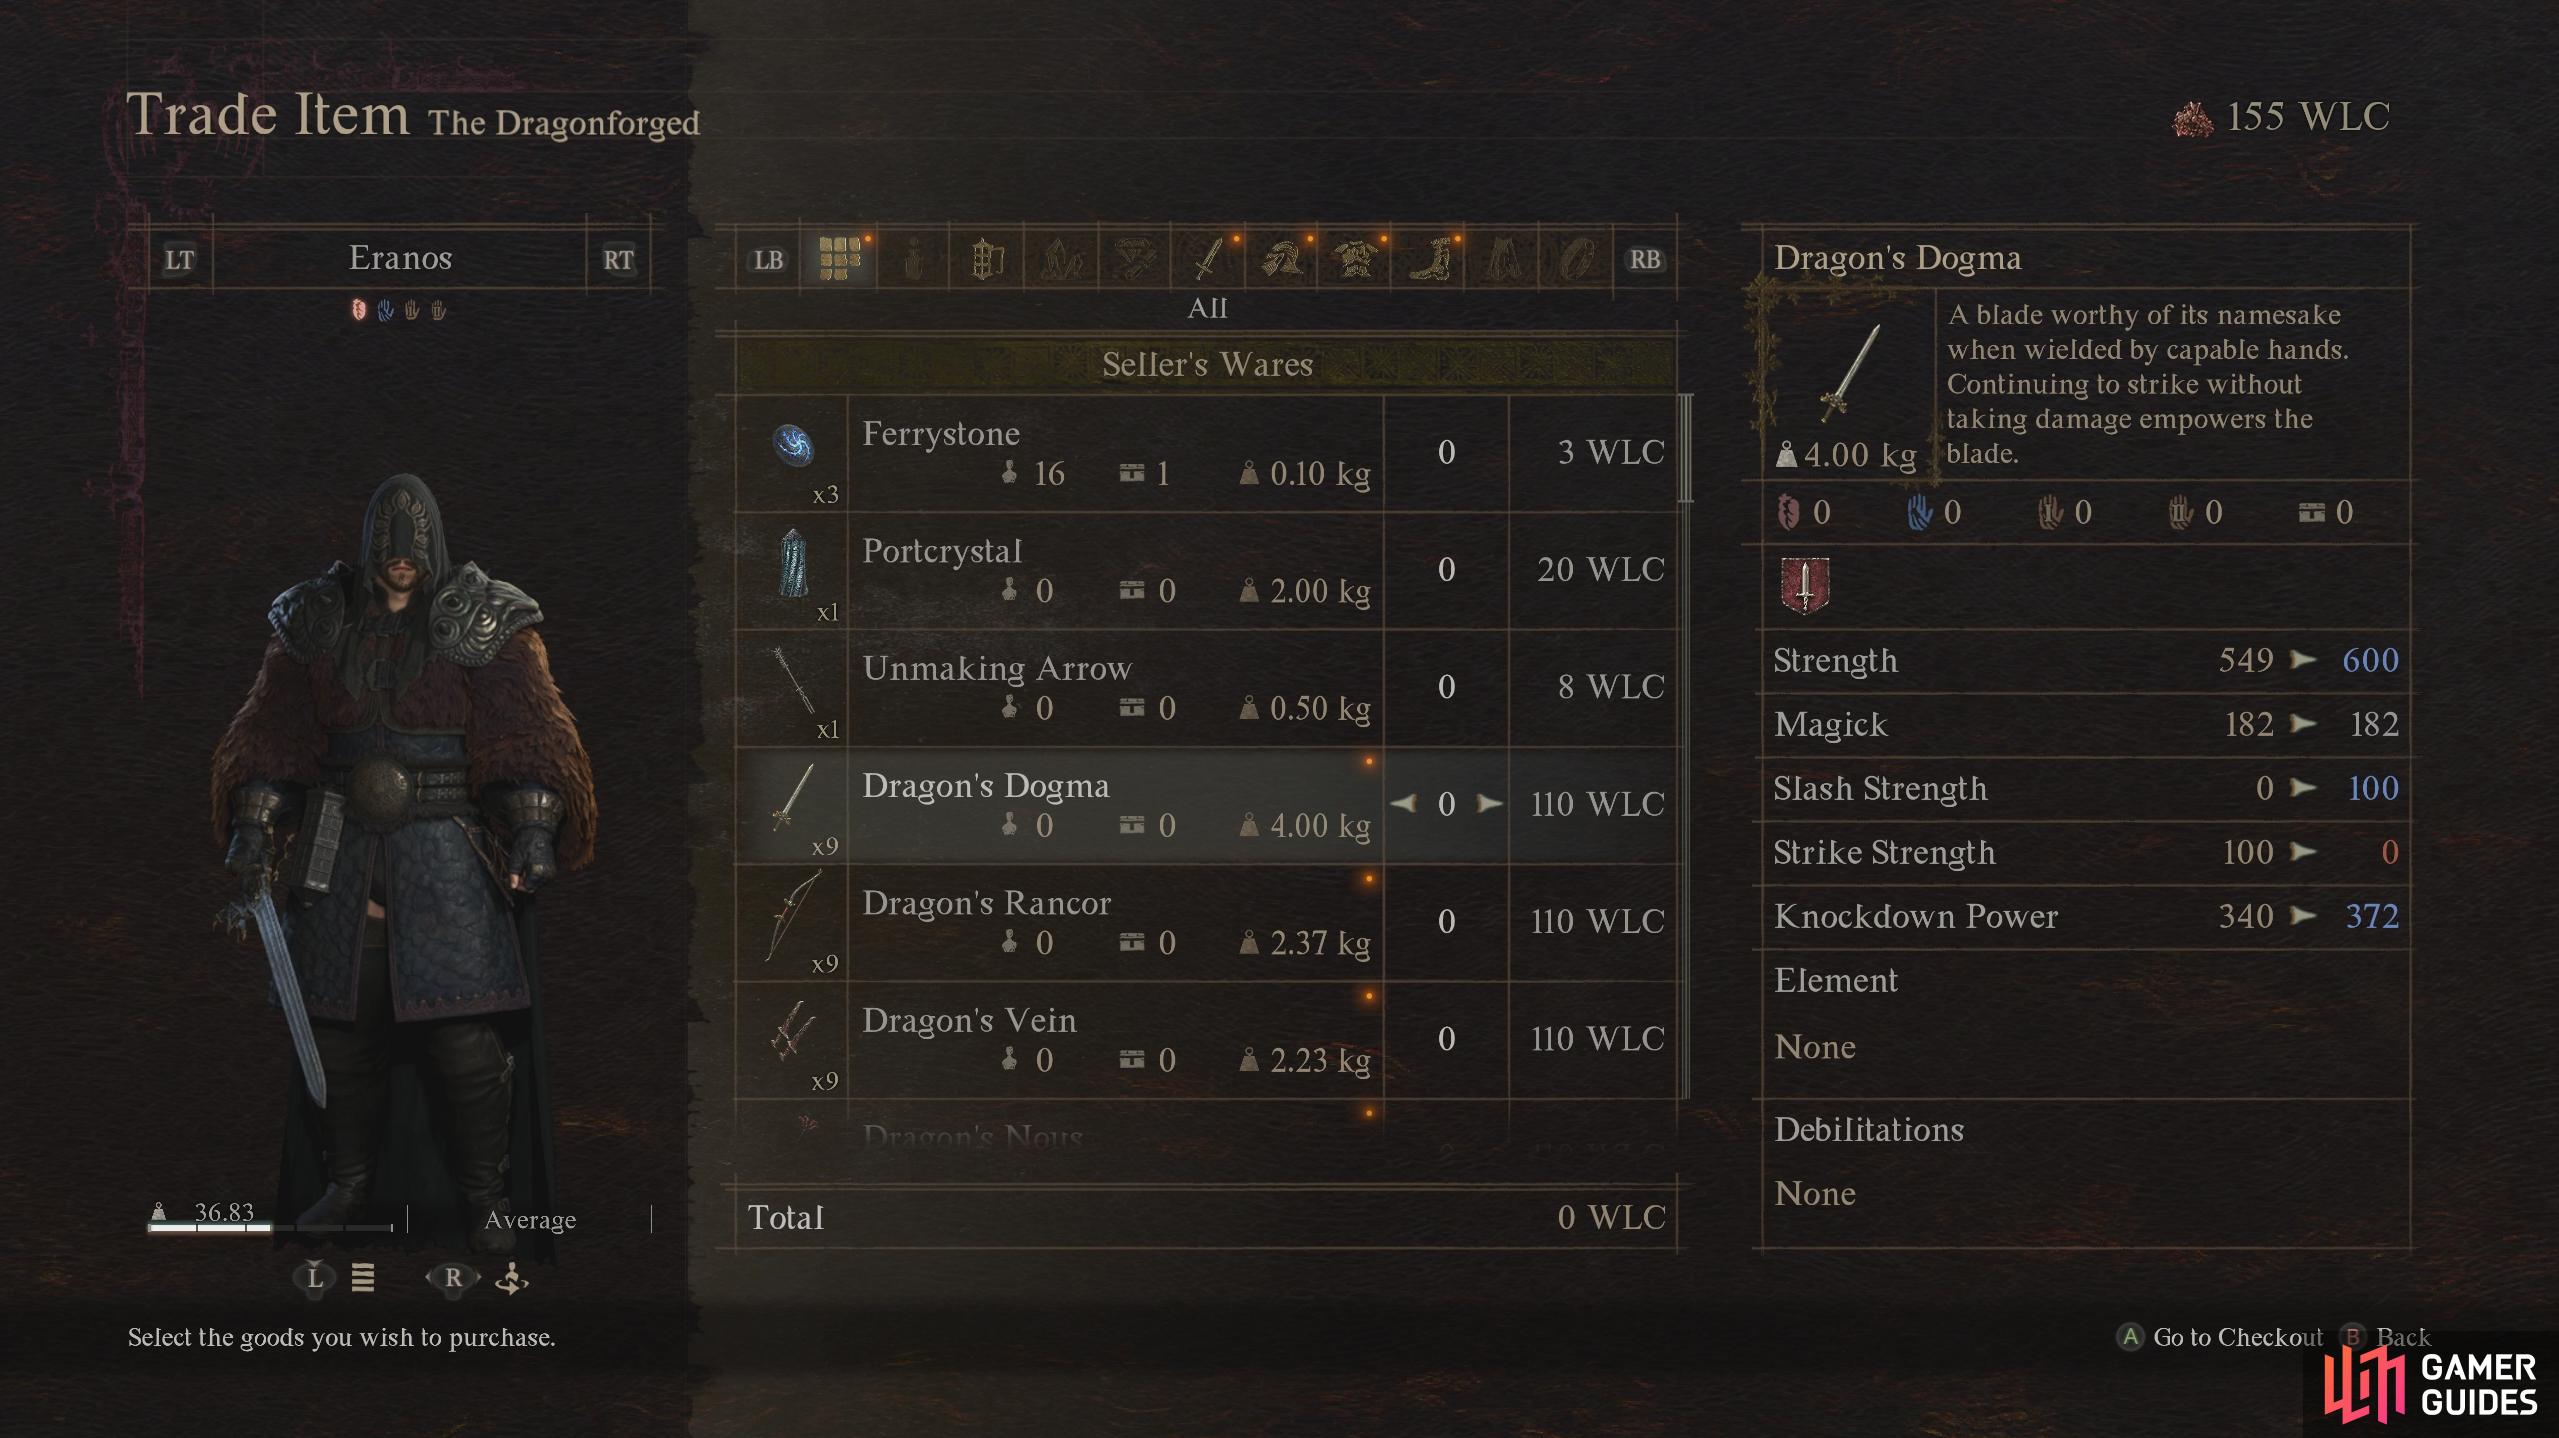
(1 of 3) In the post-game, The Dragonforged will appear in the Seafloor Shrine - Sacred Grounds.
| Item | Type | Cost |
|---|---|---|
| Item | 3 WLC | |
| Item | 20 WLC | |
| Item | 8 WLC | |
| Sword | 110 WLC | |
| Bow | 110 WLC | |
| Daggers | 110 WLC | |
| Staff | 110 WLC | |
| Greatsword | 110 WLC | |
| Archistaff | 110 WLC | |
| Duospear | 110 WLC | |
| Magickal Bow | 110 WLC | |
| Censer | 110 WLC | |
| Shield | 40 WLC | |
| Helmet | 20 WLC | |
| Helmet | 20 WLC | |
| Helmet | 20 WLC | |
| Helmet | 20 WLC | |
| Helmet | 20 WLC | |
| Helmet | 20 WLC | |
| Helmet | 20 WLC | |
| Helmet | 20 WLC | |
| Helmet | 20 WLC | |
| Body | 70 WLC | |
| Body | 70 WLC | |
| Body | 70 WLC | |
| Body | 70 WLC | |
| Body | 70 WLC | |
| Body | 70 WLC | |
| Body | 70 WLC | |
| Body | 70 WLC | |
| Body | 70 WLC | |
| Legs | 30 WLC | |
| Legs | 30 WLC | |
| Legs | 30 WLC | |
| Legs | 30 WLC | |
| Legs | 30 WLC | |
| Legs | 30 WLC | |
| Legs | 30 WLC |
As you can see, you’ll need a good amount of Wyrmslife Crystals (WLC) to acquire this gear. Fortunately, the Purgener battles (Pillar of Lights) offer you a good amount, and The Unmoored World isn’t short of dragons which you’ll need to defeat to obtain the crystals.
The Dragonforged New Game Plus Changes
When you finish the game and enter new game plus, The Dragonforged will return to the Bay Wayside Shrine, but he’ll retain the post-game shop he had before. On top of this, he has some new features. The first addition is to Receive Blessing. This allows you to receive one of four boons that lasts a day for 30 WLC. Here is what each one does:
| Boon | Description | Cost |
|---|---|---|
| Experience | Increased Experience | 30 WLC |
| Vocational | Increased Discipline | 30 WLC |
| Unflagging Vigor | Increased Stamina Recovery | 30 WLC |
| Charming Aura | Increased Affinity | 30 WLC |
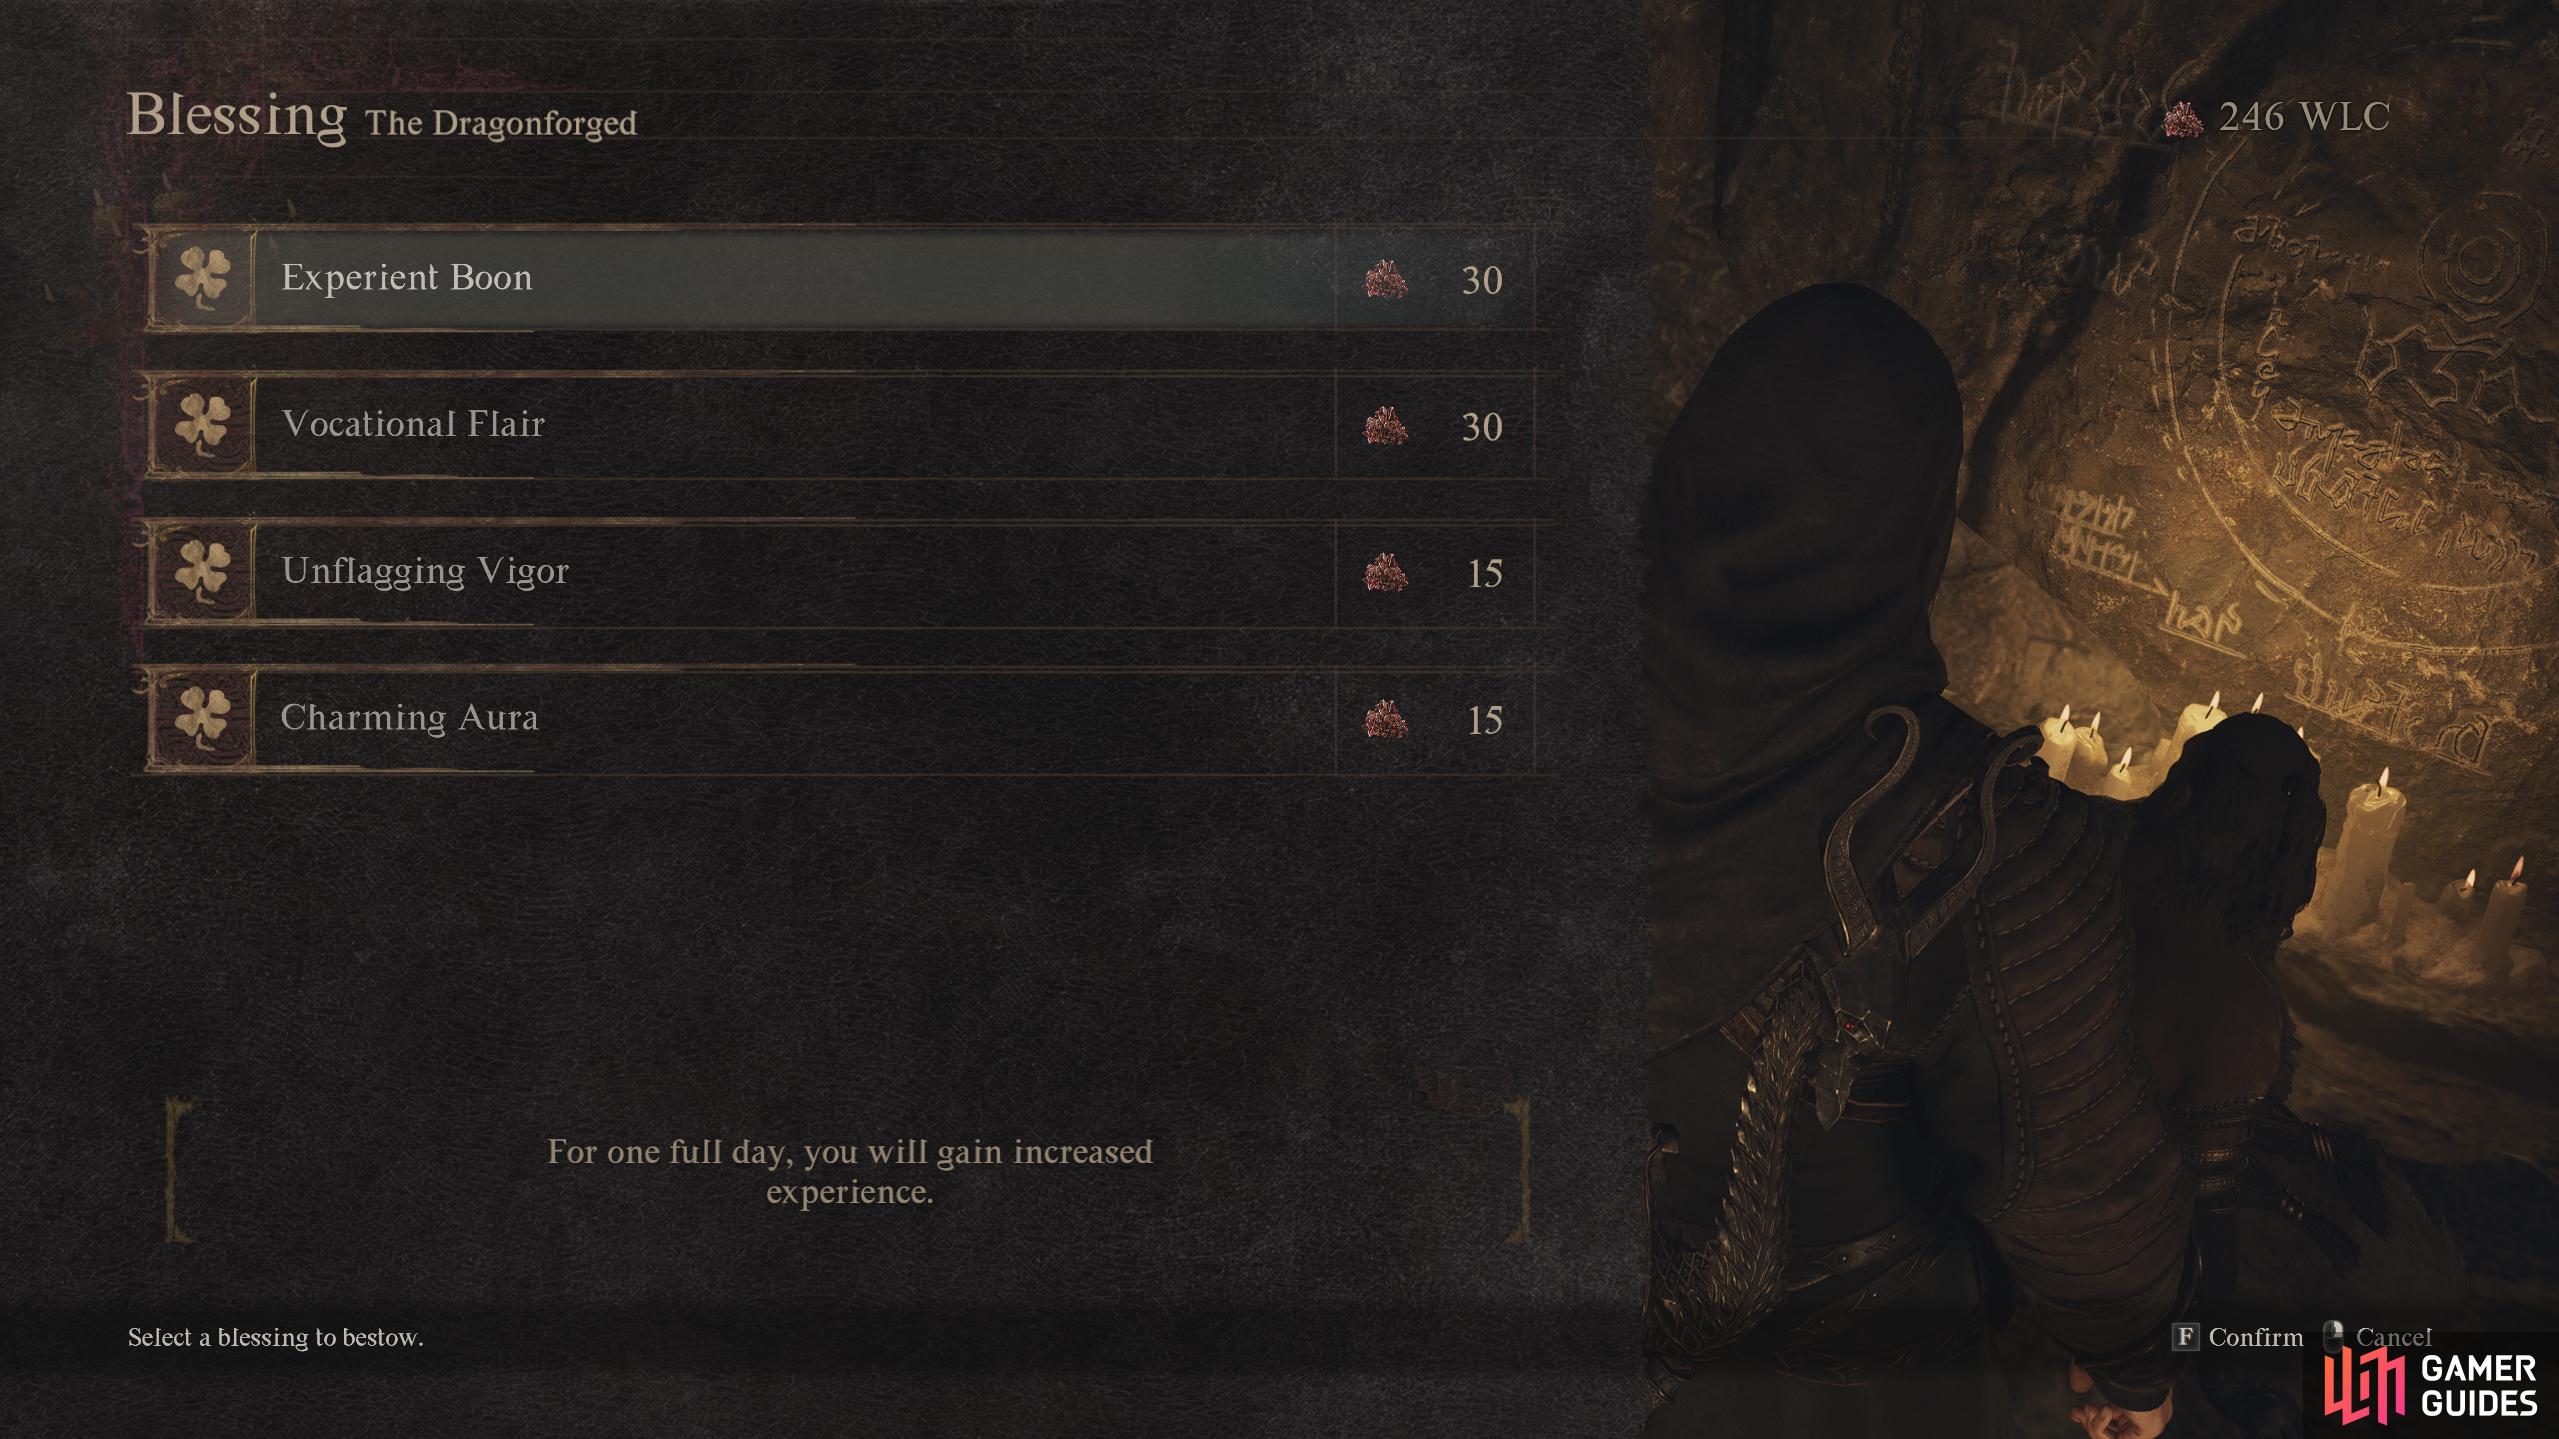
(1 of 3) Blessings are boons that last for the whole day. Only one can be used at a time.
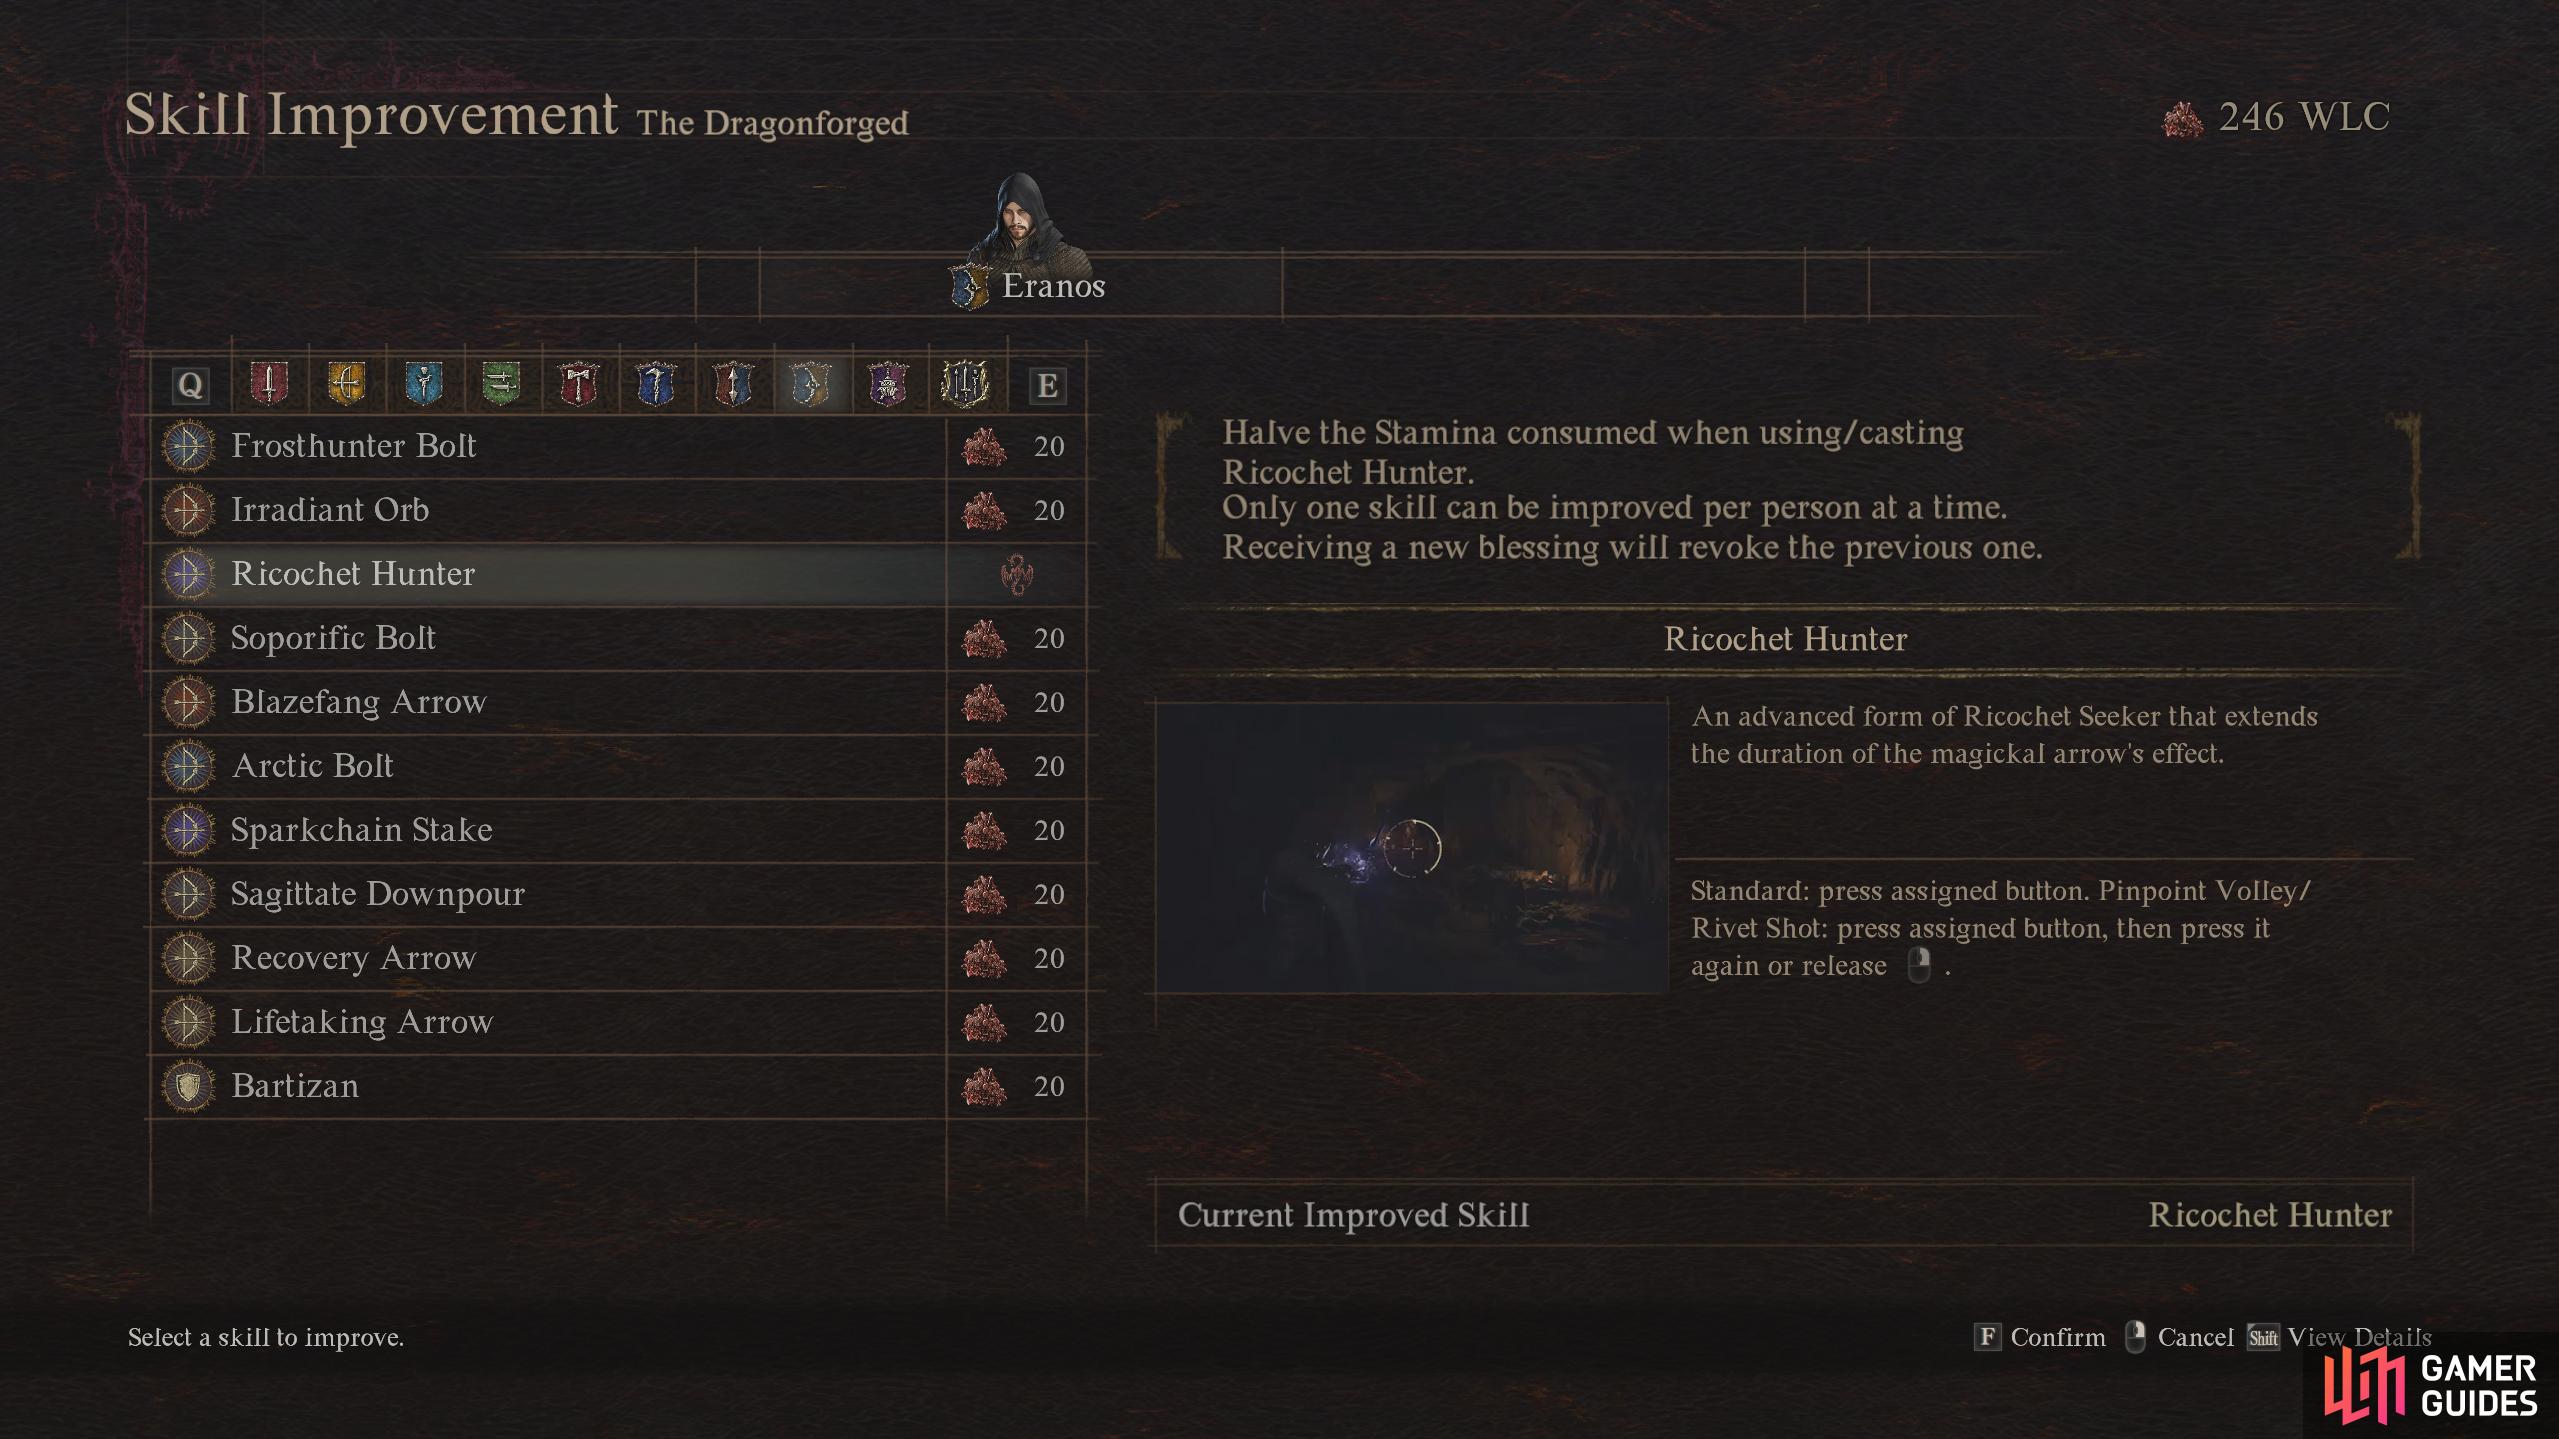
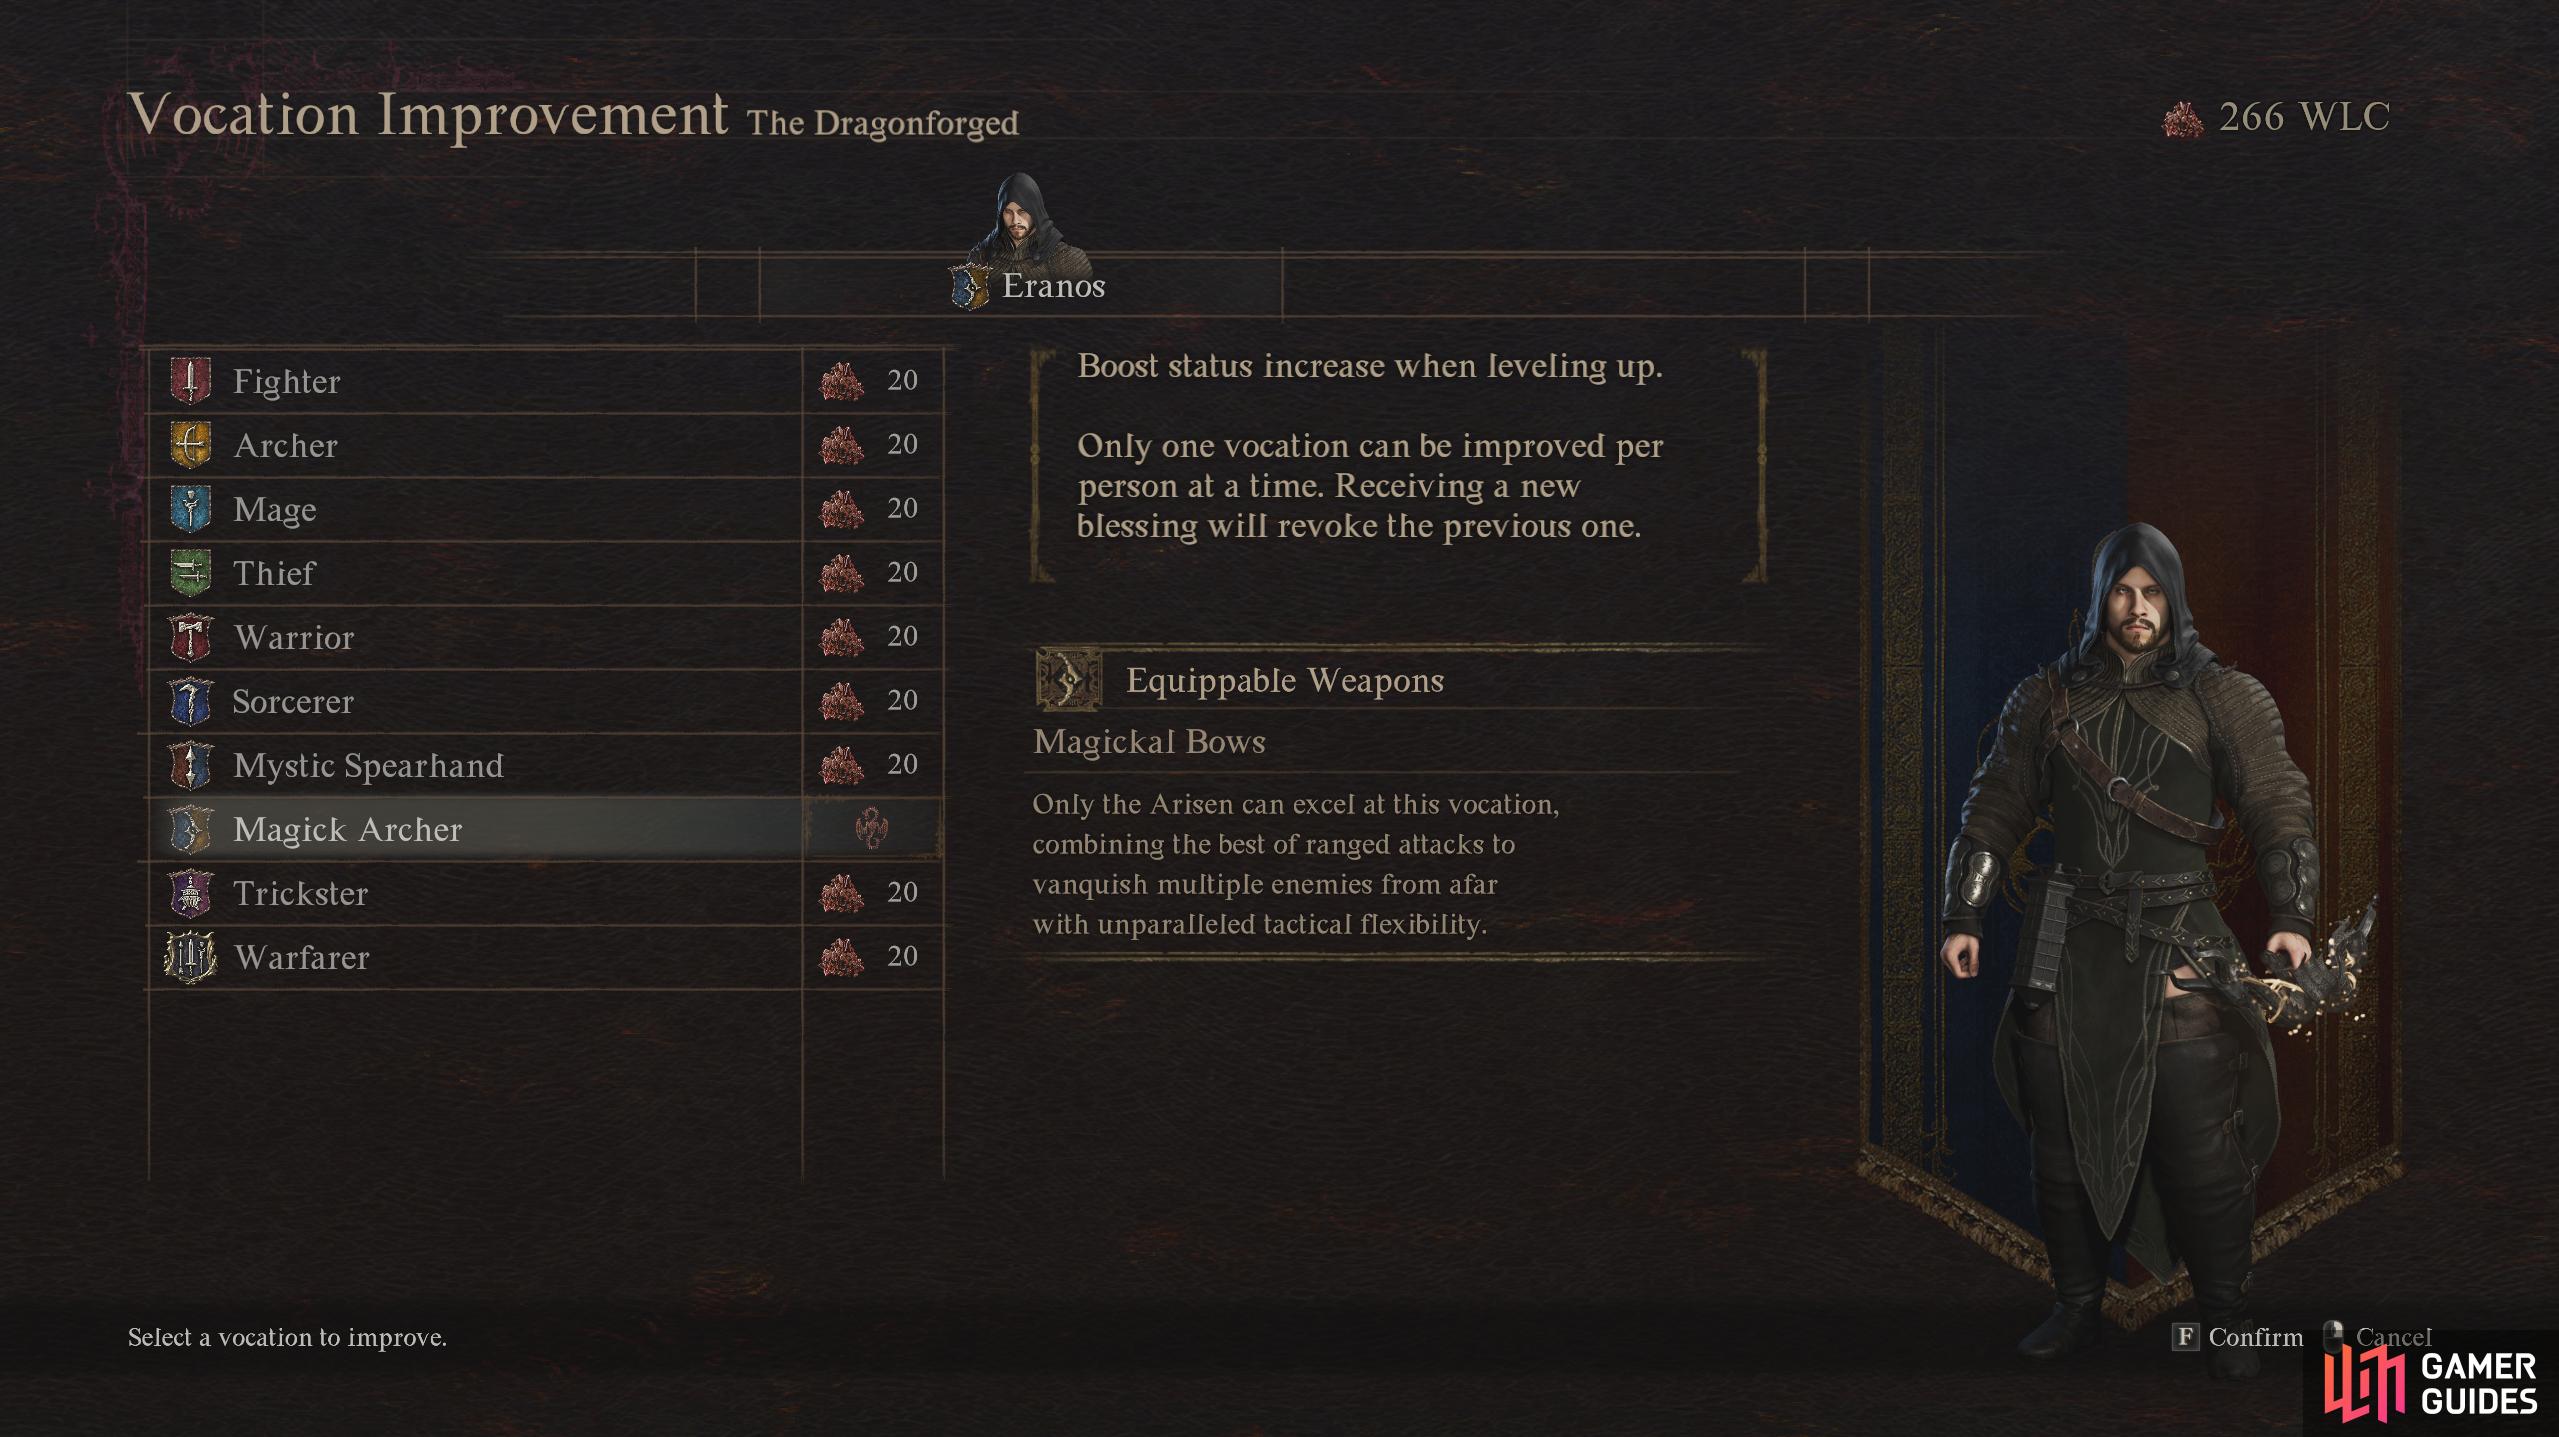
Next up, you have Vocation Improvement. This will increase the amount of status attributes you get when leveling up with that Vocation for 20 WLC. Finally, you have “Improved Skill”. This allows you to select any skill and decrease the Stamina consumed by it for 20 WLC. Unfortunately, only one skill can have this effect per person. There you have it, everything you need to know about The Dragonforged.
More Dragon’s Dogma 2 Tips
If you finnd this guide handy, why not check out our other Dragon’s Dogma 2 Tip pages?

 Sign up
No Comments