Objective: Find a way into the old prison
When you regain control, you’ll be in a small garage area behind cover with five enemies occupying the area with you. From our initial location, the enemies include:
- One on the second floor walkway at the back of the room.
- One patrolling back and forth along the left hand wall.
- Two by the fuel tank in the far, right corner of the room.
- One on the computer to your right. He’ll patrol over to join the guards at the fuel tank after a short time.
We’ll need to clear the room of enemies and we can do it quickly and silently relatively easily with the right equipment. First, take out the guard on the balcony with a headshot, then the patroller on the left side of the room. Wait for the guard at the computer to join his mates at the generator in the back, right corner and hit all three of them with a Poison arrow to drop them all at once.
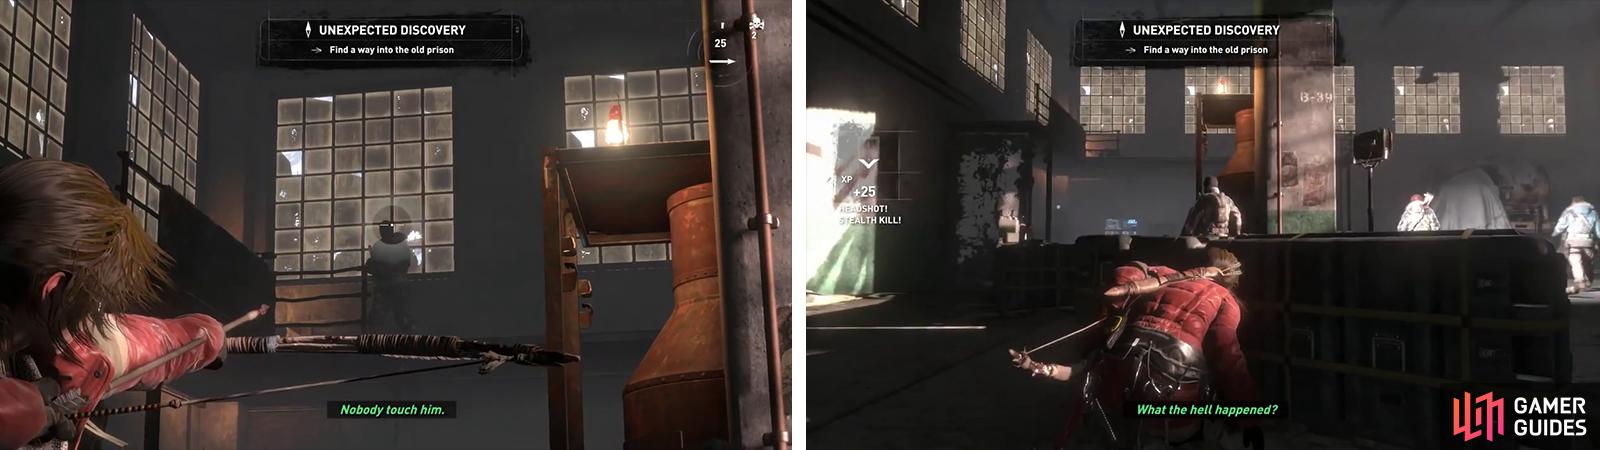
Take out the lookout on the balcony first (left) before focusing on the other enemies (right).
Head for the fuel tank and look to its left to find a wall we can scramble up to reach the balcony area. On a crate in the corner here you’ll find an oil lamp. Grab this and throw it at the cloth tarp covering the fuel tank to watch some fireworks.
The fuel tank explosion will blow a hole in the nearby door. It will also alert a pair of guards just outside -one will enter the room whilst the other will stay outside in cover. Use your weapons of choice to kill the pair of them – note that the fellow outside has foolishly decided to take cover by a red barrel – shoot it to end things quicker!
Exit the garage and look along the right hand wall outside for a Mural [03/11 – Russian] .
Climb over the gate at the back of the area and drop down below to find a new Base Camp ‘Train Yard’. Use this opportunity to apply any upgrades you require and spend any skill points you have. Exit the base Camp menu when you are ready to continue.
Follow the path until you reach a dead end. We’ll need to climb the guard tower here to reach the objective marker. Before we do that however, look on the floor by the fence on the left hand side of the guard tower area to find a Survival Cache [04/21]. To the right of the guard tower, there is a hole in the wire fence. Through here you can find a crate of Salvage and inside the train car, a chest containing Relic [01/18 – Rosary].
Head back to the guard tower, climb it and use the zip line to reach the next area.
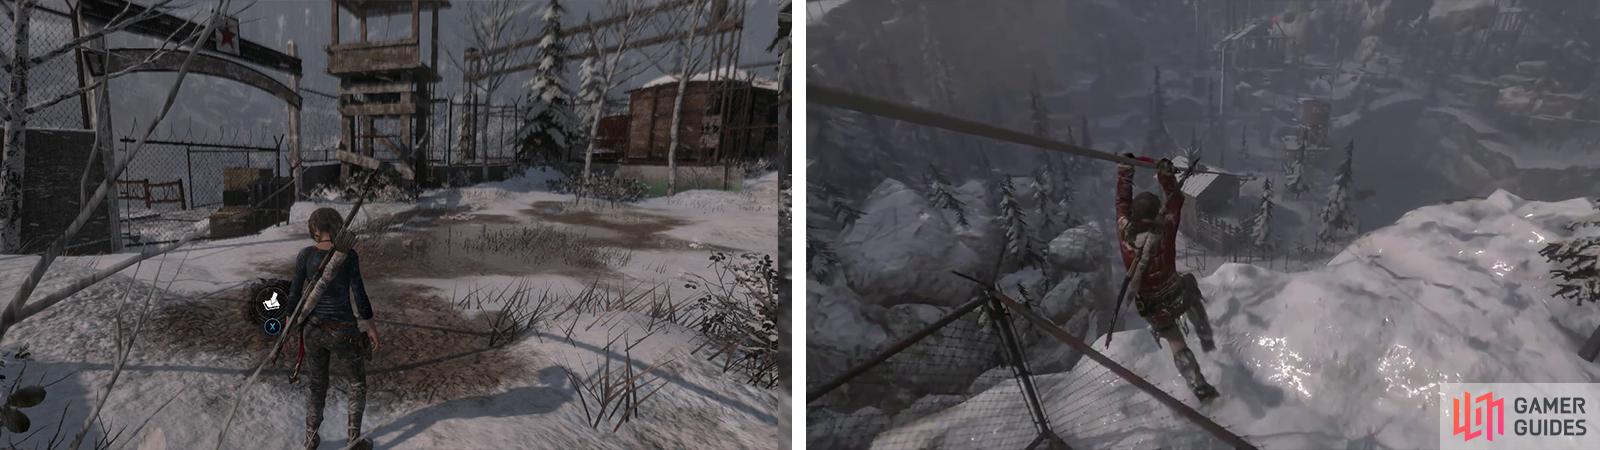
As you approach the guard tower you’ll find Survival Cache 04 nearby (left). When you are ready to continue use the tower to reach a zipline to the next area (right).
As you reach the bottom you’ll be greeted by one of the locals. We’ll be bumping into a few of these guys throughout the game and speaking with them will give you side-quests to complete for XP and gear rewards.
This particular individual will give you the ‘Communications Breakdown’ mission. We’ll want to complete this side-mission to obtain the Lockpick . As such, head over and accept his side-mission.
You can use the newly discovered Base Camp ‘Logging Camp’ here to apply any upgrades you require and spend any skill points you have. Exit the Base Camp menu when you are ready to continue.
There is a Strongbox by the Base Camp that we can’t open yet (remember the location though!). Enter the building at the top of the stairs to find a Document [05/26 - Russian] on a small table. There is also a box of ammo by the bed nearby if you need to restock.
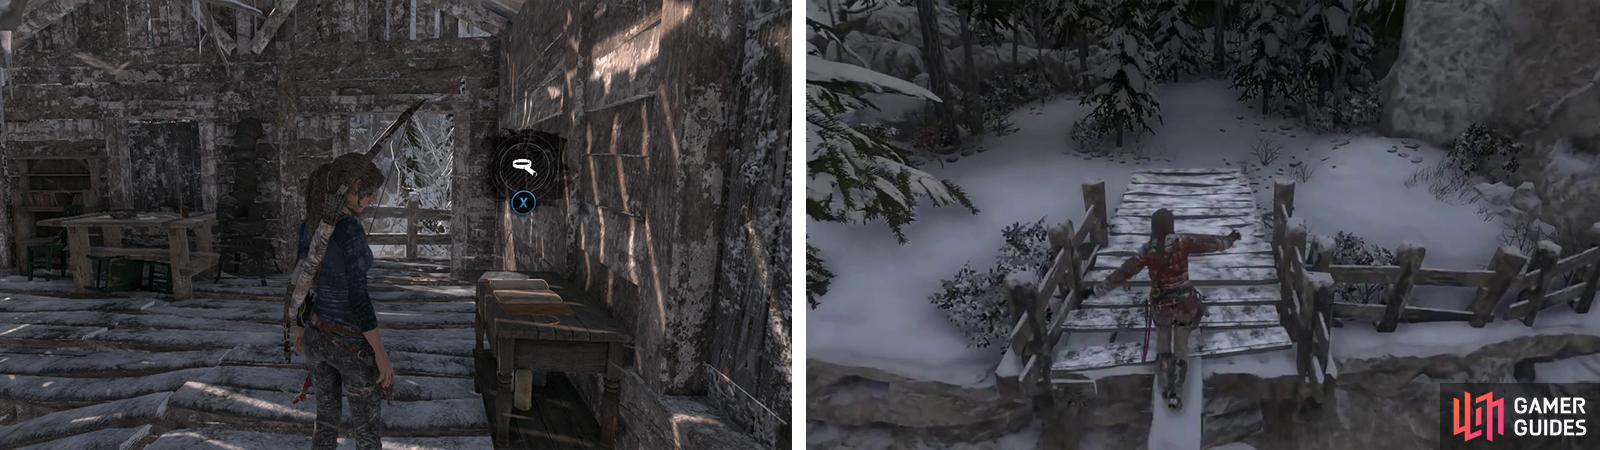
Enter the house at the base of the zipline for Document 05 (left). Cross the beams to the north (right) to reach the entrance to a crypt.
Leave the camp and head to the north to find a frozen river. There is a pair of beams placed across this that will allow you to jump to the far side. Near the base of the ice wall to the right you’ll find a cave entrance. Enter [Into Darkness Challenge 02/05] .
Inside the initial room you’ll find a barrel of reagents and a vein of Magnesite Ore. There is also a weak wall to mash down. After breaking down the wall, you should see a pile of Byzantine Coins you can loot. Follow the passage through the cave here and look out for another pile of Byzantine Coins on the left side of the path and a Mural [04/11 - Greek] . Climb over the nearby blocks and jump into the water below, find the ledge on the right side of the room to find a scroll for Document [06/26 - Greek] .
Hop back into the water and swim through the gap in the rocks opposite the platform with the document. Exit onto dry ground and follow the slope to the top. There is a vein of Magnesite Ore on the right hand wall. Enter the small tunnel nearby to find the cave’s treasure room.
Drop to the floor and grab the pile of Byzantine Coins and the barrel of reagents before approaching the central chest. Loot this for Crypt Treasure [02/02 - Weapon Part: Ancient Bow Part 02] . Backtrack all the way through the area until you are outside once again.
Return to the Base Camp with the friendly.
No Comments