To begin our mop up for the collectibles in the Geothermal valley, you’ll want to fast travel to the ’Ridgeline’ Base Camp in the northwestern part of the map. Once you have arrived on the scene, from the camp fire look for a red ramp overlooking the waterfall below. This is the first of four high dives that we can complete for the area challenge ‘High Diving ’. To successfully pull off a dive, run and jump from the ramp. Quickly press the LT button as you jump to have Lara dive into the water below [High Diving 01/04] .
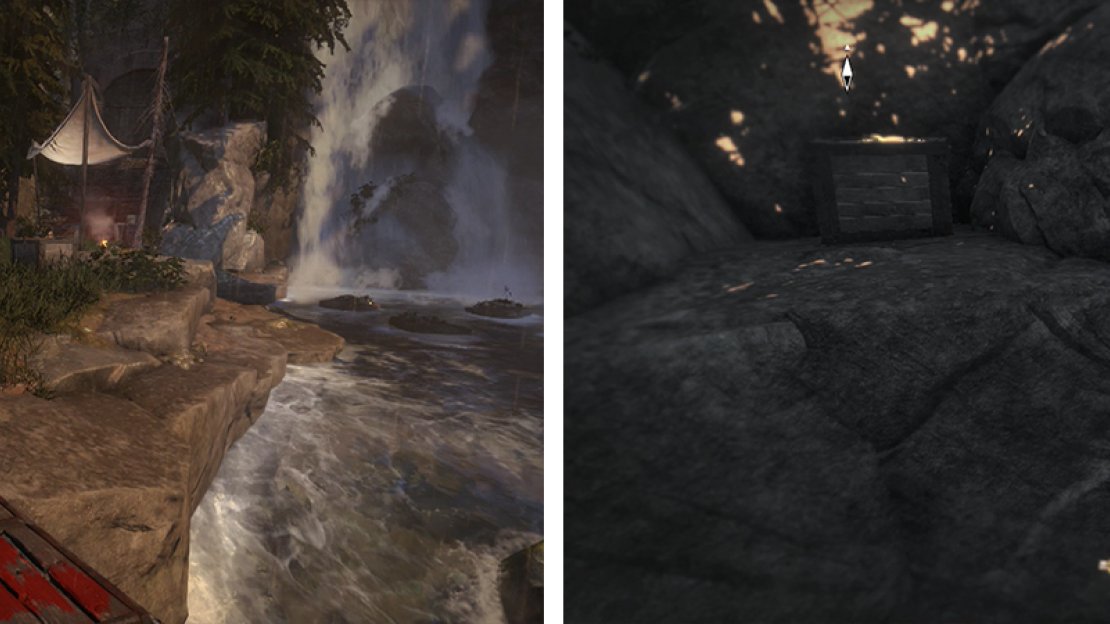
Dive from the platform by the Base Camp (left). Use the weak wood on the tree by the cave entrance to climb it using broadhead arrows (right) - hop to the nearby platform for Document 33.
From the base of the waterfall, swim over to the eastern bank to where we found the cave containing the Baths of Kitezh Challenge Tomb earlier. In the easternmost part of this area, there is a dead tree with weak wood that we can use our Broadhead Arrows on to climb. There is a raised ledge to the east of the main area here which we can jump to from the tree. On this ledge you’ll find a crate with a Document [33/33 - Greek] on top of it.
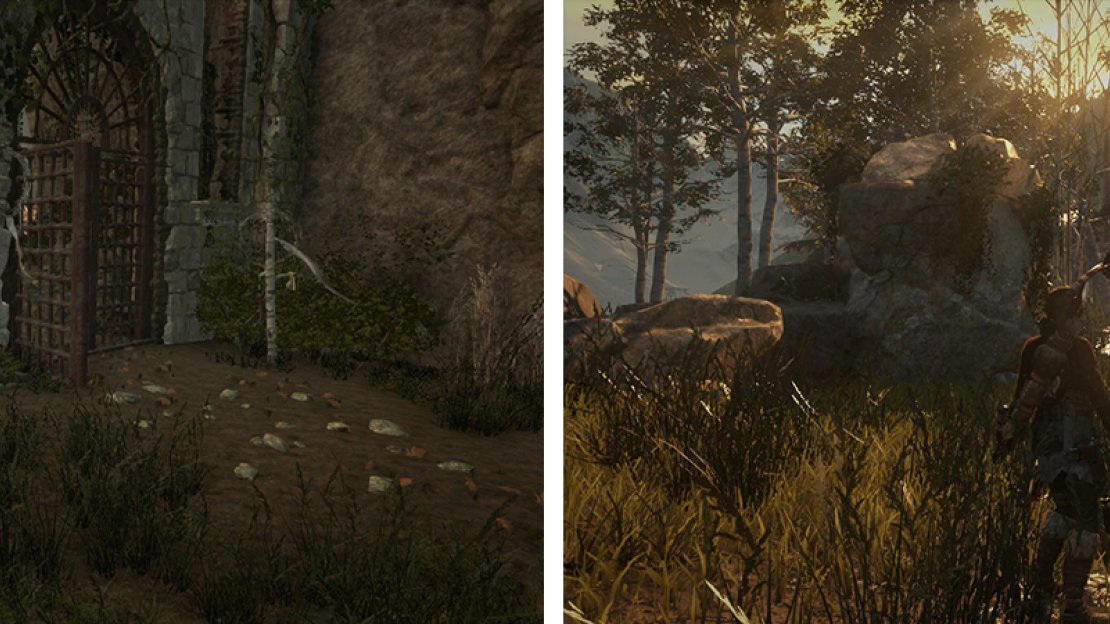
Cross to the western bank of the river until you reach the wooden platform leading to the first Challenge Tomb we completed in the area – The House of the Afflicted. Proceed along the path until you crawl through the gap. In this area, just to the left of the man-made doorway there is a Coin Cache [07/09] .
Make your way down to the southern part of the main valley to where we completed the ‘Surveillance Disruption’ and ‘A Hearty Meal’ side-missions earlier. Along the coast, just to the south of the guard tower here, there is a Coin Cache [08/09] .
In front of the House of the Afflicted Challenge Tomb is Coin Cache 07 (left). By the guard tower in the southern section of the valley is Coin Cache 08 (right).
Climb the guard tower to find a diving platform. Execute a dive into the water below [High Diving 02/04] .
Now let’s go to the ‘Ruins Encampment’ Base Camp. From here, make your way to the north, past the end of the main bridge and to the path behind the waterfall (near the entrance to the Pit of Judgment Challenge Tomb). On the wooden structure near the waterfall there is another diving platform. Execute a dive into the water below [High Diving 03/04] .
Return to the Base Camp and this time head east. Speak with the quest giver in the ruins here to hand in the ‘Ancient Secrets’ side-mission.
Use the nearby rope pole to reach the island with the signal fire spire that we lit earlier. Climb it the same way as we did previously. Once you reach the first scalable wall section where we need to drop from the first wall to a second below and then jump to a third to the right. As soon as you find yourself on solid ground, look back towards the ruins. Below this area is a small, lower platform with a diving board. Execute a dive into the water below from here [High Diving 04/04] .
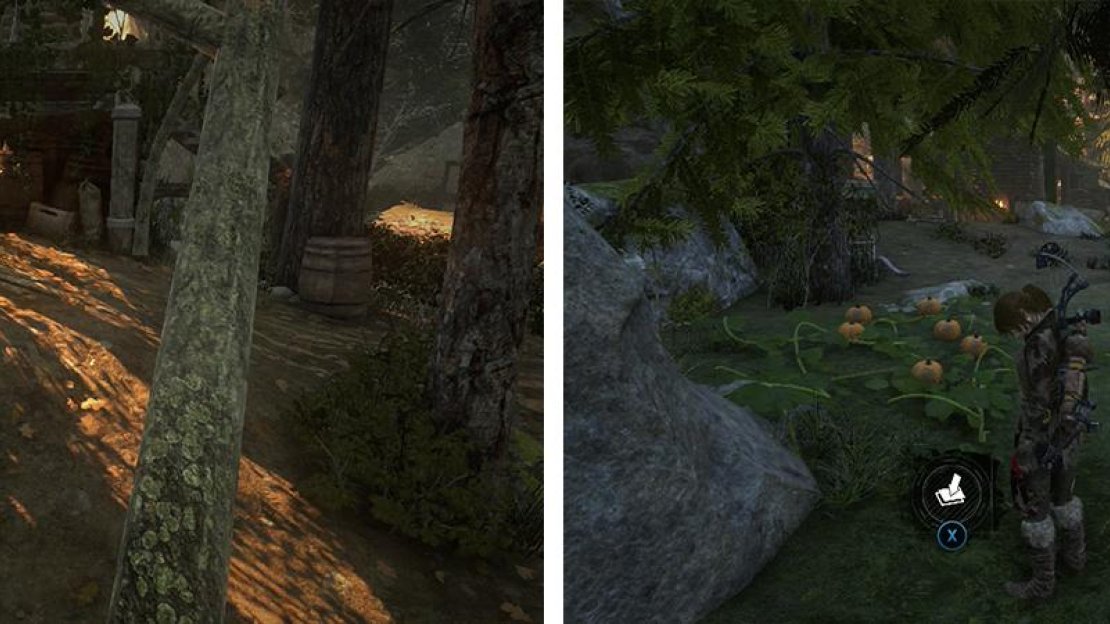
Now we’ll want to fast travel to the ‘Cliffside Lookout’ Base Camp in the southeast corner of the map. From here, follow the zip lines down and proceed along the river into the upper village as we did earlier when Trinity was in control. In the first zone you come across with the bonfire, look just to the left of the eastern building find Coin Cache [09/09] .
Coin Cache 09 (left) can be found entering the vilage from the south. Survival Cache 20 (right) and the ‘Tossing Gourds’ challenge can be found in a newly accessible area of the village.
Proceed through this building and run between the two on the other side. Make your way to the western section of the area here that was previously blocked by a barricade. In this location you’ll be able to find the final Survival Cache [20/20] and the final area Challenge ‘Tossing Gourds’ .
To complete the ‘Tossing Gourds’ Challenge, you’ll need to pick up the pumpkins on the ground nearby and throw them into nearby barrels. You’ll notice that the target barrels have a wooden pallet sitting behind the opening – try to toss the pumpkins so that they land on this and roll into the barrel below. The barrels can be found in the following locations:
- The first three are found just behind the spiked fence surrounding the pumpkin patch [ Tossing Gourds 01/05, 02/05 and 03/05] .
- On a raised ledge just to the north of the pumpkin patch. Stand in front of the Strongbox we previously opened at this location for a good angle [ Tossing Gourds 04/05] .
- This is also behind a spiked fence. It can be found behind the southernmost of the three buildings. You’ll have to make the shot from just south of the eastern side of the building [ Tossing Gourds 05/05] .
This should be your 100% completion in the Geothermal Valley region. Make your way to the nearest Base Camp to fast travel out of there!


No Comments