Objective: Fight through the Trinity base to the old train station
After climbing from the water, you’ll find yourself in a radio room of sorts. On the desks here you can find an Archivist’s Map (for Document and Mural locations) and Document [14/26] . Open the nearby door with a pickaxe to continue.
In the next room you’ll find a rope covered cogwheel opposite a rope wrapped object either side of an electrified pool of water. behind the cogwheel there is a chest containing Relic [07/18 – Patch ].
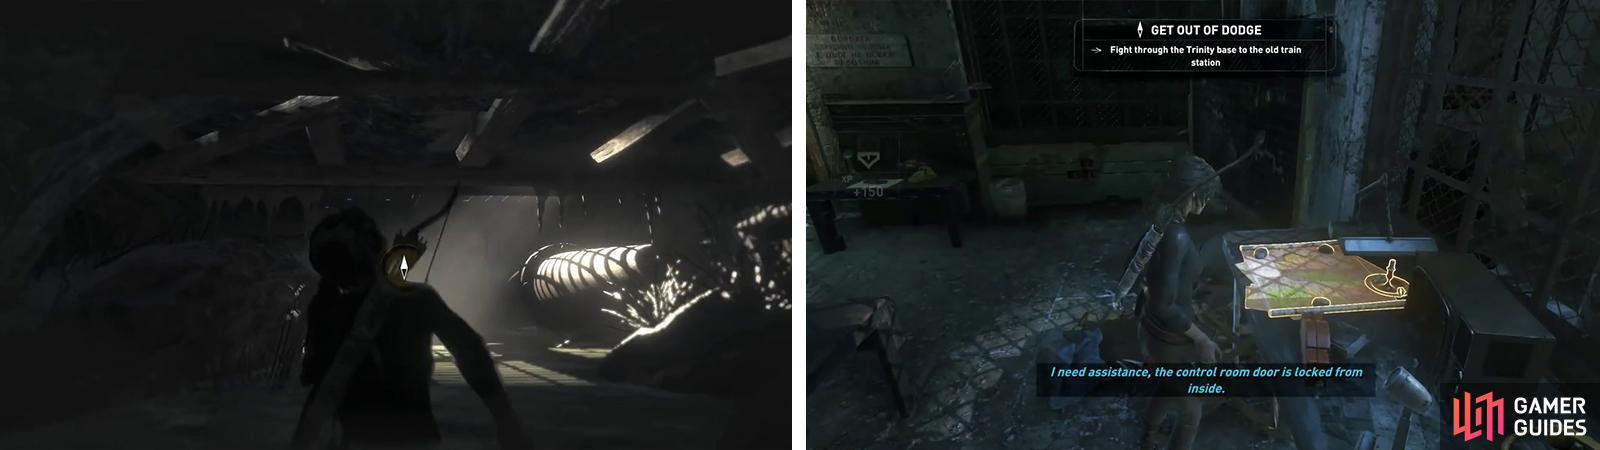
After wading through the water (left) exit into the room above and loot the Archivist Map (right) and Document 14.
$$$achievement
Stand behind the cogwheel and use a Rope Arrow to shoot the patch of rope opposite. Use the crank on the side of the cogwheel to raise the object out of the water to stop the electric current.
Cross the pool of water and smash the crate of Salvage before approaching the doorway.
As you attempt to open this, a short scene will play and you’ll end up with a new piece of equipment – Assault Rifle. You’ll be in slow time for a short moment so kill the three guards through the doorway as quickly as you can.
Go through the door. Down the stairs and to the left is an open building with a pair of guards inside. Kill them both (from cover if possible) before proceeding inside. There is a crate of Herbs and a box of Ammo here if required.
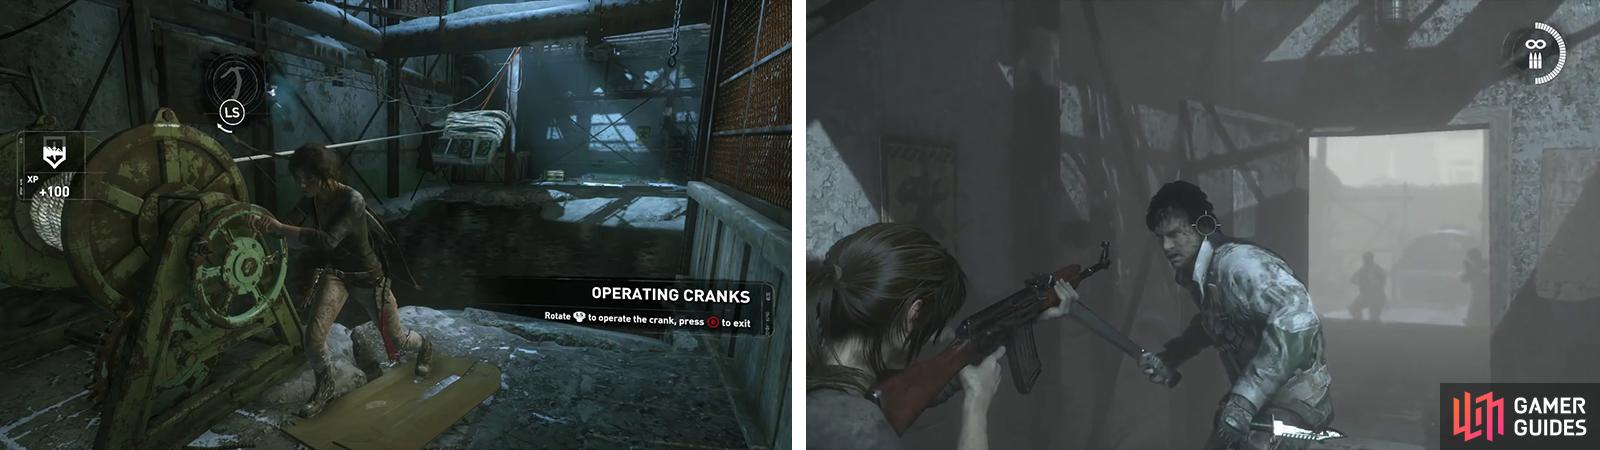
Use the winch to pull the generator out of the water (left). Exit the door and you’ll encounter enemies - shoot them to proceed (right).
Head through the open doorway and turn left. There is another pair of enemies in cover ahead. Eliminate them and continue along the set route until you enter another building. Wait a few seconds for a pair of enemies to enter and then shoot the red barrel at the back of the room to kill them both at once. There are two bits of Magnesite Ore in and around this building and a box of Ammo to restock. Exit the door for a scene.
During the scene, Lara will suddenly gain the ability to craft explosives. Follow the button prompt to create a Shrapnel Grenade . Toss the completed grenade at the pair of enemies firing at you. Note that this will incapacitate them briefly and unlock a finisher for them, but will also summon another pair of guards from within the building ahead – as such shoot the injured enemies to avoid being ambushed!
Once the enemies stop coming, examine the platform to the right of the next doorway for some Magnesite Ore and a crate of Salvage before heading inside.
There are a further two enemies within this building who we’ll need to eliminate. Inside you’ll also find a crate of Herbs , a locked cabinet (which we can unlock for XP) and either side of the hole at the end of the room a Document [15/26] and a Laptop [Data Corruption Challenge 07/10] . Drop down the hole to continue.
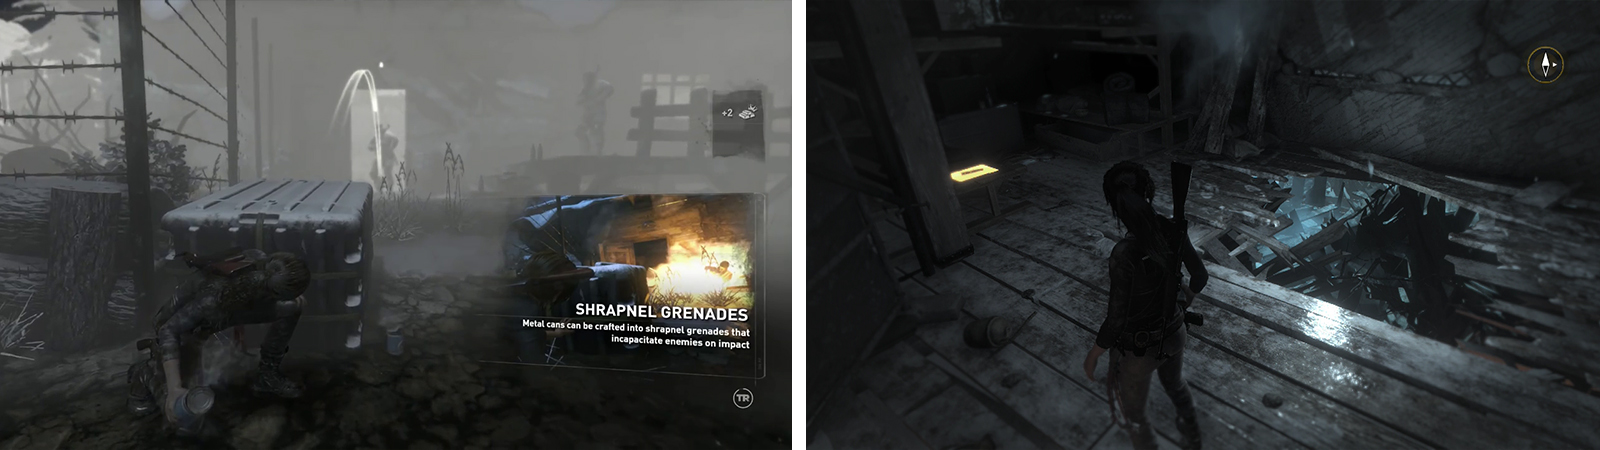
Craft a grenade to kill the enemies in front (left). Inside you’ll find a Laptop and Document 15 (right) before dropping down the hole to continue.
As soon as you land, loot the nearby Explorer’s Satchel . Follow the passage through the water until you find yourself outside once again. A short distance along the set route you’ll find a new Base camp ‘The Gulag’. You can use the Base Camp here to apply any upgrades you require and spend any skill points you have. Exit the Base Camp menu when you are ready to continue.
Continue through the gap in the nearby gate. As soon as you do, you’ll be ambushed by several enemies with automatic weapons. Quickly get into cover. During this next little section, you’ll be in full on third-person shooter mode and as such you’ll want to stay in cover as much as possible. Watch out for grenade indicators that flash up on the screen and if necessary use your scramble moves to reach another piece of cover before it explodes. There are several red generators around the area which will explode when shot and a couple of rope-covered support beams that we can use to collapse segments of buildings. Be sure to use all of these things to your advantage as you move through the zone.
In the immediate area there are three enemies at ground level and a fourth on the balcony overlooking the area. A quick way to do some serious damage is to use a Rope Arrow on the wooden support wrapped in rope which will collapse the upper platform and kill several enemies at once before using your other weapons to head shot the remaining enemies. A fifth enemy will emerge from the building when the others are dead.
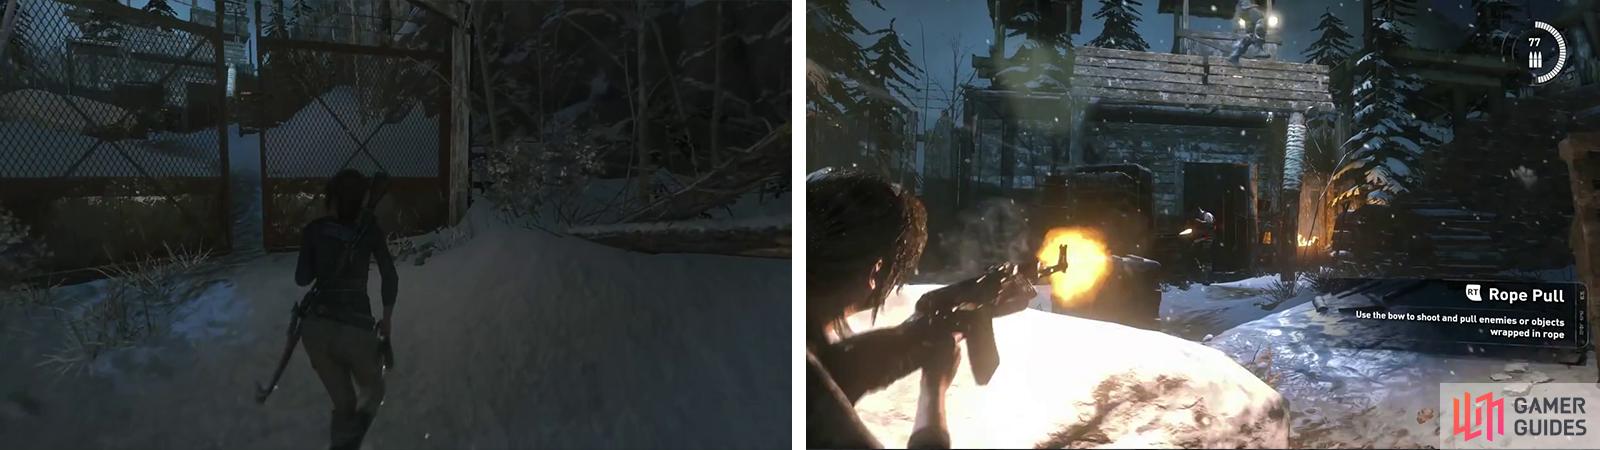
Enter the gate and you’ll be ambushed (left). Use Rope Arrows to pull down the structure (right).
It’s not all clear just yet though, move up and you’ll find another group of enemies around the corner to the right. There are two on the rooftop nearby, another 1-2 at ground level and another in a guard tower behind it. Again you can use your Rope Arrows on the rope-covered pillar below the rooftop to bring it crashing down. Doing this will also destroy a Laptop [Data Corruption Challenge 08/10] within the building. Clear out the remaining enemies for a scene.
Once you are back in control, you’ll be fighting off against five spec ops soldiers who will advance on your position. They are heavily armored, so body shots will be much less effective – head shots on the other hand are much better. Use the cans on and beside the cover you start behind to craft Fragmentation Grenades and throw them at the advancing enemies to help thin the numbers, you can also utilize Poison Arrows to help out in this regard if necessary.
Once the area is cleared of enemies, you’ll be able to proceed. Before we do however, there are a few collectibles in this area to gather. Return to the gate we came in from and with it at your back, check out the small building to the left for Laptop [Data Corruption Challenge 09/10] a Box of Ammo , some Magnesite Ore and a quiver of Arrows . There is another box of Ammo by the crates just outside.
Inside the door that the first enemy emerged from you’ll find a box of Herbs . In the right hand building you’ll find a crate of Salvage , some Magnesite Ore and if you didn’t use the Rope Arrow earlier, a Laptop to explode. There is also a Survival Cache [07/21] in the corner by the fence to the far right of the exit door.
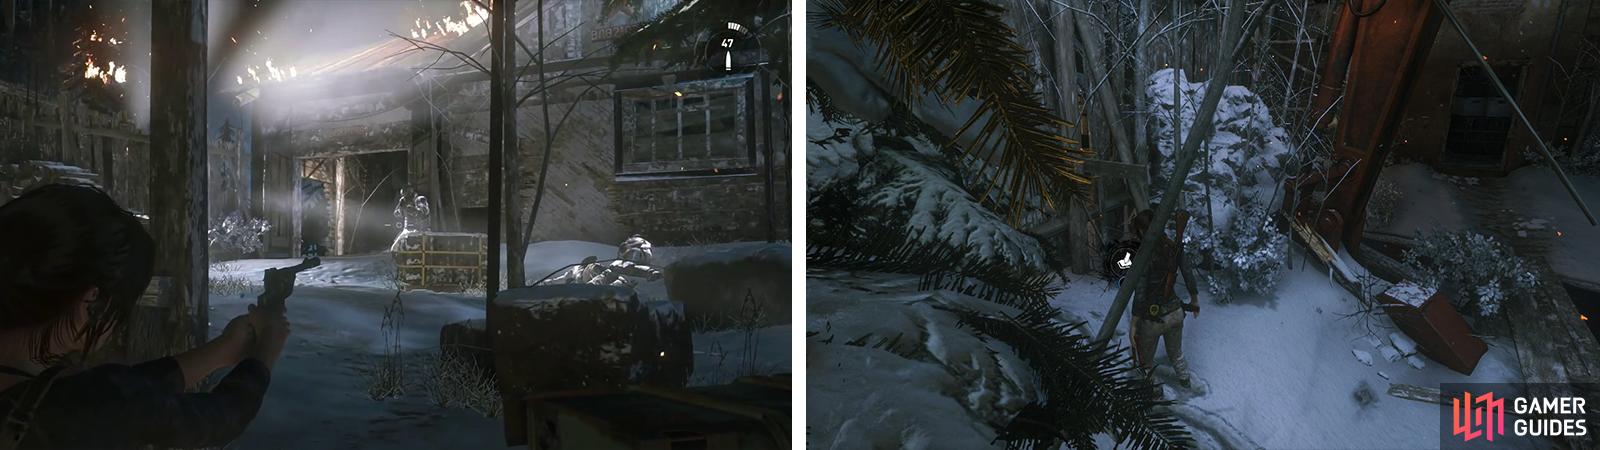
Use cover and projectiles to take down the armored enemies that show up (left). Afterwards look in the snow by the excavator for Survival Cache 07 (right).
Head through the door that the spec ops soldiers emerged from and follow the path. Just before walking beneath the excavator, look in the snow to the left for Survival Cache [08/21].
Enter the building at the end of the path to find the final Laptop [Data Corruption Challenge 10/10] and Document [16/26] on the table to the left as you enter. Continue down the stairs and in the room at the bottom is a chest containing Relic [08/18 – Medal ]. Look on the opposite side of the broken wall from the base of the stairs to find a Mural [08/11 - Russian] .
Enter the train cart to find some Magnesite Ore and exit via the door opposite. Look to your left as you land and head down the narrow passage between the pair of train containers here to find a Survival Cache [09/21] in the snow at the end.
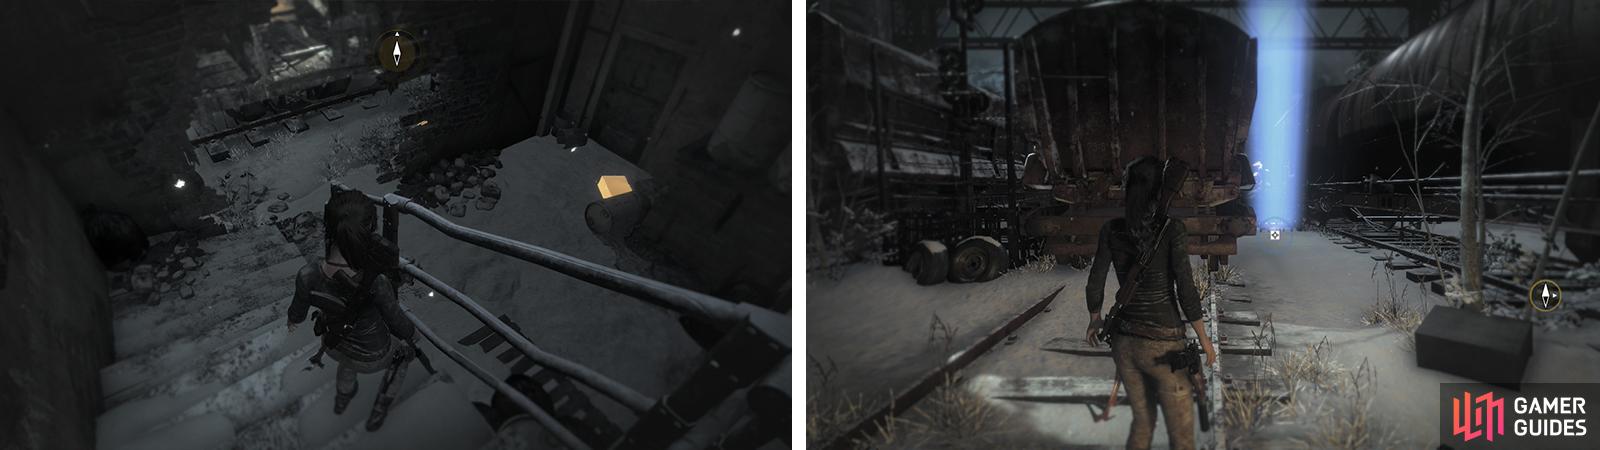
At the bottom of the stairs you’ll find Relic 08 (left). In the train yard you’ll find Survival Cache 09 (right).
Make your way to the train marked with the objective marker, looting the bodies for Salvage and grabbing the bundle of Hardwood as you go (if required). Climb into the train for a scene.
No Comments