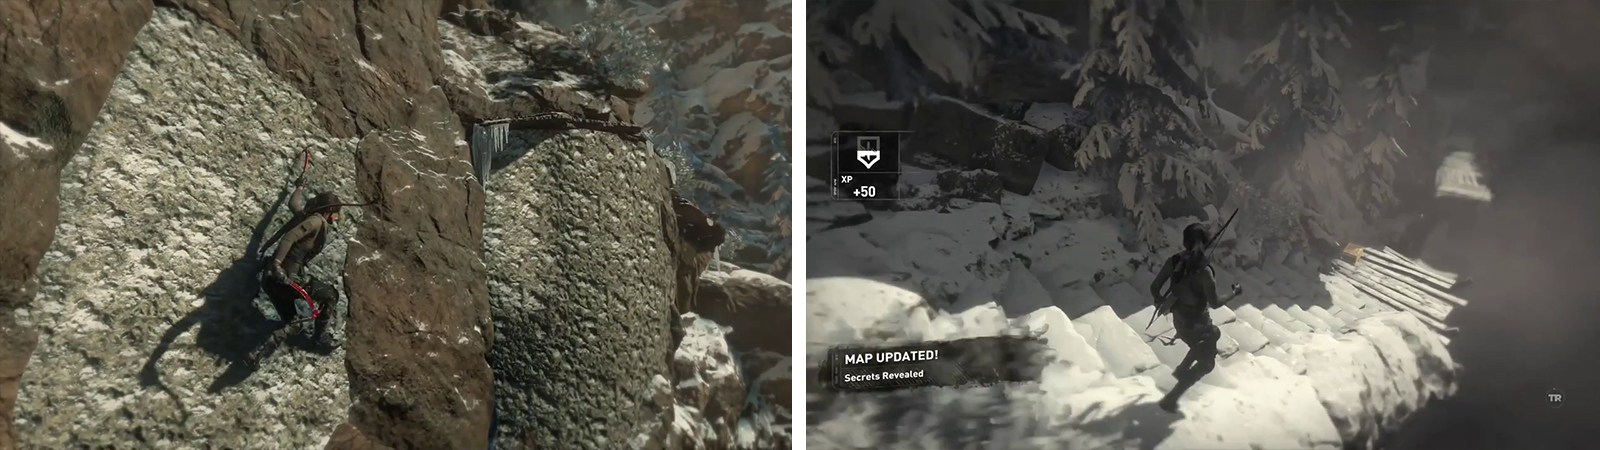
Make your way to the east and look for the cave at ground level just below the ‘Sheltered Ridge’ Base Camp marker on the map. Watch out as you approach however as there is sometimes a Leopard wandering about.
Enter the cave. Inside you’ll find a pair of veins of Magnesite Ore and a door with roped-up beams forming an obstacle blocking the way. Use a Rope Arrow to remove the beams. Approach the door to open it with your pickaxe.
Follow the path inside and eventually you’ll come across a new Base Camp ‘Frozen Gorge’. You can use the Base Camp here to apply any upgrades you require and spend any skill points you have. Exit the Base Camp menu when you are ready to continue.
Follow the path along the cliff to the left and squeeze through the narrow crack in the rocks here. Hop across to the ledge opposite (be ready for a button prompt!). Scramble up the wall and use the set path across the ledges, climbing walls and narrow walkways to spot the entrance to the Challenge Tomb.
As you head across the final narrow walkway towards the tomb the walkway will snap, sending Lara sliding downwards. Be sure to hit the pickaxe button as you approach the wall to have her latch on at the last second. Work your way across the last couple of climbing walls and ledges to reach the entrance.
Before entering the tomb, look on the ground by the wooden pillar with the rope wrapped around its top for an Explorer’s Satchel and in the snow at the base of the wall opposite, a Survival Cache [11/21]. H ead down the walkway to the right of the temple entrance to find a chest containing Relic [10/18 – Maniples ].
Work your way along the cliffs until you reach the temple (left). Before entering, take the stairs in front to find Relic 10 (right).
Now let’s (finally) enter the tomb. As you enter you’ll find a pile of Byzantine Coins you can loot and a Survival Cache [12/21] in the corner just left of the door at the back of the room. On the left side of the room you’ll also discover a bin full of reagents, an Archivist’s Map and a Document [17/26 - Greek].
Head back to the entrance and use the cogwheel mechanism to lower the gate. Climb up the handholds on the back of the gate and shimmy across to the ledge on the left. Drop down to the platform below when you reach the end. Look in the alcove to the right for a Document [18/26 - Greek] .
Stand behind the cogwheel here and use a Rope Arrow to shoot the hanging counterweight in the distance. Now hop across to the nearby platform and smash down the weak wall here to return to the entrance room. Grab the cogwheel by the door and use it to raise the gate again – this will lower the counterweight in the second room. Return through the hole in the wall to the second cogwheel.
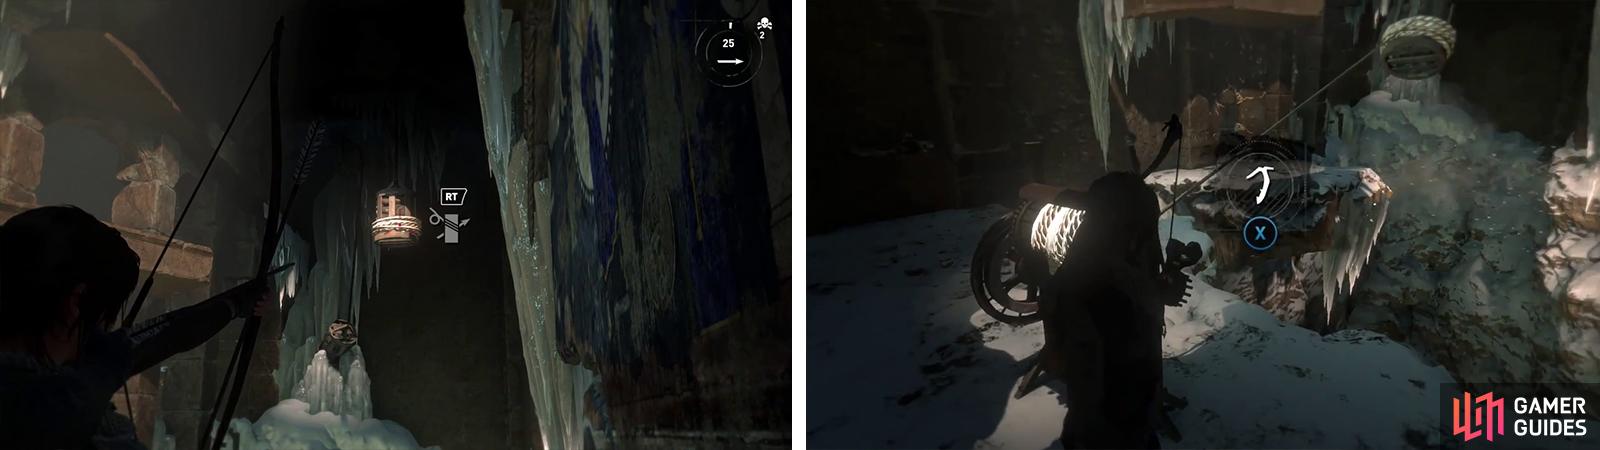
Once the counterweight has been lowered, attach a rope to the cogwheel here (left). Wind it in and cut the rope when the snow starts blowing into the room (right).
Use the wheel on the left side of the cogwheel to pull the counterweight over as close to your position as it will go. Move around to the right hand side of the cogwheel to find a lever. This will release the counterweight. To solve this room, we’ll need to have this counterweight hit a second counterweight which is encased in ice in the back, left corner. To do this, wait until the wind starts blowing (as soon as you see snow fly in) and hit the lever. This should smash the ice encasing the second counterweight. The timing can be a little tricky, so keep plugging away until you get it done!
Once successful, return to the main room and approach the back door. You’ll now be able to use the cogwheel here to open the door. Head on through and descend the stairs. At the bottom you’ll find an altar of sorts containing a Codex we can interact with to complete the Challenge Tomb [01/03] .
Now that we are done here, let’s head back to the main area and collect a few more collectibles on the way out. Upon exiting the tomb, turn right and find the pillar with the rope. Grab a Feather from the bird’s nest here if you need it before firing a Rope Arrow at the beam in the distance and climbing over to it. Drop to the ledge below.
Climb to the upper platform here to find a barrel with reagents. Continue to the end of this platform to find another Survival Cache [13/21]. Use the pillar with Rope here to create a zip line with the next beam wrapped with rope in the distance. Slide across to find another bird’s nest containing a Feather and a chest containing Relic [11/18 – Censer ].
Use the handholds here to climb up to a platform above and again use your Rope Arrow to create a zip line across to the far side of the cavern. Drop down to the ledge below and hop across the gap to the right. Squeeze back through the crack in the rocks here to reach the ‘Frozen Gorge’ Base Camp.
Use the Base Camp to fast travel back to the ‘Logging Camp’ Base Camp to continue.
No Comments