
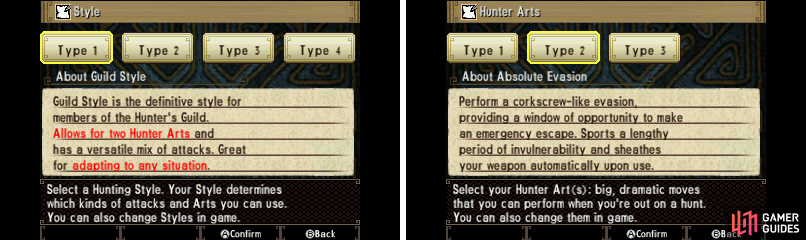
Select your starting hunting style and art(s). Don’t worry, you can change them later!
The first thing you’re going to need to do is select a file to save to (you have three), and create your character. Your character is more or less fully customizable (aside from body types, alas), so go wild. You can even give yourself a bright pink beard. Unlike in 4 Ultimate , you will not be customizing your primary Palico right away. That will come later.
Towards the end you will be asked to select a panel scheme for the touch screen and a hunting style. Don’t worry, these can all be changed in-game to your heart’s content, and are not set in stone. Once all is well and done, you will be sent to your very first village: Bherna Village . Welcome to the world of Monster Hunter !
There is no storyline in this game, not even an excuse plot, so you have a lot more free reign. This comes at the cost of very little in the way of tutorial or guidance, but don’t worry, we’ve got your back. So first things first! Red speech bubbles indicate that you must talk to the person to unlock more quests and progress. So make sure you hit up all of them. Yellow speech bubbles are optional. Any facility that you haven’t used yet will have a yellow speech bubble and when spoken to, you will receive a short tutorial/overview of what they offer. Additionally, random NPCs with yellow speech bubbles will usually have some sort of village request , which we will cover later.
Always check the red speech bubbles!
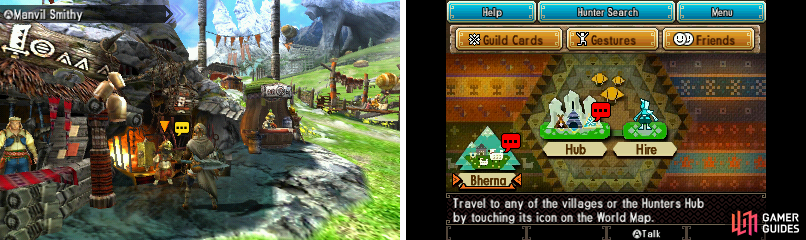
So first, talk to the Bherna Village Chief . He’ll inform you that you’re here to work for them as part of the Wycademy Guild. That’s about all the plot you’ll get—you’re a hunter for hire, a mercenary who, for the duration of the game, will be able to work for Bherna Village and a variety of other villages too. Check out the Villages section of our guide for a detailed rundown of the four major village hubs of this game!
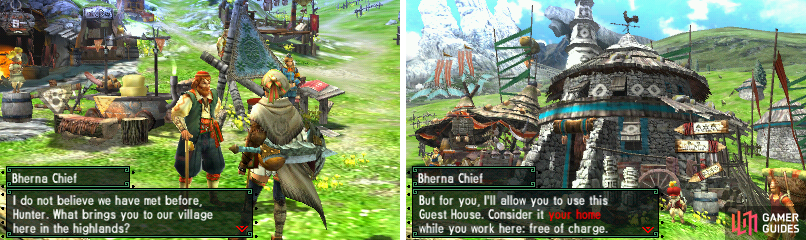
Talk to the Bherna Chief.
Once you’re done talking to all the red speech bubble people, be sure to visit the Palico Ranch. There you can customize and recruit your first ever Palico, meet Neko (means “Cat”), and a variety of other things. Check out our Facilities guide section for more details. Additionally, be sure to visit your House , the little grey building. You’re a lucky little hunter and you have your own Housekeeper , a very capable Felyne who will handle a variety of tasks for you, and also is where you can access DLC.
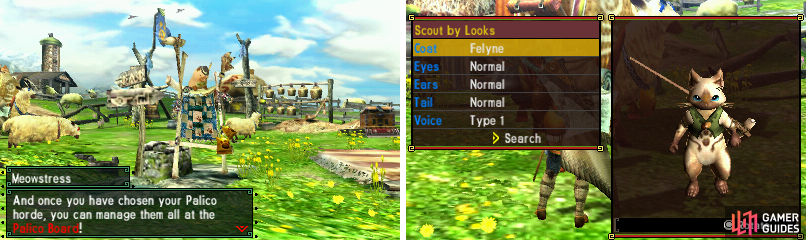
Just once, you can pick out exactly how your Palico friend will look.
After all of this, you can then talk to the Bherna Gal . She’s the girl in the blue by the Purr-prietess, a Felyne cook who will cook your meals for you. From here, you can accept Quests. You will see two tabs, Training and 1 Quests* . Training Quests are where you will find tutorial quests. Remember in previous games how you had to do all this mandatory herb-farming, potion-making, meat-cooking stuff before you can take on the real quests? Well if you’re a series veteran, you no longer have to do them! And if you’re a series newcomer, you should probably do these. They aren’t mandatory and they have some modest rewards, but will be worth your while if you have never played Monster Hunter before. Training Quests, due to their straightforward nature, will not be covered.
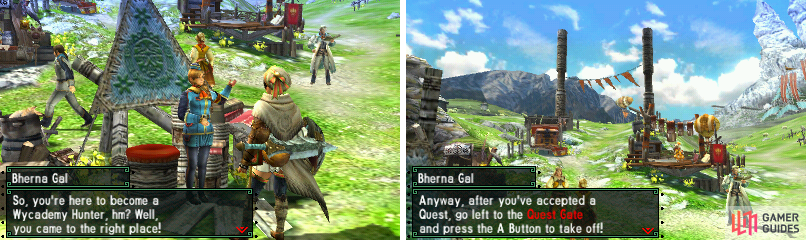
Talk to Bherna Gal for your first quest!
In order to progress to 2* Quests, you will need to complete Key Quests , quests the game has decided must be cleared. Of course, the game is also quite secretive about which quests are key. The Bherna Gal will sometimes drop a few hints, but for the most part you’re left on your own. Clearing every single quest will give you a nice, pretty check mark, so that’s one way to ensure you’re getting everything done. But if you’re in a hurry, we’ll let you know which quests are the important ones.
You are now officially an expert on how this game will progress!
…Oh, you’re not? Well, don’t worry, the other sections of this guide talk about all of these things more in-depth, and we’ll be covering them as we go.
Quests will be displayed in this guide in a table format so that they are easy to find and read. Pertinent information will be displayed in a very short paragraph below said quest. Quests without any really important notes will just be displayed in one continuous table. With the exception of 1 Quests* , all quest tiers will present the key quests first , then the non-key quests, so you can see what’s important.
Find the Ferns
Objective: Deliver 8 Unique Ferns
Location: J. Frontier
Subquest: Deliver 10 Unique Mushrooms
Notes: This is the first quest on the list and is a key quest—the closest thing you’ll get to a mandatory tutorial and thankfully so. Unique Ferns are Account Items . They have no use to you as a hunter and exist to be delivered to clients or converted into resource points. You can find them at plant gathering spots alongside actually-useful items such as Herbs, Antidote Herbs, etc. The area you will be at is the Bherna Village area, Jurassic Frontier. Cheesy name aside, this is a pretty basic area that contains a diverse number of places—open fields, caves, a wyvern’s nest… A good starting area as any. Fern gathering areas are everywhere, such as areas 1 and 2.
The subquest, delivering 10 Unique Mushrooms , involves gathering anywhere you see mushrooms on a log. Areas 6, 4, and 11 are a good start. When you return to base camp, be sure to deliver to the red box , and deliver subquest items first!
Fungal Hunt
Objective: Deliver 5 Abyssal Mushrooms
Location: J. Frontier
Subquest: None
Notes: Completing “Find the Ferns” unlocks this quest. Abyssal Mushrooms can be found only in areas 9, 10, and 11 of Jurassic Frontier. Their item description and their name notes that they only grow in darker parts of the forest, so take that to heart as you search. This is a key quest!
Wipe Out!
Objective: Slay 10 Maccao
Location: J. Frontier
Subquest: None
Notes: This is the third Key Quest. You are tasked with slaying little mooks called Maccao. They’re the bright green dinosaurs that are running around Jurassic Frontier making a nuisance of themselves. They’re everywhere too, so it’ll be easy to kill 10. No subquest this time!
Complete any one of these quests (I recommend you deliver some Unique Ferns to get it over with) and then talk to the Bherna Chief again. You will be given an official introduction to Village Requests!
Village requests come in two flavors: Quests and deliveries. A re-quest (ha!) will take the form of a standard quest and when completed, you will usually talk to the person again for a reward (which usually takes the form of resource points , secondary currency you can use for a variety of transactions). Deliveries require you go to the Palico Ranch to talk to the NPC Neko (means “Cat”) and then deliver the required items. Afterwards you receive a reward.
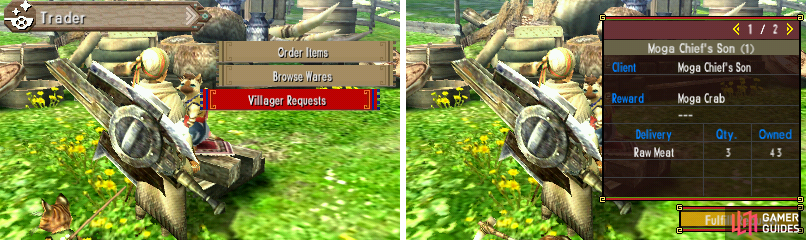
Villager requests, via Neko (means “Cat”).
Your very first request will come from the Palico Ranch. You’ll probably first notice that the Dojo is open for use, but you have more important matters at hand right now! See the girl by the big Moofah? In case you haven’t met her yet, she’s the Palico recruiter. She needs some help, too.
Another Pack Attack
Objective: Slay 10 Jaggi
Location: J. Frontier
Subquest: None
Notes: This is the final Key Quest. Jaggi are smaller purple dinosaurs. Players from 3 or 4 Ultimate will be familiar with them. There are going to be some larger purple dinosaurs running around, those are Jaggia , female Jaggi, and will not count towards your total kill count. They are annoying though so you might want to kill them anyways—they yield two carves instead of one, as well. Area 5 spawns Jaggi continuously and you can also check out areas 8 and 9.
After you have completed the four key quests in this tier, talk to the Bherna Chief, he has some urgent news…your very first Urgent Quest! These quests are going to be a step up in difficulty from what you’ve been used to, but clear them and you can go to the next level of quests (in this case, 2*). So what are you waiting for? Get to it!
URGENT: Vaulting Outlaw
Objective: Hunt a Great Maccao
Location: J. Frontier
Subquest: Slay 5 Maccao
Notes: This is your first ever quest where you’re hunting a large monster . These monsters are going to be much larger in scale than the small Maccao or Jaggi, have a much larger diversity of attacks plus a more sophisticated AI, and can be targeted with the L-trigger camera lock. You got this game for these.
Sorry to disappoint you though. You first ever large monster is a Great Maccao , the souped up alpha male of the Maccao, and he’s not as impressive as you think he is. Head to Area 5 for his introductory cutscene and start wailing on him! Be sure to bring Paintballs to throw at the Great Maccao to mark him on the map—he travels using paths that you, the hunter, can’t access, which may throw you off a little. The subquest, slaying 5 Maccao, should happen automatically as they get in your way and die.
Completion of this urgent will unlock the 2* Quests. You’ll get some cooler bigger monsters now, I promise. You’ll also unlock more ingredients at the kitchen, so go make some new recipes! And, finally, you will be able to use the services offered by the Flight Cattendant . This allows you access to the other three villages: Pokke, Yukumo, and Kokoto Village . These are all villages present in previous Monster Hunter games and will come with their own slew of Village Requests. It’ll get pretty messy pretty fast but we’ve got you.
No Comments