


| Items In This Area |
|---|
| Goddess’s Magicite • Orrachea Armlet |
Cellar
After watching a scene showing a possible future complication, you’ll find Vaan in the Cellar Stores which are part of the Royal Palace. Looks like there’s a few goods you can loot in here, but Vaan’s probably after more exquisite goods. Ah well. Open the decorative urn nearby to claim a map of the area, then save your game at the Save Crystal, if you wish. When done, open the door to the east to reach the Cellars area. Make your way north through the cellar and approach the crowd to the north, where you’ll witness some Imperials ordering around the palace staff. More importantly, they prohibit all travel upstairs, and leave a guard behind to enforce it.
Before you try your luck getting upstairs, loot the cellar, as there are plenty of chests around. Most of them have low-end restoratives in them, but one of the two chests in the southeastern corner of the cellar contains an Elixir , which is a fine healing item, indeed. Note that these chests will not respawn.
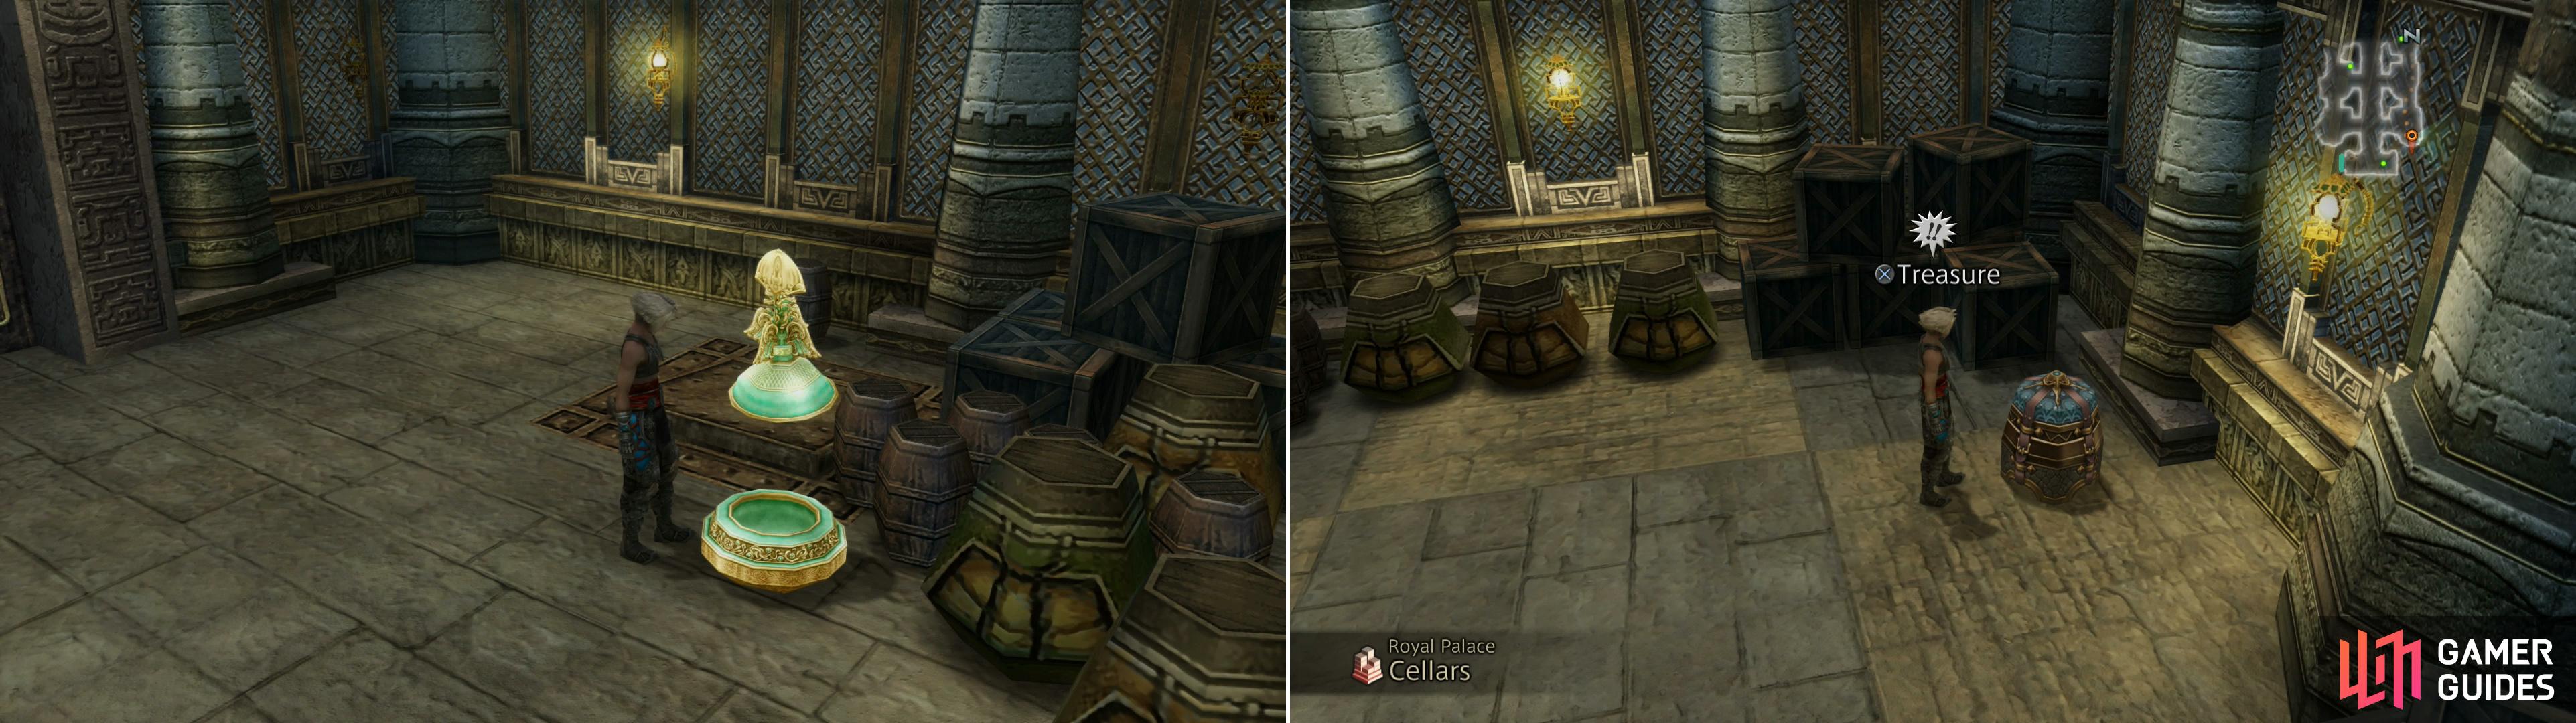
When you surface in the Royal Palace of Rabanastre, grab a map out of a decorative urn (left), but don’t neglect to other treasures in the palce (right)!
Once the loot has been acquired feel free to run around and talk to your fellow plebs, many of which vaguely hint at larceny of some sort. Maybe the Imperials are right to treat Dalmascans with a heavy hand? When you’re ready to move on, approach the stairs only to have the Imperial posted there stop your progress. Witnessing the scene, a nearby Seeq will misinterpret your plight and with this misunderstanding conceive a desire to help you get upstairs. Talk to the Seeq and when prompted press [Square] to call the guard and lure him over to the Seeq. If he gets too close to you he’ll spot you and you’ll have to try again, so wait for him to walk a few steps towards the Seeq, then begin to move over to the stairs, giving the guard a wide berth. This event isn’t timed, only the guard’s proximity matters, and once he’s by the Seeq he’ll stop moving.
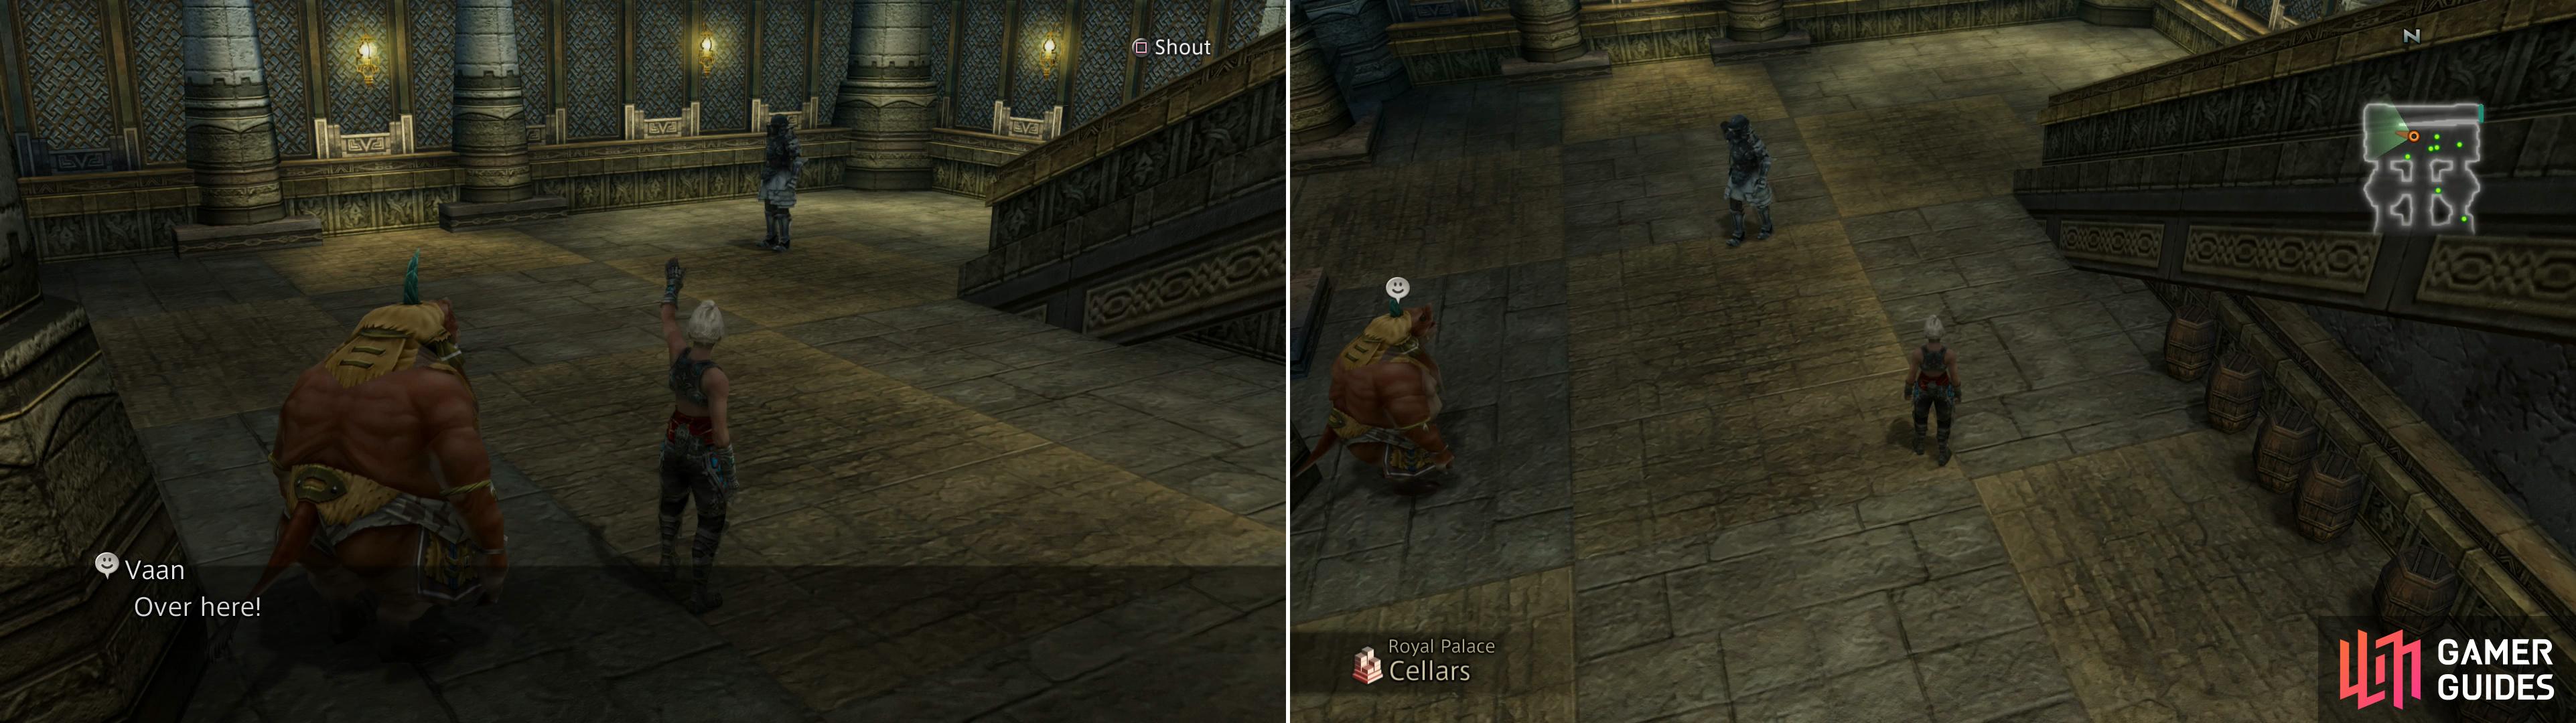
Lure the Imperial (left) then wait for him to move over to the Seeq and calmly walk around him (right).
Lower Halls
Head upstairs and through the door to reach the Lower Halls, where Vaan will recall what Old Dalan told him back in Lowtown. Looks like you have some searching to do, but there’s one small problem - the place is crawling with guards! Fortunately, the Archadian army isn’t renowned for the intelligence of its foot soldiers, and these ones are good examples why. They’re all stationary, and if you run into them you’ll just be sent back to the beginning of the area, and to achieve that you quite literally have to run into them.
From where you start, head east down the hallways to find a four-way intersection, at which turn north to find your first batch of guards. You’ll need to move these goons eventually, but first, let’s grab some more treasure. At this four-way intersection turn south, then east down another corridor when your way south is blocked. Shortly you should reach a three-way fork, at which turn south again and ignore all the nearly-blind guards to the east that guard dead-end passages. Climb some stairs and loot a chest in the corner to find an Orrachea Armlet .
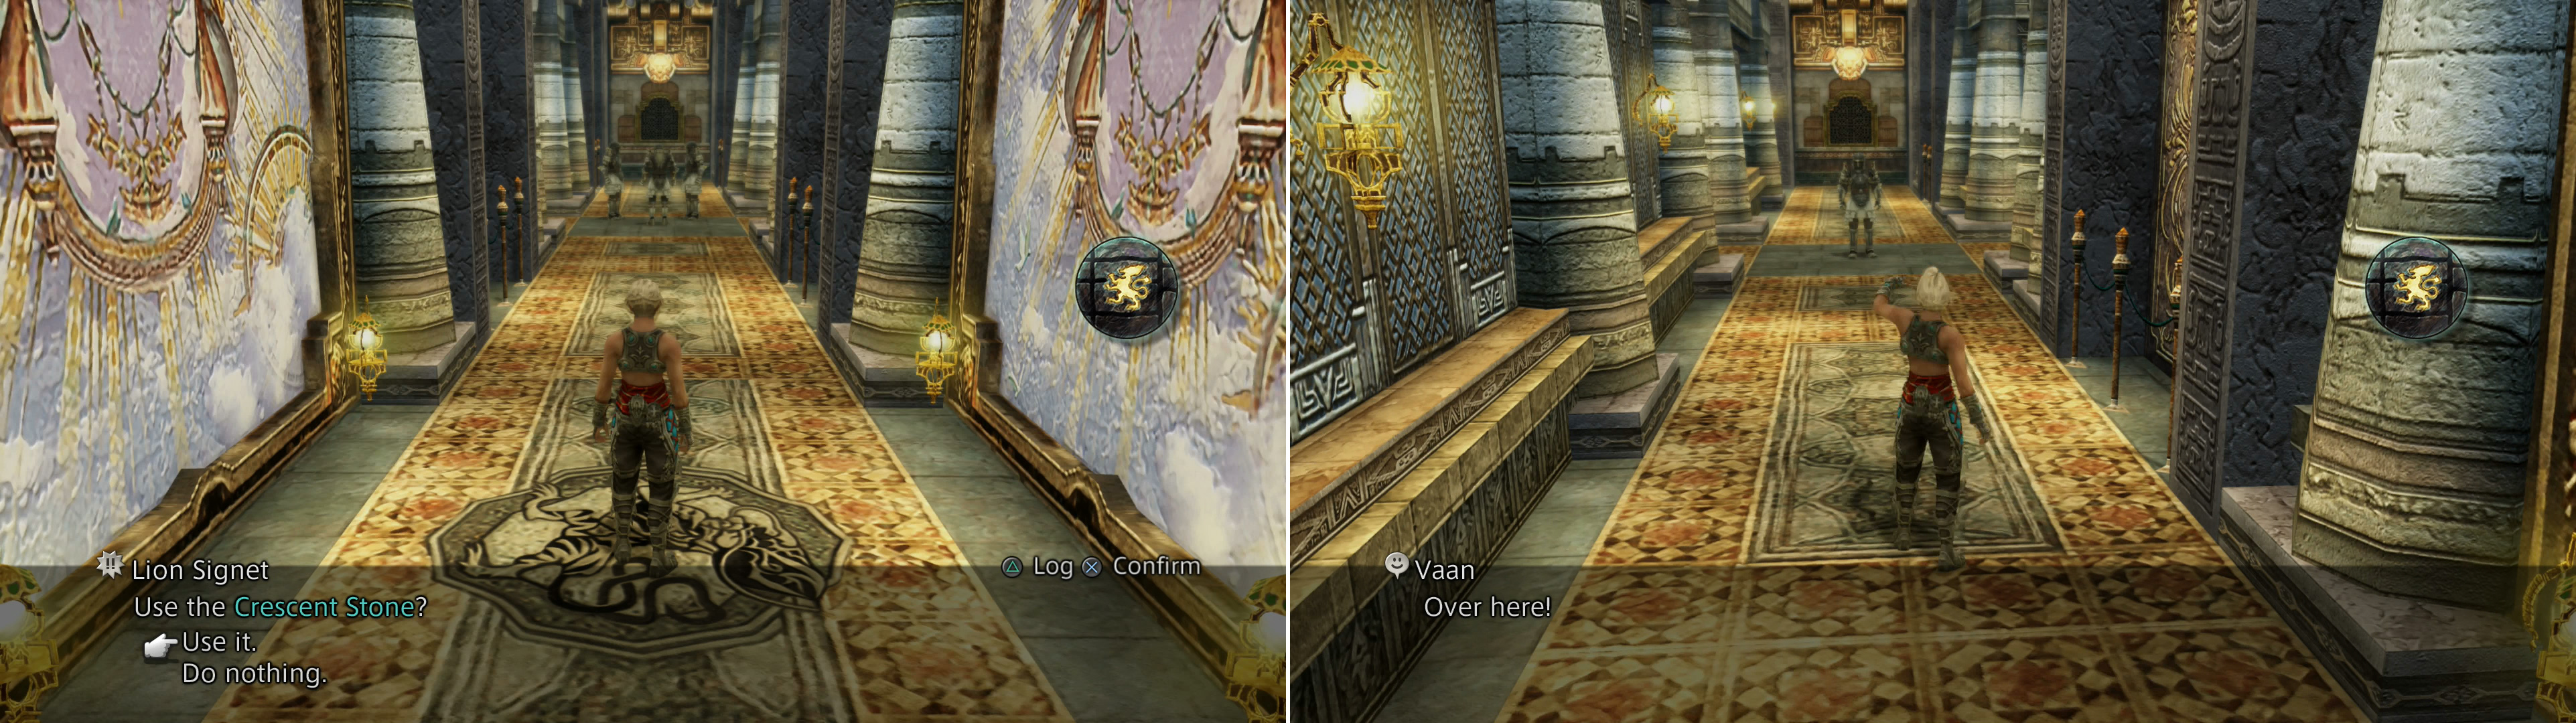
Use the Crescent Stone on the Lion Signet (left) then lure Imperials out of your way (right).
Once that’s yours backtrack up the hallway to the north, then west, then north again to return to the four-way fork near the entrance. Time to get rid of those guards. Turn east at this fork and head down the hallway until you find a Hawk Signet on the ground. While you were instructed to look for such a device, this isn’t the one you’re after. Continue a bit east and you’ll get a prompt to shout (press [Square]), which will lure the guards towards you. Do so, then retreat back west to the four-way, at which turn south and continue to the corner. When the guards occupy the four-way, shout again to lure them down to the corner, while you retreat to the large corridor to the east.
The first group is neutralized, now it’s time to take care of the second group of guards - the ones standing north of the four-way near the entrance to the level. Walk up the corridor to the north and take the first hallway to the west (the one with the Hawk Signet) to return to the four-way fork. At the fork turn north and shout at the group of three guards, then retreat back east. When you’re back in the large corridor on the eastern edge of the area, continue north and head down the first hallway to the west. In the middle of this hallway you’ll find a Lion Signet, which you should examine (press [X] while standing on top of the signet) and while so doing use the Crescent Stone when prompted.
Behold, the secret way is lit! And it just so happens to lead you to an ornate grate along the wall in the northwestern section of the level. From the Lion Signet head west to find another four-way, at which turn north and lure a lone guard to you. While he rushes over to the four-way, return back to the large corridor to the east and continue following it north until you find another hallway to the west. Proceed down this northern-most hallway and when you hit a four-way, continue west to spot a pulsating green light behind the ornate grate on the wall. Investigate this “Faint Light” and select the option “Approach the Wall” when prompted.
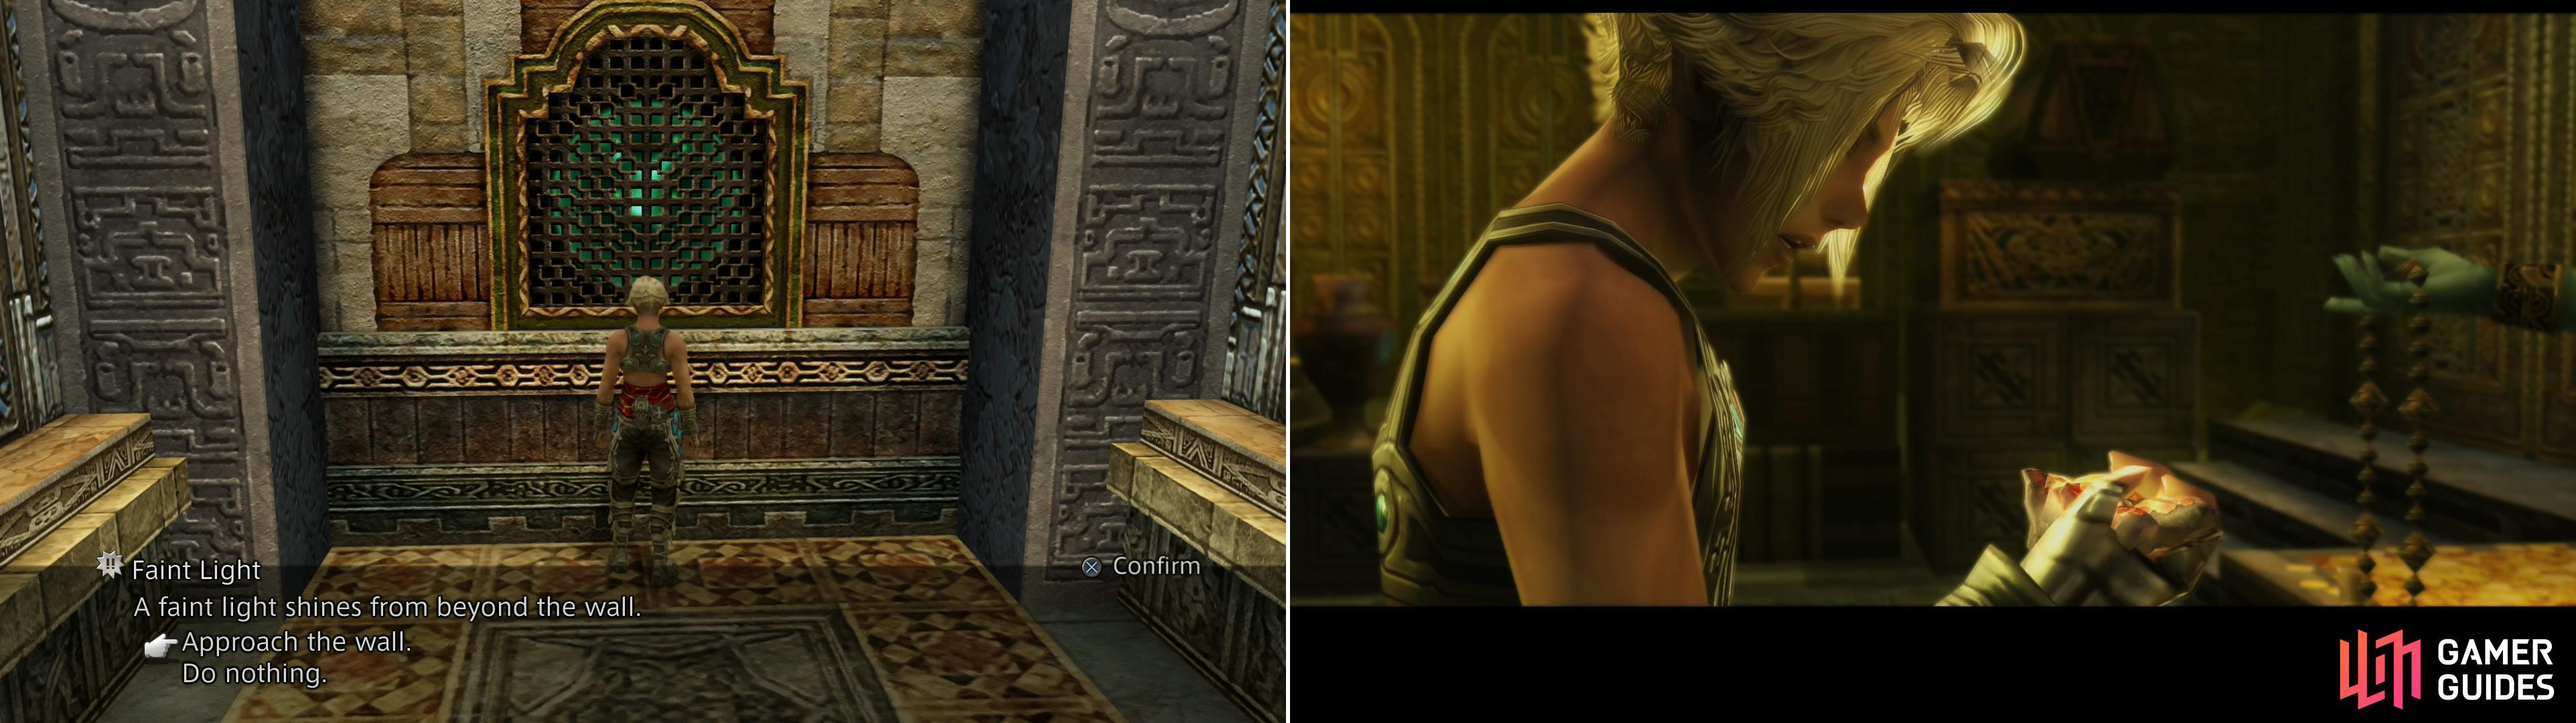
Find the hidden door by searching for the wall with the glowing light (left), after which Vaan will claim a choice bauble from the treasury (right).
Secret Passage
Well, looks like everything Old Dalan told you was true - you found the back door through the sewers and the secret passage in the palace itself. Now to just locate this treasure room. Head down a hallway to the west and note the door to the north. You can’t open it conventionally, so continue to the western end of this hallway and search the southern wall to find a hidden Switch. Press it, then return to the door and examine the “Suspicious-looking Wall”. Yeah, it’s suspicious looking, because it’s actually a door! Pick the option “Examine the wall” and Vaan will find his way into the treasure room. Unfortunately, he’s not the only person to discover it, and politics conspire to make the situation even messier…
When you’re back in control of Vaan head up the nearby stairs and witness the chaos that has engulfed the Royal Palace.
No Comments