| Bestiary |
|---|
| Adamantitan • Dive Talon • Greeden (Rare Game) • Slaven Wilde • Wild Saurian • Worgen |
| Items In This Area |
|---|
| Arc Scale • Barheim Key • Black Cowl • Bone Helm • Bone Mail • Bone Mail (Drop from Wild Saurian) • Burning Bow (Drop from Dive Talon) • Deathbringer (Steal from Ithuno) • Demonsbane • Diamond Shield • Dragon Shield • Enchanter’s Habit • Firefly (Drop from Slaven Wilder) • Glacial Staff • Gladius • Golden Amulet • Hammerhead • Headband • Magick Gloves • Obelisk • Seitengrat • Soldier’s Cap (Steal from Adamantitan) Steel Poleyns (Steal from Worgen) • Thorned Mace • Valeblossom Dew • Viking Coat • Wyrmfire Shot. |
The Lost Cactoid
The next stop on this road to power is the South Bank Village in the Estersand, so use a Teleport Stone at a Gate Crystal to instantaneously travel to the “Dalmasca Estersand” destination. Your goal is to finish up the Patient in the Desert sidequest, but before you can do that you will have to complete another sidequest: The Lost Cactoid.
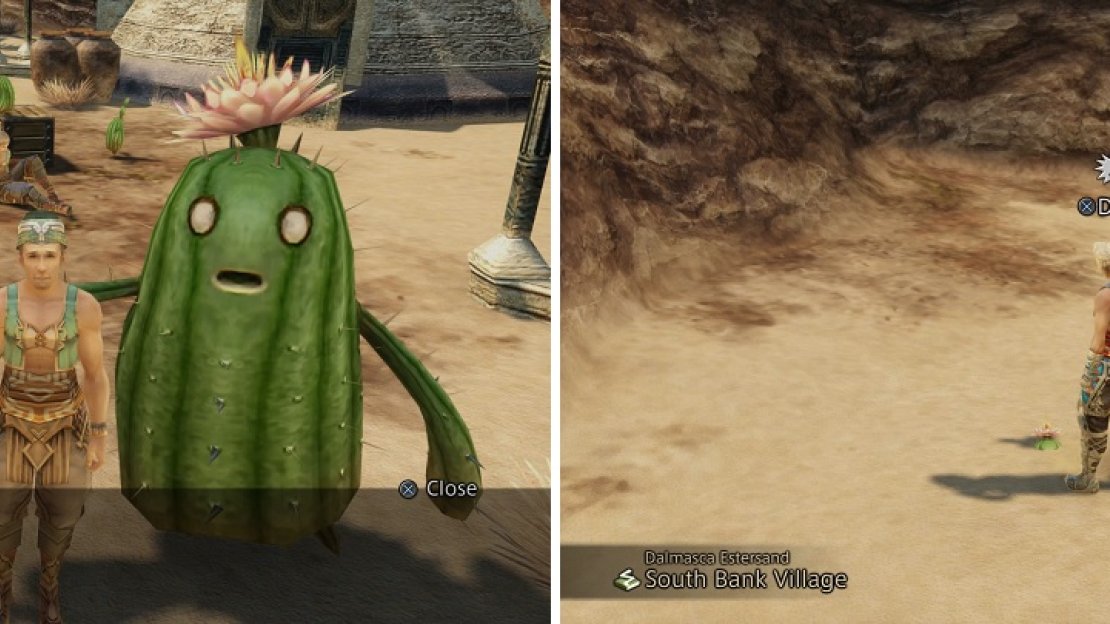
The Cactoids are just looking for their family (left). Dran can be found behind the one hut in South Bank Village (right).
When you arrive in South Bank Village, make your way north to find a child named Tchigri standing on a dock. Talk to the kid and offer to help him with his problem after which you will automatically be taken to North Bank Village via the boat. When you arrive you’ll see a bunch of Cactoids flailing around near some villagers. Fortunately the Cactoids flee shortly after you arrive, so approach the villagers and talk to Ruksel, Tchigri’s father, whereupon you’ll initiate another scene. It seems that these Cactoids are one big family, and the mother Cactoid (they have genders?) is looking for one of her children, named Dran, who has gone missing. This Dran is one bad apple, er, Cactoid, and mother Cactoid is trying to find him and set him straight, although she’s admittedly not setting a very good example by wantonly kidnapping people and forcing them to help with her search. That aside, it looks like you’re going to have to find Dran for the Cactoid family, or else they’ll keep misbehaving.
After meeting with the mother Cactoid, you’ll sail back across the river to the South Bank Village. Once you arrive, speak with Dantro’s Wife to learn that the Flowering Cactoid you hunted earlier was likely this Dran. Oops. The Cactus Flower you brought her earlier was thrown out back, so go behind the hut and inspect it to have a Cactoid pop out of the ground. Lead this back to the boat with Tchigri and have him take you back to North Bank Village. Approach the Cactoids in the middle of the village and Dran will reunite with them, finishing up this short sidequest. Hopefully getting smacked around, boiled and tossed outside taught Dran some manners.
| Reward (For reuniting the Cactoid family) |
|---|
| 1,000 Gil |
| Wyrmfire Shot |
The Yoma
With the Cactoids all happy and back together, they scurry off and you will have free access to the northern areas of the Estersand. Not only will you encounter greater dangers, as the enemies are stronger than in the other areas of the Estersand, but the treasures have received a boost, too, making the danger that much more tempting. Exit the North Bank Village via the area transition to the west to arrive in The Yoma, the first of the two zones. The main predator here is the Worgen, a more dangerous variation of the Wolf.
Worgen :
Worgens are an upgraded Wolf, pretty much, although they do have a few new skills that Wolves didn’t have. They can counter your attacks, as well as use Eerie Soundwave to damage not only their target, but also those close to them. In addition they also have Screech, which deals damage and can also inflict Confuse. Note that you may find an Alpha version prowling about, which, while similar to the others of its species, are stronger and possess more HP. They can drop a piece of Fire Magicite, Nu Khai Sand, a Quality Pelt, or a Libra Gem, plus you can steal Fire Magicite, a Hi-Potion or Steel Poleyns from them. They are weak to water.
Apart from one more enemy to the north, the rest of the enemies in this area are just higher-leveled versions of ones (or the normal version, in the case of the Dive Talon) you’ve already encountered. As soon as you enter this zone, head south to the shoreline and you might see a treasure by a trap there, which might contain a Demonsbane (Swords 5). Head west to the mountain dividing the southwest portion of the zone from the southeast, and follow it north and then east a little bit to spot another potential treasure nestled in the little dip on the map, which could yield a Gladius . From the chest with the Gladius, continue west and slightly northwest to spot another treasure sitting out in the open.
This one could contain a Bone Helm (Heavy Armor 5) and to the west of that one is another treasure that might give you its matching piece, the Bone Mail (Heavy Armor 5). Both of these pieces of armor halve Dark damage, but make you weak to Holy damage. If you don’t get either of these, you can use the transition to the Westersand along the western side of the zone to respawn the chests. Speaking of that transition, if you stick to the mountain as it goes north, you can nab one more treasure in this zone, which might yield a Hammerhead (Axes & Hammers 4). That’s all of the treasures you can grab here in The Yoma, but there are two more enemies that need to be talked about before you venture north to the next zone.
Dive Talon:
These flying monstrosities were briefly mentioned before, but you should be more than ready to tackle them now. As previously stated, you can only hit flying enemies with spears/poles, ranged weapons, Telekinesis or with magicks. They are weak to Earth but are only immune to Stop, Confuse and Slow. You can steal a Giant Feather, 120 gil or a Taurus Gem from them (can steal off flying enemies normally, for some odd reason). They can drop a Wind Magicite, Handkerchief, Giant Feather or a Burning Bow (Bows 5). Remember that Dive Talons are docile and won’t attack unless they are provoked.
Wild Saurian:
Unlike the Saurian in The Stepping, the ones north of the North Bank Village are aggressive and will attack on sight. They can hit a little hard, but nothing you can’t handle with the equipment you’ve gotten thus far. Their Sonic Fangs attack has a very small chance to deal an instant KO to a character and Screwtail, which it only uses when it’s low on health, hits in front of it and could hit multiple characters. The Wild Saurian is weak to Wind and can drop a Tanned Hide, Earth Magicite, Chronos Tear or Bone Mail. You can also steal a Tanned Hide, Hi-Potion or Leo Gem from it, as well as a Tanned Hide or Tyrant Bone should you decide to Poach it.
There’s a lot of nice treasure to be grabbed in the northern areas of the Estersand, especially if you go there as early as possible.
Broken Sands
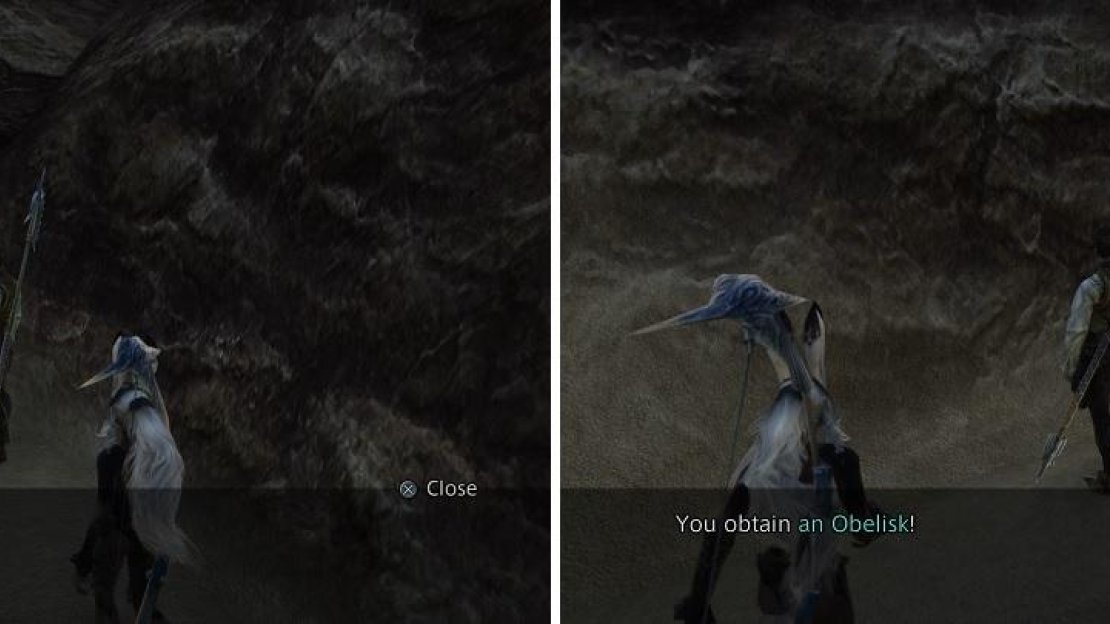
Once you’re done fooling around in The Yoma, go north into the next zone, the Broken Sands. The enemies here will be the same, with an exception in the far north, but there’s also more treasure to be had here! As soon as you enter, look to your west and you should spot a little dead end on your map, which can house a treasure with an Obelisk (Spears 3) in it. Continue north past the first, slightly open area and to the second, where there will be another chest on the west edge, this time containing a Dragon Shield (Shields 4), which grants immunity to Earth damage. Return to the entrance now and follow the southern edge of the map to the east this time, where you might spot a treasure towards the southeastern corner, with this one yielding a Black Cowl (Mystic Armor 6). Grab this wonderful Mystic Armor now and it’ll prove superior to anything else you’ll find for quite a while.
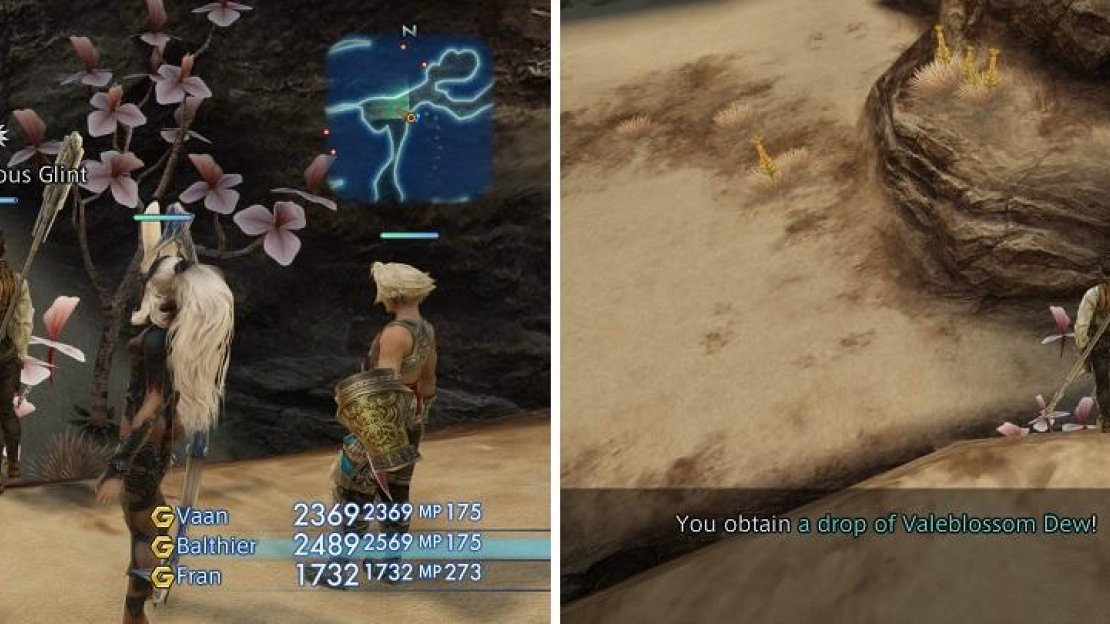
Go back to the entrance one more time and head up the middle path this time, where you should notice some pinkish flowers in the crevice in the middle. Approach them and you should receive a prompt to pick up a “Mysterious Glint”, which will be the Valeblossom Dew that you need for the Patient in the Desert sidequest. There’s a total of three of them, although you only need one, but if you want the best reward, then you’ll need the three. Two of them are close enough to each other, one not too far north from the southern entrance and the second a little bit north of the first. From where you grab the Valeblossom Dews, go northeast and at the southern end of the hairpin turn, there will be another treasure next to the cactus, inside of which you may find Viking Coat (Light Armor 6). In addition to the typical Defense and HP boosts offered by this Light Armor, it also makes its wearer immune to Water damage.
There’s not much left here, but you do need that third Valeblossom Dew. Return to where you picked up a Dragon Shield and look to the east. The third Dew will be on the northern side of the crevice here and if you continue in that direction, you will see a large rock that you can push over, which will create a shortcut. The only things left now are in the northern section of the zone, so head there to find some docile creatures called Slaven Wilders, above which fly several Dive Talons.
Slaven Wilder:
You’ve encountered Slavens before in the dry area of Giza Plains, and this one is an enhanced version of one of those. They are docile and won’t attack unless provoked or if magic is used near them, although they also may turn hostile if another enemy is hostile near them. You will find that they are weak to Wind and immune to Doom and Poison, so you are free to use a wide array of ailments against them. They have access to Reflect, Protect and Shell, as well as Gnaw, Power Stun (hits one character) and Spinkick (can hit multiple). They can drop a Tanned Giantskin, Earth Magicite, Firefly or Gemini Gem, plus you can steal a Tanned Giantskin, Lightning Fang or Gemini Gem from them. Poaching them will always yield a Tanned Giantskin.
The Mysterious Glints you find near the pink plants (left) will yield the Valeblossom Dews you need for the Patient in the Desert sidequest (right).
You may also come across a Bangaa Pugilist up here, but don’t bother him and he won’t bother you. Go to the northern exit and look for the raised section to your south, where there will be a guaranteed chest at the end, housing some Berserker Bracers . There’s one more item for you to grab before returning to South Bank Village, which is at the end of the path that extends south in the northwest corner - it can give you a Diamond Helm . You will also find another rock here to create one more shortcut, so use it to make the trip back to North Bank Village a little easier. Note that the northern exit in Broken Sands just leads to Mosphoram Highwaste. Once you get back, take the ferry to return to South Bank Village.
Patient in the Desert (Part 2)
You will now be able to finish up the Patient in the Desert sidequest, provided you picked up the Valeblossom Dews in Broken Sands. Speak with Dantro’s Wife and hand them over, when she’ll notice that Great Serpentskin that you received from the Nidhogg hunt earlier. Give this to her as well and she’ll mention the patient is now recovering. Zone out and zone back in, then talk to Dantro’s wife again to find out that the patient made a startling recovery. He’ll be out behind the hut and depending on how many items you handed over, you will have a different NPC, who will reward you the Barheim Key , as well as another item.
If the NPC is a Bangaa, then you will receive a Balance Mote (this will happen if you gave Dantro’s Wife three to seven requested curative items). If he is a Hume, then you will receive Magick Gloves (eight to twelve items). The Moogle is who you really want, as he’ll appear if you’ve turned in all of the items already mentioned, and he’ll hand over another Golden Amulet . This should be your second one now, meaning you can double the earn License Points of two characters. With all of this powerful equipment, there is one more thing you can do in the Estersand, which involves going to Banks of the Nebra, the zone just outside of South Bank Village.
Greeden :
Greeden is a Rare Game that spawns in Banks of the Nebra, but instead of it being based on a percentage, you just need to wait around three minutes. However, there is one catch, it seems, as you can’t kill any of the Cactoids roaming about, but everything else is free game. Nothing passes the time like running around and slaughtering the wildlife. Once the time finally passes, it will spawn on the shore, usually between the two Ichthons there. Despite it being a higher level than usual (around the same as the Wild Saurians), the Greeden is relatively easy to defeat.
It absorbs Wind, so if you’re using the Gladius, equip another weapon for the time being. Greeden is immune to Doom, Poison, Disable and Sap, so you try and put Blind on it to reduce the number of times it can hit your characters. Its normal attacks can inflict Poison, plus it has access to Shell, as well as Ram, Fangs and Flash, the last of which can blind you. You can get it to drop a Braid Wool (common) or Blood Wool (rare), as well as steal a Wind Crystal from it (rare) and poaching can net you either a Pebble or Blood Wool. You have the Barheim Key, so if you want to do a little more digging for treasure, you can - otherwise, you can skip ahead to the “Rains in the Giza Plains” section.
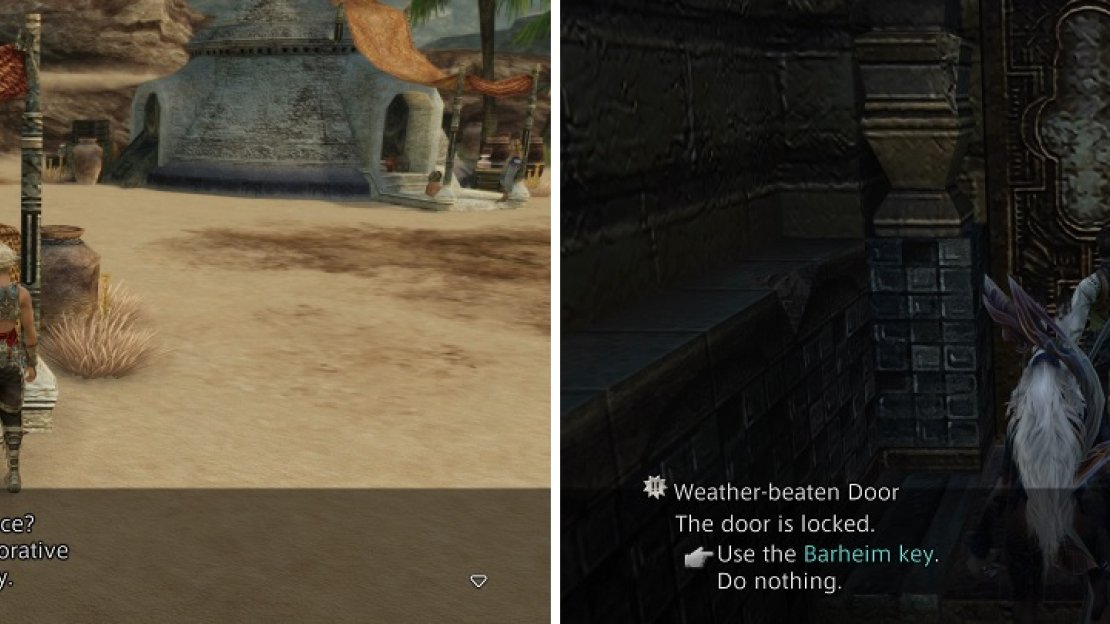
The Great Serpentskin from the Nidhogg hunt is used in the Patient sidequest (left). The Barheim Key from the sidequest will allow you to venture back inside the Barheim Passage (right).
Plundering Special Op Sector 5
Although this entire section has been optional loot-hunting, this is optional above and beyond that, in part due to the power of some of the foes you’ll be facing. Depending on how much loot you gathered in the previous steps, what level your characters are, and how many licenses you’ve purchased, this could be anywhere from moderately challenging to very difficult. If you persevere, however, the treasures you’ll get will make you significantly stronger, so it’s arguably worth giving it a try.
Now that you have the Barheim Key you can revisit the Barheim Passage, but you’ll need to find another entrance, as the last one was blocked during your escape. Luckily for you, you should be very close to an alternate entrance to the place. In Banks of the Nebra area (in the Estersand), there is an area transition in the southeast corner which leads to a zone called the “Murmuring Defile”. It is here where you’ll find the locked door leading back into Barheim Passage, provided you have the Barheim Key, of course.
Open the door and head on inside and you’ll find yourself in the familiar Zeviah Subterrane zone, which isn’t any different than how you left it before, including the treasures and enemies. Look at your map and go north into the Great Central Passage, where the previously blocked western exits are now open for business. Take the southern of the two area transitions to the west to reach the Special Op Sector 5 area, wherein dwells the Rare Game you are after. It’s important to note that one quick look at the enemies in this area and you should see you don’t belong here. The Surianders here aren’t any different than previous ones, other than being almost level forty and hence a lot stronger. If your party’s level is in the mid-twenties and you have between 1,500 HP and 2,000 HP per each character, you’ve got a great chance of pulling this off. Test the waters and if they prove to be too strong, retreat to the previous area to regroup.
Ithuno, your target, spawns near the western end of Special Op Sector 5 and is a mimic, meaning you won’t see it roaming about like other enemies. While running to check if it spawned or not, you might as well check some other treasures to see if they contain anything good, right? Head west and you should see an alcove of sorts to the north. There can be two treasures here, one by a trap and another tucked away in the corner - you want the one in the corner, as it can yield a Thorned Mace . Continue west and you’ll run into a new enemy, the Adamantitan.
Adamantitan :
This giant turtle might seem familiar, but this beastie is definitely a tough cookie. Not only does it sport a lot of health, but it is a powerful attacker and has some sturdy defenses, the latter of which improves when it’s low on health. It also has access to a lot of magicks, namely Fira, Thundara, Blizzara, Aquara, Protect and Shell (the attack ones hit in an area-of-effect). Stone Gaze can petrify a single character, Restore and Meditate can replenish some HP, Purify gets rid of any ailments, and Flatten/Stone Stomp are attack moves. Should you try to take one down, you might get a Turtle Shell, Water Stone, Phoenix Down or Water Magicite as a drop. You can also steal a Water Stone, Aries Gem or Soldier’s Cap from the overgrown turtle.
There are three treasures near where the Adamantitan is located, one at the dead end to the west ( Headband ) and two to the northeast (northern of the two is a Diamond Shield and southern is an Enchanter’s Habit ). Luckily, that’s the only turtle here, as you’ll be greeted by more Surianders to the west. At the very end, in the southern portion of the dead end will be a guaranteed chest with an Arc Scale (doesn’t respawn). Next to a rock in the little path might be another treasure, housing a Glacial Staff (Staves 4). If you get your hands on this staff now, you won’t need another weapon for your Black Mage for some time. If you see another treasure next to the one with the Glacial Staff, then that will be Ithuno, posing as glorious loot to unsuspecting hunters.
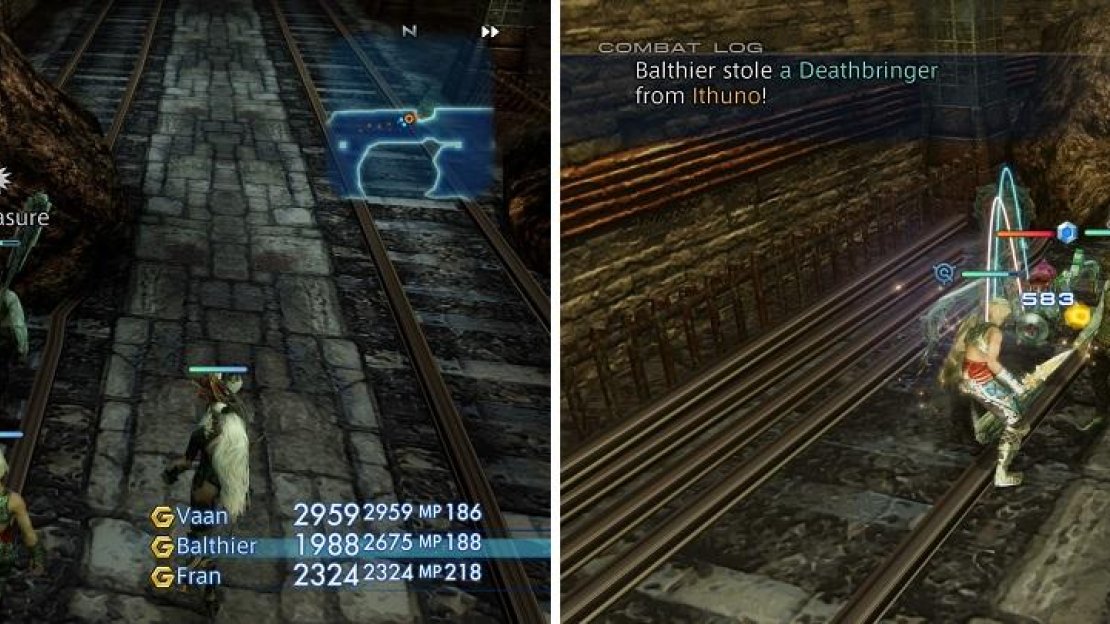
It’s easy to tell when Ithuno has spawned, due to the chest looking different (left). The sole reason you ventured inside Barheim is to steal the Deathbringer one-handed sword (right).
Ithuno
This devious mimic has a 20% chance of spawning upon each entry to Special Op Sector 5, in the same spot described above, so exit/re-enter until you finally see it there. You’re not here to kill it, though, as Ithuno holds a very powerful one-handed sword, the Deathbringer (Swords 8). Before you wake it up from its slumber, cast Protect on your party and set your Cura gambit to around 50-60%, to be on the safe side. You also want to equip the two Thief Cuffs to characters, as they will help, since the Deathbringer is a rare steal. Ithuno only has two attacks, in addition to its normal one, Lunge and Leech. The damage inflicted by its normal and Lunge attacks can be reduced by Protect, but Leech seems to always do the same range of damage. Once you’ve stolen the Deathbringer, quickly make your exit to the previous area and save at the Gate Crystal to the north, then it’s time to get back to the story, provided you want to avoid the completely overpowered bow below.
The Bow of Destruction
The Seitengrat is one of three pieces of equipment in the game that are invisible when you equip them, and they also don’t have any corresponding licenses, so every character can wield them. Let’s preface this by saying the Seitengrat is extremely powerful, capable of killing enemies very quickly, as a level 23 Vaan (as Shikari with a decent amount of the license board unlocked) can deal upwards of 4,000 damage with this bow. If you don’t care about trivializing the difficulty of the game, then by all means, you can go and get yourself three of these and breeze through the majority of the game.
Normally, the Seitengrat can be one of the hardest treasures to get, as the chest only has a 1% chance to spawn, with an 80% chance of containing gil. You need to have a Diamond Armlet for this, which you should have from the “Exploring the Westersand” section, although you can also grab one from one of the treasures in level 1 of Trial Mode. This method of obtaining the Seitengrat will use some RNG (Random Number Generator) manipulation, changing the 1-in-10,000 chance to 100% chance.
To start off, you want to start a new game, which will help in guaranteeing the treasure to spawn. It might seem weird, but for some reason, it will all work out in the end. As Reks, you want to head inside the fortress and make your way to the Save Crystal. In the area just past the Save Crystal, Reks will stay behind and fight three Imperial Soldiers. Defeat them, then return to the room with the Save Crystal. Make a hard save here on a different file, as you will be returning to this shortly.
Once you do this, load up your main game file and head to Rabanastre, specifically the Westgate. Go into the Aerodome and book a ticket to Nalbina, picking the Leisure option. When you do this and regain control, you want to go outside to the deck, which will create an autosave. While you’re out here, it’s a good idea to take a look at the NPC you will be using later, as well as ascertain the location of the Seitengrat chest. Go up the stairs and you should see a NPC on the stairs named Boonswaggled Bookkeeper. This NPC will move from his initial position on the stairs, run up to the upper deck, then move back down to the previous spot - this will be important in a bit.
At the top of the stairs, look straight to the end to spot the large structure connected to the airship. The treasure will spawn right in front of this and you’ll know it’s there, since it feels like you are hitting an invisible wall. Yes, the treasure itself is invisible and there is no button prompt to tell you to open it. Anyway, the autosave has been made, so you want to close the game completely, which you can do by holding down the PS button and choosing “Close Application” from the menu. Once you do this, start up the game again and load the file that has you playing as Reks from earlier.
You should still be at the Save Crystal inside of Nalbina Fortress. Do not exit this area, as doing so will overwrite the autosave on the ferry, making you have to go back and do that again. While near the Save Crystal, you want to cast Cure on yourself until you get certain values. These values are going to be a heal of 88, 97 and then 90, in that order. It may take a bit, but you don’t want to go real quick and overshoot, as you will need to start over with the Cure step. You are free to use the Save Crystal to replenish your MP until you get the values listed above. Another combination that seemingly works is 97-94-95. When you get those three in that order, press Options and Square to return to the main menu.
With the method outlined, you too can be the proud owner of an overpowered bow!
Load up your autosave from the ferry and run up the stairs, looking to “see” that the treasure has now spawned. Quickly turn around and the Bookkeeper NPC should now be at the top deck, marking the first time he has done this. Yes, while standing at the chest, keep the camera panned on him and wait for him to go up and down a total of three more times. Make sure you have the Diamond Armlet equipped on your lead character and on the fourth time he reaches the top, open the chest to loot your Seitengrat . Why does this work? Who knows, but it does and you are the proud owner of the most powerful weapon in the game. Make sure you go back to the ground to save. If you wish to get more of this weapon, you can start again from the Ferry Autosave step.
After all that looting and plundering, you should be strong enough to make the next few story sections trivial. Speaking of which, that’s all you can reasonably do for now, so return to Rabanastre with your mind set on the task of slogging through the Giza Plains.

No Comments