| Bestiary |
|---|
| Gigantoad • Imperial |
| Items In This Area |
|---|
| Altair • Chromed Leathers • Kotetsu • Leather Breastplate • Leather Helm (Steal from Gigantoad) • Light Woven Shirt • Mace • Oaken Pole |
Out of the Fire, Into the Sewers
After the scenes that follow, Vaan will find himself - by some stroke of mad luck - back in the Garamsythe Waterway. Unfortunately he’s accompanied by the two rival thieves, Fran and Balthier, who covet the pretty stone Vaan stole from the treasure room. While it might be unfortunate for Vaan, from a story perspective, it’s fortunate for you, as these sewers are a bit more dangerous than the previous stretch of sewers was, and the extra help will come in handy. Balthier and Fran can be controlled like any other character, and you can even take direct control over them (press [Up] or [Down] on the D-Pad), assign them a License Board class, change their equipment, all that good stuff.
Balthier’s low Magick Power means he likely won’t excel as one of your primary casters, but his other stats are sufficient to make him a competent Shiraki or Uhlan. Since Vaan and Balthier both make good fits for the Uhlan/Time Battlemage and Shiraki/Foebreaker roles, it’s not a terrible suggestion to give Balthier whatever of those two classes Vaan doesn’t currently occupy. Fran, for her part, is unimpressive or middle-of-the-road, but she makes a fine tertiary caster. If you care about lore, it’s hard to argue with Red Battlemage/Archer, since Fran starts out using a bow and Viera are customarily associated with the Red Battlemage role. She also makes a fine White Mage, if you didn’t assign that job to Penelo already.
In fact, there’s a bit more you can do with them, too, as you’ll find out once you progress a tiny bit further. Head south and save at the Save Crystal, then head down some stairs to the north to get an advanced tutorial on Gambits from Balthier. Yep, this is that “tiny bit further”, and after the game is done showing you these tutorials, you’ll find that the Gambits and Party options have been added to the Party Menu.
Tutorials - Advanced Gambits
Penelo introduced you to the magical world of Gambits, but Balthier will explain the details and really let you get to customizing them. Let’s have a closer look at things and cover them in a bit more detail. Enter the Gambits menu in the Party menu. As the in-game tutorial showed you, you can turn Gambits on and off via the Gambit menu in the Party Menu by toggling the “On” and “Off” text near the character’s name, but it’s far easier to change this on the fly via the Battle Menu. You can clear all of a character’s Gambits by pressing [Touch Pad] while the cursor is pointed at the On/Off text above their Gambit list, or you can clear a specific Gambit line by pressing [Touch Pad] while the cursor is pointing at any point on the line.
Now scroll down to the first Gambit, where you’ll notice there are three parts to each Gambit line. At the far left end of the Gambit line (the cursor hand will point to the number indicating the Gambit’s priority) you can press [X] to select the entire Gambit line. If you press [X] again you’ll turn off that specific Gambit command, while you can also scroll [Up] or [Down] to change its priority. The character will attempt to complete Gambits in the order that they’re listed, meaning Gambits on the bottom of the list are the least likely to occur, as the conditions for every other Gambit above them will be heeded first. This is where you should - in the future, when you have more Gambits to play with - put your generalized commands, like “Attack”. The top-most Gambits, then, should be your situational/preventative Gambits, anything from curing specific status effects or healing injured characters - things that can’t wait.
For now, however, your list of Gambit commands is pretty limited, so are your available Gambit lines. Scroll over to the right (so the cursor is pointing at the - symbol) to select the Target section of the Gambit line. This is where you can enter the Targets for your eventual command - scroll the different pages by pressing [Left] and [Right] on your D-Pad. If you want to set up a general healing Gambit, something simple like “Ally: HP
If you move your cursor right to the next part of the Gambit line you’ll be able to access the various commands. Once a target is selected in the previous step, you’ll need to set what, exactly, you want to do with that target. This is basically a listing of all your commands, technicks, magicks and items at the moment, and should fill up as you learn more. Pressing the [Square] button will allow you to see all of the currently-selected character’s magicks, and you can cycle to technicks by pressing [X], and cycle between character with [R1] and [L1].
These are all examples for future tactical situations you may encounter - for now, you shouldn’t have such quandries. Just keep in mind that Gambits work best when you change them to suit your needs. While building a few lines of general commands for simple, weak enemies works well, for more dangerous enemies in late-game dungeons, you may want to build specific Gambit setups for each area, specifically to counter the foes therein. Late-game bosses, Rare Game and Marks of course, may also be worth specific Gambit setups - if you know the enemy is weak to something, and a higher level than the surrounding monsters… well, this Gambit almost writes itself, doesn’t? Be flexible, be willing to change them often, and most importantly, don’t rely on them exclusively - sometimes the battle just needs direct intervention to keep things from going awry, and commands you input directly will be carried out immediately, after which the character will resort to their normal Gambit routine.
East Spur Stairs
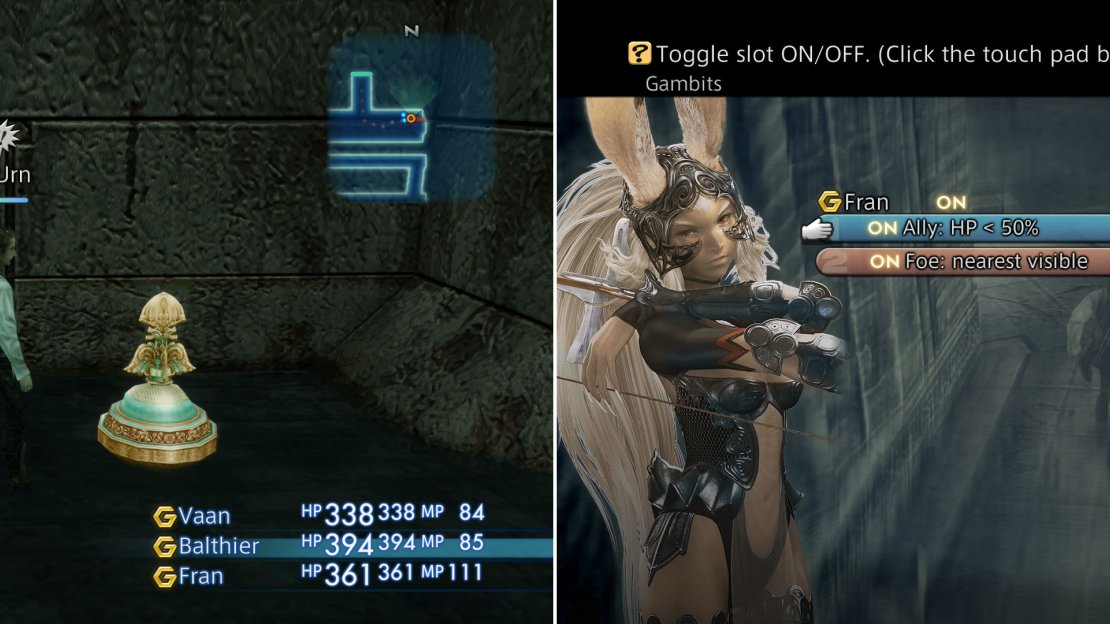
Now that Gambits have been discussed, consider giving your characters the Gambits “Target: nearest visible -> Attack” or “Target: party leader’s target -> Attack” just to ensure that they’re doing something. In the latter case your direct input will lead the entire party and focus their attacks, while the former is more passive, albeit less efficient. If you give your party leader “Target: nearest visible -> Attack” and the rest of your party the command “Target: party leader’s target -> Attack” you’ll get the best of both worlds! Also consider giving Fran the gambit “Ally: HP Cure”, which will take care of healing - at least it will as long as it’s set above her Attack Gambit. Balthier’s First Aid Gambit, on the other hand, leaves much to be desired in the healing department, and can be safely discarded. If you want to sacrifice a character, you can also have either Vaan or Balthier be set to Steal exclusively, and this dungeon is easy enough that you can get away with it, but stealing is best left a manual exercise for now.
Once all that is set, it’s time to get back to business. Make your way south down the watery channel and investigate a pair of rather dead Dalmascan resistance soldiers to listen to Balthier muse about the political situation. Vayne’s honeyed words earlier clearly were kept sweet to disguise the venom behind them. Continue south to the next area - the East Waterway Control.
Grab the map from within the decorative urn (left) then set your limited Gambits however you wish (right).
East Waterway Control
Continue south until you reach a fork, at which immediately turn east to find another decorative urn, within which you’ll find a map of the Garamsythe Waterway . That should make your escape somewhat easier. Thanks, sewer faeries! Your foes in this area are limited to Steelings and Dire Rats, so they need not be mentioned in any great detail - they were weak enough for Vaan to defeat so Vaan plus friends is overkill. A chest may randomly spawn just south of the urn, but it only contains low quality loot.
Turn back west and make your way down the channel until you find some stairs. Another low-quality loot chest can be found upstairs if you want to bother, but to continue on, head west beside the stairs, turn south, then turn east and head up another flight of stairs. Continue east until you find a bridge to the south, immediately off of which is a chest that can contain an Altair (Guns 1). Grab it and continue west until you find a ramp to the south. Head down the ramp and turn down a dead-end passage to the east to find another chest, which may yield a Leather Breastplate (Light Armor 2).
That last bit of loot obtained, continue downhill to the south, turn east and cross a bridge, then descend some stairs to the west to find the area transition leading to the next zone.
No. 11 Channel
From where you enter the level head south and ignore a bridge to the west - all it leads to is some Steelings and a shot at a low-quality chest. When you run no further south, turn east and follow the winding channel until you find a new foe - the Gigantoad.
Gigantoad :
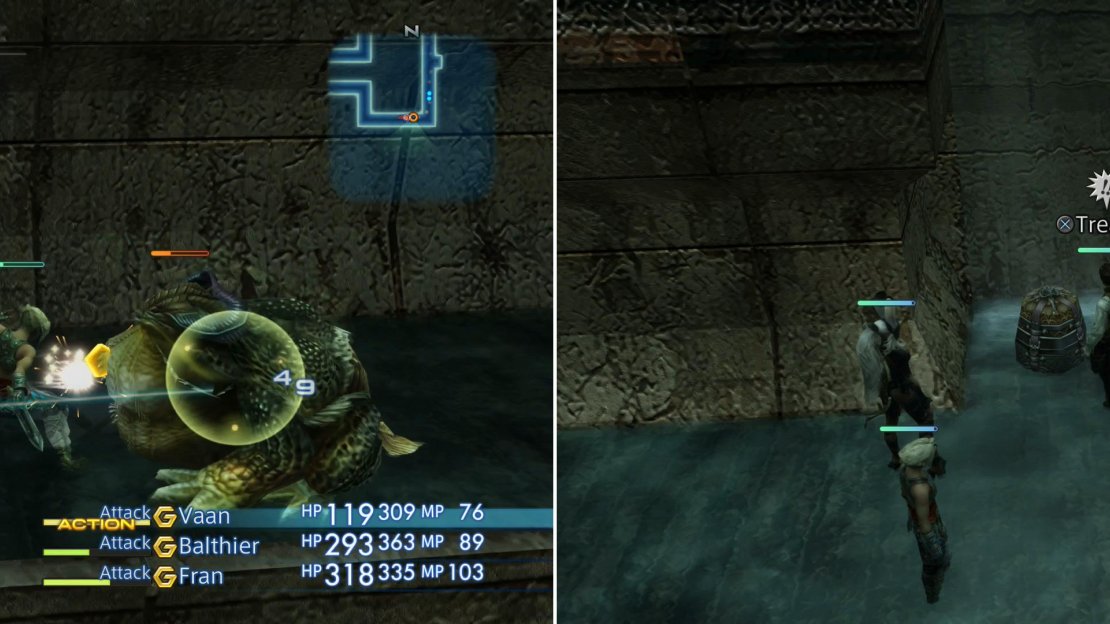
A Final Fantasy staple, this bloated frog does considerably more damage than the Steelings and Dire Rats you’ve been squashing up until now. They’re somewhat sturdier, too, but not enough to stand out as a particularly tanky foe, although they can cast Angelsong to give them (and nearby monsters) Regen, which restores HP over time. They drop a Water Stone, a Horn, a Potion and Eye Drops, while you can steal a Horn, 50G, or a Leather Helm (Heavy Armor 1) from them. Grabbing two Horns to unlock a Bazaar item is recommended (which is easiest done via stealing), but otherwise they’re not terribly worth farming. Gigantoads are weak to Fire.
Shortly past the first Gigantoad you’ll find a second, but between the two of them is a small cubby with a waterfall that can also contain two chests. The left chest can - amongst various junk - contain a Light Woven Shirt while the right chest can contain a set of Chromed Leathers (Light Armor 2).
In this section of the Garamsythe Sewer you’ll find new monsters (left) as well as new treasures (right).
Claim those prizes, then continue following the channel south, then west until you reach some stairs that’ll get you out of the water temporarily. Head upstairs, turn south, then find another set of stairs leading back down to a watery walkway. Down here you’ll find two more Gigantoads and a handful of Steelings. Dispose of them, cross a bridge, then ascend another flight of stairs to reach a fork in the path. The next area is to the south, but head north first, as there are some treasure chests worth looting. In the corner you’ll find a chest which can contain an Oaken Pole (Poles 1), at which turn southeast to reach a dead end, which houses a second chest, this one occasionally yielding a Kotetsu (Katana 1). Best of all, since the area transition is so close it’s quite easy to farm these weapons, if you’ve a mind to do so.


No Comments