Dha Vikaari Sirhru
| Regular Treasure |
Diamond Armlet |
Respawns (Y/N) |
| – |
– |
– |
| Enemies |
Weakness |
Steal |
Loot |
| Larva Eater (Rare Game) |
Ice |
Scorpio Gem |
Mina, Demon Eyeball |
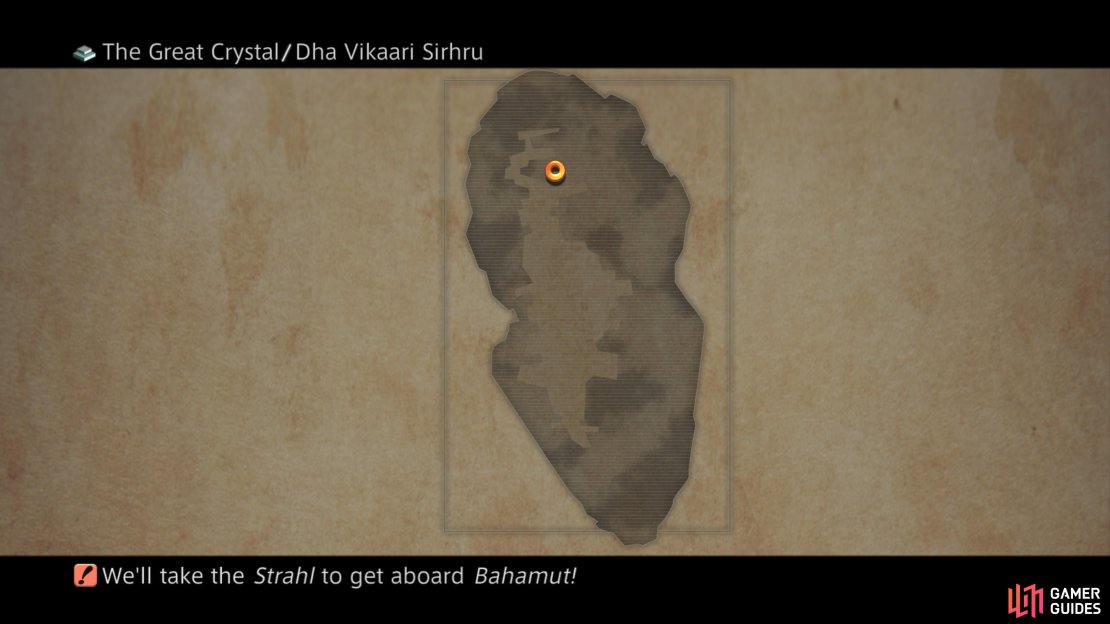
This is the entry point for the confusing Uldobi level and you’ll reach it by taking Waystone XV on the Sirhru level. There’s not much to see and do here but you will be revisiting it often as you navigate this level.
- Exits:
1. North - Sthaana Libra
2. Northeast - Sthaana Virgo (Capricorn Gate)
3. Northwest - Uldobi Jilaam Praa’Dii
4. Waystone XVI - A Vikaari Uldobi (back to the Sirhru level)
Uldobi Jilaam Praa’Dii
| Regular Treasure |
Diamond Armlet |
Respawns (Y/N) |
| – |
– |
– |
| Enemies |
Weakness |
Steal |
Loot |
| Skulwyrm |
Holy |
Dark Crystal, Wyrm Bone, Sweep |
Battlewyrm Carapace, Dark Crystal, Hi-Potion, Charger Barding |
An empty room with the sole exception of a single Skulwyrm that shouldn’t pose too many problems. You’ll also find a Libra Gate here that you can’t progress past unless you visited the Gate Stone to the north of Dha Vikaari Sirhru first.
- Exits:
1. Northwest - Uldobi Jilaam Praa (Libra Gate)
2. Southeast - Dha Vikaari Sirhru
Sthaana Libra
| Regular Treasure |
Diamond Armlet |
Respawns (Y/N) |
| – |
– |
– |
| Enemies |
Weakness |
Steal |
Loot |
| Forbidden |
Holy |
Remedy, X-Potion, Kaiser Shield |
Dark Crystal, Echo Herbs, Forbidden Flesh, Capricorn Gem |
No treasure to find here but you’ll find the all important Libra Gate Stone which you’ll pay many visits to across your time on this level. As you approach the Gate Stone, you’ll be ambushed form behind by Forbiddens so be sure to clear them out before activating it.
- Exits:
1. Northwest - Uldobi Jilaam Praa’Vaa
2. Northeast - Uldobi Jilaam Pratii’Vaa
3. South - Dha Vikaari Sirhru
Uldobi Jilaam Praa’Vaa
| Regular Treasure |
Diamond Armlet |
Respawns (Y/N) |
| – |
– |
– |
| Enemies |
Weakness |
Steal |
Loot |
| Skulwyrm |
Holy |
Dark Crystal, Wyrm Bone, Sweep |
Battlewyrm Carapace, Dark Crystal, Hi-Potion, Charger Barding |
| Forbidden |
Holy |
Remedy, X-Potion, Kaiser Shield |
Dark Crystal, Echo Herbs, Forbidden Flesh, Capricorn Gem |
This is a simple room that serves as a gateway to two different Gates, one from the Libra Gate Stone and one from the Virgo Gate Stone. The Libra one is a lot easier to access while the Virgo one will require you to pay a visit to the western side of this level before doubling back. You’ll also encounter both a Skulwyrm and Forbidden here so if you’re short for time, simply run past.
- Exits:
1. Northeast - Uldobi Jilaam Avaa (Virgo Gate)
2. Southeast - Sthaana Libra
3. Southwest - Uldobi Jilaam Praa (Libra Gate)
Uldobi Jilaam Praa
| Regular Treasure |
Diamond Armlet |
Respawns (Y/N) |
| – |
– |
– |
| Enemies |
Weakness |
Steal |
Loot |
| Ash Wyrm |
Earth |
Wind Crystal, 800 Gil, Leo Gem |
Ring Wyrm Scale, Wind Crystal, Koga Blade, Leo Gem |
Another room that you’ll have to pay many visits to as your first visit will only allow you to take the southwest exit, the others will require Gate Stones to be active. Beware of the Ash Wyrm that lurks in this room, if you’re not careful it can easily do major damage to you.
- Exits:
1. Northeast - Uldobi Jilaam Praa’Vaa (Libra Gate)
2. Southeast - Uldobi Jilaam Praa’Dii (Libra Gate)
3. Southwest - Sthaana Capricorn
4. Northwest - Uldobi Phukka Praa’Vaa (Aquarius Gate)
Sthaana Capricorn
| Regular Treasure |
Diamond Armlet |
Respawns (Y/N) |
| – |
– |
– |
| Enemies |
Weakness |
Steal |
Loot |
| Forbidden |
Holy |
Remedy, X-Potion, Kaiser Shield |
Dark Crystal, Echo Herbs, Forbidden Flesh, Capricorn Gem |
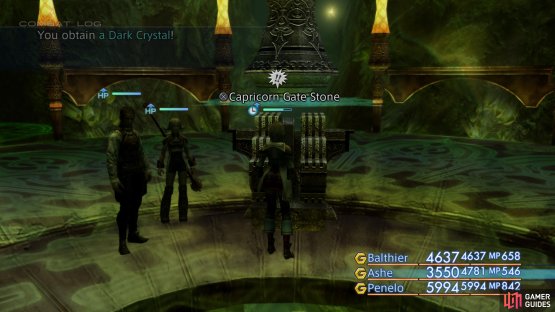
This is the location of the Capricorn Gate Stone, important to reach the eastern side of the level where you’ll find the Virgo Gate Stone required to head up to the next level. As with most Gate Stone rooms, you’ll be ambushed when you approach it, this time by Forbiddens.
- Exits:
1. Northeast - Uldobi Jilaam Praa
2. Southeast - Uldobi Phullam Udiipraa (Capricorn Gate)
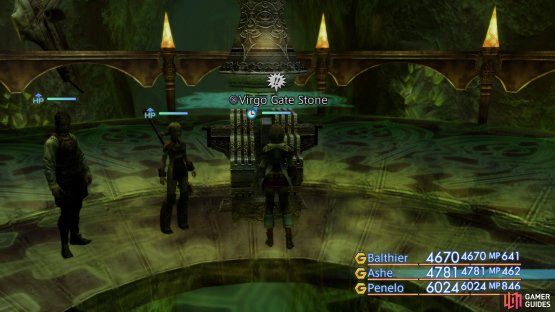
(1 of 2) Capricon Gate Stone will allow you to gain access to the Virgo Gate Stone
Capricon Gate Stone will allow you to gain access to the Virgo Gate Stone (left), which in turn grants you access to the final level of the Great Crystal. (right)
Uldobi Phullam Udiipraa
| Regular Treasure |
Diamond Armlet |
Respawns (Y/N) |
| Ring of Renewal |
Ring of Renewal |
N |
| Meteorite (5%) |
Meteorite (5%) |
Y |
| Enemies |
Weakness |
Steal |
Loot |
| Giruveganus |
Holy |
Prime Tanned Hide, Broken Greataxe, Carabineer Mail |
Prime Tanned Hide, Dark Crystal, X-Potion, Leo Gem |
This room is home to the first big ticket item on this level, the excellent Ring of Renewal which will grant auto-Regen to the wearer. It’s also a guaranteed chest so you’ll always find it here with perhaps another containing a Meteorite. You will, however, have a Giruveganus to contend with first and it’s one of the tougher enemies you’ve had to contend with here in the Great Crystal.
- Exits:
1. Northwest - Sthaana Capricorn
Uldobi Jilaam Pratii’Vaa
| Regular Treasure |
Diamond Armlet |
Respawns (Y/N) |
| – |
– |
– |
| Enemies |
Weakness |
Steal |
Loot |
| Skulwyrm |
Holy |
Dark Crystal, Wyrm Bone, Sweep |
Battlewyrm Carapace, Dark Crystal, Hi-Potion, Charger Barding |
This is another room that offers two exits with gates blocking them, a Virgo Gate to the northwest and a Capricorn Gate to the southeast. The Capricorn Gate leads to a room full of Taurus Gates which will require a trip to the next level up and back down again before you can head this way. Additionally, a Skulwyrm lurks in the center of this room, attempting to slow you down.
- Exits:
1. Northwest - Uldobi Jilaam Avaa (Virgo Gate)
2. Southeast - Uldobi Jilaam Pratii (Uldobi Jilaam Pratii)
3. Southwest - Sthaana Libra
Sthaana Virgo
| Regular Treasure |
Diamond Armlet |
Respawns (Y/N) |
| – |
– |
– |
| Enemies |
Weakness |
Steal |
Loot |
| Forbidden |
Holy |
Remedy, X-Potion, Kaiser Shield |
Dark Crystal, Echo Herbs, Forbidden Flesh, Capricorn Gem |
This is the location of the Virgo Gate Stone, the main purpose of this one is to provide access to the rooms to the north, allowing access to the higher levels. As always, when you approach the contraption in the center, a group of Forbiddens will ambush you.
- Exits:
1. Northeast - Uldobi Jilaam Pratii (Aquarius Gate)
2. Southwest - Dha Vikaari Sirhru (Capricorn Gate)
Uldobi Jilaam Avaa
| Regular Treasure |
Diamond Armlet |
Respawns (Y/N) |
| – |
– |
– |
| Enemies |
Weakness |
Steal |
Loot |
| Giruveganus |
Holy |
Prime Tanned Hide, Broken Greataxe, Carabineer Mail |
Prime Tanned Hide, Dark Crystal, X-Potion, Leo Gem |
You can reach this room from one of two paths so long as you’ve opened the Virgo Gate that blocks it. Once inside, you’ll find a Giruveganus in the center, deal with it and press onwards to the north.
- Exits:
1. North - A Vikaari Kanbhru
2. Southeast - Uldobi Jilaam Pratii’Vaa (Virgo Gate)
3. Southwest - Uldobi Jilaam Praa’Vaa (Virgo Gate)
A Vikaari Kanbhru
| Regular Treasure |
Diamond Armlet |
Respawns (Y/N) |
| – |
– |
– |
| Enemies |
Weakness |
Steal |
Loot |
| Larva Eater (Rare Game) |
Ice |
Scorpio Gem |
Mina, Demon Eyeball |
This is the final room on the Uldobi level and Waystone XVII provides the way to the top of the Great Crystal. If your goal is just the Ultima Esper, you can press onwards but there’s more lucrative treasures on this level that requires you to return after activating the Aquarius Gate Stone at the top.
- Exits:
1. South - Uldobi Jilaam Avaa
2. Waystone XVII - Dha Vikaari Uldobi (up to the Kanbhru level)
Uldobi Jilaam Pratii
| Regular Treasure |
Diamond Armlet |
Respawns (Y/N) |
| – |
– |
– |
| Enemies |
Weakness |
Steal |
Loot |
| Ash Wyrm |
Earth |
Wind Crystal, 800 Gil, Leo Gem |
Ring Wyrm Scale, Wind Crystal, Koga Blade, Leo Gem |
Another room that serves as a crossroads for many different Gates while an Ash Wyrm sits in the center. How you access this room will vary based on the path you take however if you’re chasing down the Hastega spell, it’s most likely from the Capricorn Gate.
- Exits:
1. Northeast - Uldobi Phullam Pratii’Vaa (Taurus Gate)
2. Southeast - Uldobi Phullam Pratii’Dii (Taurus Gate)
3. Southwest - Sthaana Virgo (Aquarius Gate)
4. Northwest - Uldobi Jilaam Pratii’Vaa (Capricorn Gate)
Uldobi Phukka Praa’Vaa
| Regular Treasure |
Diamond Armlet |
Respawns (Y/N) |
| – |
– |
– |
| Enemies |
Weakness |
Steal |
Loot |
| Skulwyrm |
Holy |
Dark Crystal, Wyrm Bone, Sweep |
Battlewyrm Carapace, Dark Crystal, Hi-Potion, Charger Barding |
This is a room that you won’t gain access to until you’ve reached the top level, Kanbhru, and activated the Aquarius Gate Stone there. Once you do gain entry, you’ll have to contend with two Skulwyrms.
- Exits:
1. Southeast - Uldobi Jilaam Praa (Aquarius Gate)
2. Southwest - Sthaana Taurus
Sthaana Taurus
| Regular Treasure |
Diamond Armlet |
Respawns (Y/N) |
| – |
– |
– |
| Enemies |
Weakness |
Steal |
Loot |
| Forbidden |
Holy |
Remedy, X-Potion, Kaiser Shield |
Dark Crystal, Echo Herbs, Forbidden Flesh, Capricorn Gem |
As you may expect by the name of the room, this is the location of the final Gate Stone, the Taurus Gate Stone. This is your link to the rooms on the eastern side of this level where there are some lucrative treasures well worth your time and you’ll need to revisit this room twice to gain access to them all (two different Gates blocking two different routes).
- Exits:
1. Northeast - Uldobi Phukka Praa’Vaa
Uldobi Phullam Pratii’Vaa
| Regular Treasure |
Diamond Armlet |
Respawns (Y/N) |
| – |
– |
– |
| Enemies |
Weakness |
Steal |
Loot |
| Skulwyrm |
Holy |
Dark Crystal, Wyrm Bone, Sweep |
Battlewyrm Carapace, Dark Crystal, Hi-Potion, Charger Barding |
This is an empty room that you won’t be able to access until you’ve taken the path of using the Aquarius Gate Stone on the level above to reach the Taurus Gate Stone and unlock this Gate. Once you do, you’ll be ambushed by a group of three Skulwyrms.
- Exits:
1. Southeast - Uldobi Phullam Pratii
2. Southwest - Uldobi Jilaam Pratii (Taurus Gate)
Uldobi Phullam Pratii
| Regular Treasure |
Diamond Armlet |
Respawns (Y/N) |
| Hastega |
Hastega |
N |
| Meteorite (5%) |
Meteorite (5%) |
Y |
| Enemies |
Weakness |
Steal |
Loot |
| – |
– |
– |
– |
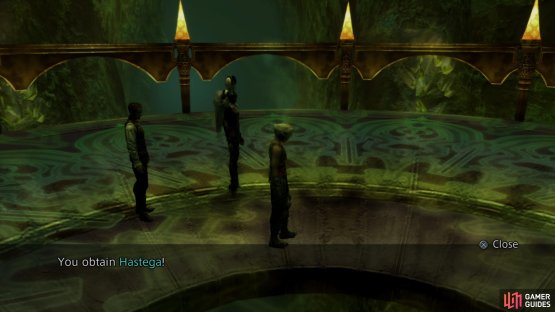
It took a lot of navigating to get here, but in this room you’ll find one of the main goals of the Great Crystal, a chest containing the excellent Hastega Magick. Better yet, there’s no enemies to constantly harass you and you’ll have the small chance of another chest containing a Meteorite spawning.
- Exits:
1. Northwest - Uldobi Phullam Pratii’Vaa
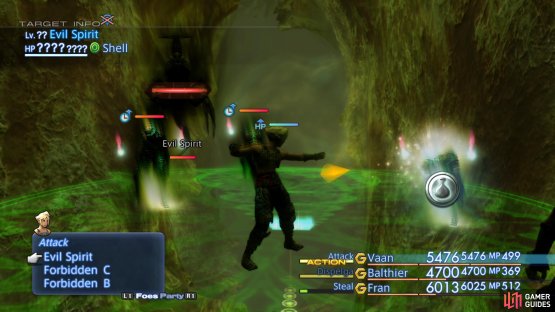
(1 of 2) Beware of the Evil Spirit that can spawn with the Forbiddens, it can easily wipe out your party
Beware of the Evil Spirit that can spawn with the Forbiddens, it can easily wipe out your party (left), after a visit to the top level, you can finally access the incredibly useful Hastega Magick. (right)
Uldobi Phullam Pratii’Dii
| Regular Treasure |
Diamond Armlet |
Respawns (Y/N) |
| Artemis Bow |
Artemis Bow |
N |
| Meteorite (5%) |
Meteorite (5%) |
Y |
| Enemies |
Weakness |
Steal |
Loot |
| Forbidden |
Holy |
Remedy, X-Potion, Kaiser Shield |
Dark Crystal, Echo Herbs, Forbidden Flesh, Capricorn Gem |
As you approach the Taurus Gate in this room, you’ll be ambushed by Forbidden. Once you’ve dealt with them, you can claim at least one of the two treasures here, the powerful Artemis Bow and a possible Meteorite. This will most likely be the final treasure on this level however the exit to the southwest provides more opportunities for adventure.
- Exits:
1. Northwest - Uldobi Jilaam Pratii (Taurus Gate)
2. Southwest - Dha Vikaari Sirhru Si
Dha Vikaari Sirhru Si
| Regular Treasure |
Diamond Armlet |
Respawns (Y/N) |
| – |
– |
– |
| Enemies |
Weakness |
Steal |
Loot |
| Evil Spirit (Rare Game) |
Holy |
Lifewick |
Glass Jewel, Vrsabha |
| Forbidden |
Holy |
Remedy, X-Potion, Kaiser Shield |
Dark Crystal, Echo Herbs, Forbidden Flesh, Capricorn Gem |
The use of this room depends entirely on if you’re here to take on one of the game’s ultimate superbosses and to even encounter it, you’ll need to have the final Mark, Yizamat, available to hunt (you don’t need to have killed it). If you’ve not met these conditions, then avoid Waystone XXI for now as there are no treasures save for this battle on this route.
- Exits:
1. Northeast - Uldobi Phullam Pratii’Dii
2. Waystone XXI - A Vikaari Uldobi Si
Path to Omega Mark XII
Taking Waystone XXI above will lead on the path toward Omega Mark XII and across the entirety of the Crystal.
A Vikaari Uldobi Si
| Regular Treasure |
Diamond Armlet |
Respawns (Y/N) |
| – |
– |
– |
| Enemies |
Weakness |
Steal |
Loot |
| Evil Spirit (Rare Game) |
Holy |
Lifewick |
Glass Jewel, Vrsabha |
| Forbidden |
Holy |
Remedy, X-Potion, Kaiser Shield |
Dark Crystal, Echo Herbs, Forbidden Flesh, Capricorn Gem |
This first room is back on the Sirhru level and other than the usual Forbiddens, there’s not much to see other than an exit to the north.
- Exits:
1. North - Dha Vikaari Dhebon Si
2. Waystone XXII - Dha Vikaari Sirhru Si (back to the Uldobi level)
Dha Vikaari Dhebon Si
| Regular Treasure |
Diamond Armlet |
Respawns (Y/N) |
| – |
– |
– |
| Enemies |
Weakness |
Steal |
Loot |
| Evil Spirit (Rare Game) |
Holy |
Lifewick |
Glass Jewel, Vrsabha |
| Forbidden |
Holy |
Remedy, X-Potion, Kaiser Shield |
Dark Crystal, Echo Herbs, Forbidden Flesh, Capricorn Gem |
Just like the room before it, nothing but a room full of Forbiddens and a possible Evil Spirit. You’ll also find Waystone XXIII in this room that will take you down to the Dhebon level.
- Exits:
1. South - A Vikaari Uldobi Si
2. Waystone XXIII - A Vikaari Sirhru Si (back to the Dhebon level)
A Vikaari Sirhru Si
| Regular Treasure |
Diamond Armlet |
Respawns (Y/N) |
| – |
– |
– |
| Enemies |
Weakness |
Steal |
Loot |
| Evil Spirit (Rare Game) |
Holy |
Lifewick |
Glass Jewel, Vrsabha |
| Forbidden |
Holy |
Remedy, X-Potion, Kaiser Shield |
Dark Crystal, Echo Herbs, Forbidden Flesh, Capricorn Gem |
As the previous rooms before it, this is full of Forbiddens and a possible Evil Spirit however here you’ll want to take the time to clear the room out before proceeding. In the room to the north is one of the game’s ultimate bosses so be sure to prepare using our advice on it before you head into the room.
- Exits:
1. North - Dhebon Jilaam Avaa
2. Waystone XXIV - Dha Vikaari Dhebon Si (back to the Sirhru level)
Dhebon Jilaam Avaa
| Regular Treasure |
Diamond Armlet |
Respawns (Y/N) |
| – |
– |
– |
| Enemies |
Weakness |
Steal |
Loot |
| Omega Mark XII (Boss) |
Varies |
Knot of Rust |
Bonebreaker, Omega Badge |
This will most likely be the final room you visit in the Great Crystal and as soon as you enter, you’ll spot an imposing figure in the center. If you’ve unlocked and accepted the final Mark, Yiazmat then Omega Mark XII will attack you as you approach the center. This is one of the game’s ultimate superbosses and is Lv 99 so be sure you’re well prepared before you even attempt it. You’ll find all the details you need to defeat it on our boss page for it.
- Exits:
1. South - A Vikaari Sirhru Si
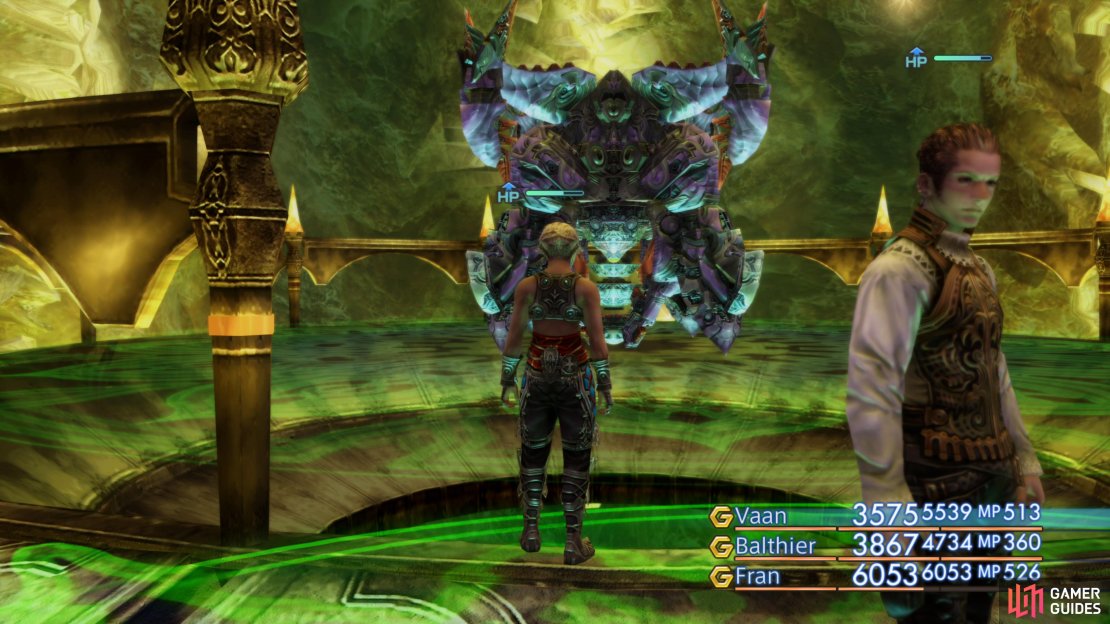
The deadly Omega Mark XII will only attack you once the Yiazmat Hunt has been accepted.





No Comments