| Bestiary |
|---|
| Cataract Aevis, Famfrit (Esper), Hashmal (Esper), Purobolos (Esper), Tower (Rare Game) |
| Items In This Area |
|---|
| Antares, Ardor, Blazer Gloves, Caldera (drop from Cataract Aevis), Flare, Grand Helm (drop from Tower), Nishijin Belt, Ultima Blade, White Robes, Wyrmfire Shot |
Spire Ravel - 1st Flight/2nd Flight
Both of these floors are combined in the walkthrough, due to the nature of how they work together. You will start in the southwest corner of 1st Flight, so venture to the northeast and head down a small flight of stairs to find several new paths to explore. If you head west, then south down some stairs you’ll just run into an Ancient Door you can’t open, so head up one of the flights of stairs to the north or east and kill the Purobolos enemies floating about. Once done, explore this elevated walkway to find four Way Stones, a Black Sigil, a Green Sigil, a Red Sigil, and the Sigil of Sacrifice.
Purobolos:
An evolution of the basic Bomb you’ve faced earlier in the game, the Purobolos does what you would typically expect from this enemy. It can use Darkra to inflict damage to multiple characters, but it’s biggest threat will come from blowing up in your face. Chain Reaction will set things off and order others to either Self-Destruct or Mass-Destruct. These things can drop a Dark Crystal, Bomb Shell, Handkerchief, or a Scorpio Gem, while you can steal a Bomb Shell, Dark Crystal or Scathe Mote. Poaching will yield either a Bomb Shell or Mallet, the latter of which is also a Monograph (Mage) drop. They are weak to holy, but absorb dark.
As usually is the case here in Pharos, the only worthwhile piece of loot that you can get from the Purobolos is the Mallet. This is used in a Bazaar recipe for a great one-handed sword, of which you need two of them. If you’ve already fought King Bomb, then you’ll get one from Montblanc, but the other will likely come from these. The drop rate with the Mage’s Monograph is only 5%, which is the same as the rare poach. It is easier to just wait for a drop than set up poaching gambits, so go with that route.
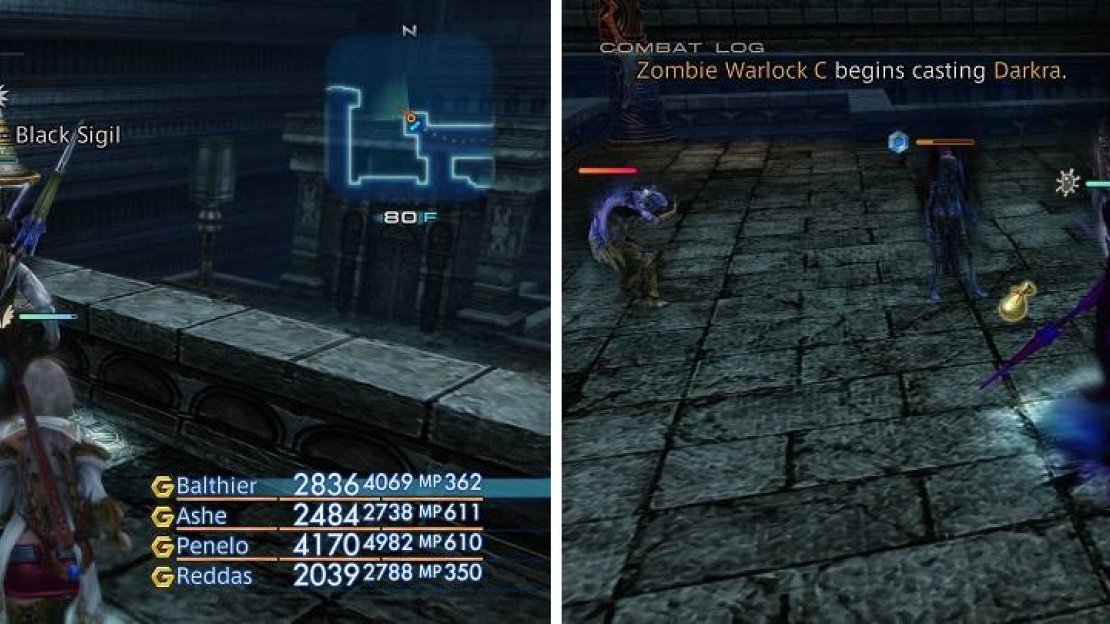
Only one of these Way Stones will allow you to progress, after which you’ll have to find more Way Stones and repeat the process. Before getting to that, however, it’s worth mentioning what happens if you pick the wrong Way Stones. Touch the wrong Way Stone once and you’ll be teleported to a teleportation tile southwest of these Way Stones. If you pick the wrong Way Stone twice in a row you’ll be teleported to a purgatory plane (not marked on the map), where you will be required to fight some undead. These undead will consist of Necrofiends, Zombie Warlocks and Dead Bones.
All three foes can be a major problem, since they can cast area of effect magicks and also have access to a wide variety of status ailments. These Dead Bones have different drops here than in previous areas, they can drop a Dark Crystal, Eye Drops, Blood-darkened Bone and Golden Skullcap and you can steal a Dark Crystal, Blood-darkened Bone or Ancient Bone. Of course, you can counter this with area of effect magicks of your own. In fact, having a Black Mage here would be idea for Firaga, Blizzaga or Thundaga, as all three will prove useful in taking out the undead.
The Way Stones need to be used in a certain order (left) or else you end up having to fight a horde of undead (right).
Despite being a punishment for guessing wrong, there is some incentive to facing these undead. First, it’ll give you a shot at their loot, and given the otherwise scarcity of Necrofiends, it’s as good a chance as any to score some Lifewicks. More importantly, the decorative urn containing the map to the Third Ascent can be found in the punishment room, near the door to the south. Pick the wrong Way Stone (say, pick the Red Sigil) twice, kill the undead, grab the map, then exit out the nearby door to find yourself at the end of the western walkway. You can repeat this process as often as you wish.
Once that’s done, it’s time to pick the correct Way Stones and progress through this place. First pick the Black Sigil, which will teleport you to an area to the east. Continue east up some stairs, defusing some more Purobolos as you go. Eventually you’ll find a chamber to the east, up a short flight of stairs, inside of which a new foe awaits - the Cataract Aevis. Before you go in and fight it, however, turn south and you’ll find a chest at a dead-end that may contain some Wyrmfire Shot . Loot it, then search the wall to the east to find a Fool’s Facade, beyond which is a chamber containing a chest that always yields an Antares (does not respawn). Further east, beyond a trap, you’ll find the Green Sigil Way Stone. That’s the correct Way Stone, but there’s a bit more to do here… starting with returning back west, then north, then entering the room to the east where the Cataract Aevis dwells.
Cataract Aevis:
These dragon/wyrm creatures are probably among the strongest/beefiest ones in the Pharos, possessing over 20,000 HP. They don’t have any magicks or technicks you haven’t seen before though, resorting to Firaga, Thundaga, Blizzaga, Lunge, Crushing Fangs and Fireball. They can drop a Charger Barding, Ice Crystal, Cura Mote or a Caldera , while stealing from them might get you a Charger Barding, 50 gil, or Leo Gem. Poaching will yield either a Charging Barding or Leo Gem. They are weak to lightning.
Kill the Cataract Aevis and leave the room it was occupying, then turn north and head up another flight of stairs to reach a fork. Turn west and loot a chest in the corner to get a shot at a Nishijin Belt , then continue down some stairs to the west until you reach a dead-end. Turn south and search the wall to find another Fool’s Facade, beyond which you’ll find a chest sitting teasingly on a trap. Use Float to bypass it and loot the chest to score the Flare magick (Black Magick 12). Despite the name, the spell does a massive amount of non-elemental damage to a foe, and is an upgrade over the Shock magick. You can now continue exploring the northwestern end of the level, where you’ll find the other three Way Stones, but it’s the Green Sigil you want to take to advance, so give that a touch when you want to progress.
The Green Sigil in the hidden area will bring you to another hidden area not marked in your map, which is in the northeast corner of the Third Ascent. As soon as you teleport in, look around the room for two chests, one in the northeast corner for the Ardor magick (Arcane Magick 3), the Red Battlemage’s most potent - and exclusive - magick, and the other chest is sitting merrily amidst a trap to the southwest, and contains some White Robes .
Beyond the chest with the White Robes are two trapped hallways, both of which lead to a pair of Fool’s Facades, which ultimately take you to the same place. After the second Fool’s Facade you’ll be attacked by an Aeronite, after head up some stairs to the west to find a collection of four Way Stones. This time you’ll want to take the Red Sigil Way Stone to reach yet another small hidden platform, where two Aeronites will be guarding a chest, which contains an Ultima Blade .
The next waypoint you need to use will differ and depends on the sacrifice you picked at the beginning of the Second Ascent. For example, if you chose the Altar of Knowledge, which disabled the mini-map, then you will want to pick the pink waypoint. Purple is if you disabled magicks, yellow for items and white for weapons. They’re all named “Sigil of Sacrifice”, so you’ll have to pick them out by color. For the colorblind, pink is to the southwest, purple is southeast, yellow is northwest, and white is northeast.
Pick the correct Way Stone and you’ll appear at the northwestern area of the map. From where you appear if you head upstairs to the south, then east you’ll find four more waystones, but there’s some trickery involved here, too. These waypoints are actually fake and lead to nowhere… well, nowhere besides the mass of undead you’d have to fight. Instead of dealing with that bother, make your way to the north end of this area and you should find a Fool’s Facade to the west. Navigate the trapped passage beyond and at the end of it you’ll find another Way Stone Blazer Gloves.
Take the Way Stone to reach a small area that you might have seen to the east of the undead punishment ground. More interesting is the chest to the north, which contains an Elixir. If that’s not enough, you may also encounter the Rare Game, Tower, here. If it doesn’t spawn and you wish to fight it, simply use the Way Stone to travel back and forth between this area (88F) and a previously inaccessible area north of the undead purgatory battlefield (79F) until it appears. When you’re finished, take the nearby elevator to be confronted by the next boss.
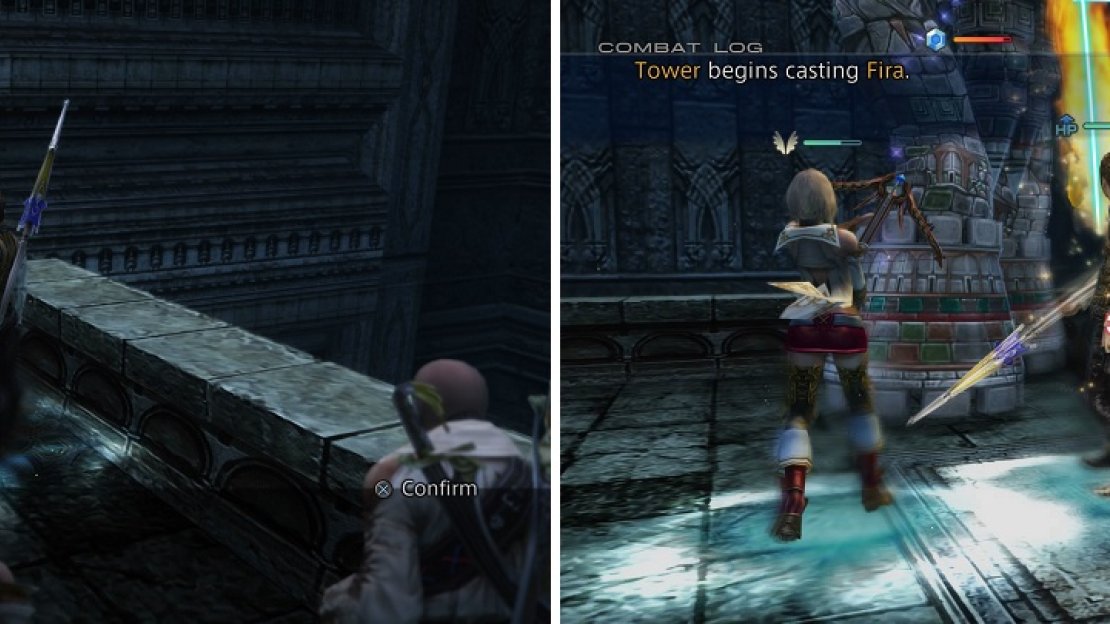
Take the colorless Way Stones back and forth (left) until you manage to spawn the Rare Game, Tower (right).
Tower:
If you remember the Clay Golems from Mosphoran Highwaste, then you will recognize Tower, as it is the same species. This towering construct has a smallish chance to appear every time you warp to the small area with the Dais of Ascendance in the Third Ascent from the colorless waystone. Tower has access to the middle and high-tier Black Magicks (Fira, Thundara, Blizzara, Aquaga, Aeroga, Firaga, Thundaga and Blizzaga). There is also Graviga, which always does a set amount of damage (50% of your max HP). Apart from those, it can use Mana Spring to make all of its magicks use 0 MP, plus it has Ignore Reflect and Magick CT0 augments. Tower has a lot of health (130,000+) and usually comes with Bravery, Protect and Shell, so use Dispel. It can drop a Solid Stone (common) or a Grand Helm (very rare), plus you can steal an Einherjarium from it. Tower is weak to Dark, but absorbs Holy.
Boss - Hashmal
As a boss, Hashmal can be fairly easy, depending on your party setup and available skills. His normal attacks can inflict Disease, so you will want some people in your party set up with Serum/Cleanse/Remedy (Remedy Lore 3) gambits to get rid of it as soon as possible. He can also buff up his normal attacks’ damage by using Battle Cry. In addition to those two things, Hashmal has access to a skill called Roxxor, which is an earth magickal attack against one character. His ultimate attack is called Quakeja and as its name suggests, it’s an earth-elemental skill that will hit everyone and has a chance to inflict Slow.
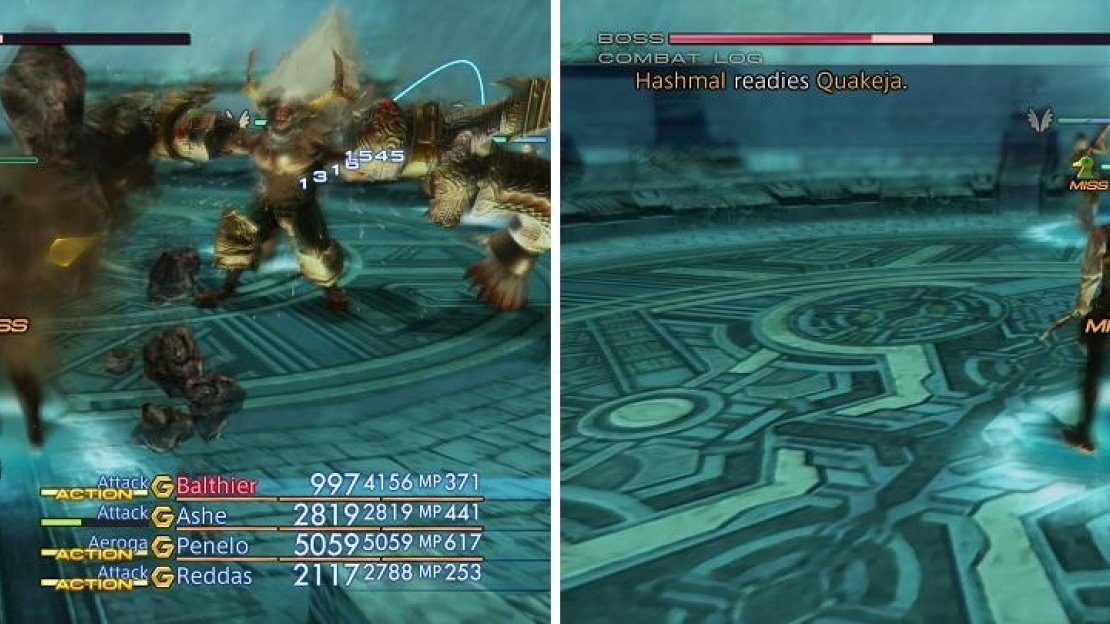
The biggest thing that makes this battle simple is the magick, Float. Not only will this make Roxxor miss, but it also makes Quakeja miss, meaning the only attacks you have to deal with is his normal ones. Of course, you still have to contend with the Disease from the normal attacks. He is weak to Wind, absorbs Earth and is immune to all other elements, so have your Black Mage use Aeroga until he gets low on health, which is when he’ll erect a barrier to block all magickal damage. At this point swap your Black Mage out or switch to a melee weapon and before long, Hashmal will go down… and you’ll have a new Esper under your control.
| Hashmal | . |
|---|---|
| Level | 50 |
| Weaknesses | Wind |
| Resistances | Earth (Absorbs), Dark, Fire, Holy, Ice Lightning, Water, (Immune) |
| Immunities | Blind, Confuse, Disable, Disease, Doom, Immobilize, Petrify, Poison, Sap, Silence, Sleep, Stop |
| Safety | Yes |
| Drop | N/A |
| Steal | Leo Gem (55%), Hi-Ether (10%), High Arcana (3%) |
Float will negate two of Hashmal’s bigger attacks, Roxxor (left) and Quakeja (right).
Empyrean Ravel
After your battle with Hashmal you’ll find yourself in the Empyrean Ravel area (90F). This is your final ascent to the top of this long and tiring dungeon. The path is linear, but there are two treasures you might want to grab along the way. You should notice two little alcoves on your map, one in the southwestern corner of the map, and on in the northeastern corner. Basically, from the elevator, go west, south, west and south to find the first little alcove, where you’ll find a Dark Matter. Continue following the path, where a cutscene will occur, but as soon as it’s over backtrack a bit to find the other alcove, where you’ll find a Megalixir. Now, keep going to the end, using the Save Crystal to rest/save, then take the waypoint to the top of Pharos for more scenes and another boss battle.
Boss - Gabranth
From here on out, it’s a good idea to set your attack gambits to go after the highest max HP, which will help shortly. The fight with Gabranth is a simple one, as despite his attacks, all of them are physical. He tends to start the battle by casting Protect on himself, so Dispel that before you begin pummeling him. You don’t have to worry about elemental attacks, since Gabranth takes regular damage from all of them. He’ll stick to normal attacks, Lunge, Kick and Sentence during the first half, all of which only targets a single character. At 50% health, a scene will occur (this is special if Basch is in your active party), after which he will use Guilt, another single-target attack. Grabranth will also erect a Magick Wall, making him immune to magick for two minutes. He will also toss in Circle of Judgement, which can hit multiple characters if they’re close to him. His attacks can be strong, but they are nothing special.
| Gabranth | . |
|---|---|
| Level | 47 |
| Weaknesses | None |
| Resistances | None |
| Immunities | Blind, Confuse, Disable, Disease, Doom, Immobilize, Petrify, Poison, Sap, Sleep, Slow, Stop |
| Safety | Yes |
| Drop | N/A |
| Steal | Potion (55%), Hi-Potion (10%), X-Potion (3%) |
Unfortunately, you don’t get much in the way of rest, as another scene plays out after your victorious battle with Gabranth, then you are thrown into your next boss battle.
Boss - Doctor Cid and Famfrit
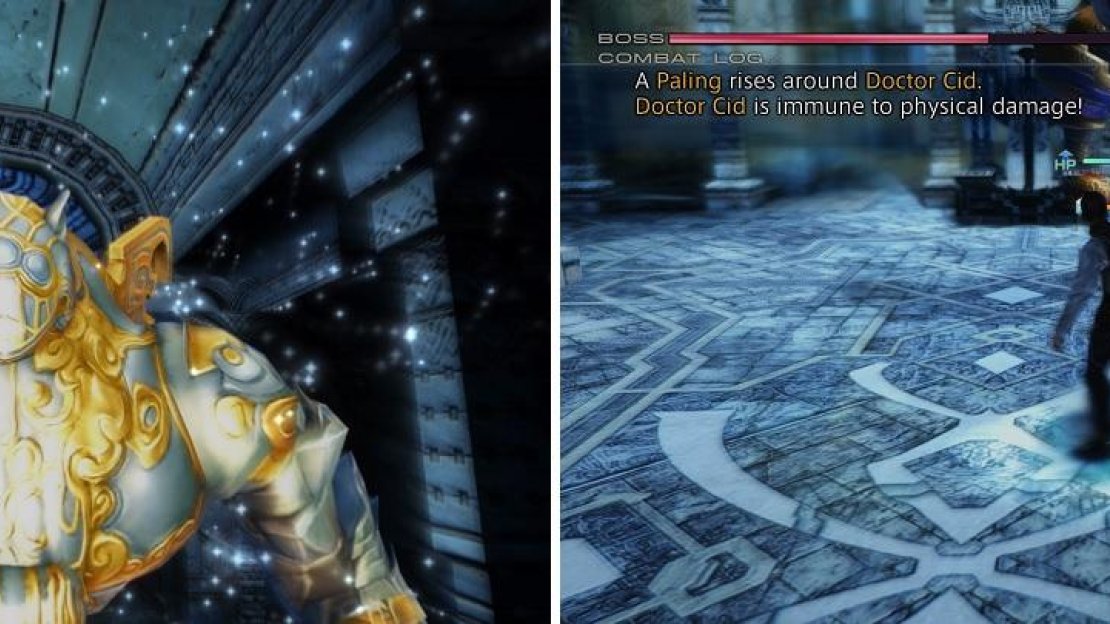
The battle will start out with Doctor Cid alone, who will pretty much just use ordinary attacks on your party. Eventually, around 75% or so, he will bring out one of his special attacks, Gatling Gun. This hits in a cone shape and it does Fire damage, so it’s very possible to completely nullify it. Doctor Cid is weak to Holy, absorbs Dark and takes half damage from all other elements. Not long after that, at around 50% of his health, Cid will summon a new friend to join him, Famfrit, as well as toss up palings to completely null all damage to him. Of course, these palings will stay up until Famfrit is defeated, so you’ll need to turn your attention over to it.
At 50% health, Cid will summon Famfrit (left). He will erect palings on himself to nullify all damage until Famfrit is defeated (right).
This is where that “highest max HP” gambit comes into play, as your party should turn their blades towards Famfrit, instead of whacking away at an invincible Cid. You will see Cid occasionally buff Famfrit with Haste, Protect and Shell, so use Dispel to get rid of those. First and foremost, Cid will still attack you while you concentrate on Famfrit, but there’s nothing you can do about that, except keep your heals up. Famfrit is weak to Fire, absorbs Water and is immune to all other elements, so you’ll need to readjust some things to the new battle here. Firaga will work wonders on Famfrit or even your newly acquired Ardor, should you snatched it while ascending the Pharos.
Famfrit does have quite a bit of HP under its belt, but not too much else. Its normal attacks can inflict Silence and Briny Cannonade can only hit one character for Water-elemental damage. That’s about the extent of its attacks, too - except, you know, its ultimate attack of Aquaja. This deals heavy Water-elemental damage to the party and can also inflict Silence. If you have Viking Coats, Famfrit will be greatly frustrated in his attempts to do telling damage to you. Keep pelting it with attacks and the beast will eventually go down, leaving you to face Doctor Cid again. If Cid hasn’t started his other attack by now, he will after Famfrit perishes. This is S-85 Cyclotrone, an upgrade to the S-27 Tokamak attack he used in the first battle.
Also, with Famfrit gone, Cid will drop his palings for the remainder of the fight, so you are free to attack him without abandon. If Cid rebuffed himself, don’t forget to use Dispel to get rid of them again. There isn’t really much more to the fight after Famfrit goes, as Cid will stick to normal attacks while tossing in the other two skills now and then.
| Doctor Cid | . |
|---|---|
| Level | 50 |
| Weaknesses | Holy |
| Resistances | Dark (Absorbs), Earth, Fire, Ice, Lightning, Water, Wind (Halves) |
| Immunities | Blind, Confuse, Disable, Disease, Doom, Immobilize, Petrify, Poison, Sap, Silence, Sleep, Slow, Stop |
| Safety | Yes |
| Drop | N/A |
| Steal | Hi-Potion (55%), Ketu Board (10%), Magepower Shishak (3%) |
| Famfrit | . |
|---|---|
| Level | 52 |
| Weaknesses | Fire |
| Resistances | Water (Absorbs), Dark, Earth, Holy, Ice, Lightning, Wind (Immune) |
| Immunities | Blind, Confuse, Disable, Disease, Doom, Immobilize, Petrify, Poison, Sap, Silence, Sleep, Stop |
| Safety | Yes |
| Drop | N/A |
| Steal | Aquarius Gem (55%), Elixir (10%), High Arcana (3%) |
After the battle has concluded, you will gain Famfrit as a new Esper and there will be a number of scenes, including a demonstration of Ashe’s resolve, a sacrifice being made and humanity finally taking history back into their own hands. Once everything is said and done, you will end up back in Balfonheim, where the party will learn of recent happenings from Al-Cid about the impending war. You also find out your next destination, the Sky Fortress Bahamut, which will be your final leg on this journey.


No Comments