| Bestiary |
|---|
| Mimic • Mimic Queen • Suriander |
| Items In This Area |
|---|
| Capella • Cherry Staff • Cypress Pole • Horned Hat (Drop from Suriander) • Iron Hammer • Iron Sword (Steal from Mimic) |
North-South Junction
When you’re done looting Op Sector 37, return to the previous area - “Special Op Sector 3” - and make your way east to the threeway fork. At this point head south and pass through the newly-raised gate to reach a new, small area “North-South Junction”. It’s a safe enough area, given its Save Crystal, and Basch takes advantage of the fact to scavenge some arms and armor. Now somewhat resembling the warrior he once was, Balthier will resort to a bit of snide commentary, before Vaan starts throwing a tantrum. Basch will tell his side of the story, and despite the plausibility of Basch’s claims, nothing ends up resolved. Thankfully, Balthier steps in and puts an end to the argument, freeing you to continue on.
Great Central Passage
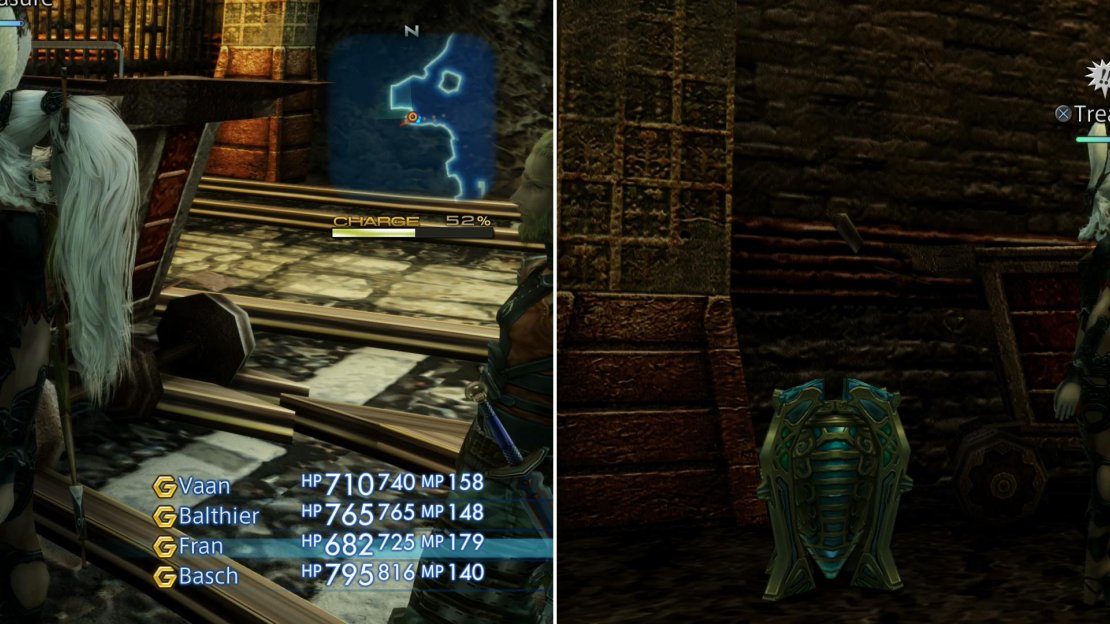
Exit to the southern area, the “Great Central Passage” where one more Battery Mimic lurks. Just head south and search a side area to the east to find the monster happily slurping down your power. Kill it and search the area to find a multitude of chests scattered about - or what appear to be chests, anyway. Look closely at these “chests”, however, and you may spot differences. One such odd “chest” can be found in the side area just south of where the Battery Mimic was feasting in the corner near a mine cart. Notice how colorful that “chest” is? Blues and greens can be seen in the central form of the chest and in its supporting arms. Head across the level to the west, however, and find another chest near a mining cart near a gate and look at it to find that it’s much less colorful. Shenanigans!
Mimic :
The colorful chests are, in fact, Mimics doing what they do best - mimicry! These larger Mimics have nothing to do with your electricity, preferring instead to take the form of objects irresistable to humanoids - treasure! As combatants, they’re nothing special, but they can use Leech to siphon some HP from their foes. You can obtain an Earth Stone, Eye Drops, Iron Scraps or a Dark Mote from them, or steal Iron Scraps, 20G or an Iron Sword .
Now that you know what to look for when it comes to Mimics, make your way to the western end of the level, where you’ll find a gate with three train tracks running through it. Search along the rocks south of the southern-most of these tracks here to find a normal chest near a mine cart (as was pointed out earlier), while west of this chest is another mundane chest, inside of which you may find some Onion Shot. This is the sole bit of noteworthy loot in this area, and once it’s yours travel south to reach the next area.
Normal, treasure-containing chests are bland (left) while Mimics posing as chests are distinctively more colorful (right).
Barheim Passage Skeleton Grind
While there are better places to grind later on, this area is the best spot in Barheim Passage to grind Skeletons. If your charge gauge is below 50%, around six Skeletons will spawn in this area, and the area to the north is very small, meaning you can zone out twice very quickly (remember, traveling two areas away - in this case returning to the Special Op Sector 3 - will respawn all foes in the Great Central Passage). Use this fact - while you avoid touching the Save Crystal in the area to the north and provoking the chest-faking Mimics - to chain Skeletons, who will then drop large numbers of Bone Fragments and Dark Stones.
Dark Stones are fair enough, as far as loot goes, but Bone Fragments are what you’re really after. These sell for 193G each, and if you collect 99 of them (the max allowed - it doesn’t take long to harvest them) the whole bundle will sell for a whopping 19,107G. Needless to say, this is a great sum of money for this point in the game, and nobody could fault you for wanting to fatten your purse a bit. All the better if you pile on a bit of XP and LP in the process. You can also keep your chain pretty much indefinitely, too, as you can return to Burrogh in The Lightworks area without resetting your chain, just hold down [R2] to run through the Barheim Passage in Escape Mode (to prevent you from killing any other enemies) and don’t touch any Save Crystals in between.
The Zeviah Subterrane
Three more Battery Mimics await your attention in this area, one of which is right near the area transition. You’ll find it to the west, on the other side of a low fence. Kill it and continue south killing Tiny Mimics (and perhaps Undead) as you go until you find the second one just east of the tracks. From this point on you’ll need to abandon the tracks you’ve been following through much of Barheim Passage, as they now lead into water. Instead continue south on the rocks to find a new foe - the Suriander.
Suriander :
A palette-swap of the Gigantoad, the Suriander is a tiny bit more formidable. Otherwise they have the same attacks (a normal attack, Gnaw and Angelsong) and are weak to Ice instead of Fire. They can drop a Storm Stone, a Horn, a Teleport Stone or a Horned Hat , while you can steal a Storm Stone, Horn or Antidote.
Fight your way south until you find a passage running uphill to the northeast. It’s worth exploring down south in a bit, but for now, focus on putting the third Battery Mimic down and turn northeast instead. Dispatch any foes in your way as you begin a literal uphill battle, at the end of which you’ll find the thieving Battery Mimic munching away on some wires near a light post. Smite it to end its larceny, then note the passage to the south, which leads to the next area. All well and good, but there’s looting to be done in this area, first.
Return to the beginning of the area (the northern-most bit with the area transition to the Great Central Passage) and plunder a chest east of the fence to get a shot at an Iron Hammer (Axes & Hammers 2). Another chest standing out in the open west of the fence can hold a Cypress Pole (Poles 2). Continue south and when the path splits, keep heading south along the rocky path. It’ll eventually lead to water, but right before the water you may find a chest right in the middle of the path, between some cliffs to the south and a boulder to the north. Loot it to possibly lay your hands on a Cherry Staff (Staves 2), then continue through the shallow water to the northwest to reach a small island, where you’ll find more Surianders and another chest, this one containing a Capella (Guns 2).
There are other chests, of course, and some contain various goodies like Motes and other damage-dealing items. Spend as much time getting whatever loot you wish, then make your way to the eastern end of the area, south of where you killed the third Battery Mimic, where you’ll find the area transition to the next zone.
Terminus No. 4 Adjunct
This area is another short area with a Save Crystal, little more than a safe zone before you move on to the final area. Recuperate, save your game, and when you’re ready head on to the next area to the south. Be warned, though - you’re leaving Barheim Passage behind after you leave this area, so be sure you’re done with everything you want to do, first.
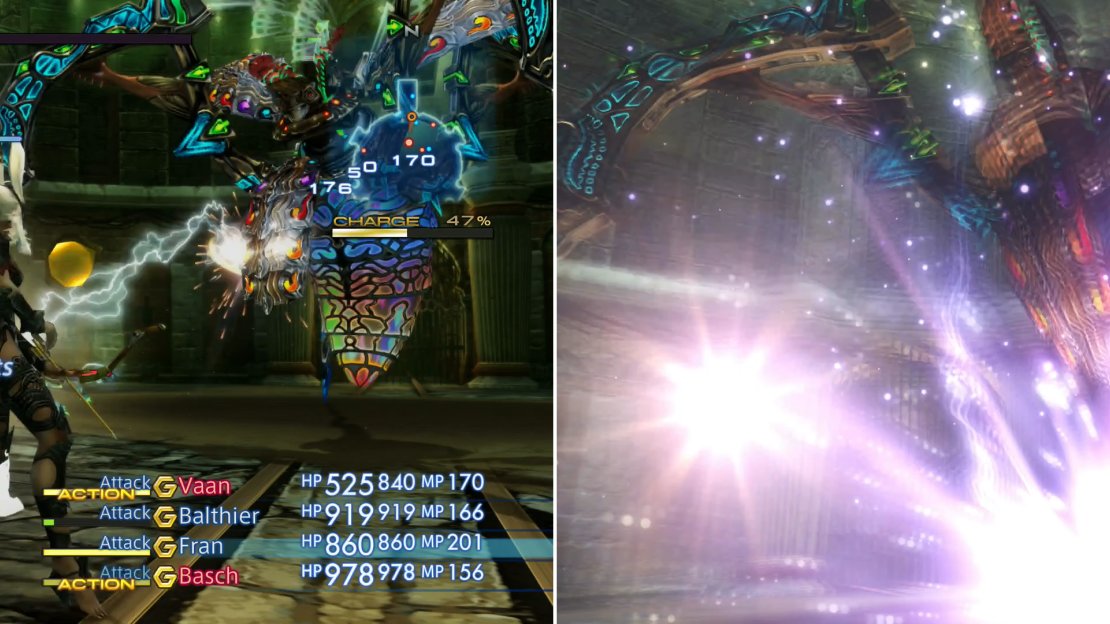
It should be no surprise that the Mimic Queen will utilize electricity, given the appetite of their children (left). When pressured she’ll use her potent Shockstorm attack (right).
Boss - Mimic Queen
| Mimic Queen | . |
|---|---|
| Level | 10 |
| Weaknesses | Ice |
| Resistances | Lightning (Absorbs) |
| Immunities | Confuse, Disease, Immobilize, Lure, Petrify, Poison Reverse, Sleep |
| Safety | Yes |
| Drop | N/A |
| Steal | Knot of Rust (55%), Storm Magicite (10%), Rose Corsage (3%) |
When you arrive in the next area you’ll find a host of Mimics - and their source. Of course these insectoid beasts have a queen, and she’s none too happy to see you stumble into her nest.
She starts out with four Tiny Mimics scurrying around, but their primary focus is to deplete your charge gauge to no discernable effect. If bothered, they may turn and attack you, feeble as they are. Ignore them and focus on the Mimic Queen instead, who is much more of a threat. Her basic kick attack can deal around 60~ per hit, and as to be expected, she’s more than happy to utilize Thunder magick against you, also dealing 60~ damage. The attack you really have to watch out for is her infrequently-used Shockstorm , which hits the entire party for 150~ damage.
Keep your HP above that threshold, however, and you should be fine. The Mimic Queen isn’t a terribly difficult foe. To give herself some longevity she’ll also use Breath of Life to heal a bit, and she’ll use Spawn to create more Tiny Mimics. She’s weak to Ice magick, but since you don’t have access to any at the moment, it’s kind of a moot point.
Once the Mimic Queen has been bested you’ll flee the Barheim Passage, leaving the place in no condition to make a return easy.


No Comments