


| Items In This Area |
|---|
| Killer Bow • Onion Arrows • Onion Bolts • Pheasant • Netsuke • Recurve Crossbow |
Jahara
Welcome to Jahara, land of the Garif, who all look rather similar, thanks to their penchant for masks. When you first enter the village, there will be a Chocobo stable nearby, as well as a Gate Crystal, but the main entrance into town is being blocked by two guards. Speak with the one guard and he’ll rightfully insult Vaan, but another garif comes and vouches for your warrior spirit, who turns out to be War-chief Supinelu. With backing like that, your entry is assured. There is really not much to do here in the village, so go around and speak with some of the garif to learn that the elders know not much of this nethicite.
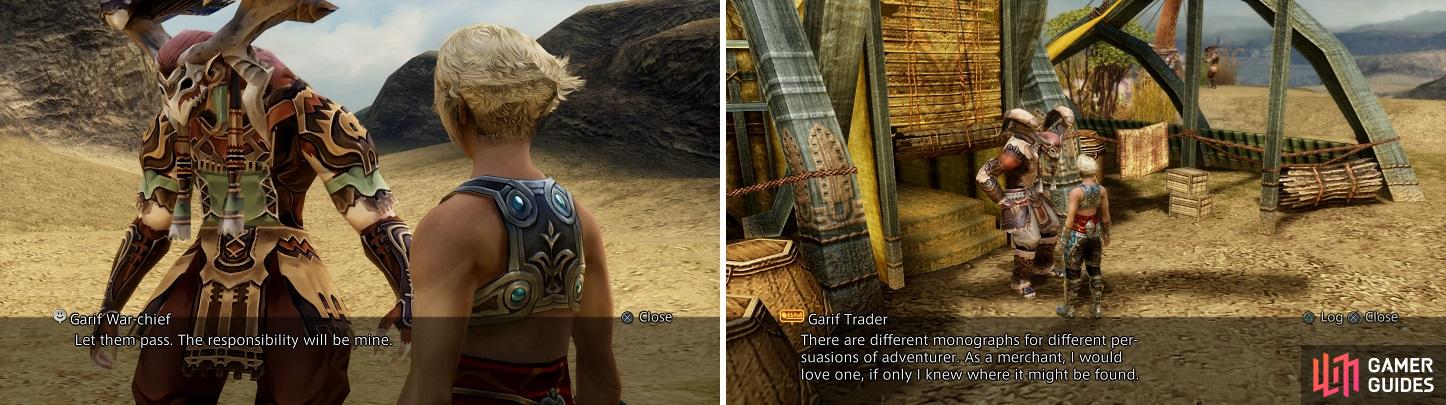
The War-Chief lets you inside the village (left). The merchant here mentions something called Monographs (right).
One does say that the Great War-chief might know of nethicite, but before you go off and speak with him, check out the lone shop here. You will see that it is selling plenty of weapons, some of which you might have equipped currently. Of course, if you’ve been following this guide so far, the equipment on offer might be a little outdated. One thing you might want to purchase is additional Tourmaline Rings, since they halve the damage dealt by Ice magicks, a resistance which will be useful for an upcoming Mark.
Also, the trader has a new technick, Traveler, and some new magicks - Stona, Fira and Bleed. Traveler deals damage to all enemies within a range, based on the number of steps you have taken since last dealing damage with it (it maxes out at 9,999 damage) - it can be used by a Machinist, Archer and Shikari, as well as the Monk, once they’ve been assigned an upcoming Esper. Stona (White Magick 5) cures Petrify, allowing you to dispose of Gold Needles, Fira (Black Magick 5) is an area-of-effect Fire elemental attack, a worthy upgrade for your Black Mage, and Bleed (Time Magick 5) deals damage over time to a single target.
As far as loot goes, you may have obtained a good bit of treasure in the Ozmone Plain. Doubtlessly you’ve collected some Quality Hides from Zaghnals, Dark Magicite from Black Chocobos, Chocobo Feathers from Black Chocobos and Red Chocobos, Iron Carapaces from Mesmenirs, and hopefully some Wyvern Wings from Aeros. There are rarer ingredients, of course, but nothing worth spending time harvesting. Despite all this none of this loot will unlock any Bazaar bundles, so while it’s worth checking your stores of the aforementioned loot items, you won’t be doing any Bazaar shopping just yet.
Monographs
As you finish your dealings with the merchant in Jahara, you see him mention something called Monographs. These are special Bazaar items that you can unlock, that when purchased, will make enemies start dropping more loot. Monographs are not unlocked by selling loot, but rather in indirect methods, with one such example being to talk to any weapon shop owner 30 times. The only catch is that they are rather expensive to buy, with the cheapest one costing 18,000 Gil. When unlocked, Monographs appear as “ Forgotten Grimoire “ in the Bazaar section of a shop. The following table shows how to unlock each Monograph. Note that all of the numbers are cumulative and doesn’t have to be done at once. The first ones you should save up for are the first three Monographs, as you encounter a lot of beasts/avians, giants/insects, and amorphs/undead (respectively).
| Monograph | How To Unlock | Price |
|---|---|---|
| Hunter’s Monograph | Talkto Gastly in Muthru Bazaar after. | 18,000 Gil |
| Knight’s Monograph | Talk to weapon merchants 30 times. | 19,000 Gil |
| Warmage’s Monograph Mage’s Monograph | Read notice board 20 times. Talk to magick merchants 25 times. | 20,000 Gil 21,000 Gil |
| Dragoon’s Monograph | Read notice board 40 times. | 22,000 Gil |
| Scholar’s Monograph | Talk to armor merchants 15 times. | 22,000 Gil |
| Sage’s Monograph | Talk to any merchant 100 times. | 25,000 Gil |
| Canopic Jar | Sell Phobos Glaze, Horakhty’s Flame and Deimos Clay to any merchant. | 250,000 Gil |
The Great-Chief
Once you’ve finished shopping head east of the merchant to find High-chief Zayalu, who will give you a Jaya Stick and ask you to deliver it to the War-chief Supinelu when you speak to him. Righty-o. Make your way to the northwestern corner of the village to find a bridge, near which stand Supinelu and some more guards. This bridge leads to the Great-chief, who may know of nethicite, but first you’ll have to decide what to do with this Jaya Stick. You can give it to Supinelu as instructed, but you can also sell it for 500G. You’ll get a different item for it after the following scenes - giving Supinelu the Jaya Stick will ultimately net you a better reward, but it’s something you can just buy soon enough, anyway.
Give Supinelu the the Jaya Stick or sell it, then you’ll be let past to see the Great-chief after Ashe makes an appeal… and Supinelu trusts his instincts over anything objectively verifiable. In the next area - The Elderknoll - you can do a few things prior to your audience with the Great-chief. If you picked up the Enkelados hunt from Rabanastre, then go north from the entrance to find Low-chief Sugumu, who will point out where you can hunt the beast, officially starting the hunt. If you head to the far west end of this area, you will find a treasure that yields a Pheasant Netsuke accessory. This handy little thing will double the effect of restorative items, such as Potions.
Now, go and speak with the Great-chief, whose hut is just uphill and to the west of the bridge. Unfortunately he’s of little help, as the use of nethicite eluded the garif. This caused the gods to take back the stone and give it to the Dynast-King, who used it to restore peace. While speaking with the Great-chief, he will have another visitor, Larsa. He proposes heading to Mt. Bur-Omisace, to get the blessing of the Gran Kiltias to hopefully stop the impending war. Larsa’s proposals are somewhat surprising, since it requires maturity and foresight (something which Larsa clearly has more of than Ashe) and the alienation of past allies - in your case, of Ondore, in his case, of Vayne.
After Larsa leaves you’ll be treated to a scene of Ashe and Vaan chatting, where Vaan pretty much forfeits the only, tenuous bit of motivation he had, becoming an even more bland, superfluous character. In the morning, Ashe will agree to Larsa’s course of action, and the pint-sized Archadian will make a vague promise before joining your party as a guest once more… or as a prisoner? It seems Dalmascan nobles aren’t the only ones inclined to beg to be kidnapped, eh? Not much has changed for Larsa, but he does come with a wonderful new magick this time, Bubble. This spell basically doubles your max HP when it is cast on you, so someone with 2,000 HP normally will have 4,000 HP with Bubble. Watch Basch and Baltier chat some, then the scenes will finally be over.
On your way out, Supinelu will give you either a Recurve Crossbow and a quiver of Onion Bolts or a Killer Bow and some Onion Arrows . You’ll get the former if you gave him the Jaya Stick and the latter if you did not. He’ll also mention that he spoke with the Moogle at the Chocobo stable to offer you a free ride for your first time, which is good, becuase you’re going to need that mount here shortly. Speaking of Chocobos, Don’t forget to buy the maps for Jahara (30G) and Ozmone Plain (1700G) from the Cartographer near the Chocobo pen.
| Cartographer’s Guild - Maps | . |
|---|---|
| Jahara | 30 Gil |
| Ozmone Plain | 1,700 Gil |
Hunt - Enkelados
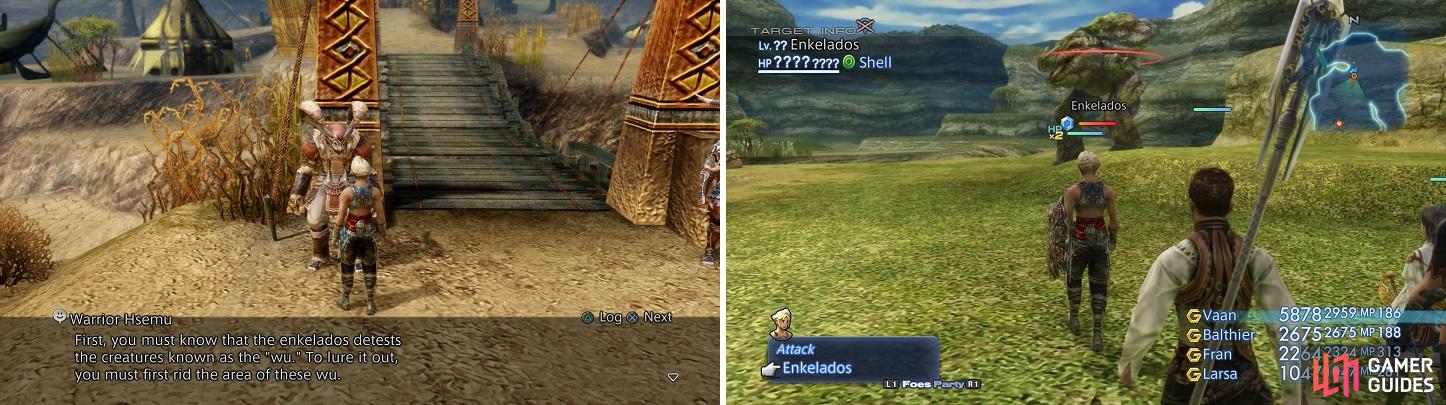
Hsemu will give you rundown on how to spawn Enkelados (left), where you will it in The Shred after clearing it of the Wu creatures (right).
You’re all set to leave Jahara now, as far as the main quest is concerned, but there’s still one more bit of business you can see to before leaving Jahara and the Ozmone Plain. Return to the bridge where you spoke with Supinelu and talk with Warrior Hsemu to get an update on how to spawn the Enkelados. He confirms its located at The Shred and mentions that you will need to get rid of all of the Wu there before it will appear.
You should already know where The Shred is located, since you hunted two Rare Games there, the Bull Croc and Aeros. Going by what Hsemu said in Jahara, it looks like you will be doing the same thing here to make Enkelados appear - killing all of the Wu bird creatures in the northern part of the zone. Once you do this, exit and re-enter to have Enkelados appear. Note that this could also spawn Bull Croc, so you need to be prepared for that possibility. That said, Enkelados doesn’t charge at your party and will freely walk around, so you could potentially lure Bull Croc away from the Mark, down it, wait for Aeros and get rid of both before engaging with Enkelados.
The Mark itself is one of the easier ones in the game. It doesn’t have many options as far as offense is concerned, sating itself with Gnaw and Spin Kick, the latter being the only multi-targeted ability. Enkelados is only immune to Doom, Petrify, and Poison, so you can use whatever ailments leftover to inflict on the beast. However, once the enemy’s health hits 50% or lower, it will Purify to rid itself of any ailments, then follow this up with White Wind, preventing any more for two minutes. Enkelados can also use Restore to recover some health, although at best it’s just delaying the inevitable. It is weak to Wind, absorbs Earth and takes less damage from all other elements. The Mark drops nothing, but you can steal a Potion, Earth Magicite or a Slaven Harness. When the beast has been felled, return to Sugumu in Jahara to receive your reward. Note that the Errmonea Leaf you receive after the battle can be given to Lesina in the Nomad Village in Giza Plains during the Dry for two Remedies.
| Reward (For exterminating Enkelados) |
|---|
| 1,100 Gil |
| Ether |
| Golden Amulet |
No Comments