


| Bestiary |
|---|
| Cockatrice • Flowering Cactoid • Nekhbet (Rare Game) • Ripe Rampager (Rare Game) |
| Items In This Area |
|---|
| Argyle Armlet • Calot Hat (Drop from Ripe Rampager) • Firefly* • Handaxe • Onion Arrows • Poison • Wizard’s Hat (Drop from Nekhbet). |
*If not collected earlier.
Sand-swept Naze
You’ve finally put to rest the Mimic Queen and escaped the cave-in of Barheim Passage, emerging in the Estersand, although likely an unfamiliar zone. Before you return to Rabanastre, there are a few things you can do here, with the mighty support of Captain Basch (he’s still a guest, so enjoy the extra character while you can!), specifically the Flowering Cactoid hunt you should have logged, as well as some Rare Game. There are also a few treasures you can get in the Estersand, although nothing too amazing or game-breaking, but diversifying your magick aresnal is always worth doing - especially if it’s for free! The two main areas you’ll be concentrating on are Sand-Swept Naze (just west of your current location) and Yardang Labyrinth, which is south of the former.
As soon as you exit the Passage Entrance zone and enter the Sand-Swept Naze, go south and look at the dead end to your east to spot an Urn, which will contain the Poison magick (Black Magick 5). This is the only place where you can get this and since you’re literally a hop, skip and jump away from it, why not pick it up now. There’s one other thing you will want to do in the Sand-swept Naze, which is to hunt down the Rare Game, Nekhbet.
Nekhbet:
In order to spawn it, you’ll need to kill some Cockatrices in the zone, so run around (maybe utilizing Speed Mode to expedite the process) and slaughter the balls of feathers. For each one you kill, Nekhbet has a 20% chance of spawning and there are three specific areas in which it can show up: the center of the area, at the eastern end of the area (close to the Murmuring Defile zone), and near the westernmost point of the area. You’ll know it has spawned when you see it, as it tends to appear with some buffs, like Bravery, Faith and Protect - the icons floating over its head are unmistakable. Unfortunately, there’s nothing you can do about those buffs, so you will have to live with them for now.
In addition to those buffs, Nekhbet boasts nearly 4,000 HP and a physical attack stronger than the Mimic Queen, so it’s at least going to take a bit longer to chop down than its lesser fellows. Since Nekhbet does hit a little bit hard, you might want to set up a Gambit to use Cure on someone if they drop below 50% HP or so (if you don’t have such a Gambit active already), just to be on the safe side.
Its attacks do more than just hit hard, however - they also have a chance to inflict Slow. It knows Purify, so inflicting ailments (like that new Poison spell you just found) might not be a good idea, Poke does a little more damage than the regular attack (and can also inflict Slow), and Mucus has a chance to inflict Slow on its own. Once you drop its health below 50%, you will have to contend with an increase in damage. It can drop a Small Feather or a Wizard’s Hat (Mystic Armor 3) and you can steal a Rainbow Egg from it. Whether it’s worth the trouble to get these items (especially the Wizard’s Hat) is for you to decide. It’s weak to Water, but absorbs Fire.
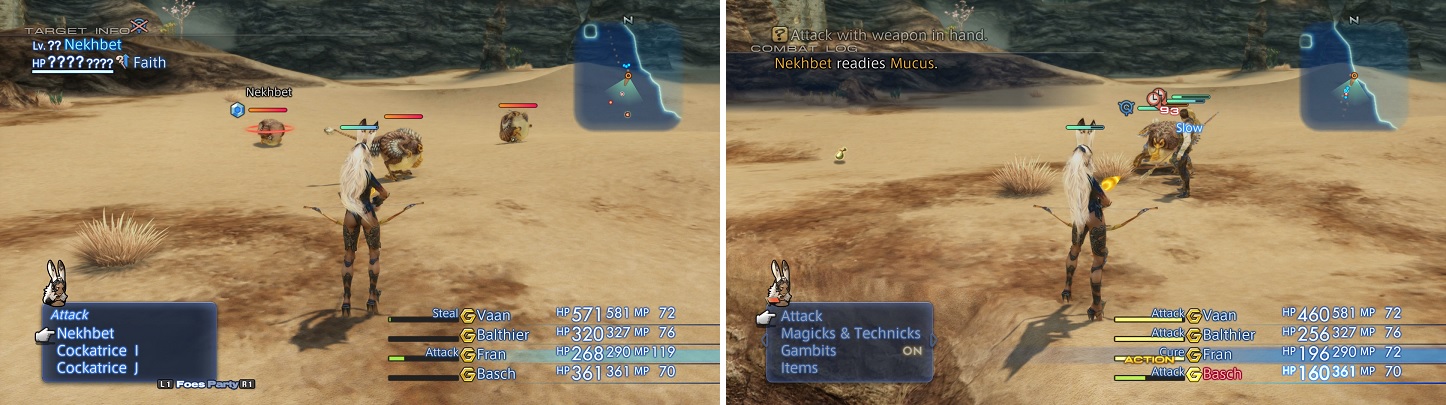
You can tell if Nekhbet spawned by his buffs (left). His Mucus attack inflicts Slow (right).
When you’re finished with Nekhbet there’s one more bit of loot you can set your mind to grabbing in this area. Make your way to the western-most edge of the area, where you’ll find an area transition to the north which leads to the “Banks of the Nebra” zone. This area itself isn’t of much interest just yet, but it’s a good place to start searching for this treasure. From this area transition turn south to find two large rock formations, which together serve as a barrier. Head south along the eastern edge of these rocks to find a much smaller stone standing on its own to the southeast. On the western side of this stone you can find an urn which often contains an Argyle Armlet (Accessories 3).
Hunt - Flowering Cactoid
With that you’re done in the Sand-Swept Naze - it’s time to move onto the next target, which can be found in Yardang Labyrinth to the south. To be precise, there are two targets here, one is the Flowering Cactoid (the Mark of the hunt “Dalmasca’s Desert Bloom”) and the other is the Rare Game, Ripe Rampager. The latter takes a little bit of work to spawn, while the former just requires you to talk to Dantro in the Outpost area, which can be reached by passing through the Yardang Labyrinth and exiting via the area transition in the southwestern corner. This, of course, assumes you’ve accepted the hunt “Dalmasca’s Desert Bloom” from the Sandsea earlier, as suggested. If not, do so now or just skip ahead to the “Ripe Rampager” header below and come back to this section when you’ve accepted the hunt.
The first step of this hunt - aside from reading the notice in the Sandsea - happens before you even bother talking to Dantro, as the Flowering Cactoid will utilize the random enemies of the Yardang Labyrinth against you if given a chance to do so. Don’t let it play that game, and explore the place before starting the hunt, clearing out whatever Wolves and Cockatrices which prowl about but leave the neutral Cactoids and Cactites alone for now. When done, head to the Outpost area and return, then kill all those monsters that respawned. With two good wipes done leave the Yardang Labyrinth and head to the Outpost.
When you reach the Outpost find Dantro - the man sitting on a crate talking to a Seeq - and he’ll tell you about the Mark. The Flowering Cactoid, however, decides not to leave its reputation to Dantro, and makes a personal appearance. If that provocative plant wants a fight, it’ll get one! Before you leave, if you’ve never been to the Outpost before (you may have come here during the Dustia Grind) be sure to search the eastern-most part of the map, past a palm tree, where you’ll find an urn waiting for you near the sheer cliffs. Plunder it to score a Firefly (Accessory 2).
| Flowering Cactoid | . |
|---|---|
| Level | 4 |
| Weaknesses | Wind |
| Resistances | Earth (Absorbs) |
| Immunities | Confuse, Doom, Libra, Lure Petrify, Poison, Reverse |
| Safety | Yes |
| Drop | N/A |
| Steal | Cactus Fruit (55%), Earth Stone (10%), Potion (3%) |
Return to the Yardang Labyrinth and make your way northeast. Ignore the first opportunity to turn southeast, but take the second one, where you’ll find the Flowering Cactoid (this is just south of the area transition to the Sand-Swept Naze). The Flowering Cactoid is a jerk, plain and simple. Not only do you take damage when you attack, but the Mark has pretty good evasion, which is something you can remedy by sticking Balthier’s default gun - an Altair - back on him (they ignore evasion) - assuming you bothered to change his equipment, anyway. If that’s not annoying enough, the Flowering Cactoid’s regular attacks can inflict Blind. Be sure to counter with Blindna and/or Eye Drops.
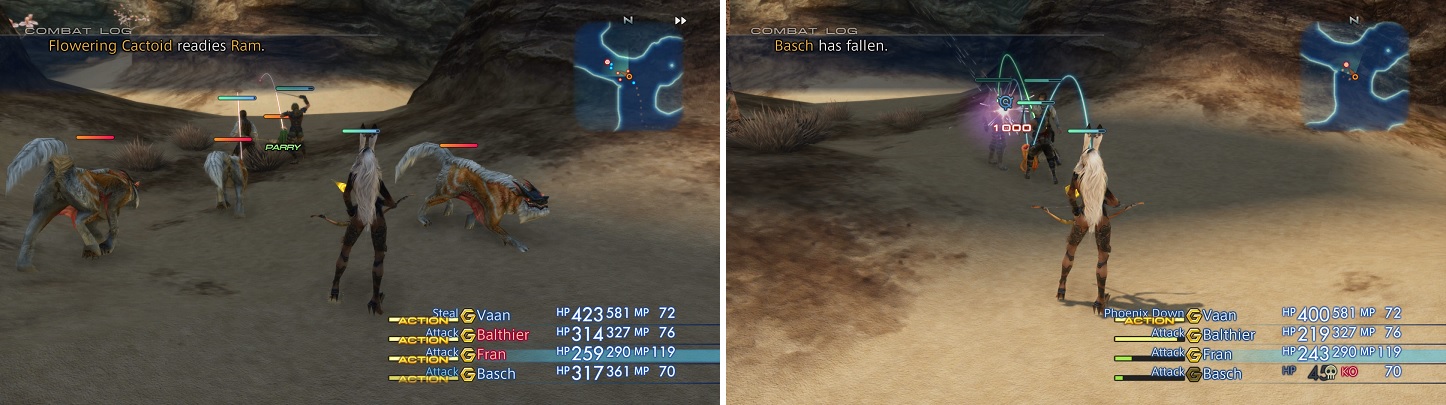
The Flowering Cactoid will run, bringing other enemies into the fight (left). When it gets low on health, watching out for its 1,000 Needles attack (right).
After sustaining enough punishment the Flowering Cactoid will try to scurry off, making you give chase and inviting other enemies to attack you. If you cleared the area ahead of time, it’ll be much easier chasing it down and keeping up the pressure. On the other hand, if you’re forced to ease the pressure to concentrate on the other mobs, then the Flowering Cactoid can actually use Potions to heal itself.
If you continue to damage the cunning Cactoid to the point where its HP drops below 20% it’ll start using its 1,000 Needles attack. This wretched attack - a staple of Cactuars in Final Fantasy games - deals one point of damage per needle, collectively inflicting 1,000 damage to its target. At this point in time this will probably kill whomever it hits instantly. Keep a Phoenix Down handy for this eventuality and finish it off to prevent it from using it too many times. It doesn’t drop anything and has nothing useful to steal, so just kill it and then return to Dantro to receive your reward.
| Reward (For Killing the Flowering Cactoid) |
|---|
| 500 Gil |
| Potion (x10) |
After you collect your reward from Dantro for the Flowering Cactoid, talk to him again and he’ll ask you for another favor. The cheek of this guy! Oh well, it’ll give you an incentive to explore more, even if you can’t complete his little quest yet. He’ll ask you to simply take the Cactus Flower you plucked as a gruesome (by plant standards, anyway) trophy from the Flowering Cactoid to his wife in a village to the north.
Rare Game - Ripe Rampager
Before you venture off to the South Bank Village and give Dantro’s wife that Cactus Flower, return to the Yardang Labyrinth. It’s time to hunt down another vegetable villain! To lure this Rare Game out of hiding you’ll need to exterminate the other, neutral Cactoids and Cactites in this area, and with any luck they’ll be the only critters left in this place. If not, no big deal, this just means more trash mobs to smite on your way through.
From the area transition to the Outpost head southeast to find a Cactite milling about. Kill it, then head north, then east until you hit a fork, at which continue east a tiny but until you hit another fork. Turn south here, then when your way south is impeded by some rocks turn east again to find the second Cactoid critter. Once it’s been smote continue east until you reach the end, then turn north to hit a fork. At this point head west a bit before heading up a sandy route to the northwest to find the third Cactoid.
With those three slain return to where you killed the first Cactite, which again is just southeast of the area transition to the Outpost (if the first Cactite has respawned, kill it). Wander around the dead-end here and there’s a chance it’ll pop out of the ground. If it doesn’t, return to the Save Crystal in the Passage Entrance area (where you exited Barheim Passage), save your game, quit to the main menu, reload and try again.
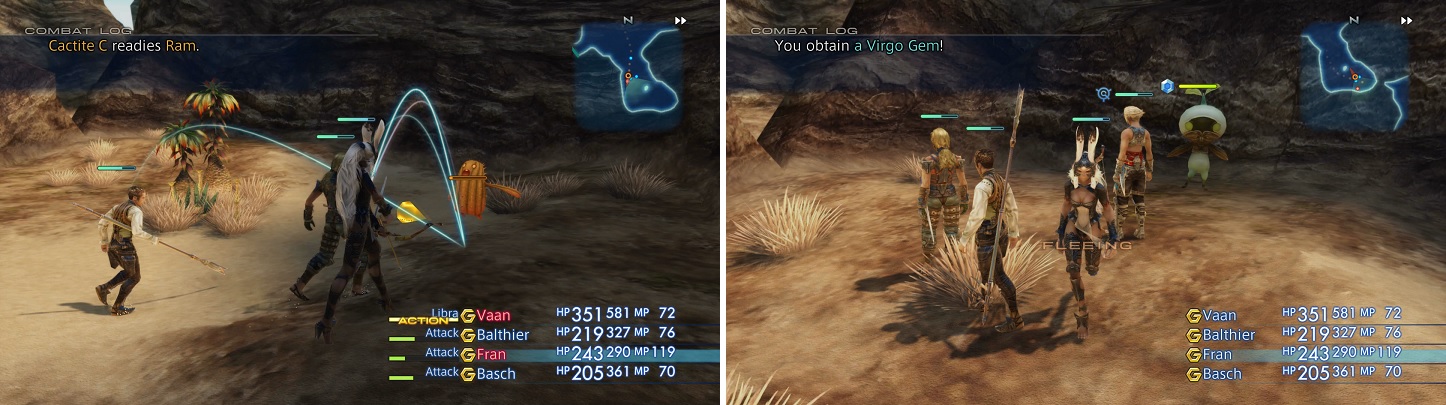
Slaughter the Cactites (left) and you may get the Ripe Rampager to pop up out of the ground (right)
When you’ve managed to get the Ripe Rampager to show itself, begin attacking it, as it is otherwise neutral. All in all, it’s a very weak foe compared to Nekhbet and the Flowering Cactoid. Its normal attacks can inflict Blind, plus it has access to Cure, Protect and Blindna. Vespersong increases its Magick, but you don’t have to worry since it doesn’t have any offensive ones, while Warsong increases its strength. Mystery Waltz can be dangerous, as it can increase its level, but you should be able to kill the mob fairly quickly without any troubles.
It has a possibility to drop a Calot Hat (Mystic Armor 3) as its rare drop, and it has a Screamroot loot item you can steal, which is worth a whopping 1,350 gil when you sell it. If you want to get a little extra out of the Ripe Rampager, go away two screens and respawn it twice more to get a total of three Screamroots, which can be sold to open up a Bazaar bundle.
Checking Out Nalbina
After you’ve wilted those two weeds, it’s time to return to Nalbina. Not the dungeons, thankfully, but there’s a bit to see and do in the fortress itself. To get there, just head to the northeastern part of the Yardang Labyrinth to find an area transition to Nalbina. Before you leave the Yardang Labyrinth, however, search the cliffs to the west to find an urn, which should contain the Silence magick (Black Magick 3). If you have a Black Mage/Red Battlemage, then this magick will be extremely useful in an upcoming hunt but more on that later.
Portentous Provisions:
Pass through the area transition to reach the first area of Nalbina - the “West Barbican”. This area is pretty quiet, just a Gate Crystal (which you should activate to unlock it as a possible teleport destination) and a Seeq merchant - Portentous Provisions. Despite their sob story, however, it’s unlikely you’ll find much worth buying, as they only sell basic ammunition and common curatives including Potions, Antidotes, Eye Drops, Phoenix Downs and Echo Herbs. Since the way to the northwest - the Mosphoran Highwaste - is blocked, continue northeast into Nalbina instead.
Jajim Bazaar:
The central area of Nalbina’s three zones is the Jajim Bazaar, and as its name implies, there are a few merchants here worth checking out. Also, if this is your first time visiting Nalbina (outside of the lovely dungeons, of course) then you’ll bear witness to a cutscene showing off the fortress. The first shop as you head northeast is the Mysterious Magicks store, which, as the name implies, sells a variety of spells. You should find every spell you’ve been able to find for sale so far here, with the notable addition of Blizzard (Black Magick 2), which is bound to make your Black Mage happy.
Troublesome Technicks:
Troublesome Technicks is the next up, but despite the suggestion of illicit wares, this merchant offers nothing but the Libra and First Aid technicks, which you’ve either obtained (First Aid from Balthier) or you’ve had plenty of other merchants off (Libra).
Morning Star Gambits :
Continue, then, to the northeast to find another stall - Morning Star Gambits. Unlike the last merchant, this one has new goodies to sell you, and who doesn’t love new Gambits? Acquire some interesting new Gambits, which will advance the intuition of your AI as much as is allowed by your income, anyway. This will get you near all the Gambits available, and purchasing them all will cost you around 20,000G, so unless you spent time grinding Skeletons you’ll probably have to leave a few things on the table. The best ones to purchase right now would probably be the Ally: HP ones, as well as the Ally: status Gambits.
Antiqued Armors:
Make your way northeast to the final area of Nalbina, West Ward. Here you’ll find two merchants, a Seeq selling armor and another selling weaponry. Start with Antiqued Armors to pick from a selection of tier 1 and tier 2 armors. New armor includes a Magic Curch (Mystic Armor 1), Leather Armor (Heavy Armor 1) and Cotton Shirt (Mystic Armor 1).
Weapons of War:
Not much worth buying there, maybe if it wasn’t so antiqued it would be worth purchasing? Anyway, make your way to the weapon-selling Seeq to find that he, too, sells tier 1 and tier 2 gear. The only new item here is a Silver Bow (Bows 2).
Banks of the Nebra
When you’re finished window shopping in Nalbina, there is one last thing to do in the Estersand - get a jump start on that quest Dantro gave you. Return back to - and through - the Yardang Labyrinth area, making your way to the Sand-Swept Naze. In the northwestern corner of this area you’ll find an area transition, which in turn leads to the Banks of the Nebra zone. The area transition to the village where Dantro’s wife can be found is in the center-north edge of this zone, but before you head there, let’s give this place a look-see.
This place is largely occupied by Cockatrices, Wolves, and the odd neutral Cactoid. Near the shore to the north you’ll find Ichthons (somewhat stronger than the ones in the Garamsythe Waterway), where the Rare Game Greeden can also spawn. Greeden is probably a bit tough for you right now, so avoid him by killing any Cactite or Cactoid, as he’ll spawn if you spend three minutes in the zone without killing one.
As for the loot, head east along the southern cliffs that form the boundary of this area and when the cliffs turn southeast, search a cubby to find an urn, which can contain a Handaxe (Axes & Hammers 1). From here continue east to find another urn near some palm trees, within which you may find some Onion Arrows . For the next bit of loot return to the area transition that leads to the Sand-Swept Naze. From here follow the cliffs west, then north to find an urn near some palm trees, which may yield a Shortbow . Finally, from the area transition that leads to South Bank Village make your way south to find an urn behind some rocks. Inside you might find a Bangle .
Patient in the Desert (Part 1)
With the Banks of the Nebra looted, make your way to the South Bank Village, where you can find a Gate Crystal, a cartographer Moogle with maps you’ve already had the opportunity to buy, an Unlucky Merchant selling entry-level ammunition, basic curatives and the Blizzard magick. Besides that there’s little of immediate interest, so let’s go find Dantro’s wife, who can be found standing in front of a small building right next to the merchant.
Speak with her and she’ll shush you up, claiming the patient inside is recovering and needs quiet. What, does he have an ear infection or something? Whatever. When she notices that you have the Cactus Flower she’ll take it off your hands and give you a “ Bunch of Needles “, which is in fact the Bundle of Needles loot item. Naturally this item contributes to a Bazaar bundle, and you only need one, which is good, because it’ll be a while before you get your hands on another.
| Reward (For bringing the Cactus Flower to Dantro’s wife) |
|---|
| Bundle of Needles |
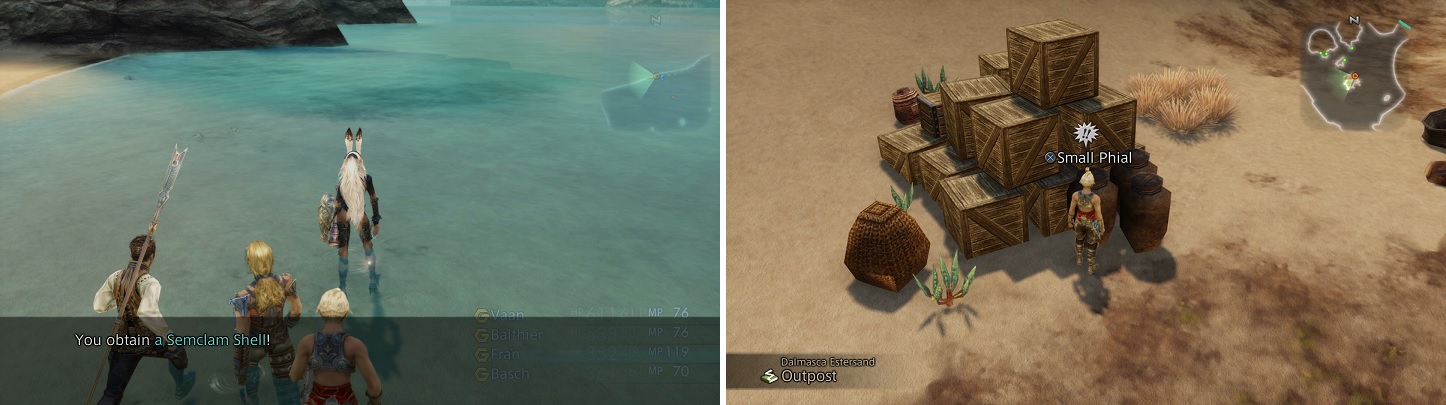
The Semclam Shells can be found along the shore (left). You can actually see the small phials of Nebralim in the outpost with Dantro (right).
Like her husband, she’s not content when you finish the stated task, however. Talk to her again and she’ll impose on you, asking you to grab some Semclam Shells to help aid her patient’s recovery. These Semclam Shells can, naturally, be found on the banks of the river, and it’s worth pointing out that the reward for this sidequest will vary depending on how many items you collect and bring back. You’ll always get the Key Item this quest rewards you with, but still, you might as well get as much out of this as possible, right?
There are five Semclam Shells to find, and two of these shells can be found right in the village. First make your way to the village’s northeastern most point to find a Semclam Shell merrily sparkling away under water, near some rope-laden posts. The sparkling really makes these things hard to miss. The second Semclam Shell is on the opposite end of the waterfront, to the west, in the northwestern corner of the village.
Once those two are yours return to the Banks of the Nebra area and head west, then north to reach the Nebra river. Wade into the water as far as you can go and search the eastern-most edge of the riverfront you have access to in order to find the first of three Semclam Shells in this area. From here just splash your way west through the water until you find the second Semclam Shell three quarters or so of the way to the edge of the area. The fifth and final Semclaim Shell is, predictibly, in the water in the northwestern corner of the zone. Bring the shells back to Dantro’s Wife and she’ll send you on another fetch quest, this time for Nebralim vials.
There are only two vials and they are both in the same location, in the hands of Dantro himself. So, you’ll need to run all the way back to the Outpost, which will be made quicker with the help of Speed Mode, which Square-Enix thankfully implemented for this remaster. When you finally reach the Outpost talk with Dantro, who tells you the vials are on the crates nearby. For the first one simply turn southeast from where Dantro sits to spot a collection of urns and crates. The “Small Phial” of Nebralim is on top of one of the urns. The second one can be found to the north, near a house in front of which a Chocobo stands. Simply search the urns next to the Chocobo to find the second dose of Nebralim.
With both in hand, return them to Dantro’s Wife and she’ll request yet another item - some Valeblossom Dew to neutralize the poison. This guy has a fever, was in pain, is bleeding and he’s poisoned? Maybe if this hack frontier doctor would stop treating the symptoms and start working on their cure. In any event, this Valeblossom Dew can be found in the Broken Sands, a place you cannot reach quite yet. Put this on the backburner for now and return to Rabanastre to continue the main story.
No Comments