


| Bestiary |
|---|
| Danbania • Pineapple (Rare Game) • Speartongue • Urutan Exile (Rare Game) • Urutan-Yensa • Wyvern. |
| Items In This Area |
|---|
| Ancient Sword • Argyle Armlet (Poach from Danbania) • Barbut • Barbut (Steal from Yensa Bhuj) Golden Amulet • Golden Shield • Healing Rod • Killer Bow • Kogarasumaru • Leather Gorget • Linen Cuirass • Linen Cuirass (Drop from Wyvern) • Magoroku (Drop from Urutan Exile) • Musk Stick • Reflect • Round Shield • Sirius • Storm Staff (Drop from Pineapple) • War Hammer • Wizard’s Hat • Wizard’s Robes • Wizard’s Staff. |
Platform 1 - East Tanks
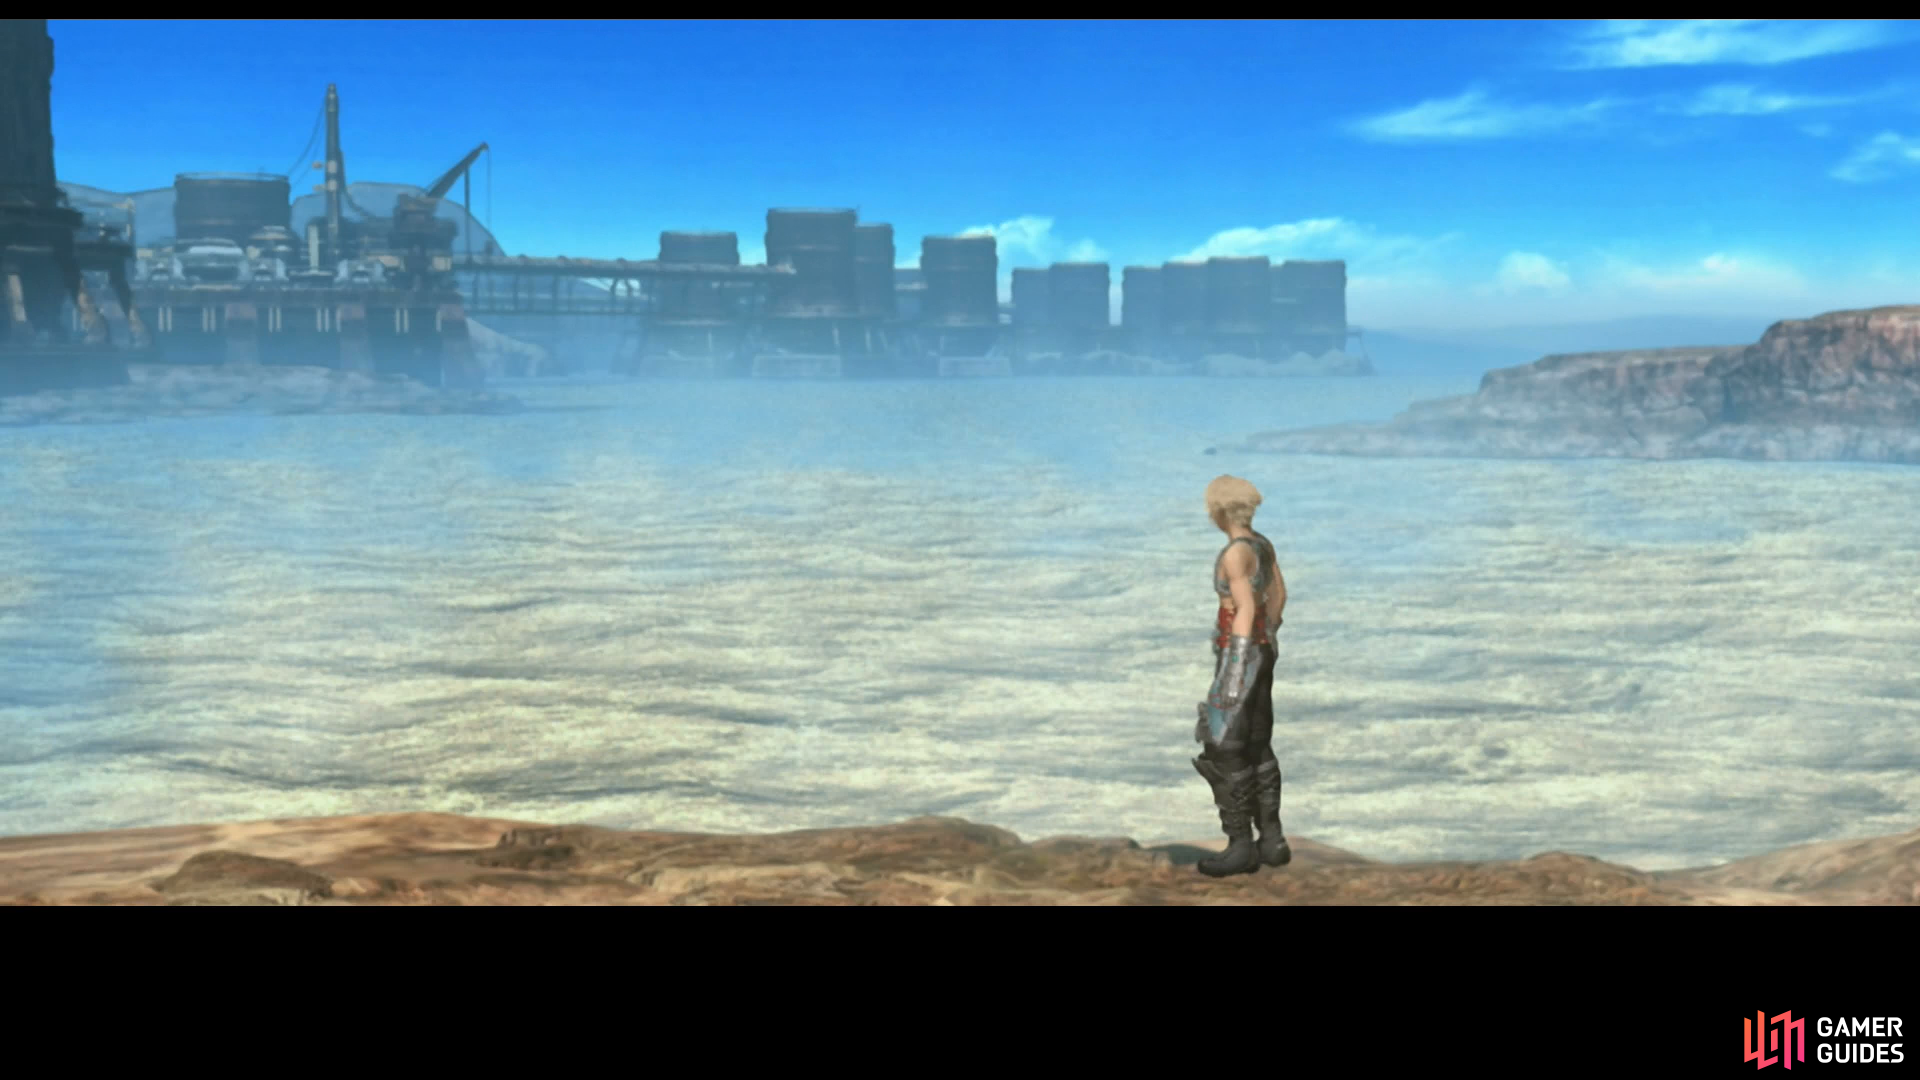
Leave the oasis of The Western Divide and venture west into the first area of the Ogir-Yensa Sandsea - the East Tanks area. When you arrive, venture a bit west and Vaan will test how literally accurate the name of this area is, only to find that the name is apt, indeed. There’s not too much loot in this area, and much of the loot in this part of the Sandsea could have been purchased in Rabanastre, but it’s still worth pointing out if you want to get a second copy for free, or if you didn’t bother to buy said items at the first opportunity.
From where you start out head west to reach the northern tip of the area, where you’ll find a chest wedged between some cliffs and the sandsea itself. In this chest you may fund a Bhuj (Maces 2). From this chest head south and you’ll find a ramp leading up to a circular platform surrouding a massive tank. Kill the Alraunes near the ramp, then ascend to find two urns. The one to the left contains the map to the Nam-Yensa Sandsea , while the one to the right contains the map to the Ogir-Yensa Sandsea .
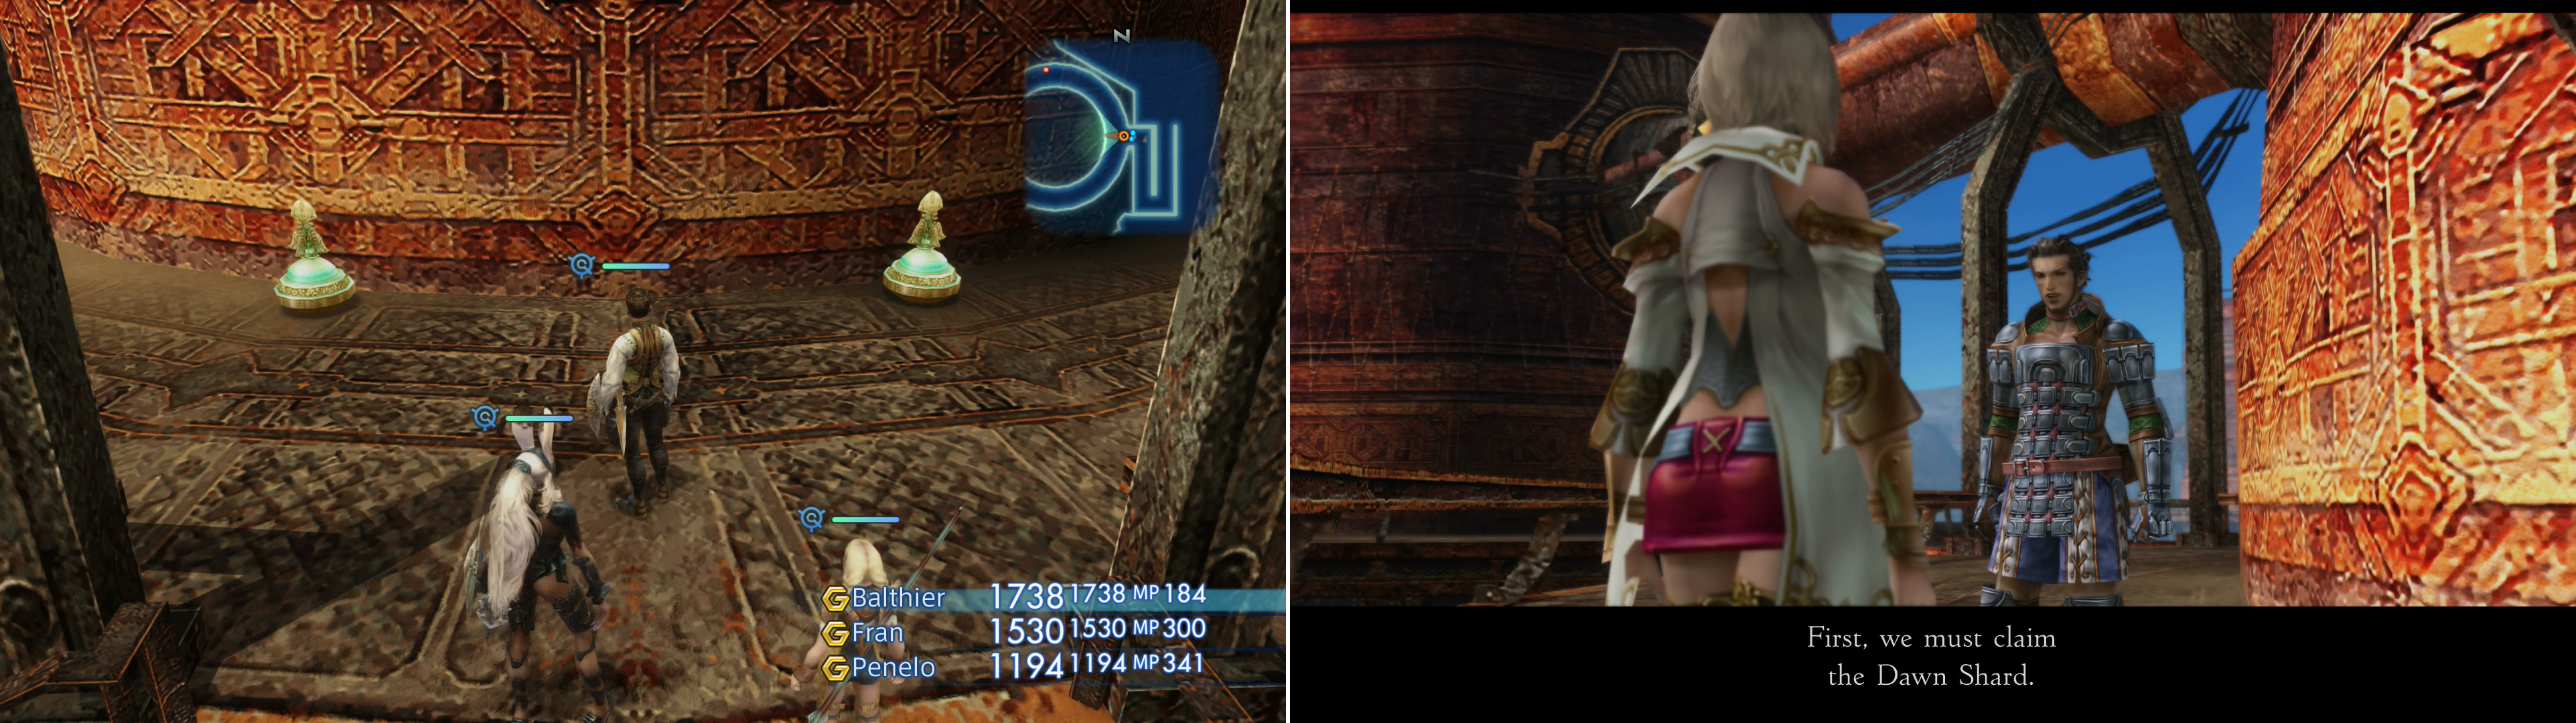
On the first platform you can find maps to the Nam-Yensa and Ogir-Yensa Sandsea (left). As you leave the first area, Vossler will show up and join your party as a guest (right).
For the last bit of loot in this area, head to the western side of this circular platform to find a walkway blocked off by some crates and barrels. It’s not all bad, however, as in front of these parcels a chest may spawn, which may forfeit a Wizard’s Staff (Staves 2). Once you have this treasure, all you need to do is head southwest to another platform, then turn west to reach a third platform, on the western edge of which is the area transition to the second area, killing Alraunes as you go.
Speaking of which, this is a fair spot to grind the little tomato-headed plant people. There are only about ten of them in this area, but you can easily zone out twice by heading back through The Western Divide area and to the Windtrace Dunes, then return back. This makes it pretty easy to chain them, if a might time-consuming, but that’s what Speed Mode is for, right? As pointed out earlier they can drop Succulent Fruit, each of which sells for 363G, and a stack of 99 of them will return 35,937G. You’ll also likely earn just as many Earth Stones while you farm Succulent Fruit, which are collectively worth a paltry sum in comparison, but yet, a few thousand Gil per run just sweetens the deal.
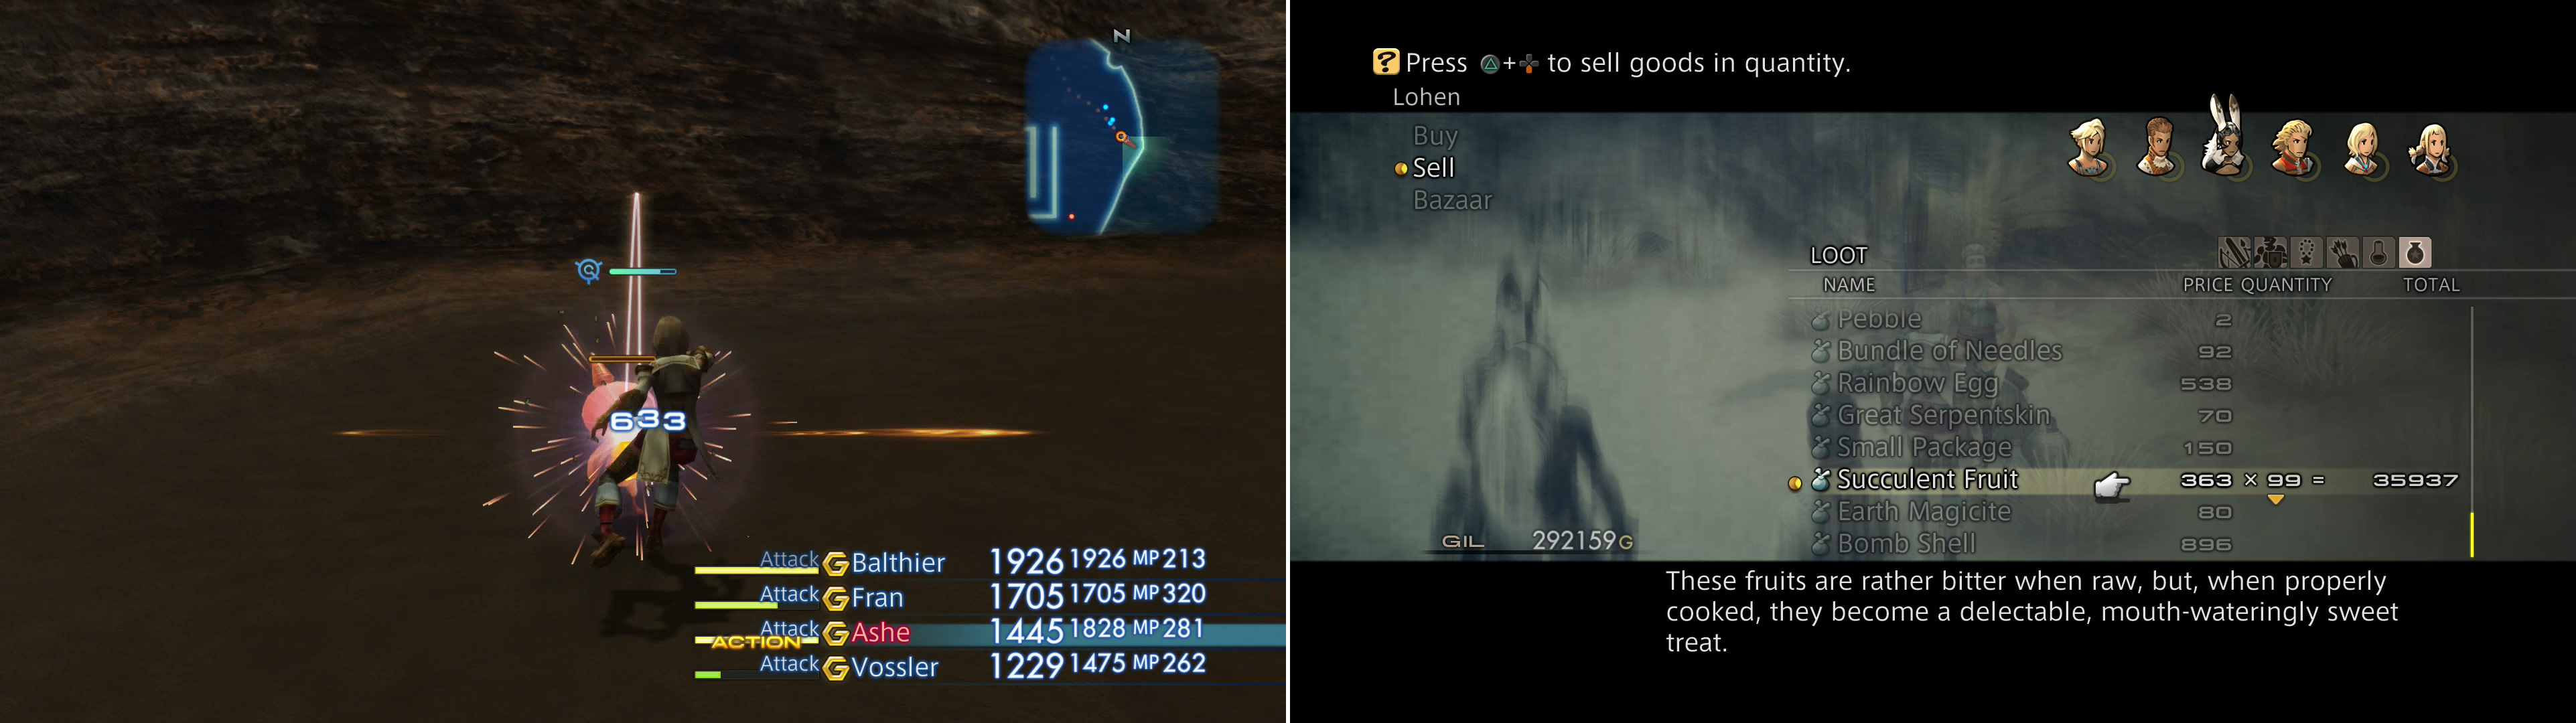
Alraunes can be relatively easily chained (left) and their Succulent Fruit sells for quite a bit (right).
Platform 1 - Refinery
Grind Alraunes as much as you want, but don’t burn yourself out just yet, as there’s more grinding to be done later on. When you’re ready, move on to the next area, the Platform 1 - Refinery area. When you arrive in the area an old friend will drop in and chat politics with Basch and Ashe before Fran’s Viera senses pick up a threat, which prompts Balthier to warn the party about the Urutan-Yensa, whose territory on which you’re trespassing.
You’ll get to these Urutan-Yensa in a bit, but first continue to the southwestern end of the circular platform you start on to find a walkway leading to another platform. This platform is occupied by more Alraunes, as well as the first bit of noteworthy loot in this area. Search along the southeastern edge of this platform to find a collapsed walkway with a trap on it. Behind this trap you may find a chest, which has a chance to yield an Ancient Sword .
Grab the sword if you care to, then make your way back to the northeastern platform and circle around to its western end to find some ramps leading down to the sandy ground below. Here you’ll find your first Urutan-Yensa foes, which begs a bit of a description.

There are plenty of traps in the Ogir-Yensa Sandsea, so keep vigilant with Libra (left). Traps aren’t the only threat, however, as the Urutan Yensa are hostile to all outsiders (right).
Urutan-Yensa:
These little sand goblins vary wildly depending on what gear they have equipped, with bow-wielding Urutan-Yensas capable of casting a variety of spells including Blindna, Poisona, Silence and Sleep, the sword-bearing Urutan-Yensa are the most competent in melee thanks to their Tri-Attack technick, while the unarmed ones are capable of using Dark Motes to cast the magick Dark. From all of them you can steal Potions, Echo Herbs and Yensa Fins, while they can drop Earth Stones, Phoenix Downs and Earth Magicite. You can “Poach” them (when you “poach” sentient humanoids, it’s called slavery!), but all you’ll get out of it are Pebbles. They are weak to Wind, meaning the Gladius will do absurd amounts of damage to them.
Pineapple:
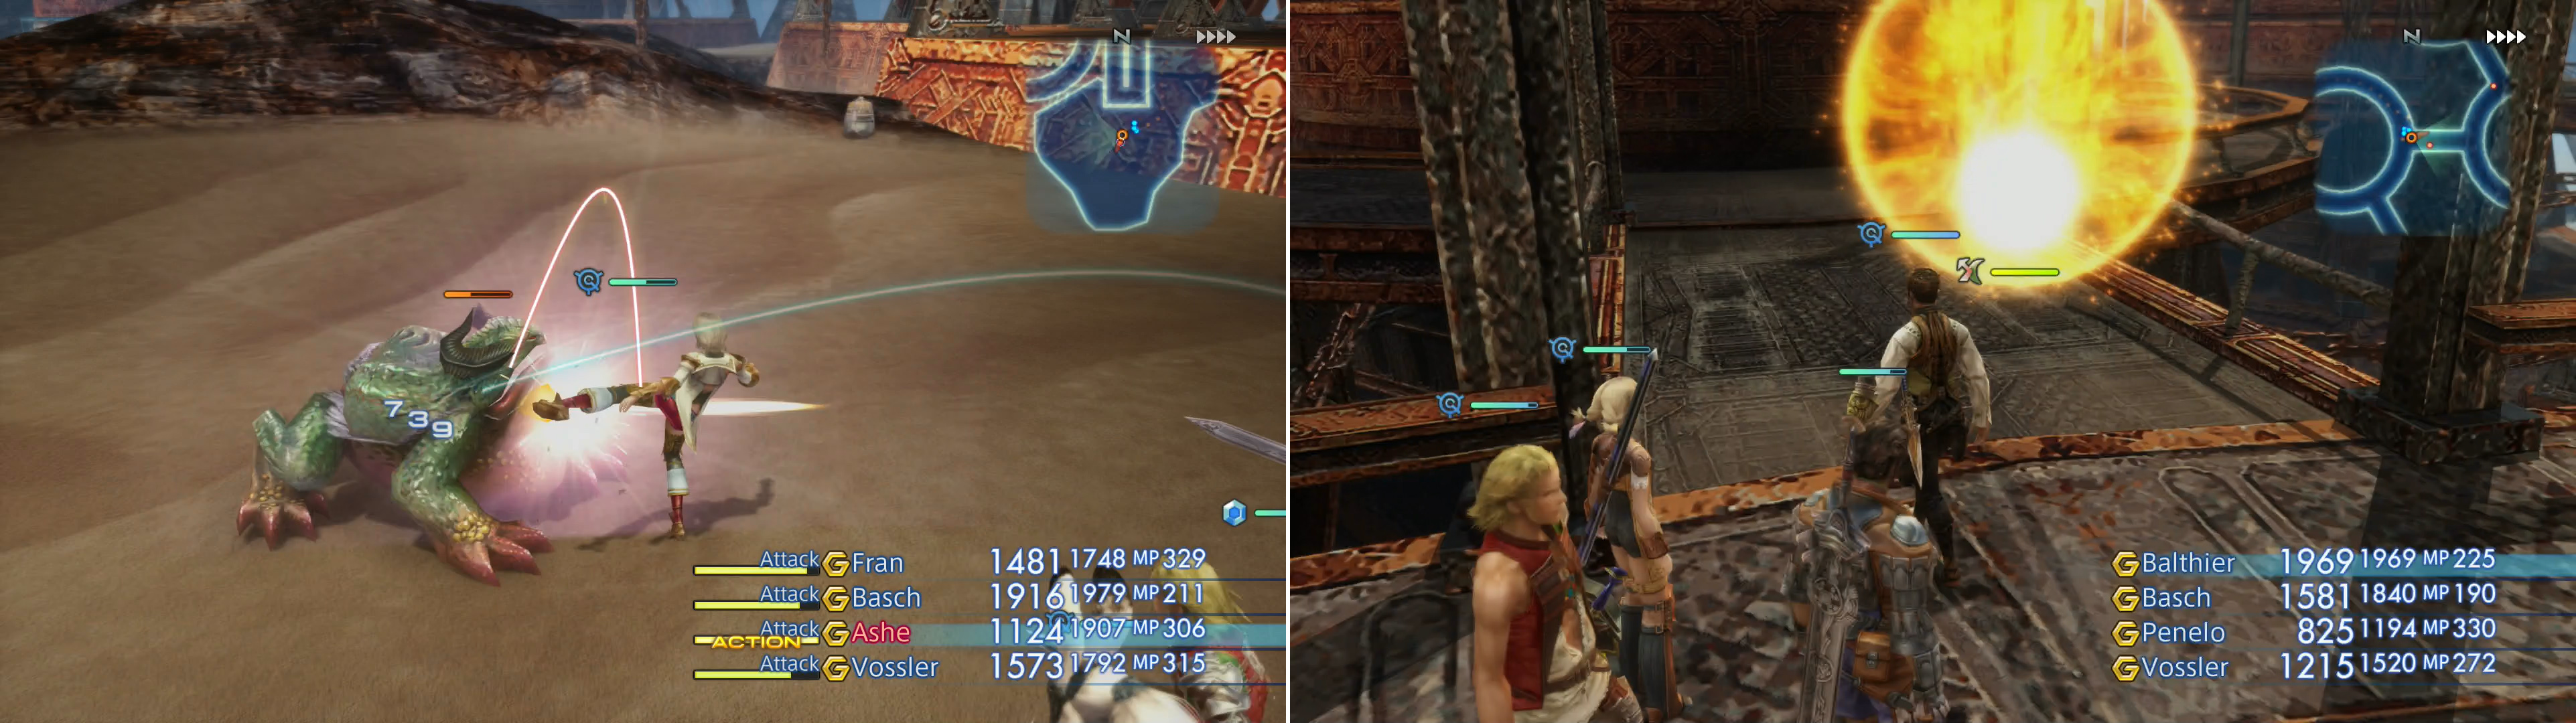
If Alraunes and Urutan-Yensa aren’t enough of a challenge for you, good news! There’s Rare Game to hunt here, too - the Bomb-like creature creatively named Pineapple, perhaps a reference to the famous “pin-and-pineapple” Mk 2 grenade? Whatever the case, the spawn conditions for Pineapple are pretty simple: like Aerieel back in the Lhusu Mines it has a flat chance to spawn when you enter the area and unlike Aerieel, you can see it from a distance. Unfortunately its exact spawn point is random and varies, and the draw distance isn’t great, so you’ll just have to run around the level hoping to glimpse the distinctive burning orb in the distance. It it doesn’t show up, zone out and return and try again.
When it spawns you may be somewhat disappointed, as it’s only a mediocre combatant. It boasts over 4,000 HP, can inflict the Oil status when it hits, but it oddly doesn’t have a follow-up Fire elemental attack. No Fire, Fira, or even Self-Destruct. The best it can really manage is to cast Reflect on itself, which will bounce magick - both helpful and harmful - back at the caster. You can steal a Bomb Shell from it, but you only have a 3% chance of success per attempt, while it can drop some Bomb Ashes or a Storm Staff (Staves 3). You can Poach Pineapple for a Pebble or a Bomb Fragment. It absorbs Fire and is weak to Water.
Defeat the Urutan-Yensa on the sandy lowlands and keep an eye out for that Pineapple, should you have a desire to fill out your bestiary. When done, note that there are some ramps leading up to another platform to the west, but there’s nothing terribly noteworthy there (unless you’re scouring every corner of the map looking for Pineapple), so continue north along the edge of the ramps leading to the platform to the east. Turn east and search the northern edge of the ramp to find a chest near a trap. This is one of those odd traps that’s regularly beneficial, often healing you, and the chest itself has a chance to drop a Round Shield.
Turn north and ascend some more ramps to reach a massive bit of machinery, which of course is crawling with Urutan-Yensa and Alraunes. Kill them and make your way north, then ascend another series of ramps to reach the top-most level of this structure. Search near some crates to the north to find a chest which will always give you a Golden Amulet , which doubles the amount of License Points its wearer receives. You know, in case you don’t use a character much, but don’t want them to fall too far behind but also don’t want to play them any more than you have to cough Vaan cough. Oh dear. Strange cough, that.
Head back down to the lower levels of this massive bit of machinery by heading south down several ramps, and when you’re on the lower level turn west to find a long bridge leading to a circular platform surrounding a massive storage tank. Kill any Urutan-Yensa that challenge your passage (this area is thick with them), then turn your attention to the possible routes ahead of you. If you want to explore absolutely everything in the Ogir-Yensa Sandsea, the next area you’ll want to visit is to the north (reachable via a bridge to the northeast), but there’s some loot to be had to the south, first.
That being the case, head to the southern edge of this platform and follow a bridge to the southwest, which leads to a smaller, crate-laden circular platform. Put down the sand goblins that bother you, then loot a chest behind some crates to the southeast to find a chest, which may bear a Killer Bow (Bows 3). Cross another bridge to the southeast to reach a more traditional tank-encircling platform and work your way clockwise to reach the eastern end of the platform, where you’ll find another chest. If it’s feeling nice it may bestow a Wizard’s Hat onto you. Definitely an easier way to get this treasure than by killing Nekhbet, no?
When those treasures are yours, venture back north to the previous large platform and ignore the area transition to the west. It leads to the Central Junction, and while you’ll get to there later, there’s slightly less backtracking by hitting the East Junction area, first. You can achieve this pedestrian feat of navigation by continuing northeast across a bridge to reach another platform, then heading across another bridge to the northwest, which will take you to the area transition to the East Junction area.
East Junction
This area is actually the most diverse, in terms of enemy types, in the entire Ogir-Yensa Sandsea, even though it doesn’t exactly boast that by pitting you against some Urutan-Yensa at the outset. Kill them and continue norhtwest to another platform, where more Urutan-Yensa await you. After they’ve been dealt with you’ll have a choice of areas to explore.
First head down some ramps to the east to reach a low, sandy area, where you’ll find a new foe - the Speartongue. While these bloated beasts are fine flopping about on the sand, another new foe, the Danbania, must be lured from the liquid sand. To do this, simply continue north to the edge of the sandsea and the docile beast will present itself, fit for slaughter. It’s also worth noting that if you venture east, then south ,you’ll find a cave entrance leading to the Zertinan Caverns. This particular entrance doesn’t lead anywhere interesting, so there’s no need to bother with them at this time. Don’t worry, you’ll get around to exploring them eventually, just not yet.
Speartongue :
These Gigantoad palette swaps fight almost exactly the same as their sewer-bound counterparts, boasting only higher stats and one new ability, Magick Ballad. This technick rather makes Angelsong somewhat redundant, as it restores the amphibian’s HP fully. Other than that, it can drop a Water Stone, a Horn, and a Aries Gem, while you can steal a Water Stone, a Horn, or a Potion. It can be poached for a Horn or Frog Oil. It’s weak to Fire.
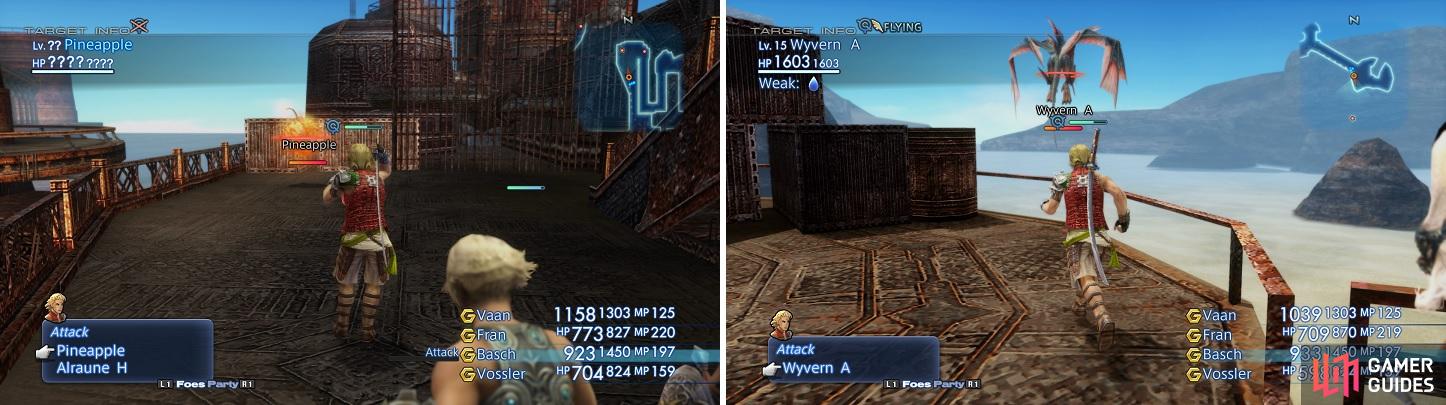
You might find the Rare Game, Pineapple, lurking about (left). The Wyvern can be a tricky creature to kill, as only certain attacks/weapons work against it (right).
Danbania :
Another palette-swap, this time of the Ichthon. Like the Ichthon they’re both floating fish-monsters, both start out docile. If you’re looking for something that definitively sets this version apart, aside from better stats… well, there’s not much. Its got the basic Lunge attack and Water Cannon, both of which you’ve seen before. You can steal a Water Stone, a Fish Scale, or a bottle of Bacchus’s Wine from it, while it can drop a Fish Scale, a Water Stone, Echo Herbs, or a Water Mote. You can Poach it for a Fish Scale or an Argyle Armlet. It’s weak to Lightning.
When you’re done picking on fish and frogs, return back up the ramps to the platform and cross a bridge to the southwest to reach another platform. Expel the Urutan-Yensa blocking your way, then circle around to the southeastern edge of this platform to find a collapsed bridge, upon which is a chest. If the loot gods are feeling generous you may be blessed with a Barbut (Heavy Armor 3) when you plunder this chest.
Circle around to the northern edge of this platform to find another long bridge which connects to yet another circular platform. These structures are a feature of the Ogir-Yensa Sandsea, so hopefully you’re not sick of them - they’re not going anywhere anytime soon. From this platform you have three ways to go - if you continue northwest you’ll reach the next area, the Primary Tank Complex. That’s where you want to end up, after you finish this area. To the east are several small platforms, where most of the loot in this area lives, while to the west you’ll find a ramp leading back down to the sandy ground below the platforms.
Since a trap bars the way counter-clockwise around this platform (your brain-dead allies will almost certainly walk over it) just head clockwise instead and head down the ramps to the west. Shame to keep all that loot to the west waiting, but it’s not worth expediting the process for a bit of pain. When you reach the sandy ground, turn south and deprive any Urutan-Yensa of their lives. They may be joined by some Yensa, the fish-beasts they were seen riding earlier, which, while large and scaly, are quite weak. Loot a chest to the south and with any luck you’ll get a suit of Chainmail (Heavy Armor 3) then return back north up the ramps to reach the platform.
Yensa :
A large fish-creature which serves as a steed for the Urutan-Yensa, these beasts have, well, little to recommend them, as far as being worthy combatants goes. They can inflict Poison when they hit, but otherwise, they’re not the least bit threatening. They can drop an Earth Stone, Gold Needle, Yensa Scale or a Dark Mote, while you can steal a Yensa Scale, Pisces Gem, or a Barbut . You can Poach them to obtain a Yensa Scale or a Yensa Fin. They are weak to Wind, making them easy prey to the Gladius.
Continue circling around the platform clockwise, ignoring the bridge to the northwest for now and heading down another bridge to the east. Here you’ll meet your old friends, Alraunes, which are a change of scenery, if nothing else. Squash them, then occupy the small, circular platform they were guarding and search near some crates to the northwest, where you’ll find a chest which may contain a Kogarasumaru (Katana 2).
Cross a bridge to the northeast and you’ll reach another platform, which will likely be occupied by more Alraunes. Grind them to paste, then note there are two more bridges ahead of you, a trap-laden bridge to the northeast and a pristine bridge to the northwest. Flying between the two will be a Wyvern, a foe who, while hostile, may abruptly abandon any fight with you to continue flying its route. How rude! There will naturally also be Alraune scurrying about under foot.
Wyvern :
Being somewhat sturdier and more powerful than the other foes you’ve faced so far, the Wyvern is extra annoying, as it’s a flying foe. You’ll need to utilize ranged weapons (Bombs, Bows, Crossbows or Guns) or magick to hit it. Vossler can also contribute thanks to the Telekinesis technick, which you sadly do not possess. Change your Gambits around so your magick users have a Gambit that specifically instructs them to target flying critters with spells if they don’t have an alternate way to reach them and you should be fine.
That out of the way, the Wyvern isn’t a terribly challenging foe, although it can do a bit of area-of-effect damage with its Aero spell. Other than that, you’ll need to watch out for its ability to Petrify characters with its melee attacks. Wyverns can drop a Fire Stone, Crooked Fang, Linen Cuirass or a Hi-Potion, you can steal a Fire Stone, a Teleport Stone or 500G, and you can Poach them for a Crooked Fang or Bacchus’s Wine. They are weak to Water.
The treasure on the northwestern platform, a Healing Rod (Rods 2) is fairly easy to obtain, despite the monsters, but the platform to the northeast, well, between those traps and the brain-dead AI, it’s just an accident waiting to happen. There’s a way to make manuevering around traps much simpler, however; simply disband your entire party save Vossler (he’s locked in at the moment) and hope he’s not dumb enough to trigger anything. There’s less of a chance that you’ll trigger traps this way, but if you do, or if you get attacked by monsters, well, one wrong step, one dead character and you’ll be looking at a game-over screen. When you do make it across, loot a chest for a shot at a War Hammer (Axes & Hammers 3).
When you’re done looting, make your way back to the large platform to the west and from there cross the previously-ignored bridge to the northwest, which will lead to the next area, the Primary Tank Complex.
The Urutan-Yensa rule the platforms, but on the sands other monsters hold sway (left). The Salamand Entite is the more powerful monster in the Sandsea (right) - don’t provoke it or cast magick near it.
Primary Tank Complex
Well, if there’s one thing you can say about this area, it’s that it lives up to its name. This area consists mostly of massive storage tanks, and the platforms that surround them. There are three rows, in fact, with three platforms on the northern-most row, four in the central row, and two in the southern row, not including one outlier further south. This southern-most platform, in the southwestern corner of the zone, is your ultimate destination, as it leads to two other areas - the previously ignored Central Junction and the Platform 2 Refinery. While you work you way there, however, there are Urutan-Yensa to slay by the score here, and quite a few treasures to collect.
That said, there’s little else of interest here, as, aside from hordes of Urutan-Yensa, there’s only one other critter inhabiting this area - the Salamand Entite. It’s docile, and you want to keep it that way, as it’s fearsomely strong. Don’t case magick around it and you’ll be fine, and if it gets its dander up, flee.
From the southeastern corner of the area where you start, first head southwest to find another small platform, where, aside from the trap in the center, you’ll find a chest that always drops the Reflect magick (Time Magick 2). When you cast this magick it’ll provide the targeted character with a barrier that reflects - or rather deflects - magick away from the target, continuing in the same direction and distance as the original spell, perhaps affecting characters in the new area. Reflect doesn’t care if the incoming magick is beneficial or harmful, it’ll happily deflect Fire magick just as much as it’ll deflect Cure magick. There is a catch to Reflect, though: it’ll only bounce magicks one time, so use that to your advantage when you can.
After you’re done ogling your new spell, return to the small platform to the northeast, then cross a bridge to the northwest to reach another, larger platform. You know how to fight Urutan-Yensa, you know to avoid the Salamand Entite, and hopefully you’re keeping Libra handy to spot the traps lying about. Those being the assumptions, then, let’s focus on the loot.
Make your way to the central platform of the northern row of three platforms and search the southwestern end of the platform to find a chest which may grant you a Musk Stick (Poles 3). Not a very appealing name, but, well, loot is loot. Your next two bits of loot come from the west, as on the western-most of these three northern platforms you can find a chest containing a Sirius along the northeastern end of the platform. The platform southeast of this one (the western of the two central platforms in the center row) also contains a loot-bearing chest. Locate this chest on the southern end of the platform and plunder it for a shot at some Wizard’s Robes . Finally, make your way to the southern-most platform and search a collapsed bridge to the northeast to find a chest which may yield a Linen Cuirass .
Now that you’ve claimed all the loot of note in this area and you’re on the southern passage, contemplate your next move. To the southwest you’ll find the area transition to the Platform 2 - Refinery area, while to the southeast lies the Central Junction. While you’ll want to get around to that poor Central Junction area, it’s worth checking out the Platform 2 - Refinery area first for one simple reason: there’s Rare Game there.
As you’ve been running through the Primary Tank Complex area, you probably racked up an impressive kill count of Urutan-Yensa, and it’s no exaggeration to suggest that you can easily encounter a few dozen of the sand goblins in one or two run-throughs of the area. To spawn the Rare Game Urutan Exile in the Platform 2 - Refinery area you’ll need to muster up one hundred Urutan-Yensa kills in the Ogir-Yensa Sandsea area without leaving or touching a Save Crystal. While your cumulative total in just this run is probably significantly higher than what you’ve encountered in the Primary Tank Complex area, there are an awful lot of them here with no other enemies to complicate things, save the Salamand Entite, anyway, and it’s happy enough to leave you be under most circumstances. You don’t need to chain them, but it’s a built-in counter, and chaining them will improve the chances that the Urutan Exile will drop something noteworthy.
So, while you’re here go about killing Urutan-Yensa. If you must zone out twice to respawn them at some point, do so by heading through the East Junction area to the Platform 1 - Refinery area, sticking to the large platforms, as they’re only occupied by Urutan-Yensa. Do not go into the Platform 2 - Refinery area until you have one hundred kills logged.
Platform 2 - Refinery
Kill one hundred Urutan-Yensa in the Primary Tank Complex area, then head southwest to reach the Platform 2 - Refinery area. From the platform you start out on note that there’s a collection of three smaller platforms to the west, where loot lives. Unfortunately they’re also infested with Alraunes, which will be a distraction at best, or break your battle chain at worst. You don’t need a high chain level to spawn the Urutan Exile, but again, you’ll get better drops if you do.
That being the case, ignore the loot to the west and turn east to reach another large platform, then contine southwest, then south to two more platforms. From this southern-most large platform note the area transition to the east and southeast, then continue west across a bridge to a large refinery structure. On this structure you may - if you killed one hundred Urutan-Yensa before entering this area - find the Urutan Exile.
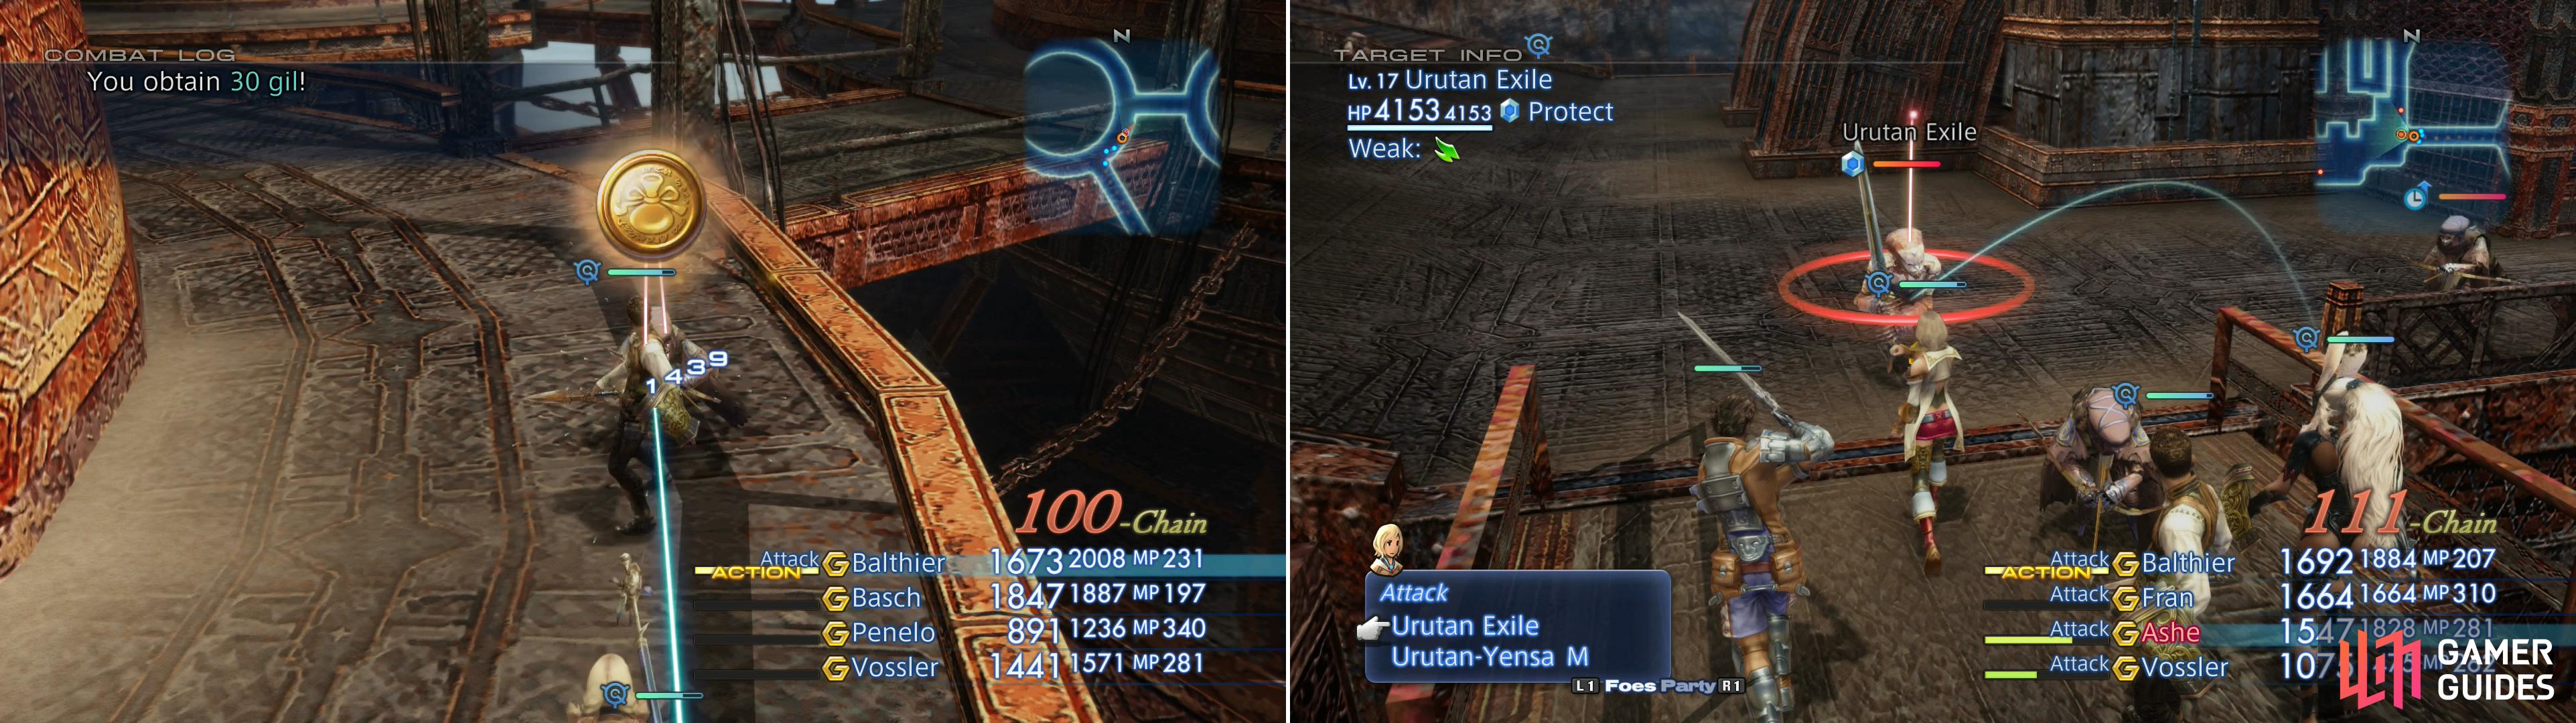
Kill one hundred Urutan Yensa in the Ogir-Yensa Sandsea (left) to spawn the Urutan Exile (right).
Urutan Exile:
The Urutan Exile is a sword-bearing Urutan, making him a capable warrior, as evidenced by his possession of the Tri-Attack technick. In addition, he’s got far more HP than the average Urutan (over 4,000), does a bit more damage, and can reach a frighteningly high combat hit count, albeit rarely. In addition he’s got a Water Spout attack which deals Water element damage to all enemies within the area of effect. Like Nidhogg, when his HP is low he’ll get boosts to attack and defense. Otherwise, he shouldn’t be too much of a threat. You have a low chance to steal a Hi-Potion from the Urutan Exile, which is hardly worth going after, and he can drop an Earth Stone or a Magoroku (Katana 2). This Katana’s stronger than any other weapon you’ve found for the Bushi, but inferior in damage to both the Gladius and the Karkata. If you have a Bushi that desperately needs an upgrade, it might be worth your time to get (it has an 18% drop rate at chain level four). Urutan Exile is weak to Wind and absorbs Earth.
Grind the Urutan Exile if you wish - if you kill him, you’ll need to exit the Ogir-Yensa Sandsea area, then return and grind out one hundred more Urutan-Yensa to respawn him. This can easily be done by continuing west down a ramp and through some sandy lowlands to reach a cave leading to the Nam-Yensa Sandsea. If you’re playing the Zodiac Age version of the game, you can also just leave an area, wait for the auto save, quit to the main menu, then reload the auto save to reset the Urutan Exile’s spawn. This, of course, resets your battle chain, but you’re killing one hundred more Urutan-Yensa if you want Urutan Exile to respawn either way.
When you’re ready to move on, head to the northern platform you entered the level onto (the one with the area transition to the Primary Tank Complex area) and from there head west onto the aforementioned cluster of three small platforms. Smash the Alraunes waddling around here, then search the southern-most of the platforms to find two chests. The chest near the railing along the southwestern end of the platform can contain a Golden Shield (Shields 3), a better shield than you’ve been able to purchase thus far, while the western-most platform also has two chests. Search the northern of the two for a shot at a Leather Gorget .
After you’re done terrorizing the Urutan-Yensa, it’s time to move on. Your target? The long-neglected Central Junction area. To get there simply make your way to a platform east of where you fought the Urutan Exile, in the southeastern corner of the map. From there, cross a bridge to the east to find the area transition to the Central Junction.
No Comments