


| Bestiary |
|---|
| Aerieel (Rare Game) |
| Items In This Area |
|---|
| Assassin’s Dagger • Bronze Mace • Golden Armor (Drop from Aerieel) Leather Headgear • Numerology • Onion Bombs • Osafune • Serpent Rod • Silence* • Steel Gorget • Topkapi Hat. |
*If not collected earlier.
Shaft Entry
This first trip to the Lhusu Mines is relatively short and fairly straightforward (yes, there will be multiple trips if you want to do everything in this game). You will be facing similar foes to past dungeons, such as the Steeling, Skeleton, and Skull Defender assuming you let the charge gauge diminish enough to encounter them regularly, that is. Other than being a little stronger and having more health, they behave in the same manner, have the same attacks and yield the same loot, both as drops and when stealing, so they won’t be discussed again.
From where you regain control after the cutscenes head north to the large east-west passage with two train tracks and look to your east. If you didn’t pick up the Silence magick earlier in the Estersand, then you will find the treasure with it here; otherwise, there won’t be anything. For some less predictable loot, turn west and follow the tracks to the western end of this passage, clipping the Steelings’ wings as you encounter them and ignoring the two southern paths for now, until you get to the far end. A Skull Defender will likely pop out to say hello, so grind its bones to dust and you may find a treasure at the dead end, which could contain a Bronze Mace (Maces 1).
Once that loot is yours, turn your attention to the two tunnels running south, both of which lead to a more humble east-west passage, which serves as little more than a Steeling-occupied distraction. Instead turn your attention to two more tunnels running south. The western-most of these two tunnels leads to the area transition that’ll bring you to the next area, but the eastern one will lead to some more treasure. Who can pass up treasure? Head down the eastern tunnel first and note that the two-tracked passage running east-west is blocked off by a gate at its western end. Shame, that. You’ll encounter more Steelings in the smaller tunnels, but you will be facing Skeletons and Skull Defenders when you reach the east-west passage with the train tracks.
Kill the Steelings and undead that pester you, then explore the tunnel’s eastern end to find a chest that may contain an Osafune (Katana 1), although you may have already bought one from the shops in Bhujerba. To the west of that are some stairs that lead to a switch, but you can’t use this yet, so ignore it for now. In addition to the switch you may find another, unfortunate device waiting for you, which bears a bit of a tutorial…
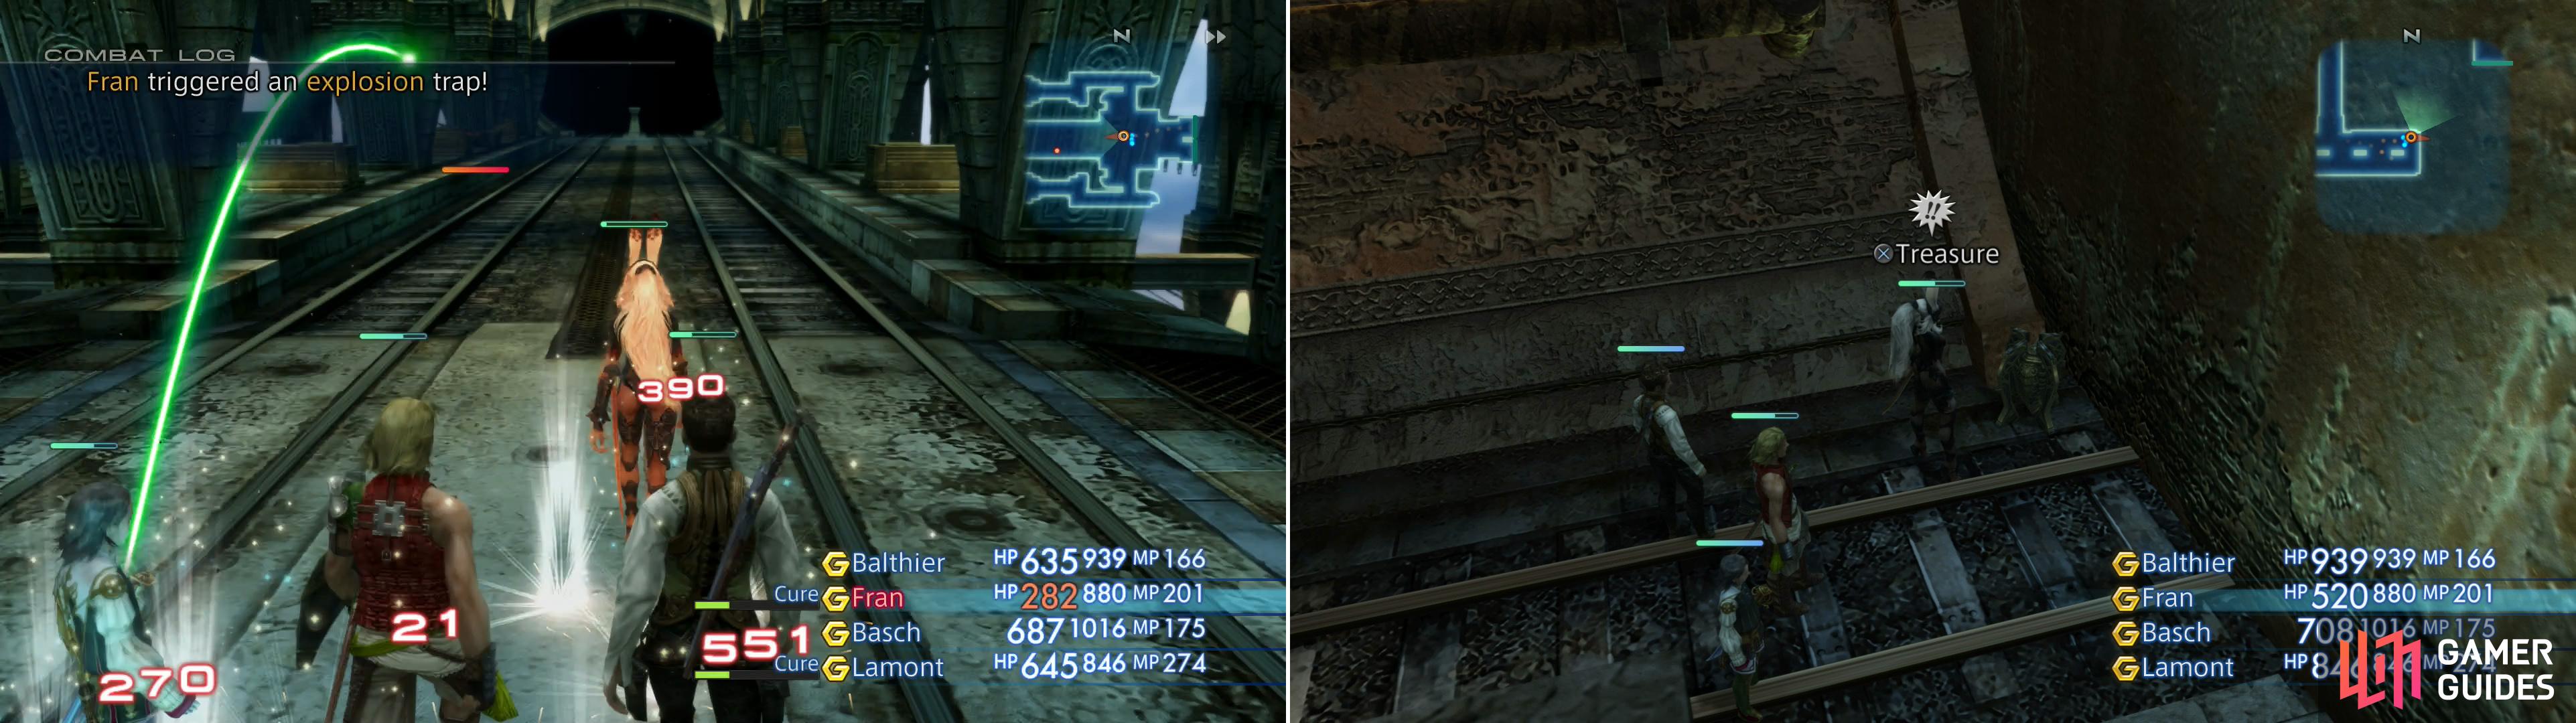
Traps make their debut in the Lhusu Mines, and provide a good reason to keep Libra active at all times (left). New treasures can also be found throughout the Lhusu Mines (right).
Tutorials - Traps
If you have Libra active, either by use of someone with the Bangle equipped or from someone having used the technick, then you should see a red circle on the ground by the previously mentioned switch. This is a trap and they can be quite deadly in this game, as not only are they plentiful from here on out, but they can be triggered by anyone in your party. Of course, stepping on one will affect all of the nearby characters, but never any enemies. A large portion of traps will consist of you and your team taking damage, such as Explosion ones, which deal non-elemental damage when triggered. Of course, there are traps that do other things, such as reduce MP, inflict ailments and very rarely, restore HP or MP.
Normally, traps are invisible to the player and indirectly mentioned already, the only way to see them is with the use of Libra. That’s why it’s imperative to have a “Self: Any -> Libra” gambit somewhere on a character, preferably low on the priority list so that character doesn’t take their sweet time activating it during an intense battle or a Bangle equipped, whichever you prefer. There are ways to walk over traps without setting them off, however, one of which is an accessory called the Steel Poleyn. The other way is via the Float status, which can be triggered with the corresponding Time Magick (you can also use Float Motes to give yourself Float). Unfortunately you don’t have access to any of those right now, so you’ll have to just use Libra and watch your step - and hope your companions aren’t too stupid.
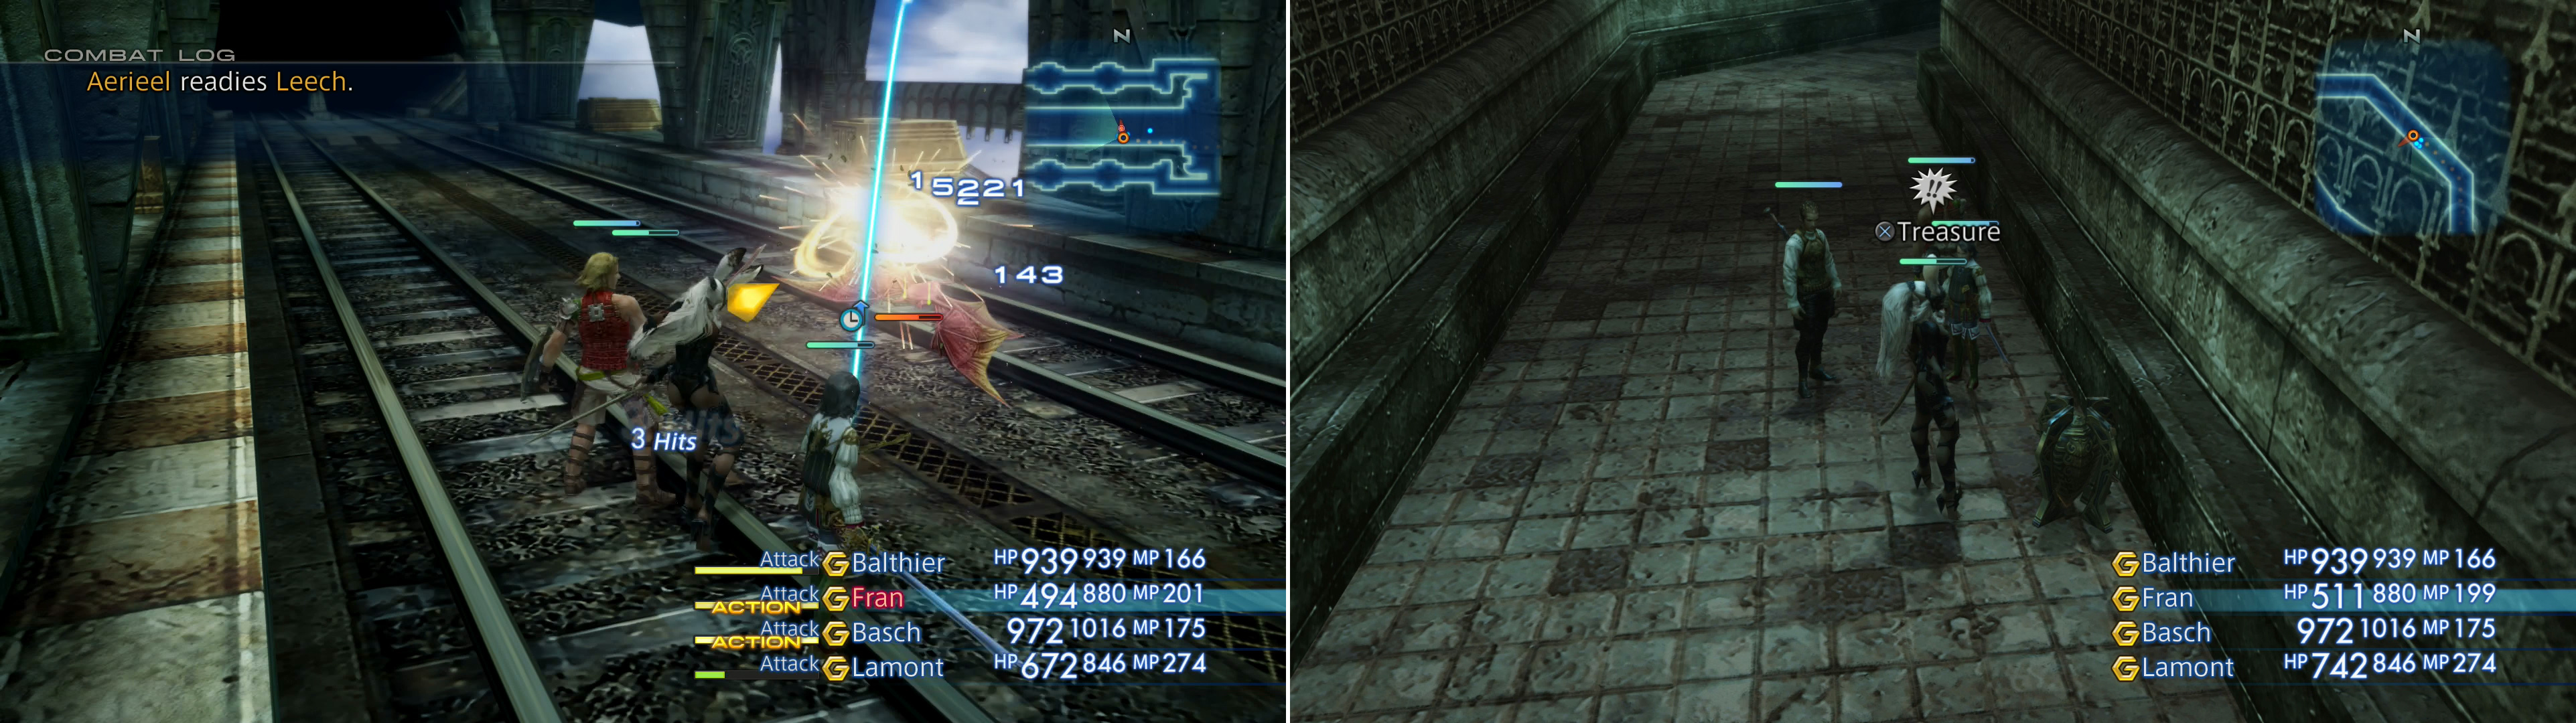
In the Oltam Span area you may encounter the elusive Aerieel (left). Be sure to explore a side passage to find a chest with the Numerology technick in it (right).
Oltam Span
With that out of the way, make your way back up the tunnel to the north and down the western tunnel you neglected earlier to reach the area transition. This area consists of a double-track-bearing bridge with two depressed walkways on either side of it. Both the bridge itself and its two subordinate walkways house a few traps, but the southern walkway is also home to a chest which may contain a Topkapi Hat , while the northern walkway may spawn a chest that holds Onion Bombs .
Aerieel:
Not only will you face more Steelings and undead here, but there’s a Rare Game that may possibly spawn, Aerieel. It has a chance of showing up somewhere on the bridge every time you enter the area, so if you don’t get it the first time, exit and re-enter. The only problem is that you won’t know it’s there until you get close enough, as it will rise from the ground like a zombie. Aerieel is not much different than the normal Steelings, except it is stronger and undead. Yep, being undead means curative magicks and items will work on it. In fact, a single Phoenix Down will put Aerieel right back where it belongs. Aside from more health and strength, Aerieel has Gnaw and Leech, the latter of which will heal it for the same damage it deals to one of your party members. Also, its regular attacks have a chance to inflict poison. It can drop either a Bat Fang (common) or Golden Armor (rare), and the only thing you can steal from it is a Bat Wing.
Transitway 1
Cross the bridge to the west and enter the next area, Transitway 1. Near the eastern edge of this area - where you find yourself - is a tunnel to the north. This tunnel is trap-filled, but within you’ll find a chest containing the Numerology technick. This is technically potentially the most damaging ability in the entire game, as it deals twice as much damage every time it hits in a row without missing. The first hit, for example, deals a measely one damage and has a 90% chance to hit, while the second attack deals double the damage (that’s a whopping two damage) and also has a 90% chance to hit. The chance continues to go down and the damage doubles every time up until the 16th sequential hit, which has a pathetic 0.055% chance to hit, but will deal 65,536 damage if it does. If that’s not enough the technick has a chance to deal splash damage, which deals double the normal damage, up to a maximum of 131,072 damage. The 17th hit always misses. While the chances to deal serious damage are too remote to be of much use (just over 3% to deal 4,096 damage, 1.5% to deal 8,192 damage) it should be noted that the counter is shared by the entire party, as it does not reset when you load. This being the case you can simply save/load Numerology uses and save your game after the hits, and reload when you miss. Whether it’s worth the bother is up to you.
Other than that there’s only one bit of lackluster loot to obtain in this area. Abandon the tunnel and return to the eastern-most edge of the area and follow the tracks west until they split. Turn northwest, as the southwestern path leads to a lowered gate, and keep your eye on the eastern wall to spot a chest, which may contain Leather Headgear . Defeat whatever undead and Steelings pester you as you loot, then exit via the area transition to the north.
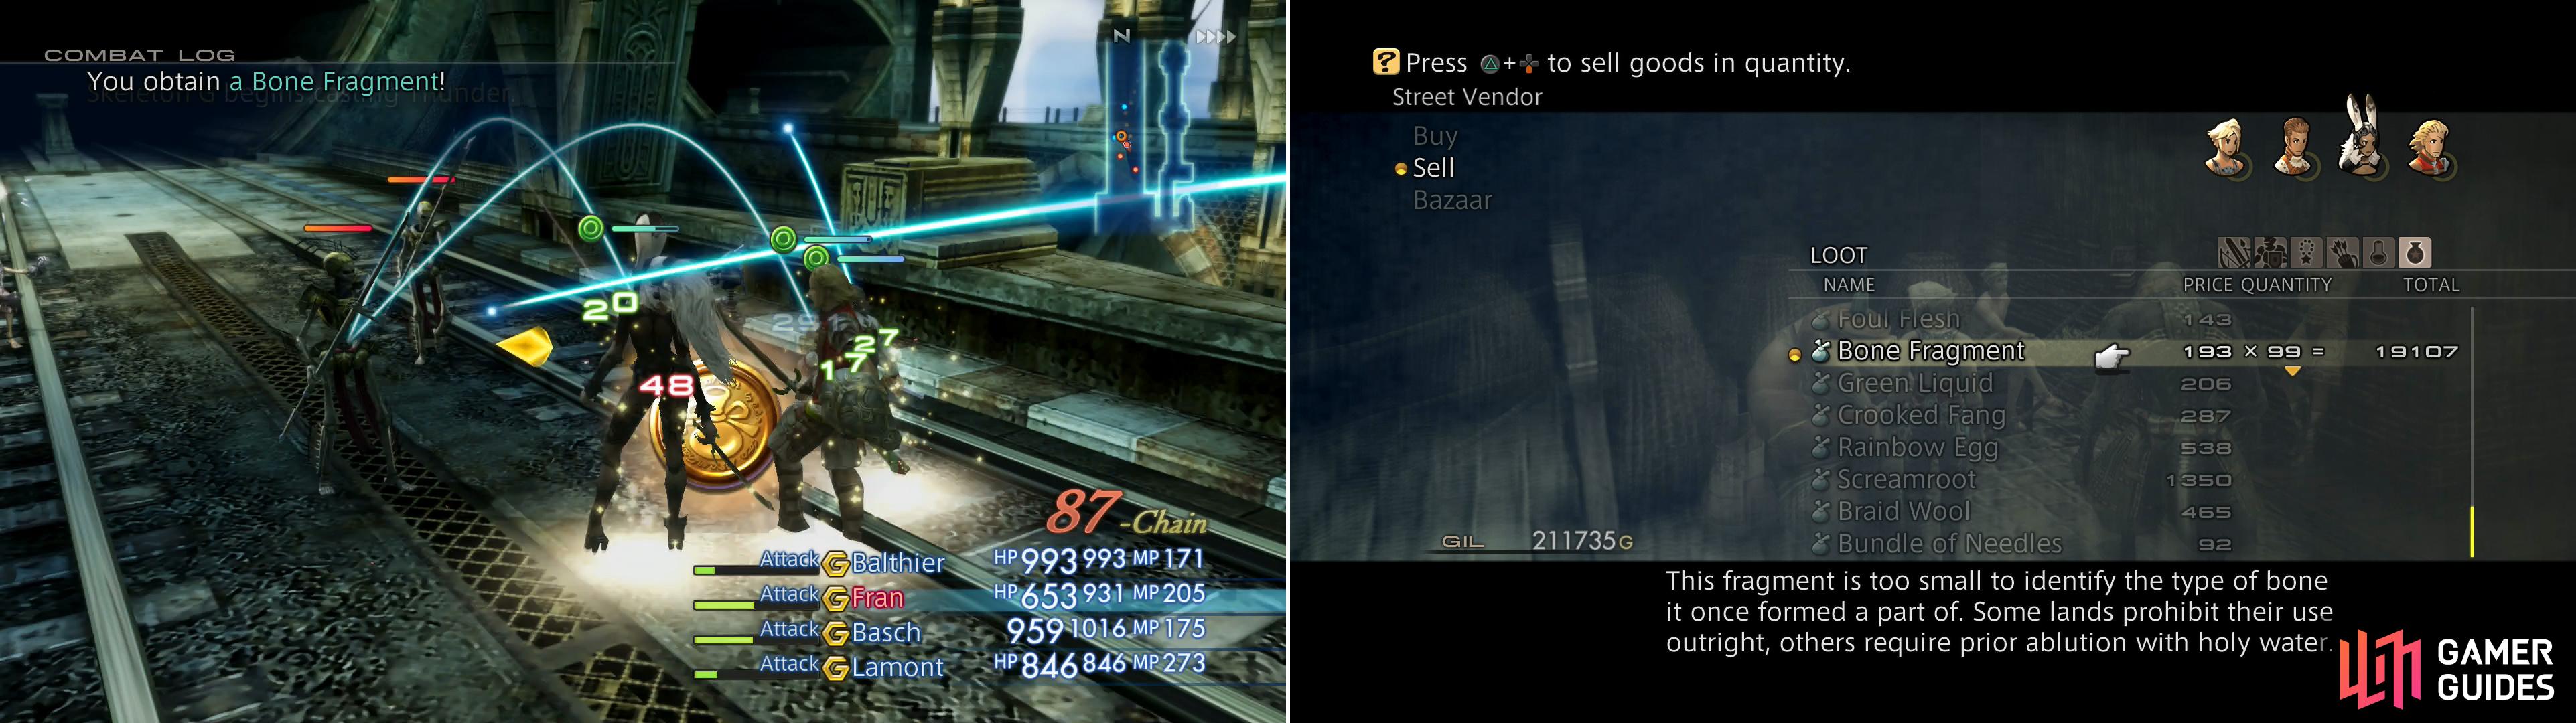
Undead are the only enemies that spawn in the Shunia Twinspan, allowing you to easily chain them (left). A full stack of Bone Fragments will net you a health amount of Gil (right).
Shunia Twinspan
Lo and behold, another bridge! This bridge area has only one depressed walkway, which is along the eastern side of the bridge. That said, there’s precious little loot worth mentioning in this area, but that doesn’t mean there’s nothing worth your attention here. The bridge here is crawling with undead, both Skeletons and Skull Defenders, which will rise from the ground to oppose your crossing. Both of them count towards the same battle chain, and if you march up and down the bridge repeatedly you can end up encountering 30 - 40 foes on this screen. This easy chaining makes this area an obvious place to grind for Bone Fragments, which, remember, sell for 193G each, or 19,107G for 99 of the loot items. When you exhaust the area of undead, simply run through the Transitway 1 area (using Escape Mode to avoid killing any Steelings that may have respawned) and to the Oltam Span area. Oltam Span, being two zones away, will respawn all the undead in Shunia Twinspan. You really can’t ask for easier grinding than this. Harvest Bone Fragments as much as you want, as it’s an easy way to pack on a hefty amount of Gil - and XP and LP, while you’re at it.
Site 2
When you’re done exploiting the undead, head north to the next area where you’ll find more undead. Joy. Fortunately you’ll find a good bit of loot worth grabbing as well, so let’s focus on that, taking the undead slaying for granted. From where you entered, follow the curving passage ahead to the northeast until you find a tunnel running north. Follow it until it deposits you in another two-tracked passage, the western end of which is blocked by a gate. At the eastern edge of this passage you can find a chest, which may yield a Serpent Rod (Rods 1).
Return south to the track-bearing passage you entered into and continue following it east, looting a chest that might possess a Steel Gorget (Accessories 4) before turning down another tunnel to the south. Follow this tunnel as it turns east, then north and ultimately leads to some stairs. Ascend the stairs and turn east to reach a natural stone cavern, or well, a Magicite cavern, in any event. Loot a chest along the eastern end of the chamber to possibly find an Assassin’s Dagger (Daggers 2), then turn north and head up a passage to reach a larger chamber.
Here Lamont will find what he’s looking for, and again utilize more resources and knowledge than he should. This is too much for Balthier, who begins to interrogate the kid, but before any answers are forthcoming, you’ll be interrupted by Ba’Gamnan and his goons. Naturally you won’t be getting out of here without a fight… or will you?
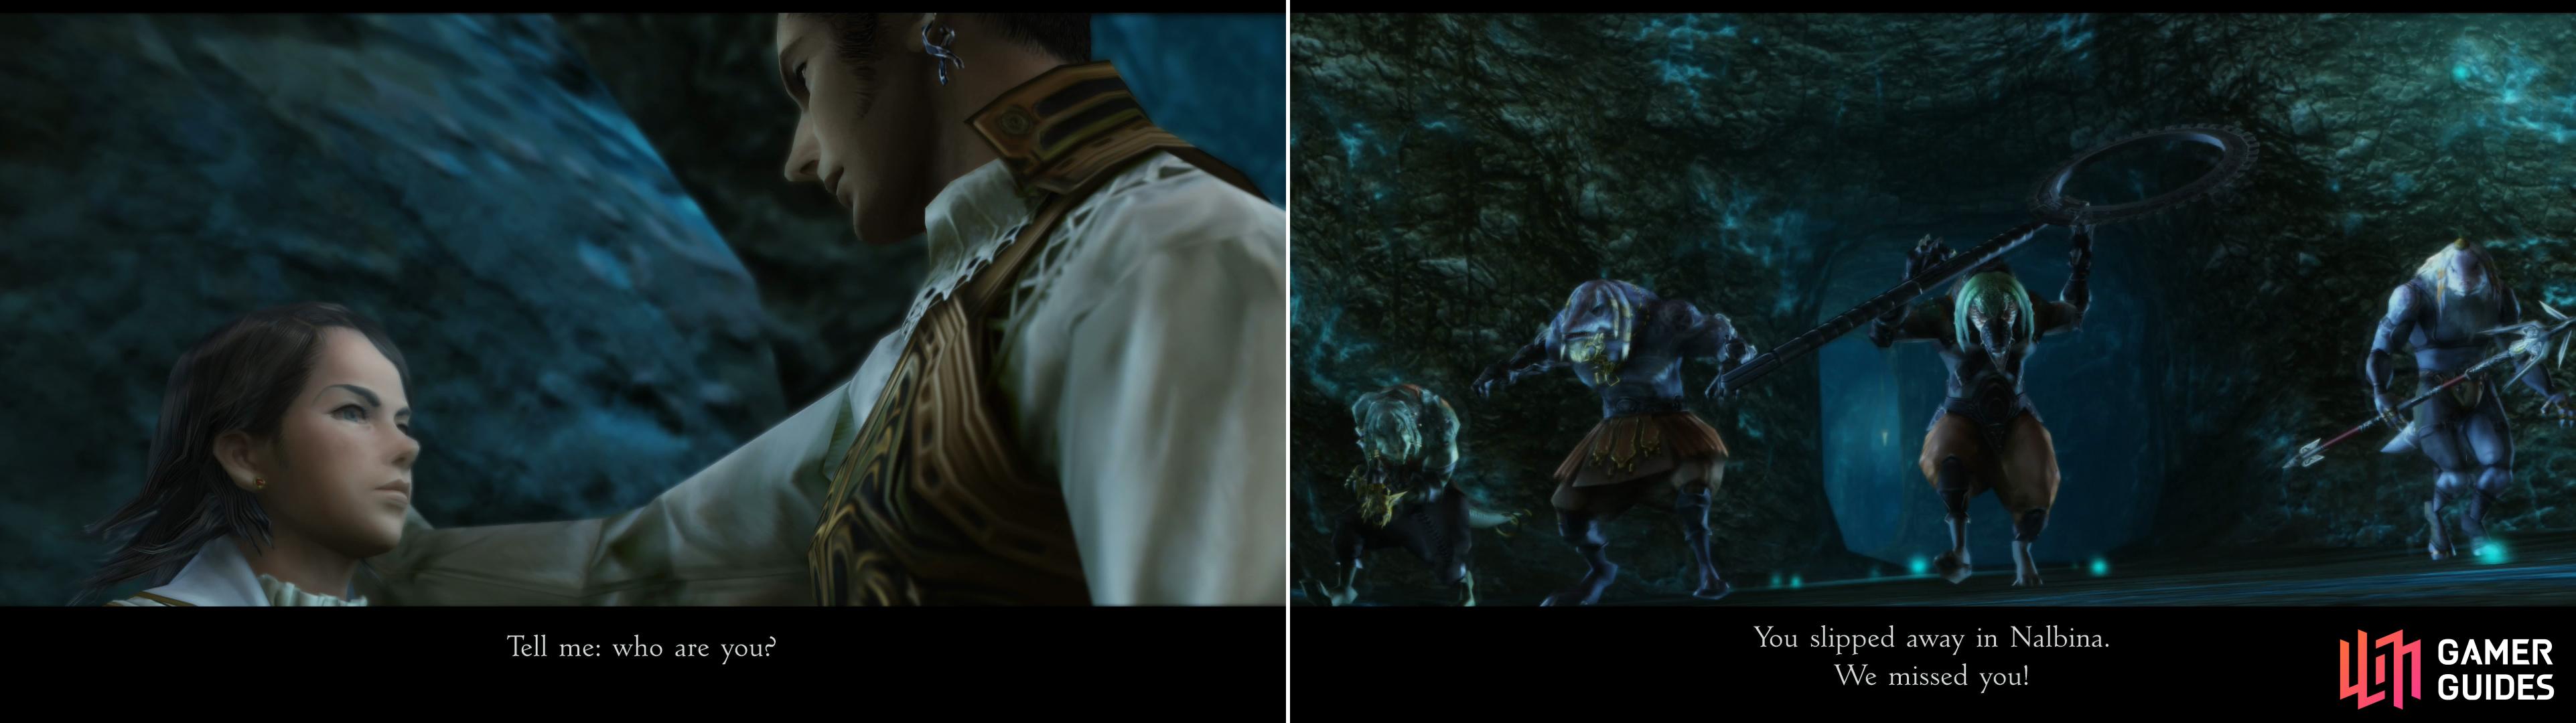
Lamont’s activities late in the mine provoke Balthier’s suspicion (left), but fortunately for the deceptive youth, Ba’Gamnan interrupts the interrogation (right).
Boss - BaGamnan
| Ba’Gamnan | . |
|---|---|
| Level | 12 |
| Weaknesses | Water |
| Resistances | Fire (Absorbs), Dark, Earth, Holy, Ice, Lightning, Wind (Halves) |
| Immunities | Blind, Confuse, Disable, Disease, Doom, Oil, Petrify, Poison, Reverse, Sleep |
| Safety | Yes |
| Drop | N/A |
| Steal | Potion (55%), Hi-Potion (10%), Round Shield (3%) |
| Bwagi | . |
|---|---|
| Level | 11 |
| Weaknesses | Water |
| Resistances | N/A |
| Immunities | Confuse, Disable, Disease, Doom, Petrify, Poison |
| Safety | Yes |
| Drop | N/A |
| Steal | 30 Gil (55%), Potion (10%), Hi-Potion (3%) |
| Gijuk | . |
|---|---|
| Level | 11 |
| Weaknesses | Water |
| Resistances | N/A |
| Immunities | Confuse, Doom, Immobilize, Petrify, Poison, Reverse |
| Safety | Yes |
| Drop | N/A |
| Steal | 30 Gil (55%), Potion (10%), Hi-Potion (3%) |
| Rinok | . |
|---|---|
| Level | 11 |
| Weaknesses | Water |
| Resistances | N/A |
| Immunities | Confuse, Disable, Disease, Doom, Immobilize, Petrify, Poison, Stop |
| Safety | Yes |
| Drop | N/A |
| Steal | 30 Gil (55%), Water Mote (10%), Hi-Potion (3%) |
When you’re back in control you’ll find yourself in the previous, smaller chamber (Where you can loot the Assassin’s Dagger). Here you can choose to either follow Balthier’s advice and flee or stand and fight Ba’Gamnan and his gang, which includes Bwagi, Gijuk and Rinok. To flee, simply hold down [R2] and retreat through the Lhusu Mines in Escape Mode, running all the way back to the Entry Shaft area to complete your escape. This can be made even easier by reducing the Battle Speed to its lowest value, as this doesn’t affect how fast characters move, only how fast they act in combat, and since all you’re doing is moving, it’s decidedly biased in your favor.
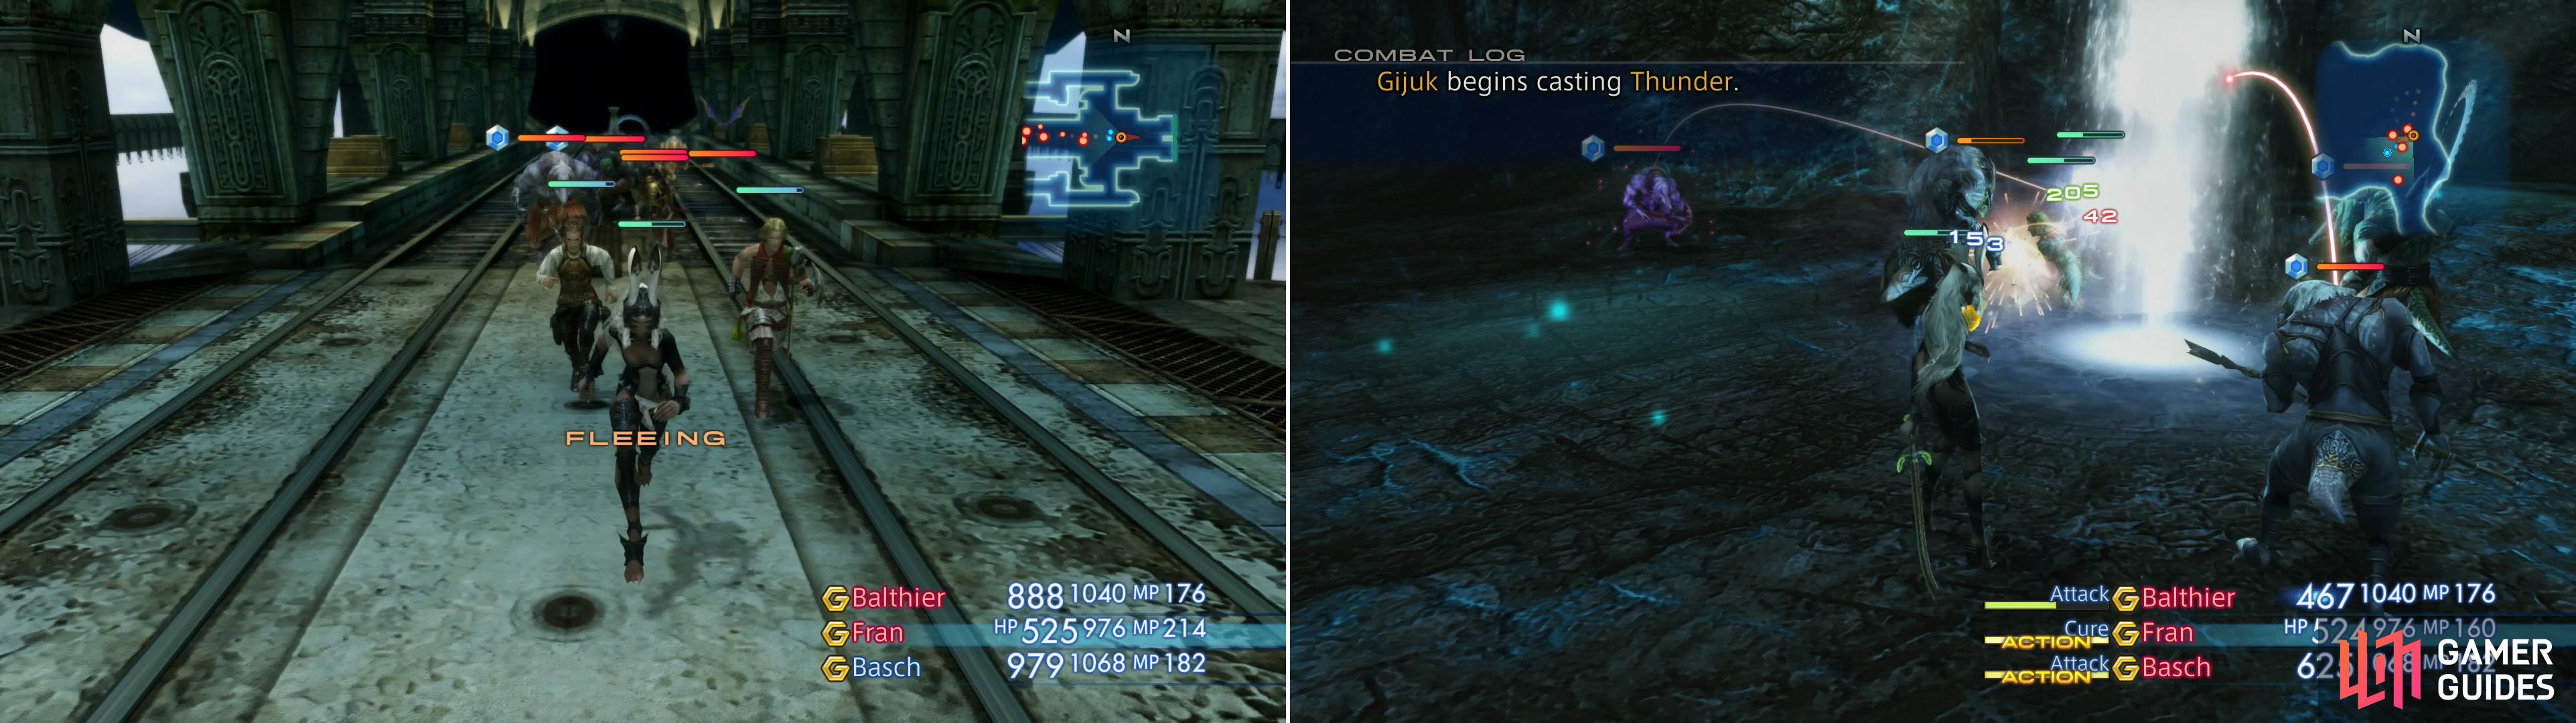
To deal with your Bangaa problem, you can simply flee back through the Lhusu Mines (left), or you can stand up and fight them (right).
If you choose to stand and fight, be wary that Ba’Gamnan and all of his goons likely have more HP than any of your characters, all of them start the fight with Protect active (a few might have Haste and Shell as well) and you don’t have access to Lamont’s excellent healing services, as he’s making good his escape - from both Balthier and Ba’Gamnan, presumably.
As for your combatants, Bwagi can cast basic white magicks like Cure and Vox (removes the Silence status effect from allies) as well as attack physically. His casting prowess is completely over-shadowed by Gijuk, who can cast white magicks (Cure, Protect, Shell, Vox) and black magicks (Blizzard, Fire, Thunder), but isn’t as adept in melee. Rinok is mostly a melee combatant, as is Ba’Gamnan himself. Ba’Gamnan is far stronger than his fellow Bangaa, and is capable of dealing much more damage and utilizing numerous technicks, including Kick and Lunge (both deal 1.5x normal damage), High Jump (area-of-effect attack) and Water Spout (water element damage, area-of-effect attack). Even worse, his physical attacks can all inflict Silence.
Their collective damage-dealing capabilities are rather respectible for this point in the game, and Cure probably won’t be enough to keep up, so have characters use Hi-Potions when they’re hard pressed. The damage spikes to watch out for come from Rinok’s Jump attack (capable of dealing around 200~ damage), Ba’Gamnan’s Water Spout (around 150~ to all characters in the area-of-effect), Ba’Gamnan’s High Jump (200~ damage).
Setting up the Gambits “Foe: lowest max HP -> Attack” and “Self: HP Hi-Potion” will make this battle much simpler, just be sure to tailor your Hi-Potion usage to the amount of HP you have, you don’t want to fall below 200 HP at any point in this fight, but you also don’t want to waste Hi-Potions. If you have considerably more than 500~ HP, consider making the threshold lower (Self: HP
Escaping Lhusu Mines
After Ba’Gamnan and his goons are defeated, it’ll be time to chase down Lamont - or whatever his name really is. To facilitate your desire to leave the Lhusu Mines, the treasure in this area will stop respawning. How rude. If you fled from Ba’Gamnan, you merely have to make your way through the Shaft Entry area and leave the mines to continue on, otherwise leave Site 2 and trek through the areas you’ve previously explored, watching Lamont flee periodically. You may come across new foes, like the Slavens in Transitway 1, the Oltam Span and in the Shaft Entry areas, but otherwise your escape shouldn’t be terribly different from your intrusion.
When you’re back in the open air of Bhujerba you’ll witness a scene where Lamont, or rather Larsa, rescues Penelo from suspicion and absconds to Marquis Ondore’s estate. Seems that everybody’s goals once again converge on the same location, this time being Marquis Ondore’s estate. Getting in, however, might be a bit of a problem, as past experience has shown that the Marquis is no fan of random strangers waltzing into his estate. Seems like you need fancy armor and a fleet of airships to get that key. Continue upstairs to the Save Crystal, near which the party will hit upon a plan that allows Vaan to put two of his only talents to use - causing a scene by being loud and annoying, and lying.
No Comments