
This page offers a guide on how to complete the main quest, Moisture Farm Blues, including how to find the condenser in The Breach, and build the Hydrogel Core and Hydrogel Door in My Time at Sandrock.
Before you can do this quest, you’ll need to first complete The Old Man and the Tree main quest.
Defeat the Geeglers at Moisture Farm
As you enter into the Moisture Farm for the first time, you’ll be greeted by a Geegler invasion! You’ll need to defeat the 3 Geegler Interns - they’re Level 6 and 7 enemies, but they don’t hit that hard luckily! After defeating the initial 3, ![]() Justice and
Justice and ![]() Zeke will fight off the rest.
Zeke will fight off the rest.
Zeke will then tell you that the Hydrogel which keeps the farm hydrated and running has been ruined, and he needs your help to repair it.
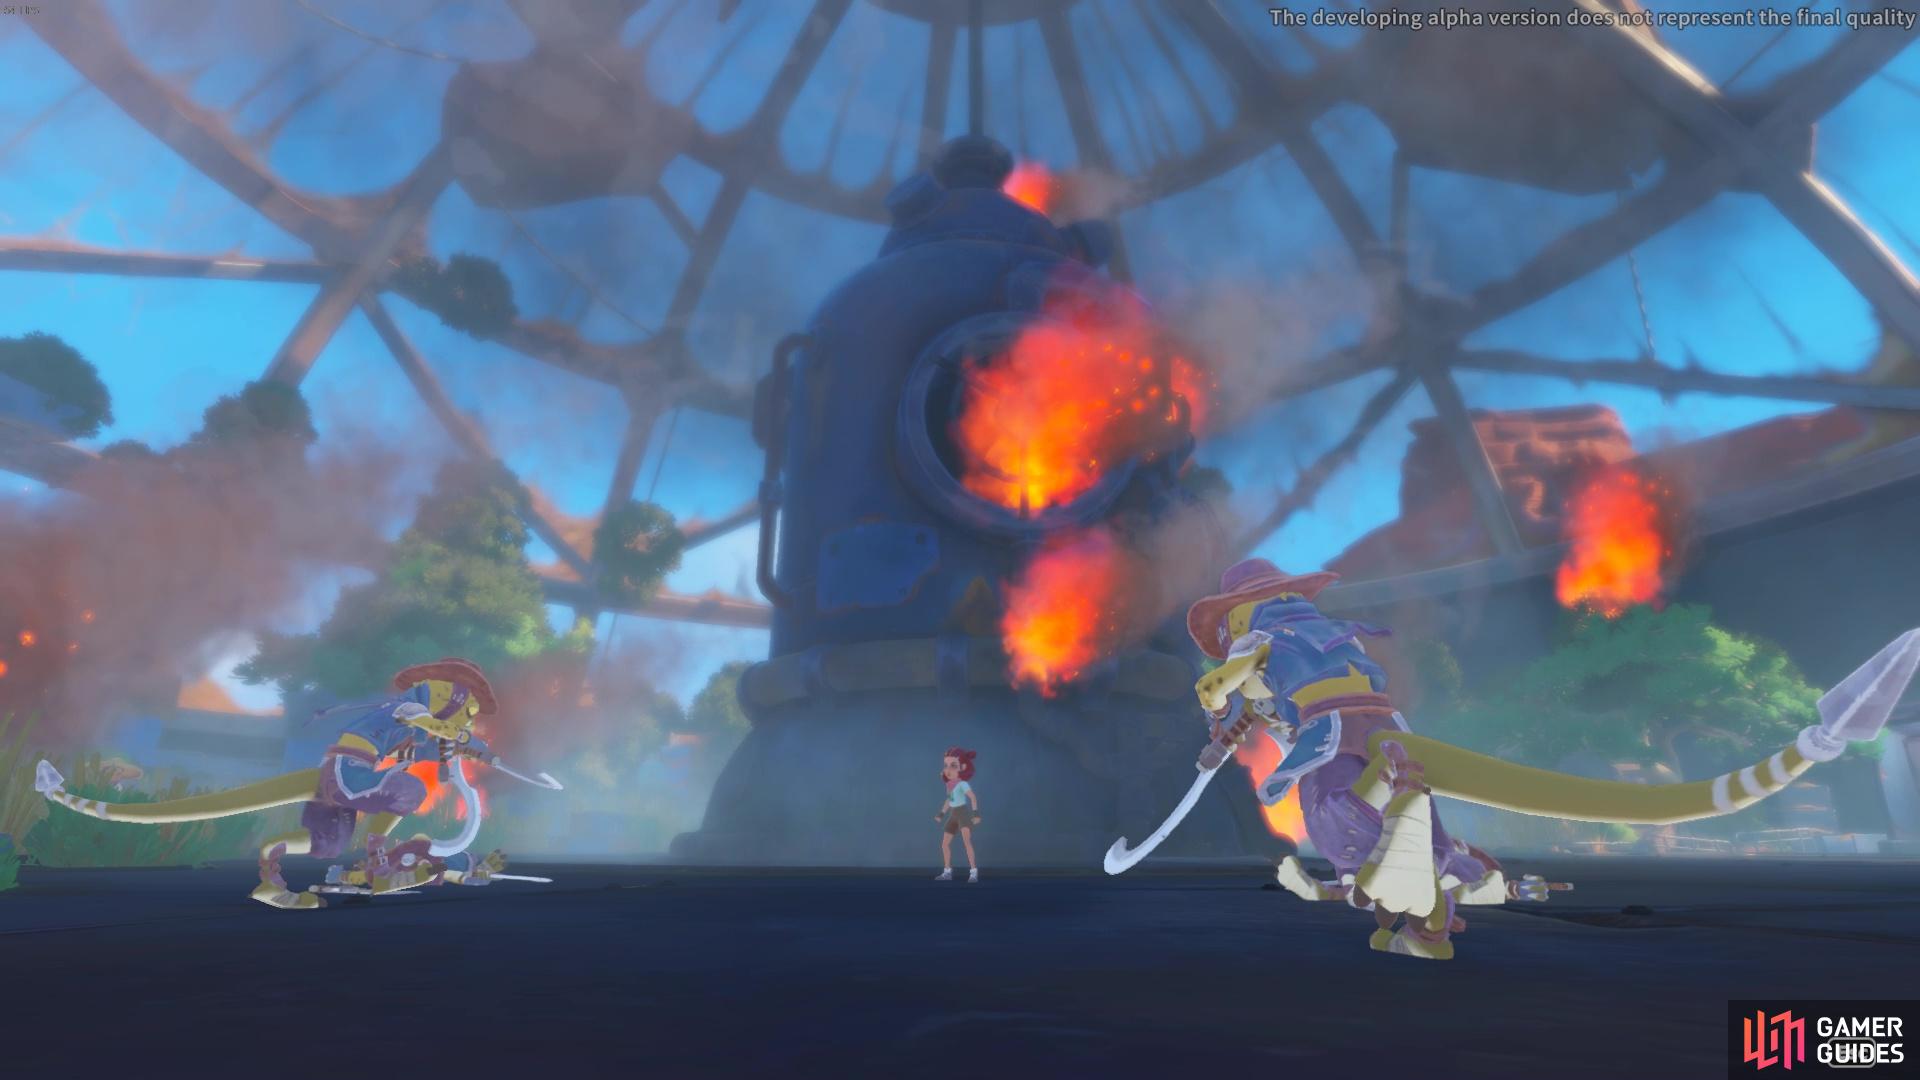
Help fend off the Geeglers from the farm!
Talk to Qi about the Hydrogel
Your first task will be to salvage the old Hydrogel - you’ll get some ![]() Copper Bars and Plates, as well as a Bronze Pipe and some other scraps. After doing so, you’ll need to head to
Copper Bars and Plates, as well as a Bronze Pipe and some other scraps. After doing so, you’ll need to head to ![]() Qi in the Research Center so he can help draw up a diagram for a new Hydrogel build.
Qi in the Research Center so he can help draw up a diagram for a new Hydrogel build.
He’ll also tell you to speak to Justice about gaining access into The Breach to find a specific component for the Hydrogel. The Breach is a dungeon-like area with monsters and treasure, so get ready to go dungeon crawling!
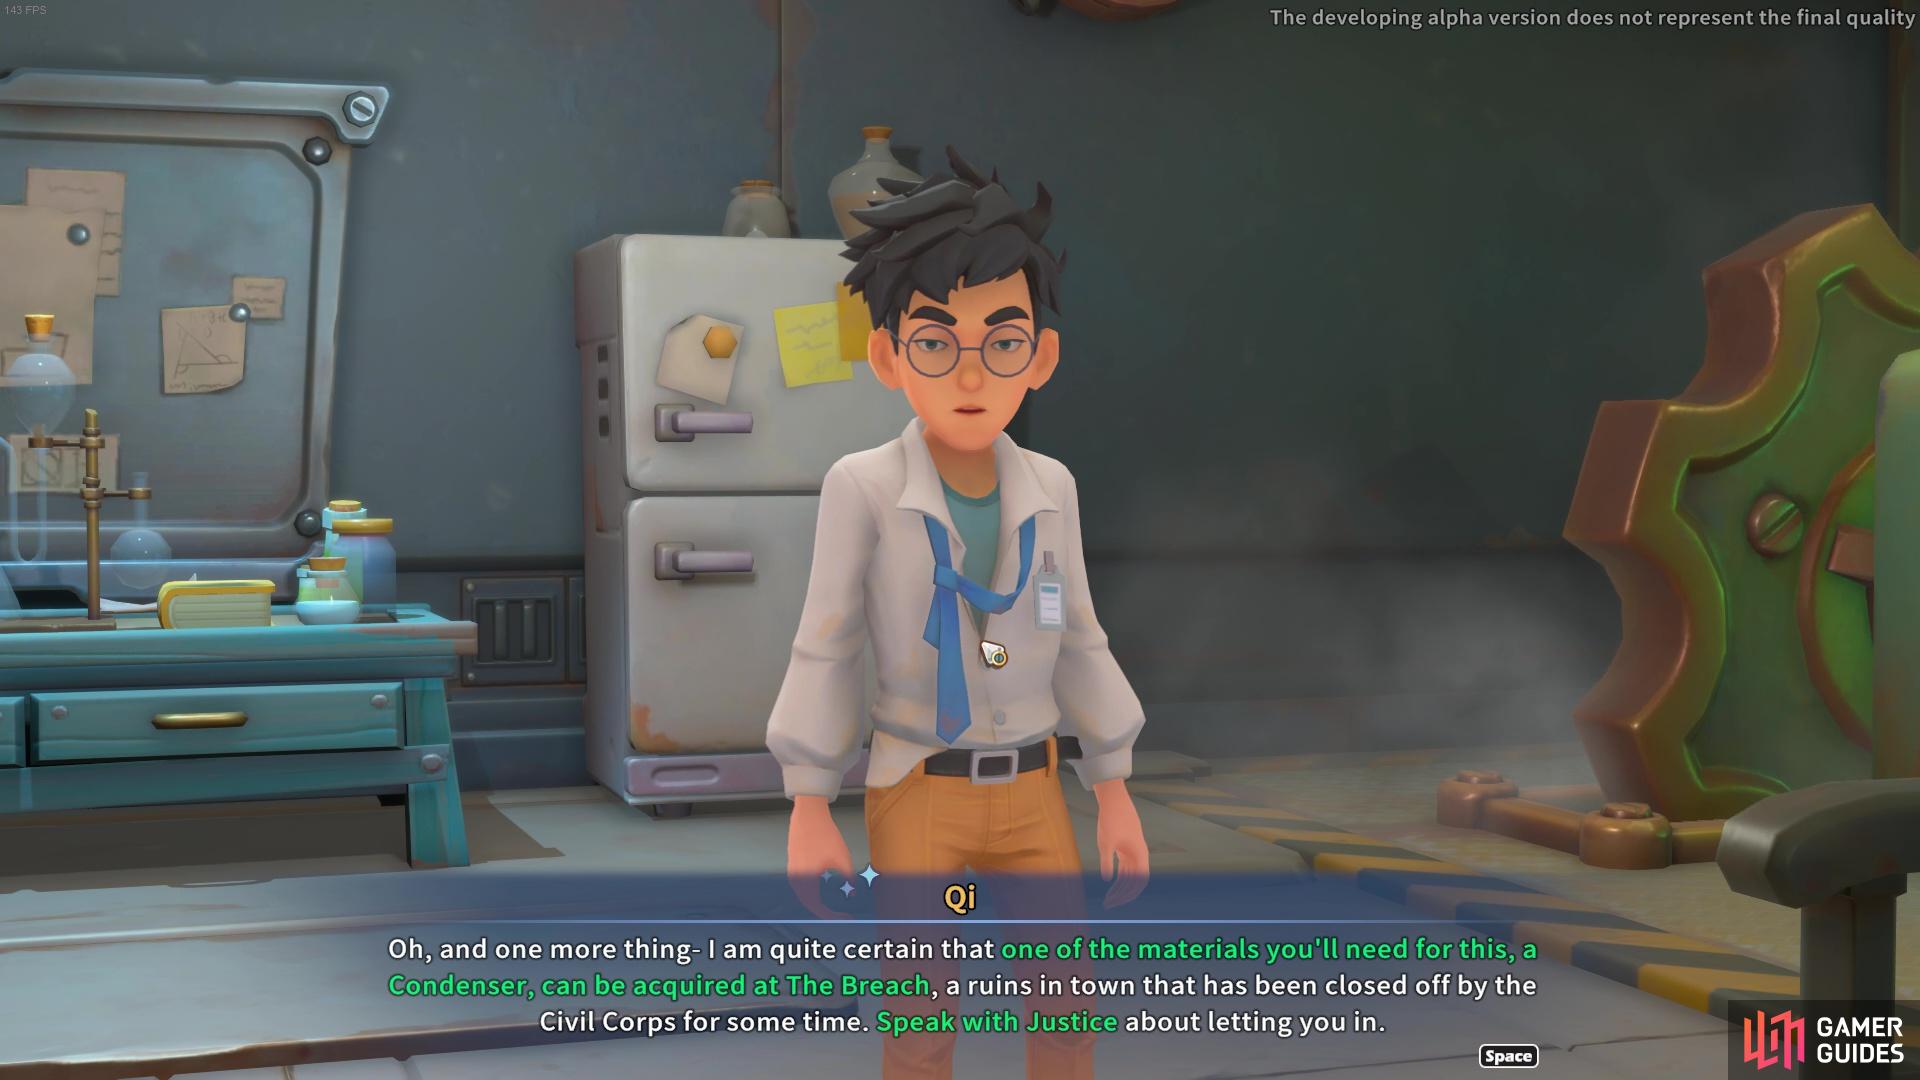
Qi will draw you some new diagrams but he also lets you know that you need to get some parts from The Breach.
How to Enter The Breach
When you speak to Justice, he’ll tell you that The Breach is a dangerous area currently closed off to the public because of monsters. However, given that the Hydrogel situation is critical, he will allow you to enter The Breach to find the Condenser component needed.
The entrance into the Breach is found down the road slightly from main square outside the City Hall.

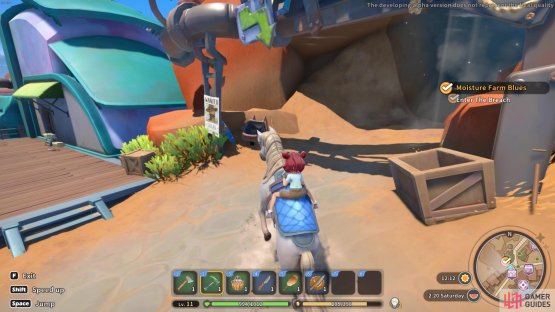
(1 of 2) Justice lets you to head over to The Breach so you can find the Condenser


Justice lets you to head over to The Breach so you can find the Condenser (left), the entrance is nearby the City Hall. (right)
Where to Find the Condenser
Once you’ve entered into The Breach, you’ll want to first head down the steps to the next floor below. From there, continue through the archway up ahead and follow the corridor around to another set of stairs downwards.
In this next room, you’ll find a couple of Level 9 Sweeper enemies. They use their pincer arms to pinch at you. Remember to dodge occasionally so you don’t take too much damage - luckily, they don’t do a whole bunch of damage so you don’t need to worry too much.
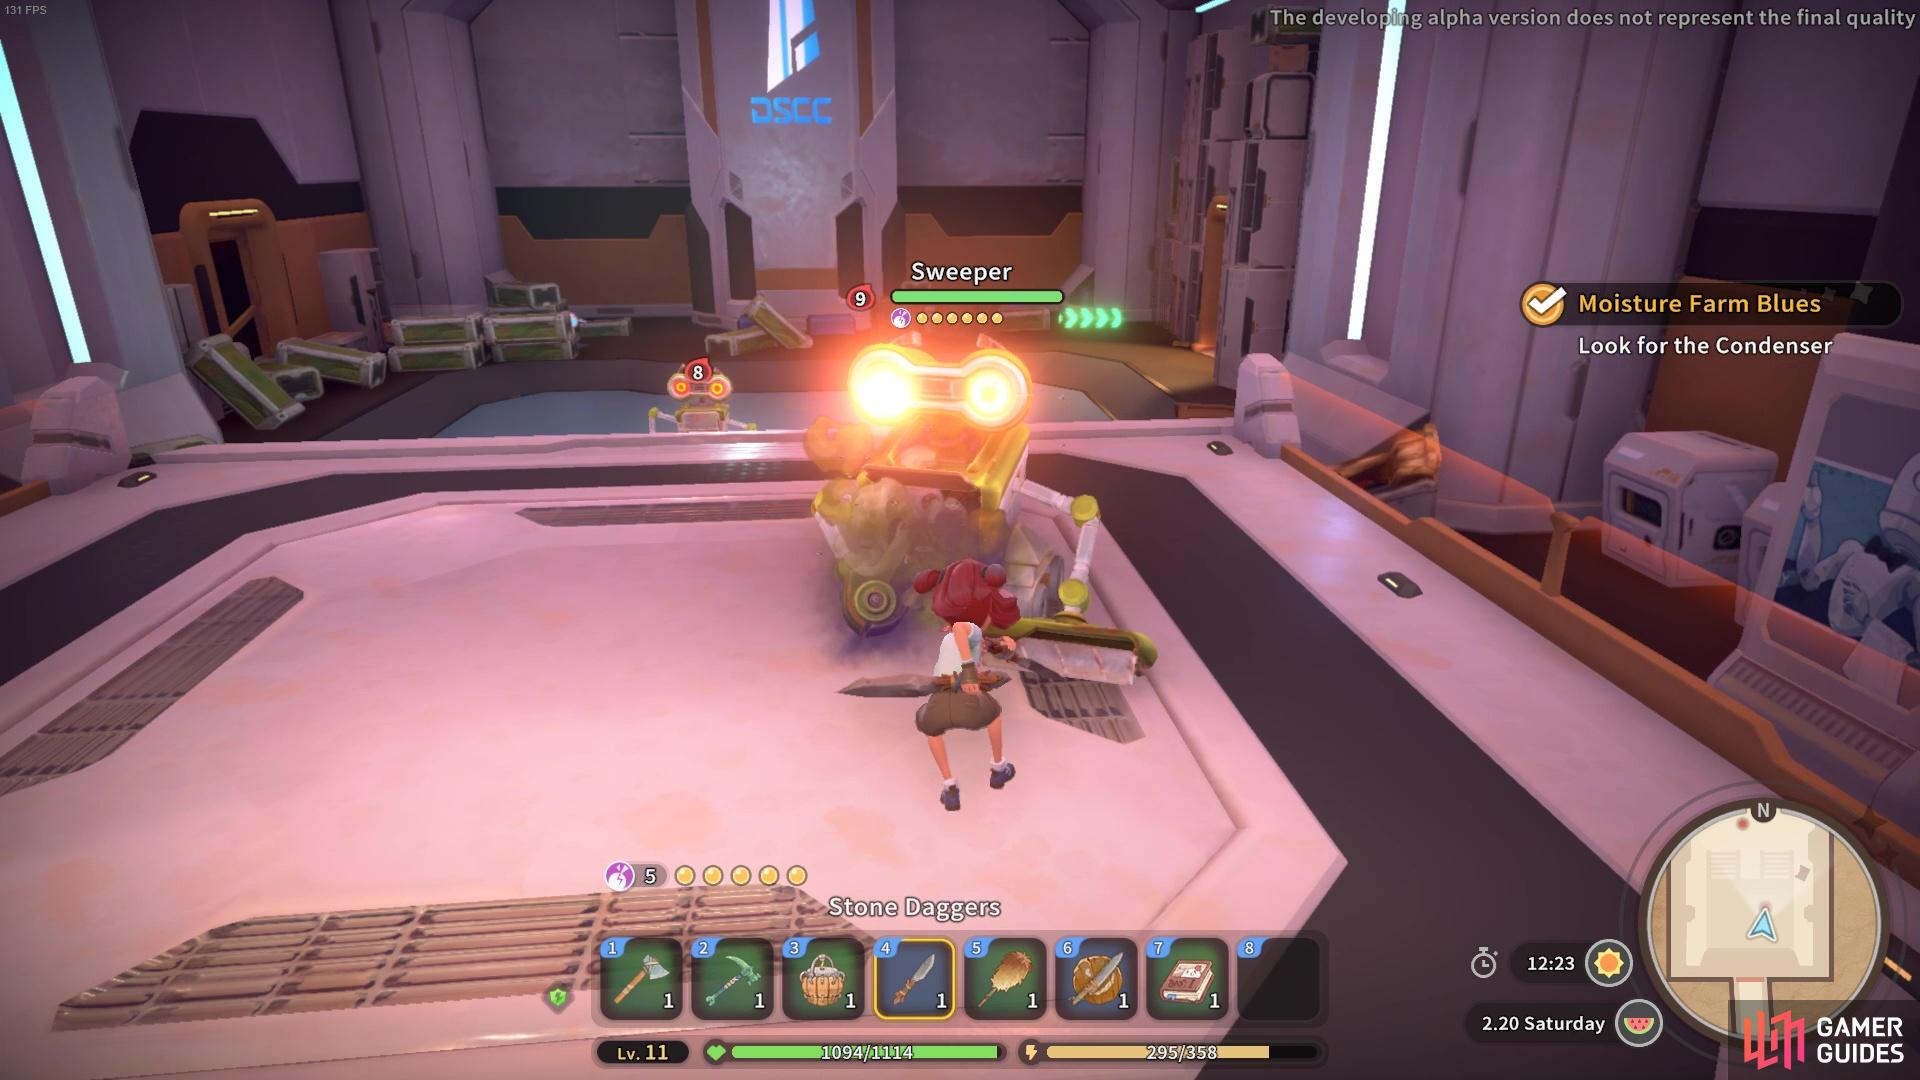
Watch out for the Sweeper bot enemies!
After taking out the Sweeper robots (or not, they’re optional!), head down the path to the right and take the steps down into a new area. This time you’ll need to take on a couple of Level 8 and 9 Geegler Interns. They shouldn’t pose too much of a threat either, but you can run past them if you want to conserve your health and save yourself some time!
Time for your first big boss fight!
If you are running a bit low on health, there’s a wooden barrel in the alcove to the left, next to the door into the nex area. If you smash the barrel you’ll get ![]() Hemostat, which can be used to replenish a bit of health!
Hemostat, which can be used to replenish a bit of health!
In this next room, you’ll need to drop down into the tunnel in the center of the room - only go down into the next area below when you’re ready as you can’t return.
Once you’ve dropped down, replenish your health with the revive station (the glowing blue + symbol). Now you’re fully healed and ready to face the enemies in the next room!
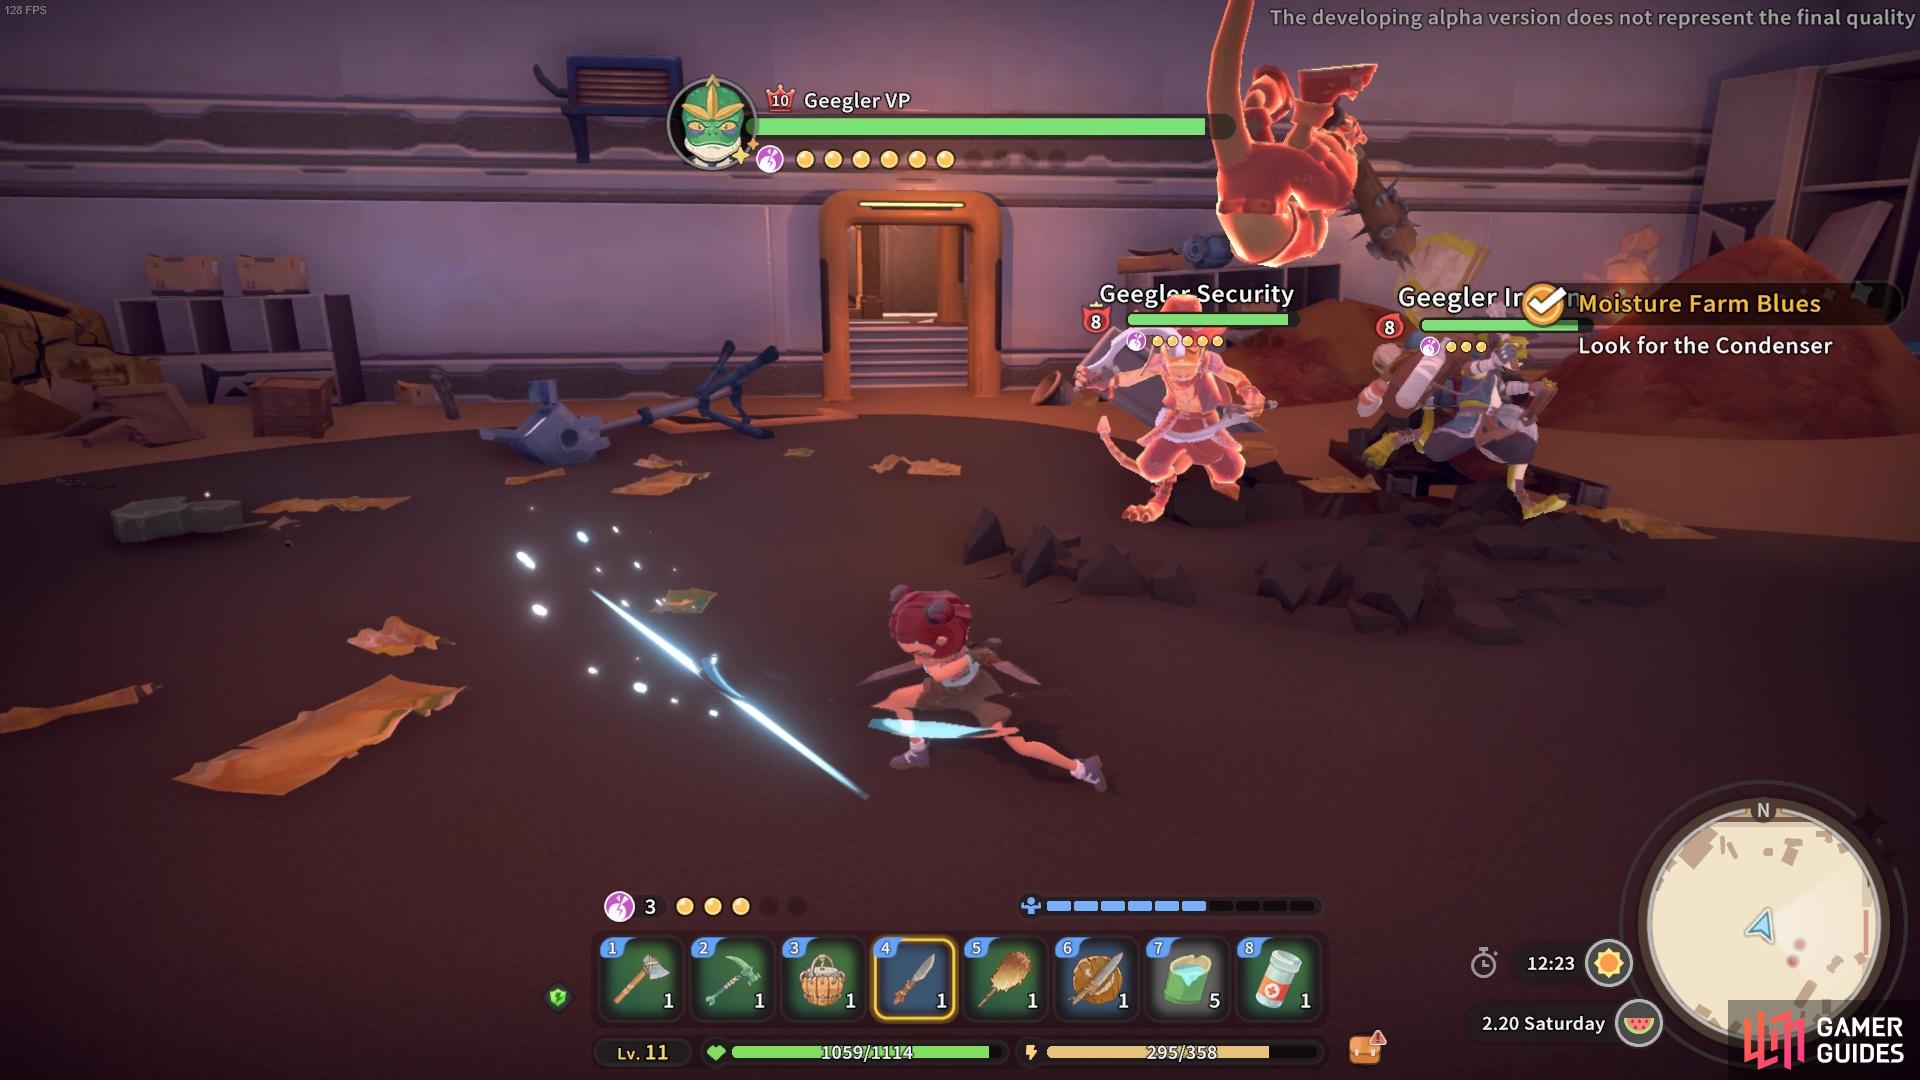
How to Beat the Geegler VP
When you enter into this room, you’ll find a host of Geeglers as well as the Geegler President and the Geegler VP. This time round, you won’t be fighting the Geegler President, but you will be fighting the Geegler VP, who’s the boss of this mini dungeon crawl.

There are some Geeglers in The Breach.
In addition to fighting the Geegler VP, you’ll also have to fight a Level 8 Geegler Intern and a Level 8 Geegler Security. You’ll want to take out the sidekicks first, with the Intern being the easiest to defeat. The Geegler Security wields two sickle-shaped daggers and can slice at you quickly, so you’ll also want to deal with him quickly, making sure to dodge whenever you see him start a big attack.
The barrel in this cubby has a hemostat inside!
The Geegler VP has a big health bar (shown on top of the screen) and can also do a big power up attack. When he glows red and pulls his bat to the side, he’s about to do a big spinning attack that you’ll want to avoid all together or get knocked over. At the end of the spin attack he’ll do a little wobble as he composes himself, so you’ll get a good opportunity to hit and possbibly break his posture.
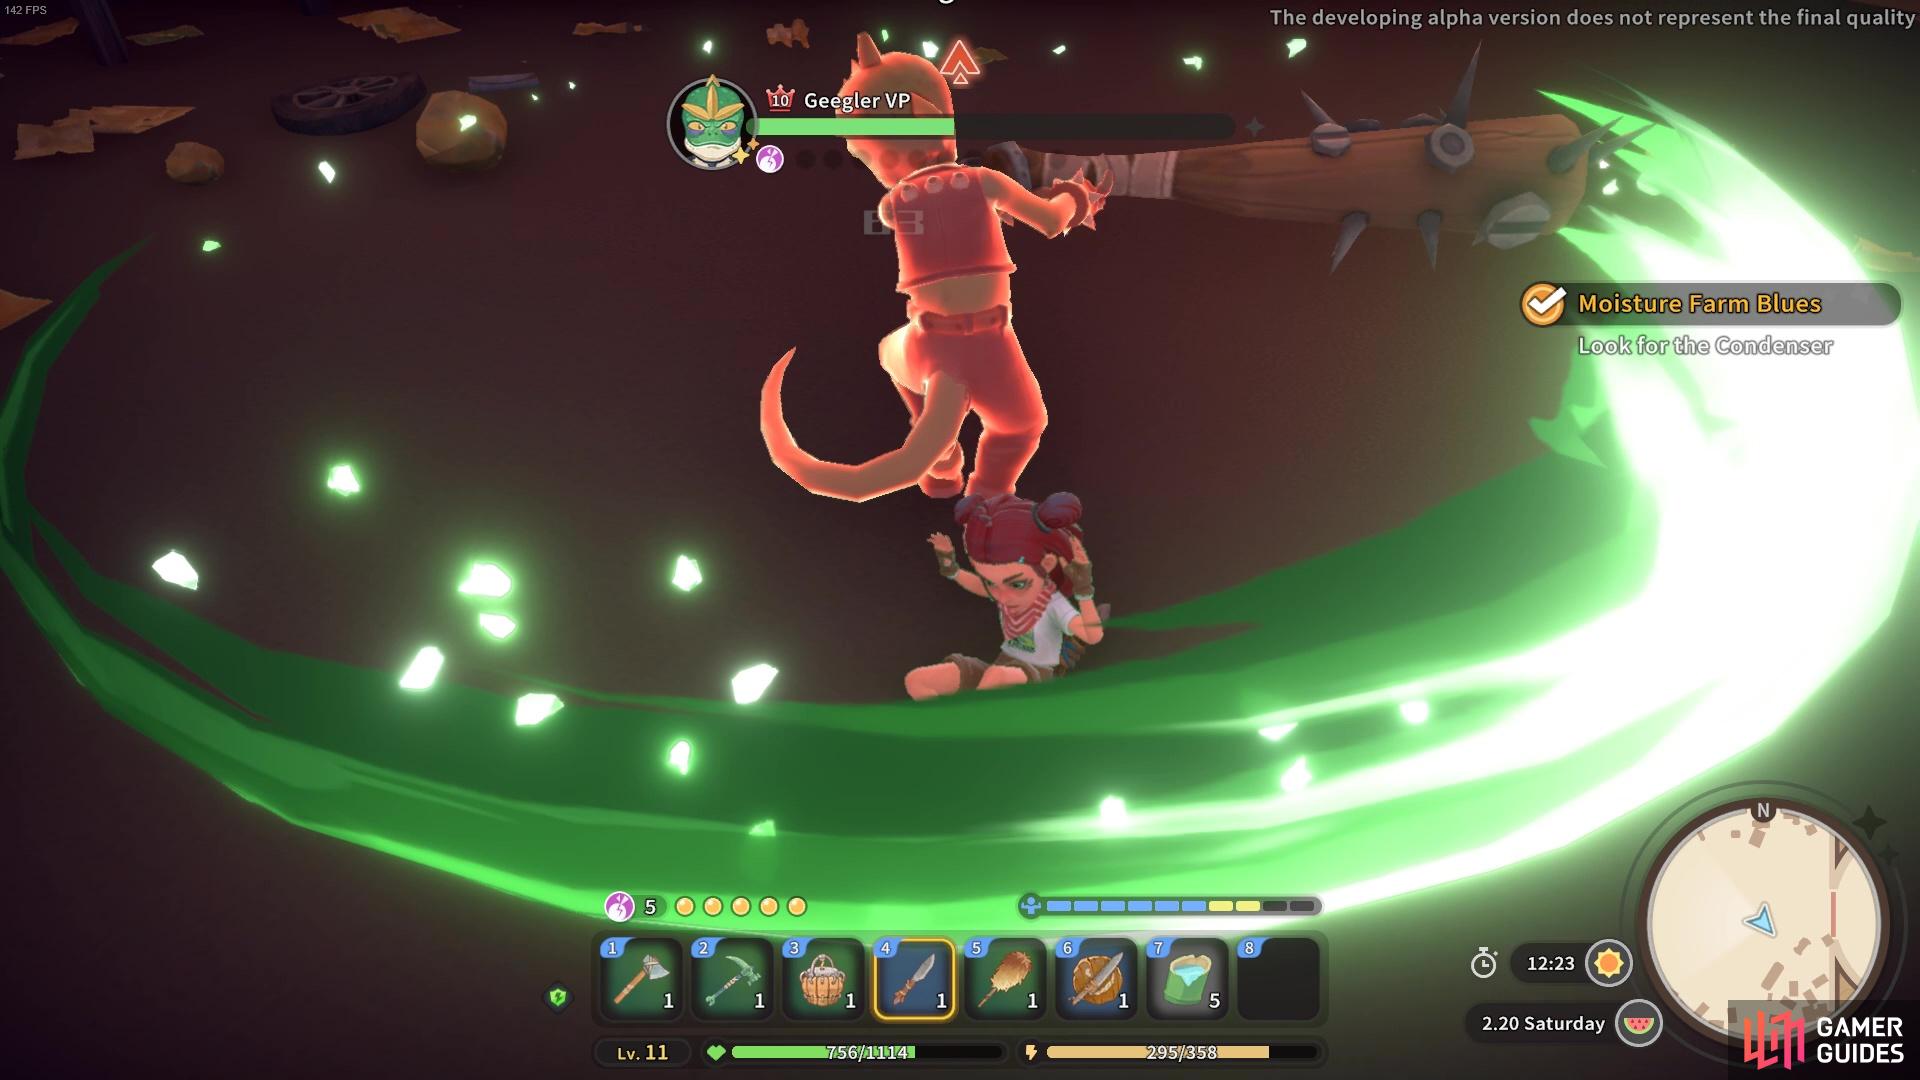
Watch out for the Geegler VP’s spin attack!
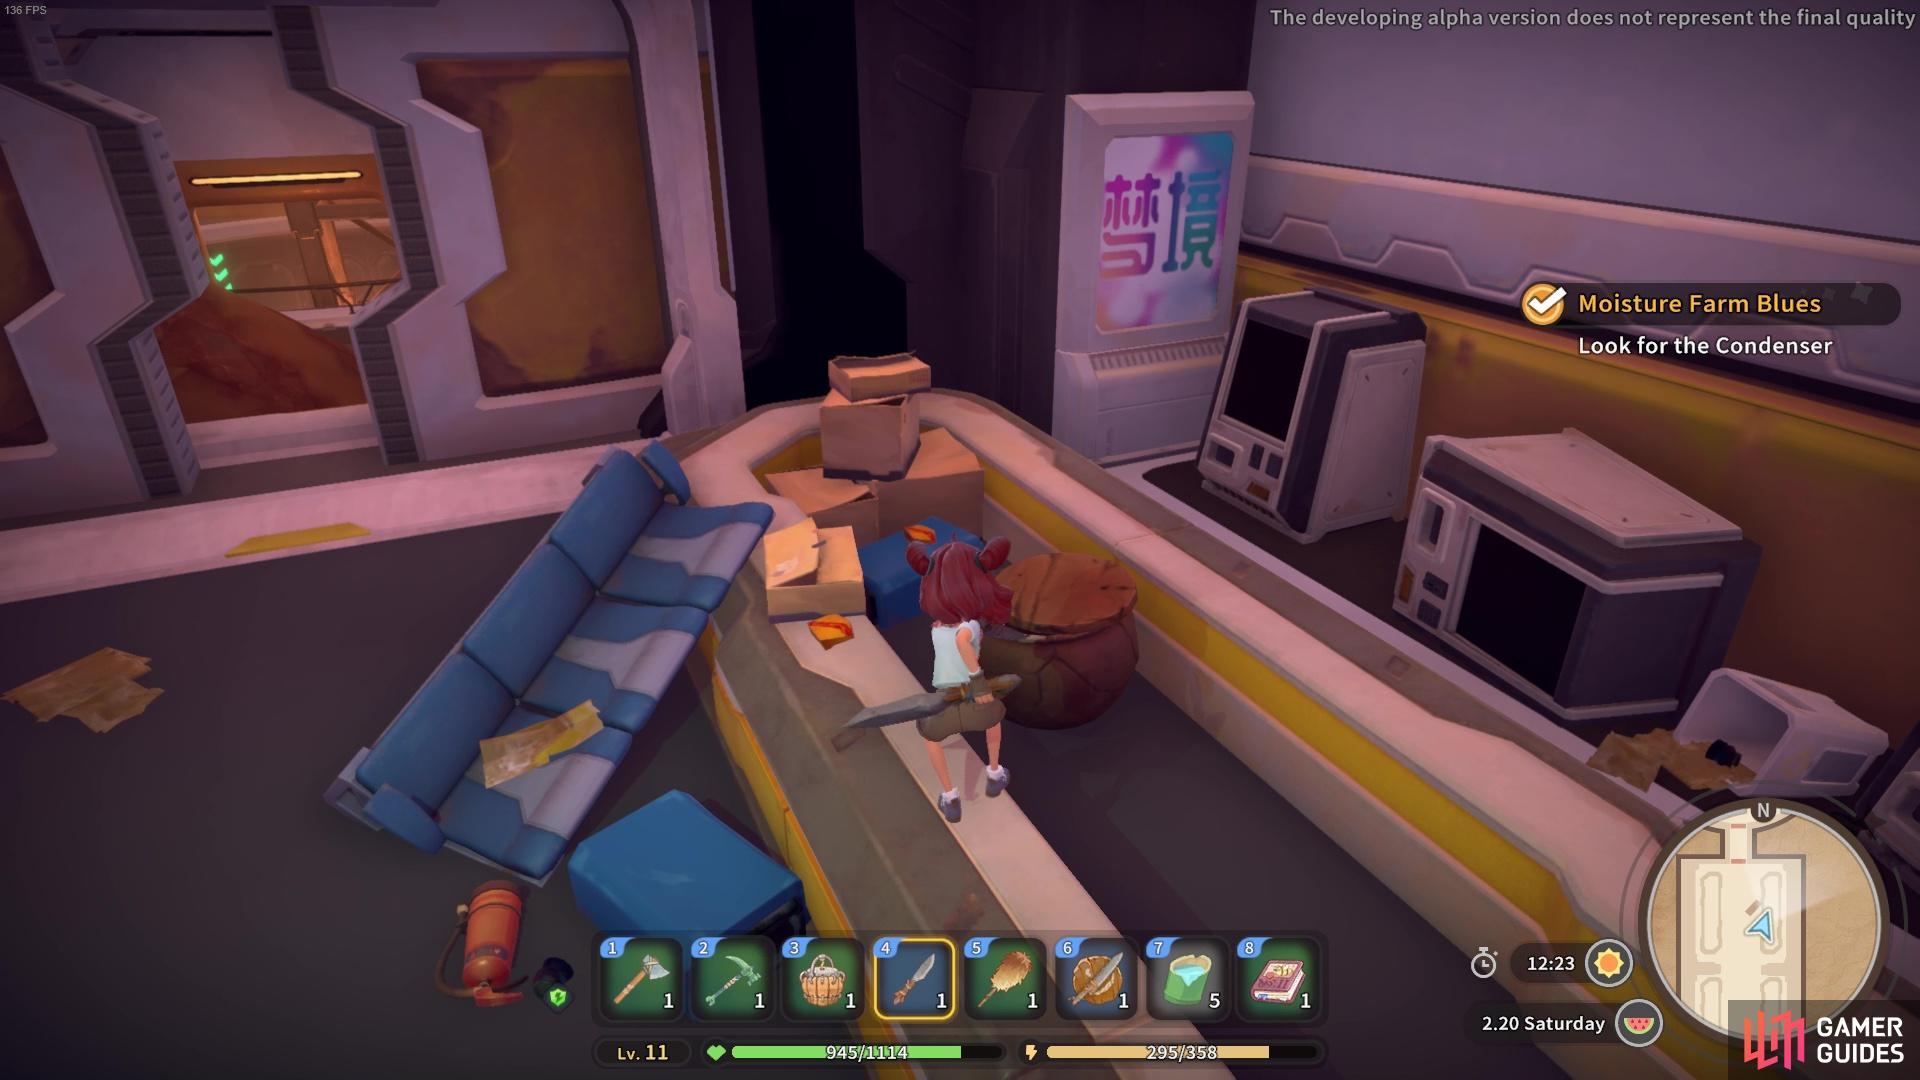
After defeating the Geeglers, you can search through this room for the Condenser and some treasure! There’s a couple of treasure chests including varying materials, and the teeasure chest found on the higher up platform contains the Condenser.
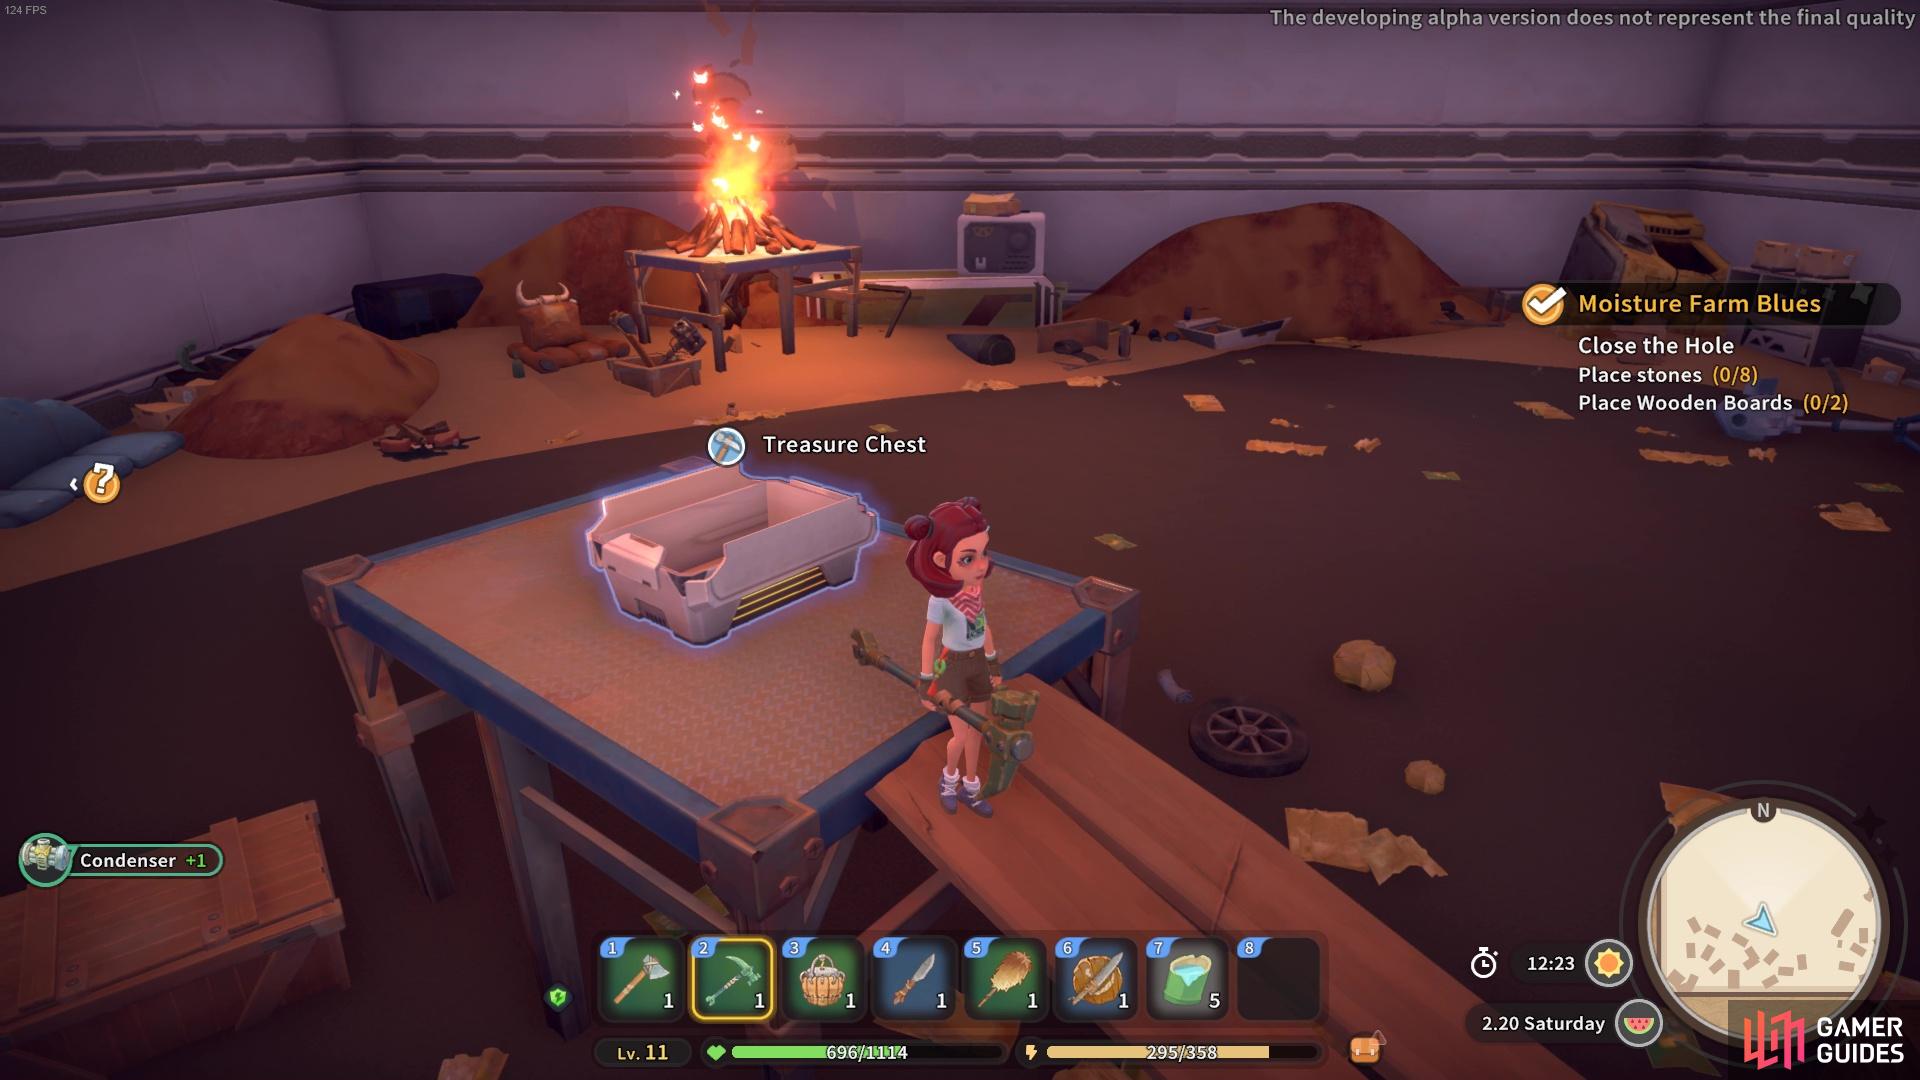
The Condenser is found in this chest!
How to Close the Geegler Hole
Your next task will be to block up the hole whether the Geeglers came from. You’ll need to place x8 ![]() Stones and x2
Stones and x2 ![]() Wooden Boards to cover up the hole. If you don’t have those materials to hand, you can collect them from various items and scrap piles around the room. Once you have the items, use them on the hole to finish up your time in The Breach. Don’t exit until you’ve collected all the treasure in this room though!
Wooden Boards to cover up the hole. If you don’t have those materials to hand, you can collect them from various items and scrap piles around the room. Once you have the items, use them on the hole to finish up your time in The Breach. Don’t exit until you’ve collected all the treasure in this room though!
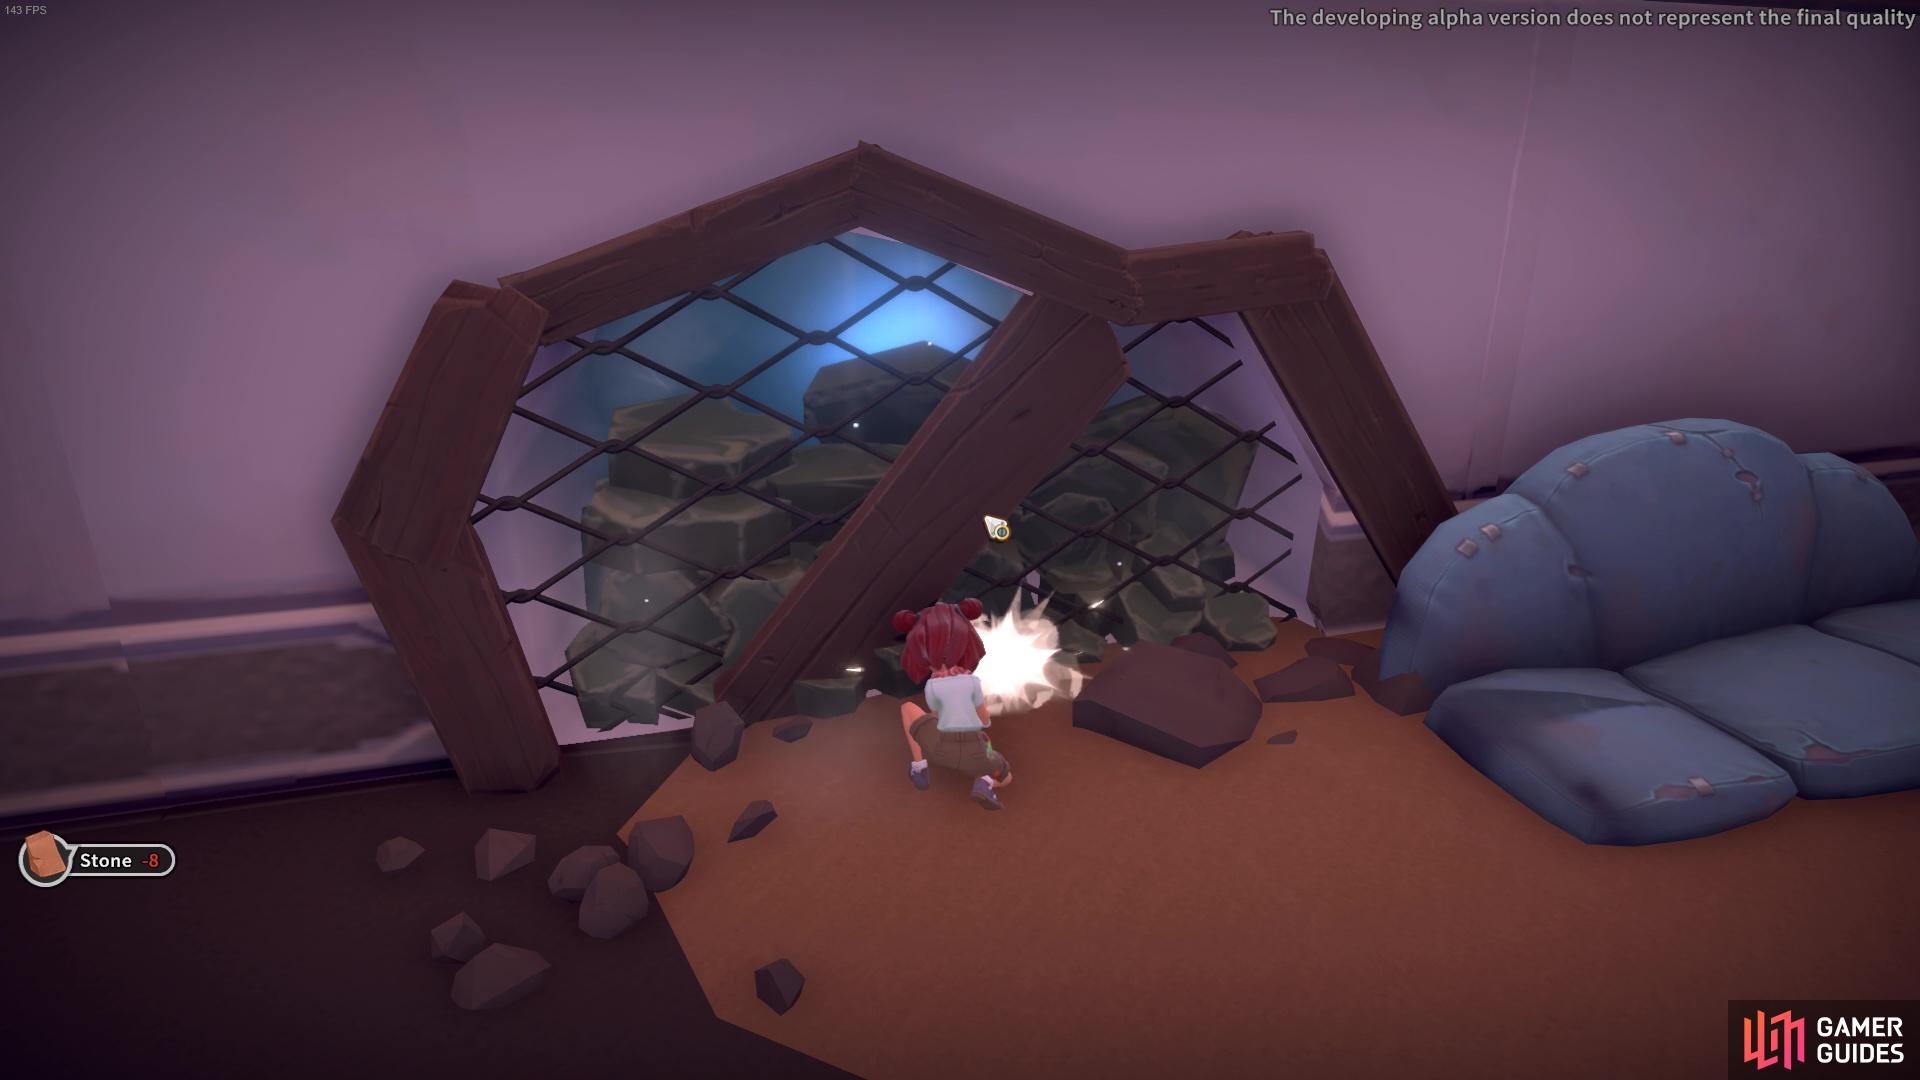
You’ll need to close up the hole that the Geeglers came from.
When you leave the area, Justice and ![]() Unsuur will meet you outside and be shocked that you had to fight off some Geeglers. They’ll thank you for your service nonetheless and tell you that they’ll go make sure your makeshift hole blocker will do the trick permanently.
Unsuur will meet you outside and be shocked that you had to fight off some Geeglers. They’ll thank you for your service nonetheless and tell you that they’ll go make sure your makeshift hole blocker will do the trick permanently.
You’ll now have to wait until Qi sends you the diagrams to build the new Hydrogel. They’ll come via the post the next morning, so if you’re impatient you can just sleep the day away!
In addition to getting the diagrams in the post, you’ll also get +50 Gols and +5 Dried Sandberries in a letter from the Civil Corps!
How to Build the Hydrogel Door
To build the Hydrogel Door, you’ll need the following materials:
| Icon | Material | Amount |
|---|---|---|
 |
x8 | |
 |
x6 | |
 |
Bronze Pipes | x4 |
To make the Hydrogel Door, you’ll need x8 ![]() Copper Plates, x6
Copper Plates, x6 ![]() Rubber Tubes and x4 Bronze Pipes. To make these materials, you’ll need the following raw resources:
Rubber Tubes and x4 Bronze Pipes. To make these materials, you’ll need the following raw resources:
- 96
 Copper Ore
  or
or  Copper Scraps
  (Copper Bars are a random drop)
 - 16
 Tin Ore
- 18 Rubber
 or
or  Rubber Scraps
  (Rubber Pipes and Rubber are a random drop)
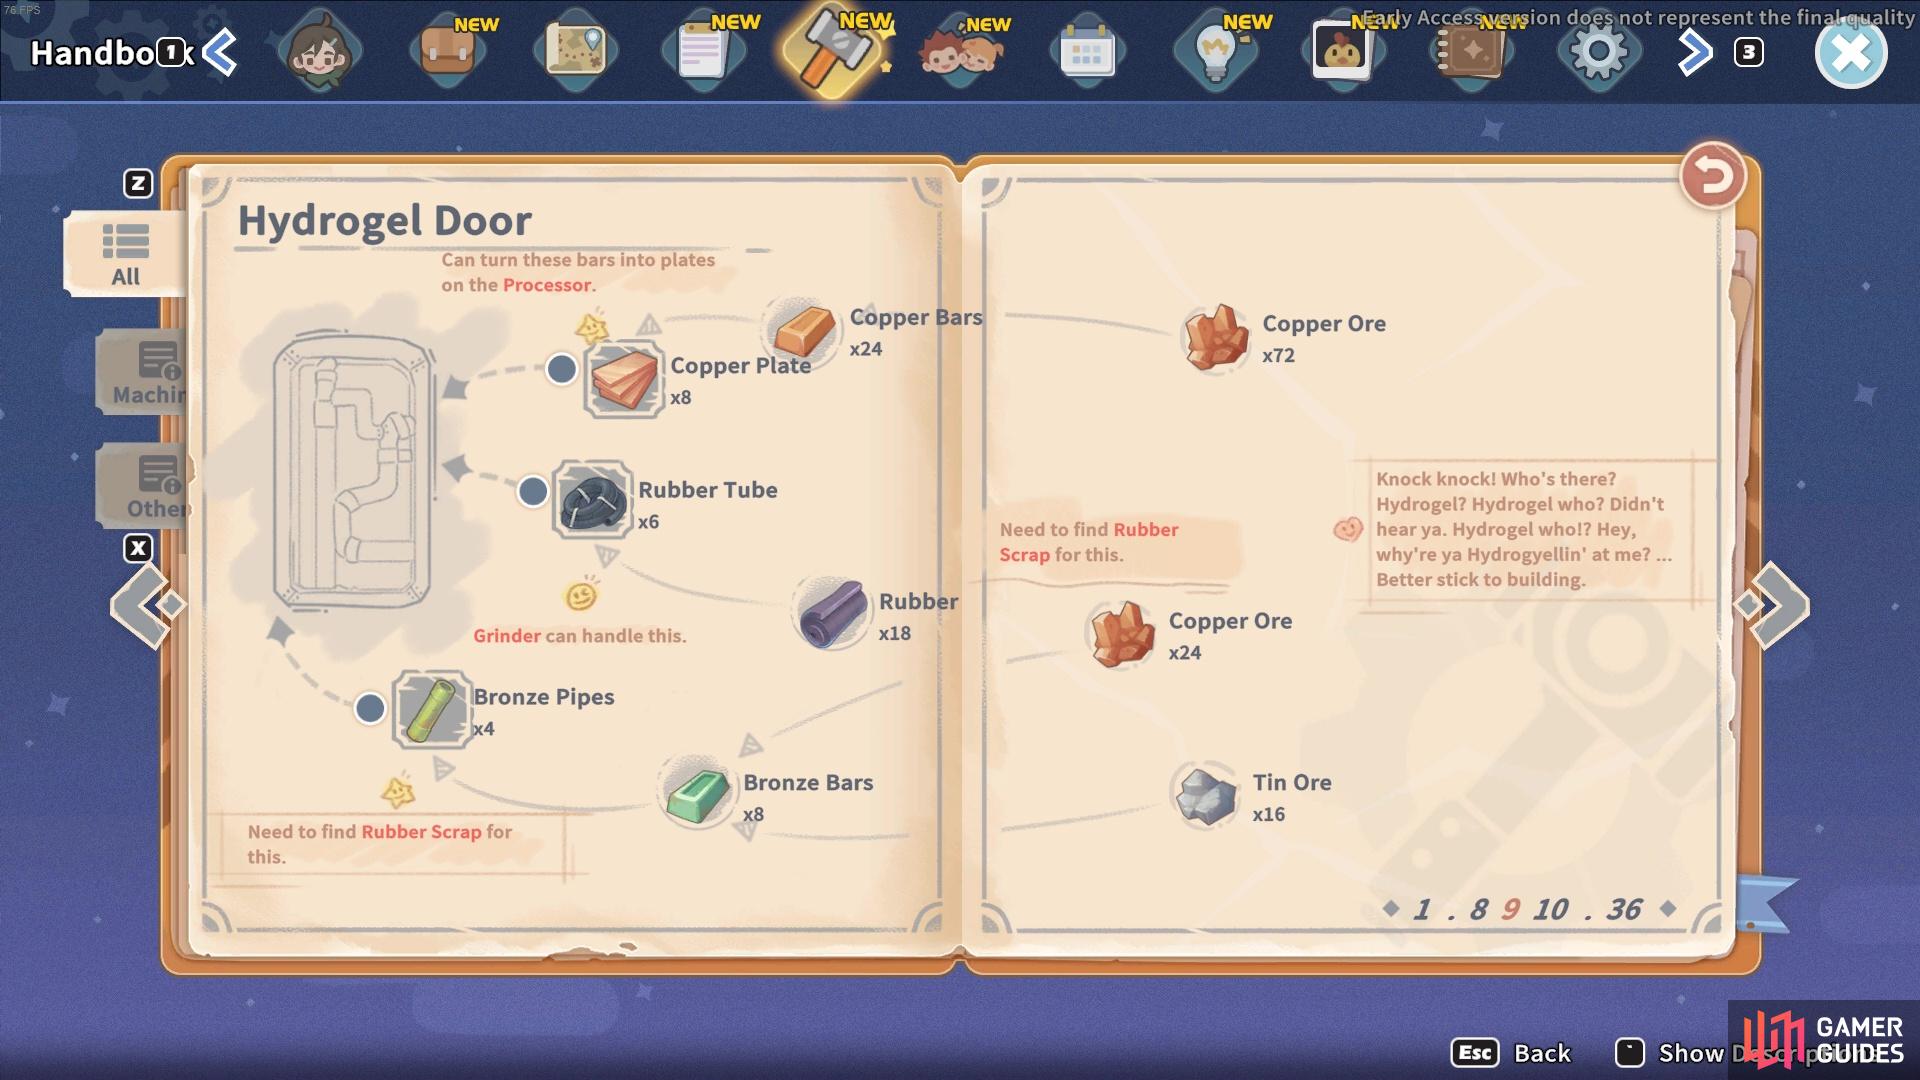
The Hydrogel Door blueprint on the Assembly Station.
For more in depth information, including how to make all the needed materials and the required machinery, head over to our guide on How to Build the Hydrogel Door.
How to Build the Hydrogel Core
| Icon | Material | Amount |
|---|---|---|
 |
x10 | |
 |
Basic Leather | x5 |
 |
x4 | |
 |
Engine | x2 |
 |
Bronze Blade | x2 |
The Hydrogel Core is probably your biggest build so far! It requires x2 Engines, x2 Bronze Blades, x10 Copper Bars, x5 Basic Leather and x4 ![]() Copper Pipes! In total, you’ll need the following raw resources to make the materials needed:
Copper Pipes! In total, you’ll need the following raw resources to make the materials needed:
- 2 Engine
- 102 Copper Ore

- 15
 Raw Animal Skin
- 5 Sea Salt

- 16 Tin Ore

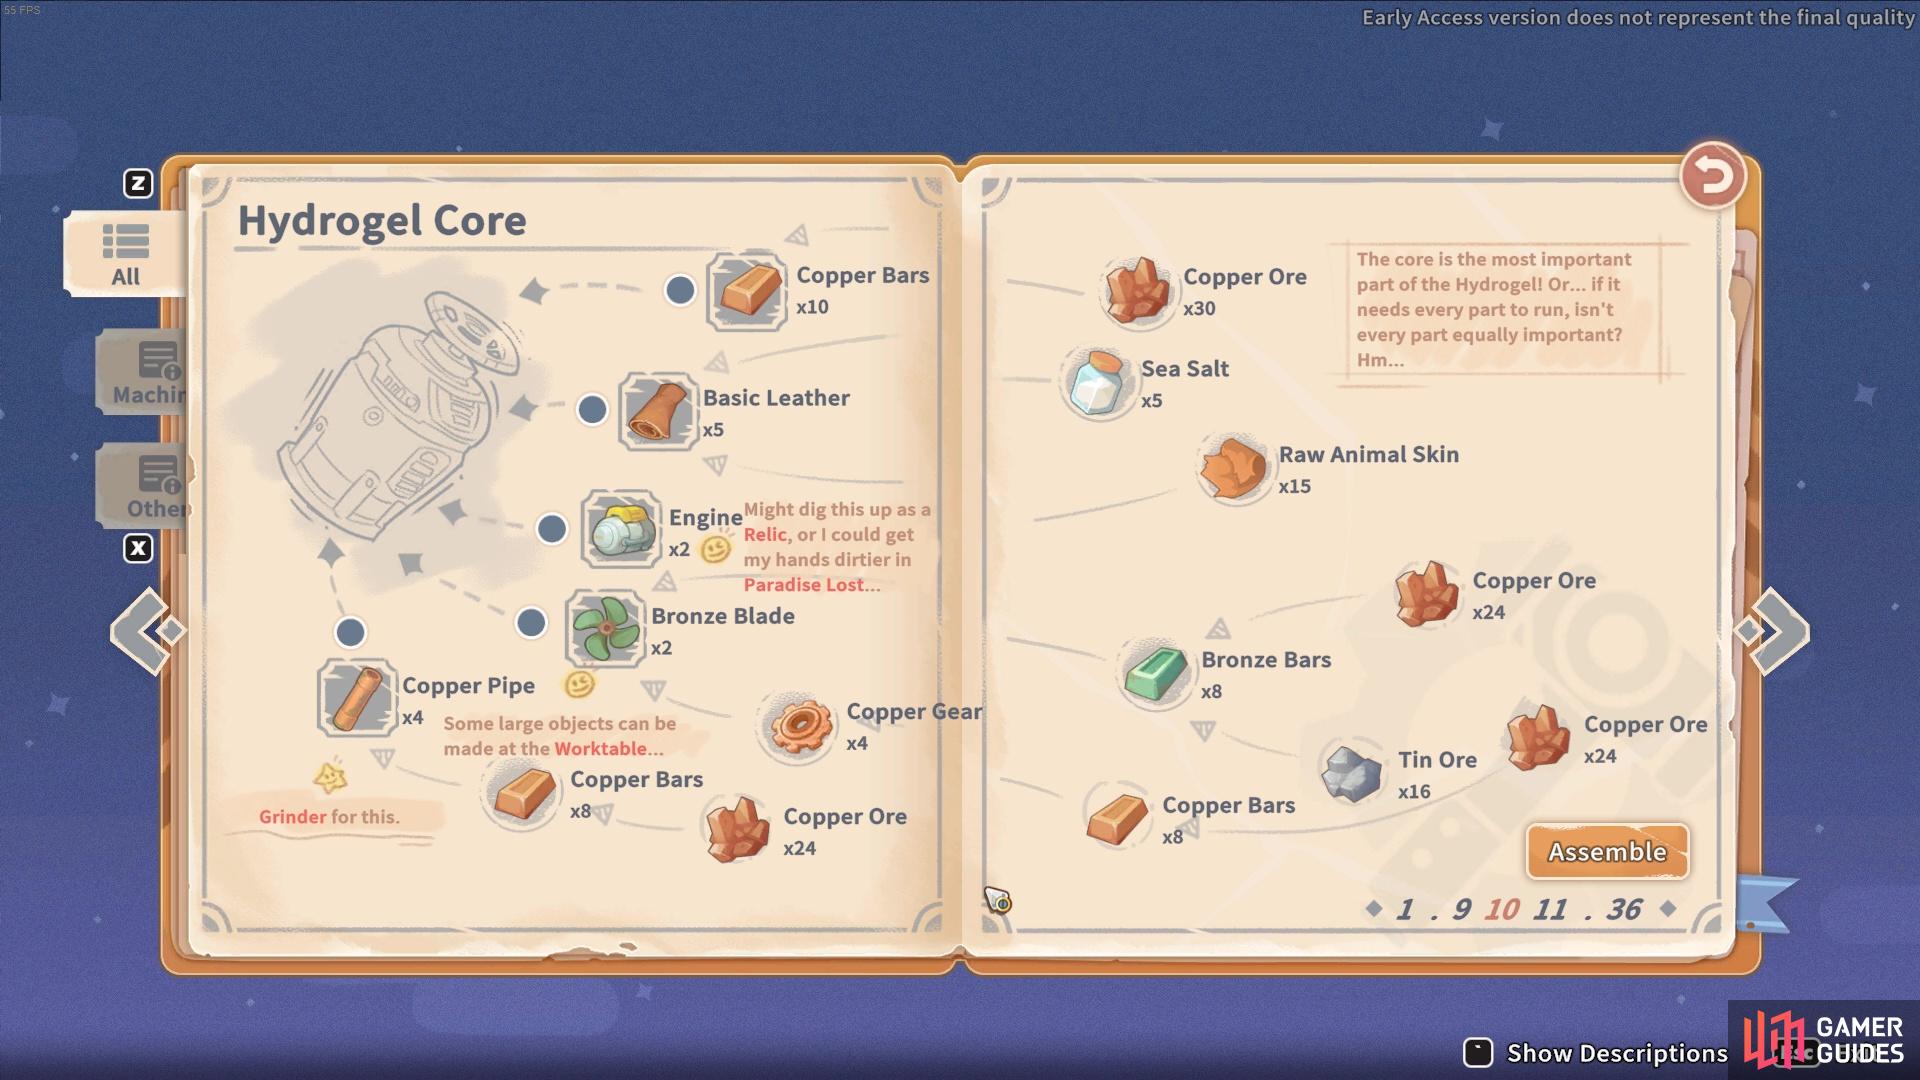
The Hydrogel Core on the Assembly Station.
For more in depth information, including how to make all the needed materials and the required machinery, head over to our guide on How to Build the Hydrogel Core.
Repairing the Hydrogel
Once you’ve finished both Hydrogel Components, return to the Moisture Farm to install them at the center of the farm. As a reward, you’ll get +1 Events Photo, +1750 Gols, +35 Workshop Reputation, +20 Zeke Relationship and +660 Experience!
Zeke will tell you that he’s happy to teach you about farming but he needs a bit of time to get things back up and running first!
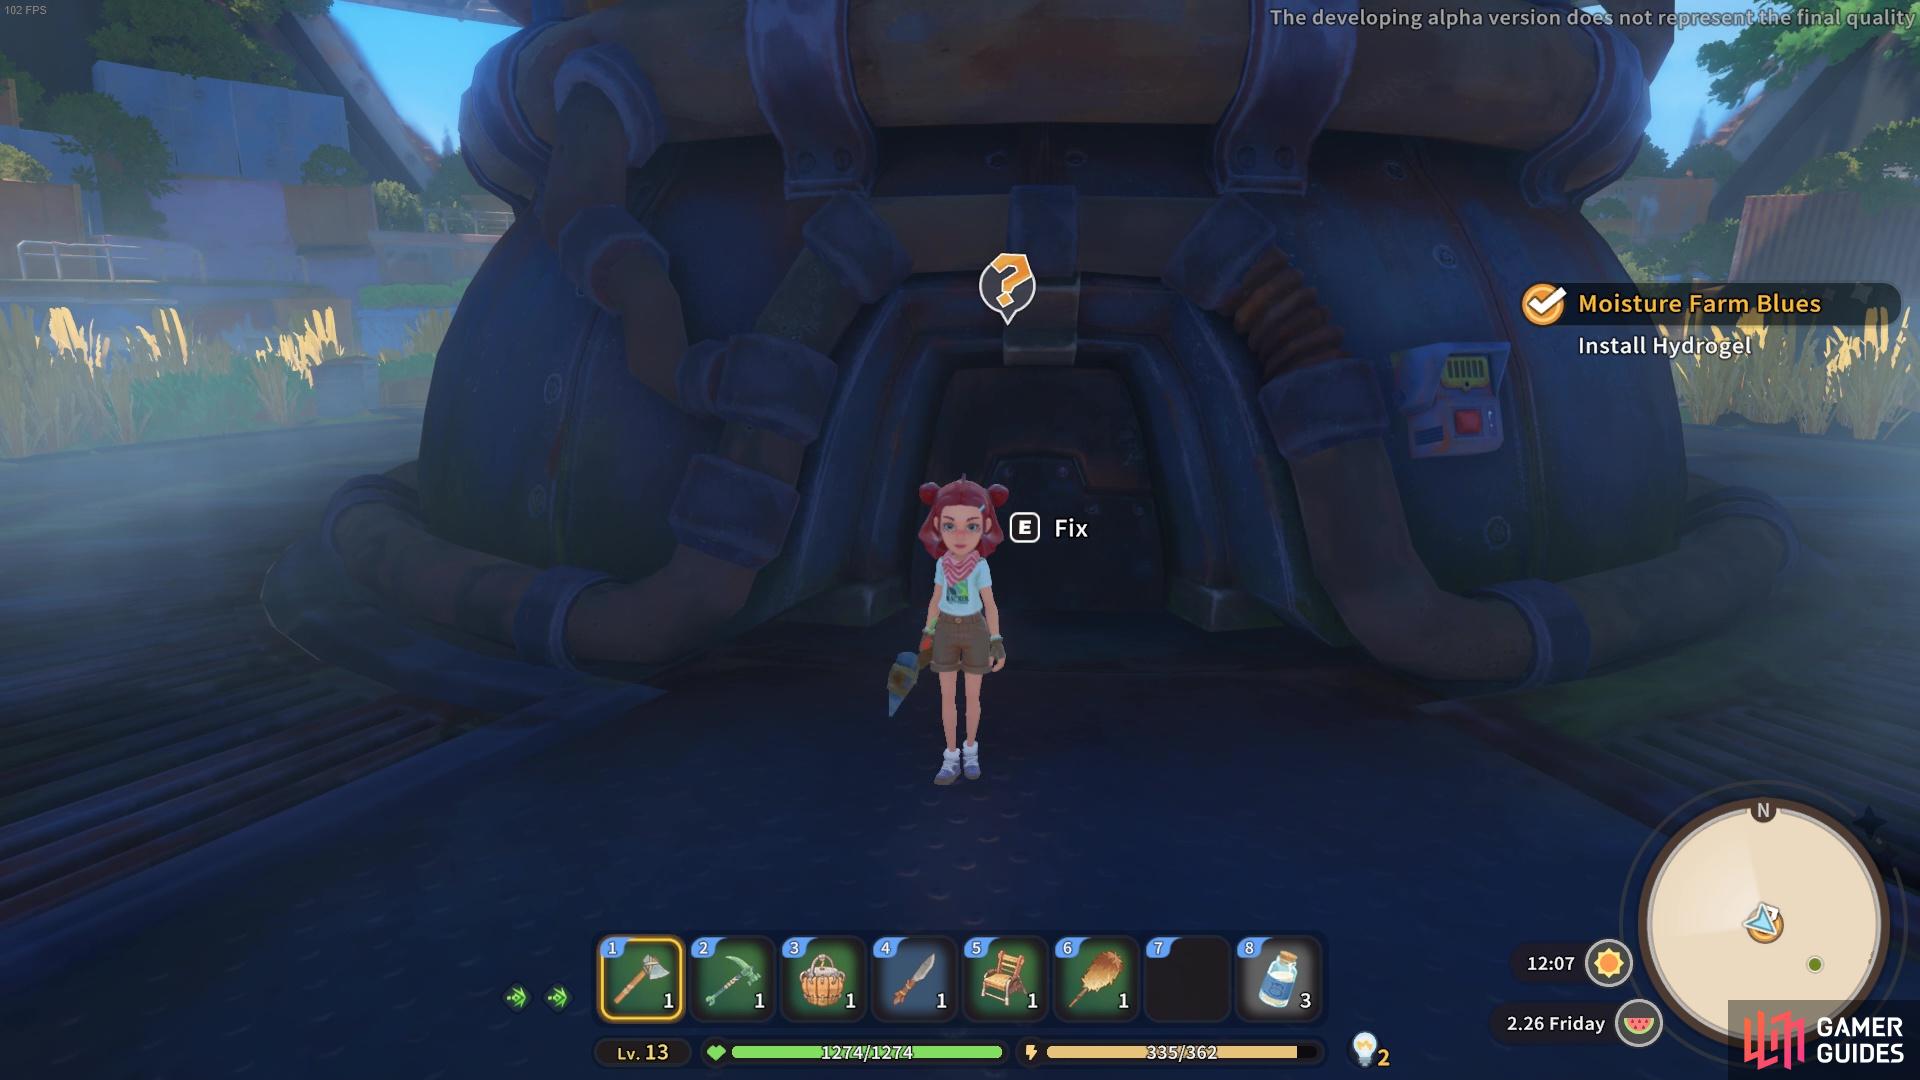
Time to fix the Hydrogel!
No Comments