
This page will guide you through Zaeed’s loyalty mission, The Price of Revenge in Mass Effect 2 Legendary Edition.
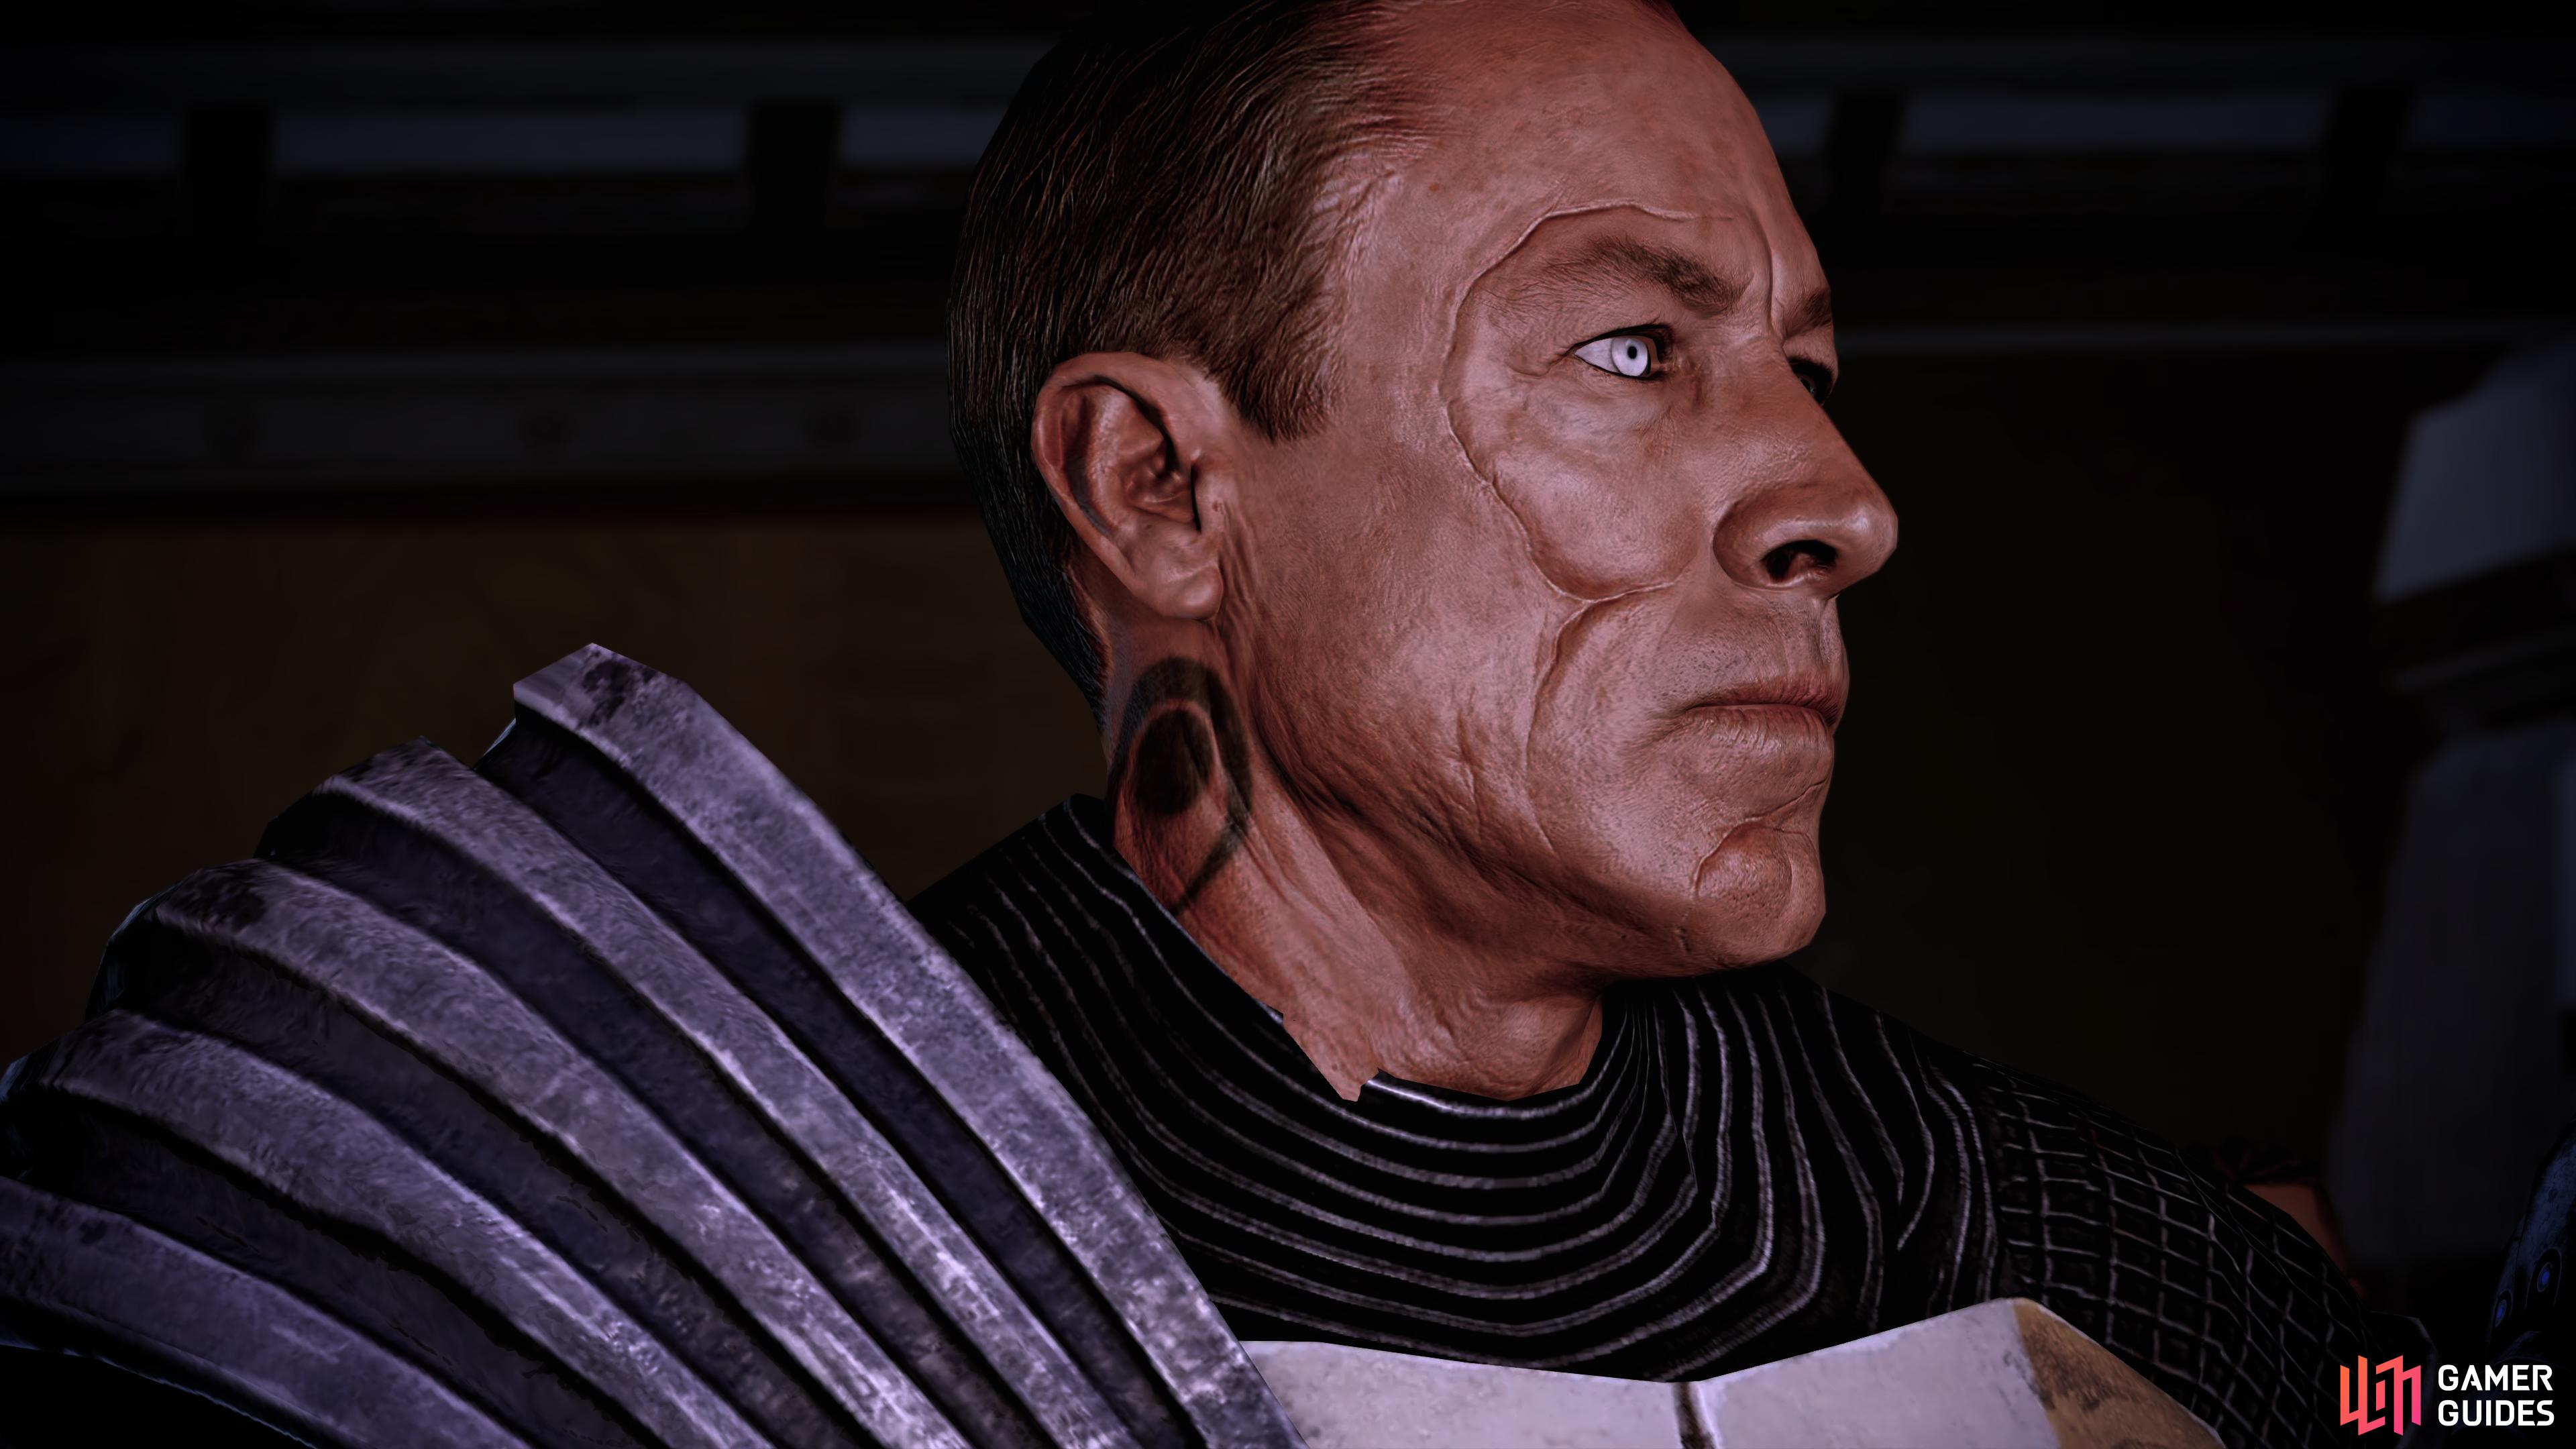
Zaeed looking menacing.
How to unlock Zaeed’s loyalty mission
To unlock the mission, you’ll need to have Zaeed available as a squad mate, which you can get him from the mission Dossier: The Veteran. Once you have him, head to the planet Zorya which is located in the Faia System, in the Ismar Frontier.
Walkthrough
Once you arrive at Zorya, follow the grassy path ahead of you, and you’ll hear Vido over the comms telling the Bravo Squad that a shuttle has landed near their position, continue down the path, and you’ll find some dead bodies to investigate, Zaaed will mention that it’s Vido’s MO because they were shot in the back, and left to rot. Push further ahead, and drop the small ledge, and you’ll hear another call from Vido telling them to take position. As you go around the corner, you’ll notice some conveniently places of cover, and you’ll be attacked by the Blue Suns.
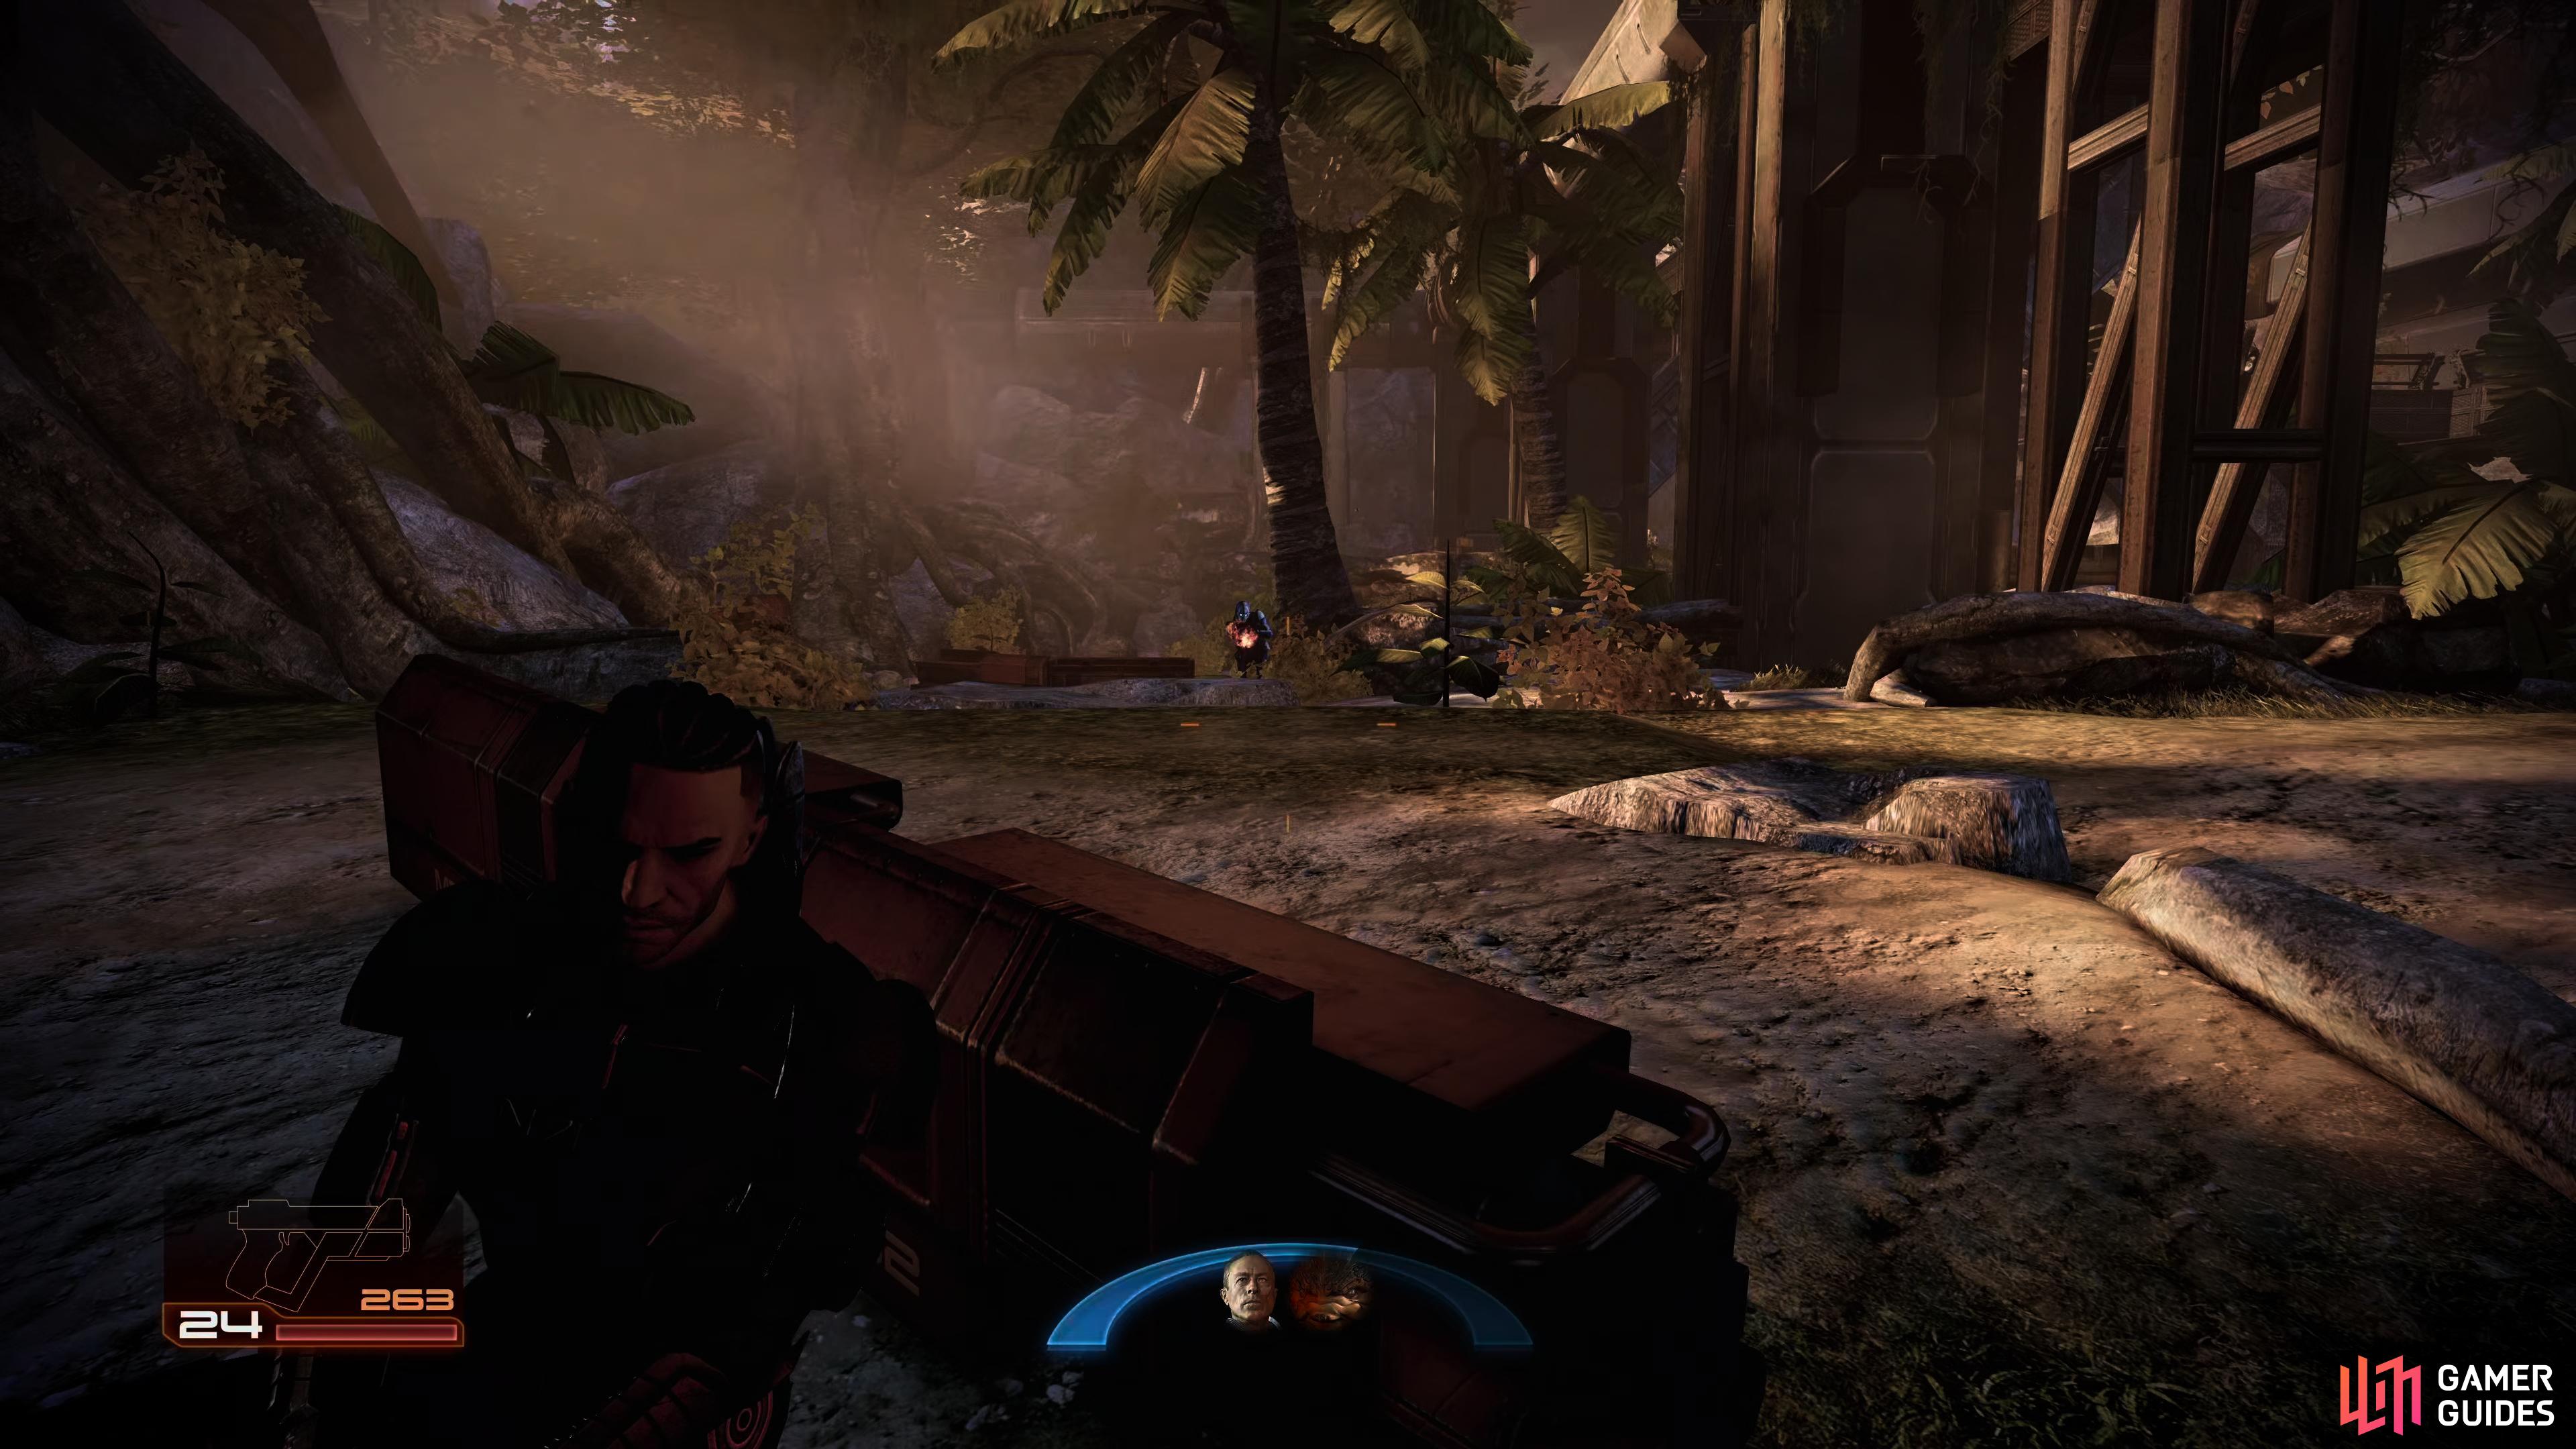
(1 of 6) As soon as you enter the area, you’ll be shot at from straight ahead by two Troopers, use the nearby cover to take them down
Head behind the cover and take out the trooper to your left, and another one appear shortly after, because these don’t have shields, powers like Incinerate and Warp work great against them, although a good gun should do the trick. As you head around the right of the structure, be careful of the Blue Suns Heavy on the catwalk above to your right because they will fire rockets at you which will hurt. Use the cover to your advantage, and only fire at them when you get an opening. If you’re low on health, you can find a Med Kit underneath the stairs to your right.
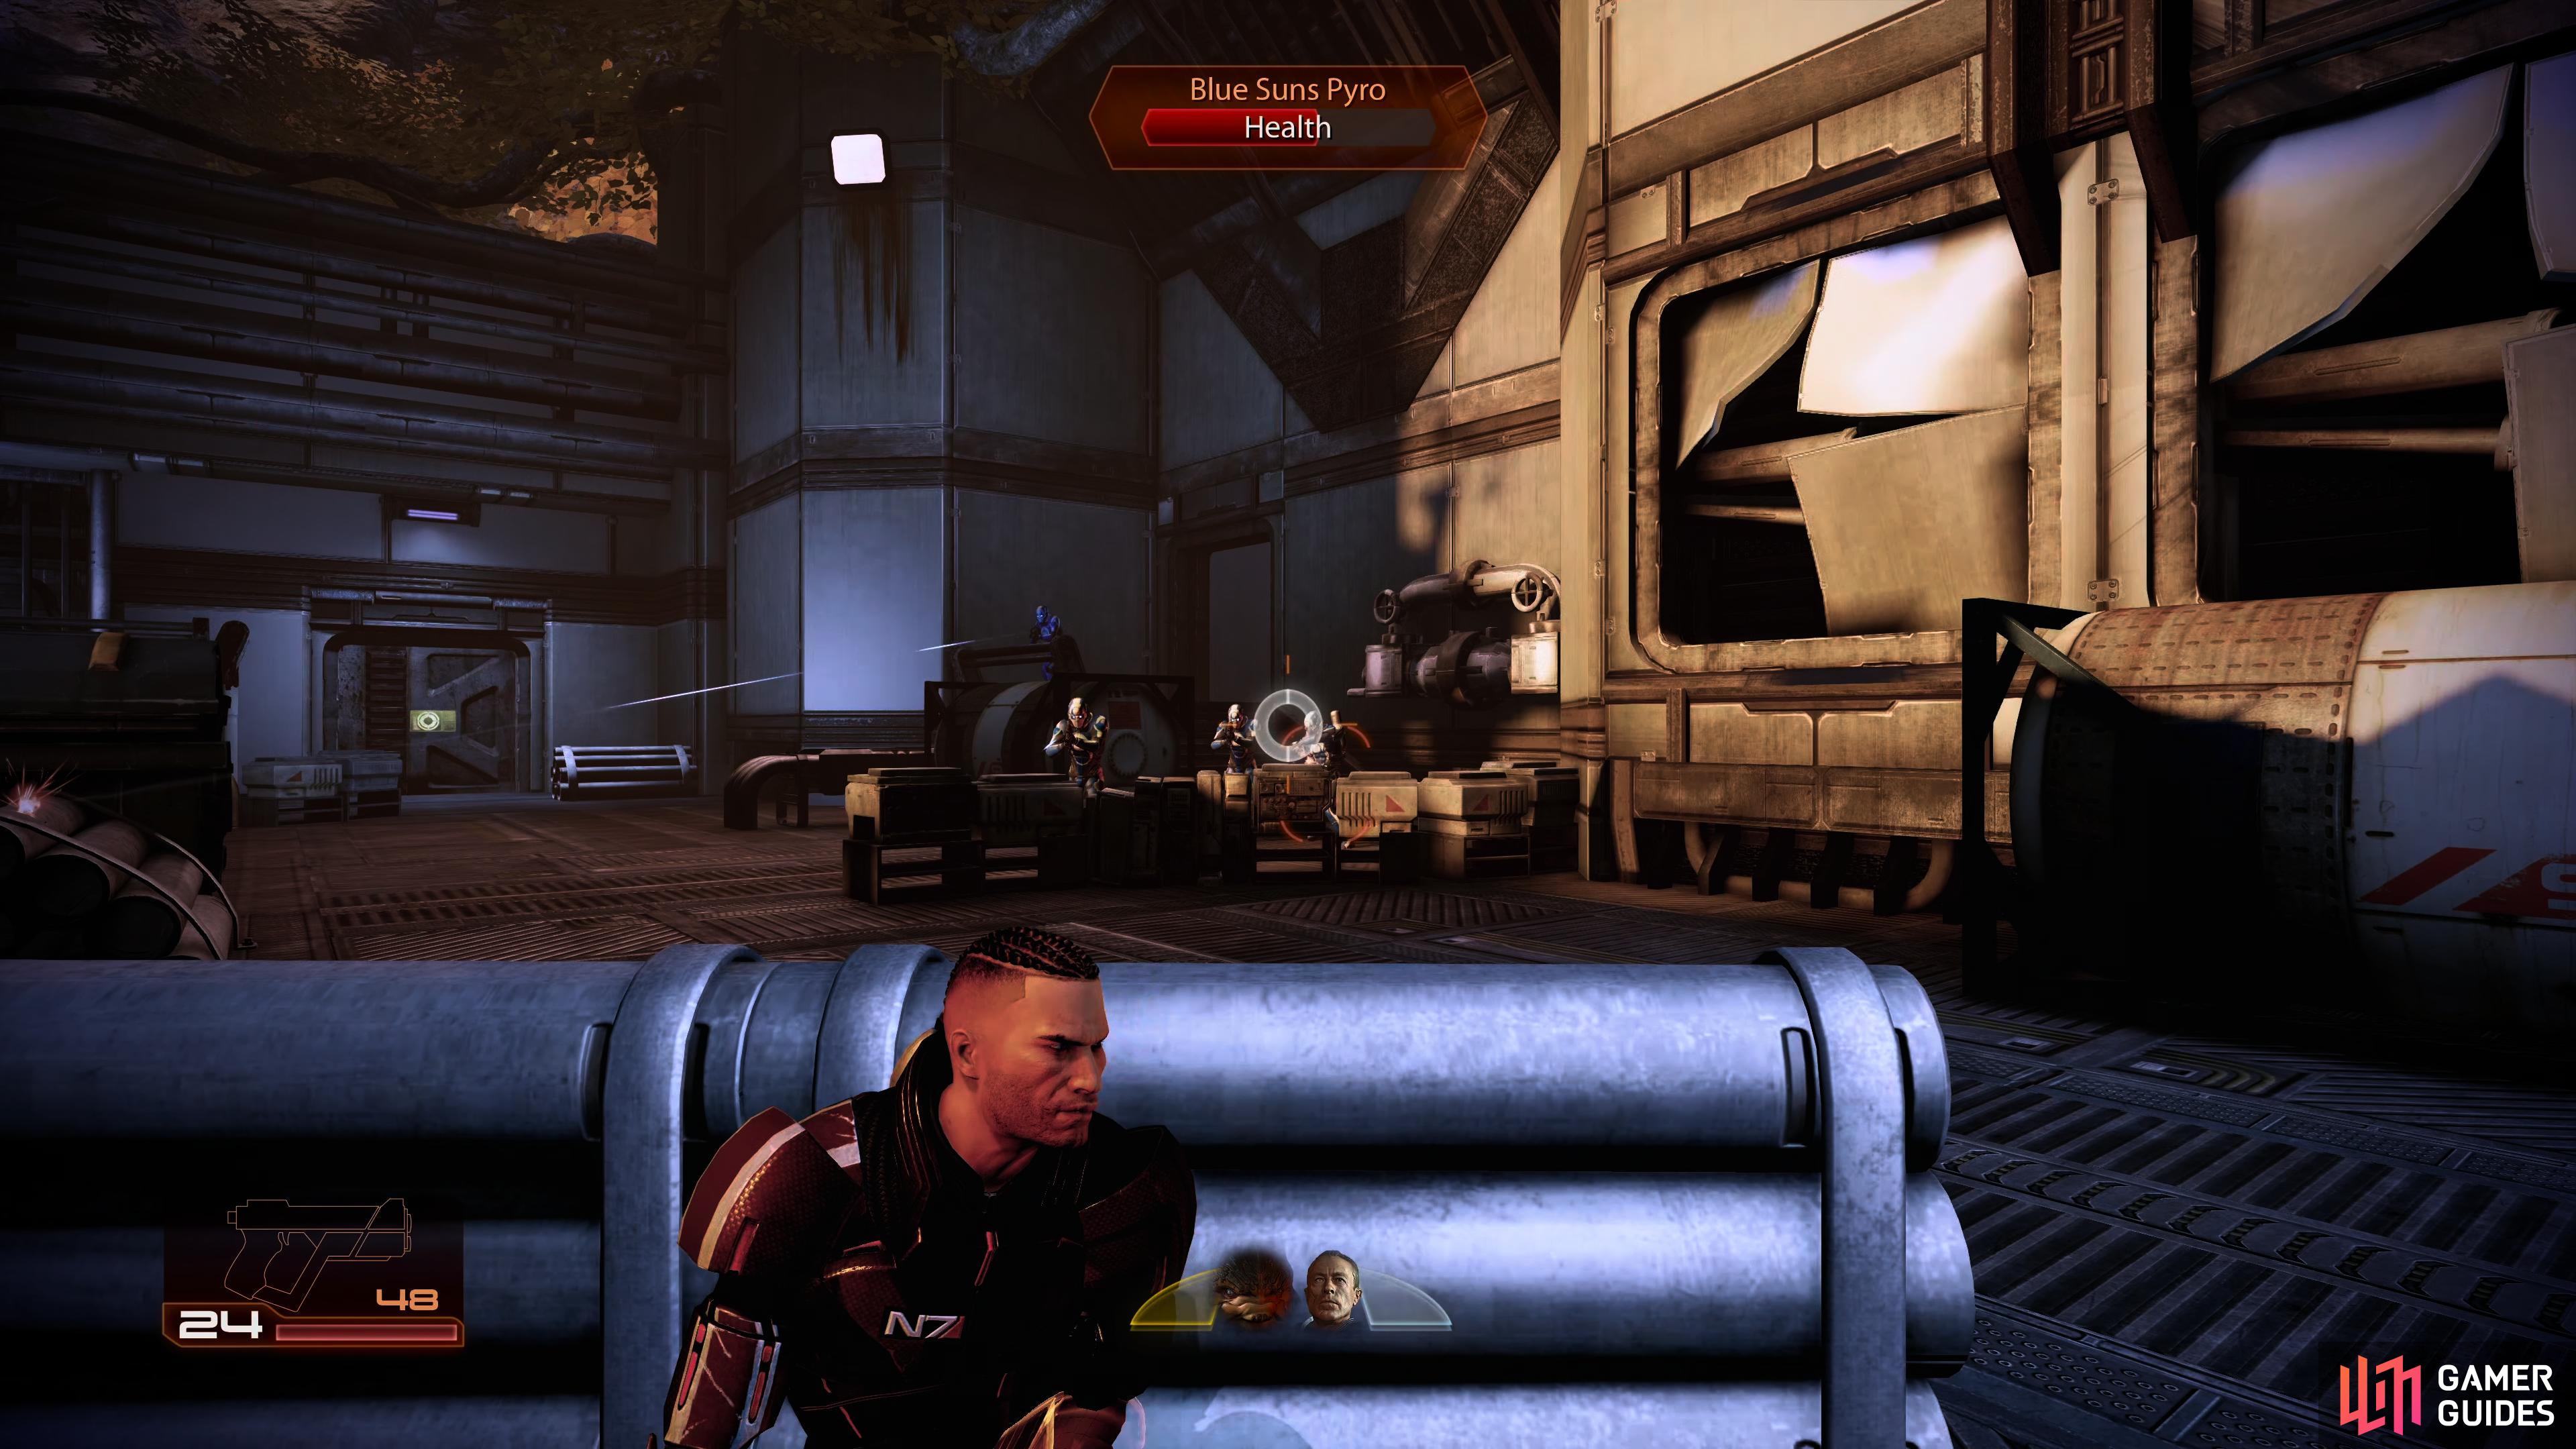
Continue onwards, and reinforcements will arrive, this gets tougher now because you will come up against shielded Blue Suns Troopers, a Blue Suns Pyro, and a FENRIS Mech. Make the Pyro the priority, as they like to come close to you and use their flamethrowers to get you out of cover. Use Overload on them if you have it or use Zaeed’s Disruptor Ammo to take down their shields, then aim for their propane tank which sits on their backs, be careful as they will explode from the result of that, dealing damage to you if you’re close to it. The FENRIS Mech can be tricky at this stage of the game because they are armored, powers like Incinerate and Warp will make your time against them easier, or a shotgun can work in a pinch. Once they’re defeated, a Blue Suns Dispatcher will tell their squads to fall back.
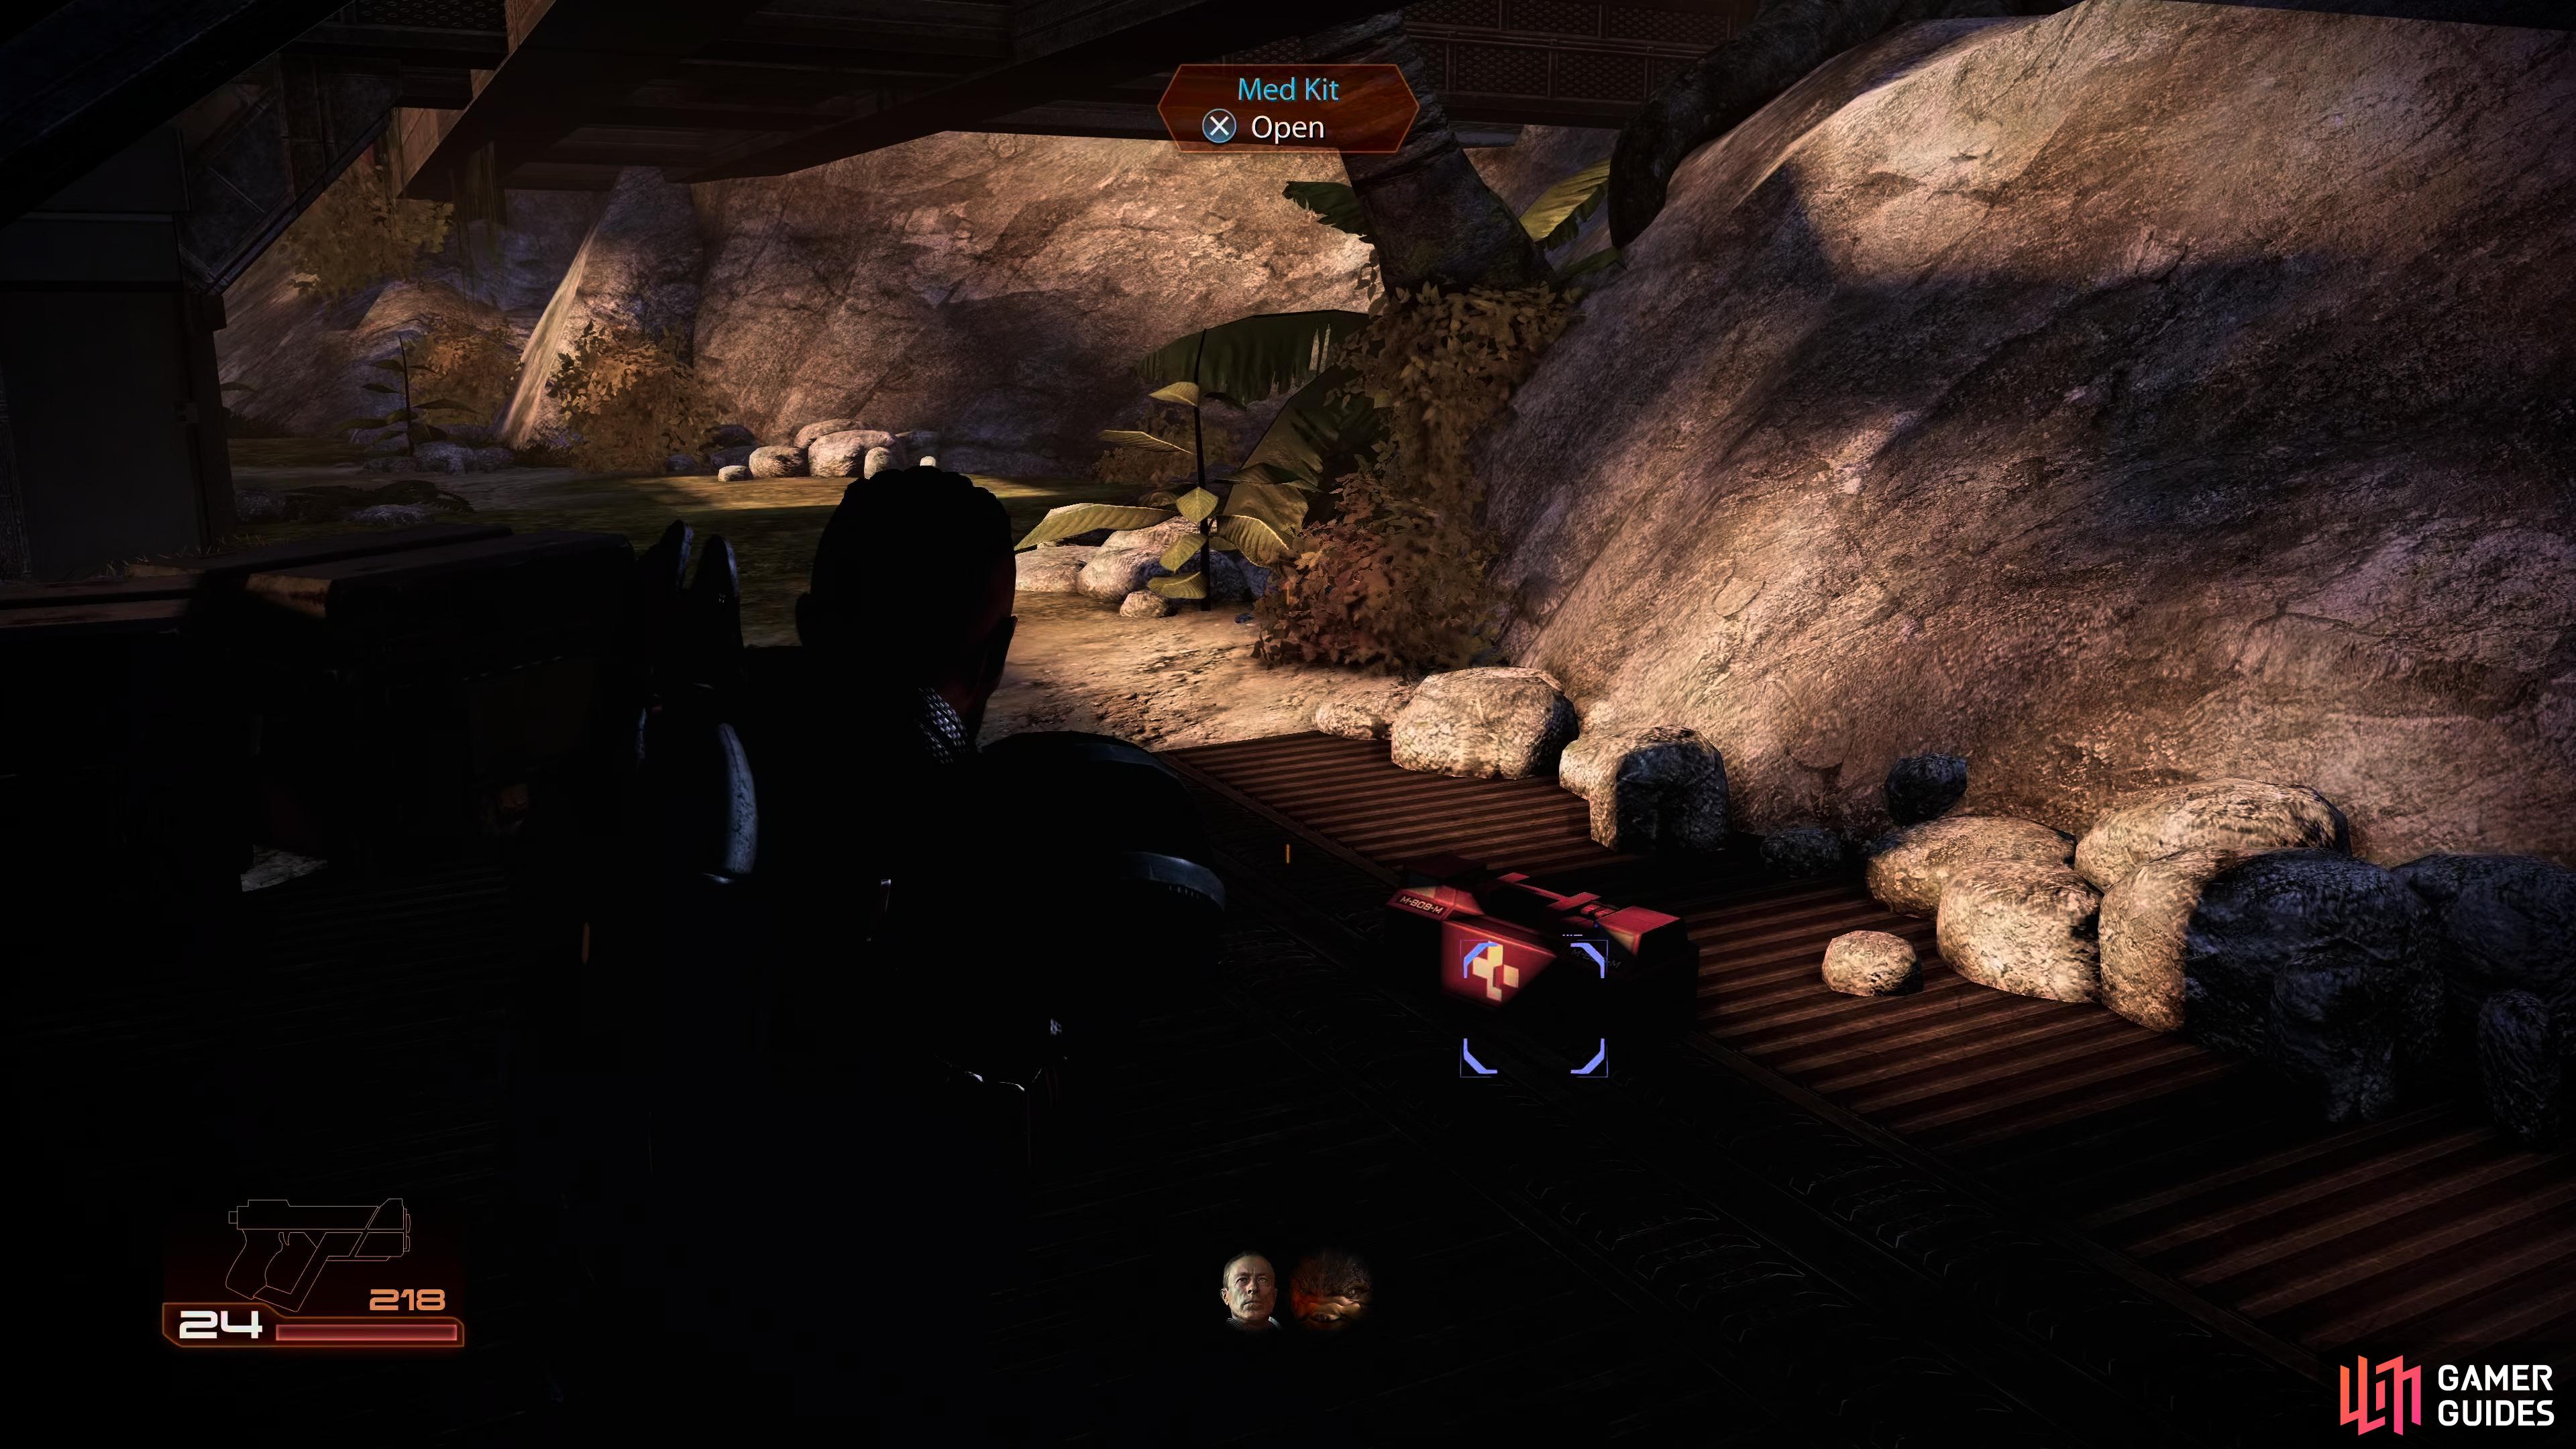
The Med-Kit can be found underneath the catwalk, the Heavy was on
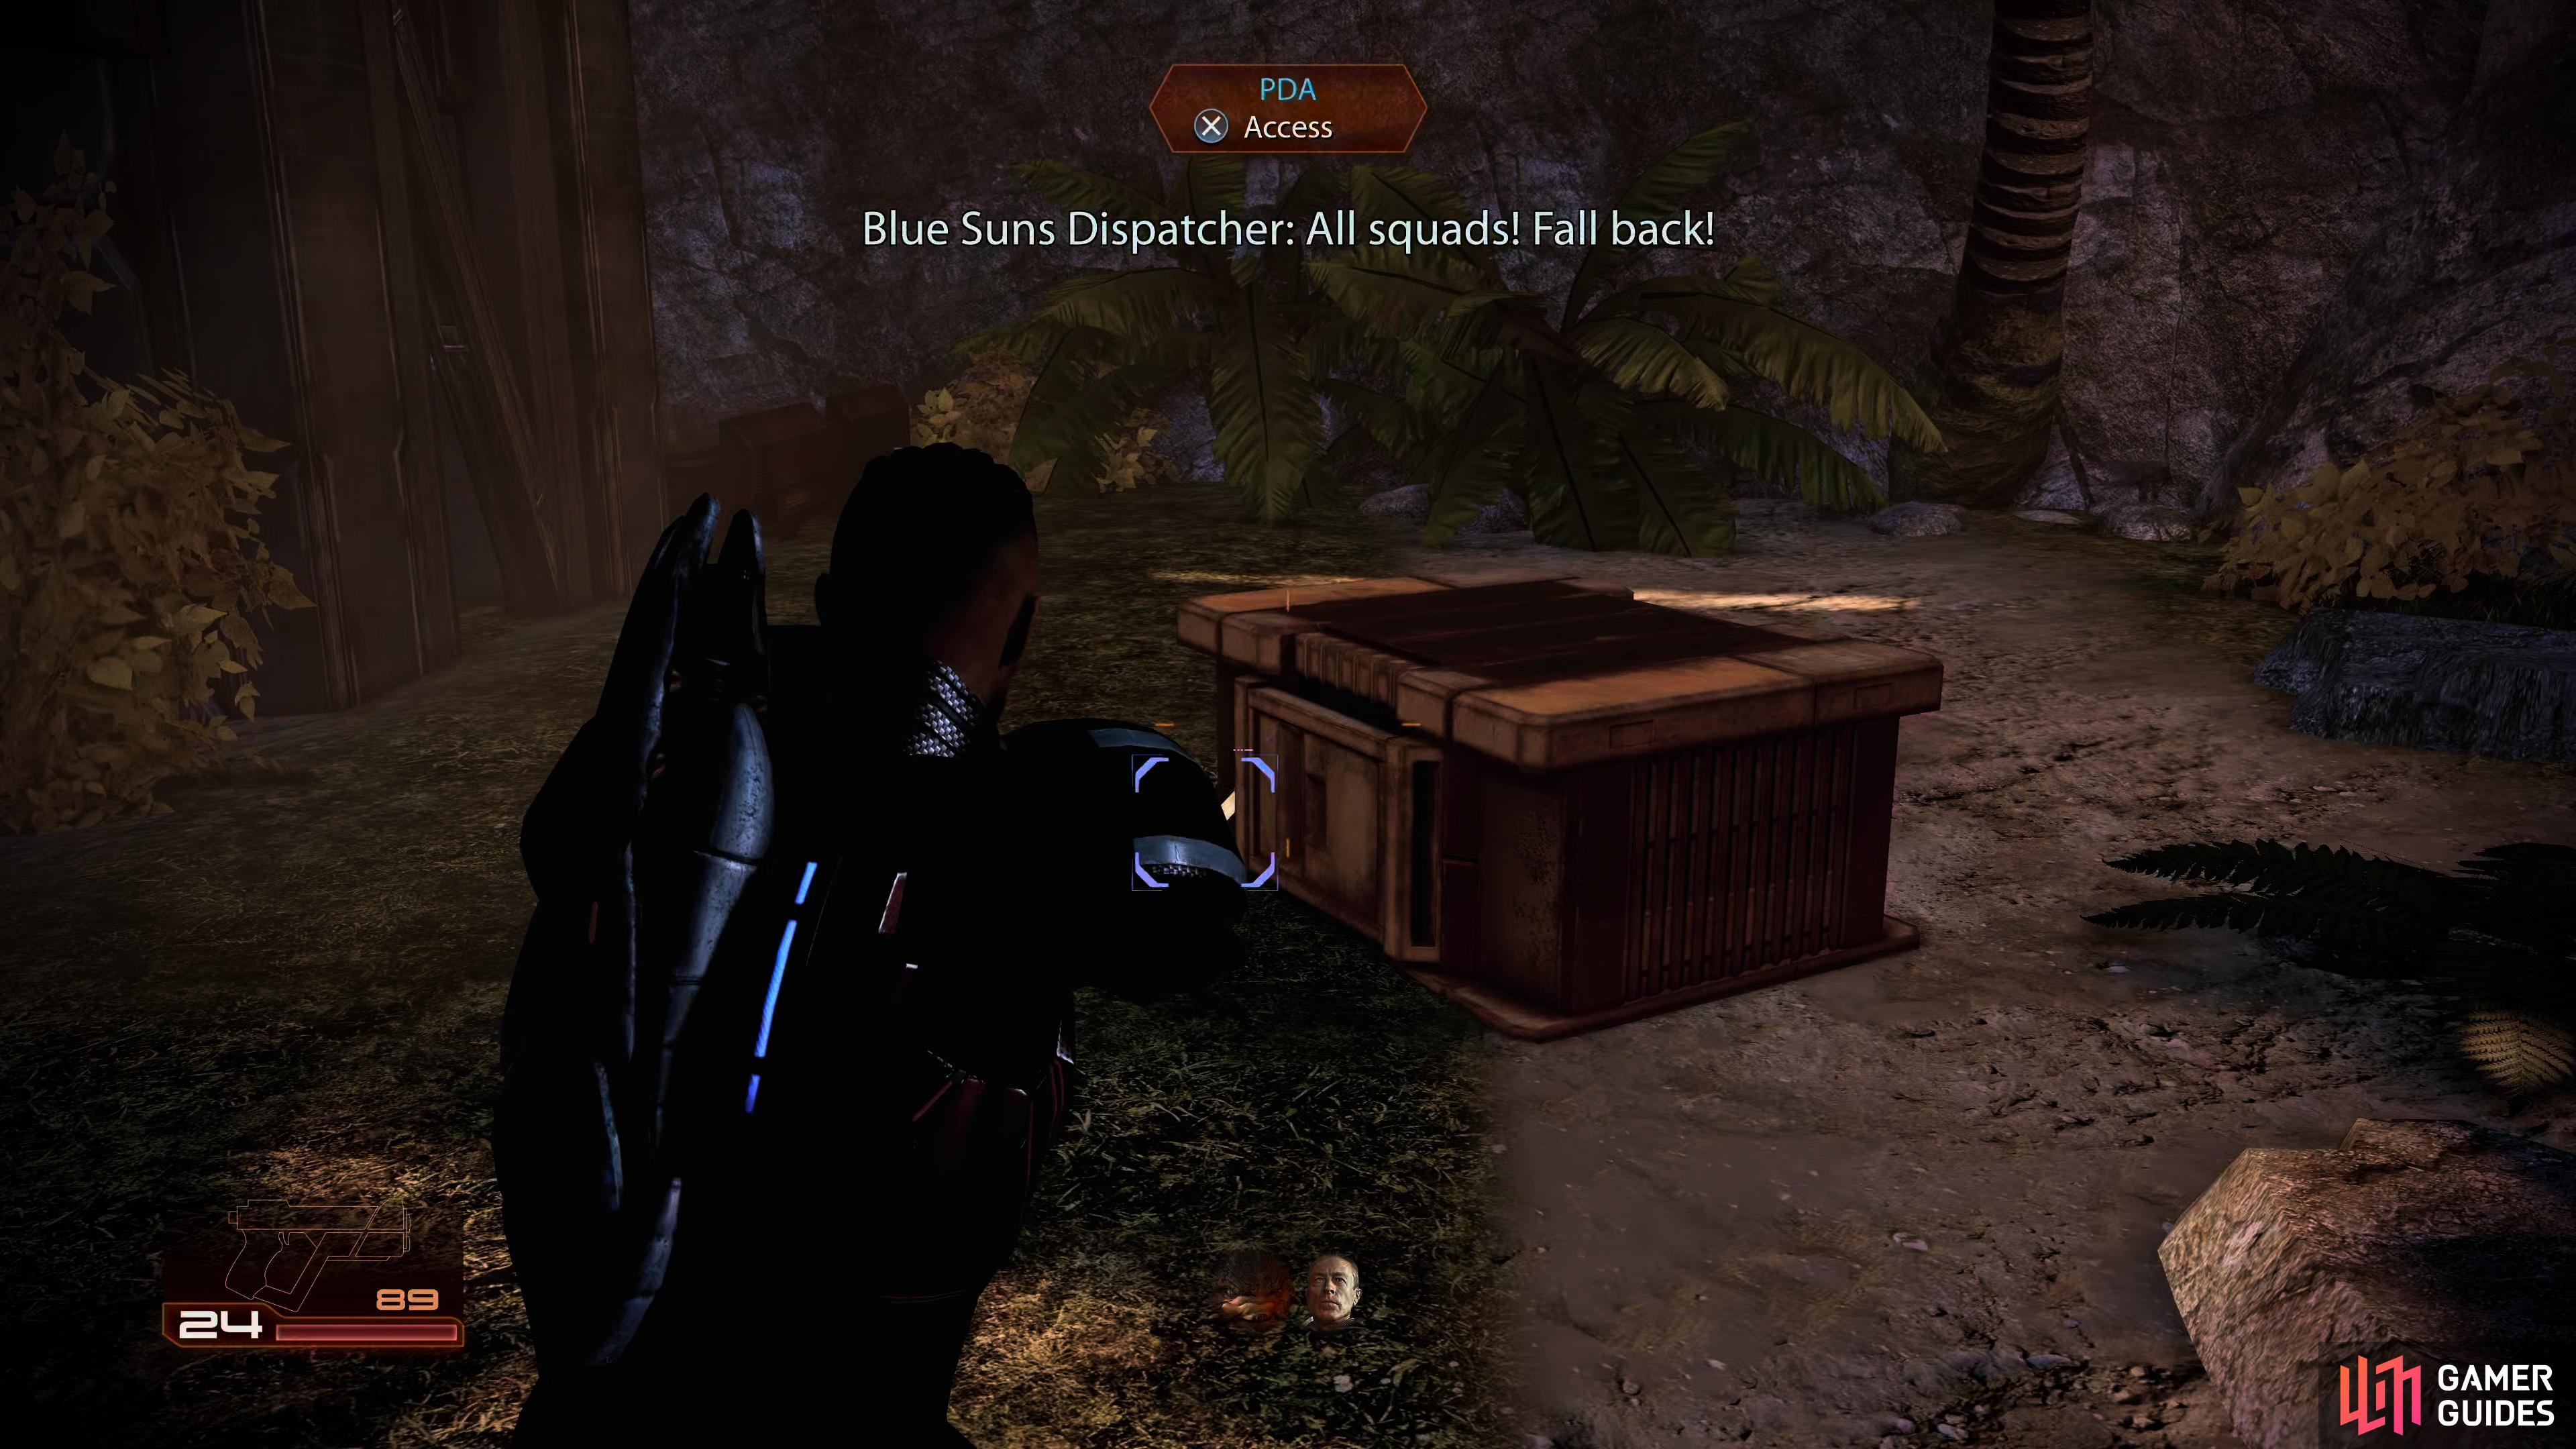
After the encounter, you can find a PDA for 6,000 Credits in the corner by a crate.
Press onwards, and you can find a PDA sitting by a crate in the far right corner, this’ll reward you with 6,000 Credits. Turn to your left, and head towards the bridge. You’ll notice that there is no access to the other side, so interact with the Bridge Control nearby, and you’ll get a short scene of a walkway extending to the other side, whilst this is happening, Vido once again gets on the comms and threatens his squads that he’ll kill them if they retreat, you can ask Zaeed if he knows this Vido, and he’ll give you some information about their past. Exhaust the dialogue options, and you’ll get +2 Paragon points for choosing “You know this guy?” and +2 Renegade points for choosing “Vido sounds dangerous.”.
Go across the bridge, and follow it around until you get back on the grassy path, to your left, you’ll see find some refined Palladium, pick it up to receive 400 Palladium. Head towards the gatehouse and open the door. You’ll get another scene, this time you’ll finally meet Vido, the leader of the Blue Suns. After being threatened, Zaeed makes a mad dash across the room, and shoots at the refinery’s pipes, this causes them to burst into flames, he then attacks the nearby valve which causes further explosions. You’ll ask him what’s he doing, and he replies “opening the gate”, this’ll give you three choices that won’t affect his loyalty, but it can have an effect on your Paragon/Renegade scores.
The choices are:
| Choices | Morality Score | Notes |
|---|---|---|
| “That was unnecessary.” | +2 Paragon | You’ll get an additional 5 Paragon points if you choose the interrupt, but this will stop you getting further points in this conversation. |
| “Explain yourself!” | Neutral | Choosing this results in neither Paragon or Renegade points. |
| “Warn me next time.” | +2 Renegade | – |
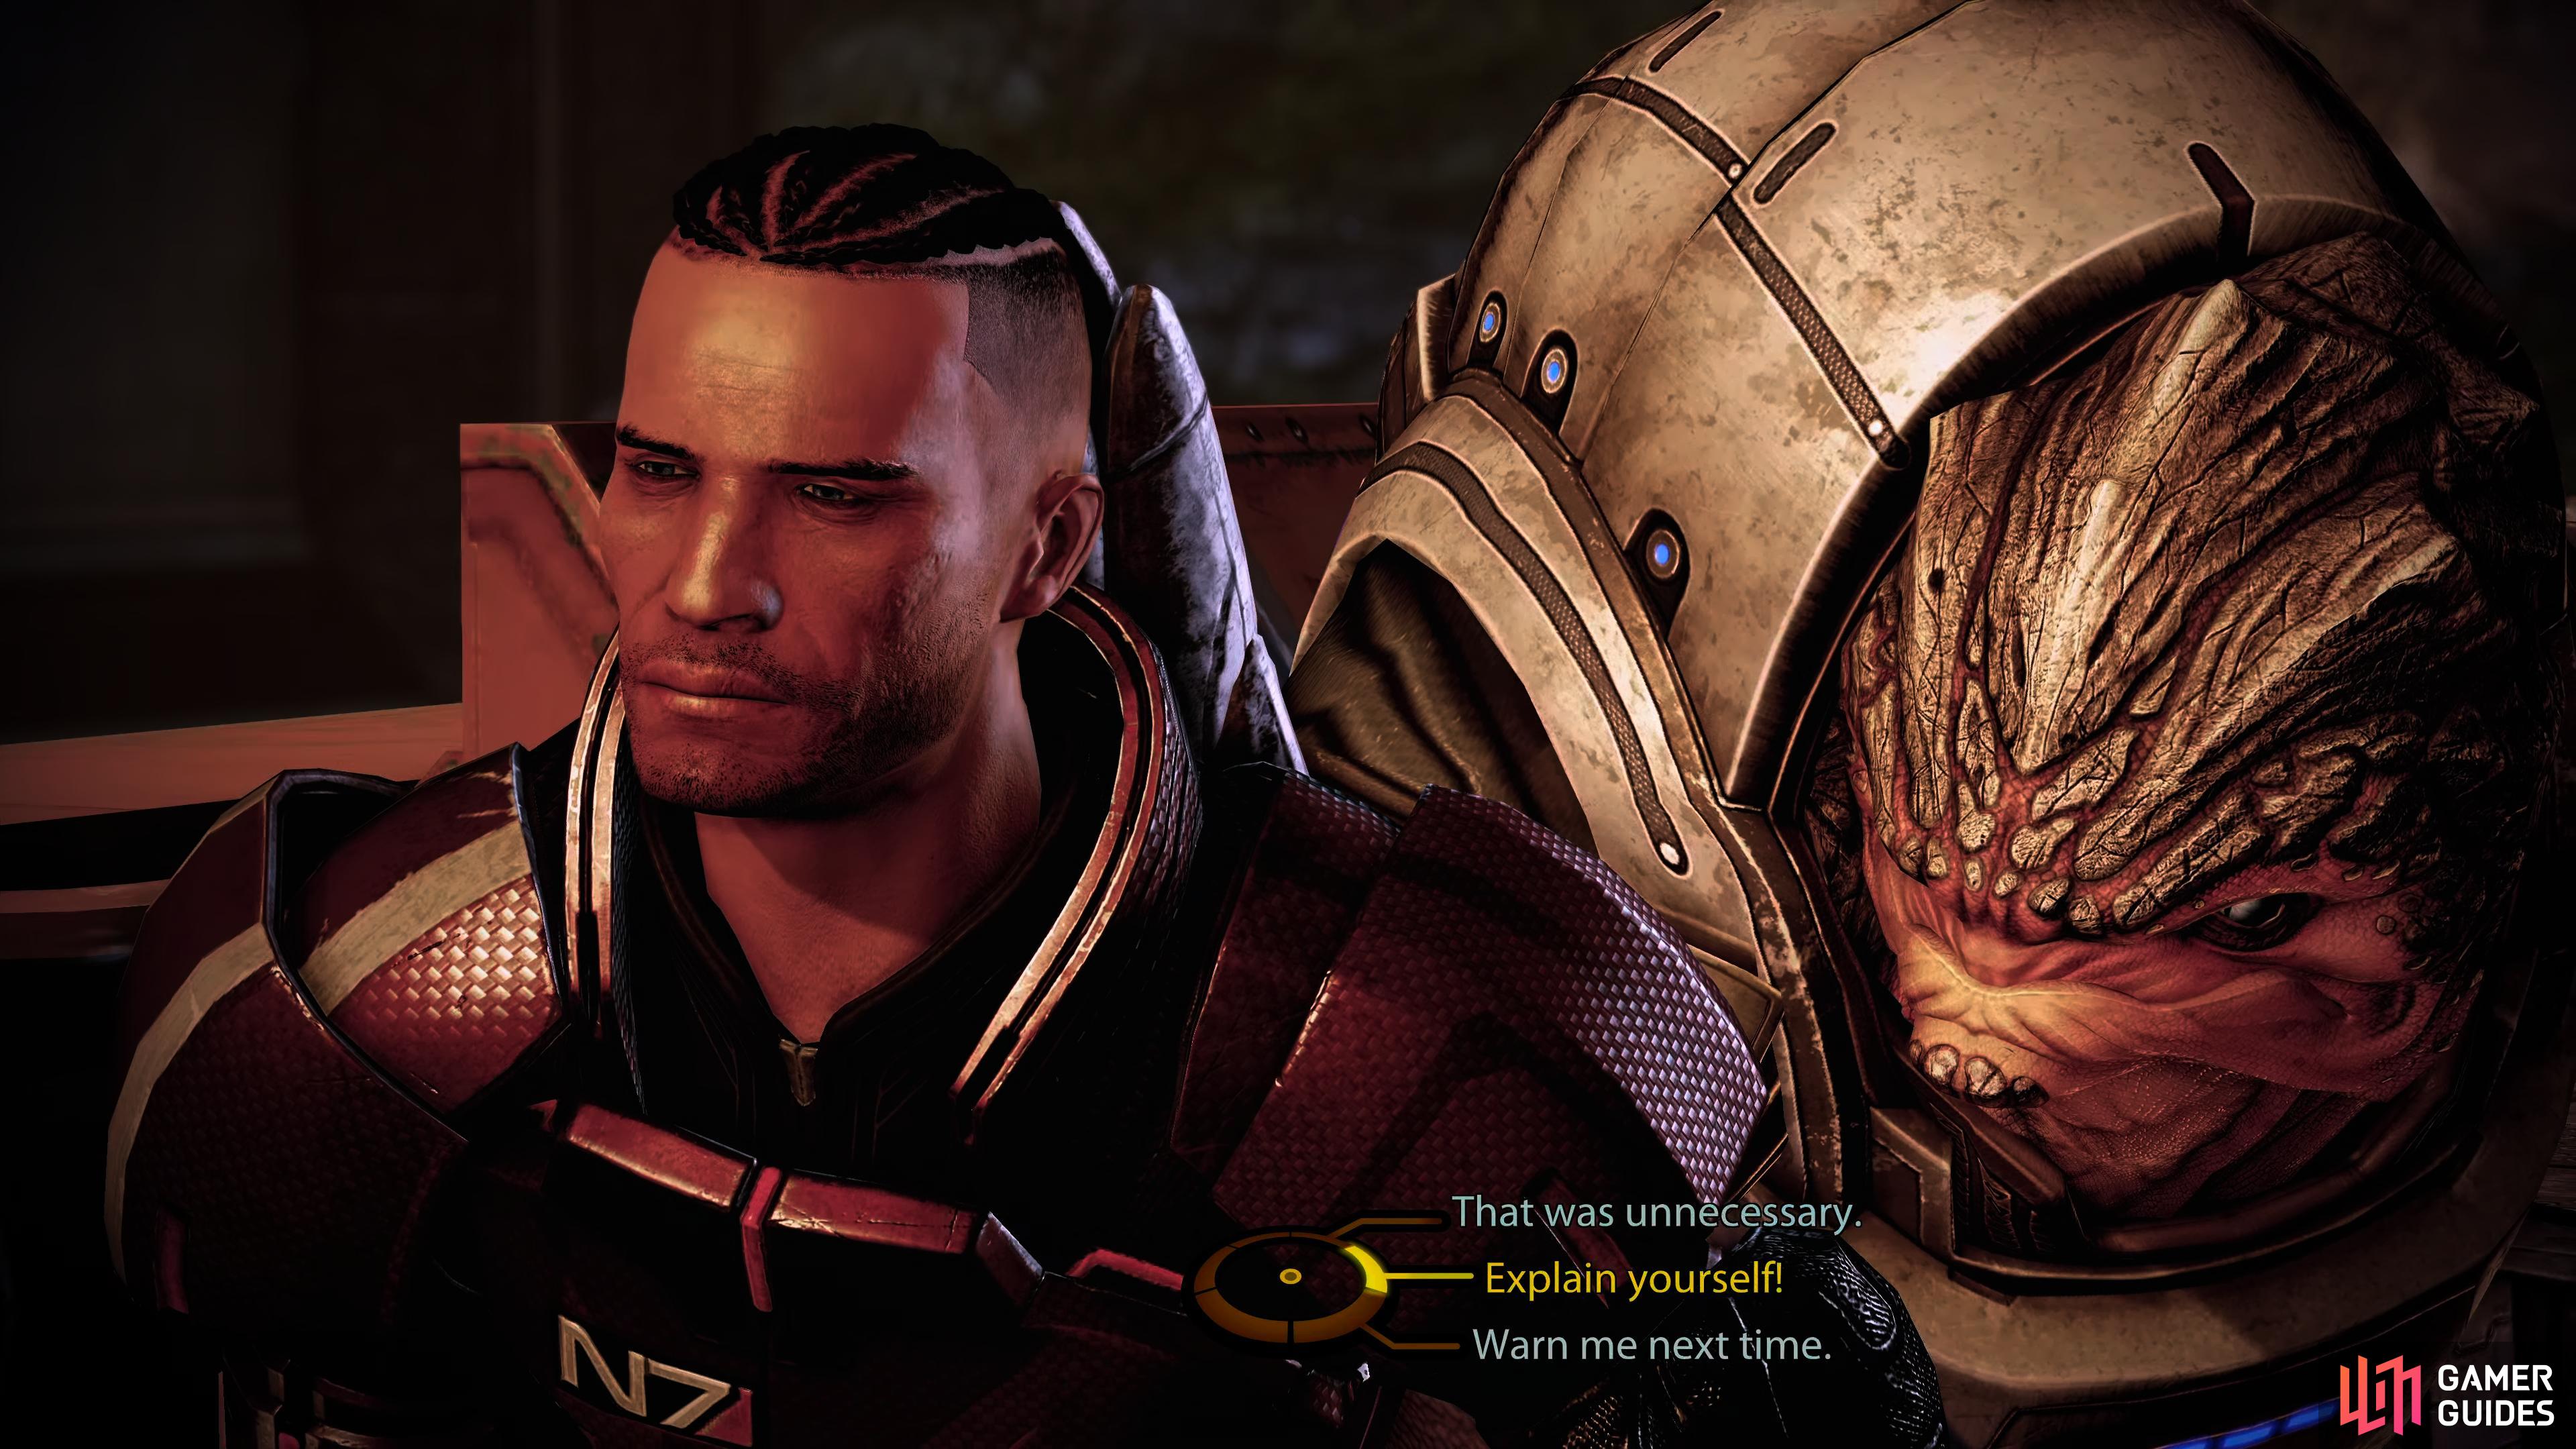
“That was unnecessary“ is the Paragon choice which can be followed up with a Paragon interrupt, whilst “Warn me next time” is the Renegade choice.
The next part of the conversation, Zaaed will say “If we keep up the pressure, no way he’s gettin’ out of here alive.
The choices are:
| Choices | Morality Score | Notes |
|---|---|---|
| “We came to save these people.” | +2 Paragon | – |
| “Explain yourself!” | Neutral | Choosing this results in neither Paragon nor Renegade points. |
| “You do what I tell you.” | +2 Renegade | – |
You’ll get one more part of the conversation to respond to, and the choices are:
| Choices | Morality Score | Notes |
|---|---|---|
| “Keep to the mission, or else.” | +2 Paragon | – |
| “We’ll talk about this later.” | Neutral | Choosing this results in neither Paragon or Renegade points. |
| “If that’s what you need.” | +2 Renegade | – |
All your choices get tallied up after the whole conversation end, and the score you got will reflect with the scoring system above. When the scene ends, you’ll have two Troopers advancing on your squad, from the hallway in front of you, one of them will be shielded, use the wall as cover and use Overload or Zaeed’s Disruptor Ammo to strip it of the enemy, then use Incinerate if you have it or gun them down. Once they’re taken care off, head back to where Zaeed bashed open the pipe, and pick up the crate of refined Palladium. Leave the area, and head across the catwalks to the next area, just before you go through the door, pick up some more refined Palladium to your right.
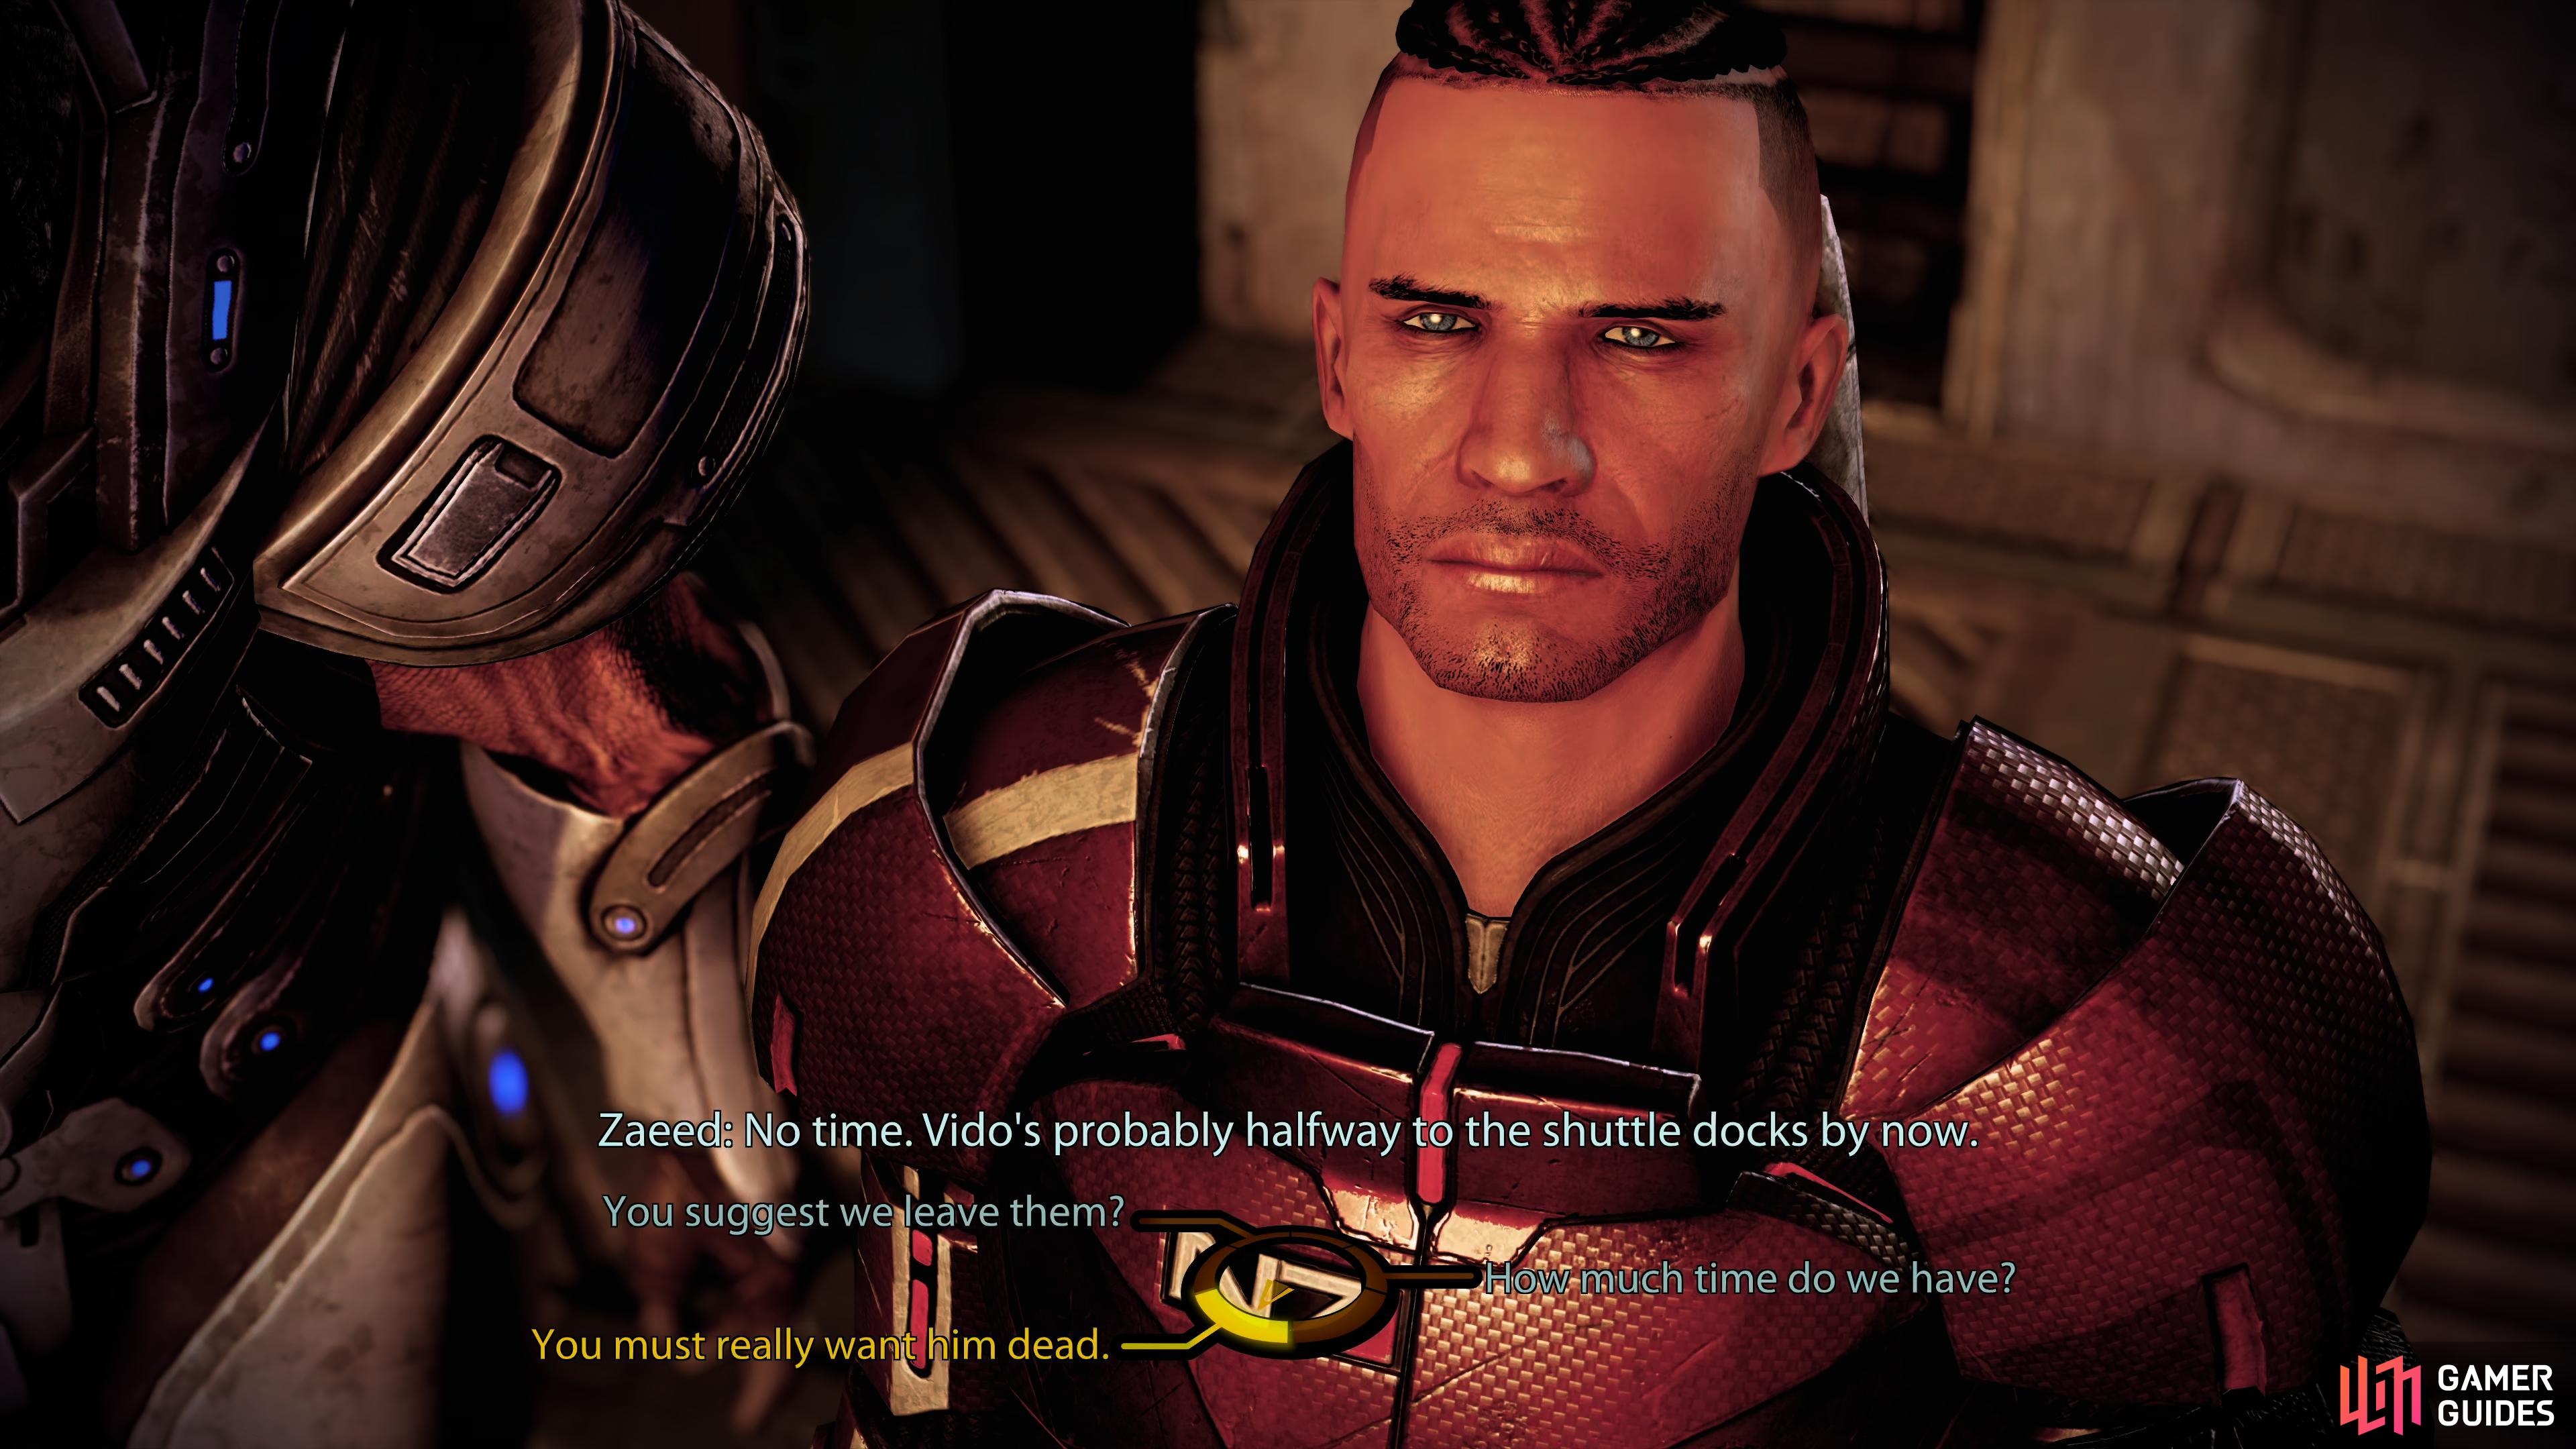
As you interact with the door, you’ll get another scene. A Refinery Worker will ask you to help them as they are trapped, and they can’t reach the gas valves to shut them off, he’ll then proceed to tell you it’ll blow. Zaeed will say “No time, Vido’s probably halfway to the shuttle docks right now”. This leaves you with a very important choice to make, which could result in not gaining Zaeed’s loyalty, or even worse, it could lead to his death.
| Choices | Morality Score | Notes |
|---|---|---|
| “You suggest we leave them?” | +2 Paragon | – |
| “How much time do we have?” | Neutral | Choosing this results in neither Paragon nor Renegade points. |
| “You must really want him dead.” | +2 Renegade | – |
(1 of 3) These next few choices are important, and can change the entire outcome of the mission
This leads to the major choice:
| Choices | Morality Score | Notes |
|---|---|---|
| “Forget Loyalty. We save them.” | +15 Paragon | Vido will get away and Zaeed will turn on you. You’ll have one more chance to get his loyalty later, but at a cost of a very high morality choice. |
| “Zaeed’s right. Vido must die.” | +15 Renegade | Choosing this will result in gaining Zaeed’s loyalty no matter what else happens. |
If you chose to save the workers
By choosing to save the facility, you’ll leave Zaeed upset with you, but he’ll agree to help you. Head down the stairs, and bypass the door, in the next room, follow the stairs up, and go through the next door, you’ll get a face full of fire, and you’ll need to redirect the fuel. Interact with the Fuel Controls to turn off the fire and follow the paths they uncover, at the back of the room, you can salvage the Generator Pipe to get 6,000 Credits. Keep following the controls around the room, and eventually you can head upstairs. As soon as you go down the stairs on the other side, you’ll see some Refined Pallidium in front of you, pick it up, and continue onwards through the door. In front of the door is a research terminal which’ll reward you with a Heavy Weapon Ammo upgrade, to the right of it is the Fire Extinguisher System, activate it, then head back and go through the door to your right, head through the corridor into the next room, and drop to find some Refined Pallidium in front of you and an M-451 Firestorm heavy weapon through the open doorway to your right, head to the end of the room, and turn right, and they’ll be two Troopers to your right, take them out, and pick up the 6,000 Credits from the table, then head to the crate near the weapons locker to pick up some Power Cells, change your loadout if you need to, and head through the door next to it. Read the Refinery fight below to find out what to do next.

If you chose to kill Vido
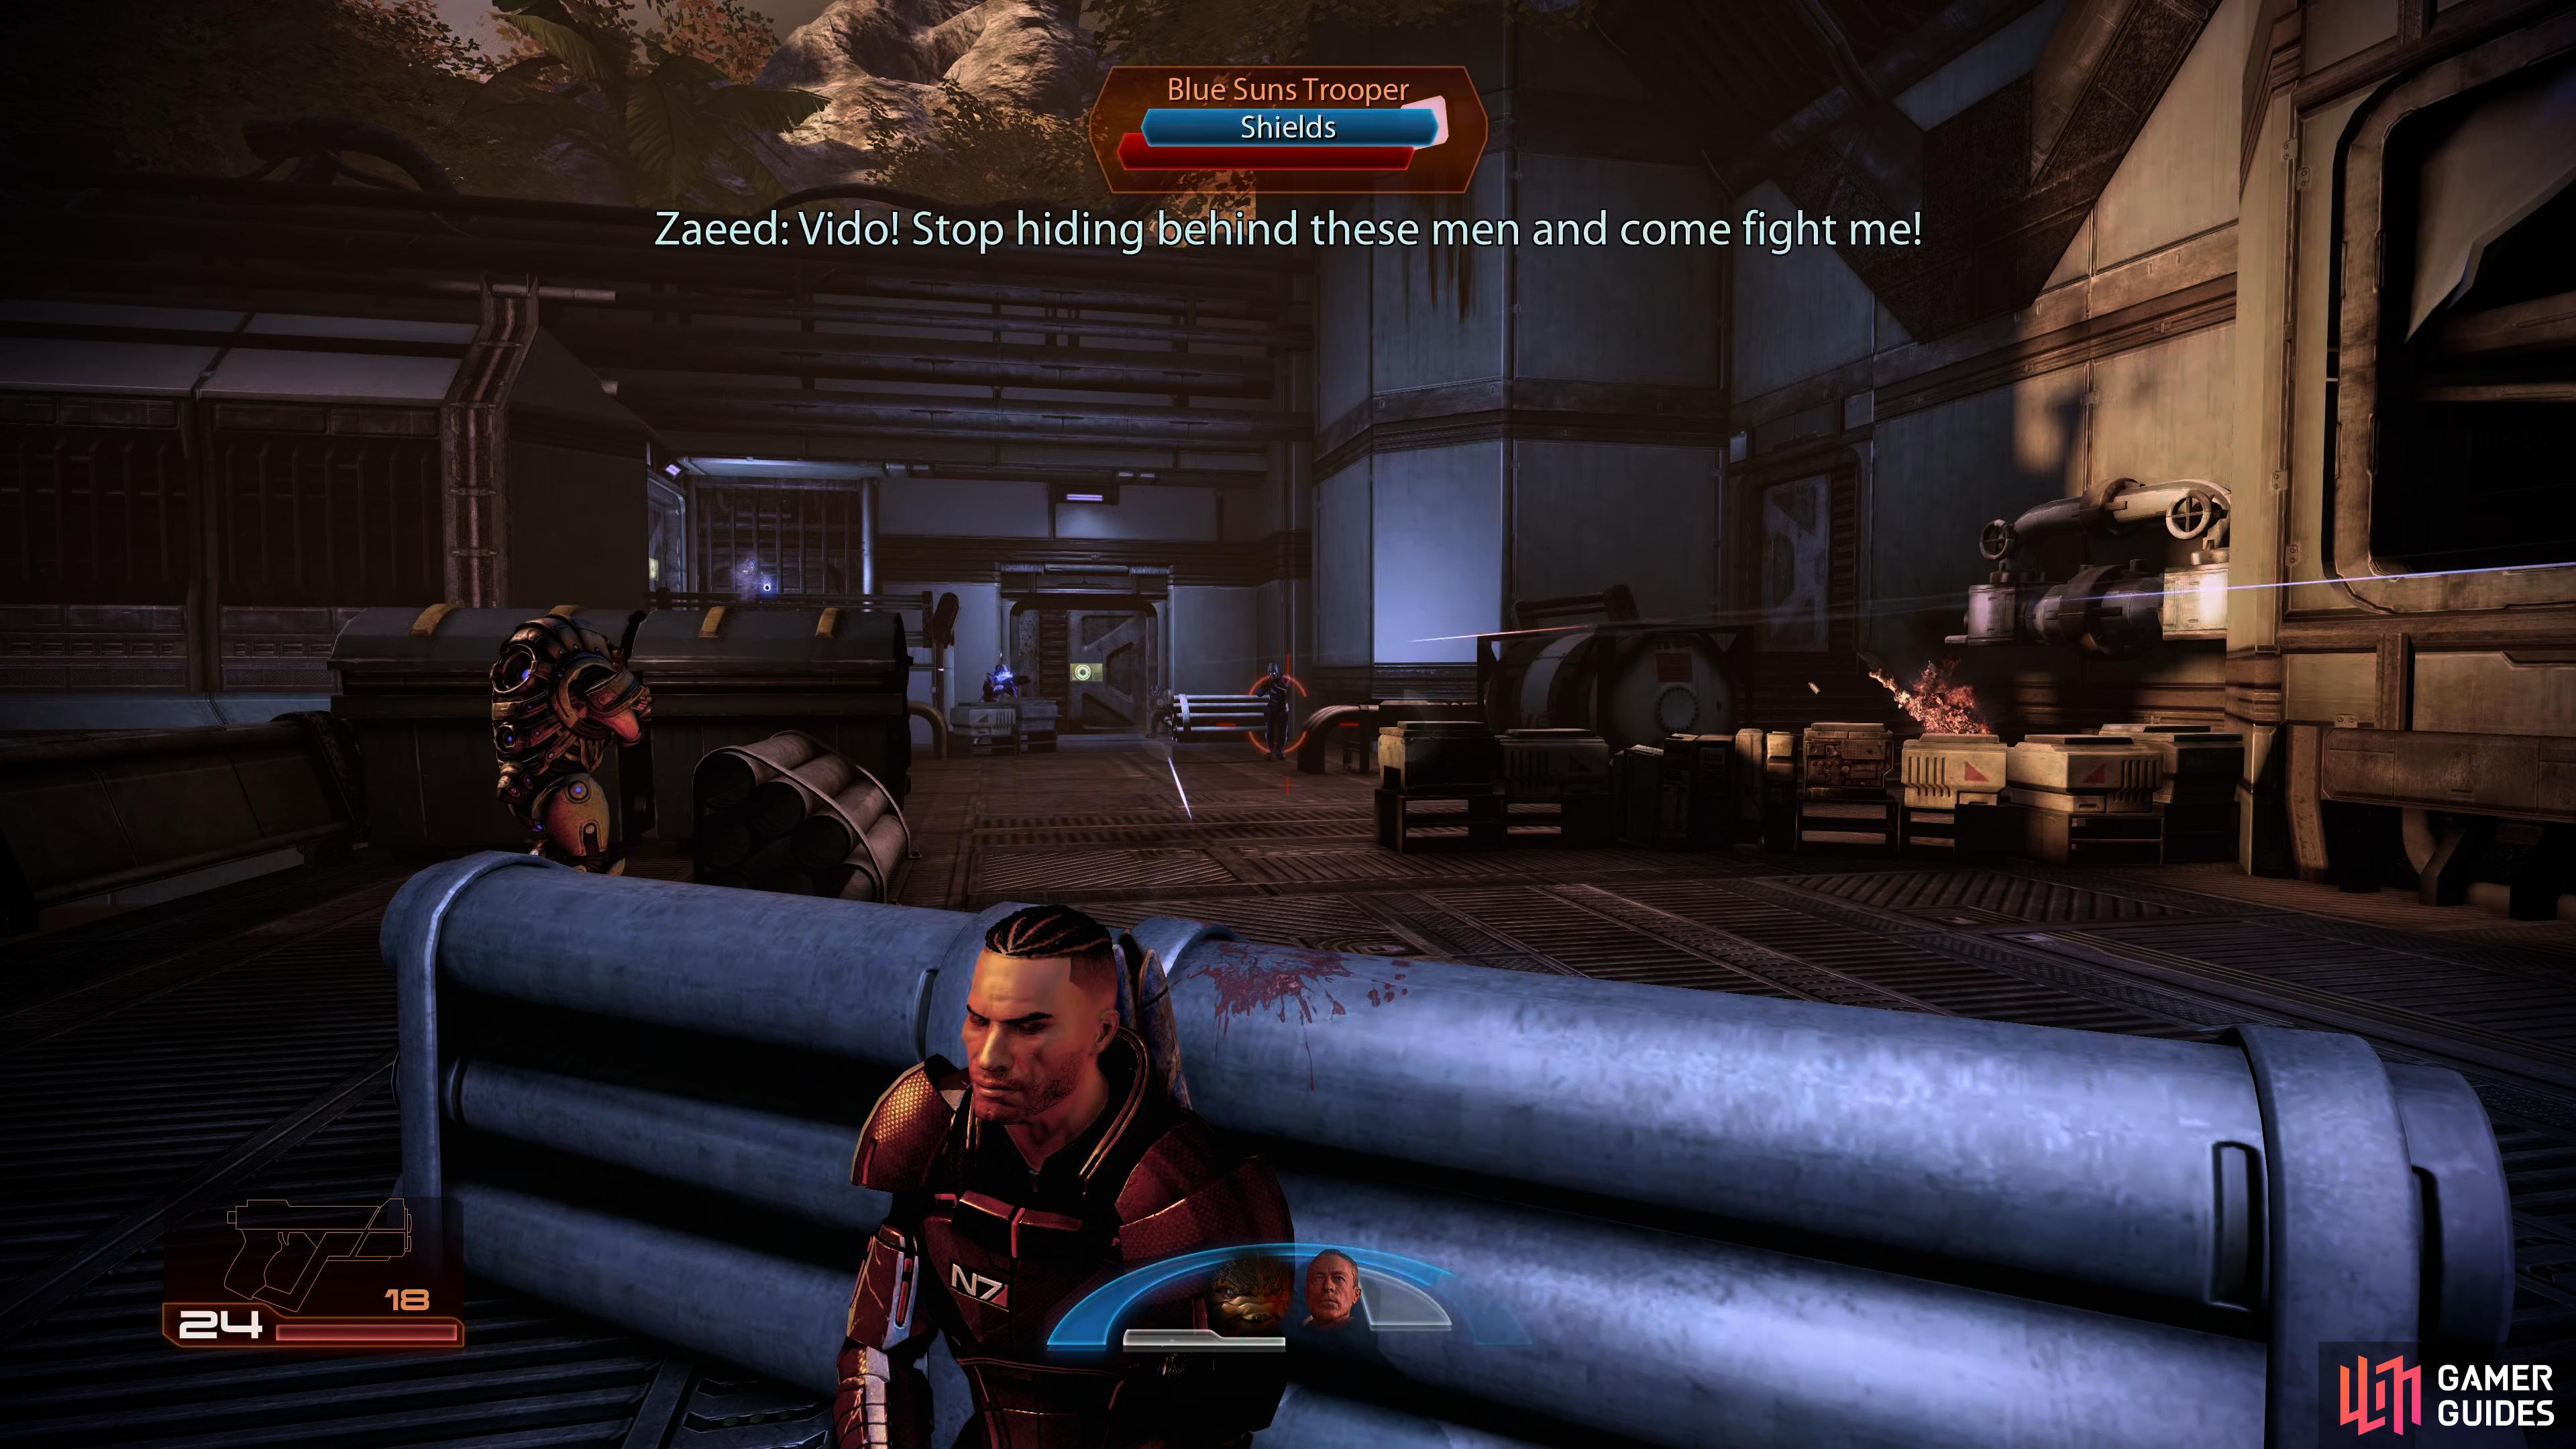
Head down the stairs and go through the door, and you’ll be greeted by some Blue Suns, head behind the cover in front of you and take out their shields, then gun them down. Once the first group is defeated, head forward a little, and hide behind the next cover leading into the open room. Jump over the cover, head right and use the cover, as you do that, you’ll be fired upon by two enemies, with a Pyro just behind them. As you engage with them, the Pyro will push forward, so make sure it’s your priority and take it down as soon as you can. When they’re defeated, go through the door where the Pyro came from, and you’ll find some Servos to salvage which’ll reward you with 6,000 Credits, pick it up and head up the stairs, and they’ll be a research terminal to access, this’ll reward you with research data for Assault Rifle Damage.
Use the pipes as cover, and use Zaeed’s Disruptor Ammo and Concussive Shots to take them out
When there’s one enemy left, a second group will spawn, with a Heavy coming out of the door on the back left.
Continue onwards, through the door to your left, and you’ll have another group of enemies to take out, take cover behind the pipes in front of you and take them out. There’ll be four enemies here, so use a combination of Overload/Disruptor Ammo and Concussive Shot to help with some crowd control. Once they’re not a problem anymore, another group of five enemies will come from the door in front of you, one of them being a Heavy, which’ll shoot rockets at you, head to the garbage cans in front and use them as cover, and take out the other enemies first before tackling the Heavy.
Now you’ll have the option of two doors to go through, one to your right, and one in front of you, they both lead to the same place so go to the door in front, and go over the bridge into the next room. As soon as you enter, you’ll find some Refined Palladium to your left, and an M-451 Firestorm heavy weapon through the open doorway, head to the end of the room, and turn right, and they’ll be two Troopers to your right, take them out, and head to the crate near the weapons locker to pick up some Power Cells, change your loadout if you need to, and head through the door next to it.
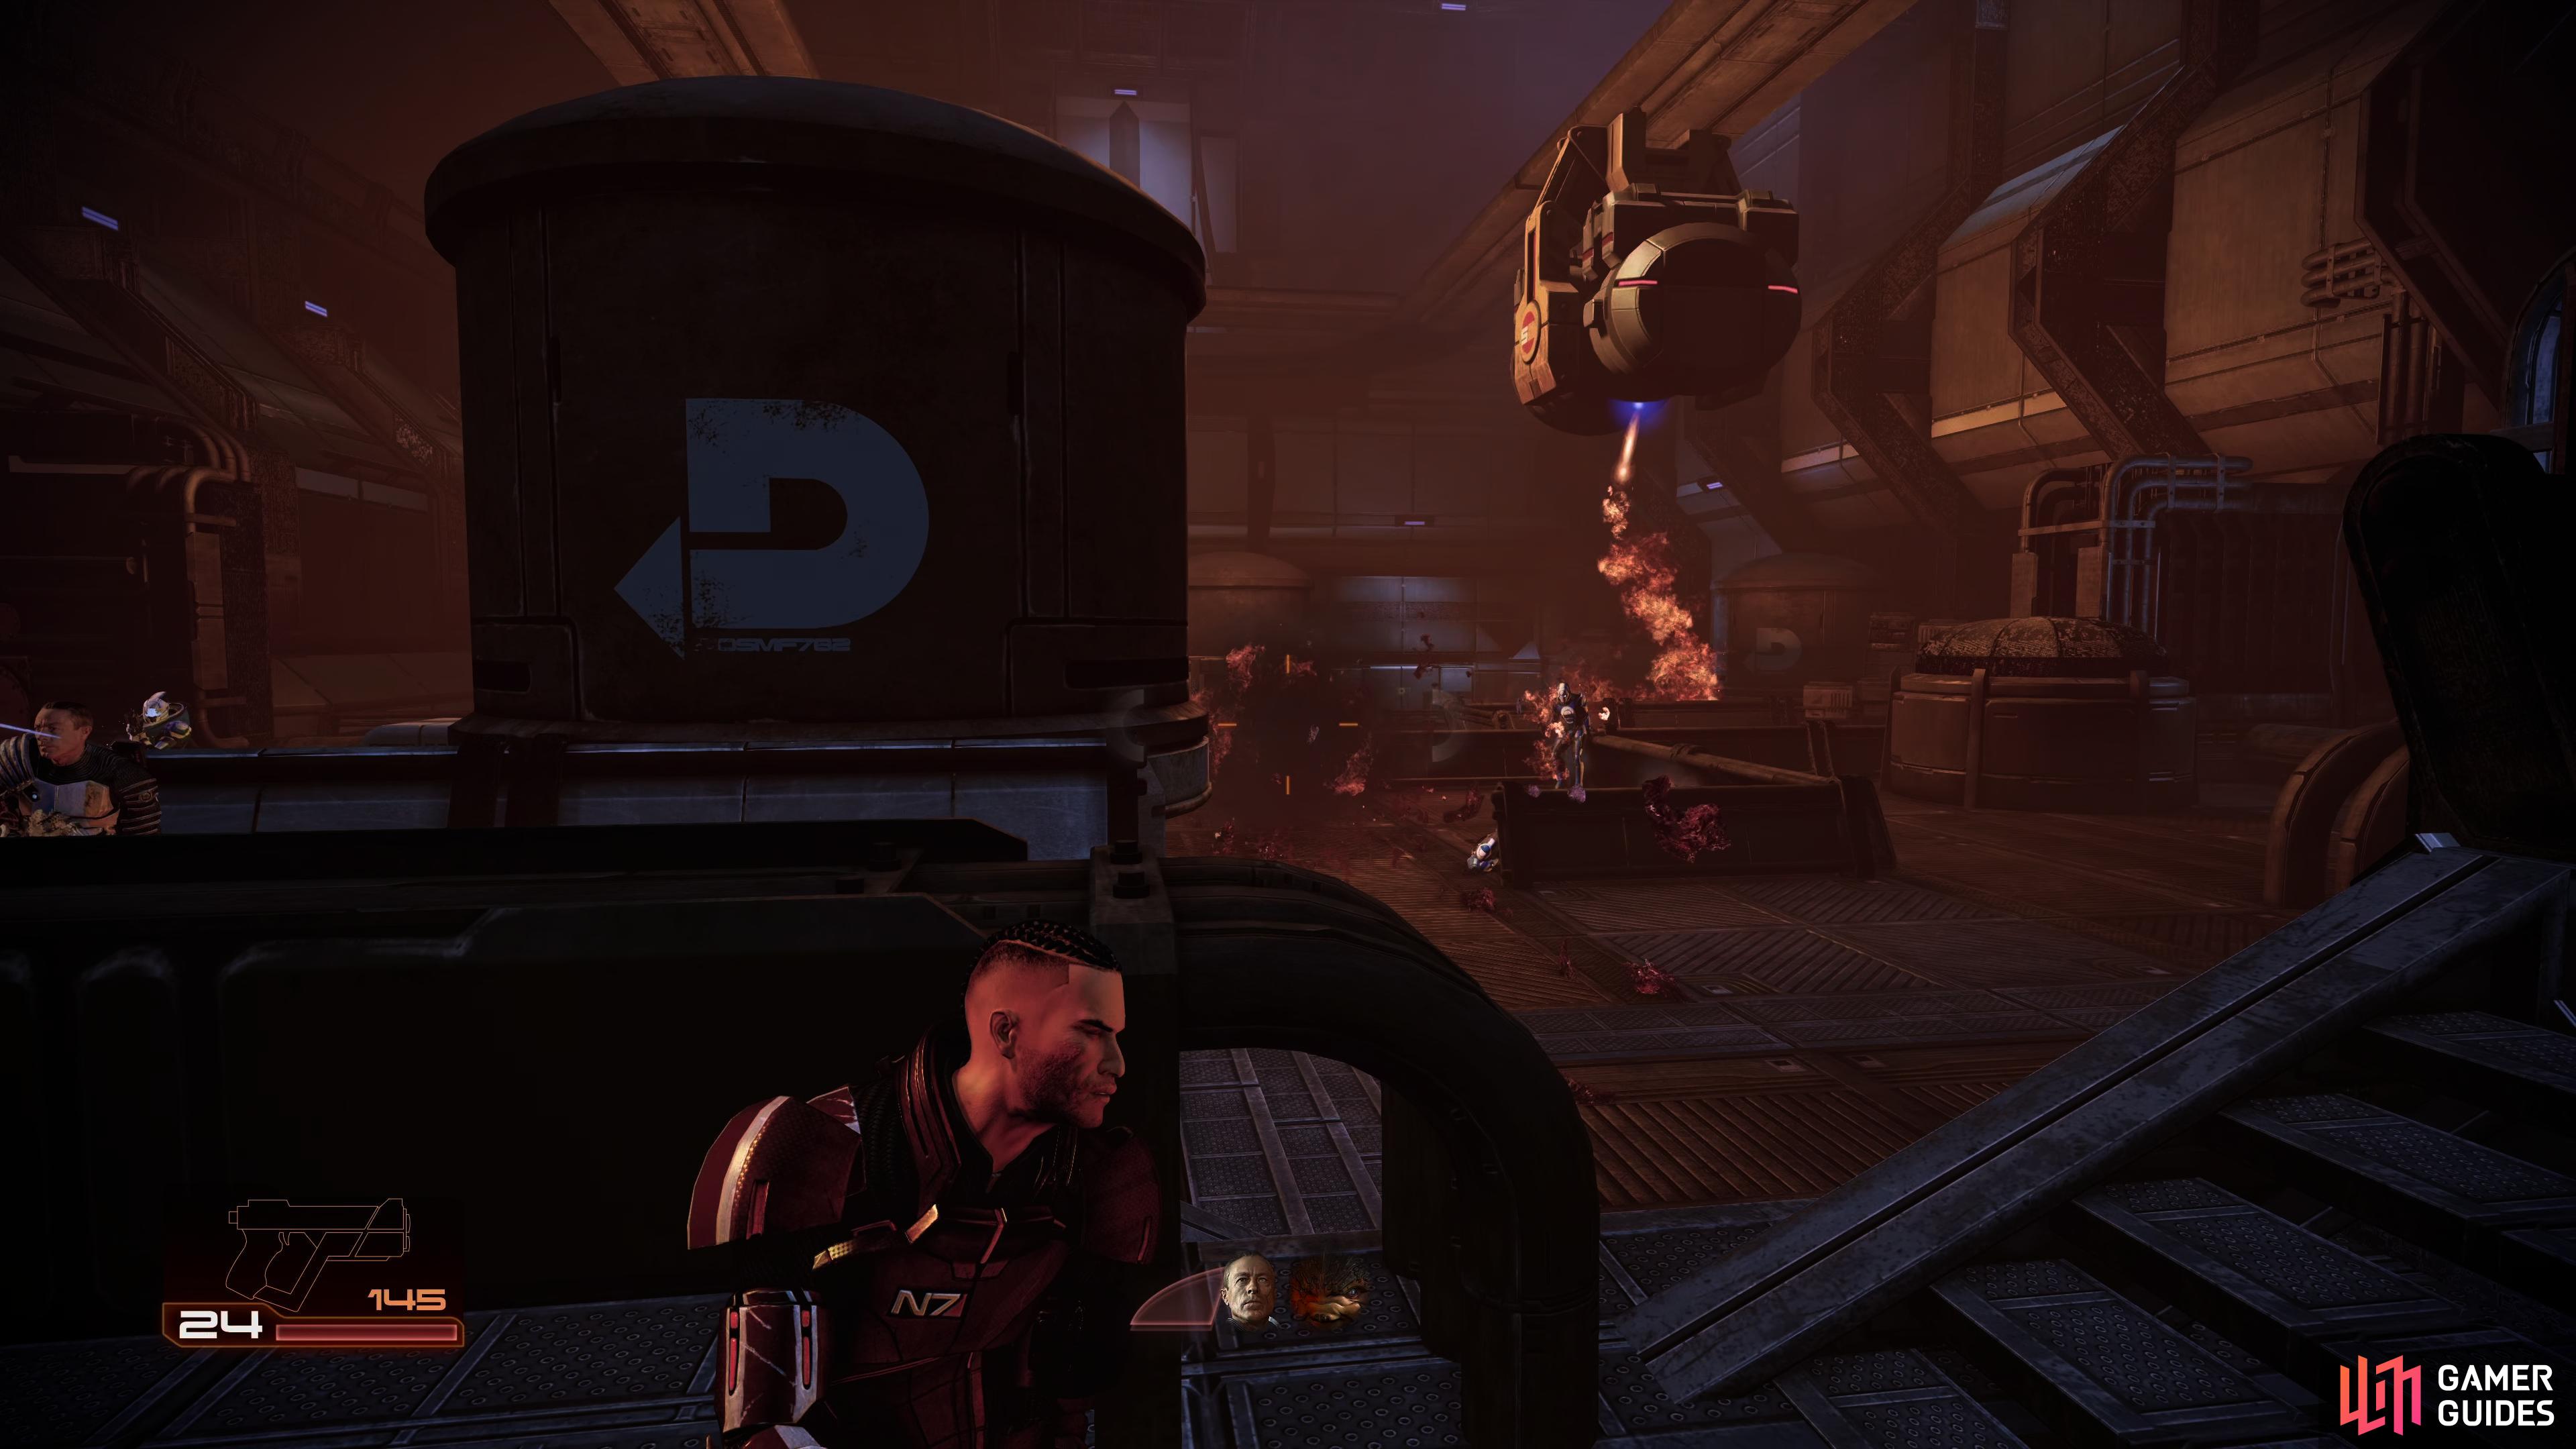
Refinery fight
This room is the largest in the Refinery, and hosts the hardest fight here too, so make sure you’re prepared. As you head in a bit, Vido will say something over the comms, this’ll change depending on your choices, and then two Troopers and two Pyro enemies will start rushing your squad. The Troopers will sit behind cover in front of you, whilst the Pyro’s will try to flank you to your right. Set up either you or the squad behind the long concrete cover to your left, whilst the other focuses on the right to watch your flank. Another way to tackle this encounter is to move cover to cover, focus firing enemies with your whole squad to quell the numbers, focusing on the Pyro’s first, try to take out their tanks on their backs to make them explode, dealing damage to all enemies near them. If you take the Pyro’s shields down, Incinerate can make them explode, otherwise if you see the tank has fire coming out of it, shoot at it quickly to reach the same outcome.
(1 of 3) Placing your squad mates on the cover to the left will keep the enemies at bay whilst you deal with the flank
Once the last Blue Sun has been eliminated, a YMIR Mech will begin to advance towards you and the squad. The YMIR Mech is a tough encounter, it has high shields, high armor, and lots of health. Make use of Zaeed’s Disruptor Ammo, and keep hitting it with Overload or Energy Drain if you have it, once its shields are down, use powers that deal damage to armor, Incinerate, Warp, Incendiary Ammo are great here. Also, the heavy weapons ML-77 Missile Launcher, and the M-451 Firestorm you picked up earlier work great here. If it gets too close to you, switch to a different cover.
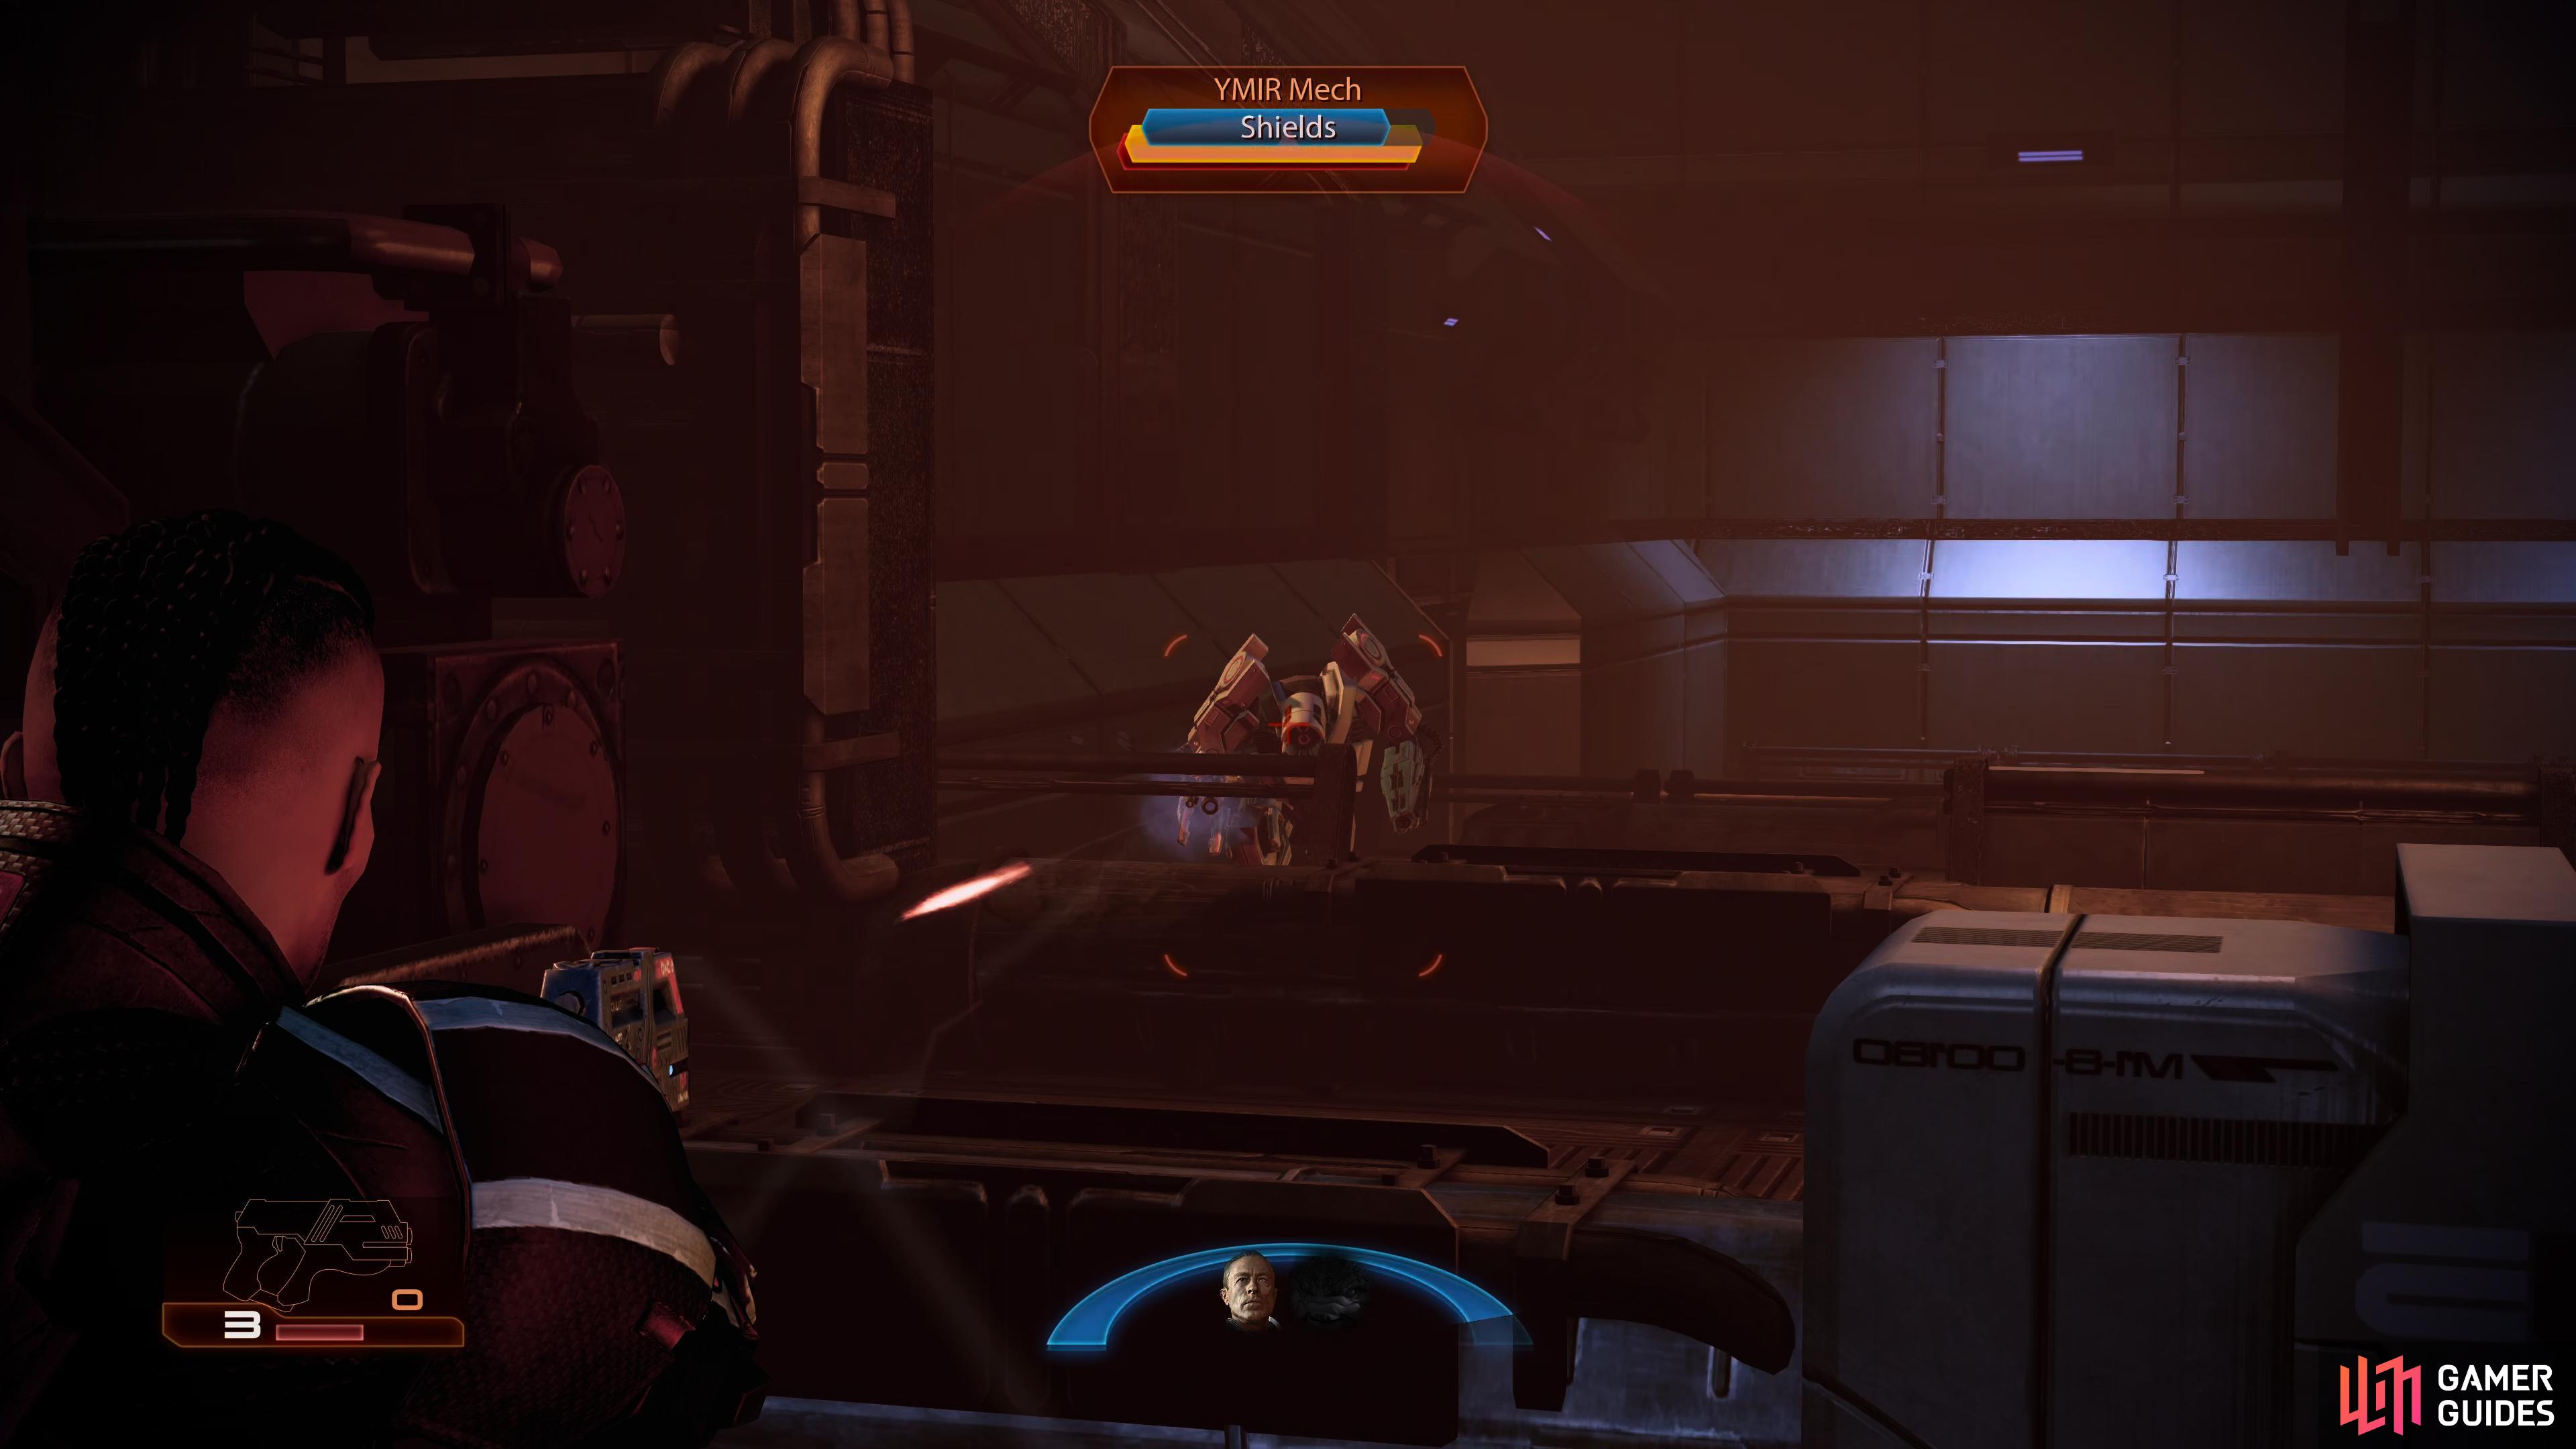
Use Overload if you have it, or Zaeed’s Disruptor Ammo to take down the Mech’s shield
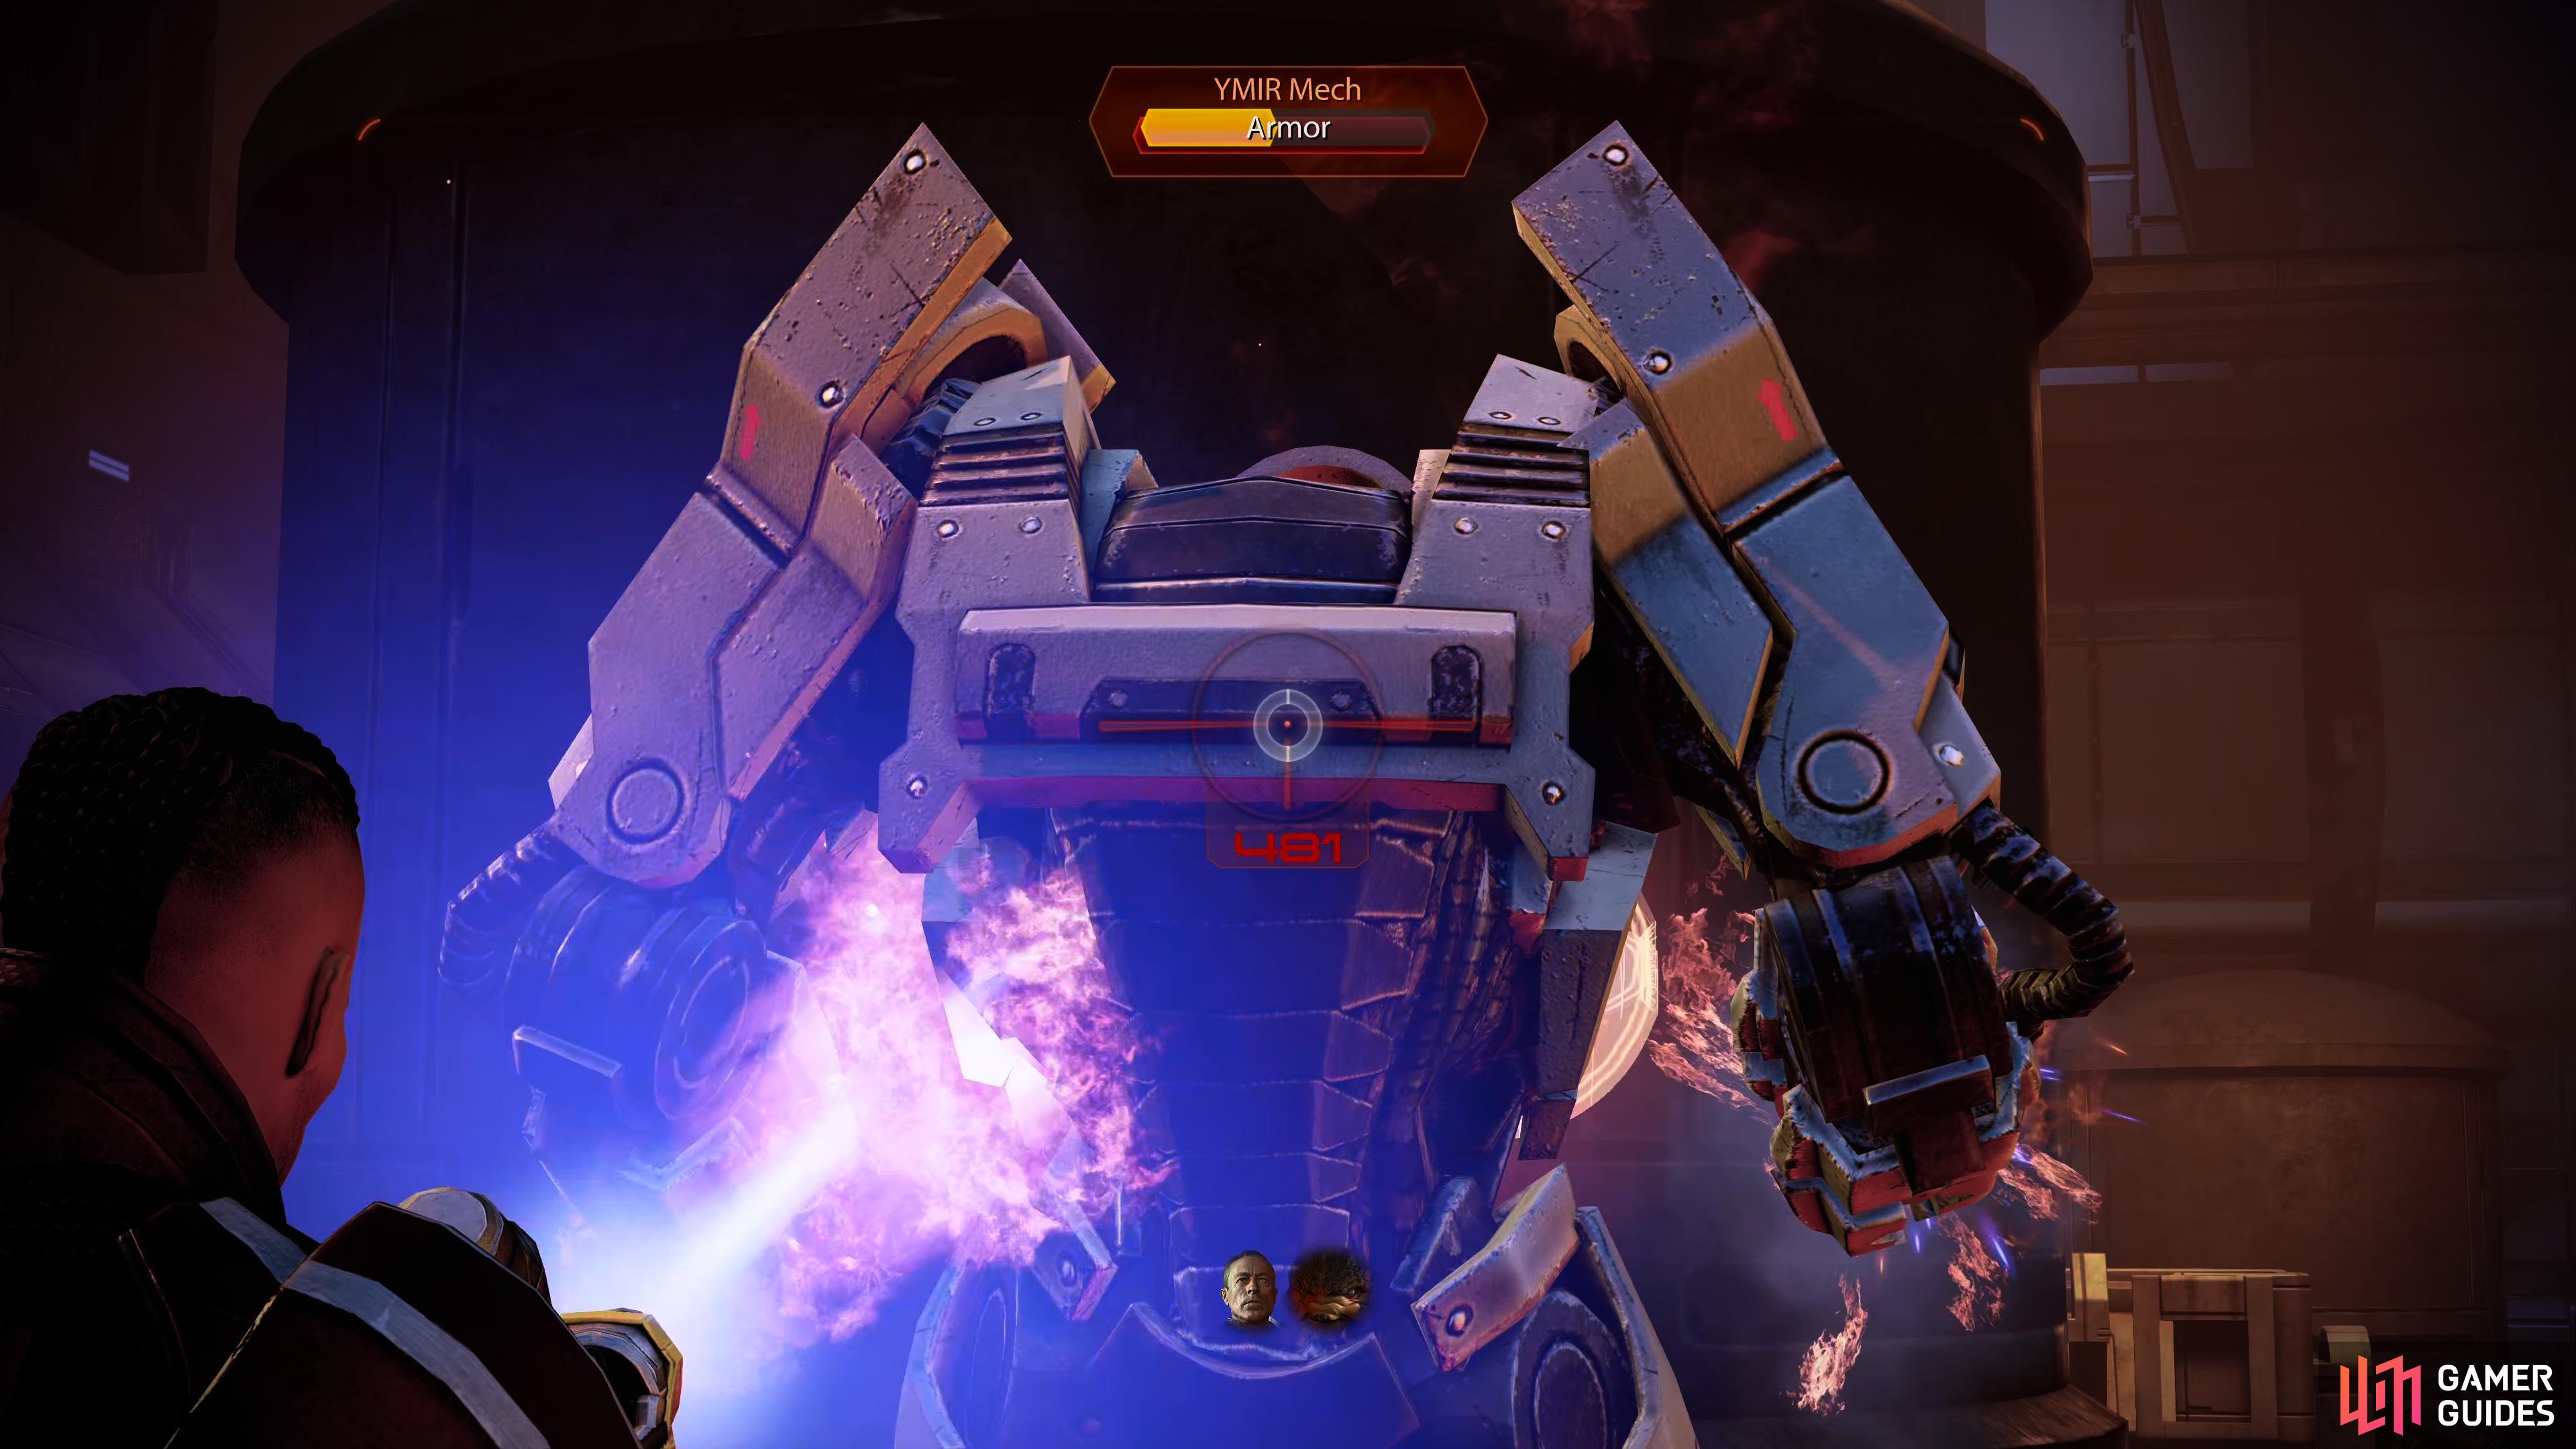
Stay behind cover until the Mech gets close, then peek up and burn down its armor with the M-451 Firestorm, Incinerate and Warp also work great here.
After it’s defeated, go through the doors the Blue Suns came from, and as you enter the next room, you’ll find Various Industrial Bits to salvage, rewarding you each with 6,000 Credits, head back out, make sure to pick up the Med Kit on the way. There are a couple more doors in this room, but they don’t contain anything. When you’re ready, cross the bridge to your right, and go through the door.
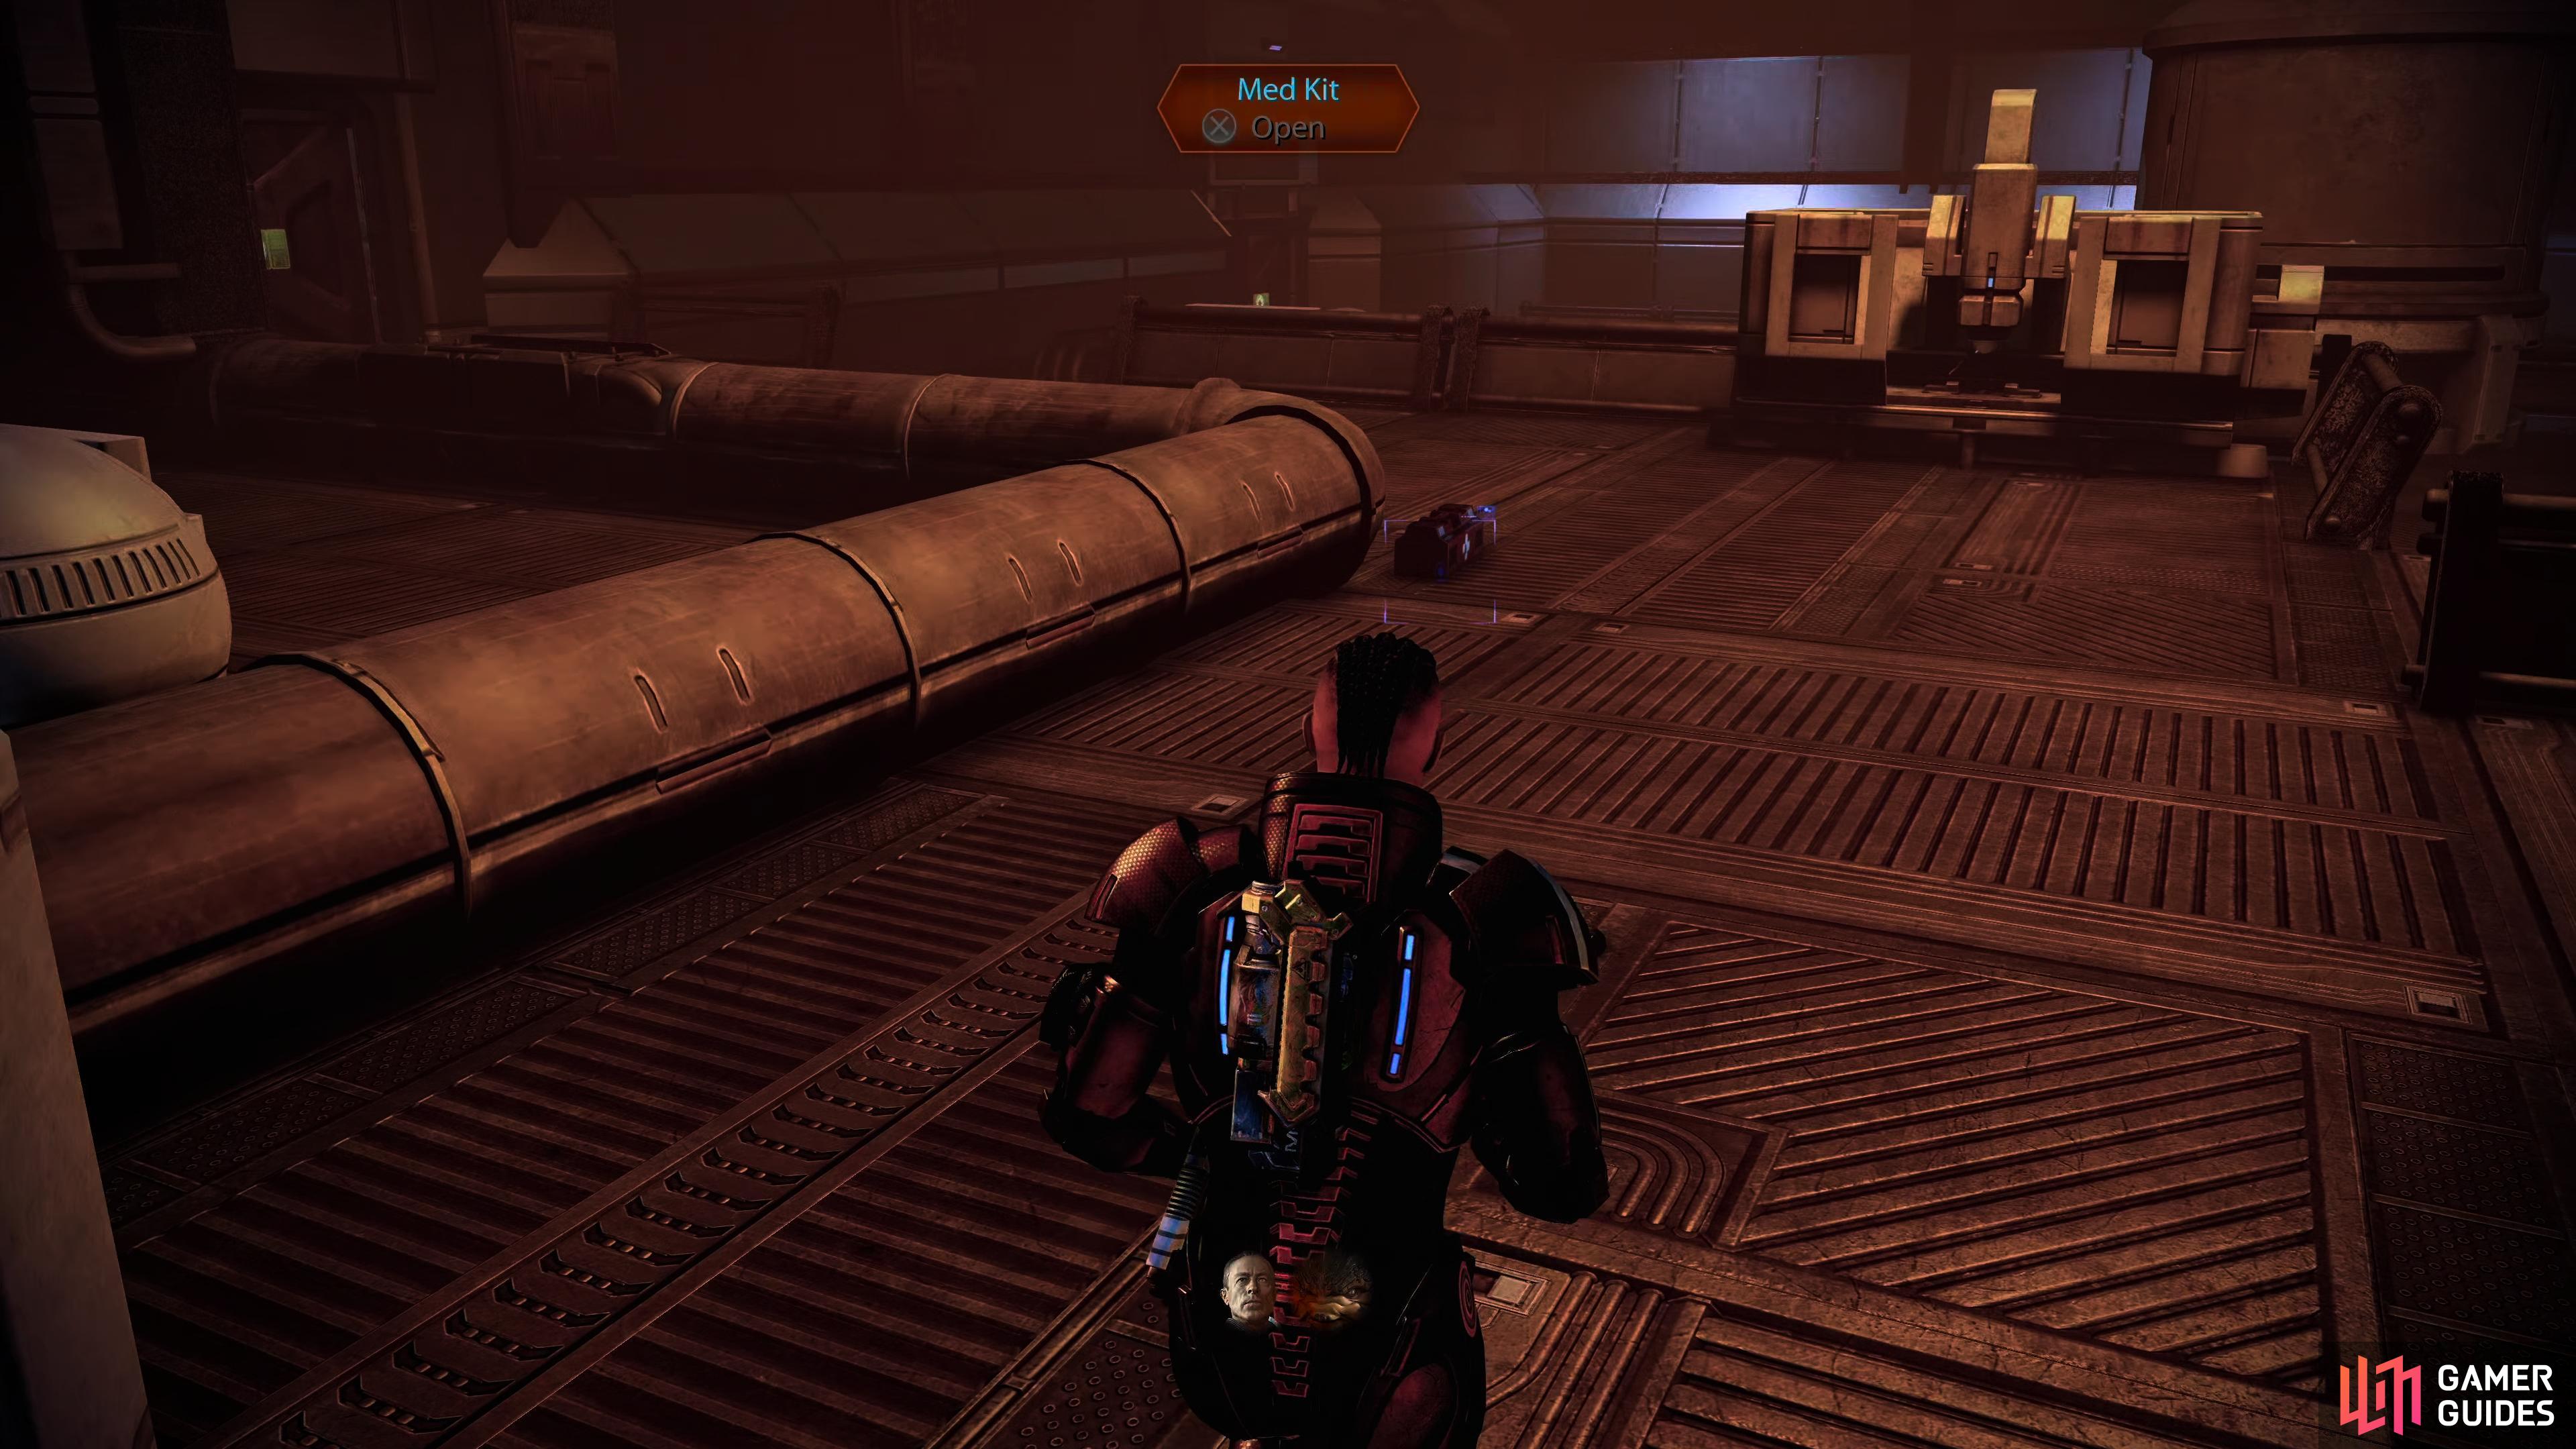
After the battle is finished, pick up the Med-Kit in the center of the room
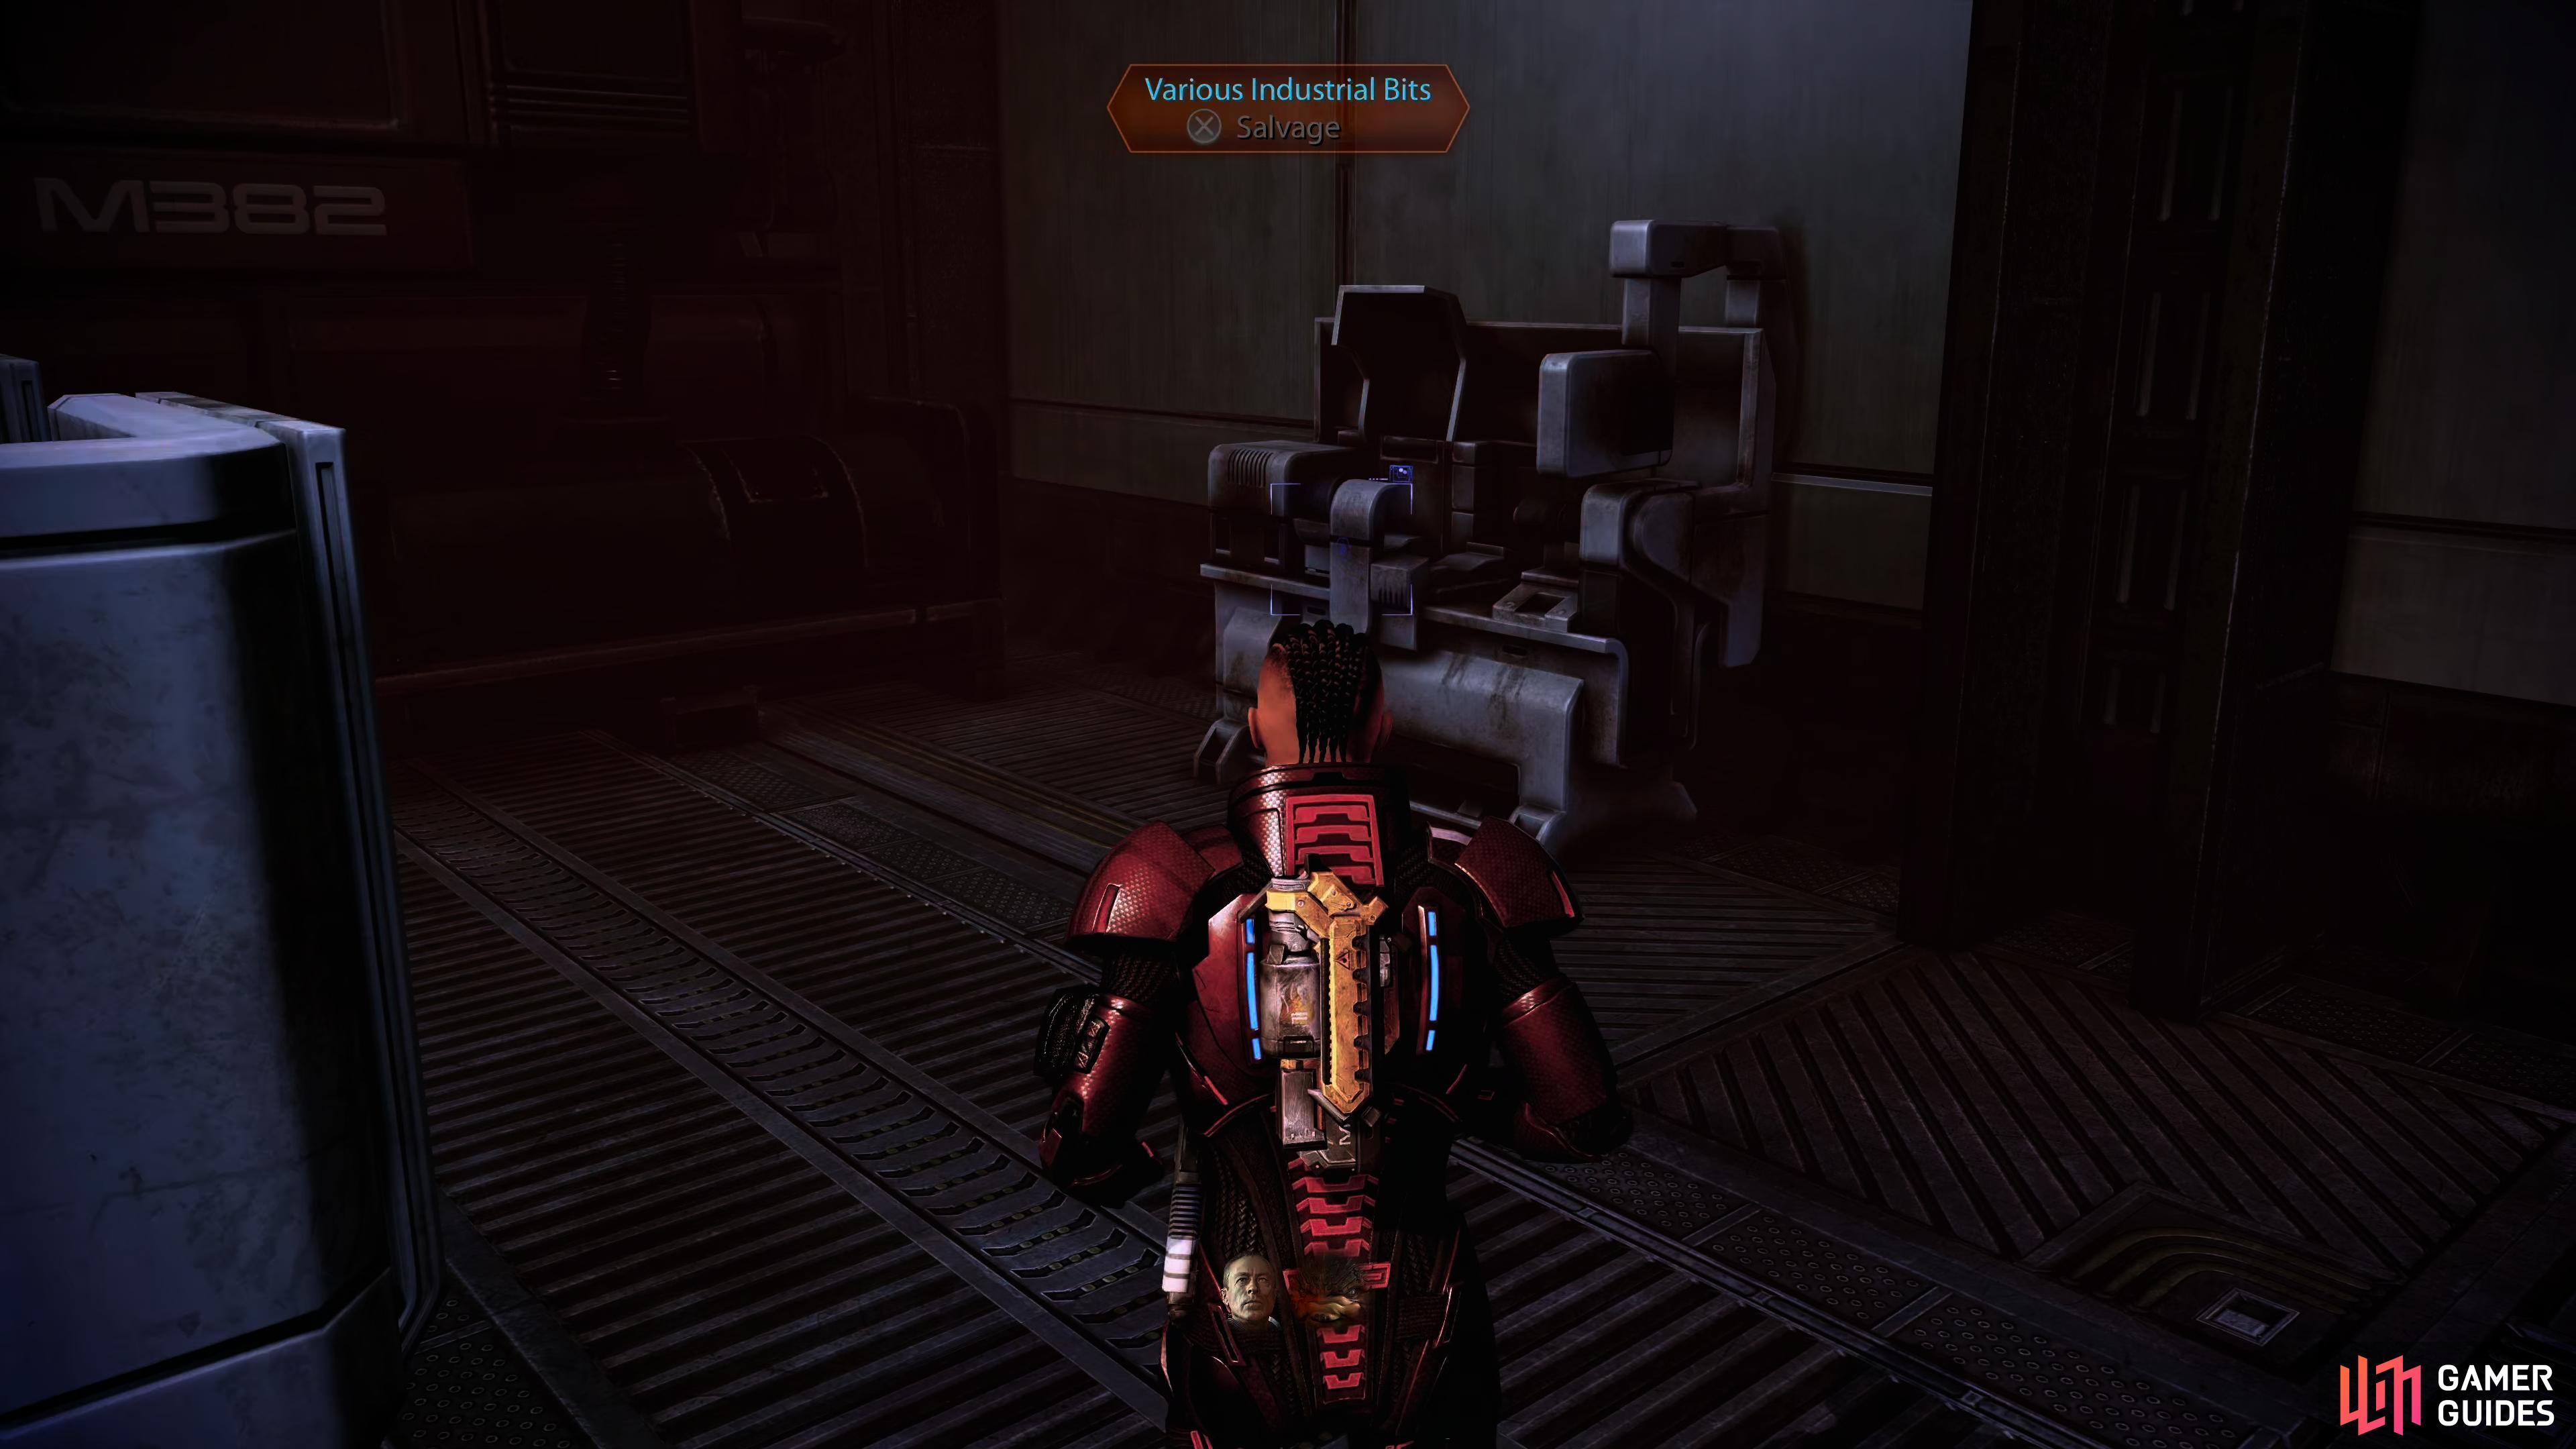
then go through the door behind it to obtain 6,000 Credits from the Various Industrial Bits.
If you chose to help the Refinery Workers, you’ll get a scene with Vido escaping, Zaeed, in his frustratio will shake his gun, and an explosive cartridge will fall out, he’ll then point his gun at you whilst telling you that you’ve wasted 20 years of his life, whilst that’s happening, the cartridge will ignite and create an explosion, leading to Zaeed getting caught under a heavy metal beam, you’ll get three more important choices to make here, which are:
| Choices | Morality Score | Notes |
|---|---|---|
| “Are you hurt?” | +2 Paragon | – |
| “You deserved that.” | +2 Renegade | – |
Followed by:
| Choices | Morality Score | Notes |
|---|---|---|
| “I don’t want you on my ship.” | +2 Paragon | – |
| “Why should I trust you?” | +2 Renegade | – |
And finally, the important one:
| Choices | Morality Score | Notes |
|---|---|---|
| “You owe me big for this.” | +2 Paragon | – |
| “Come on, Zaeed. Let’s go.” | +2 Paragon | – |
| “You brought this on yourself.” | +7 Paragon | You’ll have to have high Paragon, and little to no Renegade to have this dialogue appear. This is the only option which will get you Zaeed’s loyalty if you chose to save the workers. |
If you chose to follow Vido, you’ll get a scene, and you’ll see Vido limping away, Zaeed will confront him, and then the mission will end.
No Comments