S-Rank Requirements
| Time Limit | Objectives | Casualties |
|---|---|---|
| 21:00 | 10 | 0 |
Capturing Alerion
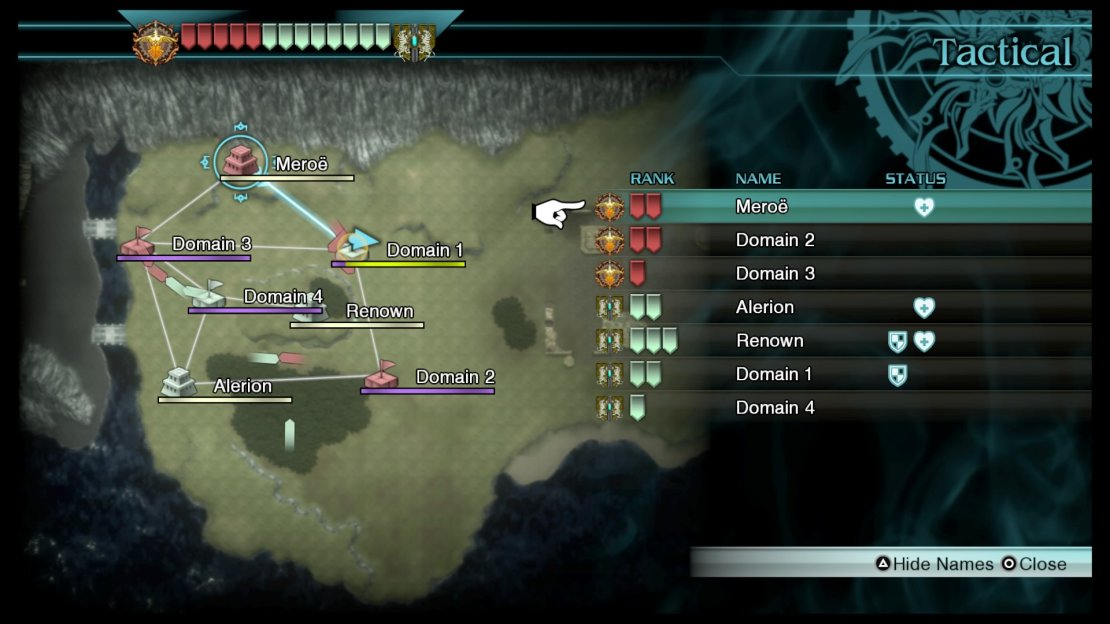
Things are pretty spread out in this RTS battle and your first order of business is to capture Domain 1 from the enemy, which is sending out Warrior units. The problem is that there’s an Autoturret right next to the stronghold, so you should eliminate that before bothering yourself with the actual troops.
Immediately following the takeover of Domain 1, a Mid-Sized Carrier will head towards Domain 2 and attack it, so quickly destroy it and concentrate on defending Domain 2 from the enemy, including another Autoturret in the woods. Upon doing that, you will gain control over Domain 2’s troops and can issue out a special unit, the Ryo Unit (they are weaker than the normal units). Break down the energy wall at Alerion and invade it.
Invading Alerion
A timer of five minutes will appear on your screen and your sole objective is to go to each area to interact with the machine to disable the enemy’s communication. You will have to contend with Imperial Troopers, some of which are in the towers, as well as Supersoldiers and a Nymurod. Only the Troopers and Supersoldiers will respawn.
The second area will have Heavy Gunners, more Imperial Troopers and some Coeurls, with the tower you need to disable on top of some crates. For the third area, you will be fighting with more Imperial Troopers and some Supersoldiers. There will be two towers to deactivate in this area and once you do, an enemy commander will come out to play. Ignore the Panjandrums if you can and focus on the CO to take over the stronghold.
Capturing Renown
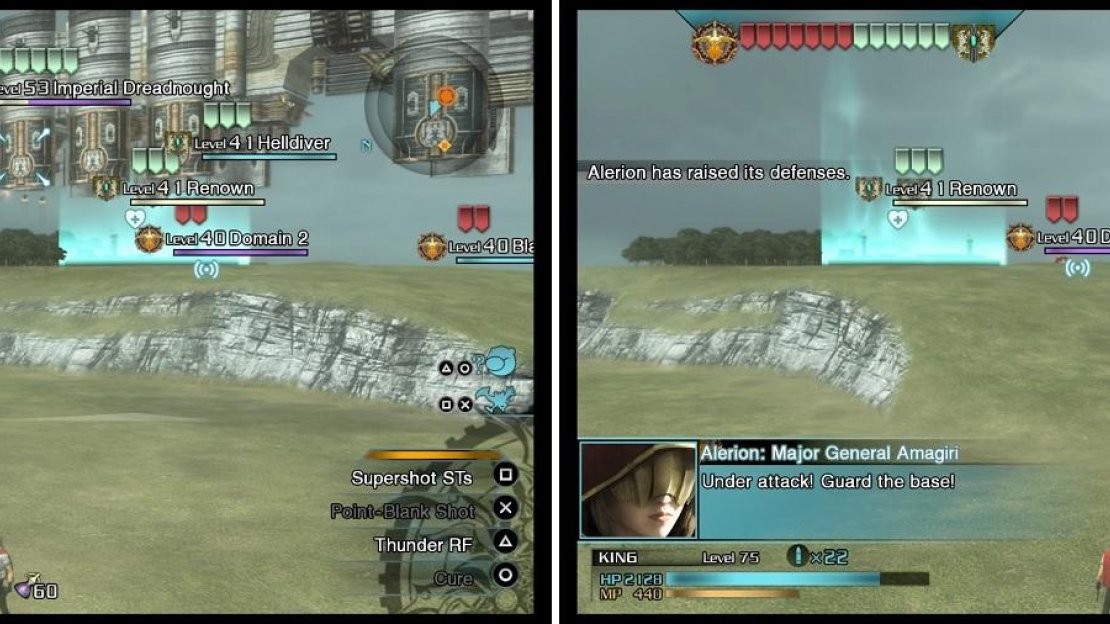
All that’s left should be Domain 4 and Renown, but things get a little hairy here, as another Mid-Sized Carrier will show up, as well as the Imperial Dreadnought. You won’t be able to do anything about the Dreadnought, so ignore it and shoot down the Carrier. The Dreadnought will automatically take over one of your captured places (not your home base and most likely Domain 1), then it will fly off and do nothing else.
This can be a problem, as Renown will likely be spitting down Helldivers at a good rate and might retake Domain 4 if you already grabbed it, which will turn their attention over towards Alerion. So, you will need to go over to Domain 2 and direct your troops to Domain 1 to recapture it, then quickly move to intercept the Helldivers from Renown. Once you’ve gotten everything under control, start going after Renown and when the energy wall is down, invade the stronghold.
The Imperial Dreadnought (left) will take over one of your strongholds, no matter what. That, combined with the Helldivers (right) coming from Renown can make things difficult for you.
Invading Renown
You don’t have to worry about any communication towers when invading Renown, as you simply need to go from area to area, clearing out the enemies in each one. For the first area, you will have Imperial Troopers and a Striker unit to deal with, and the sole goal is to defeat that Striker to move onto the next area, where you’ll have Heavy Gunners, Imperial Troopers and an enemy commander.
The first thing you’ll probably see in the third area is the enemy commander (Supersoldier), but don’t neglect the Strikers behind the barriers, as well as the RPG Gunners in the towers. There will also be some Imperial Troopers on the ground. For the last area, there will be Heavy Gunners in both the towers and on the ground, as well as some Imperial Troopers on top of the crates in the area. All you have to do to finish the mission is defeat the enemy commander here.


No Comments