| Optional Objective/s |
|---|
| 1. Do not kill any policemen. |
| 2. Do not damage the Gladstone’s carriage. |
| Reward/s | . | . | . |
|---|---|---|---|
| Money: | 1,330 £ | Bonus: | 250 £ |
| XP: | 600 XP | Bonus: | 250 XP |
| Gear: | Schematics: Devil’s Handshake Schematic |
Part 1: Locate the Targets
After watching the scene to start the memory, grab a grab a carriage and make your way over to the new objective marker located in the northeast corner of the Westminster borough.
As you arrive, a green objective marker will appear nearby, move over to this and speak with the child here. She’ll tell you where you’ll find your first target. Hop back in the carriage and follow the GPS to ride over to the location specified.
Part 2: Infiltrate the Party
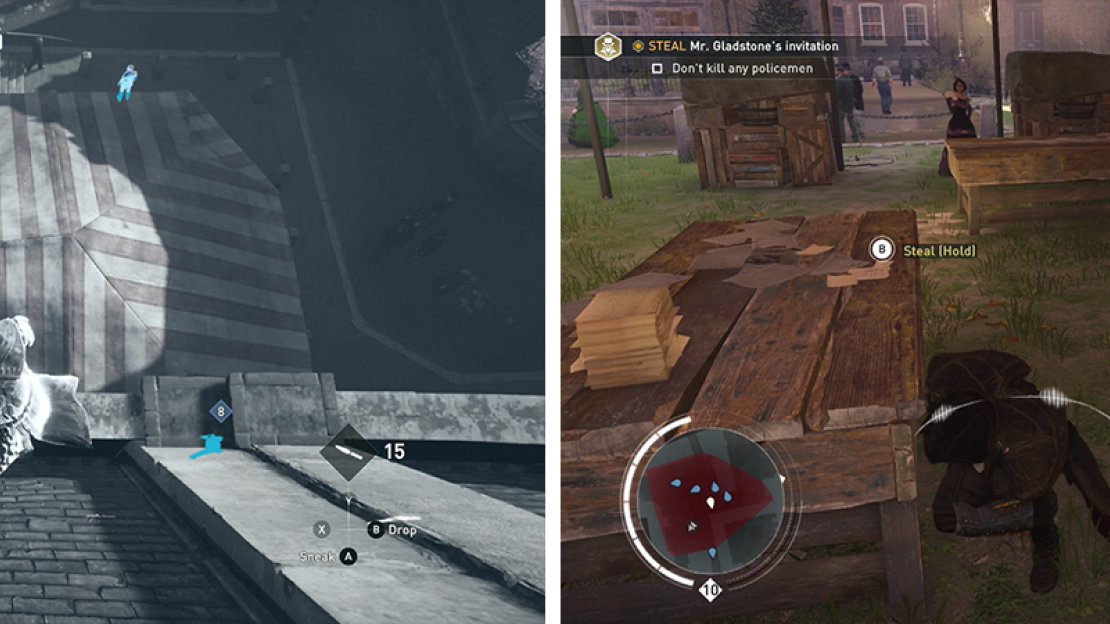
Upon arriving at the objective marker, you’ll find a party occurring just ahead which also happens to include its very own restricted area. We want to pinch the party invitation that is located inside this area – it can be found beneath the white and red striped tent.
Unfortunately, the entrance closest to us is blocked by police so we’ll need to find an alternate route. Climb to the roof of the building on your right. Sneak over and knock out the policeman overlooking the party below. At this point you have a nice vantage point, so use this in conjunction with your Eagle Vision to tag as many police as you can find in the restricted area.
Keep in mind that throughout this memory you’ll bump into plenty of policemen. There is an optional objective that wants us to complete the memory without killing any of them. If you need to get one out of the way, knock him out and if you do get detected, its best to run and hide before returning to try again.
Drop down oto the striped tent (left). Wait for guards to patrol away before dropping down to grab the invitation (right).
From here, you can either drop down to the ground below and slowly work your way through the crowd to the target tent or alternatively use your Rope launcher on the building behind the red and white striped tent. Attach this and climb over it. Drop down atop the tent.
When you are nearby/on top of the tent, observe the guards and when nobody is looking, quickly drop down and enter the tent to snaffle the invitation.
Quickly exit the tent and leave the restricted area to continue.
Part 3: Pickpocket the Target
After acquiring the first invitation, the location of the second will appear on the map. It is located at Queen Victoria train station in southern Westminster. The second invitation is on the person of a target woman whom we’ll need to pickpocket.
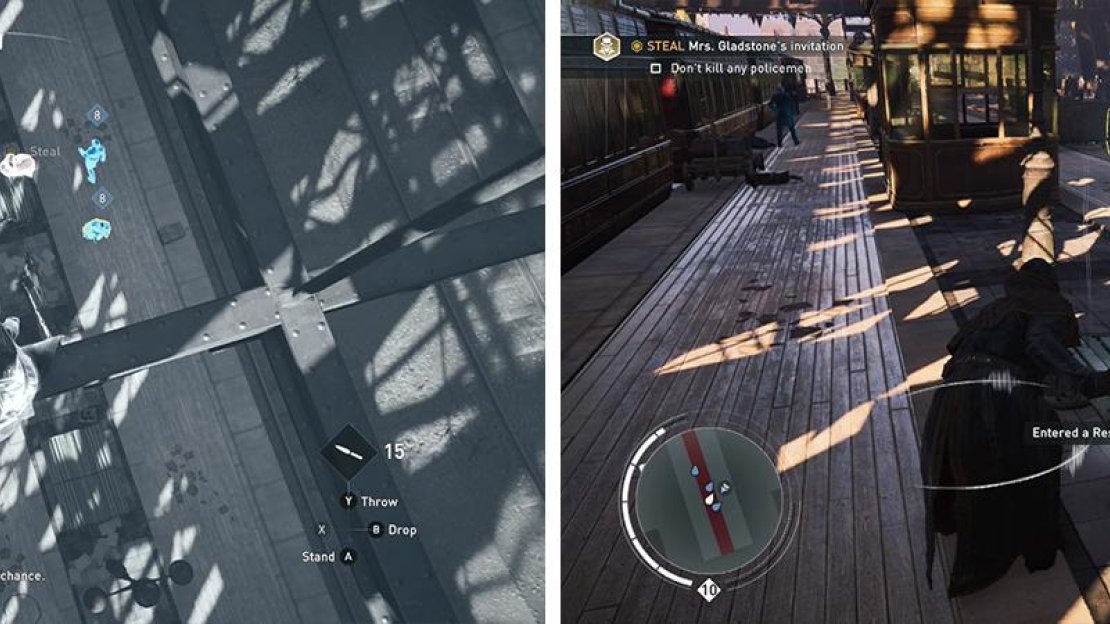
Enter the main station area and use the Rope launcher to reach the girders atop the room above the train platforms. Use Eagle Vision to locate the target and her police escort – she’ll approach a bench on one of the platforms and sit down. Work your way across the beams up here until you are right above the person of interest’s location.
Climb to the beams above the second target (left) and when its safe to do so, dorop down and steal the invitation (right).
As soon as her police escort start wandering off, drop down onto the platform behind the target and move over to the glowing indicator on the bench behind her. At this point Jacob will pinch the invitation and our objectives will be updated.
Part 4: Escape with a Carriage
Upon acquiring the second invitation, you’ll most likely get spotted. Become anonymous and when it is safe to do so, return to the western end of the station building. A new objective marker will have appeared here which indicates a carriage that we’ll need to steal.
Hop into the carriage and drive it slowly along the GPS route laid out for you. Be careful to avoid other carts, people and obstacles on the side of the road because if the cart takes any damage, it will void the second optional objective.
Once you arrive at the destination with the carriage, the memory will draw to a close.


No Comments