| Optional Objective/s |
|---|
| N/A - There are no optional objective/s in this memory. |
| Reward/s | . | . | . |
|---|---|---|---|
| Money: | 1,000 £ | Bonus: | N/A |
| XP: | 2,000 XP | Bonus: | N/A |
| Gear: | Belt: Initiate Belt |
Part 1: Infiltrate the Factory
After the opening cut-scene has run its course, you’ll find yourself in control of Jacob and we’ll be inside an ironworks building. Drop down to the floor below and approach the door indicate by the green objective marker on the far side of the area.
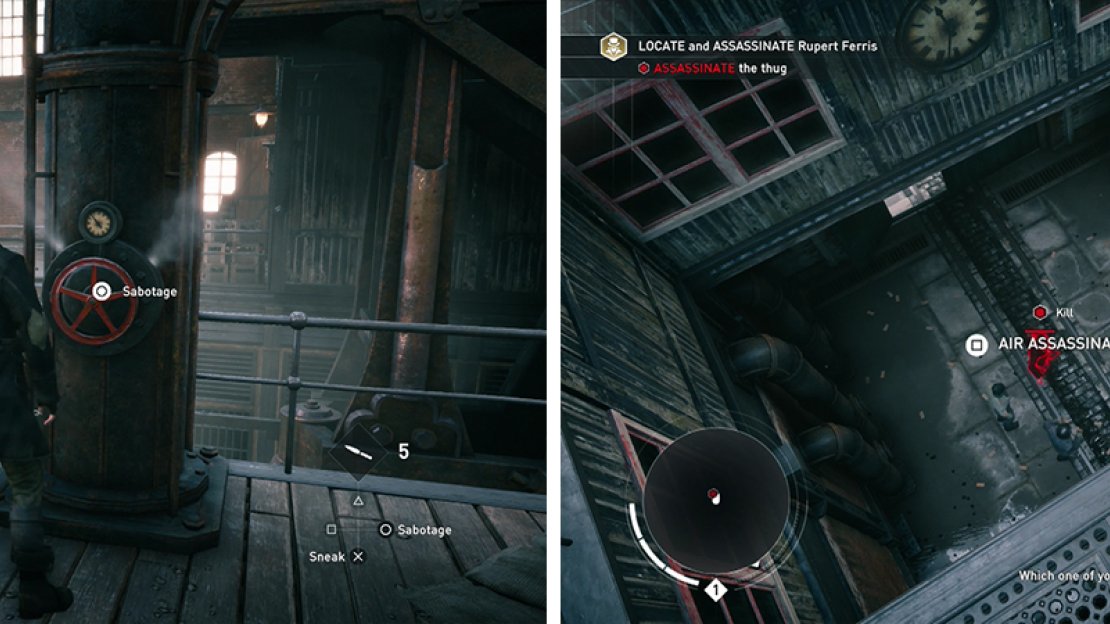
Unfortunately, the passage is locked but can be coaxed open if a problem occurs. The game will now place a series of three golden objective markers around the room and throw up button prompts to have us practice our freerunning and climbing abilities as we navigate between them. Each of the markers represents a valve that needs to be approached and interacted with.
Once you have finished manipulating the third valve, a short scene will occur showing the door opening below. Perform an air assassination on the Thug as prompted and continue through the doorway.
Disable the valves around the room (left). Air assassinate the guard that appears below (right).
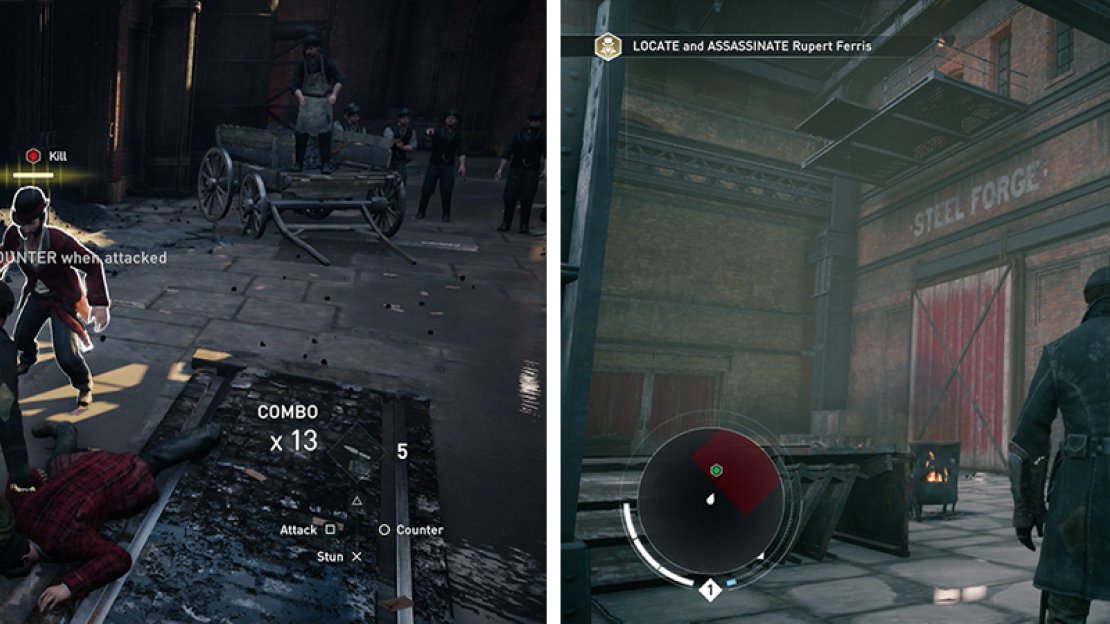
As soon as you go through the door, you’ll be attacked. This brief fight acts as a bit of a primer or tutorial to the game’s hand to hand and melee combat system. Follow the on-screen tutorials to practice your attacking, learn how to counter (watch those yellow bars!) and the basics of guard breaking.
After defeating the three enemies here, continue towards the next objective marker and move through the door to an outdoor area.
Our goal here is to reach the green objective marker on top of the crane ahead. Use your freerunning up abilities (hold the jump button (A / Cross)) to climb upwards to make your way across the various sections of environment to reach the marker. When you arrive, you can try your freerunning down (hold the counter button (B/circle)) to drop safely to the zone below.
At this point we’ll be given a brief tutorial on detection. The objective here is to reach the foundry building in the distance. How you get there is up to you – you can practice your combat by attacking guards, practice your freerunning and attempt to avoid detection or you can do a little of both.
Hit the counter button when the enemy health bars flash yellow (left). You can enter the factory via the door or the balcony above (right).
When we reach the foundry, we can either interact with the chain by the door at ground level to open it, or enter via a balcony high up on the left side of the building.
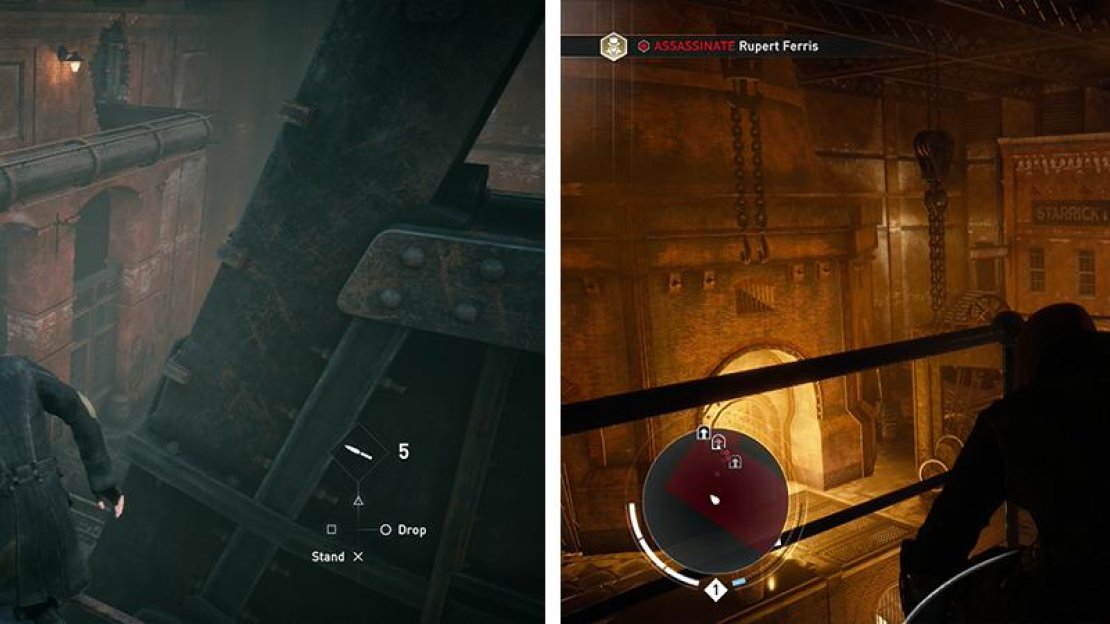
Now that we are inside the foundry, we can find and take care of our assassination target. He’s in the area marked by the green objective marker. To get there, we’ll need to head through a restricted area on the map – this means sensitive and aggressive Thugs and plenty of them.
The first objective marker points to a door in the adjacent room. We can move into this area via either the doors at ground level, or atop a pipe that leads through a hole in the wall around halfway up the room. I’d recommend using the pipes as you’ll only need to contend with one guard in the immediate area and then a second patrolling by the objective marker whereas taking the ground route features an additional four enemies.
Once you have moved into the next room, simply make your way over to the next objective marker. A scene will also play to show you the location of the target.
The pipe at the top of the room is the sneakiest way in (left). Keep moving through the foundry until you reach the room with the target (right).
Part 2: Assassinate the Target
We’ll start in a room adjacent to the area with the assassination target. There are two ways we can go about getting there. As with the previous area, we can either climb up to the top of the room and use the pipes/girders to access balconies with doors leading to the next area, or continue through the doors at ground level.
I’d recommend the former route. Sticking to the top of the room, note that there is a guard on the right hand side of the balcony along the far side of the room. We’ll want to proceed through the door on the balcony and eliminate the fellow on the far side of the short hallway here.
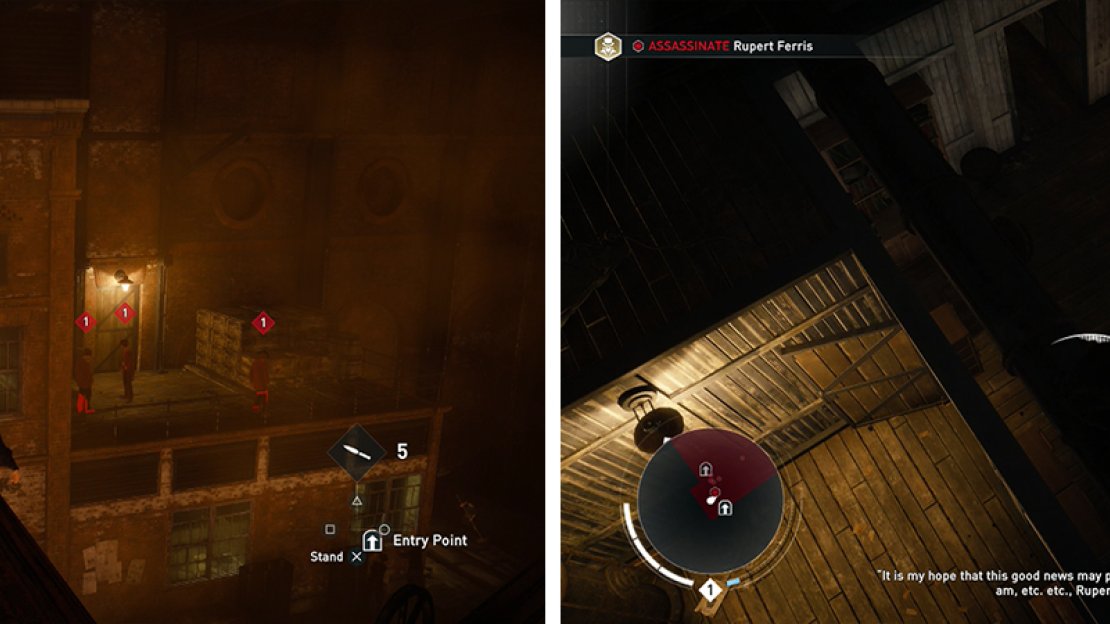
Now that we are in the room with the target, we can take stock of the area. The target himself is on the second floor of an office area along the right side of the room. There are three entrances:
- A hole in the roof of the office. From here we can air assassinate the target.
- A doorway in the far right corner of the room (from our initial entry point). This is located at the top of a short set of stairs next to a group of workers being spoken to. The entrance is often guarded by a single Thug patrolling back and forth. From the doorway, we can proceed inside and sneak to the target’s location.
- A doorway at ground level in the near, right hand corner from our entry point. You’ll need to avoid a pair of Thugs at ground level and dispatch a Thug in the office itself. There is a ladder in the back room here which we can climb to find an open door to the target’s office.
There are several entrances to the target’s room (left), Entering from the top allows you to perform an air assassination (right).
By far the easiest entry point is via the roof. We will not have to spend time fighting or avoiding guard patrols and we’ll be able to immediataely assassinate him as soon as we see him. No matter which way you eliminate the target however, once he is pushing up daisies, you’ll need to escape through the nearby door.
Part 3: Escape the Factory
Exit the office via the newly opened door conveniently indicated by the objective marker. Move through the hallway here and at the far end, exit to the balcony and use your freerun down techniques to drop down to the train passing by below.
On the train, you’ll have to fight off several Thugs who will also jump onto the train and move in to attack you. Here is a good location to put into practice your melee combat skills, being sure to counter and guard break as required. Note that fighting enemies near the edges of the train cars will allow you to kick them off when their health is low enough (note the “Tickets Please” Jacob yells for a great Indiana Jones reference!).
Fight off enemies on the train (left) and then climb down the wreckage (right).
Once you have fought off enough Thugs, a scene will play, after which you’ll need to do a little bit of platforming action that requires you to climb down a wall and to a safe spot on the ground below.
Arriving at the objective marker here will end the mission.


No Comments