| Optional Objective/s |
|---|
| 1. Use a generator to attract a spy. |
| Reward/s | . | . | . |
|---|---|---|---|
| Money: | 3,532 £ | Bonus: | 150 £ |
| XP: | 4,000 XP | Bonus: | N/A. |
| Gear: | Outfits: Military Outfit |
This memory is a little different to any of the others that we have played so far. It takes place in World War I, quite a number of years after the other events of the main game. The game still provides you with a decent sized open world here centered around London’s iconic Tower Bridge and the immediate areas to its north and south.
As such, we won’t be in control of Evie or Jacob in this mission, instead you’ll be put in the shoes of one of their ancestors – Lydia Frye. Her skills and move sets are essentially the same as the Frye twins, but she is locked at level 6, does not have access to the most advanced skills and cannot commander carriages.
Part 1: Kill the Templars
From the start of the memory, you’ll want to proceed out of the room and up the stairs at the end of the hallway. There are three Templar agents in a room below.
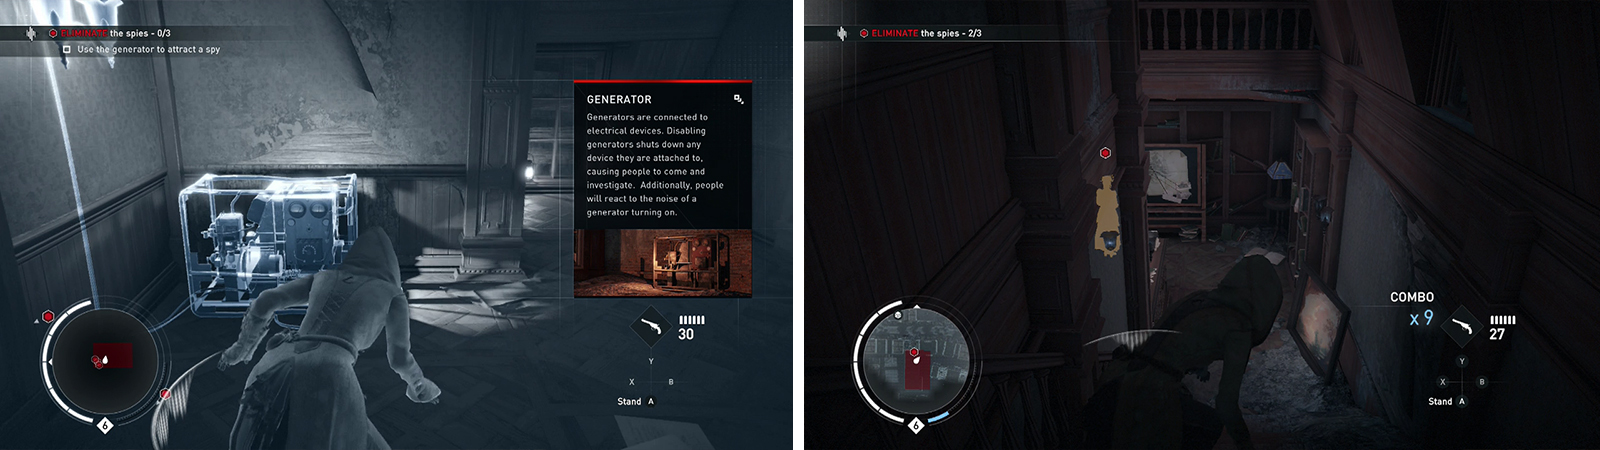
Use the generator to lure enemies into assassinations (left) before moving down to finish off the remaining enemies (right).
Move up and interact with the glowing generator against the wall near the doorway here. This will turn off the lights in the room below and a pair of Templars will come to investigate. Perform a corner assassination on the first as he approaches to lock up that optional objective. Kill the second before proceeding into the room below and dealing with the final enemy.
This will trigger a scene.
Part 2: Steal Radio Details
We’ll now be set loose in a smaller, but still quite large open world area of London circa 1916. Three objective markers will appear on the map indicating the location of the three areas of interest we’ll need to visit in order to find Templar agents with some important information that is required to progress through the memory.
Radio Intel 1
The first area of interest is located on a dock to the western side of the Tower Bridge’s southern end. The target we are after can be found beneath the large central crane in this area. He is however surrounded by 6-7 Soldiers including a group of three standing right next to him, a look out and several patrollers who will attack us on sight.
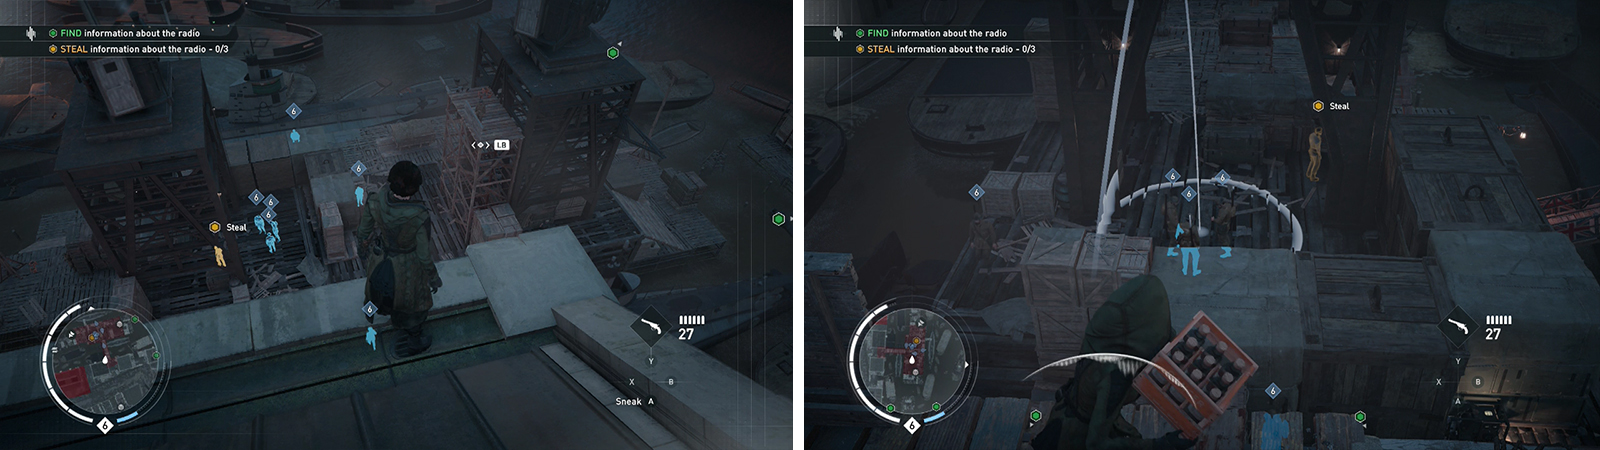
The first radio can be found by the docks (left). The nearby dynamite is a good way to thin out enemy numbers (right).
Whilst its tricky to be stealthy, there is an easy-ish way to clear out some of the enemies quickly. Just to the east of the central crane is a second crane with a Soldier on a sniper platform near its top. Rope Launch over to this platform and kill the enemy. There are three crates of dynamite here. Lob one of these down onto the group of three soldiers below (it is possible to get all three plus the target if you are patient) and then the other two crates when other enemies come to investigate the explosions. Alternatively, if explosions aren’t your thing, there is a generator on the water side of the dock we can disable to draw an enemy or two out.
Once the target is dead (and the other Soldiers if you feel the need). Run over and loot the information from the target’s corpse.
Radio Intel 2
The second point of interest is located in the river on a stationary boat just to the west of the southernmost part of the Tower bridge.
The boat houses the main target and six additional Soldiers. Four of the Soldiers will remain on the upper deck, another sits near the back and the final Soldier stands guard over some prisoners at the front of the boat. Our target on the boat will patrol from the Soldier guarding the prisoners, back to the east and up to the top deck and back again.
This section is also quite easy once you know where to go. near the front of the boat is a large wooden pole sticking out of the water that we can Rope Launch up and sit on top of. From here, wait for the target to patrol off to the east and use a throwing knife to headshot the fellow guarding the prisoners on the deck below. Either drop down, climb up onto the deck or wait atop the pole and when the target returns at the other end of his patrol, either assassinate him or plant a throwing knife in his head too.
With the target dead, move up and loot his body for the second set of plans.
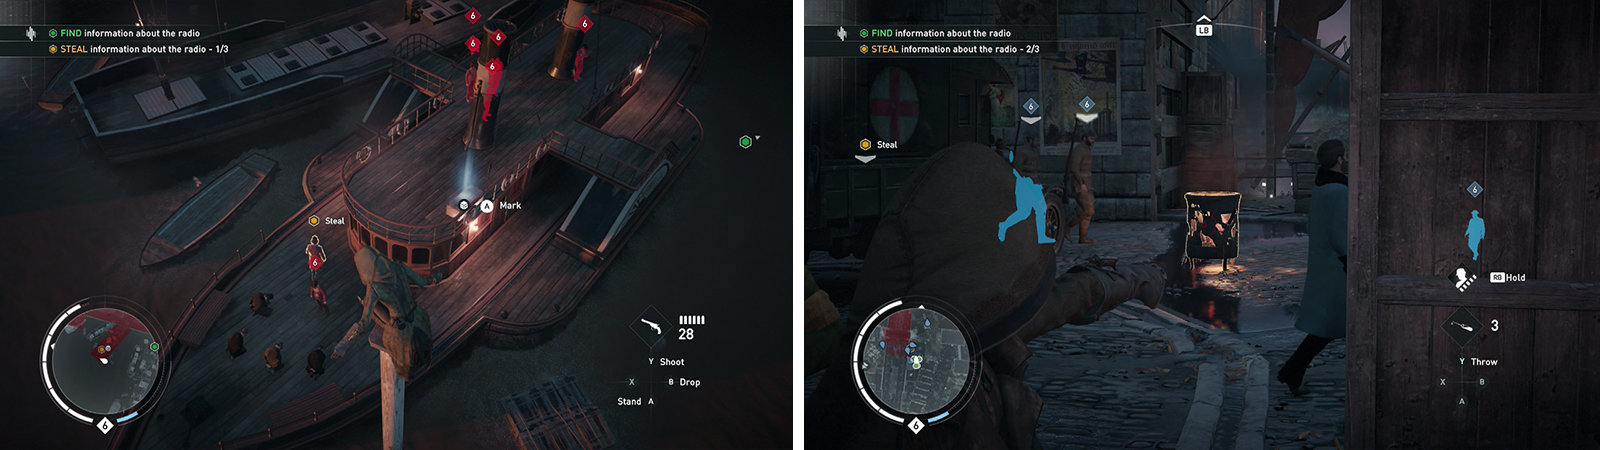
The second radio is on the deck of a ship near the bridge (left). The third is beneath the bridge and can be made easier using the darts (right).
Radio Intel 3
The third and final piece of radio intel can be found beneath the road leading onto the Tower Bridge on the southern side of the river. The target here will patrol from the restricted area directly under the bridge, to a position further to the east and back again flanked by a pair of Soldiers. There are additional enemies in the restricted area and plenty of options available for you to use.
We can head down the right hand stairs (whilst facing the bridge) to find a generator and a fire barrel right next to it. Use the generator to attract guards before backing off and hitting the fire barrel with a hallucinogenic dart when they are in range. There is also a hay stack along the target’s patrol route and a number of Rooks on the bridge above that we can recruit and take into the fight.
Anyway, once the target is down, loot the intel form the target to continue.
Part 3: Locate the Radio
Once we have all three pieces of radio intel, Lydia will put the information together to figure out where the Radio is located. Our objective marker will be updated and we will now need to make our way over to the northern tower of the Tower Bridge. Note that you’ll want to avoid the search lights as you go – standing in those is a good way to get hit by sniper fire.
As you approach the tower, you’ll see a pair of Templars on the supports linking the two bridges together. There are a further four Templars manning a radio inside the tower ahead. Kill the two outside before proceeding.
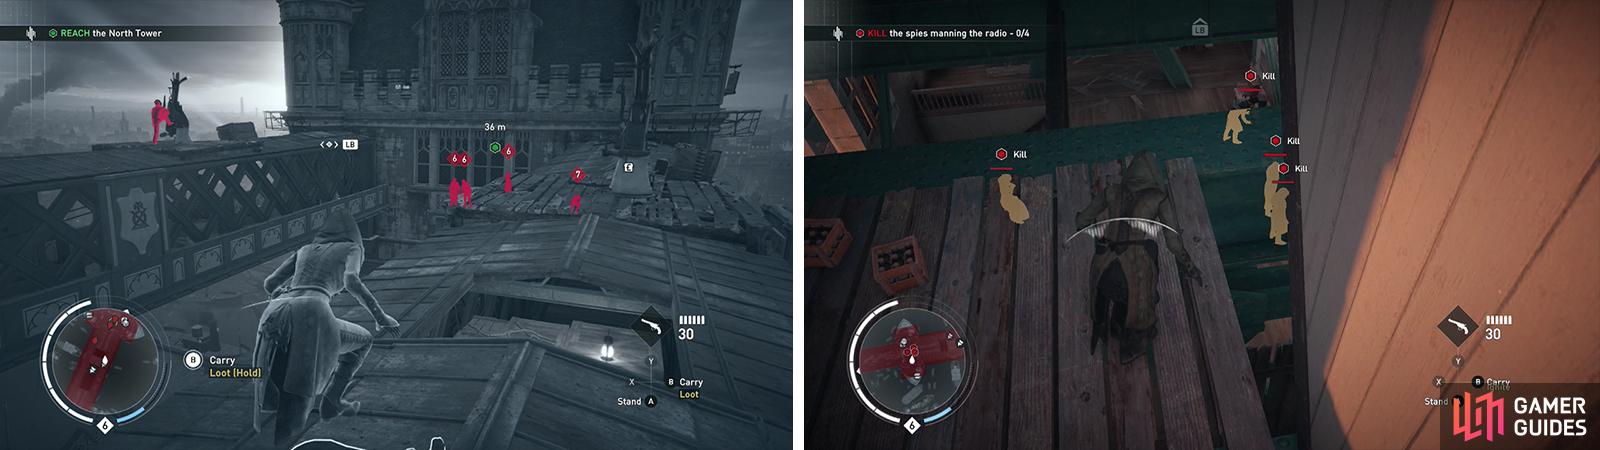
Make your way to the northern tower of the bridge (left). Enter via one of the multiple entrances and kill the Templars within (right).
We simply need to kill all four Templars in the tower to continue. The game gives us a ton of options though. You can drop down the open hatch on the left hand support bridge and charge right into the room. You can work your way around to the northern side of the tower and approach from the outside. There is another entrance higher up on the left/western side of the tower featuring some explosive crates we can lob down onto the enemies and some beams we can use for air assassinations.
Either way you go about it, once the room is clear, approach the radio they were using and interact with it. Another scene will play.
Part 4: Air Defense
When we are back in control, you’ll want to reach the highlighted ledge in front and perform a leap of faith into the hay stack below. Climb down and hop across the boats to arrive at the objective marker. Speak with the fellow here and he’ll enable you to take control of the big anti-aircraft gun.
We’ll now need to make our way through a number of waves. Using the gun, we have to shoot down the planes flying about overhead. If you see alert triangles appear above them, use the crouch button to enter cover as they will shoot at you. Stand up and return to shooting once they finish their fly by. The waves play out as follows:
- The first wave features a single plane. As far as I can tell, it will not attack you.
- The second wave includes two planes and they will attack you fairly regularly.
- The third wave consists of three Templars who will board the boat and attack you. Leave the turret and eliminate the three of them before hopping back on.
- The fourth wave consists of two planes. Again they will attack regularly.
- The fifth and final wave is made up of three planes which will also attack you on a regular basis.
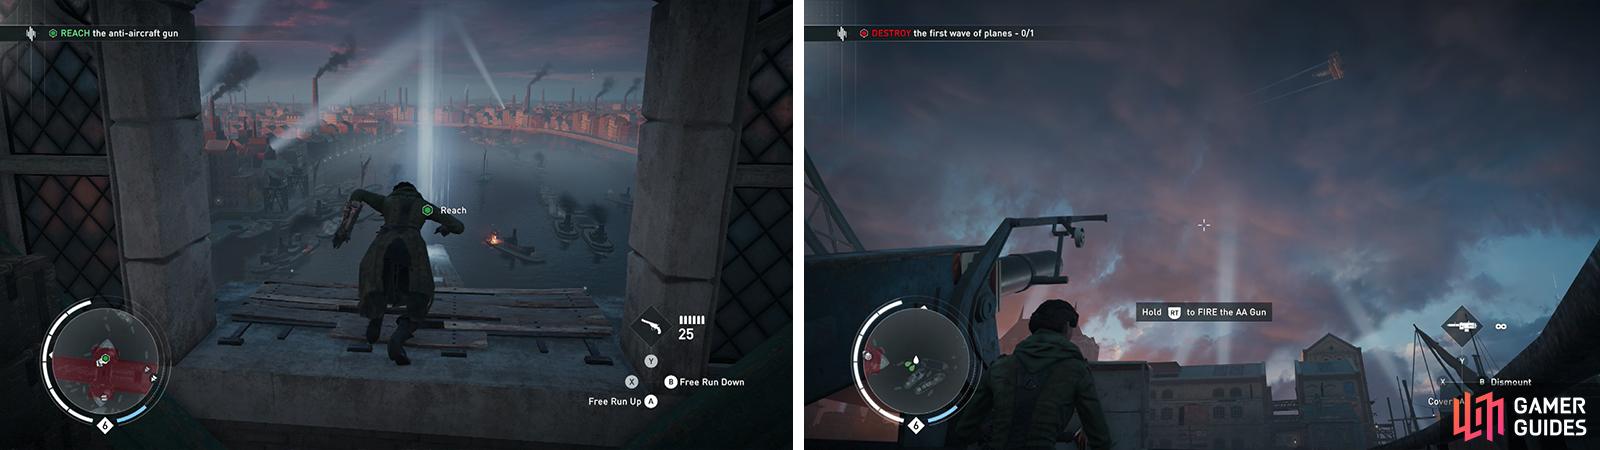
Exit the tower and dive down to the ships below (left). Hop on one of the guns and shoot down the planes as they fly overhead (right).
After clearing all of the waves successfully (and enjoying the subsequent fireworks), a scene will play to complete the memory.
No Comments