
1) Drowned Devil’s Crossing
Book - Tumblers Today
Fast travel back to the WKML Broadcast Station… sure, you’re right next to it, but who wants to climb their way back up there? From here, go north-east down some stairs to find a ruined road… or parking lot. Whatever, crumbling asphalt. In the distance, to the east, you should spot an orange and yellow truck. Head over there to discover Drowned Devil’s Crossing, which is technically the bridge to the east, south-east… but that doesn’t stand out quite as well as the truck, eh? Some truly epic random encounters can spawn here sometimes. Ever want to see a group of Sentry Bots fight it out with Deathclaws? There aren’t too many other places in the game where such an encounter can happen. Hop into the back of the truck and loot. In the back of the truck you’ll find a locked safe [Average] and on the ground near it a copy of Tumblers Today . On your way out of the truck you’ll notice some Raiders have returned, and are none too happy that you’ve been rummaging through their stuff and killing their guards.
2) The Silver Lining Drive-In
Book - Grognak the Barbarian
From the truck near Drowned Devil’s Crossing head south, south-west until you find a small shack. On a table, on top of some other books, you’ll find a copy of Grognak the Barbarian . This shack is near The Silver Lining Drive-In, which is just a wee bit south of the shack. There’s nothing else interesting about this place, but at least it’s a map marker.
3) Faded Pomp Estates
Book - Pugilism Illustrated
Return to the Silver Lining Drive-In and from here travel south, south-west to discover the Faded Pomp Estates. Not much to do here but move among the ruined buildings and loot. Not everything we do needs to be a chore. I suggest working your way from the north down to the south until you reach Roosevelt Academy. One of the houses has a safe [Easy] inside of it, as well as numerous other lootable containers. East of the house with the safe is another house with a copy of Pugilism Illustrated on top of a Small Burned Book in front of a chimney.
4) A Wanderer Near Roosevelt Academy
Now it’s time to explore the Roosevelt Academy. We’re nearby, it’ll be easier to clear out its inhabiting Super Mutants now than later, and… if we do it now we won’t have to worry about this side of the map again until we’re level 30. Plus, there’s quite a bit of loot to be had, including some skill books. What more incentive do you need?
First step, of course, is clearing the grounds of Super Mutants. Next, a quick detour. Head south-east from Roosevelt Academy to find a road. Follow it east until you reach a bus. From it, turn north and venture into the Wasteland. Near some trees you’ll find a dock defiantly standing above a dried-up river bed, on and below which you’ll find a bed, two ammo boxes and a Mini-Nuke, amongst other various loot. Drop down into the river bed and explore up its length to the north, north-east, where you should run into “A Wanderer” and their dogs. They’re hostile, so do your thing, then loot them for a unique suit of armor called Wanderer’s Leather Armor .
When you’re done making the Wasteland a little less populated, return to the Roosevelt Academy. There are three places to explore here, Roosevelt Academy, Roosevelt Arts and Athletics Hall, and Roosevelt Library. Let’s explore Roosevelt Academy first. Enter through the northern of the two doors.
5) Radroach Ruse - (Roosevelt Academy)
To the east you’ll find a bathroom with a couple of Radroaches in it. This area will illustrate a Radroaches’ greatest threat at this stage in the game-their threat indicators are, of course, no different from any other foe’s, leaving you to wonder if you’ll run into some Radroaches or Super Mutants around the next corner. Loot the Dead Settler and continue east to find a Nuka-Cola Vending Machine. Now head back west and loot a supply room. Don’t bother going up or down any stairs just yet, instead head south down the locker-lined hallway opposite the door you entered.
6) Clearing the Classrooms
Explore the classrooms to the left, taking care to disarm the trip wire in the door and avoid a Grenade Bouquet. Continue to the south, looting as you go until you come to a large open room. A corpse will fall from a hole in the ceiling as you approach. Welcoming.
7) Nurse’s Office
Book - D.C. Journal of Internal Medicine
To the west you’ll find the Nurse’s office, which has several first aid boxes about, and typical medical equipment like Crutches, Medical Braces, and some drugs. On a desk you’ll find a D.C. Journal of Internal Medicine . You’ll also find a locked safe [Hard] that can be opened by hacking a terminal [Hard].
8) Administration
Book - Pugilism Illustrated
Go east to find the Administration wing. Check out the men’s restroom on this side of the building to find a dead Wastelander, some Cherry Bombs, and a dead Raider, next to which is a copy of Pugilism Illustrated . Loot the desks in the administration office, and search the Headmaster’s office. On the desk is the Headmaster’s Terminal [Very Easy] and a Pre-War Book. All you can really do with the terminal is activate a Protectron, which is pretty much just a waste of time.
9) Roosevelt Academy Stash
Go back up the stairs and through a doorway to the east to find some stairs. Go up them until you’re in a hallway heading west. Go through a door to the right to find more Super Mutant occupied rooms. These rooms have some minor loot, and will eventually wrap around to some stairs down to near where we entered. Head down the hallway west from the stairs, then turn left to find a room which is missing much of its floor. Above you are some Super Mutants, which are easy enough to dispose of which sneak attacks. Sneak around the edge of the room and go through the door on the opposite side. Go up some stairs and across a wooden bridge to find a room with three ammo boxes, two metal boxes, and a locked cabinet [Average].
10) Down and Out
Now drop to the ground floor… not all in one go, mind you, first drop to the level below then drop to the ground level. When you’re back between the administration and nurse’s office head north up the hallway, which will take you back near where you entered the level. From these doors turn west, go through a door to the north, then go down two flights of stairs to reach the Maintenence and Evacuation Tunnel.
11) Dead Folks and Sports Gear - (Maintenence and Evacuation Tunnel)
Go down the tunnel to find a lot of dead folks and sports gear. At a turn in the tunnel will be some refrigerators. Be careful jumping around here, as there’s a grenade bouquet behind the metal drum, and any little bump will knock it loose. Disarm it or set it off and continue on.
12) Split Decision
You’ll arrive in a large room with a pair of metal shelves with some goodies on them. Loot, clear out whatever Super Mutants might be lurking about, then ponder your next move. We can end in two places, depending on which door we take-by going through the door to south we’ll reach the Roosevelt Arts and Athletics Hall, or we can go through the western door to reach Roosevelt Library. Of course, the two paths link up many times, so we might as well just explore this area in entirity before making a choice.
13) The Library Path
Go to the west and through a door [Very Easy] to find a Wasteland Captive. Go south to find a maintenence room with a fence surrounding the center of the room. Go south some more to find a sewer. You’ll only encounter a Radroach in here, but be wary, the place is full of gas and will ignite if you fire off a gun or toss an explosive. If you’re too timid, there’s a Frag Mine near a skeleton opposite the radioactive barrels that’ll do it for you, so be wary. Beyond these sewers you’ll arrive at tunnel with a metal shelf in an alcove. Flip the electrical switch above the metal shelf to open a door at the top of the stairs to the south. Up some stairs to the south you’ll find a door leading to Roosevelt Library.
14) The Middle Ground
Book - Pugilism Illustrated
Backtrack to the sewers by heading north to find a locked door [Average] just south of some radioactive barrels. Unlock the door and head inside. Loot the metal shelf nearby to find a copy of Pugilism Illustrated . If you head north you’ll eventually loop around to the first room we entered in the level, if you head north, then east you’ll find an alternate way to reach the same area you’d reach if you just head east.
15) The Arts and Athletic Hall Path
Go east up some stairs then take a right to find an alcove with a metal shelf full of goodies. Continue east and take another right to find some stairs down terminating at a locked door [Very Easy]. You’ll find another Wasteland Captive behind the door. Now continue to the east to find the door to Roosevelt Arts and Athletics Hall. Whether you want to explore the Roosevelt Library or Roosevelt Arts and Athletics Hall first is entirely up to your preference.
16) Let’s All Go to the Lobby… - (Roosevelt Arts and Athletics Hall)
Head up the stairs and go down the hallway to the west, searching both the rooms on the right for, among other minor treasures, a Pre-War Book. Ignore the first door on the left and continue to the end of the hallway, entering the second door on the left. Go down the hallway to the south, again ignoring the first door on the left, but searching the second to find a closet with some drugs inside. When the hallway ends head left to reach a lobby.
17) The Call of the Stage
Sheet Music Book
There are two curved desks occupying the middle of the lobby, and doors leading to bathrooms, stairs up to the east, a door leading to the Capital Wasteland, and doors to the north leading to an auditorium. Search the bathrooms and lobby and ignore the stairs, heading into the auditorium instead. Grab the Sheet Music Book on the floor of the stage near some music stands and head through a door to the north to return to the first tunnel we explored.
18) Sweeping the Upper Levels
Book - Tumblers Today
Go up the stairs to the north, following them up several flights until you come to a room leading west. Go through the western-most door to the south to find a small office room with two desks with a fair bit of loot around. Loot the first aid box and the wall safe [Easy] behind the one desk before heading east into a larger room with a more suspect floor. Navigate across the holey floor to find another office room to the west on the southern side of the room. Loot the first aid box, ammo boxes, the wall safe [Average], and grab the copy of Tumblers Today on the desk behind the ammo boxes before heading into the hallway to the south. Whichever staircase to the south you go down really doesn’t matter, as they’ll both take you to a fairly empty room above the lobby. Head back to the Maintenence and Evacuation Tunnel and enter the Roosevelt Library.
19) Lootin’ the Library - (Roosevelt Library)
Roosevelt Libary is a smaller area than the previous three locations, guarded by a single Super Mutant on high ground. In a bathroom to the south you’ll find a Stealth Boy on the floor near a toilet. In the central room you’ll find a desk on the ground floor with several ammo boxes near it, a Nuka-Cola Quantum and a Stealth Boy on top, a first aid box, and a wall safe [Very Easy] behind it. Also grab the Sawed-Off Shotgun from the desk. Upstairs the Super Mutant will have a key unlocking the front door, sparing you the trouble of heading back through the Maintenence and Evacuation Tunnel. We’re now done with the Roosevelt Academy. Head south, south-east to find the MDPL Mass Relay Station.
20) MDPL Mass Relay Station
Book - Guns and Bullets
Approach the MDPL Mass Relay Station from the cliffs to the north and pick the Raiders off at your leisure, as the rocks give you ample cover and they’re rather unlikely to find their way up to you. Loot the dwellings they’ve built on top of the Power Station for some minor loot before heading inside. Head north through a door and smite any Raiders you find, one of which will have a Flamer and wear the unique Raider Arclite Helmet Torcher’s Mask , which is a fine item for people who like fires and things that go boom. On the table by the door you’ll find a copy of Guns and Bullets , as well as a 10mm Pistol and 10mm Rounds. Loot the gun cabinets, footlockers and grab all the other random loot around. There’s also a terminal [Very Hard] that unlocks a safe [Very Hard], which we’ll just have to come back for. Inside of my safe was a single Nuka-Cola Quantum. Wow…
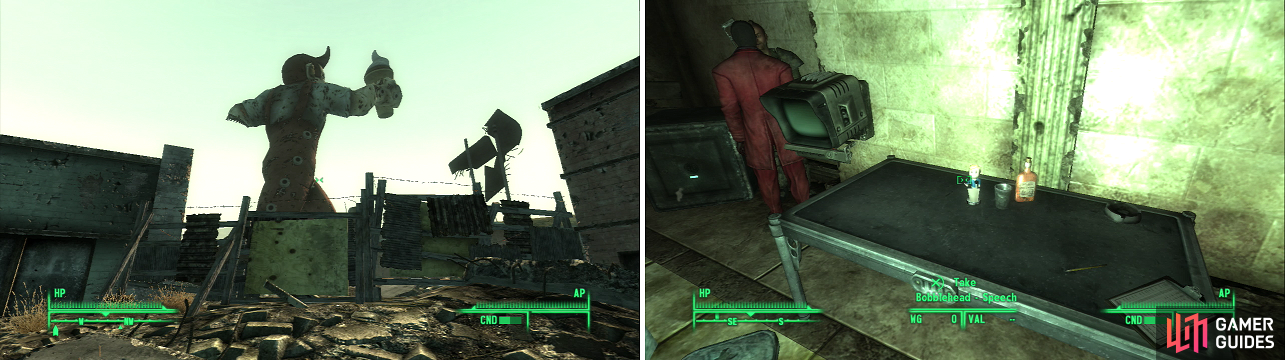
This iconic statue (left) is a convenient, if misleading landmark for Paradise Falls. In Eulogy’s Pad you’ll find the Bobblehead - Speech (right).
21) Bad is Good and Good is Bad - (Paradise Falls)
From the MDPL Mass Relay Station head north-east. We’ll be covering a bit of distance-through the area occupied by “A Wanderer” and onward until you find Paradise Falls. You should spot the giant, one-armed, ice cream cone-wielding statue as you approach. When you get near a Slaver named Grouse will stop you. If your karma is evil you can make a karma check to get into Paradise Falls. If you’re good or neutral, you’ll have to succeed at a Speech challenge to bribe Grouse with 500 Caps. Failing that, you can always do a job for him and capture a VIP slave to get in.
Either way, if you talk to Grouse he’ll try and get you to help him with his job and capture some specific slaves. If you accept he’ll give you the Mesmetron , and tell you how to catch slaves with it. This starts the quest “Strictly Business” , **** which will be discussed in the next step.
On the ground near where Grouse usually sits is a Holotape with information pertaining to “The Replicated Man” quest. Note that once the quest “The Replicated Man” is started you’ll eventually be approached by a woman named Victoria Watts, who is trying to help liberate enslaved Androids. She’ll give you a component of the andriod and tell you to show it to the people looking for it, and say that it was killed. This is in every way less profitable than actually doing the work and completing the quest.
22) Strictly Business
To complete the quest “Strictly Business” you’ll have to enslave Red (Big Town), Flak (Rivet City), Susan Lancaster (Tenpenny Tower), and Arkansas (Minefield). To get Red back you need to complete the quest “Big Trouble in Big Town” , first… or at least find Red in Germantown Police HQ. When trying to capture somebody, you have to make sure nobody else is in sight (“mezzing” somebody will naturally make nearby NPCs hostile, and in a place like Rivet City or Tenpenny Tower that can really suck), so be sneaky and try to get them alone. Once the situation is ideal, shoot them with the Mesmetron , which works like any other gun: you aim and fire, and when the target is “mezzed” talk to them and get them to put a collar on. If you need to buy more ammo it’ll cost you 200 Caps for 10 rounds, and Grouse is only too happy to take your money. Once you’ve captured a target, return to Grouse for another slave collar. Once you’ve caught them all, this quest is complete.
You’ll be doing this quest on your own time, ideally starting after finishing “Big Trouble in Big Town” , and progressing as you see fit. After capturing the targets, you can return to Paradise Falls and free them. You’ll need to disarm their collars (which requires a pretty high Explosives skill), and clearly this won’t make the Slavers at Paradise Falls happy, so don’t plan on doing any of this any time soon. If you want to complete the quest, say, for the achievement/trophy, but don’t want to deal with the potential fallout that comes with enslaving some of these folks, just make a hard save, enslave them all, don’t worry about collateral damage, get your reward, and reload.


23) Lock and Load - (Paradise Falls)
Head up to Paradise Falls and a slave named Carter will run by. His escape attempt is short-lived however, as you’ll see. Continue up into Paradise Falls and go east into “Lock and Load”. Go talk to Pronto and offer to get him twenty Chinese Assault Rifles. It sounds like an expensive proposition, and it is, but you can bring him any piece of crap Chinese Assault Rifle, regardless of the condition. It’ll give him a much better inventory, and more Caps to trade with if you follow through.
24) Slaver Barracks
Next head into the Slaver Barracks, which has plenty of stuff to steal. Who cares about stealing from Slavers anyways? You don’t even lose karma for it. On a shelf on the bottom floor is a note “Burn this Goddamn Jumpsuit”, and next to it is a Vault 77 Jumpsuit. Might as well make them yours.
25) Sammy’s Scheme
Go over to the bar to see a man in metal armor named Ymir kill a bartender named Frank. Back over by Eulogy’s Pad you can find a unique Pool Cue on a pool table named The Break . Grab it and head south to the slave pens. Talk to a boy named Sammy, who will try to orchestrate a break out with you. If you get him to tell you a plan, he’ll get his friend Squirrel, who will tell you that you need to connect their computer to the Paradise Falls secure network. There are other ways to complete this quest, but since they involve buying the kids or stealing the key and killing every Slaver in the city, we’d probably better just do it their way.
26) Eulogy’s Pad
Bobblehead - Speech
NPC - Clover
Head north-east to Eulogy’s Pad. Don’t be afraid to rob him blind… he’s not a nice guy, anyways. Be sure to grab Eulogy Jones’ Hat which is in a cubby west of his bed, the Holotape on the table in the south-eastern corner, and of course, the Bobblehead - Speech . The Holotape is one way to start the quest “The Replicated Man” , which we’ll get to when we explore Rivet City. Grab the loot out of his safe [Average] including the Stealth Boy. Also, behind the staircase you’ll find a treasure trove of Nuka-Cola Quantum for the stealing.
When you’re done looting, talk to Eulogy Jones. If you have evil karma you can try to buy Clover off of him for 1000 Caps. She’s probably not worth the asking price, but it’s up to you. If you’re really looking to be bad you can talk to him about getting a kid from Little Lamplight as a slave. Lastly, you can offer to buy the kids from Little Lamplight off of him, but it’ll cost you 2000 Caps to do so. You can make a Speech check to lower the price to 1200 Caps… but you can just break them out for free, so why bother? Hack the Paradise Falls Main Terminal and Update Network Connections before heading back to the slaves.
27) Liberation!
Go talk to Squirrel to get the next part of the plan. You’re going to have to lure Forty away from the pens in order for the kids to make a break for it. Find Forty and talk to him. If you succeed at a Speech check you can get him to go bother Eulogy about a raise. While he’s gone go talk to Squirrel again. He’ll tell you that they’re all ready to leave… once you convince Penny to go.
If you succeed at a fairly difficult Speech challenge you can convince them to leave Penny behind. If not, ask what needs to be done. Apparently Penny wants to know that a friend named Rory is safe before she’ll go. Sammy and Squirrel take off, leaving you to deal with Penny. Again, if you succeed at a Speech challenge she’ll forget about Rory. If you can’t get her to go, you’ll have to steal a Paradise Falls Box Key from either Forty or Eulogy… or you can grab the Paradise Falls Box Key from the table near Eulogy’s bed. If you let Rory go, he’s pretty much toast unless you kill every Slaver first. Whether he lives or dies Penny’ll leave. Go meet them outside of Paradise Falls for your quest reward.

28) The End of the Hunt
Now we have a good number of Bobbleheads, it’s time to return back to Megaton and continue on with the Wasteland Survival Guide. We could go grab the Bobblehead - Barter from Evergreen Mills, but it’s a bit involved, as there are a lot of Raiders that need killing and a special encounter with a Super Mutant that isn’t for the faint of heart… In any event, the Great Bobblehead Hunt is finally over.
No Comments