
1) Decompression Chamber
Once inside you’ll find a “Switch” in front of you. Make sure your Spacesuit is equipped before you activate it, or your head will explode. No joke. Continue through the door to the west to find some dead Aliens. Evidence of our Samurai friend, or merely victims of decompression? Continue through the level looting dead Aliens and containers as you go. When you find a door leading to the “Space Walk” turn south, activate some “Door Controls” and loot the room beyond, which contains two… containers. Now exit to the Space Walk.
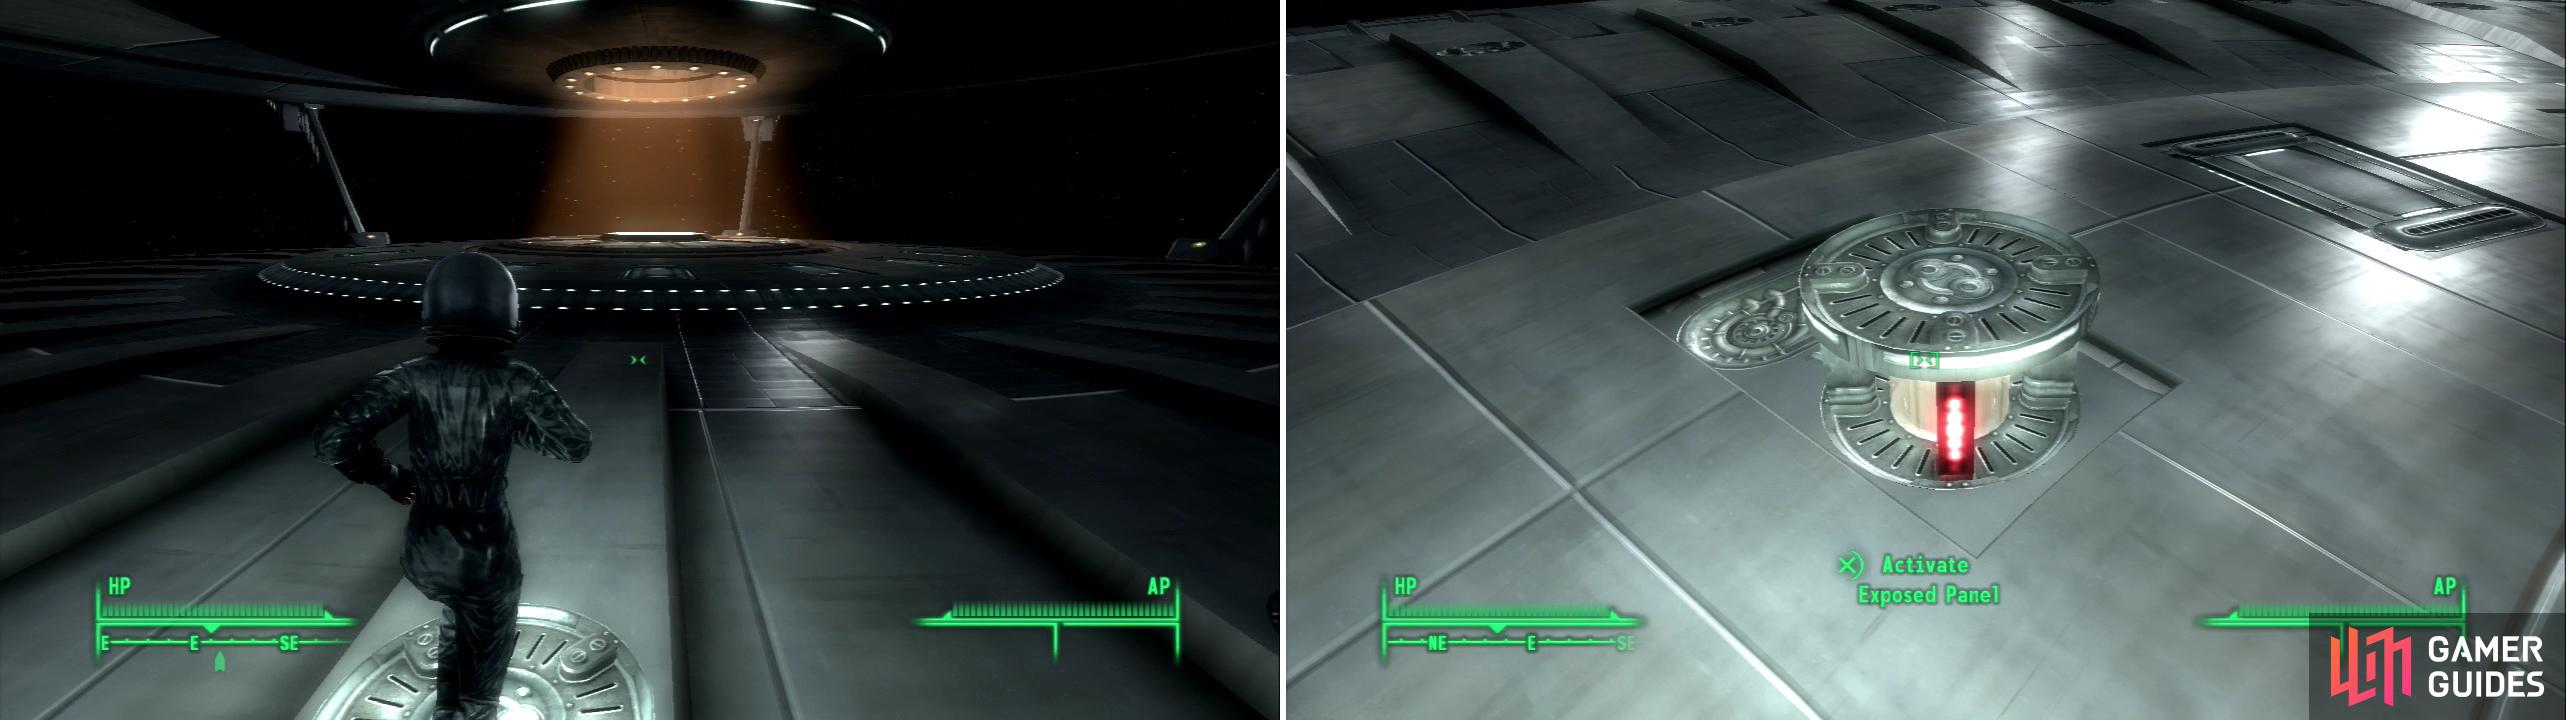
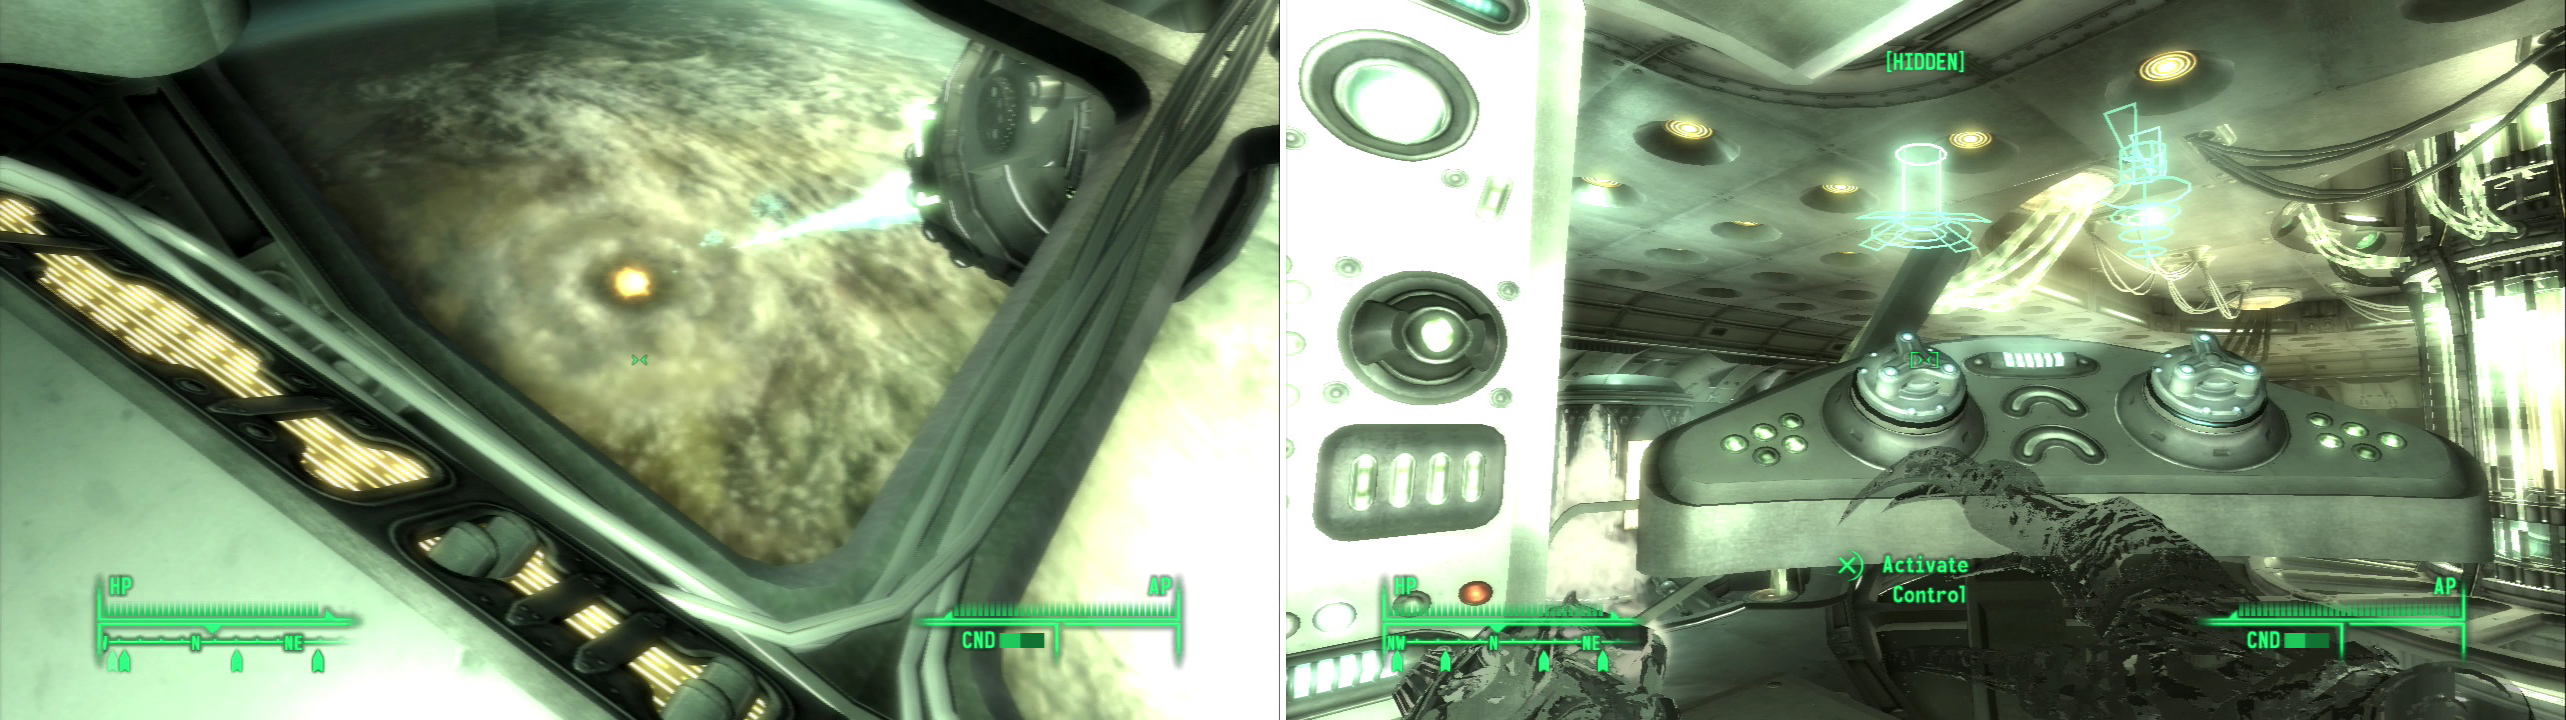
To advance through the alien ship you’ll have to take a little walk… in space! (left) Activate several “exposed panels” to activate a teleporter (right).
2) Space Walk
Ah, space… What else can possibly happen to this character? Anyways, there are three “Exposed Panels” you need to activate to get the teleporter in the middle of the level to work. Don’t try to head back to the Decompression Chamber or jump off the edge of the ship and you’ll be fine-and ignore the aliens running around below you, they are as powerless to hurt you as you are to hurt them. Once all three are activated the teleporter powers up. Stand in it to warp to the Observation Deck, and complete the quest “Among the Stars” .


3) Observation Deck
Activate the “Switch” to return to normal pressure. Then proceed through the door to the north, loot two containers, and activate the “Control” to bring the Teleportation Matrix online and allow your buddies to teleport in. This also allows you to teleport back to the Engineering Core, which is a good thing. Sally will open the door to the west, allowing you to proceed into a room with an observation window on the floor… Which is why this is the… Observation Deck?
4) The Death Ray Display
Sally will go crawl off to open another door, and the hologram of an angry Alien appears over the observation window. The Aliens will shoot a Death Ray near the Earth to try and scare you. Unfortunately for them, we beat them to the punch and already destroyed our own planet. Suck it, Aliens! After the display Somah will chat with you and give you your next mission-to deactivate the alien Death Ray. After the chatter is done continue to the west until you reach another deactivated Teleporation Matrix. Again, it’s up to you to turn it back on so the group can penetrate deeper into the ship. Your brave companions will wait here and let you explore on your own.
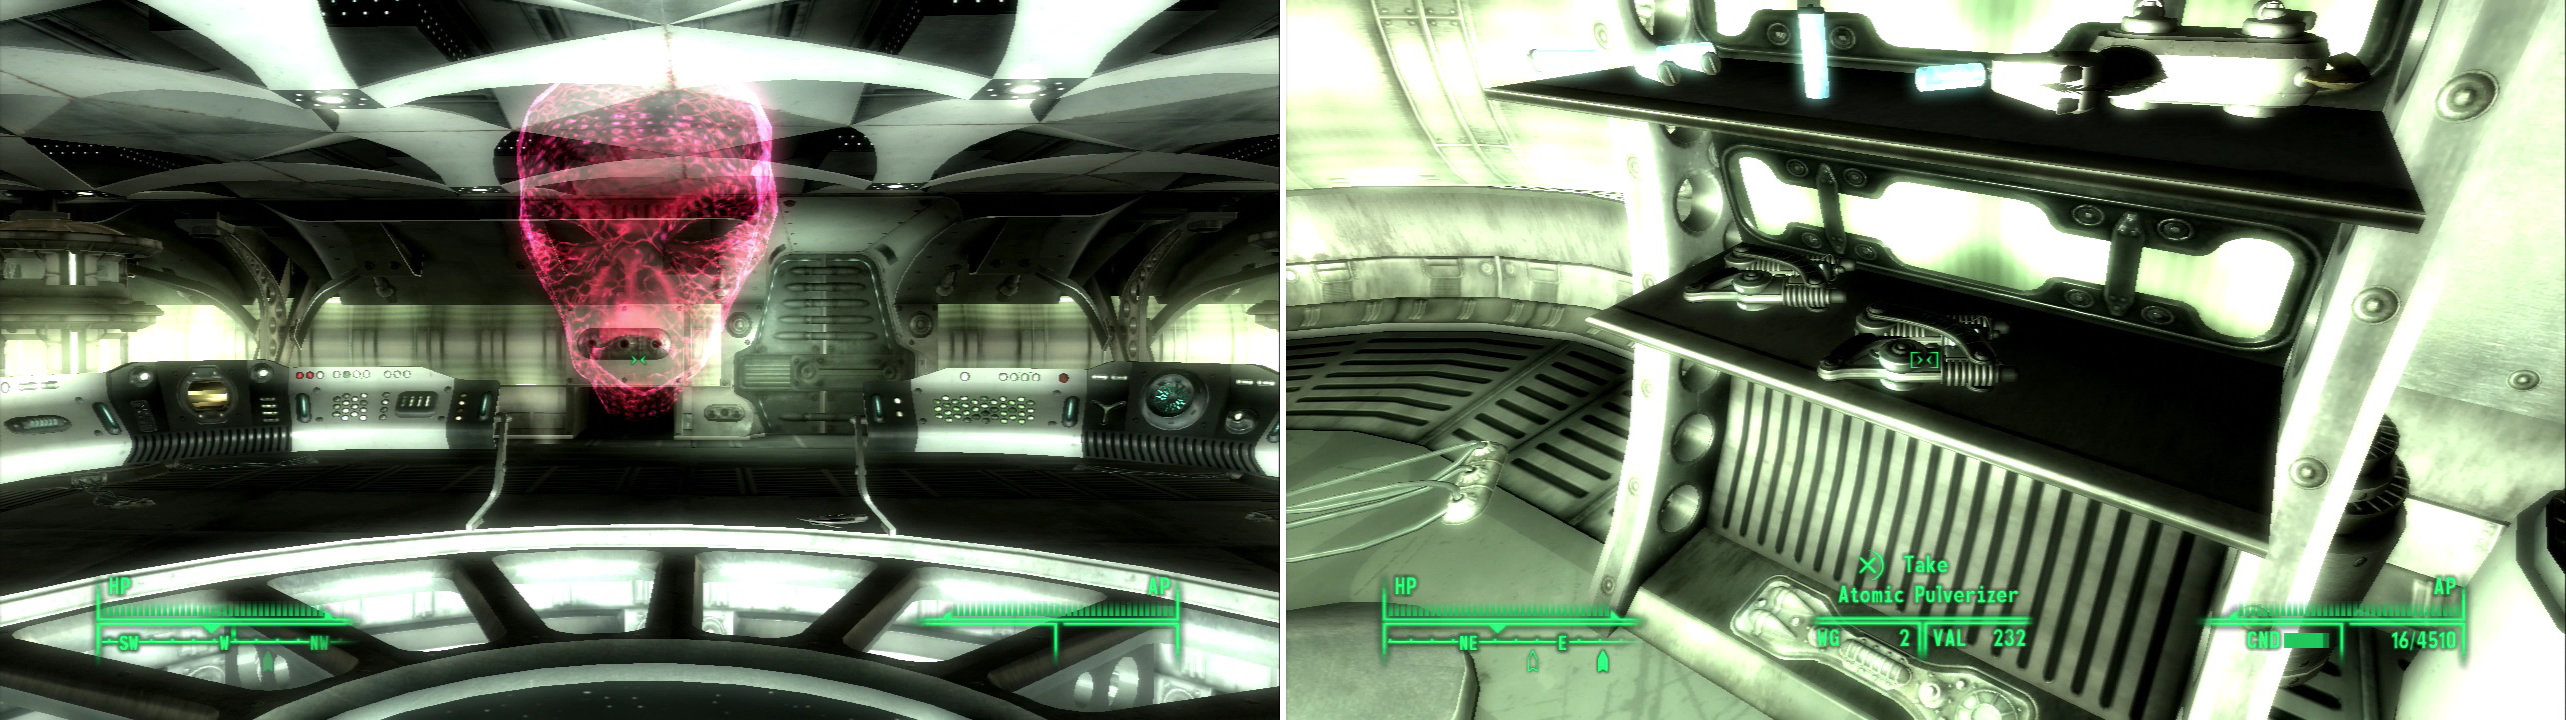
A disembodied alien shows up to issue some idle threats (left). Little does he know, we already destroyed our own planet! The Alien Pulverizer is a significant upgrade over the standard alien sidearm (right).
5) Atomic Pulverizer
Well, at least this area sounds promising, right? Where else would you expect to find super awesome prototype alien guns save the Weapons Lab? Continue to the west to reach a room, then turn south. As you go, a Guardian Drone and an Alien will appear in the two teleporter rooms to the north. Kill them and loot the containers and shelves in this room. There’s also a “Control” you can activate to deal with the Turret near the entrance to this room. As the way south is blocked by a force door, head into a tunnel to the west instead. Activate the “Control” on the wall near the door to the north to get access to this room, which contains a dormant Guardian Drone, a container, some Epoxy, Alien Biogel, Alien Power Modules, Alien Power Cells, another Buttercup Toy, an Alien Atomizer, and the unique Atomic Pulverizer .
6) Easy Back-cess
Head back out into the hallway and continue west, then turn north, killing anything you come across until you come to a T-shaped intersection. Follow the new tunnel north, then east, up some stairs, then back around to the south. When you reach a split in the path head east to reach a room with an Alien, a Healing Arch, and a “Control” which drops a force door below you. You now have easy access back to the beginning of the level.
7) Drone Cannon Ex-B
Go down some stairs to the south, where more enemies have erroneously though it would be a good idea to teleport. Kill them, loot the containers, and continue through a doorway to the east, then down a short tunnel to the south to reach a large, multi-storied room. Go up some stairs to the east to reach the upper level, kill a pair of Aliens, and head through a doorway to the south and down a short tunnel (make sure to loot the containers on the upper and lower level, first!) You’re now in the actual weapons lab part of the Weapons Lab. Along the western wall are three “Controls”. The one near the door opens the door (surprise) and each of the others activates an “Experimental Weapons Drone” and summons some Brahmin for them to shoot at. Once the display is over, deactivate the Drones and kill them for their unique Drone Cannons; Drone Cannon Ex-B .
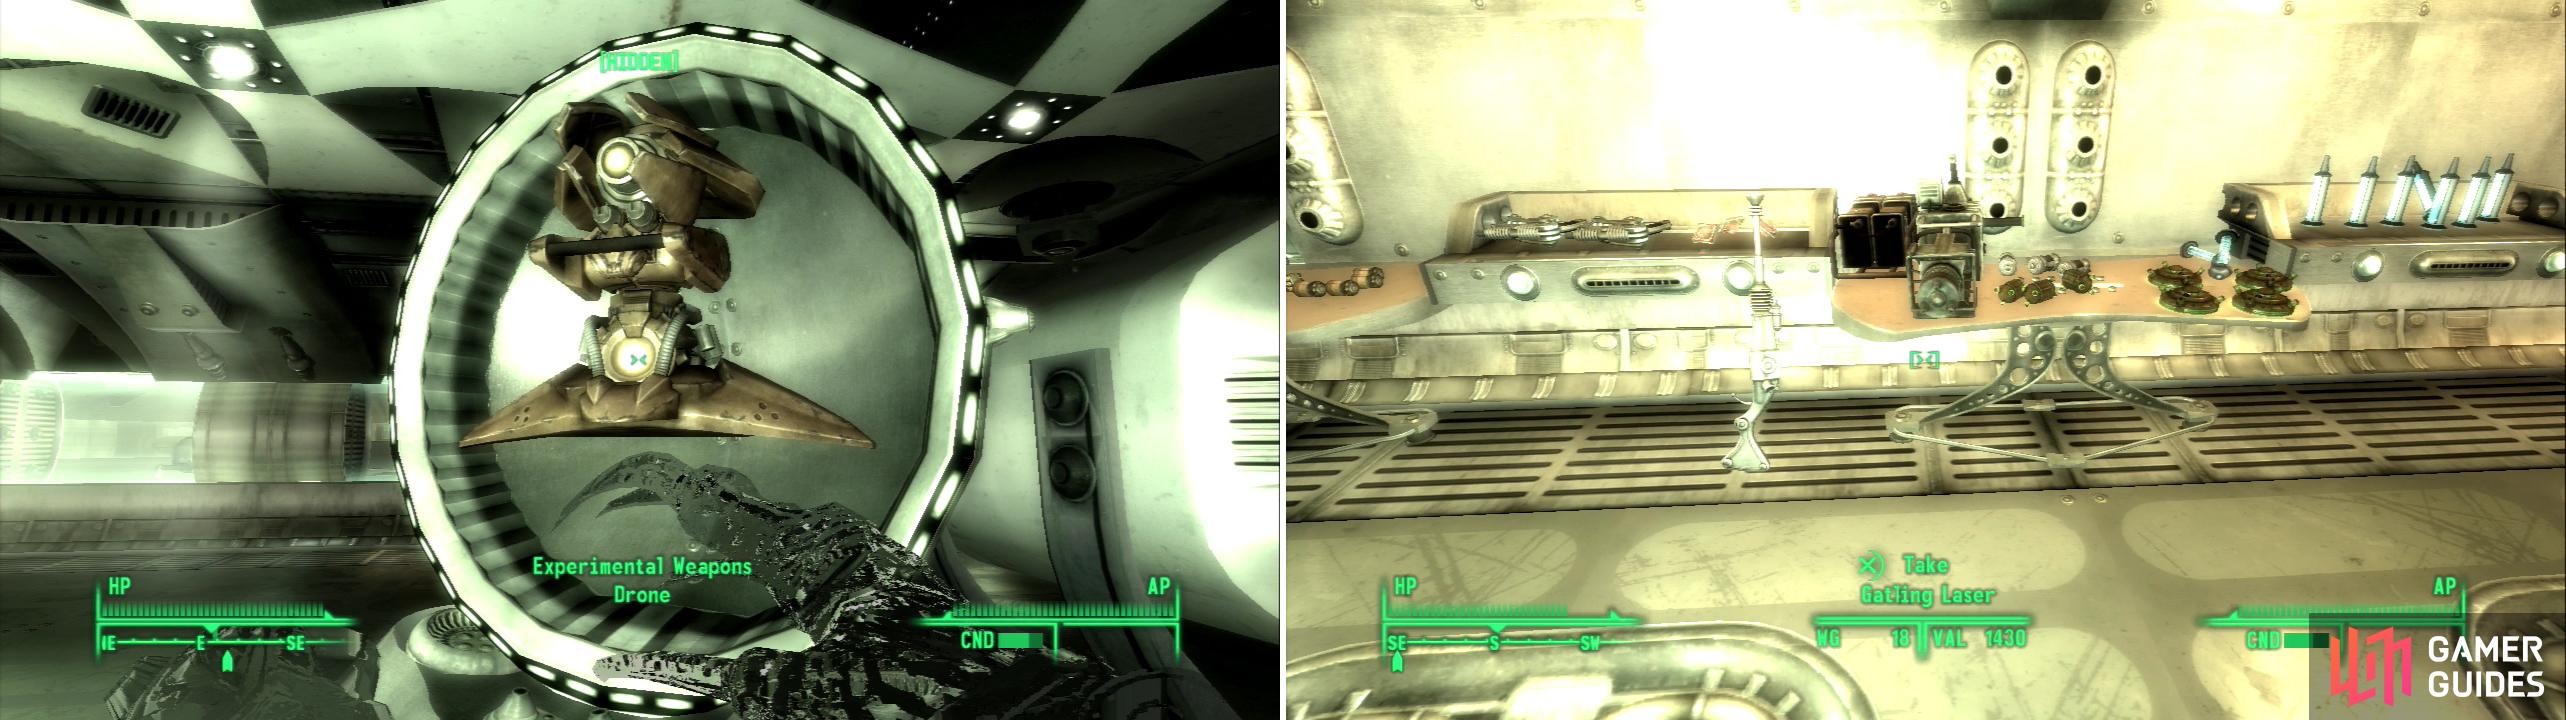
Destroy the Experimental Weapons Drone to get your hands on the Drone Cannon Ex-B (left). Behold! A mighty stash of loot! (right)
8) Loot, Stash, Loot, Stash
Alien Captive Recorded Log #24
Explore the eastern half of this lab, where you can find a “Control” you can activate which will get you Alien Captive Recorded Log #24 , as well as some shelves to the south which hold Alien Power Cells, an Alien Atomizer, Frag Mines, Combat Armor, Tesla Armor, Alien Epoxy, Plasma Mines, Plasma Grenades, Alien Biogel, Pulse Mines, Pulse Grenades, a Gatling Laser, Large Alien Crystals, two more Alien Atomizers, Microfusion Cells, Energy Cells, a Plasma Rifle, a Plasma Pistol, and Metal Armor. After that, it’s just about time to go back and stash more loot! The southern side of this lab also has an Alien and an Alien Worker hanging out, as well as a Guardian Drone in stasis.
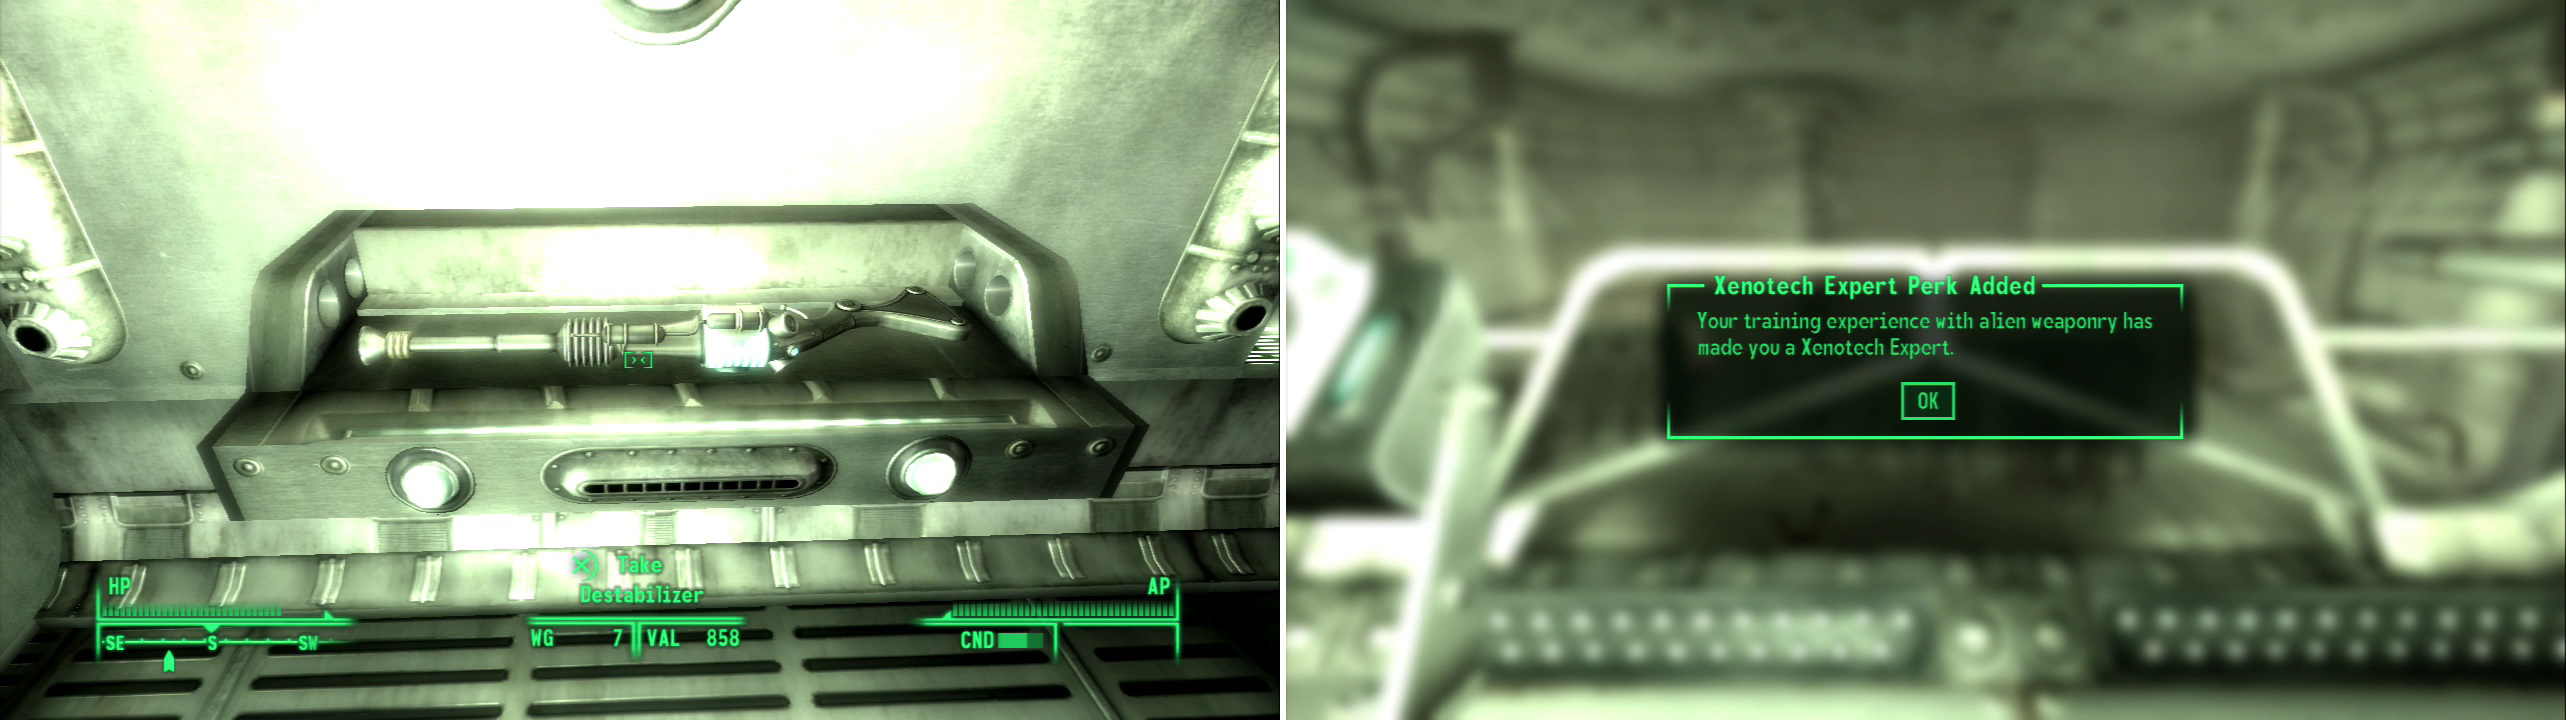
Grab the Destablizer-an improved Alien Disintegrator (left), then summon critters from earth and indulge in some target practice with Alien weapon to earn the Xenotech Expert Perk (right).
9) Xenotech Expert
Head through a doorway to the north to find a firing range. Yay! Grab the unique Alien Disintegrator, the Destabilizer off a shelf and loot the container to the north. As for the ranges, there are two “Controls” you can activate to warp in targets. The southern one will warp in up to three Brahmin, and the Teleportation Matrix nearby will take you down to the Brahmin. Sneak up to the northern “Control” and activate it to gate in some Raiders and a random high-powered enemy like an Albino Radscorpion, Deathclaw, or Sentry Bot. Let them kill each other, and when things die down, press the button again. After enough enemies have killed each other you’ll get the Xenotech Expert perk. Of course, you can kill the enemies below as the game probably assumes you’ll do, but why waste ammo? When you’re done, head back to the lab to the south, then go through a door to the east, up some stairs, and through a door leading to the Experimentation Lab.
10) Experimentation Lab
Alien Captive Recorded Log #20
Upon entering this level wait for a moment and a pair of Alien Workers should enter the area you’re in. Kill them and continue through a doorway to the west, then head into a room to the north. Continue north past a gore-covered table (which also has a suit of Combat Armor on it) and smite an Alien near some rather invasive-looking recliners. Search the room for a pair of containers and a “Control” you can activate to obtain the Alien Captive Recorded Log #20 .
11) Abominations on the Loose
Alien Captive Recorded Log #10
Head back south into the room with the grisly table and go through a door to the west. Continue down a hallway with four doors-the first three of which each leading to a room with modest alien loot on the tables and shelves. The second doorway to the right leads to a larger observation room. In the middle is a generator, to the south are windows that face a surgical room where a number of strange critters are being operated on by an Alien Worker, and to the west is a doorway blocked by a force field. Loot the containers, activate the “Control” along the northern wall to get Alien Captive Recorded Log #10 , and finally blow the generator to take down the force field blocking the doorway to the west. This also unfortunately frees the Abominations in the surgical room to the south.
12) Human-Alien Hybrids
Alien Captive Recorded Log #9
Head through the doorway to the west, turn south, then head through a doorway to the east and kill the Abominations in the surgical room any way you see fit. Loot the two containers and activate the “Control” to get Alien Captive Recorded Log #9 . Now only two left. Listen to it to confirm the fairly obvious, that the Abominations seem to be human-alien hybrids-and head back west until you find your way to the Biological Research area.
13) Biological Research
Alien Captive Recorded Log #18
Activate the “Control” to the west to gain access to the adjacent room to the north, where you can score some Alien Epoxy. Return back to the hallway and continue through a doorway to the west to discover the large room that makes up the majority of this level, and into which many of the Abominations from the last level ran. Clean up whatever Abominations and Aliens are left and loot, as there’s plenty of good alien crap lying around. There are multiple sets of stairs that lead to an elevated part of the area. Once you’re up here you can head north you’ll pass a Healing Arch, further north of which is a depression, in which is a “Control” that will get you Alien Captive Recorded Log #18 .
14) A Trio of Teleporters
Return south, past the Healing Arch and cross a bridge to reach a room with several Aliens inside… at least, if the Abominations didn’t get them already. Slay whatever xeno-freaks you spot, then head south-west to find a doorway blocked by a force field. Activate a “Control” to take it down, then proceed west to find a trio of Teleporation Matrixes, one which leads to the “Death Ray Hub” area. The other two are inactive-leading back to the Observation Deck, and to the Bridge. Hit the nearby “Control”’ to bring the Observation Deck online. Your buddies will waste little time teleporting in. As usual, they’ll elect you to explore the Death Ray Hub. Loot the lower level for some Alien Epoxy and Alien Power Cells, then go stash your loot before heading on into the Teleporation Matrix.
15) Death Ray Hub
Once you’re here, the Teleportation Matrix you came through malfunctions. Typical. Guess we’ll just have to find a new way back. Good thing you stashed your loot so you could carry all the spoils of war you’re about to collect, right? Go east to find a pair of Alien Workers. In the rooms to the north-west-and south-west you’ll find a container and a deactivated Support Drone. If you realign the sensors and reactivate the robot, you’ll get a rather weak buddy. Better than nothing though, right? Eh…
16) To Death Ray Control
Continue through the door to the south and into a hallway, where you’l find a “Control” to the left that opens a door. In the room beyond are two containers and some other useful alien loot. Head back into the hallway and continue south, then east into a room, through a door to the north and into another, larger room. Inside are several Aliens, some Alien Workers, and a Turret. There’s also a “Control” you can use to mess with the Turret. Kill the Aliens and head to the eastern side of the room, where you will find some stairs down. Go down the stairs and through some doors to the east until you come to a room with force fields blocking your way eastward.
17) Through the Force Field
Activate a “Release Mechanism” to take them down and continue through, doown a tunnel to the south, then east south again down a rather long tunnel. Go right (north-west) when you can, down some stairs, then through a door to the left to find some more Aliens, a Healing Arch, and a container. Exit out a door to the north-west, then head down some stairs to the south-west finally turning north-west again and down some more stairs to find a door leading to the “Death Ray Control” area.
The alien death ray lives up to its name (left). Manipulate the controls to sabotage the death ray (right).
18) Sabotaging the Death Ray
From the entrance head north-west down some stairs, then turn north-east to reach the large that makes up this majority of this level. Kill the Aliens within, then loot the container by the door. Near the door through which you entered this room from are two control consoles. The two “Controls” on the right move the Death Ray, and the “Control” on the left with the beam fires. It’s possible to change the Death Ray’s aim to fire on good ‘ol Earth, which is just fun. When you’re done messing around activate the “Control” left of the “Control” that fires the Death Ray (you can tell what they do by the little holograms above them-activate the one that looks like the coolant rod rising form the ground.) Activate it four times to get all four generators to open up, then destroy them all. Some aliens will show up to try and spoil your fun while you sabotage their Death Ray, but they don’t make ’em big enough or mean enough to stop us. Once the aliens are dead and the Death Ray has been disrupted head through the doorway near where you entered this room (which was blocked by a force field) to find a Teleportation Matrix to the Living Quarters.
19) Smiting Smug Force Projectors
We’re almost done now! Head into some tunnels to the east, then south until you run into a force projector. Watch as an Abomination chases off an Alien and the projector will turn off. Kill the Turret above the projector, loot a container, and head southward up some stairs. You’ll come to a multi-storied room where some Aliens have blocked off the upper platforms with some more force projectors. Loot a room to the west, then jump down to the lower level and kill everything. Blow up the force projectors too, for being all smug and in the way! Just be sure to stand back, as they explode rather… vigorously. Once done, loot another room on the upper level to the west. If you need a Healing Arch, there’s one on the lower level… also to the west. The rest of the rooms are rather boring, though.
Our wayward samurai has been busy (left) storm the bridge and engage the captain (right).
20) The Samurai’s Revenge!
Head through either of the two doors to the south, go down some stairs, and go through another door to the east. Kill two Aliens and blow up another force projector blocking your way. Continue past the force projector and down a tunnel until it splits, upon which head north. You’ll find a dead Alien in the tunnel and in a room at the end of the tunnel will be your missing samurai, Toshiro Kago. And he’s been busy. How the hell did he make it here and past all the Aliens? It just goes to show, one samurai is worth a cowboy, a medic, an astronaut, an ancient kid, a wastelander, and a vault dweller any day of the week.
21) The Final Captive Log
Alien Captive Recorded Log #23
Head back to the stairs leading to the living quarters and continue west. Kill some Aliens, deal with a deactivated Support Drone, and destroy a pair of Turrets before continuing through a door the west. In the room beyond you’ll find three more Turrets, which largely just serve to blow up and knock the loot lying on the tables around. Loot the room and activate the Control to obtain Alien Captive Recorded Log #23 , and an achievement/trophy.

22) Time to Meet the Captain
Continue through a doorway to the north to reach another room with some Aliens and a Turret guarding a container. Go through yet another doorway to the east to reach the far side of the force projector that blocked our way north earlier. Kill the Aliens nearby and blow up the force projector for spite before continuing north up some stairs. In the room at the top of the stairs are two Turrets, and beyond this room to the west is another multi-leveled room. Kill the Abominations, loot the Aliens, and head upstairs. To the east is a room with some loot, and to the west you’ll find the Teleportation Matrix leading to the Bridge. It’s time to meet the Captain of this ship.
23) The Bridge
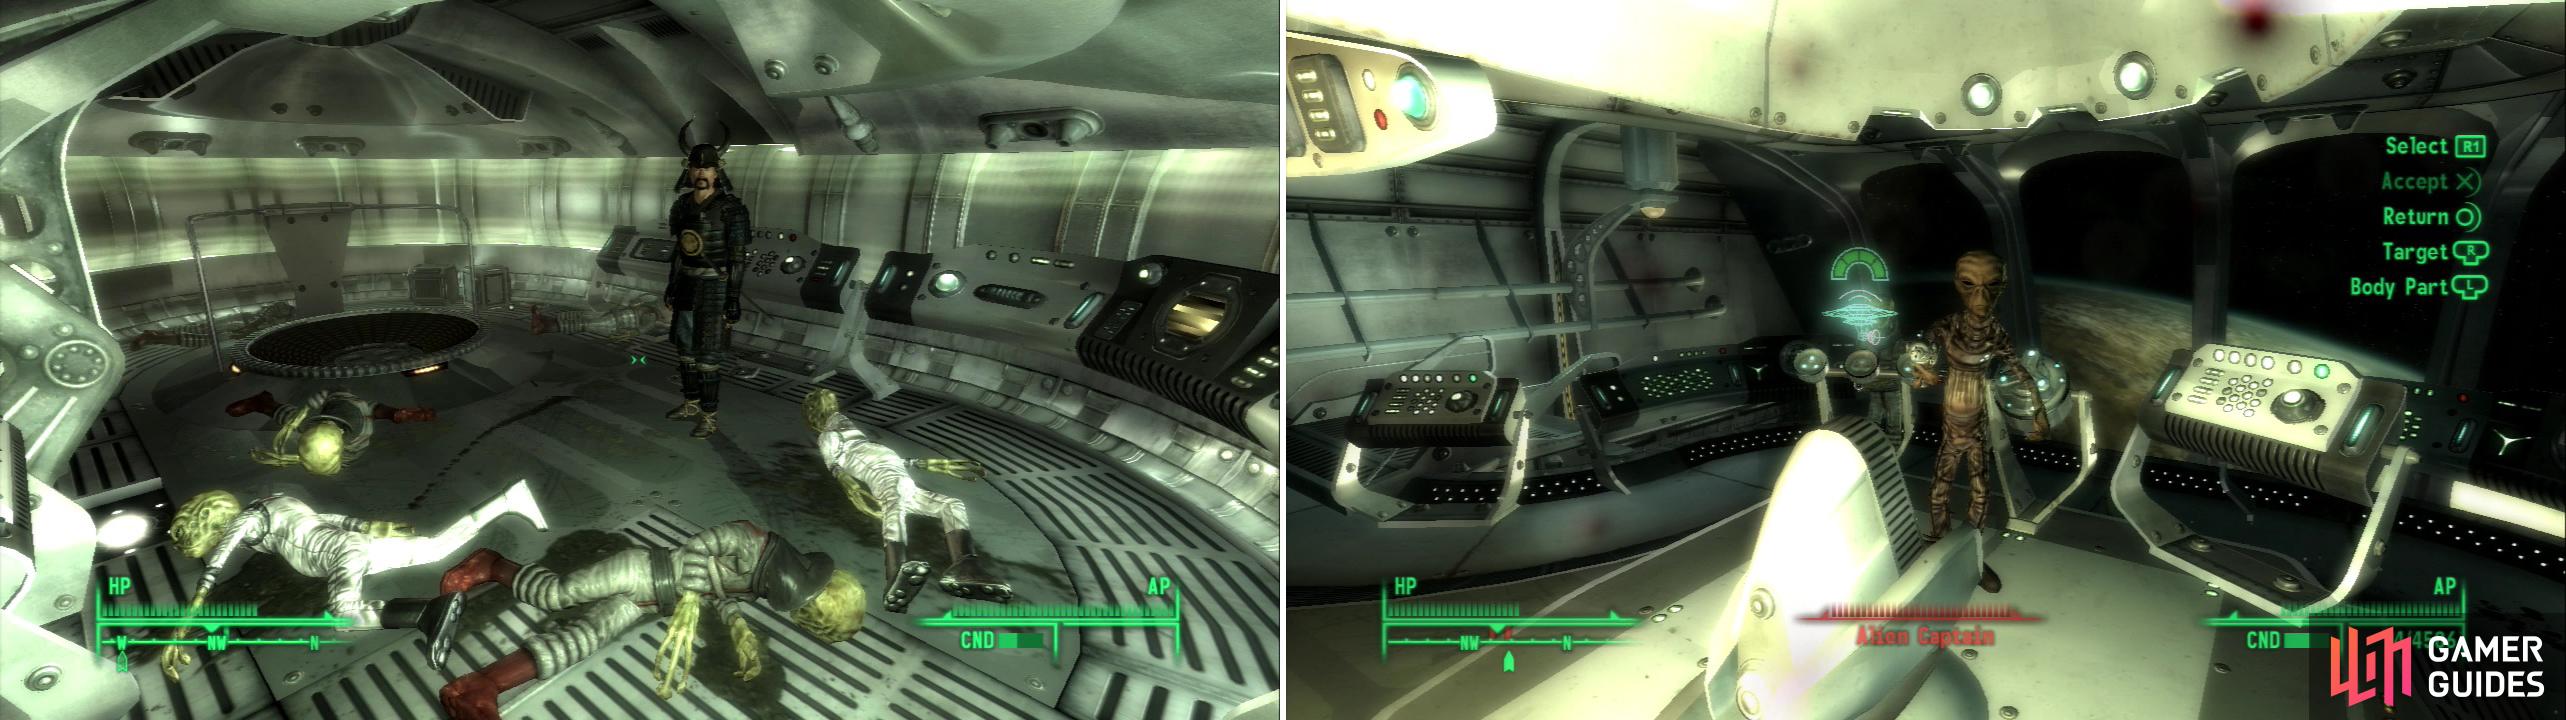
Once on the Bridge head through the doorway to the north to enter a room crawling with Aliens, including the Captain. If you’re a sneaker like me, you can just kill them all with the Deathclaw Gauntlet . Kill the Alien Captain and loot his body for the Captain’s Sidearm . Once he’s dead your big floating holographic alien friend will show up again and yell some gibberish. Some Aliens will show up to avenge their Captain, and when they fail your buddies will show up.
Take control of the ship, raising the shields and firing as necessary (left). Against all odds, you and your untrained crew win the shootout with the alien ship, proving that you’re the baddest being in the solar system (right).
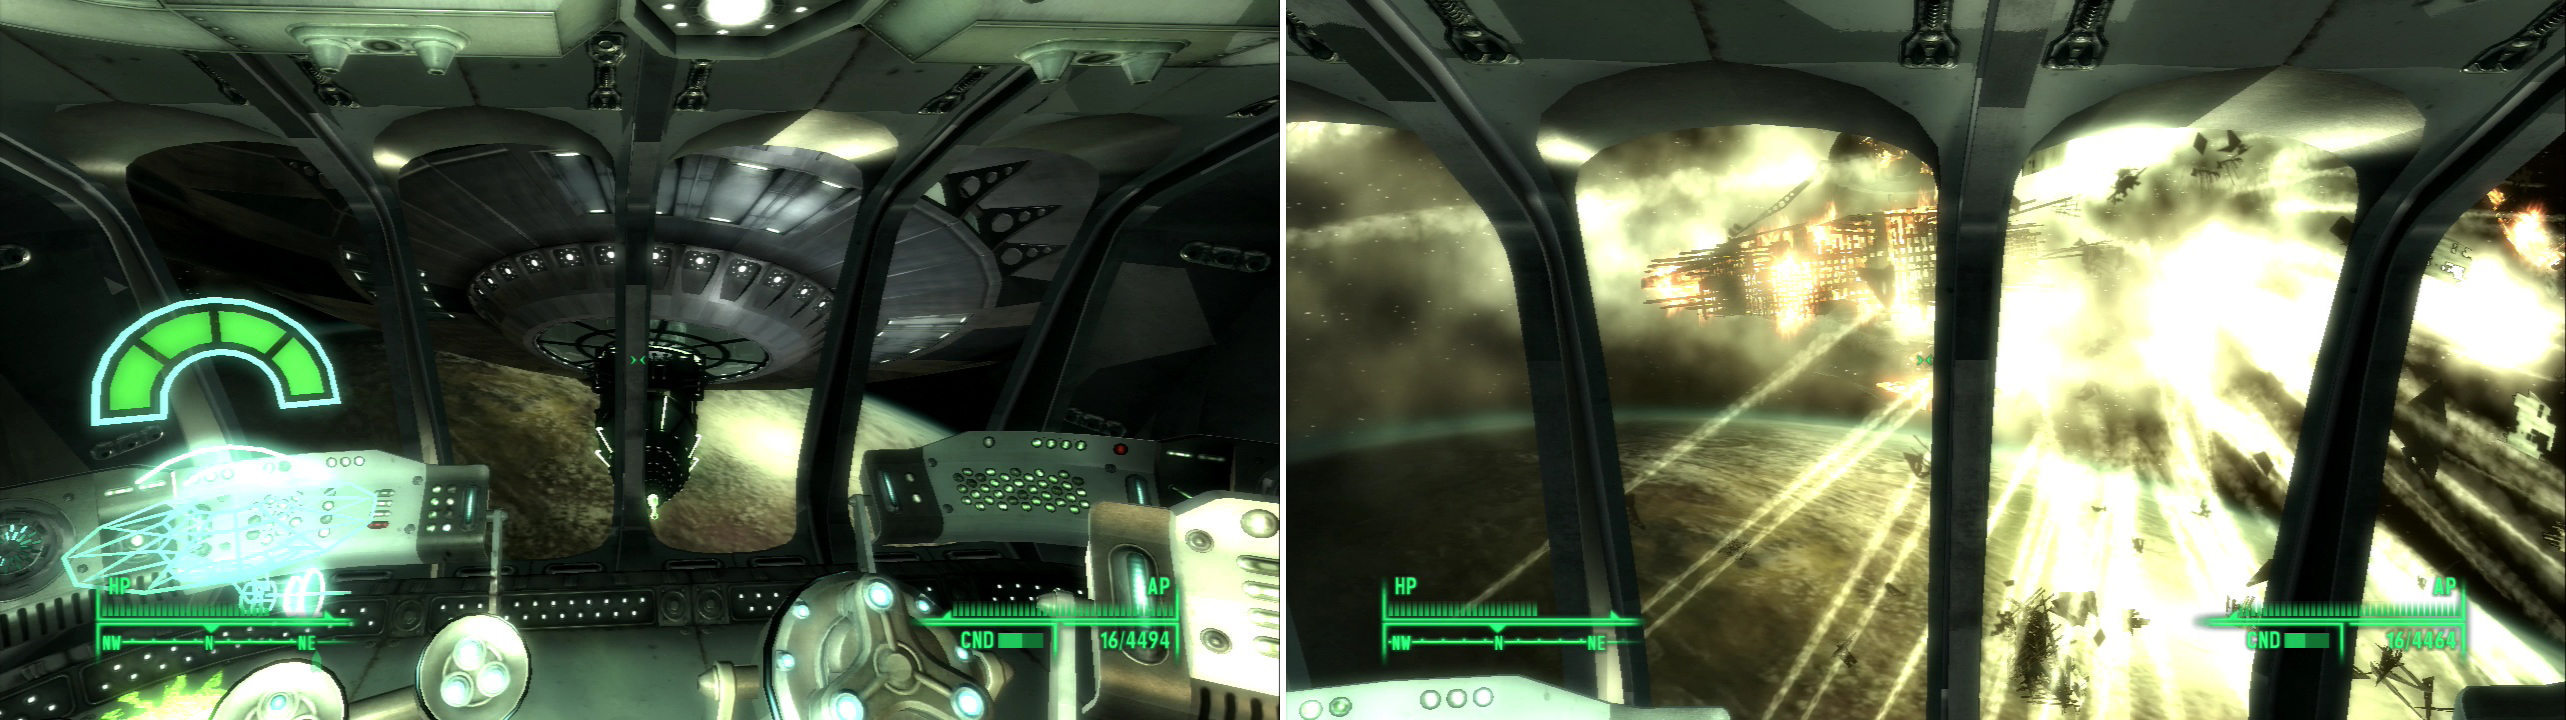
23) A Duel in Space
Another alien mothership arrives, and it appears a duel is imminent. To the left of the captain’s chair you’ll see three controls called “Power Distribution”. Of them, only the two on the ends matter. When the alien mothership is ready to fire on you (when your Death Ray is charging) hit the left-most switch the send all the power to your shields. When your Death Ray is charged, hit the right-most switch to send all the power to your Death Ray. To fire hit the “Fire Control” button in front of the captain’s chair.
Sally will direct the crew according to her old Captain Cosmo comics (where’s Jangles?!) Above your “Power Distribution” controls you’ll see a little graphic showing your ship in blue, with four green bars on top indicating your hull strength. One to three blue arches above the ships indicates your shield strength, and one to three blue arches by your Death Ray indicates your Death Ray strength. Their ship is indicated in red, following the same system. Try and fire when their shields are low, and keep your shields at max when not firing. This is really simple, and if you don’t fall asleep you should be fine. Aliens will invade the bridge periodically and try to attack you, and at some point Toshiro Kago will show up if you gave him his sword back and met him in the Living Quarters.
Near the end of the fight the Aliens on your ship will disable your generators and more Aliens will invade. Kill the Aliens in the Bridge and activate the four generators along the sides of the room and finish the fight. Once the alien mothership blows up, you’ve just proven that you’re the baddest person in this solar system.


24) The Baddest Thing in this Solar System
You are now effectively done with Mothership Zeta. Most of the areas on the ship are sealed off, although you can return to the Engineering Core, for what it’s worth. Sally, Elliott, and Toshiro Kago stay aboard the ship for good, while Somah and Paulson will both leave. Come back once in a while and ask Sally and Elliott what they’ve found. This is one way to get somewhat unlimited Alien Power Module ammo. It’s not quick, nor is it plentiful, but it’s better than nothing. Just don’t pay attention to what the screen says they give you, it’ll list one thing, but you’ll actually recieve several items.
No Comments