1) The Nuka-Cola Accident
Book - Guns and Bullets
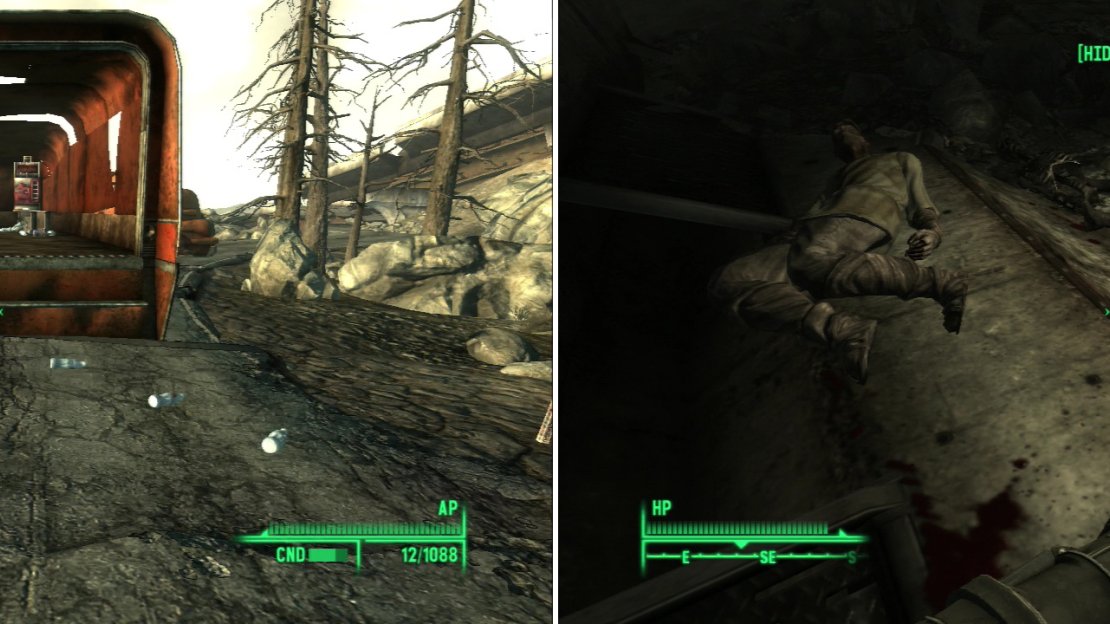
Compared to our previous outing, this will be a relatively short journey. Fast travel to Old Olney… or near it, in any event, if you’re too squeamish about potentially spawning in the middle of a pack of Deathclaws. A good place to fast travel is Chaste Acres Dairy Farm, even if it means killing a bunch of Raiders. From there head north-west until you find a road. Specifically what you’re looking for is a broken down truck, which will be near a fenced-in red rocket idol. In the back of this truck you’ll find about five Nuka-Cola Quantums, and many normal Nuka-Colas, along with whatever is in the Nuka-Cola vending machines. If that’s not enough loot for you, outside of the truck you’ll find a mail box, within which is a copy of Guns and Bullets .
2) Old Olney
Now continue on to Old Olney. There’s a bit of loot scattered around, including a Laser Rifle and a Stimpak outside of city hall. There’s also a note “Nuka-Cola Accident Report” outside of a building south of city hall. Old Olney is otherwise a pretty boring place, containing only its Sewers, which we should probably explore, don’t you think? There are two sewer entrances, of which the one to the south west in an alley is preferable. Not only is there a bit of loot mingled with the gore nearby, but the other entrance doesn’t leave you with an option for egress unless you clear the Sewer out.
This accident might have been a nuisance when it occured, but today it provides us with a treasure trove of Nuka-Cola goodness (left). Explore the sewers under Old Olney to find the corpse of a Brotherhood of Steel Initiate wearing some unique Power Armor (right).
3) Old Olney Sewers
And what do we find in the Old Olney Sewers? More Deathclaws. How do they fit in here, exactly? Who knows. You have two ways to travel, north and south. Go south through a large metal door, then east through another door. Loot the first room on your left, which contains a work bench.
4) Prototype Medic Power Armor
Book - Duck and Cover!
When you’re done looting head back out into the hallway and go through the door on the right and through another door to the south to find a dry sewer. In the middle of this room is a dead Brotherhood of Steel Initiate wearing the unique Prototype Medic Power Armor . When you’re done taking the armor and looting the other bodies head through a hole in the wall to the south and continue to the end of the tunnel, where you’ll find a skeleton who was apparently trying to tunnel out of the sewer with.. a spoon? Anyways, there’s a copy of Duck and Cover! nearby.
5) Heavy Ordinance
Head back to the tunnel you deviated from to the north, and continue north until you find a room with several beds in the middle. This is a good place to rest, if you are low on health from all the Deathclaws. There’s a Missile Launcher on one of the bunk beds, and a Fat Man under the wall-safe laden northern wall. Of course, there are the three Safes [Average], with various goodies inside, and a Nuka-Cola Quantum near an ammo box.
6) The [Very Hard] Door
Now head back to where you entered the sewers and head up to the north. Turn east when the tunnel ends and continue as far as you can until you come to a room with a locked door [Very Hard]. Open the safe [Average] in the counter on the eastern side of the room, then tackle the [Very Hard] door. Beyond the door is a small room with various loot inside, the best of which is a Mini Nuke and two first aid boxes.
7) Leaving Old Olney
Leave the room and travel back west, turning right up the first tunnel you find leading north. When this tunnel ends turn west. Ignore the “Ladder to Old Olney Underground”, as this area is off-limits to us until we come back later, during Broken Steels’ quests. Instead, take a right and head through a door to the north to find a small room with some goodies inside. There are three ammo boxes, two first aid boxes, two tool cabinets, and numerous metal boxes. There’s also a Utility Worker ID on the floor near a skeleton, if you feel like starting up the Protectron. By continuing forward you’ll find the way out of the Old Olney Sewers that we ignored earlier. Ignore it again and head back the way you came.
8) Vault 92
You’ll find lonely Vault 92 north west of Old Olney. Once inside, you’ll quickly notice that this Vault hasn’t fared much better than the other vaults around the Capital Wasteland. Continue south into the Vault and grab the Laser Pistol, Energy Cells, and first aid boxes on the table nearby. On another table near some computers you’ll find the note “Professor Malleus Adio Log V92-01”, and a Pre-War Book. A quick listen to the tape will reveal that this Vault likely didn’t save any lives.
9) To The South
This level is large, filled with Bloatflies, and mostly boring. It connects to four areas, and by now the names should be fairly typical Vault fare to you. You can reach the Living Quarters by travelling south or west. The Reactor Room can be reached by going east or west. The Sound Testing room can be reached by travelling east and south.
Lastly, and the route we’re most interested in, the Vault 92 Overseer’s Office lies to the south. Go south through a door, disarming the Frag Mine in the doorway-a common feature of this Vault that you should be wary of any time you cross a doorway. Go south through another door and cross the room to the south west, disarming the trip wire rigged to a shotgun as you go. After going through the trip-wire-trapped doorway you’ll find a skeleton with a note “Feedback Loops” nearby. Go down the stairs to find a large room. Go through a door to the south, around a corner, up some stairs, and into a room to the south east to find a door leading to the Vault 92 Overseer’s Office.
10) Vault 92 Overseer’s Office
Book - Duck and Cover!
Go through the locked door [Very Easy] to the south to reach a barricaded room. Explore and loot the rooms to the north and south, in the latter of which you can find a note “Professor Malleus Audio V92-02” on a desk. Now go through the door to the west to discover the Overseer’s office. You can activate Richard Rubin’s Terminal and read up about the Vault, which will spell out rather clearly how this Vault collapsed. On the desk nearby you’ll find the note “Professor Malleus Audio Log V92-03”. There are also three ammo boxes, a Laser Rifle on the bookshelf in the south eastern corner, a Pre-War Book and a copy of Duck and Cover! on the other bookshelf, and a Stealth Boy on the Overseer’s desk.
11) The Supply Room
Book - Tales of a Junktown Jerky Vendor
Head back to Vault 92 and go north to find a locked [Average] door. Beyond the door is a supply room, within which you can find some ammo, two ammo boxes, and a copy of Tales of a Junktown Jerky Vendor on the various metal shelves in the room. On a counter is a “Supply Shop” terminal [Average], which unlocks a safe [Average] built into the counter.
12) Sound Testing
Drop down to the lower level and head through a doorway in the north-eastern corner of the map to find some stairs leading down to Sound Testing. Go around the corner and down some stairs to the south. Go around another corner to the west to find a three-way split. In the room to the north you’ll find a Pre-War Book on a table. In the room to the west you’ll find, once you bypass the locked door [Hard] a supply room. Grab the goodies off the shelves, including the drugs and the Stealth Boy. There’s also a wall safe [Average], that belongs to you, it just doesn’t know it yet.
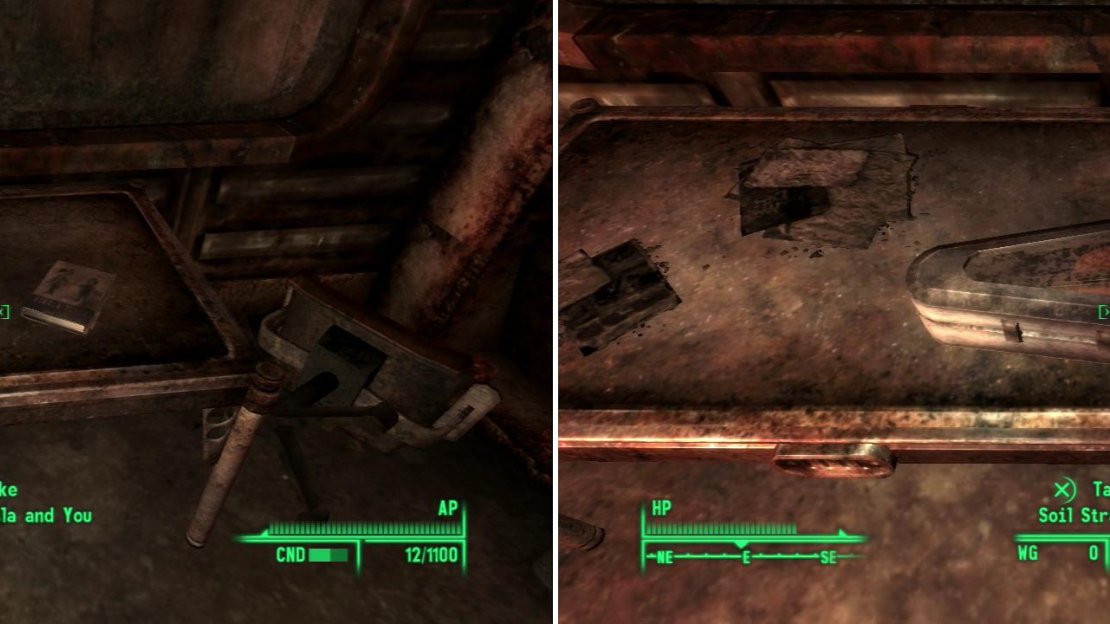
This copy of Nikola Tesla and You is one of the treasures you can find in the flooded ruins of Vault 92 (left), but the Soil Stradivarius is the real prize (right).
13) Soil Stradivarius
Book - Nikola Tesla and You
Go south to bisect another hallway running east west. Go east first and grab the note “Professor Malleus Audio Log V92-06” and the copy of Nikola Tesla and You from off the desk, then activate the “Studio Computer” and select the option “Open Recording Studio.” Now go down the hallway to the west and into the Recording Studio. Loot the wall safe [Easy] and grab the Soil Stradivarius off the table. Now we’re ready to go back to Agatha… once we’re done exploring Vault 92, of course. Head back north up the stairs you came down. This time head east, further into the Sound Testing Level, instead of going west, which will take you back to Vault 92.
14) To The East
Go around the corner to find two hallways, one south, and one east. Since it loops around, it doesn’t really matter which one you take. For the sake of argument, let’s go east first, and head into the door to the left and grab the Pre-War Book off the bookshelf. Continue to the east, ignoring the door up to Vault 92, instead travelling south. You’ll find two doors opposite each other. Go through the door to the west and grab the “Professor Malleus Audio V92-05” off the desk. To the east you’ll find two Stimpaks and a Pre-War Book next to “Zoe Hammerstein’s Terminal”. Once that’s all done and looted, head back up to Vault 92.
15) Reactor Room
You should now be on the eastern side of Vault 92. Head north up some stairs then turn west to find room with a door to the south that leads to the Reactor Room. Go around a corner and down two flights of stairs to find that this level is partially flooded… which accounts for the Mirelurks. If you follow the linear path of the level you’ll end up simply finding the other door leading back to Vault 92. This level pretty much just contains some components, Mirelurks, and rads. Well, that was a waste of time. Once you reach the end of the level return to Vault 92, where you’ll surface on the western end of the level. Enter the nearby door to the Living Quarters.
16) Living Quarters
Sheet Music Book
This area is more interesting than the last for no better reason than because you can mess around with the terminals outside the barracks and select the “Noise Flush” options, which will kill any Mirelurks in the area. That’ll teach them to be sensitive to sound. Go south and give it a try at the “Men’s Dorm Security Terminal.” Then dutifully loot the room. Search the first aid box under the table in the first room, grab the Assault Rifle from off the floor near the skeleton in the second room, go into the bathroom to the north and search the floor near a toilet to find a Sheet Music Book and finally search the storage closet to the south, where a rigged Shotgun trap obviously didn’t save the skeleton within. Take its Laser Pistol, the Rigged Shotgun, search the ammo box [Very Easy], the wall safe [Easy], and grab the note “Jon Adiglio’s Note” and the “Key Code to Data Storage.”
17) Finishing Vault 92
Book - D.C. Journal of Internal Medicine
Now-as lazy as this may sound on my part-search the rest of the dorms, which aren’t nearly as interesting or lucrative. When done, head south of the first male dorm we searched to find some stairs. Continue down the hallway until you find a door to the south. Beyond you’ll find a series of rooms, as follows. To the east will be a room with a “Security Terminal” near which is a Nuka-Cola Quantum. To the east is a room with some Pulse Mines and Pulse Grenades on tables. To the south-east is the Data Storage Entry room, which can be accessed by hacking the terminal [Hard], picking the locked door [Very Hard], or using the handy-dandy key code we found earlier. Inside this room you’ll find three ammo boxes, some drugs, Energy Cells, and Fission Batteries.
Not impressed, you say? Along the southern end of the main room you’ll find a desk with the Professor Malleus Audio Log V92-04 on it, and in the room beyond it to the south you’ll discover a small clinic with a first aid box, some medical supplies, the “Laboratory Terminal”, and a D.C. Journal of Internal Medicine . Best of all, once you’re done looting this room, you’re done with Vault 92. Time to return to Agatha… well, after one more detour.
18) Raider Barn
Book - Dean’s Electronics
Leave Vault 92 and head west until you spot a barn in the distance. Kill the Raiders guarding it and grab yourself a copy of Dean’s Electronics that’s on a metal shelf inside the barn. A short, profitable little detour. Anyways, time to go back to Agatha. For real this time. It might be worth traveling back to… wherever you stash your junk. Grab whatever Sheet Music Books you’ve found so far (by following this guide you should have found several.)
19) Agatha’s Song
Give Agatha back her violin, in exchange for which she’ll give you the frequency to her radio station, allowing you to listen to violin music. Of course, you could sell the violin to Ahzrukhal at the 9th Circle for some Caps.. but there’s a good reason not to do this, even if you already stole or used Speech to get Agatha to let you loot her ammo box. Once Agatha has her violin talk to her again and give her the Sheet Music Books you’ve found. In return she’ll decide to give you “more than just a pat on the back”. Do NOT be noble and decline her reward, as she’ll give you her husband’s old pistol… which just so happens to be a unique Scoped .44 Magnum Blackhawk , which does some pretty hefy damage, indeed.
Now it’s time to go explore Takoma Park. There’s not much there in the way of loot, but there’s one big encounter there that makes the trip worthwhile.


No Comments