
1) Unthawing the Past
Activate the “Stasis Controls” and talk to the revived folks, including Elliott Tercorien, an army medic, Paulson, a cowboy, and Toshiro Kago, a samurai-what a crew. Now, before we go on, let’s address the obvious-you can kill Paulson and Toshiro for their unique clothes and gun with no real consequences. Elliott will stay around after the expansion and give you stuff, so you might as well keep him alive-and you can get copies of his unique Combat Armor later.
Now that we’ve covered that, you’ll notice the astronaut, Colonel Hartigan, did not make it. It seems you’ll have to don the Spacesuit (which you should loot from the astronaut), but before your epic spacewalk you’ll need to shut off three generators, which lie in the Hangar, Robot Assembly and the Cryo Lab. Sally will tell you that the other areas of the ship are dangerous, and to take one of the other adults with you. Toshiro Kago continues to be useless, but you can get Elliot to travel with you to the Cyro Lab, Somah will accompany you to the Robot Assembly area, and Paulson will go to the Hangar Bay. Sally will crawl off and get you access to all these areas-enjoy the freedom of choosing where to go first, it’s about the only time you’ll get such an option in this expansion.
There are also a few more things your fellow escapees can do for you. Elliott can convert the Alien Biogel you’ve been finding (HP +30) into Adapted Biogel (HP +150), and Somah will repair your gear (for a price). Despite the cost, she’s actually one of the best NPCs in the game, with a Repair Skill of 75. Note that the Biogel, like any other drug, uses your Medicine skill to determine its potency.
As another side note, as you kill aliens, gather loot, and explore, store you ill-gotten gains in the Engineering Core, as you’ll be able to return here often. It might not seem like a big deal right now, but once you start messing with teleporters, you’ll find yourself cut off from some areas. Bottom line is, if you store your stuff here, you’ll be able to get back to it later.
And finally, near the “Teleportation Matrix to Observation Deck” you’ll find a Work Bench, should you really need to build something.
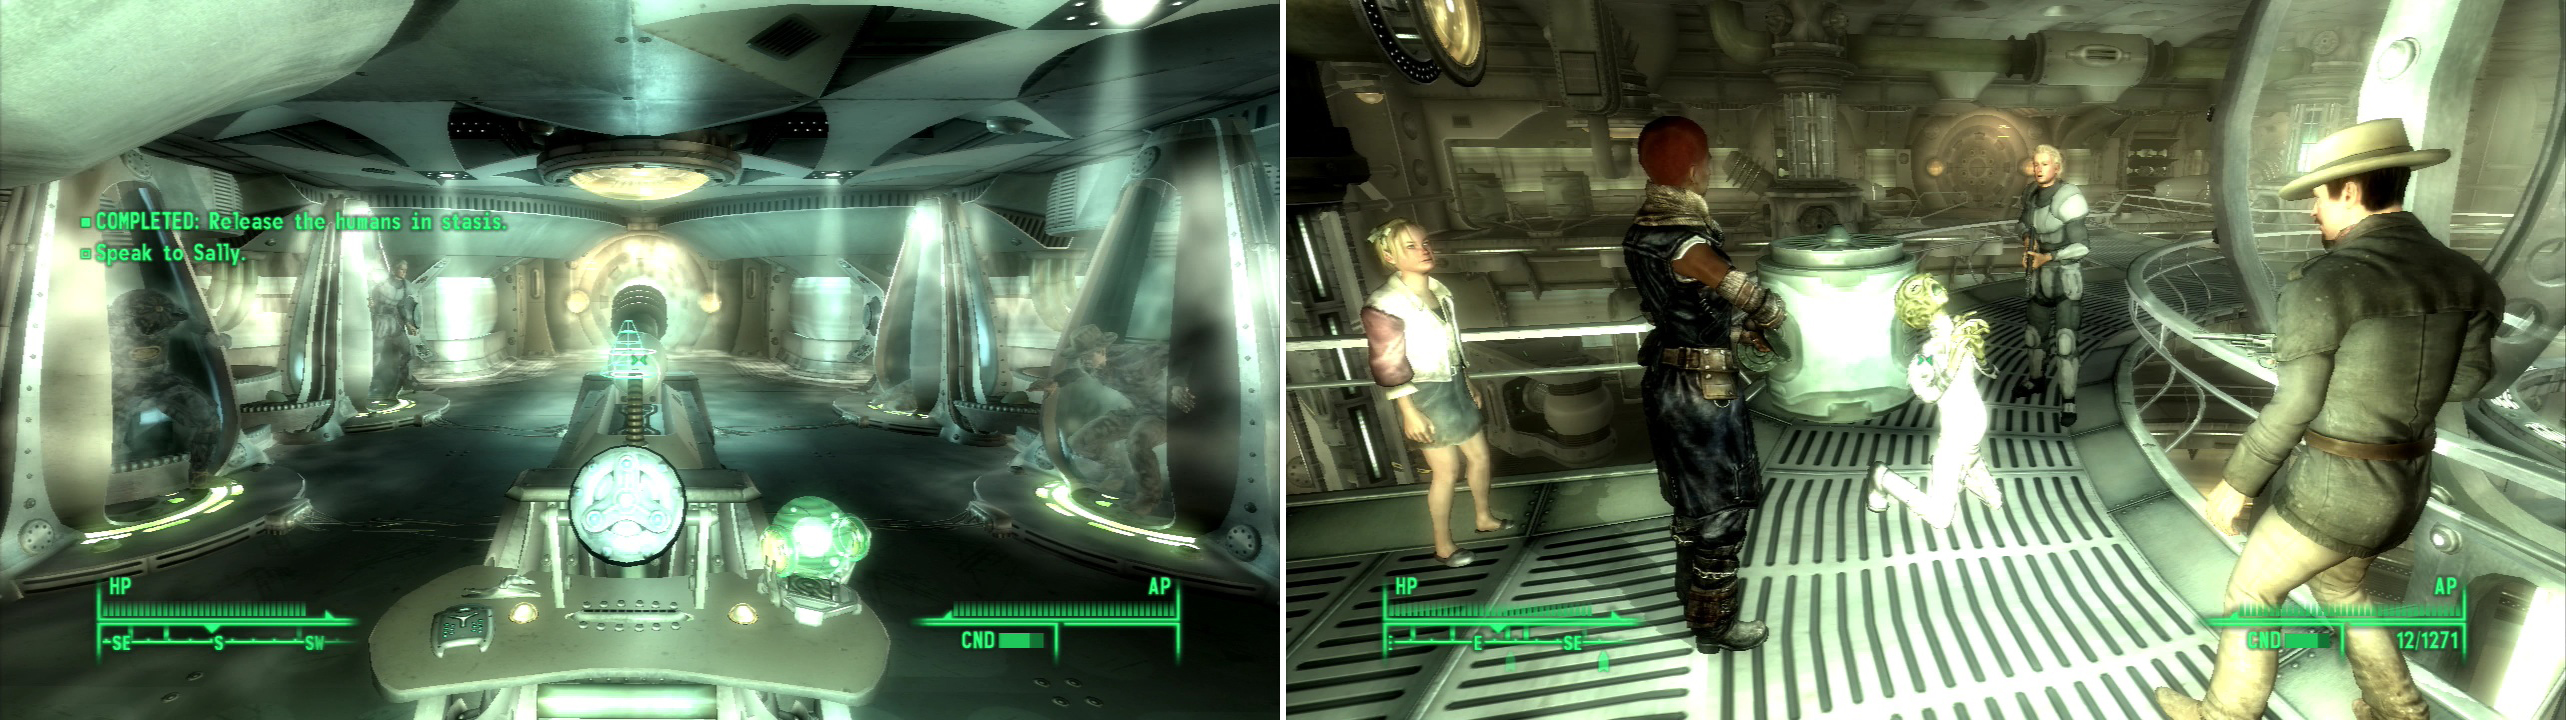
Release some fellow humans from cyrogenic sleep (left) to gain some allies in the fight for freedom. As you explore various places, your new pals will get themselves into all kinds of trouble, and generally make a mess of the place (right).
2) Cargo Hold
Before we run off to search for the generators, let’s explore all the non-essential areas first, namely the Maintenence Level, the Engine Room, and the Cargo Hold. We’ll start with the latter first, as it’ll yield an awesome weapon to use against Aliens. You’ll encounter the typical Alien troops, but you’ll also encounter the Guardian Drone, a more powerful robot with a devastating main weapon, which it’ll leave behind once you destroy it. Clear the catwalks before making your way to the ground floor, where you’ll find… well, a lot of junk mixed in with a good bit of ammo and weapons on the conveyor belt and shelves nearby. Along the conveyor belt you’ll find Power Armor, Combat Armor, a Minigun, a Missile Launcher, Nail Boards, grenades, a Sniper Rifle, Raider Armor… all kinds of junk that isn’t really useful and serves to encumber you.
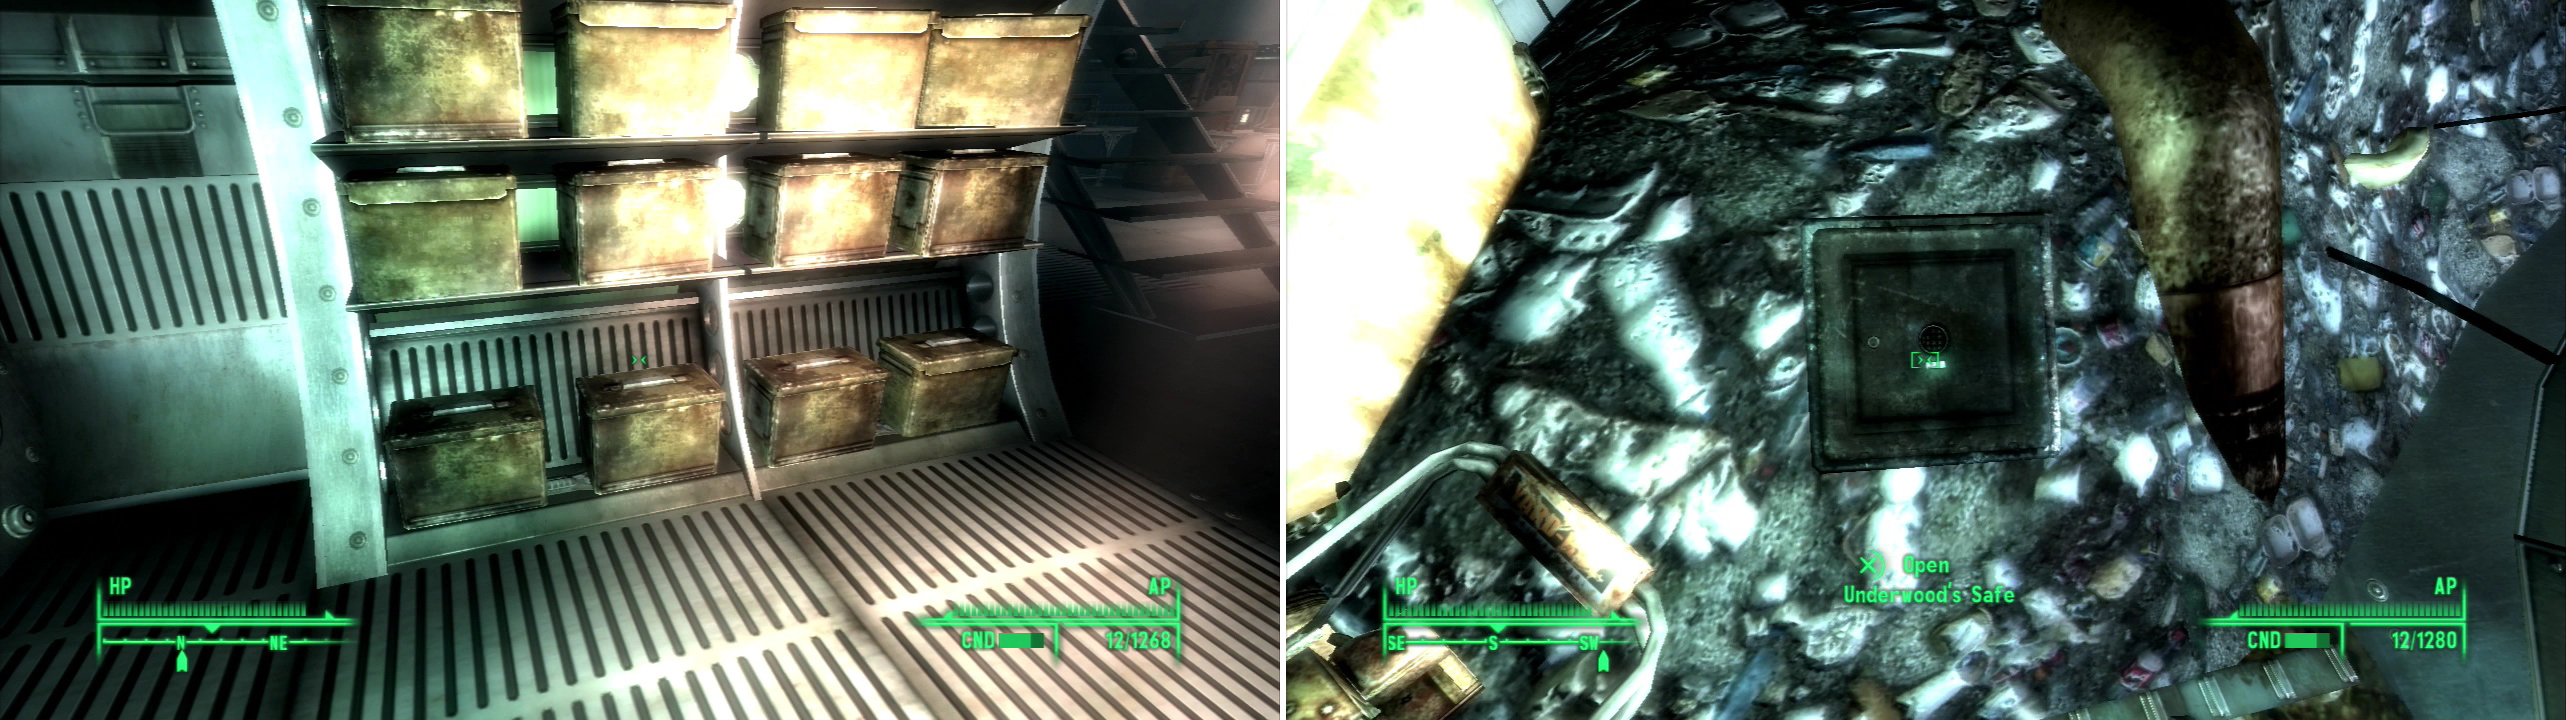
The Cargo Hold is well-stocked with treasure, as one might expect (left). The awesome MPLX Novasurge can be found within Underwood’s Safe (right).
3) MPLX Novasurge
In the south-western corner of the lower area, near a door to Research Lab, you’ll find a nice haul of loot including no less than a dozen ammo boxes, assorted drugs, Bottlecap Mines and assorted weaponry, all on shelves. From the shelves with the ammo boxes and weapons on them head north to find some furniture, and from their turn east past some shelves with cinderblocks and telephones on them to find more shelves with ammo boxes… this time a whopping dozen of them. To the east will be some stairs. Continue past them east a bit and turn north to find a table with “Reid Underwood’s Terminal” [Hard] on top. Hack it and select the option “Remote Unlock Safe.” Now head over to the south-eastern corner of the level to find Underwood’s Safe beyond the disposal chute, mostly buried in some debris. Now that you have it unlocked, open it and claim the unique MPLX Novasurge .
4) Research Lab
Alien Captive Recorded Log #13
Alien Captive Recorded Log #21
You should go explore the Research Lab next, which is a small area that contains a few Aliens and Turrets. The door to this area is in the south-western corner of the Cargo Hold. From the entrance head west to find a large room with several aliens roaming around. Smite them, then explore to the south to find a cluster of four terminals, one of which is a “Control”, which will get you Alien Captive Recorded Log #13. Go through another tunnel to the east, follow it south, then turn east again at a “Drone Pod” to find another large room, the purpose of which seems to be the study of “Giddyap Buttercup!” robotic horse dolls. Yeah… freaky aliens. Clear this room out and explore it to find another “console”, from which you can download Alien Captive Recorded Log #21 . To the south and east you’ll find more… experiments… which are humorous and creepy, if not lucrative.
5) There Ain’t No Geneva Convention in Space
Return to the Engineering Core and make your way to the Engine Room. You’ll probably have an encounter where your new pals have surrounded a lone Alien. They’ll debate on what to do with the critter until Paulson irrevocably ends the debate. You’ll also notice as you explore and return to the Engineering Core that your buddies will make a mess of the place. Can’t us humans live anywhere without trashing it? Apparently not, but at least they’ll dig up ammo and components while they’re trashing the place. One of the “improvements” they’ll make is to dig up some Makeshift Bedding in the south-eastern corner of the western-most room, which you can use to fully regain your health. You might have to kick one of your allies off of it, but… hey, you’re doing all the work, you get dibs. When you’ve stashed your loot (appropriating a container along the southern-most end of the lower level for this purpose isn’t a bad idea) and are fully healed, it’s time to head into the Engine Room, which is along the western side of the area, near the door to “Robot Assembly”.
6) Engine Room
This level is populated by Aliens, Guardian Drones, Support Drones, and Turrets-pretty much everything you’ve faced in Mothership Zeta up to this point (and pretty much everything there is to face, period.) From the entrance continue along a linear path down some stairs, then through a pair of doors to the north, down the hallway beyond, then west past a Healing Arch. Enter a room to the east, then continue east through a door to reach a large room crawling with robots.
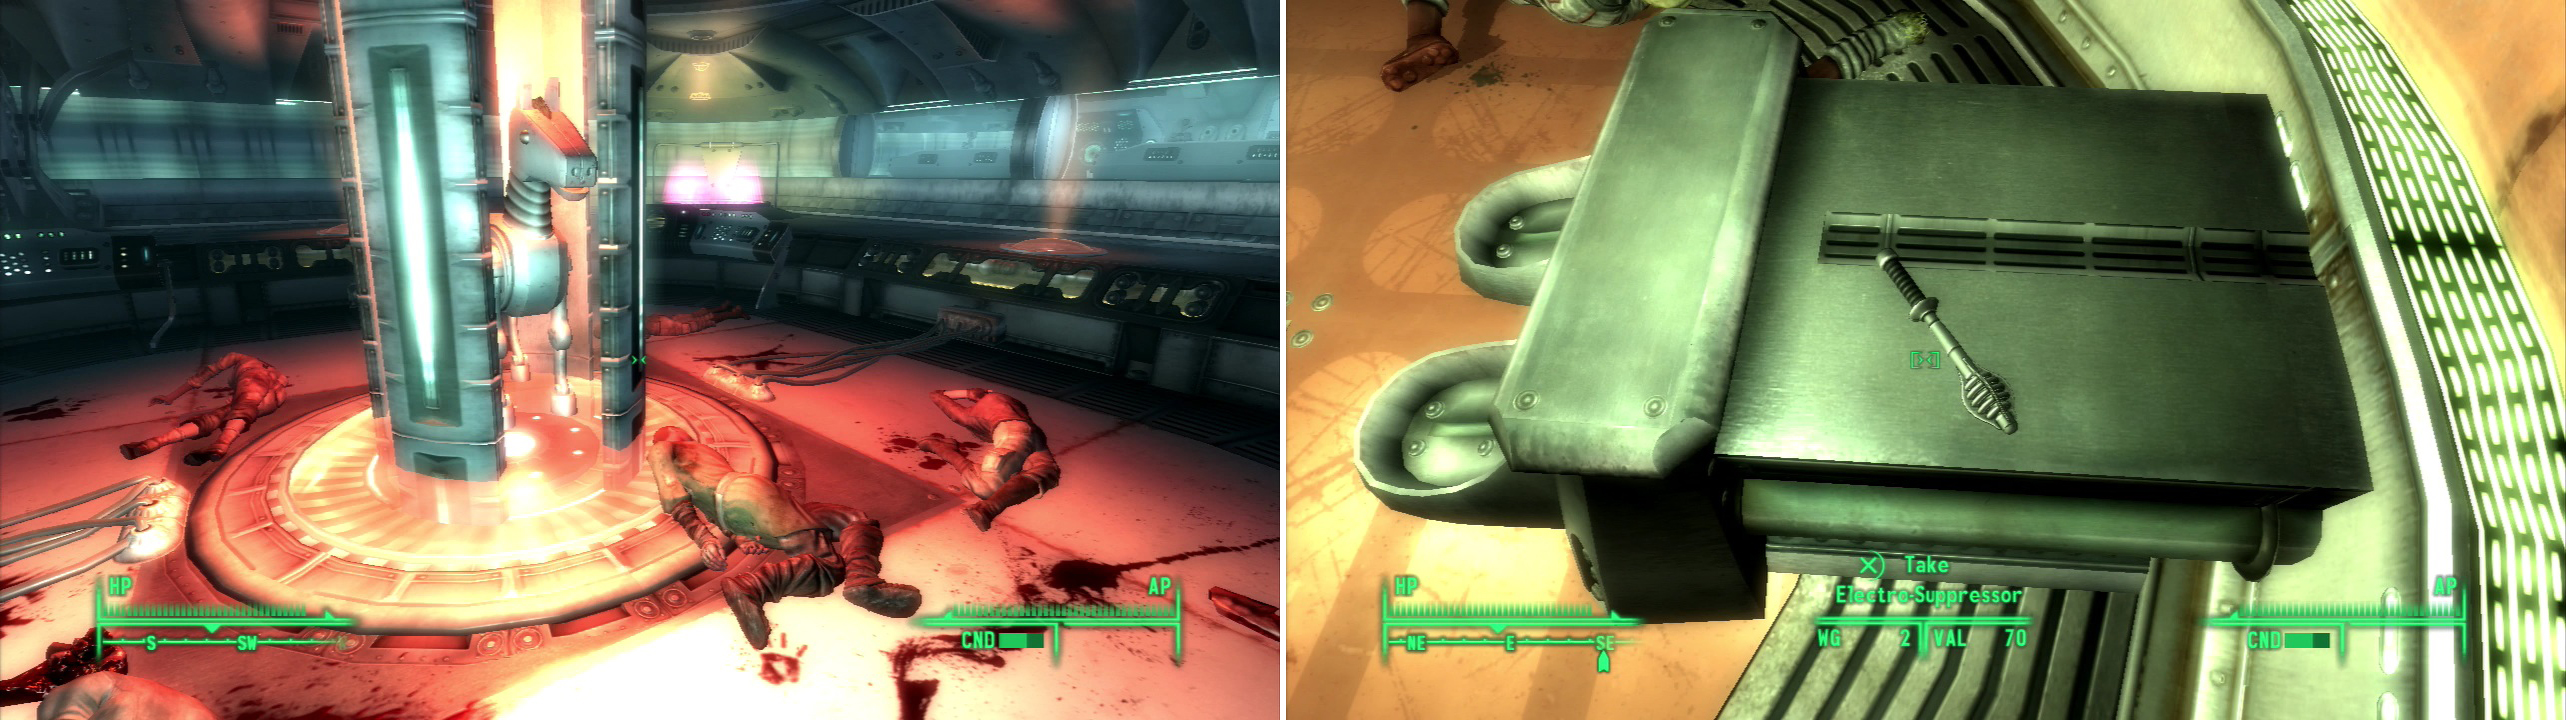
I don’t know what happened here, and I don’t want to know (left). The Electro-Suppressor is a faster alternative to the Shock Baton (right).
7) Electro-Supressor
This room contains five doors and a “Control” you can activate and overload a turret to cause an explosion, or rewire to set as a proximity explosion. More importantly, go through the door to the south-east and continue until you find a room with a container. On a metal object in this room you’ll find the unique Shock Baton, the Electro-Supressor . Score.
8) Wandering West
Now go through either of the two doors to the south to reach a room uninteresting save for another “Control”. Activate it and an Alien will come through a teleporter to the east. Smite it, and return to the large room to the north and through a door to the west, which was opened by our meddling. Continue west through another doorway, turning north and going through another door when you must. In the room beyond you’ll spot some stairs to the north, and a door to the east. Go through the door first, down a hallway, past a Healing Arch, and into a room. This is the room that contains the Turret you could have overloaded earlier. If you didn’t, dispatch the inhabitants and loot the two Containers before returning back to the room with the stairs, which you should now proceed down.
9) Down and Back Around
Go north through a doorway and down a tunnel, stopping to kill a Turret on the roof mid-way. Enter a room to the north, then go through some doorways to the east, killing Aliens and their Drones as you go. To the north is a teleporter we can’t use, so continue east, past a Healing Arch and another “Control” that you can rig, which controls the Turret at the four-way intersection to the south. Grab the Container to the south, then head up some stairs to the east and into a room wherein you’ll find another Container and a table full of Alien Crystals and Alien Epoxy. Go through the doorway to the south and the uninteresting room beyond to reach the large room near the beginning of the level. Huzzah! Time to head back to the Engineering Core.
10) Maintenance Level
Onward to the Maintenance Level, which can be accessed through a teleportation matrix just south of the door to Robot Assembly. This level is completely unoccupied by Aliens, just head west and loot what containers you can find. In a small room with a garbage-covered floor you’ll find Sally busily tinkering with something on the wall. Talk to her and when the conversation is over the “room” you’re in will begin to move. You can look out through a window to the north as you move through the ship in your little trash lift. At one stop you’ll find a trio of aliens outside the lift. Kill them and Sally will crawl out to explore. You, however, will go on a little unwanted journey of your own.
11) Waste Disposal
After being deposited in a room full of garbage Sally will show up and continue to be unhelpful. Only one way to go now-through Waste Disposal, the door to which is to the west. And is this level a mess. Well, first things first, watch out for the pistons at work throughout, less you be crushed Sonic the Hedgehog style. Not really, you’ll just take some damage, but the threat is there! That said, head south of the entrance to this level to find a raised platform with numerous crushing pistons. If you run past them to the east, you’ll find two safes [Very Easy] and [Hard] and a First Aid Box. Of course, if you were crippled in your fall earlier, this might not be quite so easy.
12) General Chase’s Overcoat
Run through the pistons again to return to the west, and continue in that direction through a door, beyond which lies a room filled with pipes. There’s not much for options in where you’re going to go here, just head south (grabbing another safe [Average] and First Aid Box to the east along the way) until you reach a door that opens into a tunnel running to the west. Continue down the tunnel, which thankfully has a Healing Arch along the way. In the room at the western end of the tunnel will be a Guardian Drone. Some Aliens will also show up behind you, so be on guard. Continue to the north, where you’ll find a walkway that wraps around back south. Watch out for more Aliens along the way, especially a pair of them on higher ground. To the east, off the walkway amidst the debris you’ll find a “Military Footlocker” which contains the note “Anchorage Quartermaster Shipment” and General Chase’s Overcoat . Continue around the walkway into the room to the south, grab a First Aid Box on the ground and continue through a door and up some stairs to the west.
13) Sally Stalls, Aliens Fall
At the end of the tunnel beyond the stairs you’ll find a force door, which Sally is kind enough to take down for you. Head south into a room with a piston, which can be disabled by activating a “Control” and wait for Sally to take down the next force door before continuing south. Grab the First Aid Box and the Safe [Hard] and continue into another room with a piston. This time Aliens will attack you while Sally tries to get the force door down, but two green men with Shock Batons aren’t much of a bother. Head on into yet another piston-occupied room and repeat the process-you kill some Aliens while Sally messes with the door.
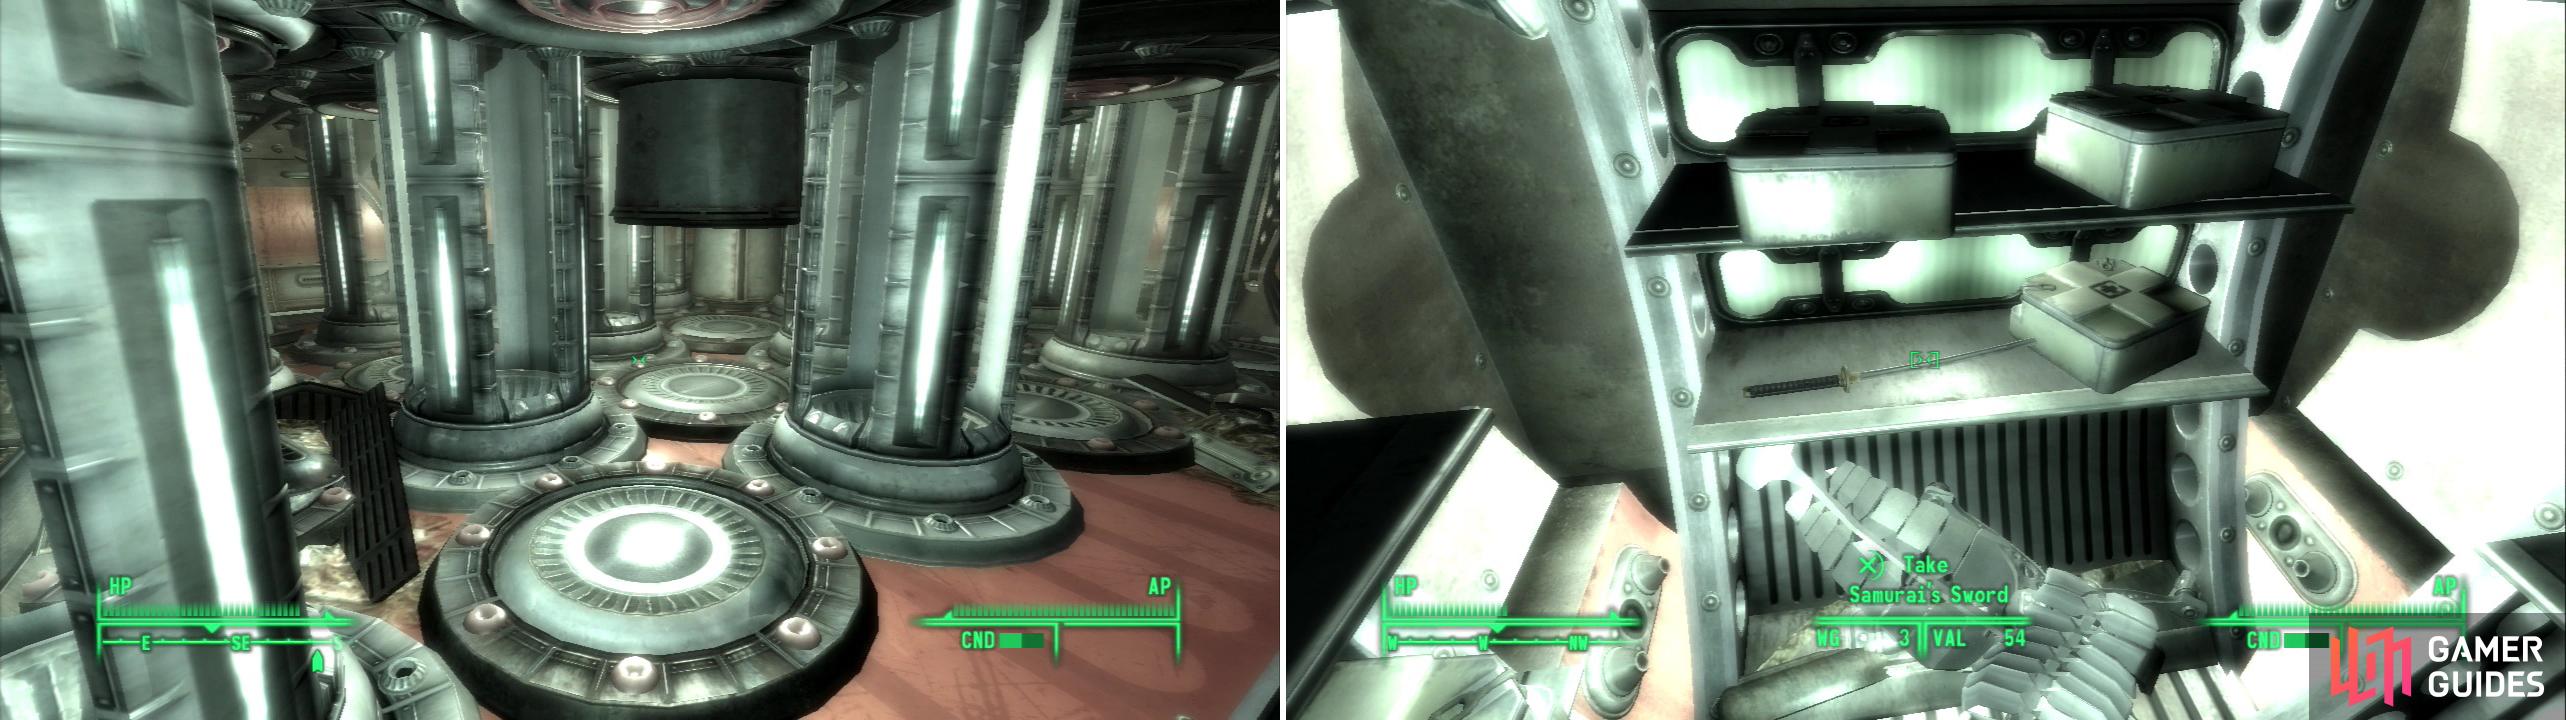
Watch out for active pistons, as they can deal damage if they smack you (left). Grab the Samurai Sword from the shelf (right), we might know somebody who wants this back…
14) The Samurai Sword
Alien Captive Recorded Log #19
Head south into another room with pipes and go west through a door to find a large room with several Aliens inside. Kill them, or let the pistons do the dirty work for you. There are more in the room to the west (beyond the force-field projector), but there’s a Healing Arch to balance things out. Before continuing on, make sure you activate the “Control” and get Alien Captive Recorded Log #19 , as well as the various containers lying around. Go into the smaller room to the west, and then head through a door to the south. Go up some stairs and kill an Alien trying to harass Sally, after which Sally will speak to you. Don’t indulge her race, instead just head into a small storage room to the west and loot the eight First Aid Boxes lying around. Oh yeah, grab the Samurai’s Sword on the shelf, too. Wouldn’t want to miss that, would we? Take the Teleportation Matrix back to the Engineering Core and like Sally said-let’s never talk about this again.
Now, if you’ve done things in order, a pair of Aliens should be attacking your pals. It’s nothing they can’t handle, however. More importantly, there will be a Power Fist, Minigun, and a Missile Launcher lying around the level, along with the usual compliment of ammo, drugs, and components. If you’re an exceptional nice guy or gal, you can give Mr. Toshiro his Samurai’s Sword back.
15) Cryo Labs
Alien Captive Recorded Log #4
Go talk to Elliott Tercorien and ask him to accompany you through the Cryo Labs. With an ally in tow, we might as well dispense with our usual stealth tactics, and instead take use MPLX Novasurge . Stealth is still a good thing, for first strikes, but if you’ve been using the Chinese Stealth Armor to kill everything… well, allies don’t tend to do so well when they’re the sole target.Go through a door to the west and dispose of the Alien walking around near the beginning of the level before heading to the south. Activate the “Release Mechanism” before heading back north and going down some stairs. Go into a tunnel to the south and enter a room with some human junk lying around, three containers, a Healing Arch, and a “Control” from which you can download Alien Captive Recorded Log #4 .
16) Raiders and Ghouls in Stasis
Alien Captive Recorded Log #2
Head back upstairs and go through a door to the west to reach a central room with a Healing Arch in it, along with several Aliens in this (and nearby) rooms that might make you need it. There are two adjacent cyro rooms, one to the north and one to the south. You can activate a switch on either side of the central room to release some Raiders and Ghouls from stasis. In the southern room you’ll find a “Control” from which you can obtain Alien Captive Recorded Log #2 .
17) The Larger Cyro Room
When you’re done messing around here, head down a tunnel to the west, which will eventually lead to… a larger cryo room! Go into the side room to the west instead of the large cryo room to the north. From here you can activate a “Switch” which will open several cryo tubes, unleashing some Raiders and Ghouls on the Aliens beyond. Activate the “Door Controls” to open the room to the south, where you can find a few containers and various human loot… probably the possessions of the Raiders we thawed. Head into the large cryo room and finish off whatever is still alive within, then go down some stairs to the lower level and loot some shelves on the northern and southern walls to score some more earthling-loot. After your orgy of killing and looting, if you’re nearly encumbered you might want to considering heading back to the Engineering Core to stash you loot. Just a friendly heads up.
18) Elliot’s Squad
Alien Captive Recorded Log #11
Alien Captive Recorded Log #17
Continue through a doorway to the north and you’ll eventually come to an observation room where some Aliens are dissecting Elliott’s squad members. He doesn’t take it well and will activate the “Switch” in the room and proceed to attack the Aliens. It’s his one moment of bravery in the expansion, and despite his resolution, he doesn’t keep it up. Activate the “Controls” to get Alien Captive Recorded Log #11 and Alien Captive Recorded Log #17 , then grab the human junk on the benches before continuing on to the north, where two more of Elliott’s buddies are trapped in stasis.
19) The First Generator
Elliott will ask you for advice on what to do, either get them out of stasis so they can fight the aliens-at least for a little while, put them out of their misery, or if you succeed at a Speech challenge, he’ll just leave them alone. What ever you do, do not just leave them there. Whether you choose to put them out of their misery, let them fight, or convince Elliott to leave them alone, you’re going to want to get your hands on their Winterized Combat Armor . This can be done by activating the “Switch” in front of their pods. If you convince Elliott to leave them alone and then release them, he’ll get pissy, but there’s nothing to be done about it. The best option is to revive them-temporarily. They’ll last quite a while, and will help you clear the Cyrogenic Storage area to the north. Just be sure to grab their armor when they die. No matter what you do, Elliott will gather some cyrogenic compound, which he’ll put to good use later. Head through the doorway to the north to continue on to the next area.
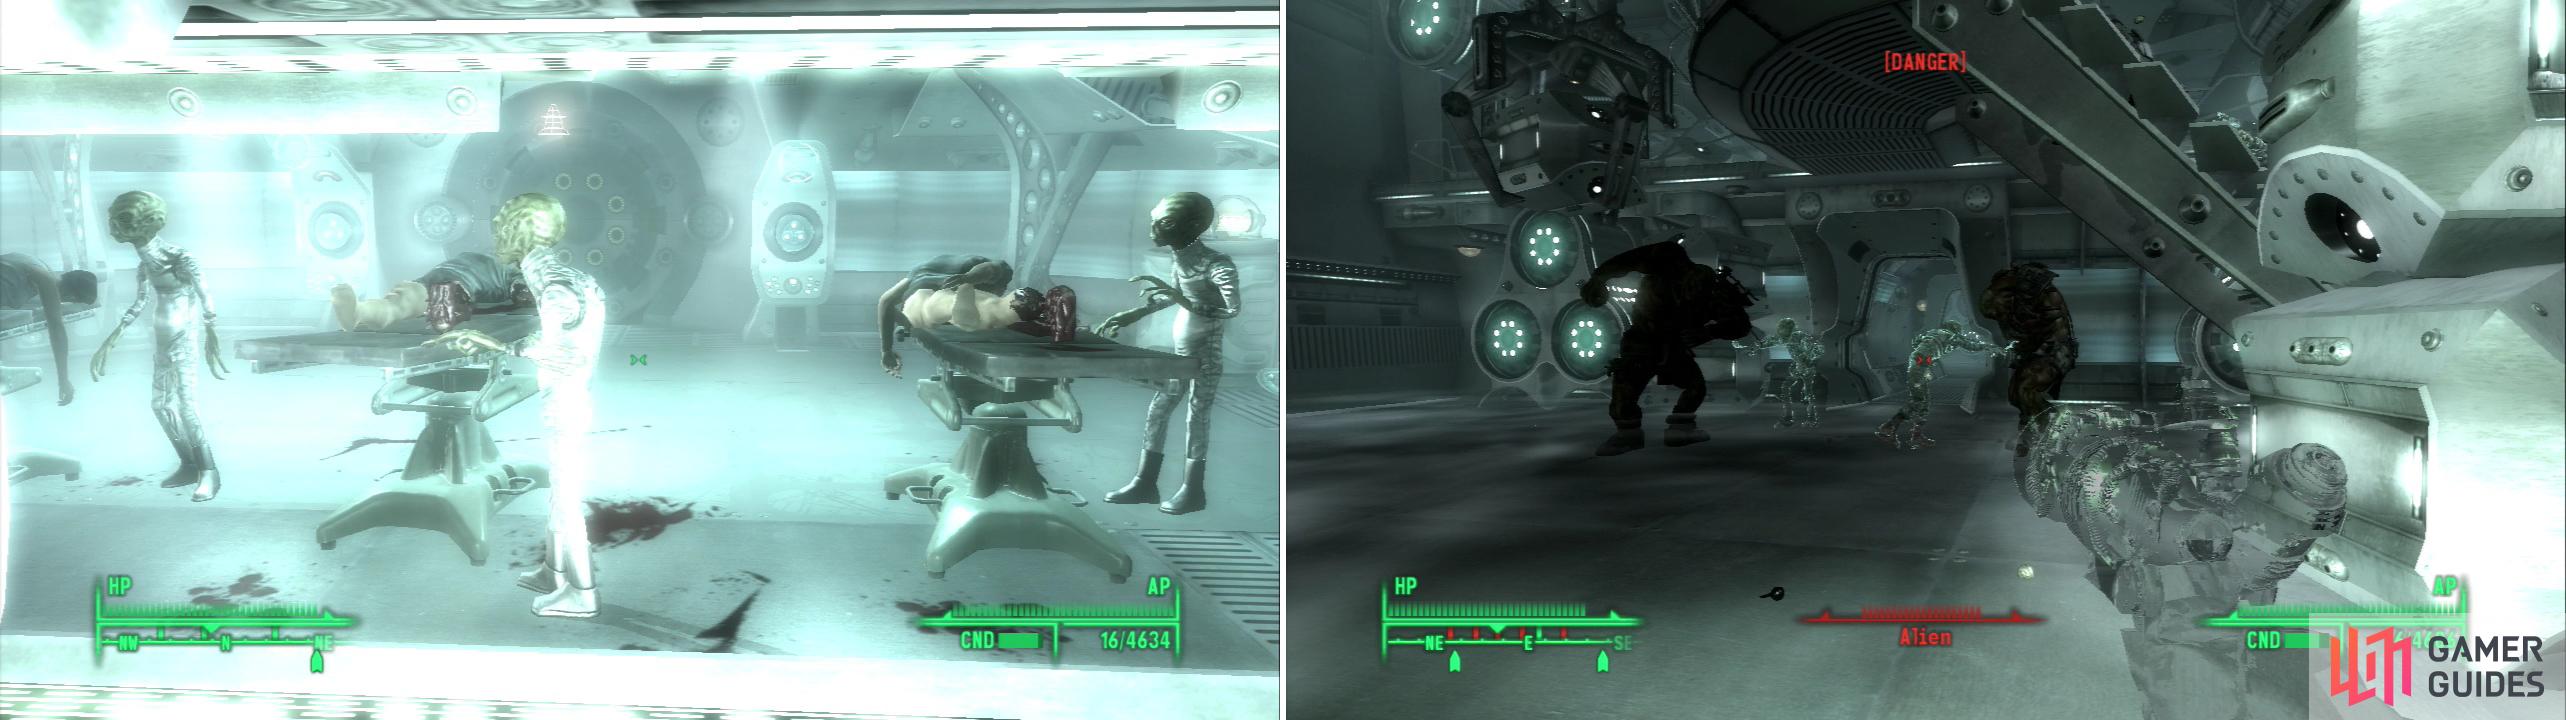
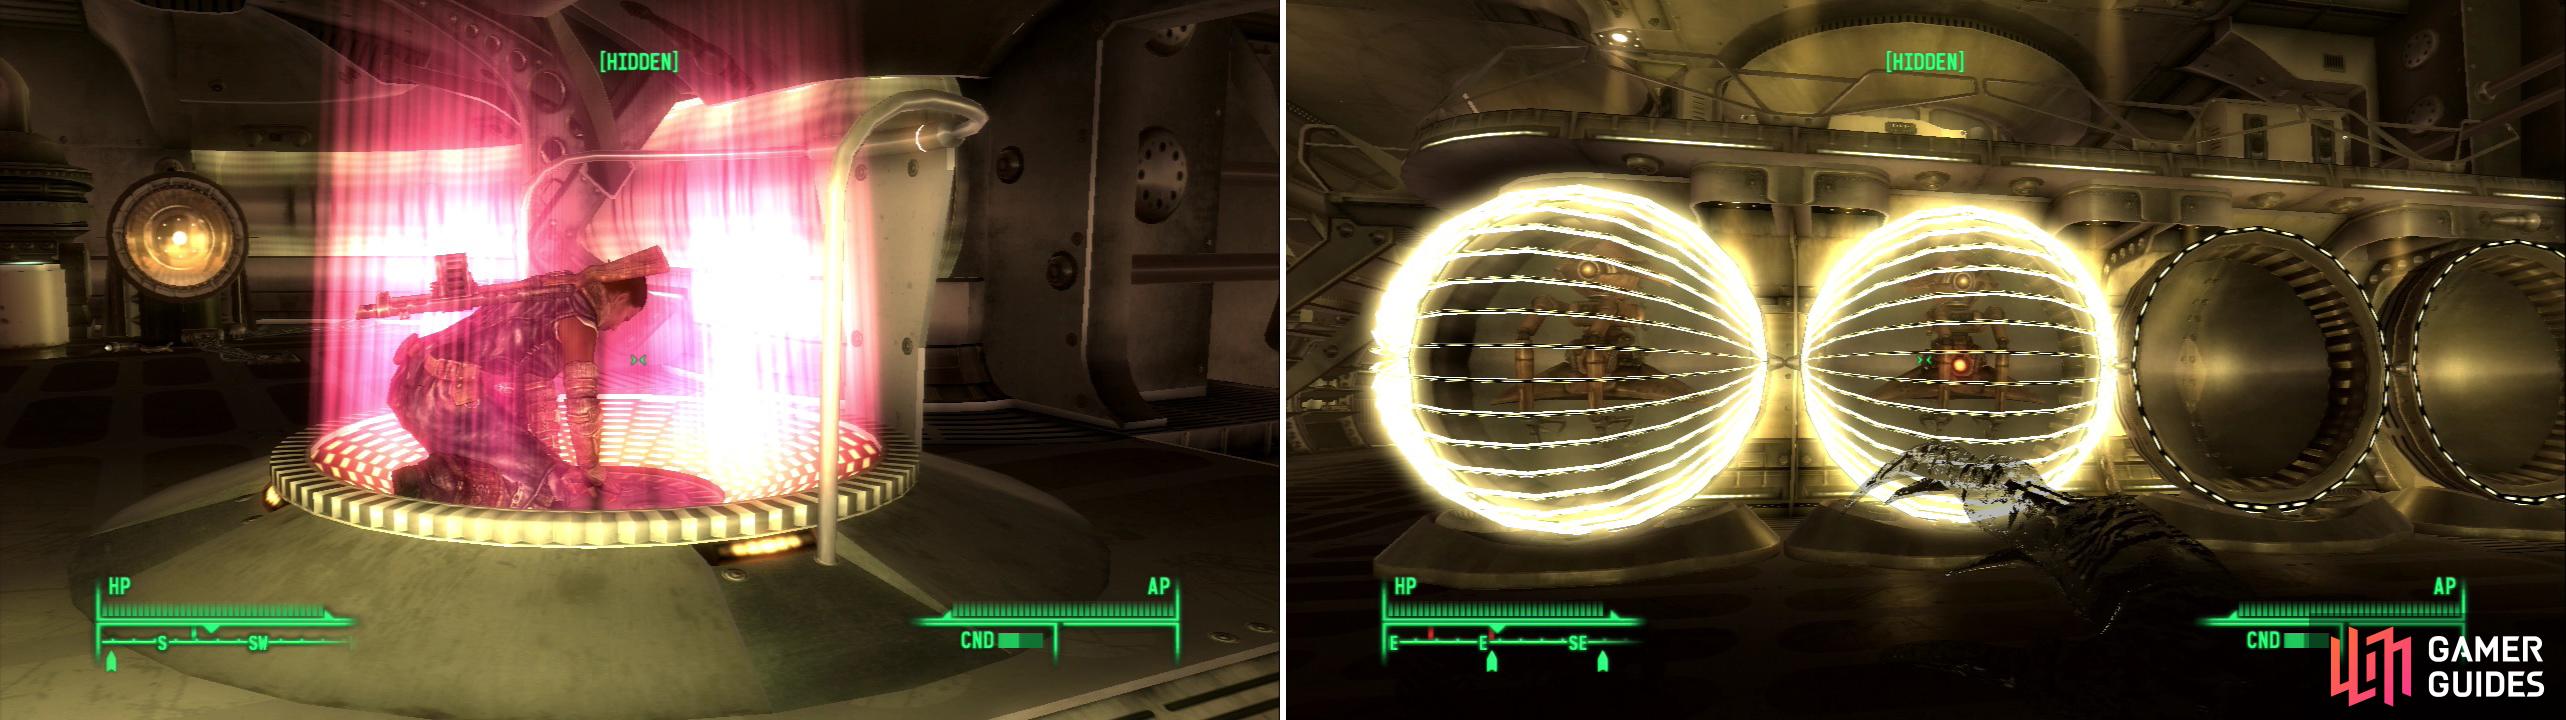
Some Aliens dissect Elliott Tercorien’s squad (left). Unleash some Super Mutant Overlords from cyrogenic storage to keep the Aliens busy (right).
20) Cyrogenic Storage
Alien Captive Recorded Log #25
To your west you’ll find another “Control” from which you’ll obtain Alien Captive Recorded Log #25 . There are also two Containers in this room, and through doors to the east and west you’ll find Healing Arches, which will come in handy considering that to the north lies a huge cryo vault crawling with Aliens. Continue on to the north and eradicate every non-human you see. Note the “Switches” in the room near cyro chambers. If you activate them, they’ll unleash cyrogenic compounds which will free anything nearby. It’s fun, but not all that handy. It’s far more effective to simply sneak around and blast the aliens with my Novasurge, which for some reason is a very stealthy firearm. If you want to shake things up, there are “Switches” on either side of the level which will unleash a pair of Super Mutant Overlords. Two unarmed Overlords aren’t going to win against shielded aliens with high-powered energy weapons, but it’s fun anyways.
21) Destroying Another Generator
Alien Captive Recorded Log #16
Once everything is dead search the lower level for alien loot, and the south-west corner for a “Control” from which you’ll recieve Alien Captive Recorded Log #16 . Once you’re done looting head back upstairs and go to through some doorways to the north to find the generator. Same deal as before, activate the “Control”, then activate the three “Core Coolant Switches” to blow the generator. Wait for the generator to blow, then activate a “Switch” to activate a Teleportation Matrix which will take you back to the Cyro Lab.
22) Elliot’s Contribution, and the Missing Samurai
Head back to the Engineering Core and ditch Elliott. He’ll now endeavor to make you Cyro Grenades and Cyro Mines with the junk he found in the Cyro Lab, and that itself is enough to recommend keeping him alive. You will also discover-if you’re observant-that Kago has taken off. This occurs whether or not you give him the Samurai Sword . Oh well. Loot whatever new crap your friends have dug up, then get Somah to join you on your journey to the Robot Assembly area.
23) Robot Assembly
Upon entering Somah will take it upon herself to start messing with the unpowered Teleportation Matrix to the south-west… after she gawks at a few consoles, anyways. She’ll apparently succeed-at least she’ll succeed in sending herself on a one-way trip to another part of the level… She’ll also succeed in setting off an alarm, which will summon several drones for you to deal with. After all the enemies are defeated with she’ll implore you to keep looking for the generator while she tries to shut off the alarm. When you’re done talking to Somah and cleaning up her messes, loot around for some containers and various alien loot on shelves, one of which carries a hefty number of Alien Power Cells.
24) Alternate Routes
On the ground floor, continue through a door to the north to reach another large room. You know the drill, kill all the drones and turrets and loot the place. Once everything is destroyed, Somah will come from a room west of a conveyor belt, which was previously blocked by a force field. She’ll tell you that the aliens are closing down the Teleportation Matrixes again, and will helpfully suggest that you blast your way deeper into the Robot Assembly area. Head through the Teleportion Matrix in the room she came from to reach the upper part of the room we started in. Loot around before returning to the room you just teleported from. In the north-eastern corner of the room, along the wall past the assembly line, you’ll find an “Electronics Access Panel”. Activate it and select the “Overload Assembly Line” option, then run away bravely. A section of the wall will conveniently explode, giving you access to more of the Robot Assembly area. Fancy that.
Somah tampers with a deactivated teleporter, and her incompetence strikes again (left). Robots in stasis can be activated with the “Drone Control Device” (right).
25) Through the Breach!
Go through the breach (once more, my friends!) in the wall and head north along the conveyor belt. In this room you’ll find aliens and Drones, both in and out of stasis. On one of the Aliens you’ll find a “Drone Control Device”, which you can use to free one Drone from stasis (at a time) and make them your robotic partner in crime. That or you can just deactivate them and kill them for their juicy robotic loot. Either way. After you have the Drone Control Device it’s business as usual: kill the Aliens, take their Alien loot, and make slaves of their alien women and children. Well, maybe not the last part, but the first two parts stand. After your enemies are dispatched and there’s no possible way Somah can do anything but get in your way, she’ll show up. Head through some doors to the east (there are four of them leading to the same area) to find the generator you’re after. Blow it up, and head west past some stairs and through some doors (which were previously blocked by a force field) to find a Teleportation Matrix which will take you back to the beginning of the level.
That’s two down and one to go, and for this last area-the Hanger-you can get Paulson to accompany you. You can, however, decide to be merciful and leave him behind. Why is this merciful? Well… there are lots of Aliens in the next area, and Paulson’s chances of surviving are pretty slim. Take him or not-but head into the Hanger regardless. This time the loot your fellows will uncover includes a Mini Nuke and a pair of Nuka-Cola Quantums.
26) The Hangar
Grab the container near the entrance and continue to the west into the hangar room. Grab the two containers nearby and head down some stairs to the south, since a force door blocks your progress westward. Paulson will comment on the flying saucer and the “tall shiney things”. Note that you can activate a Support Drone or a Guardian Drone on the lower level. Go up some stairs on the southern side of the hangar and kill two Aliens before turning west. Take down the force door in your way by activating a “Control” (this takes down the force doors on both sides of the level) and continue until you find a room with five “Pylon Controls”, an Alien, two containers, two healing arches, two dormant Drones, and a force door blocking our way to the west.
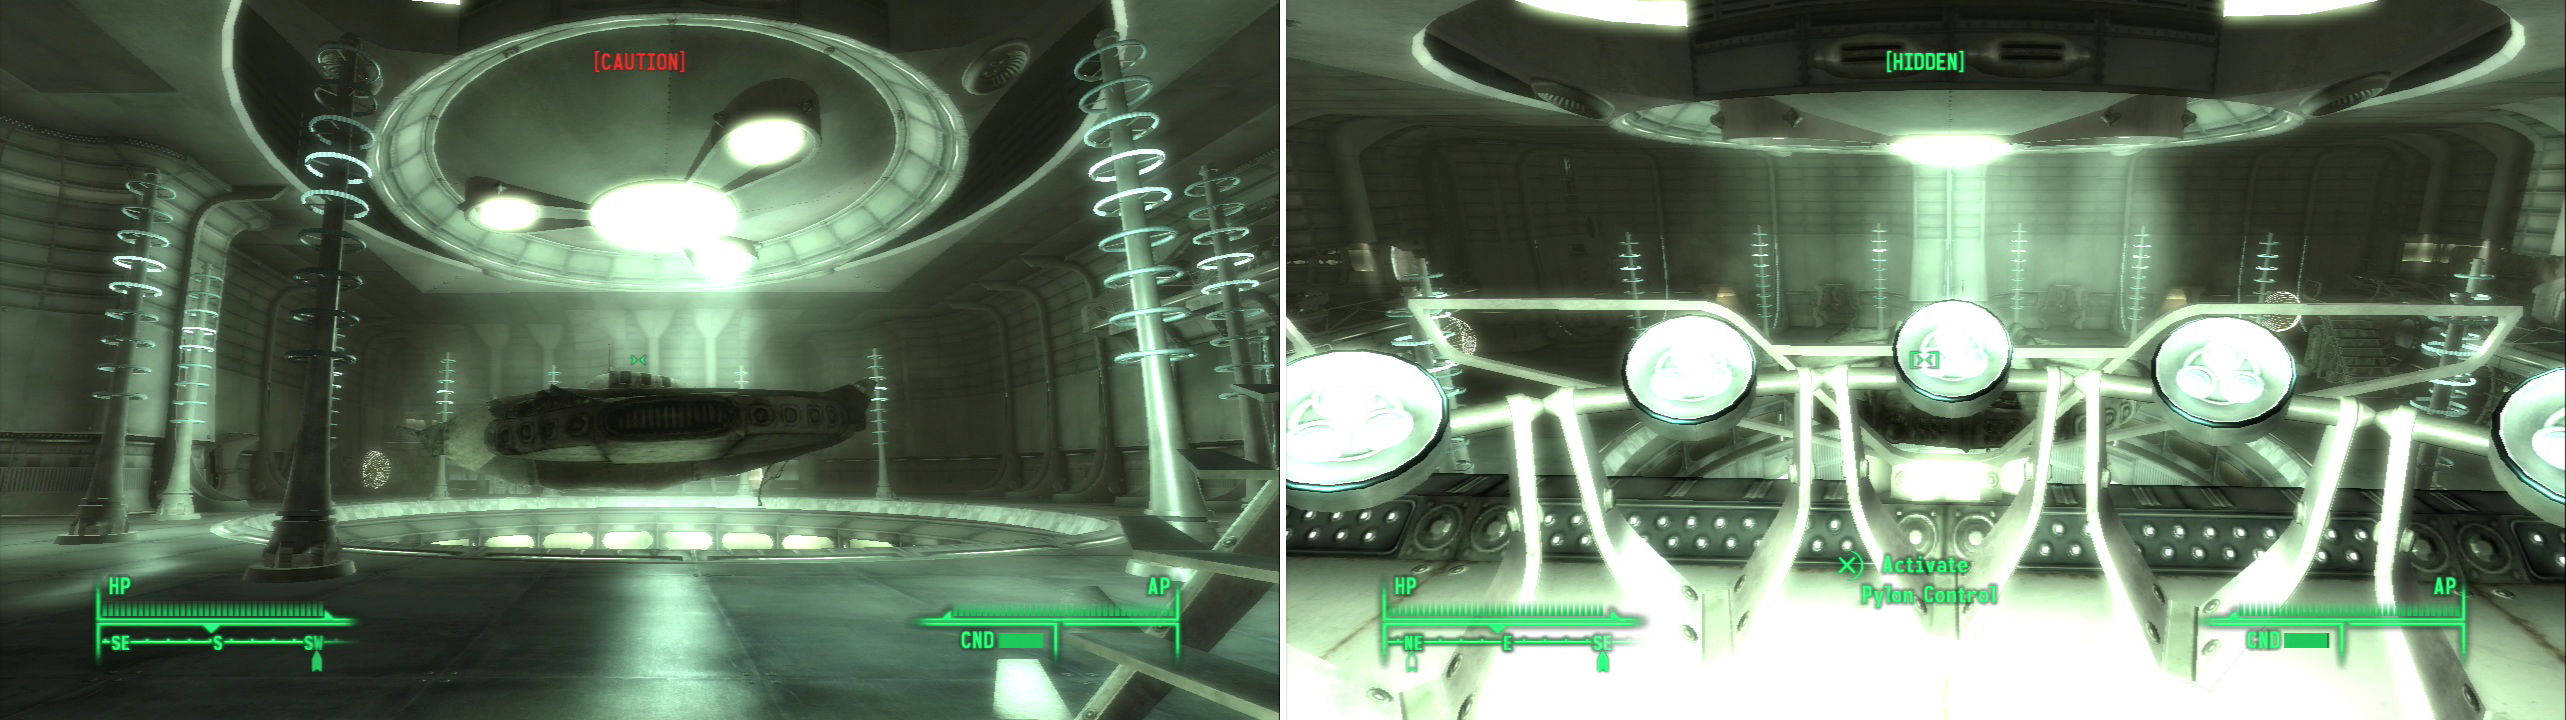
The main feature of the hangar is a docked space ship… what else? (left) Manipulate the docking controls to thwart the Aliens that attack (right).
27) Alien Horde!
Before you activate the control for the door to the west, make sure you’re prepared. Once you activate the control, an alarm sounds and a horde of Aliens and Drones will come from the eastern end of the hangar (beyond where the recon ship is docked.) The way the game wants you to handle this is by activating the Pylon Controls as the enemies get near their corresponding pylons (Paulson’s “tall shiney things” mentioned earlier) around the spaceship. This will create a gravitational field that knocks down, injures, and hopefully knocks your enemies into the void beneath the ship. Unfortunately, you’re very vulnerable to attack while playing with the controls (hence the healing arches) and so is Paulson, who doesn’t have the good sense to back up so he can heal. If you’re by yourself, you can simply hang out by the Pylon Controls and use them to kill all the aliens while sneaking… or you can try to fight it out with the Aliens without using the Pylon Controls, using Healing Arches when you must. It’ll be quite a fight, but you’ll get more loot this way (enemies and gear that fall into the void obviously can’t be looted.)
In any event, you can tell you’re done when the hole under the flying saucer seals itself. If Paulson dies… well, so much the worse for him, make sure to take his outfit and gun. After the fight is over, go through the now-open doorway which caused all this trouble, and blow up the final generator. Also grab the loot off the shelves before you leave, and loot the rooms east of the alien spaceship (where the Aliens were attacking from earlier). How many Aliens did we just kill? It’s hard to say for certain, but by counting all the weapons collected afterwards, we should be able to get an estimate:
Alien Atomizers: x20
Alien Disintegrators: x11
Drone Cannons: x5
Shock Batons: x8
Yep. That’s alot of dead Aliens.
28) Preparing for the Space Walk
Your buddies now will encourage you to get that Spacesuit on and step out into the void. First, loot around the Engineering Core for the last time to turn up some ammo boxes, alien food, another Nuka-Cola Quantum, a Gatling Laser, a Laser Rifle, a Plasma Rifle, another Buttercup toy, some Baseball Bats, and other mundane junk. Also note that if you didn’t do it already, you’ve lost access to the Maintenence Level. Get Elliott to make you some Cyro Grenades/Cyro Mines, get Somah to repair your gear, rest, stash your loot… whatever you need to do. When you’re ready don your Spacesuit and head through the “Airlock Door to Decompression Chamber.”
No Comments