
1) Into the Light - Capital Wasteland
As the blinding glare from the sun dies down (your first bath in natural light-so long as you didn’t escape during the night, that is!) you’ll see a ruined world sprawled out before you. As the game promises, you’ve got free reign of the place, to go after Dad… or not. During this walkthrough, it’s typically a lot of not… The first thing we should do now that we have the freedom to explore as we wish is to obtain the Intelligence Bobblehead. It’s in the far south-eastern corner of the map, and the trip can be somewhat perilous, but it’s a worthwhile endeavor. The prize-a permanent +1 boost to our Intelligence-will earn us an extra Skill Point each level for the rest of the game. Needless to say, the sooner we get this done, the better. If you’d rather explore Megaton… maybe get yourself a house, first… skip to “The Power of the Atom” . **** Just remember that every level you attain without getting the Intelligence Bobblehead is a Skill Point wasted (unless you started with ten Intelligence, which is wasteful enough.)
Oh, speaking of leveling up, you’ll get enough experience from completing “Escape!” to level up. Despite the primacy of skills like Lockpick , Repair and Sneak , you should boost your Explosives skill to 25. This will help complete “The Power of the Atom” , which in turn will… just make life easier. Boosting Speech a bit early on will also make you more likely succeed at Speech challenges, which will reduce the amount of save/loading you’ll need to do.
2) Megaton, Ho!
Check the compass at the bottom left of your screen… just below your Hit Point bars. You’ll want to head towards the solid green arrow pointing south-east. Navigate the terrain carefully, as falls DO hurt. When you reach Megaton you’ll meet a robot named Deputy Weld and a poor beggar named Micky. Enter the town, then immediately exit to ensure you have it on your map. Now that we have that done with, we can head on to Rivet City. If you’re overloaded with crap, wait around outside Megaton for a few hours at a time and eventually some merchants will show up. It’s as good a place as any to unload any extra suits of Vault 101 Security Armor you’ve found. We’ll talk about these merchants in greater detail later, but for now, just sell off junk. Keep your Baseball Bat, your 10mm Pistols, a copy of each Vault 101 outfit (if you horde outfits), your copy of Grognak, all your chems, your Nuka-Cola, your Purified Water… and generally anything that’s weightless. Because… why not? It’ll sell for more later, wihen you have a higher Barter skill, at the very least.
3) Tips for the Trek
Now for the big trip to Rivet City… for those of you who don’t like too much hand-holding… why did you download this guide? Seriously though, this will be a rough outline of hints to help you get there in one piece. Or at least, one piece capable of holding the several pieces that got shot/smashed/hacked/clawed/blasted/chewed off.
- Avoid fights when you can. Use the Sneak skill to move about. It slows you down, and getting within a mile of anything will probably give you away, but the least it’ll do is tell you whether you’re [HIDDEN], whether an enemy has heard you [CAUTION], and if you’re being pursued or attacked by something [DANGER]. The higher your Perception, the easier it’ll be to see and avoid danger. The higher your Sneak , the better your chances of avoiding a fight.
- Keep multiple save slots so you can back-track if you need to. Saving right before you accidently find the Death Claw random encounter will spare you a lot of trouble.
- Keep in mind that healing is NOT going to be as easy to come by anymore. In fact, healing will be one of two evils for a while: 1) prohibitively expensive, as using a Stimpak is the equivilent of swallowing 25 caps, or 2) a trade off, as food and water sources that replenish Hit Points will in turn give you Rads. A full Rad bar can be expunged with one 100 cap doctor visit though, so it is cheaper in the long run to just soak up the Rads… just be economic about it. Drinking from a fire hydrant is going to give you a much better Hit Point-to-Rad ratio than, say, drinking from a toilet. Of course, you can’t suck on a hydrant while you’re being shot… or at least, not to any effect, so use Stimpaks in combat if necessary.
- If you must fight, fight like a sissy. Get up to them in melee and V.A.T.S. them, so you’ll do some damage while being immune yourself. Once V.A.T.S. is done, run until you get more Action Points. Rinse, wash, repeat. It won’t save you from overwhelming firepower, but it will allow you to pick off the odd Raider or two.
- Occassionally try to enter V.A.T.S. as you explore, even if there’s nothing in sight. Often times you can pick out a foe in V.A.T.S. long before you can see them. This can alert you to enemies that might be hard to see against the background… Vicious Dogs, Mole Rats, Bloat Flies, etc.
- Did you save your game? Seriously, you’re going to want to do this often. Rotate save game slots, just in case. Best case scenario, you make it there without having to fight more than several foes. Worse case scenario, you save your game when you think you’re safe… but that Death Claw behind you begs to differ. And he’s not going to stop killing you when you reload, either.
4) First Step: The Sewer Waystation
For those of you who want more concrete directions to get to Rivet City besides “It’s south-east, here’s some tips, good luck!” Well… here will be chronicled one such run in detail. Just keep in mind that random encounters do occur, and there are many fine ways to get to Rivet City-this is just one of them. Your trip probably won’t be exactly the same, but it will at least give you a point-to-point reference. First head mostly east to the Sewer Waystation. If you find Super-Duper Mart, you’re too far north. If you find a highway, you’re too far south.
5) Wilhelm’s Wharf
From the Sewer Waystation head east some more until you find Wilhelm’s Wharf. Here you can find Grandma Sparkle if you need to sell off some more stuff you find. If you find Greyditch, you’re too far south (or not far enough!) Seriously, avoid the Fire Ants. You can probably kill a number of them, but it’s prohibitively costly to do so with your ammo reserves… And melee is not an option. If you want to see why… well, save the game and try it.
Grandma Sparkle will tell you about people looking for you, depending on your alignment (at this point in the game, it’s almost certainly Talon Company Mercs.) You can steal some .32 Calibur Rounds from her if you feel lucky. If you get caught by some annoying ass kid named Bryan Wilks, he’ll try and get you to start the quest “Those!” . We’re in no position to do this quest yet (see the Fire Ant comments above), and he should be ashamed that he tried to coerce us into likely suicide! You should strive to succeed at two Speech challenges with the kid to score some extra loot… which will be very difficult at this point in the game. If he catches you… just reload and try to avoid him.
6) Down the ol’ Potomac Road
Head south-east down the road along the Potomac River, past the sign that says “Anchorage War Memorial”. Ignore the bridge that leads to it, as it’s covered in Frag Mines. While they’re easily disarmed with a bit of practice, we should just avoid the place, as we don’t want the XP we’ll gain from disarming the mines. Remember, levels gained equals Skill Points lost. Keep following the road and, if it’s the right time of day, you might find a Scavenger sitting on a dock. If you can, rob the Scavenger, as they’ll likely have all manner of loot for you… although it’ll probably require a lot of save/loading to get that gear… Little of which is useful, and none of which is essential.
7) The Citadel
Continue down the road to the south and you’ll see a ruined bridge in front of you. Take the road leading up to the intact portion on the same coast you’re on. The threat icons you see on your compass (the red dashes) are Raiders that live in the area under the bridge. Avoid them by staying away from the openings in the bridge. Once on top of the bridge sneak up to the west, away from the river. At the end of the bridge where rubble prevents further exploration part of the railing has been destroyed. Jump down to onto a pile of rubble and safely head to the huge building across from the bridge with the crane over it. You’ll still way to stay up west, away from the river until you reach the building, as you can still be bothered by Raiders within the bridge. Go up the stairs to reach the building’s foundation and search garbage cans for goodies. Soon enough you’ll get a message saying you’ve discovered the Citadel. A few minor enemies so far, and one Raider camp easily skirted… not so bad, right?
8) Brotherhood Burglary
You’ll come to the front of the building, where some guys in Power Armor are standing guard, along with a Sentry Bot. You don’t want to pick a fight here. You can talk to Paladin Bael, but there’s not really any point to it just yet. If you’re an idiot, like me, you can nab some 5mm Rounds from Bael, and some 5.56mm Rounds from his buddy. If you head to the far southern end of the building you’ll see a Super Mutant, a Centaur, and a Super Mutant Master (or a Super Mutant Overlord, if you have Broken Steel installed) in a fire-fight with the Citadel Defenses. Normally, the Brotherhood cleans house, but the Overlord and his Tri-Beam Laser Rifle are just too much. Don’t get any stupid ideas, stay away from them. You don’t have the faintest chance of winning.
You might see Brotherhood of Steel patrols walking about, which can be robbed just like that Scavanger. They typically have Laser weaponry on them, and ammunition for said weapons… it just depends on how much time and patience you’re willing to spend trying to steal guns you can’t afford to use yet. You can typically steal 10mm Pistols from all the Knights carrying heavy weapons… but it’s up to you to decide if it’s worth the hassle.
9) Diving for Treasure
Head to the front of the Citadel, opposite the gate Bael was guarding and go down by the coast. Search until you find a dock with some crates and two locked [Very Hard] personal footlockers on it. Dive into the water by the sunken ship and search inside the cabin. By the skeleton you’ll find some RadAway, Rad-X, a Stimpak, some Caps, and the Captain’s Key. Also, in a submerged ammo box you’ll find 8 .44 Magnum Rounds. Now open the personal footlockers with the Captain’s Key. In the left one you’ll find 8 10mm Rounds, 4 Caps, a Chinese Pistol, and a Power Fist. In the right one you’ll find 9 Caps and another Power Fist. Keep both fists and don’t combine them.. even if they break. We’ll find a better use for them later. And by all means, don’t be afraid at all to strap them on… they’re so much better than the Baseball Bat.
10) Pirate Pely’s Boats & Bait
Now leap off the dock and into the water and swim south-east to reach shore and climb up the ridge. To the south will be a bridge leading to the Jefforson Memorial. Ignore it. Head past the rubble east, north-east to find a sign reading “Pirate Pely Boats & Bait”. If you want to explore it, do so. Inside you’ll find a Radroach, some loot, namely the boozes in the fridge, the Pre-War Money in the register, and the meds in the first aid box. Also there will be a computer [Average], and a locked safe [Hard] that we just can’t do anything about yet. If you need healing, the water fountain in the corner should have around a 24:5 Hit Points-to-Rads rate, which is as good as you’ll find out here.. better than the 20:8 rate for drinking from the river.
11) Super Mutant Smackdown
Book - Lying, Congressional Style
From the Pirate Pely’s sign you’ll want to head due east. Go up some stairs and continue east until you hit a road. Follow it south-east until you hit a fort. You’ll notice the stacked cars and sharpened stakes as you approach. Make sure you’re sneaking and undetected as you head down some stairs in front of the fort, taking you to a lower area near the shore. Loot some garbage cans. If you look across the water you might just be lucky enough to see some Super Mutants milling about on the structures around the Jefferson Memorial… and if you’re unlucky, they might see you, too.
Head east, staying near the coast until you come to a road leading down from the fort. It is possible for the following events to happen: The fort to the north might be unoccupied, or it might be crawling with Super Mutants, possibly including a Super Mutant Brute with a Minigun (which is typical for this fort). Or, if you’re lucky one of the merchants may have got into a scuffle with the Super Mutants and kill them for you. Most of the Super Mutants will have Nail Boards and Hunting Rifles, and are entirely managable singly or in pairs if you have a Power Fist.
If you’re feeling frisky, clear out the base. There are numerous ammo boxes to loot, as well as gore bags, and of course the Super Mutants themselves. If you are hurt from the fight, take a nap on the makeshift bedding. At the “top” of the fort, near the bedding and some ammo boxes you’ll find a Lying, Congressional Style book. Also on the platform with the fire on top (possibly where the Super Mutant Brute was) you’ll find a hostage. If you’re nice, you’ll let them go. You can ask them to give you stuff, but it’s usally junk and not worth it. Anyways, when you’re done killing, looting, and resting, continue east. We’re almost there!
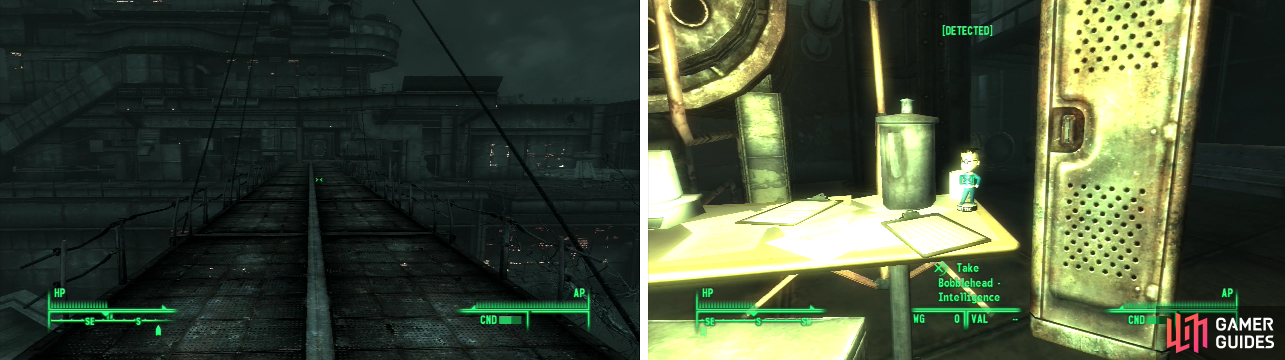
After a harrowing* journey, you’ll reach the ramp to Rivet City (right), where your glorious* prize, the Bobblehead - Intelligence (left), awaits.
12) The End of the Journey
Follow the road east and head up a ramp, you’ll see a metal sign with the beautiful words “Rivet City” on it. Huzzah! Like Megaton, merchants will occassionally gather outside of Rivet City, so if you need to rest up to trigger a merchant, by all means. Or you could waddle inside and sell your gear to some of the best vendors in the game. Head up two rusty ramps and past the beggar Carlos and activate the security intercom. The bridge to Rivet City will extend, and you’ll be cooly greeted by Harkness on the other side. When you’re done talking, head through the door leading to the stairway. You can buy pretty much anything in the Rivet City Market. Flak & Shrapnel sell guns, Seagrave Holmes sells, well, a little bit of everything, Gary Staley sells food, Cindy Cantelli sell drugs, and Bannon sells clothes. Rivet City will be explained in more detail when we come here to do quests. For now, we’re just passing through.
13) The Prize
Bobblehead - Intelligence
Circle around and go through the door leading to the Midship Deck. Follow the signs to the “Science Lab”. Head down the hallway and take a right. At the end of the next hallway take a left, and go through the door leading to the Science Lab. Go down the stairs to the main floor and look on the table by the lockers. You’ll see the Bobblehead - Intelligence near a coffee pot. Run down and grab it with out talking to anyone. We’ve no need to bother with these quests yet.
Now our great crusade for the Intelligence Bobblehead has ended, it’s time to head back to Megaton… by fast travelling via your Pip-Boy, of course. By now we’ve got some decent gear.. weapon anyways, even if we can’t afford to use them. It would certainly be nice to have a place to store it all, eh? First things first, by now you should be near level 3. If you’re not, go kill some things until you are.
No Comments