
There are 300 optional missions in Crisis Core Final Fantasy VII: Reunion. Enemy on the March (M3-1) can be found in the Genesis’s Forces Category.
You can start the M3-1 series of missions at the start of Chapter 3.
How to Unlock the Enemy on the March Missions in Crisis Core Reunion
Thankfully, most of the Enemy on the March set of missions are obtained at the beginning of specific chapters, which means that they can’t be missed. The other few are unlocked by completing the previous missions. This set of missions focuses on primarily machine-type monsters.
| Mission | Unlock | Enemies | Reward |
|---|---|---|---|
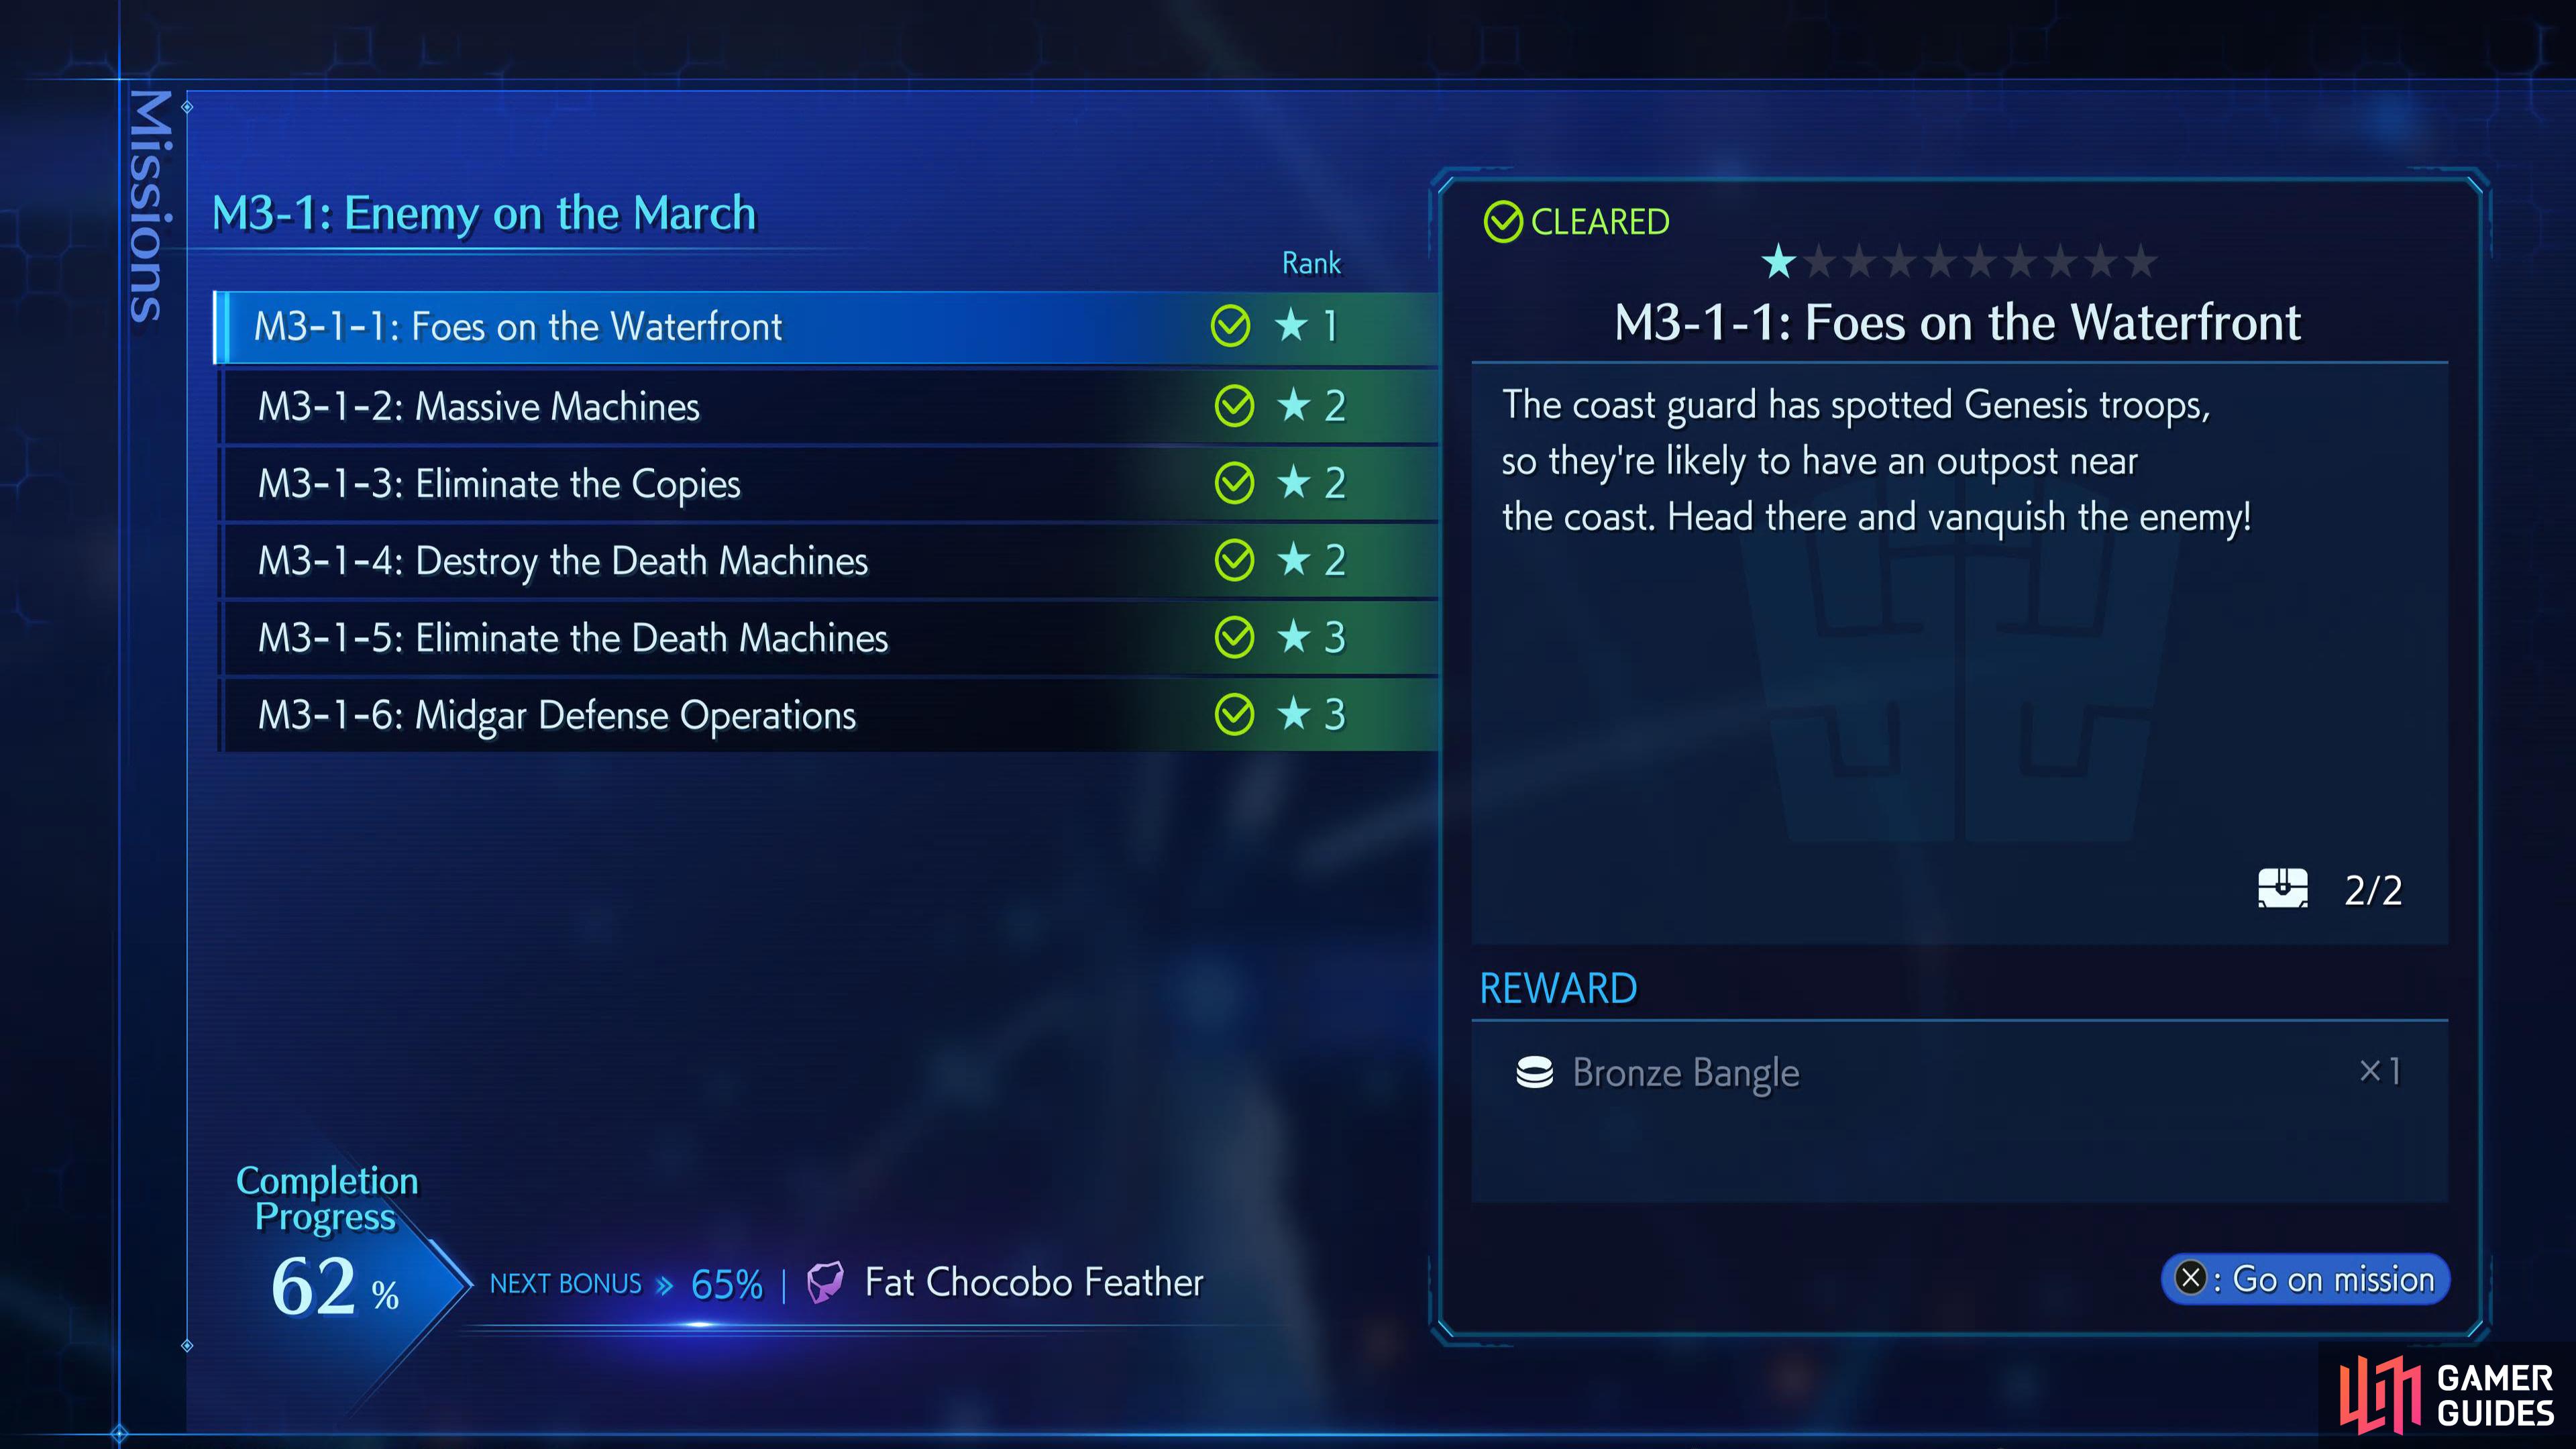
| 3-1-1: Foes on the Waterfront (1★) | Automatically Unlocked at the start of Chapter 3 | ||
| 3-1-2: Massive Machines (2★) | Complete the previous mission M3-1-1 | ||
| 3-1-3: Eliminate the Copies (2★) | Automatically Unlocked at the start of Chapter 4 | ||
| 3-1-4: Destroy the |
Complete the previous mission M3-1-3 | ||
| 3-1-5: Eliminate the |
Complete the previous mission M3-1-4 | ||
| 3-1-6: Midgar Defense Operations (3★) | Automatically Unlocked at the start of Chapter 5 |
Most of the rewards in this category are lackluster, and the only real reason to complete the missions is for the Mission Completionist trophy/achievement. All the other rewards you can get elsewhere with little effort. It’s worth noting that you can find a ![]() Kactuar in Mission 3-1-3 which is needed to unlock mission 10-1-1. This will eventually lead to you obtaining the summon.
Kactuar in Mission 3-1-3 which is needed to unlock mission 10-1-1. This will eventually lead to you obtaining the summon.


Mission 3-1-1: Foes on the Waterfront
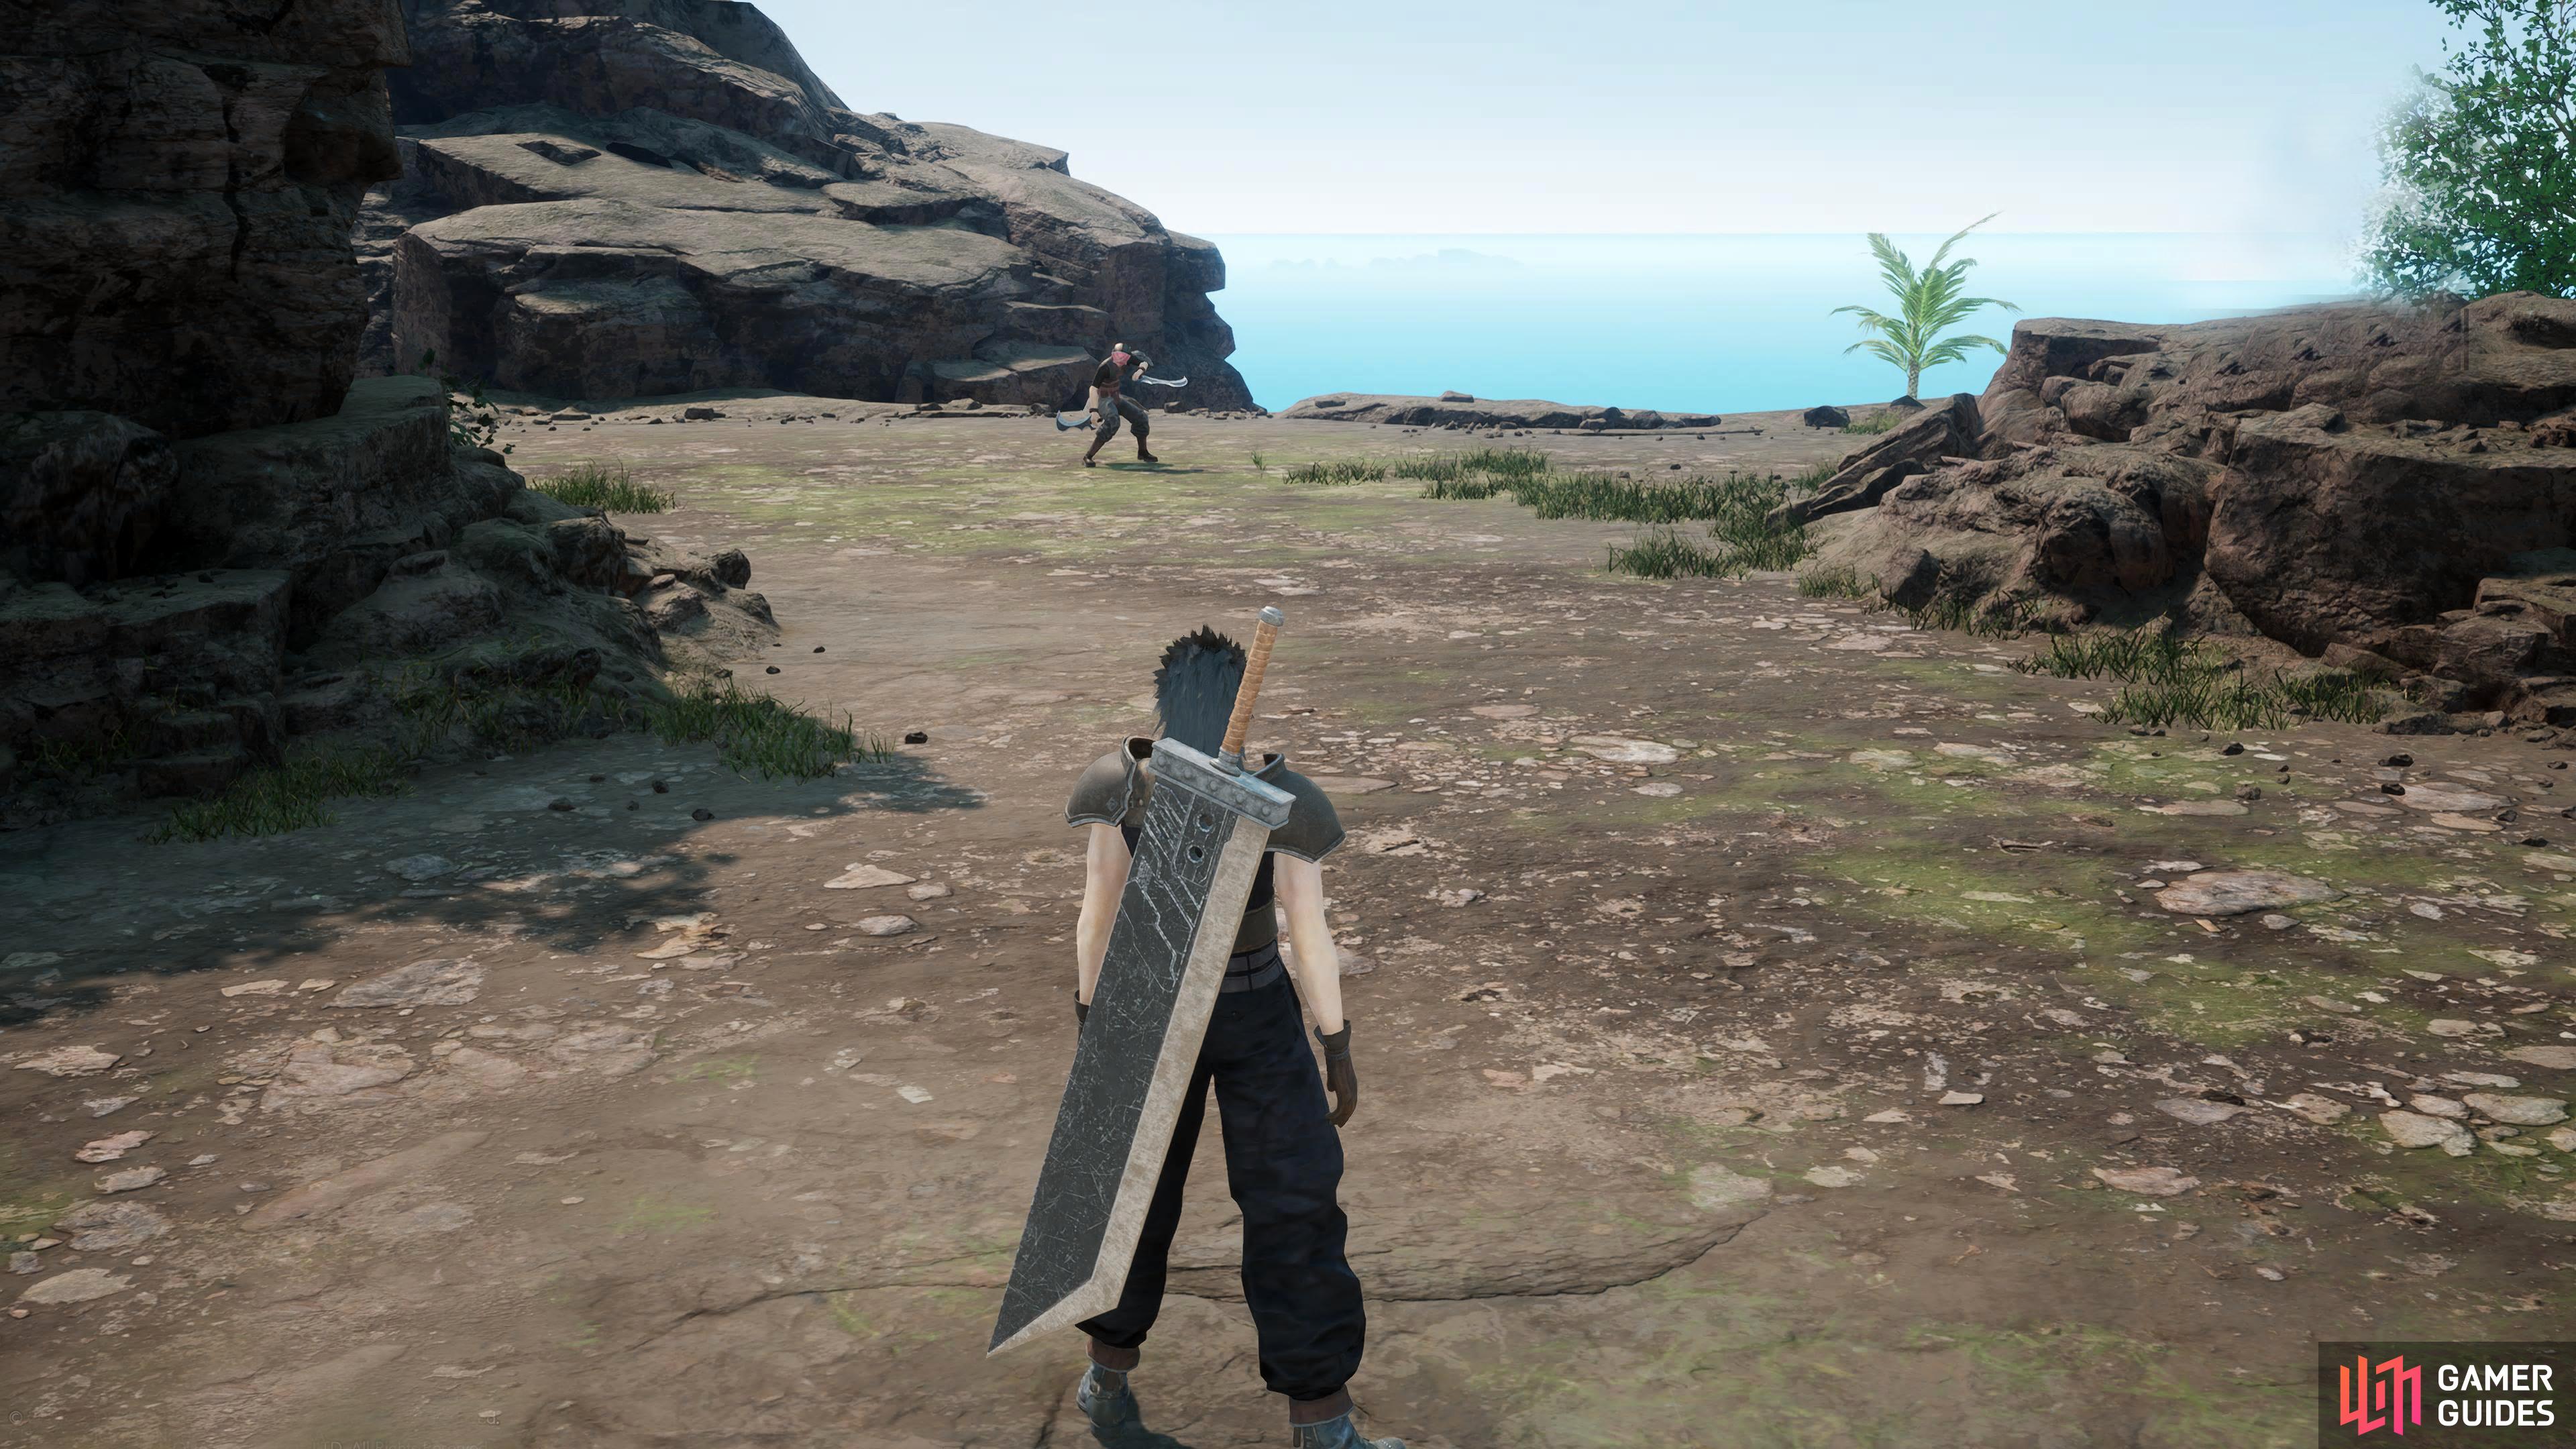
Mission 3-1-1 boss.
Unlocked at the start of Chapter 3, this mission only has a small map containing just the two chests. These chests will contain a ![]() Potion and an
Potion and an ![]() X-Potion. One chest can be found to the north, then west, near the barrier, while the other chest is to the west, then north. The Boss will be immediately in front of you once the mission begins, and it’ll be a G Assassin with some
X-Potion. One chest can be found to the north, then west, near the barrier, while the other chest is to the west, then north. The Boss will be immediately in front of you once the mission begins, and it’ll be a G Assassin with some ![]() Blood Tastes to back it up.
Blood Tastes to back it up.
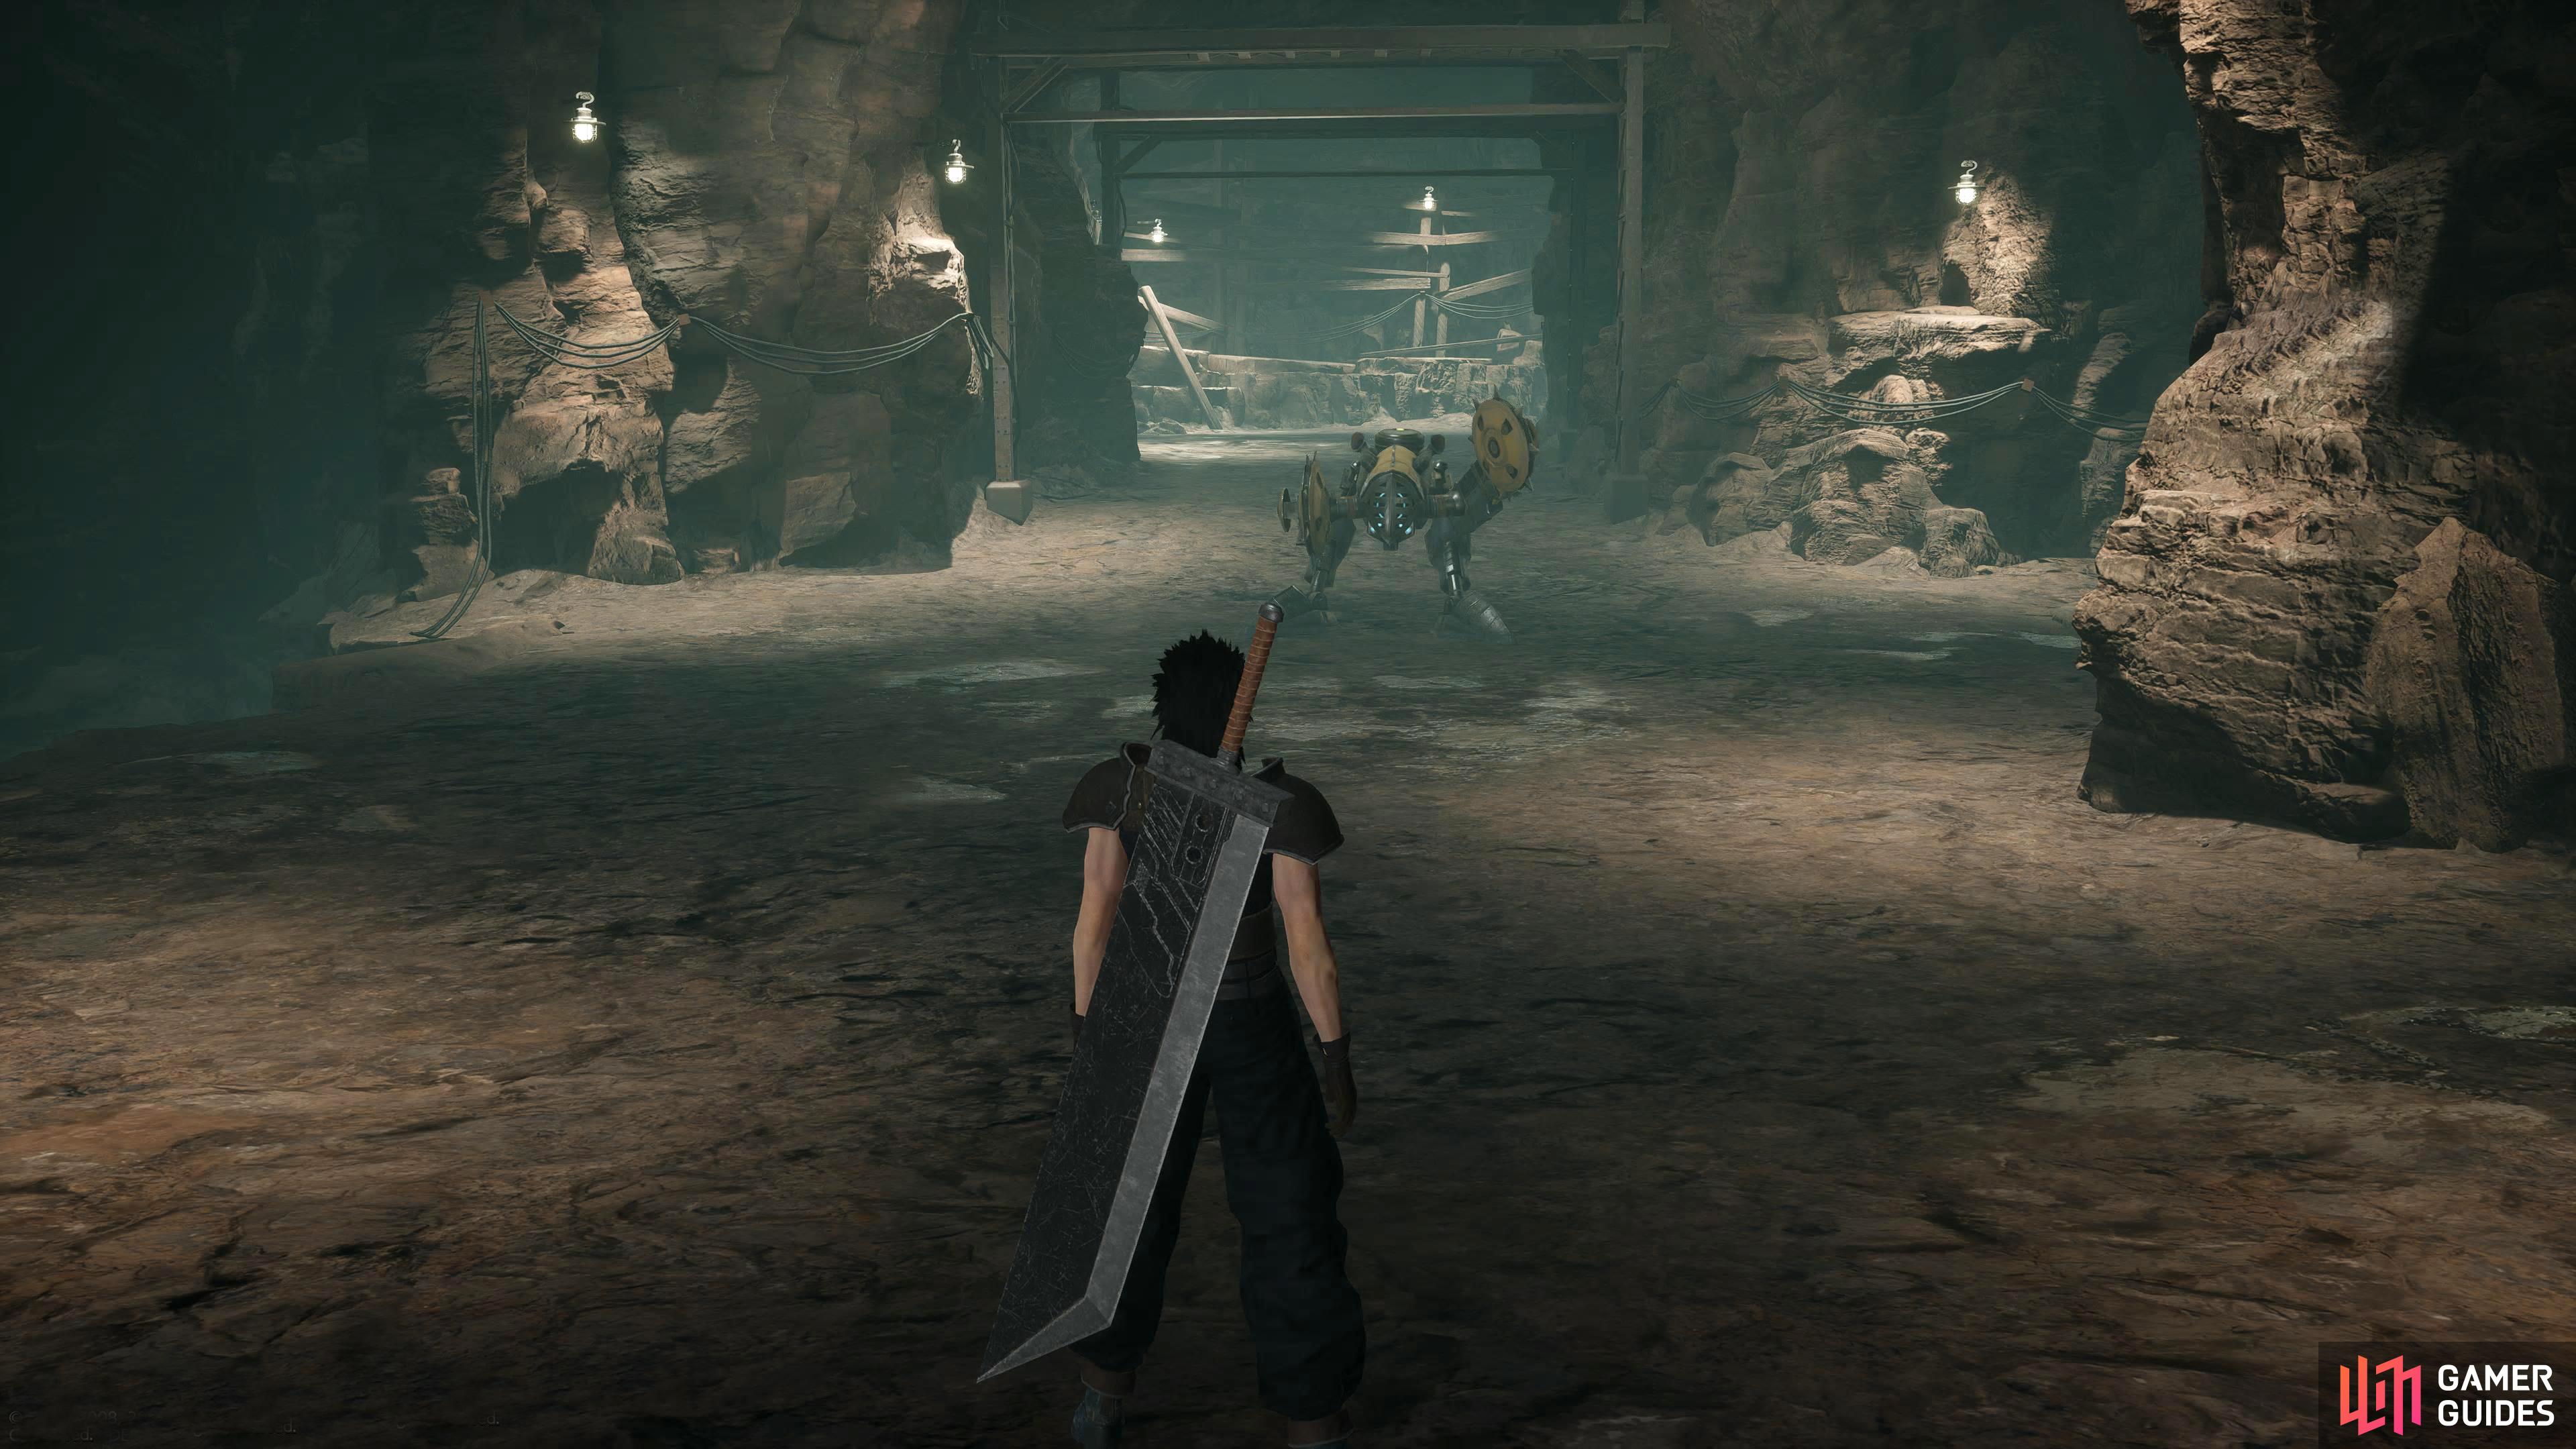
Mission 3-1-2: Massive Machines
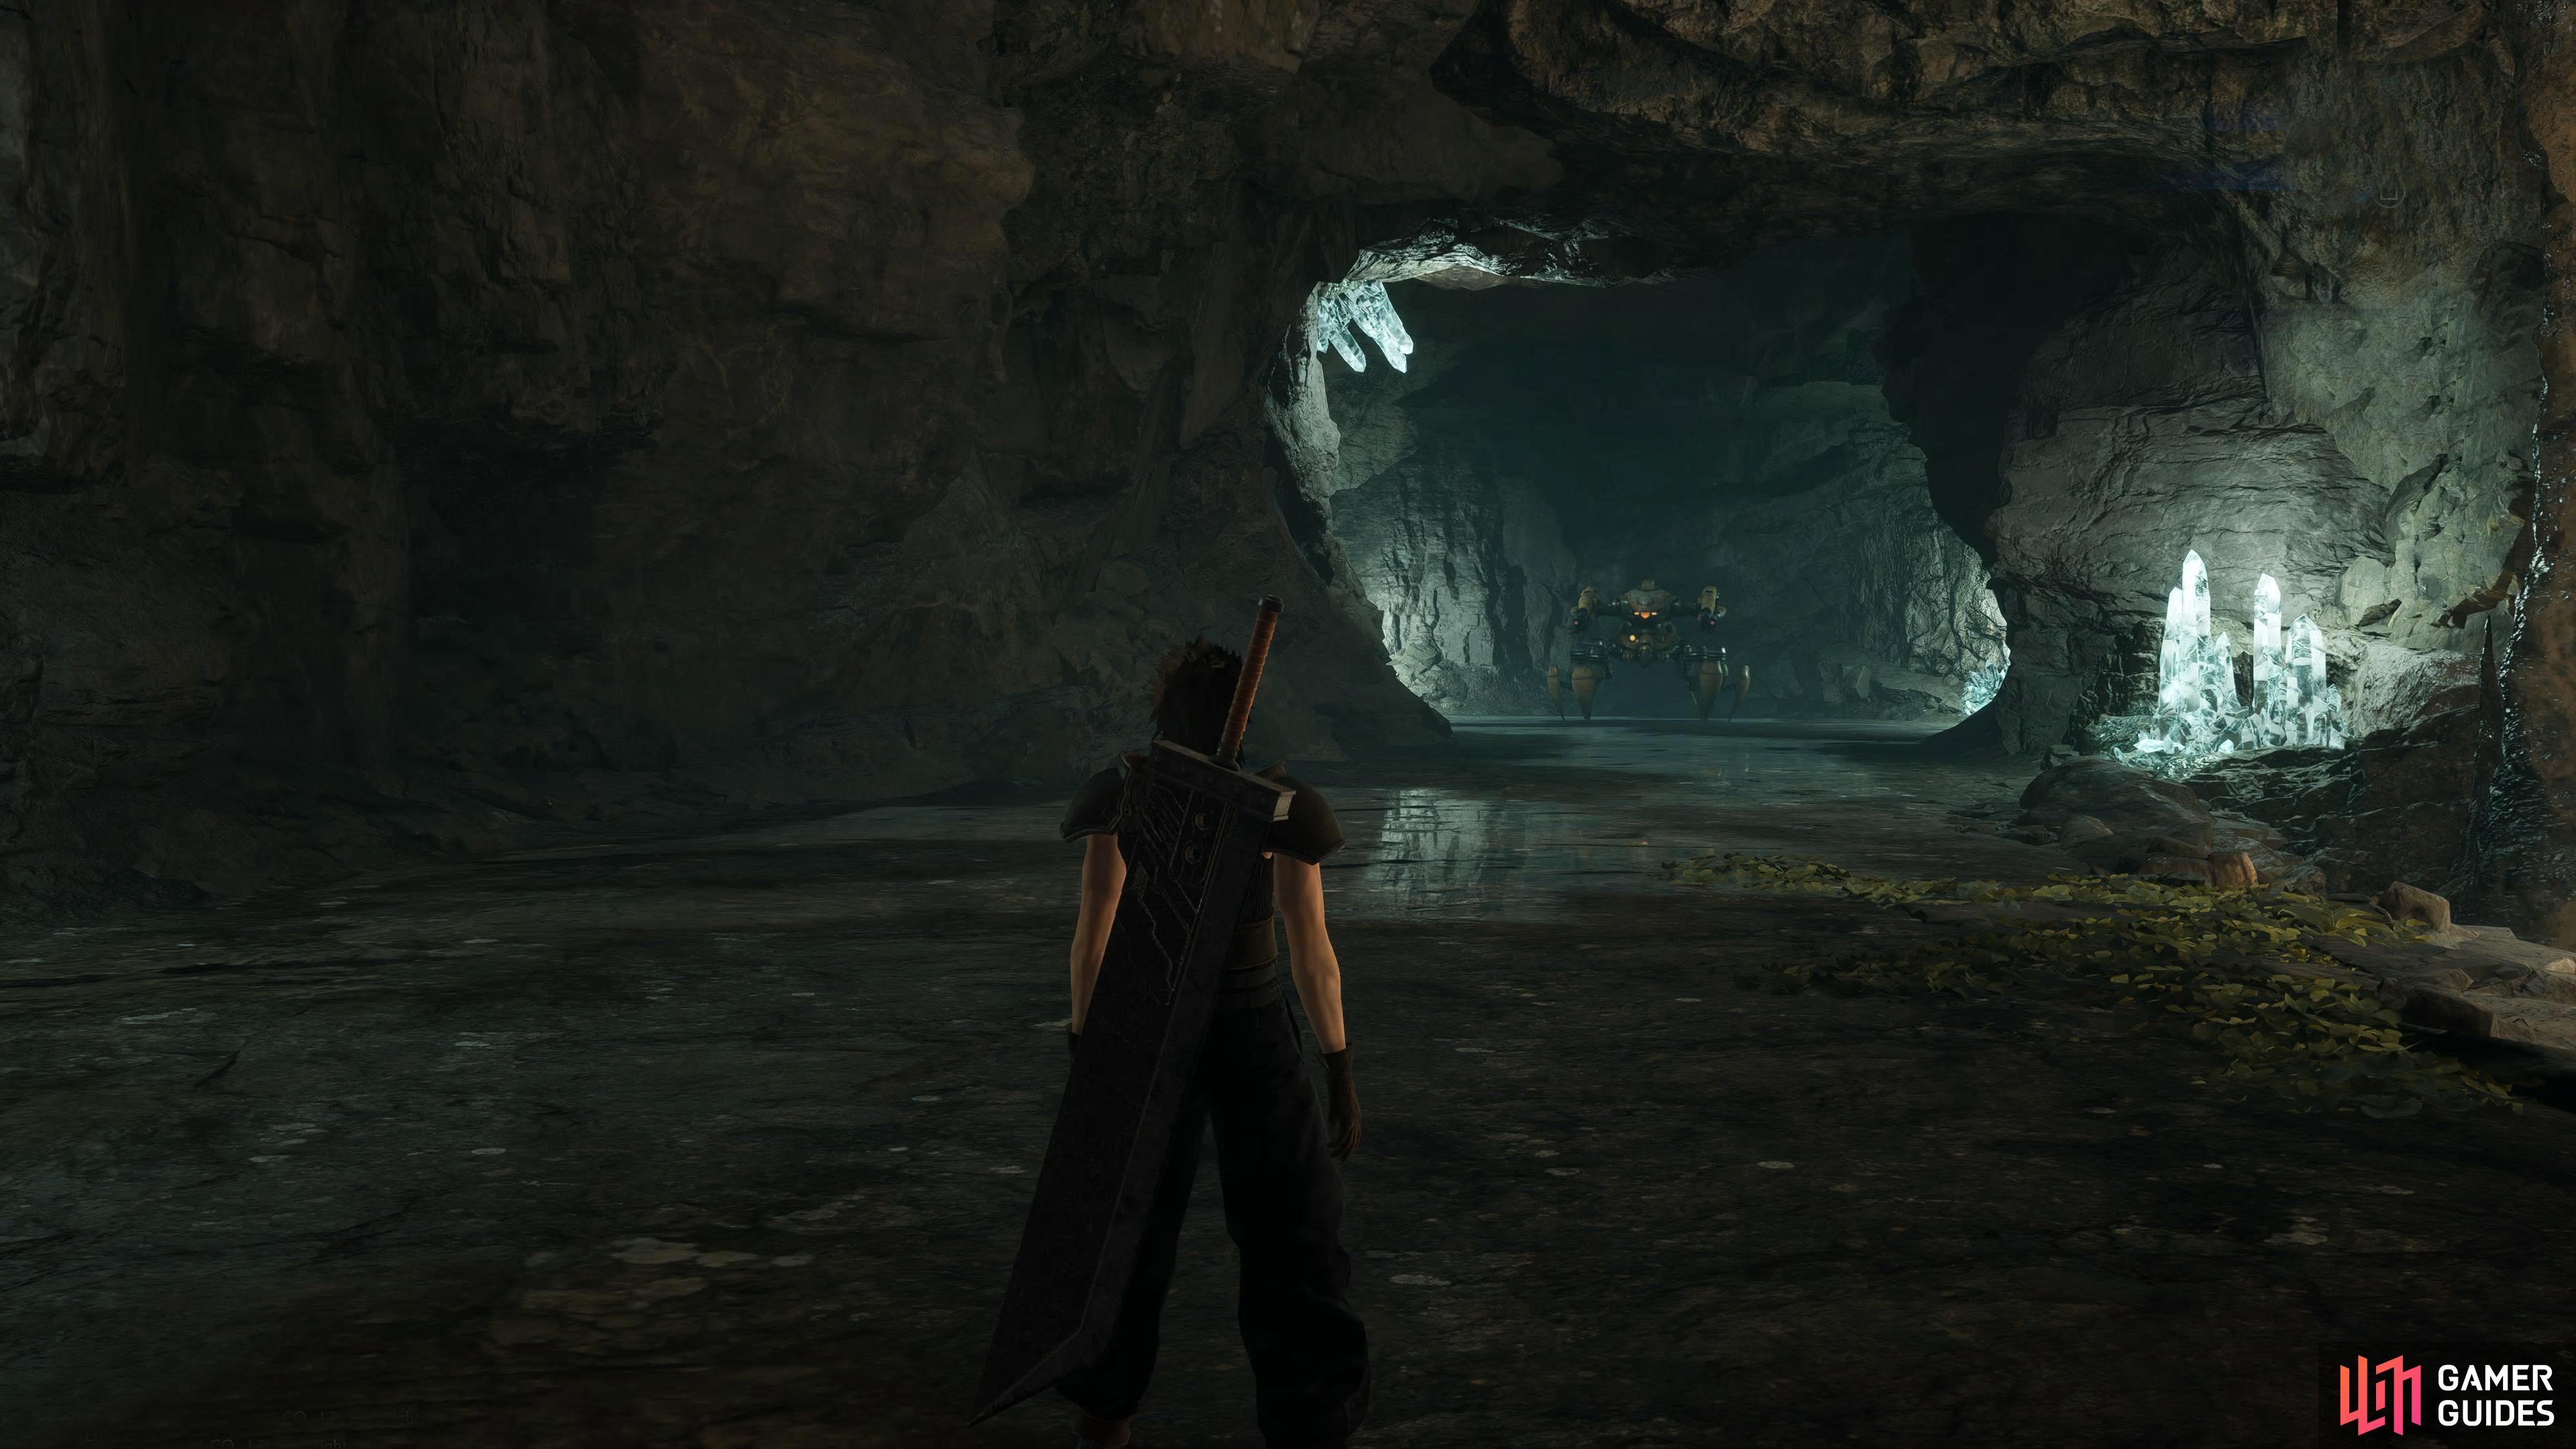
M3-1-2 Boss.
Complete M3-1-1 to start this mission. Another small map, that has ![]() G Assassins, and
G Assassins, and ![]() Heli Gunners in its random encounters. There is only one chest to find here which you’ll find out contains a
Heli Gunners in its random encounters. There is only one chest to find here which you’ll find out contains a ![]() Remedy. You can find the chest halfway through the cave, on your left while you progress west. Once you pick up the chest, continue west to defeat the Boss of the mission which just happens to be a
Remedy. You can find the chest halfway through the cave, on your left while you progress west. Once you pick up the chest, continue west to defeat the Boss of the mission which just happens to be a ![]() Guard Spider. As it is a machine, any thunder-based spell will bring it down in no time.
Guard Spider. As it is a machine, any thunder-based spell will bring it down in no time.
3-1-3: Eliminate the Copies

Mission 3-1-3 boss.
This mission is unlocked at the start of Chapter 4 and is more difficult than its predecessors. The random encounters here will have Red Saucers, ![]() Sweepers, and
Sweepers, and ![]() G Avengers which shouldn’t cause too many problems, utilize
G Avengers which shouldn’t cause too many problems, utilize ![]() Thunder spells on the Red Saucers and Sweepers, while using regular attacks on the G Avengers. There’s only one chest here containing a
Thunder spells on the Red Saucers and Sweepers, while using regular attacks on the G Avengers. There’s only one chest here containing a ![]() Wrist Band, which can be discovered by hugging the right wall as soon as you start the mission.
Wrist Band, which can be discovered by hugging the right wall as soon as you start the mission.
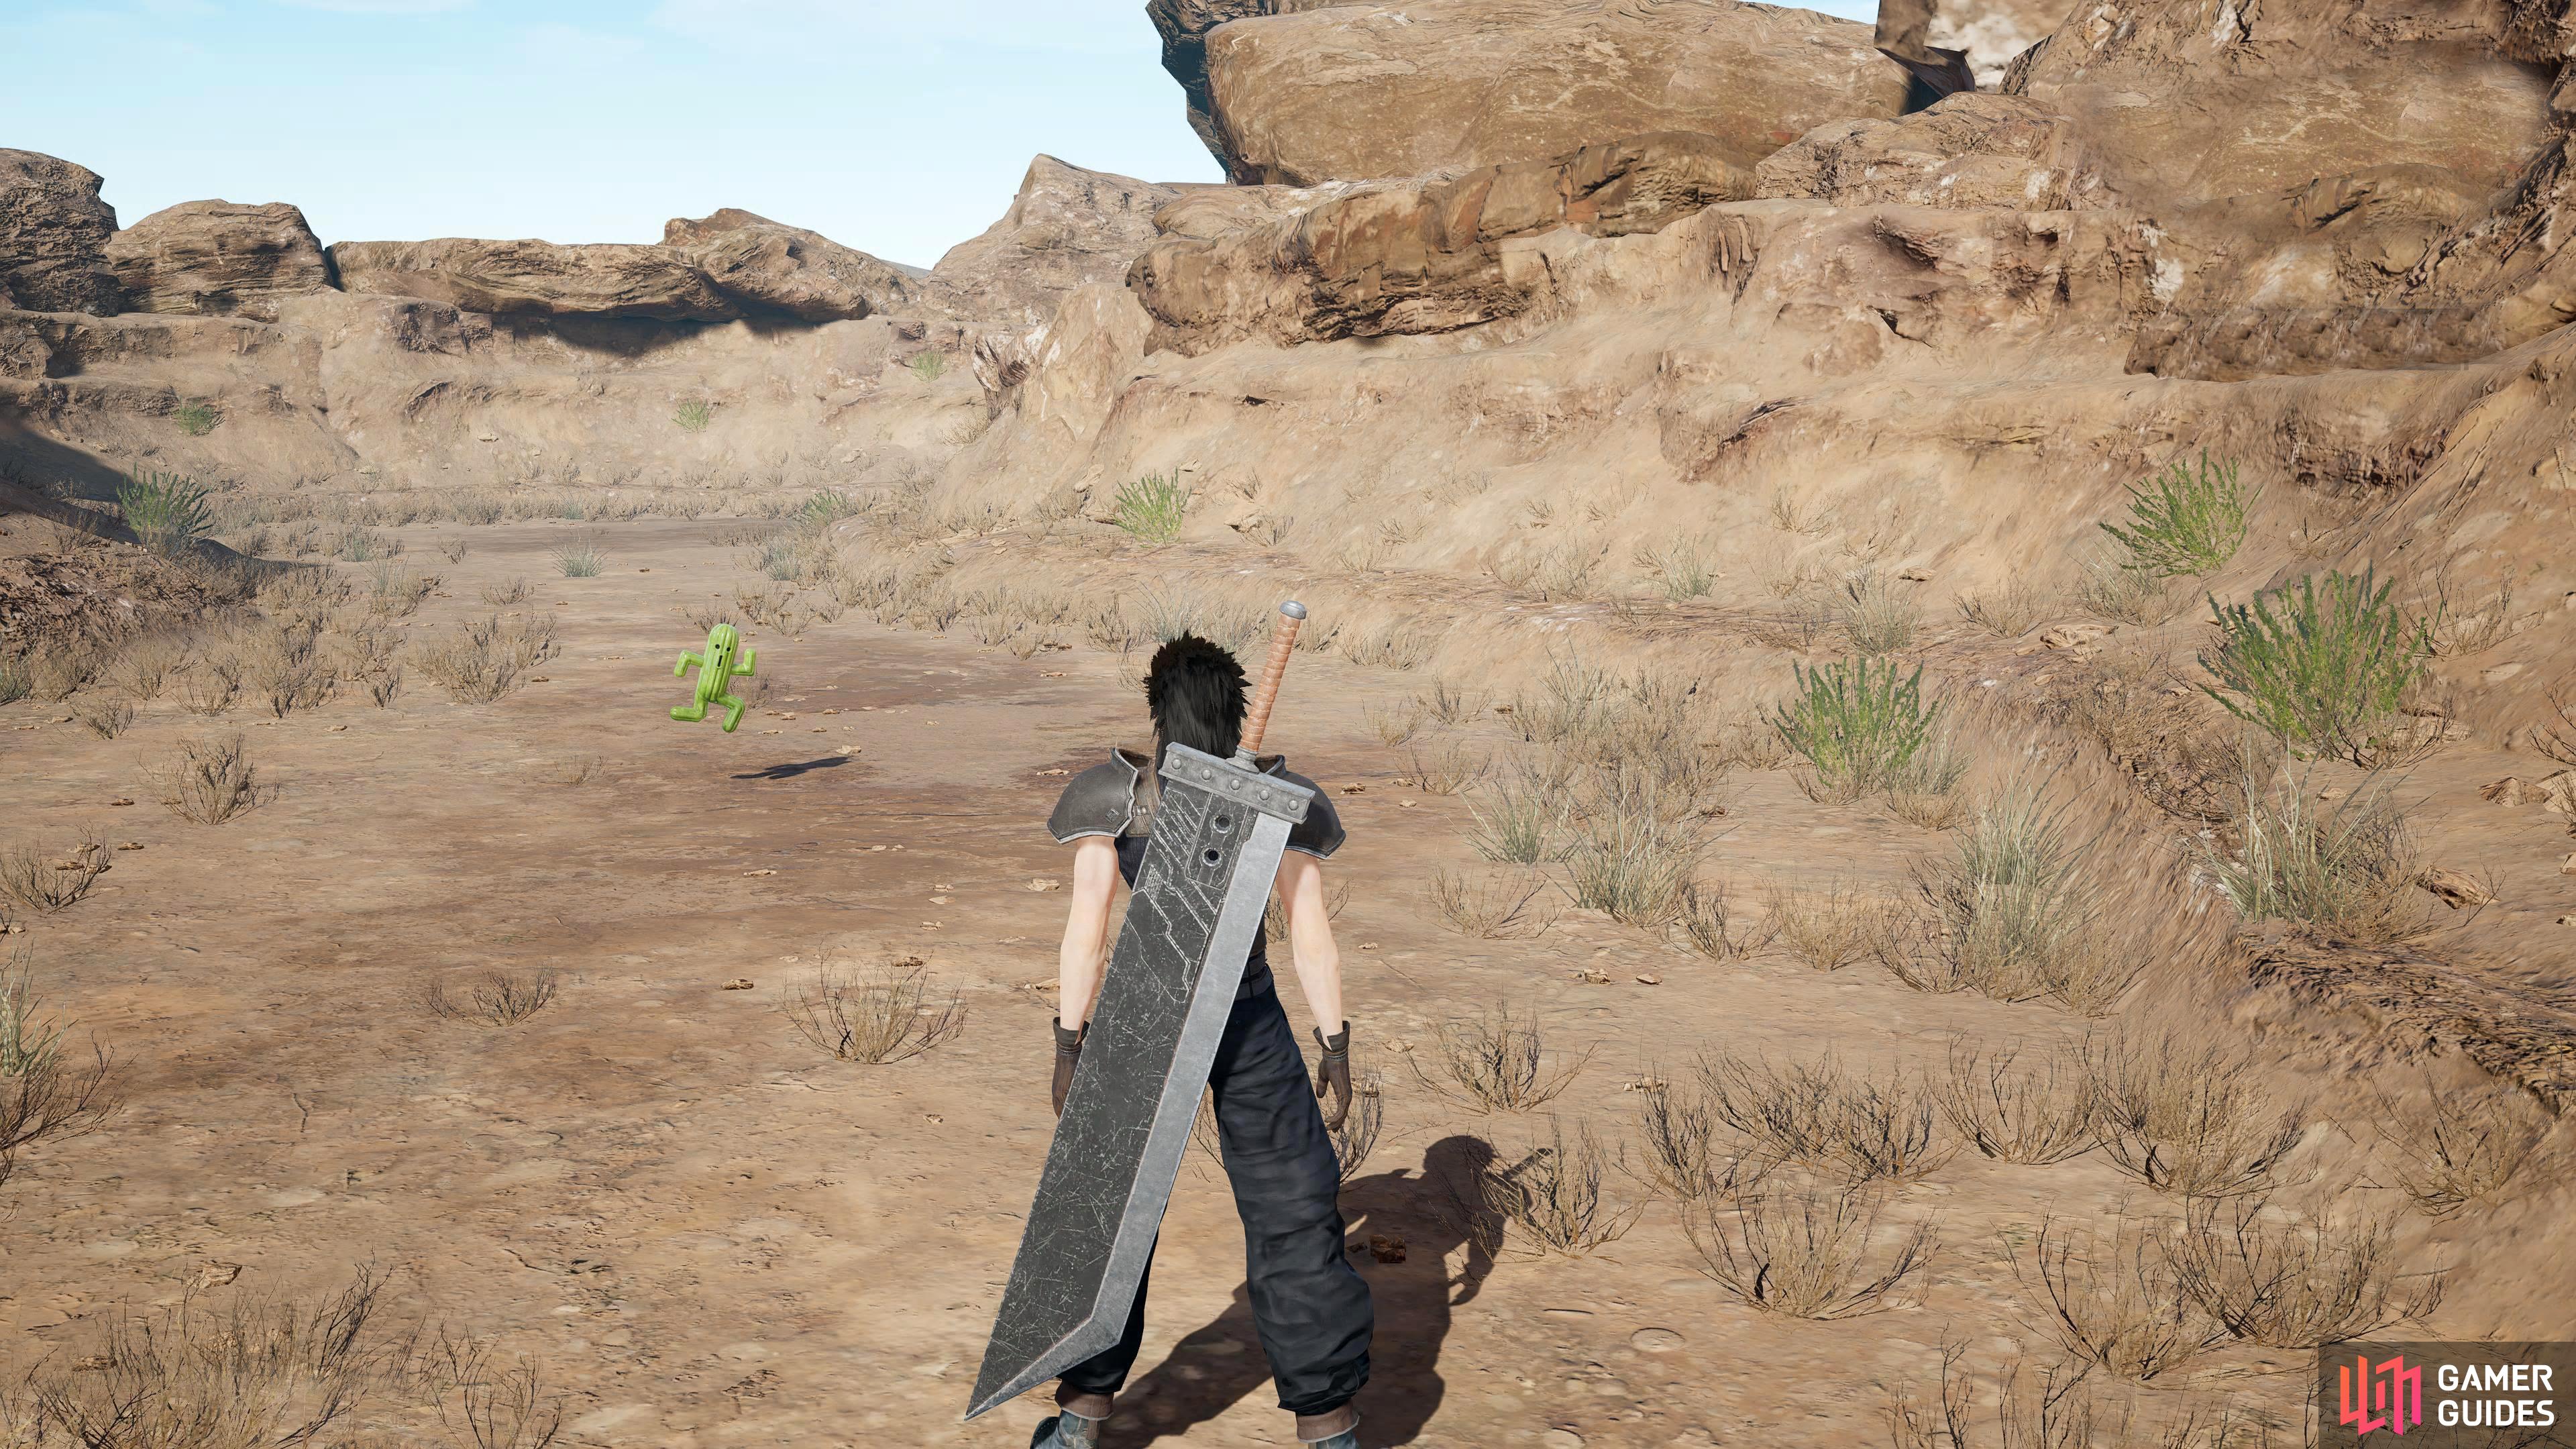
You can find the Kactuar on the east of the map.
If you head all the way east, and then south, you’ll find a Kactuar visible on the map. Defeating this little guy will unlock mission 10-1-1 which is the first step to unlocking the Cactuar Summon which you can find more about here. When you’ve got everything you need, make your way to the center of the map where you’ll need to defeat the Genesis Clone, the ![]() G Eraser. This shouldn’t be too tough to defeat as long as you avoid its Combo Attack, and Scorcher attack with the latter taking a while to charge. Other than that, it’ll cast the odd
G Eraser. This shouldn’t be too tough to defeat as long as you avoid its Combo Attack, and Scorcher attack with the latter taking a while to charge. Other than that, it’ll cast the odd ![]() Fire, shoot you with its gun, or a normal attack. It doesn’t have any real weaknesses, although you can
Fire, shoot you with its gun, or a normal attack. It doesn’t have any real weaknesses, although you can ![]() Poison or
Poison or ![]() Silence it.
Silence it.
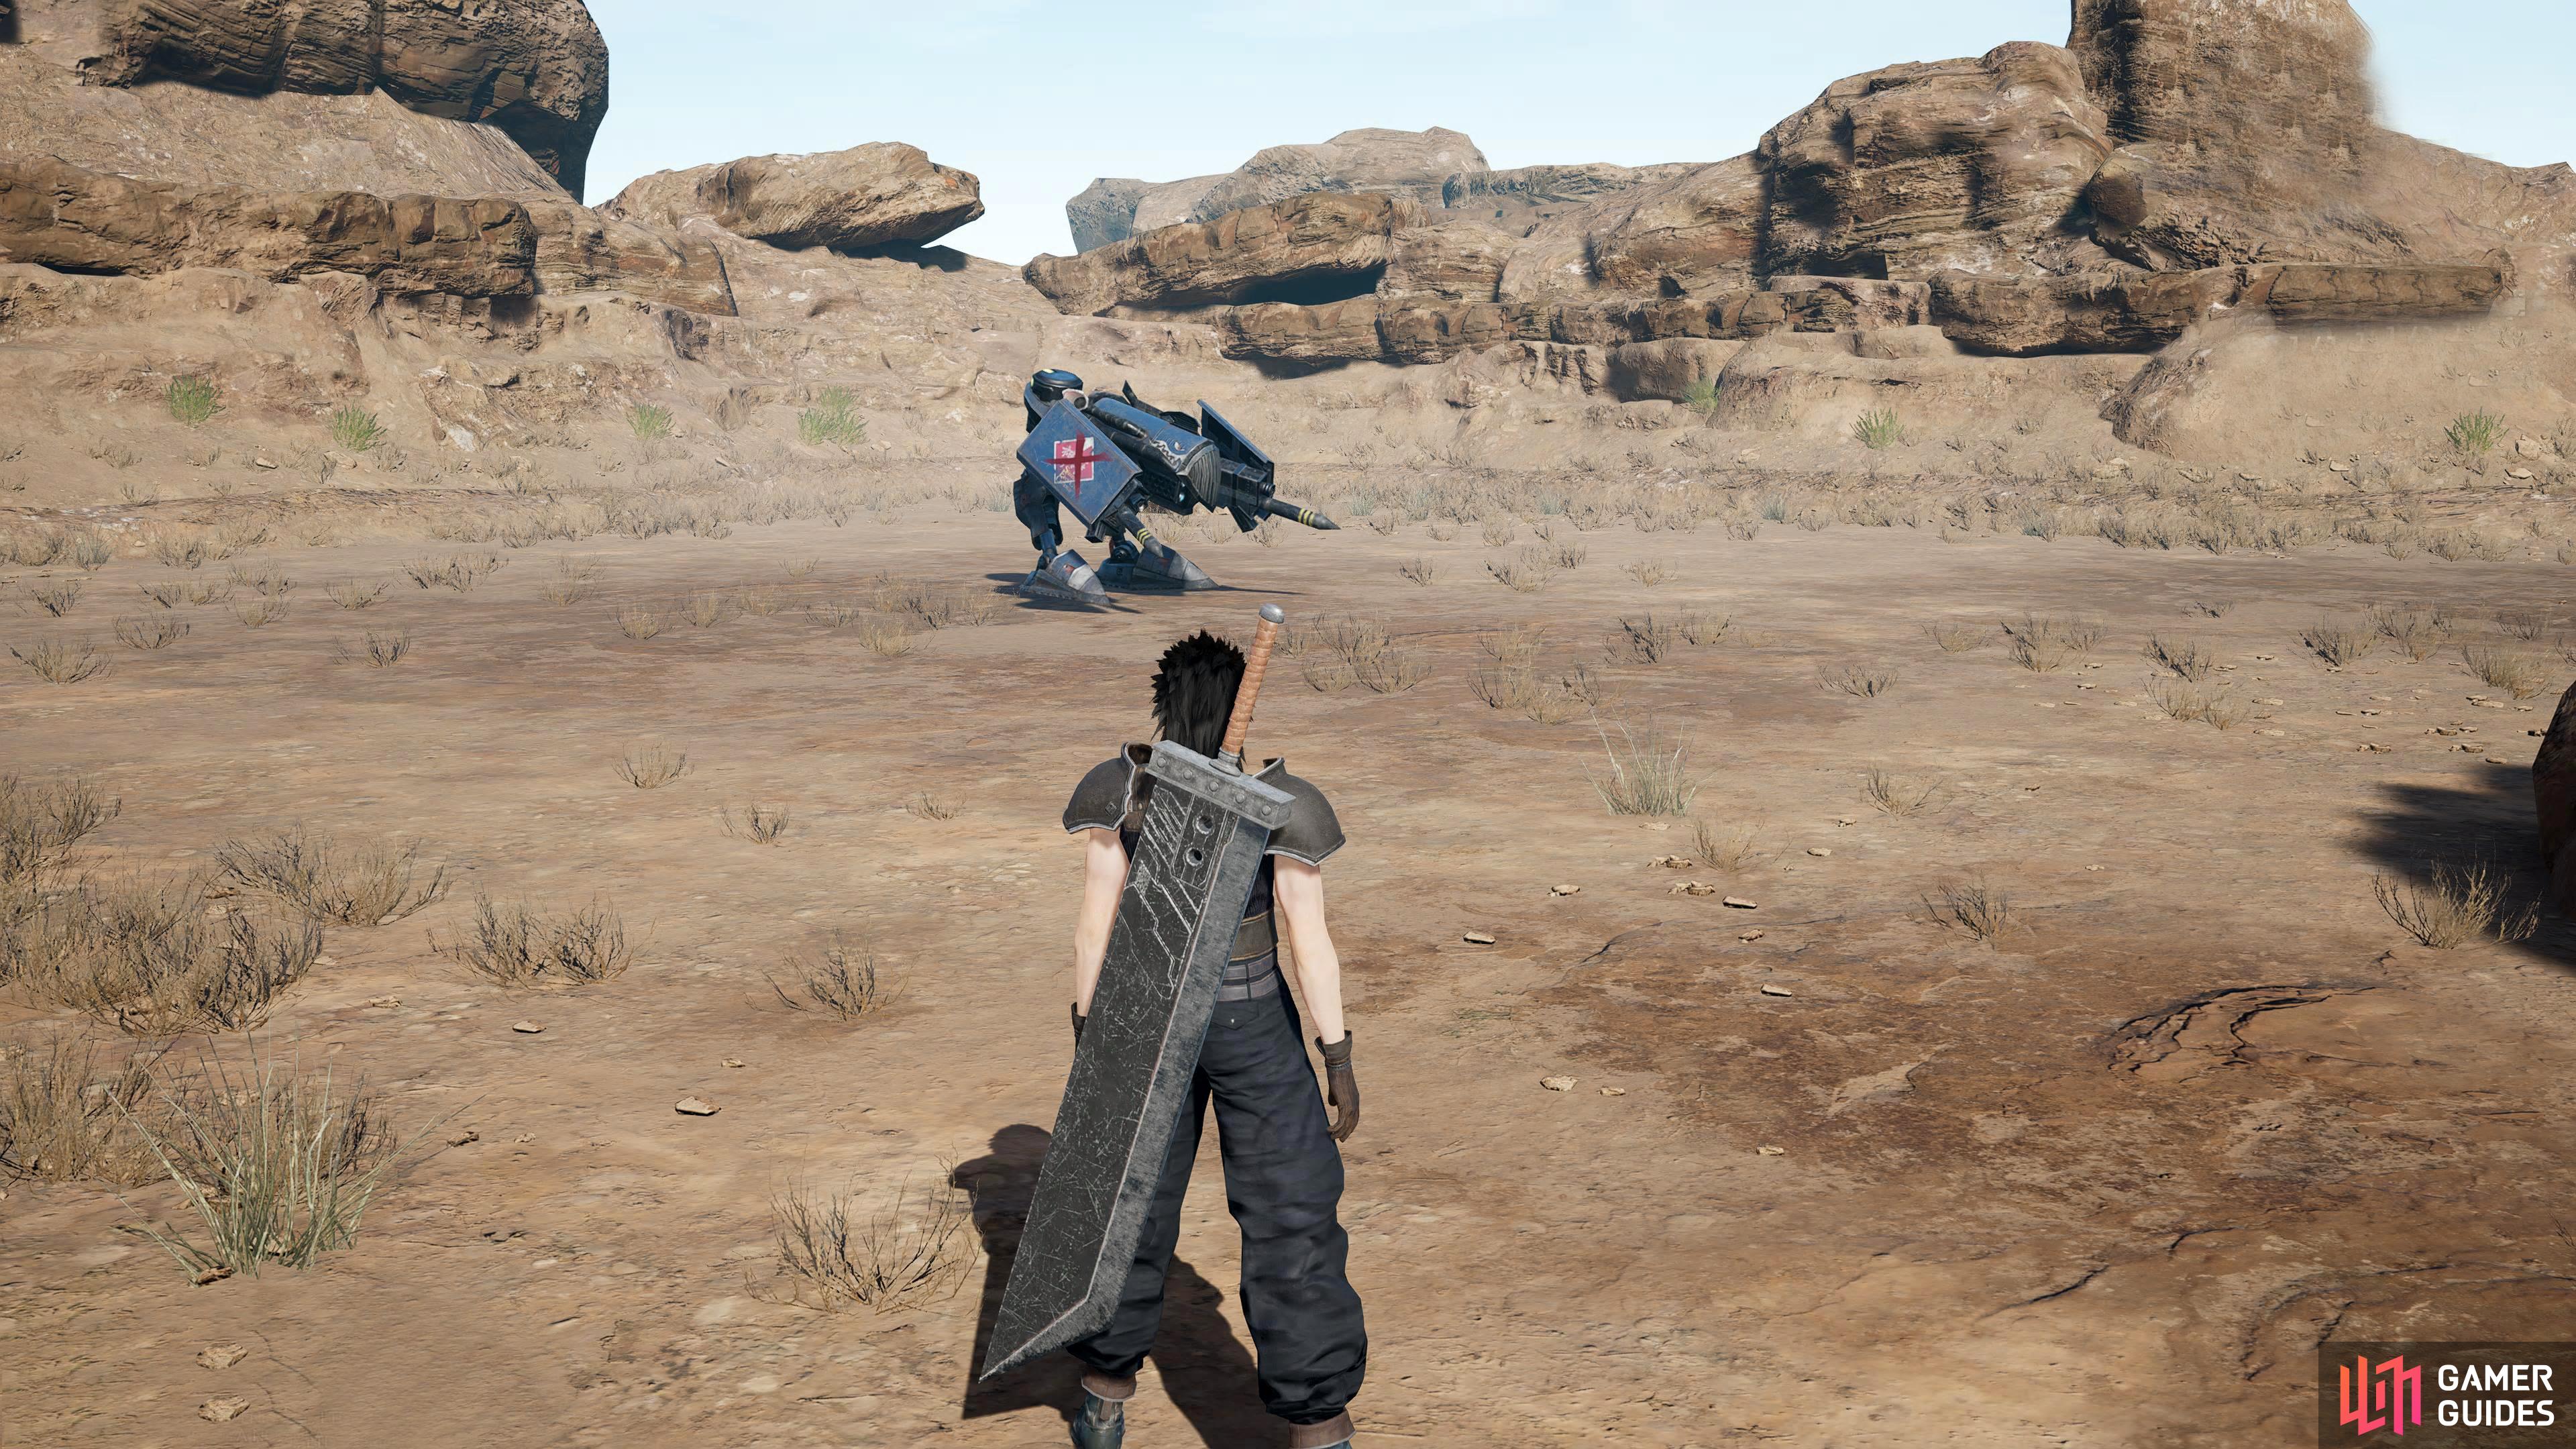
3-1-4: Destroy the Death Machines
M3-1-4 Boss.
Unlocked by completing M3-1-3. This mission has three bosses! The first will be straight in front of you which will be a ![]() Cutter Machine. All the enemies in this mission will be machine-type, so all of them will be weak to Thunder. Making use of this spell, and its higher tiers will make everything that the mission throws at you trivial. After the first boss, pick up the chest after it to the left.
Cutter Machine. All the enemies in this mission will be machine-type, so all of them will be weak to Thunder. Making use of this spell, and its higher tiers will make everything that the mission throws at you trivial. After the first boss, pick up the chest after it to the left.
This will be just before the second boss which is a ![]() Pile Machine. Defeat that, and follow the path north where you’ll find the final chest on the left corner before you go across the platform. Finally, head north to defeat the last boss which is a
Pile Machine. Defeat that, and follow the path north where you’ll find the final chest on the left corner before you go across the platform. Finally, head north to defeat the last boss which is a ![]() Shot Machine. Once again, throw as much Thunder at it as you can, and watch its health melt. The two chests in this mission contain a
Shot Machine. Once again, throw as much Thunder at it as you can, and watch its health melt. The two chests in this mission contain a ![]() Hi-Potion and an X-Potion.
Hi-Potion and an X-Potion.
3-1-5: Eliminate the Death Machines
Mission 3-1-5 boss.
Unlocked by completing M3-1-4. Everything about this map is on the small side. One boss, one chest, and a small map. The enemies that you’ll encounter here are the ![]() Red Saucer I, and Sweepers. Follow the path west, and the boss will be in the middle of the area. Before you go to the boss, turn left and open the chest behind the rock for an
Red Saucer I, and Sweepers. Follow the path west, and the boss will be in the middle of the area. Before you go to the boss, turn left and open the chest behind the rock for an ![]() Ether. This battle is fairly tough, especially if you’re not overpowered. You’ll face three enemies in this encounter, a Cutter Machine, a Pile Machine, and finally a Shot Machine.
Ether. This battle is fairly tough, especially if you’re not overpowered. You’ll face three enemies in this encounter, a Cutter Machine, a Pile Machine, and finally a Shot Machine.
They’re all weak to Thunder, so that will be your offense sorted, but due to all three attacking you at the same time, you’ll need to keep dodging to avoid their attacks. ![]() Barrier, or even better,
Barrier, or even better, ![]() Wall will help with the damage you’ll take while a smart application of
Wall will help with the damage you’ll take while a smart application of ![]() Guard will negate even more damage. Ideally, you’ll want to dodge, Thunder spell, dodge Thunder spell, rinse, and repeat.
Guard will negate even more damage. Ideally, you’ll want to dodge, Thunder spell, dodge Thunder spell, rinse, and repeat.
3-1-6: Midgar Defense Operations
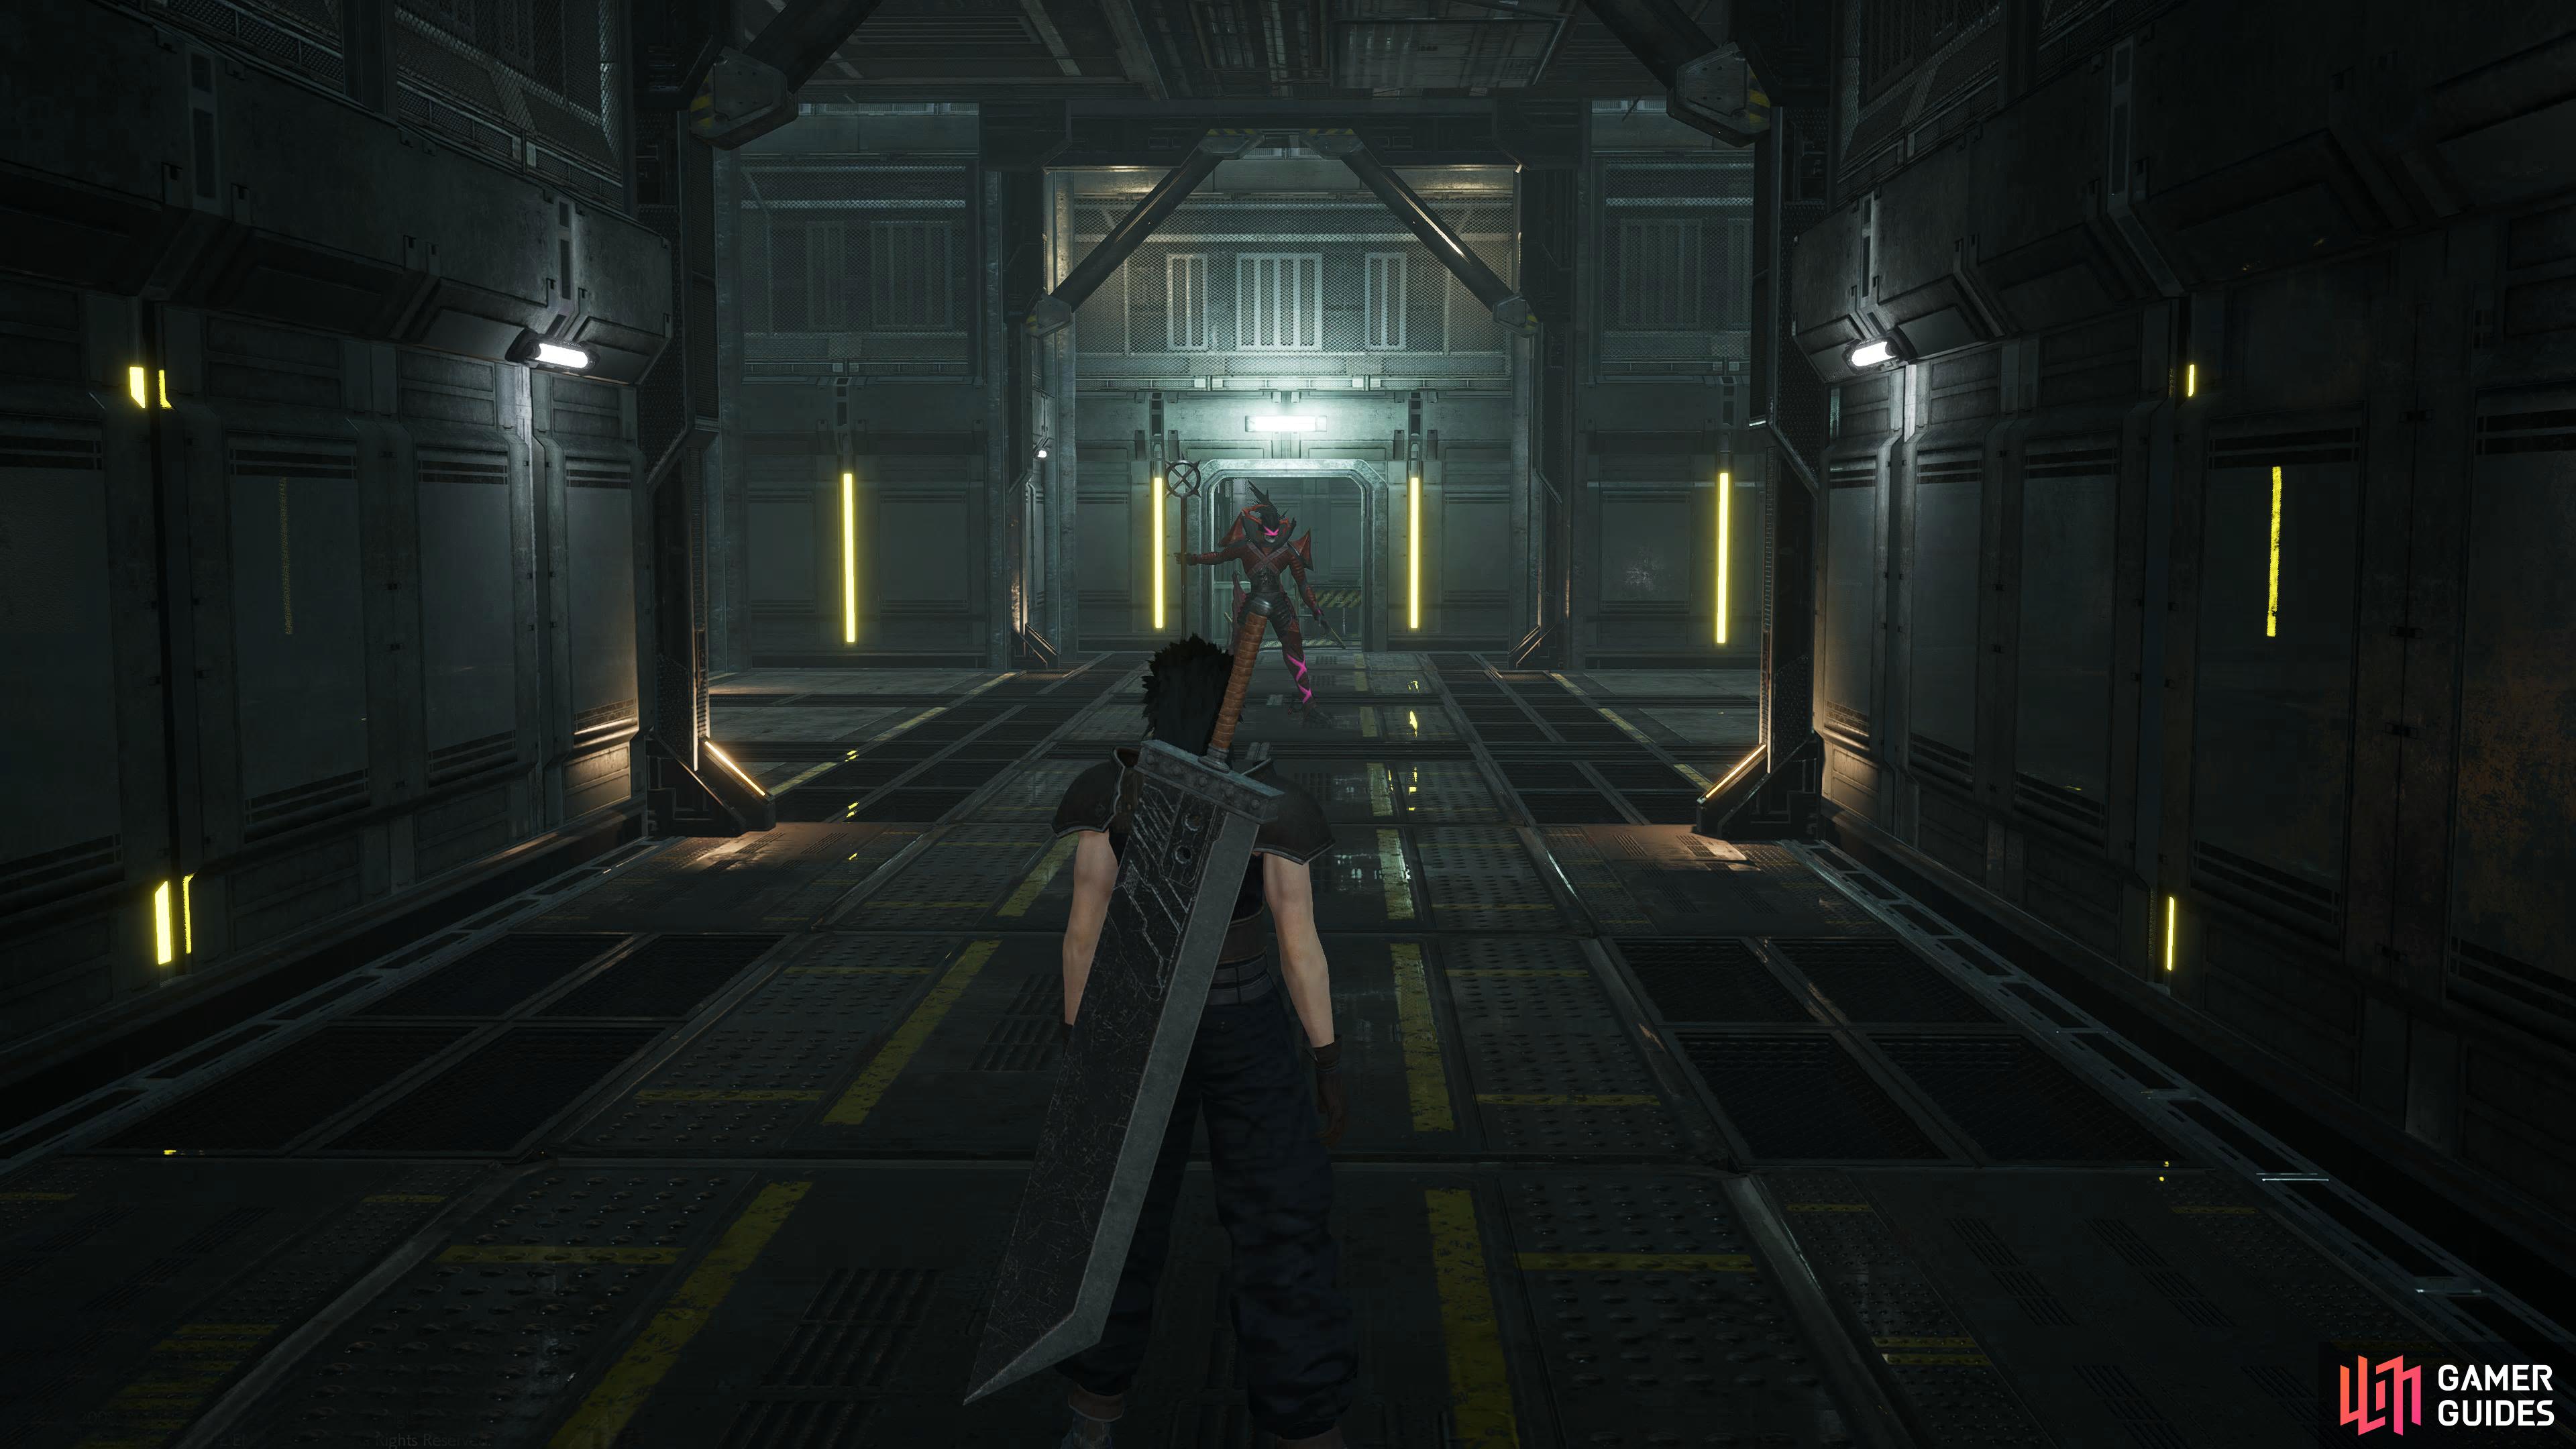
Mission 3-1-6 boss.
The final mission of the sub-category will be unlocked once you reach Chapter 5. There are four chests in this mission which will reward you with the following items: Thunder, ![]() Esuna,
Esuna, ![]() Soma, and a Remedy. Starting at the far west of the map, it’s a big one. Head north and turn east as soon as you can; head south to the end and open the chest in the corner. Go east as soon as you can, and then head south to open the chest in between the two rooms.
Soma, and a Remedy. Starting at the far west of the map, it’s a big one. Head north and turn east as soon as you can; head south to the end and open the chest in the corner. Go east as soon as you can, and then head south to open the chest in between the two rooms.
Once again, head back up and then go east and north for another chest. Finally, head south onto the main corridor; follow it east and then north, and open the final chest in between the corridor connecting the two rooms. Now continue north where you’ll find the boss who is a ![]() G Warrior who’ll be accompanied by two
G Warrior who’ll be accompanied by two ![]() G Assailants. The G Warrior is a bit tougher than the other clones, and it’ll attempt to Silence you throughout the fight. Its most dangerous attacks are its Twin Kick and
G Assailants. The G Warrior is a bit tougher than the other clones, and it’ll attempt to Silence you throughout the fight. Its most dangerous attacks are its Twin Kick and ![]() Fira. For Fira, you can use a
Fira. For Fira, you can use a ![]() Fire Armlet,
Fire Armlet, ![]() Flame Armlet, or
Flame Armlet, or ![]() Blaze Armlet, but you’ll need to avoid the two-hit Twin Attack.
Blaze Armlet, but you’ll need to avoid the two-hit Twin Attack.
No Comments