


Mechon Attack
| Key Information | Details |
|---|---|
| New Quests | 53 |
| New NPCs | 39 |
| Heart-to-Hearts | 6 |
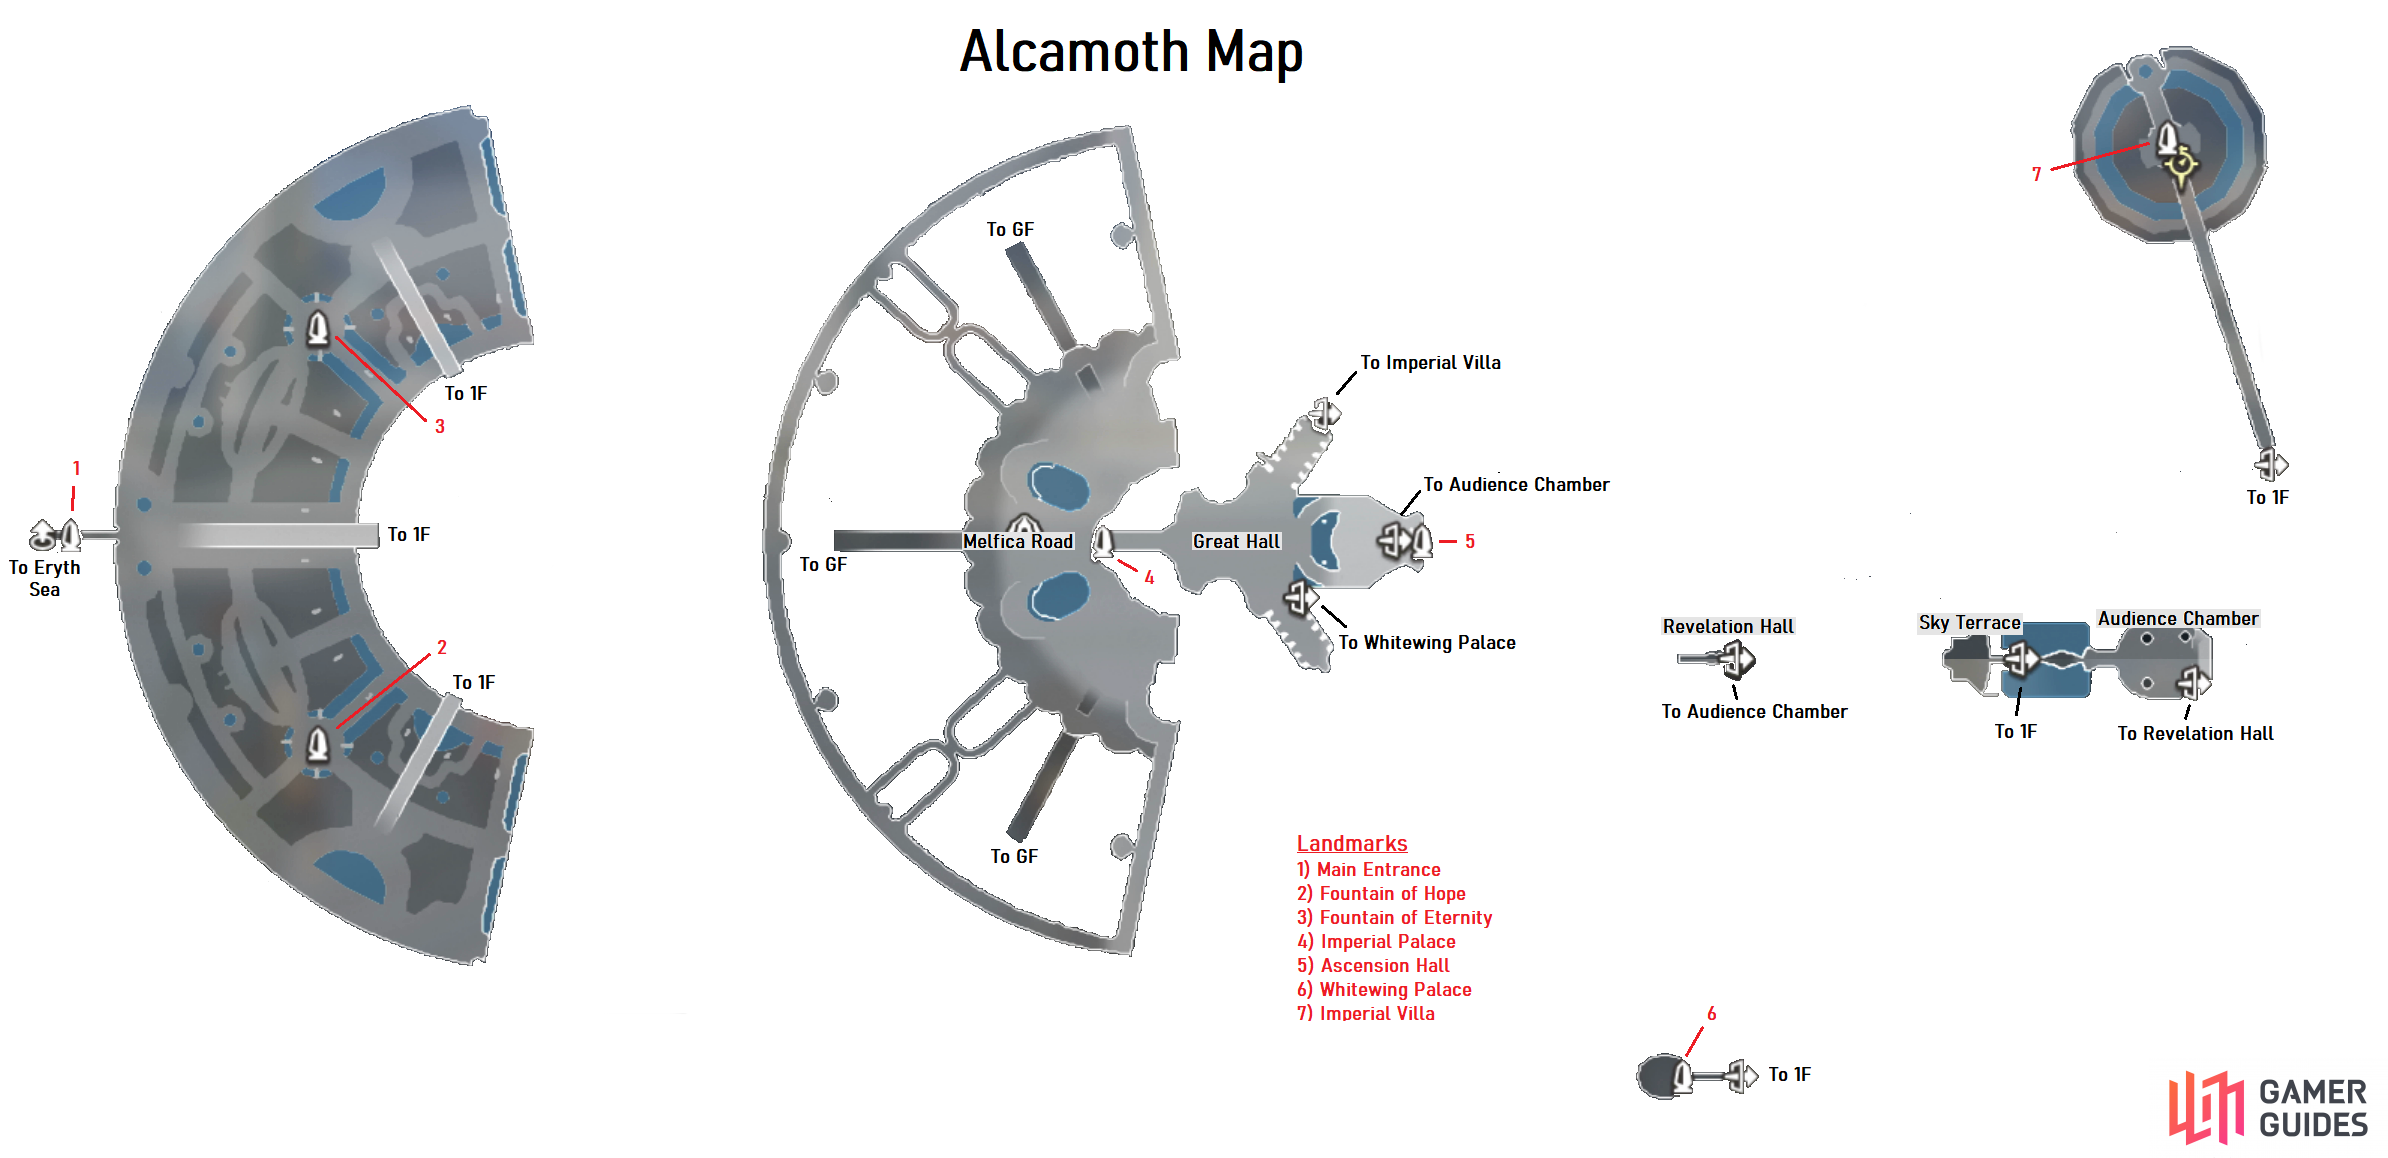
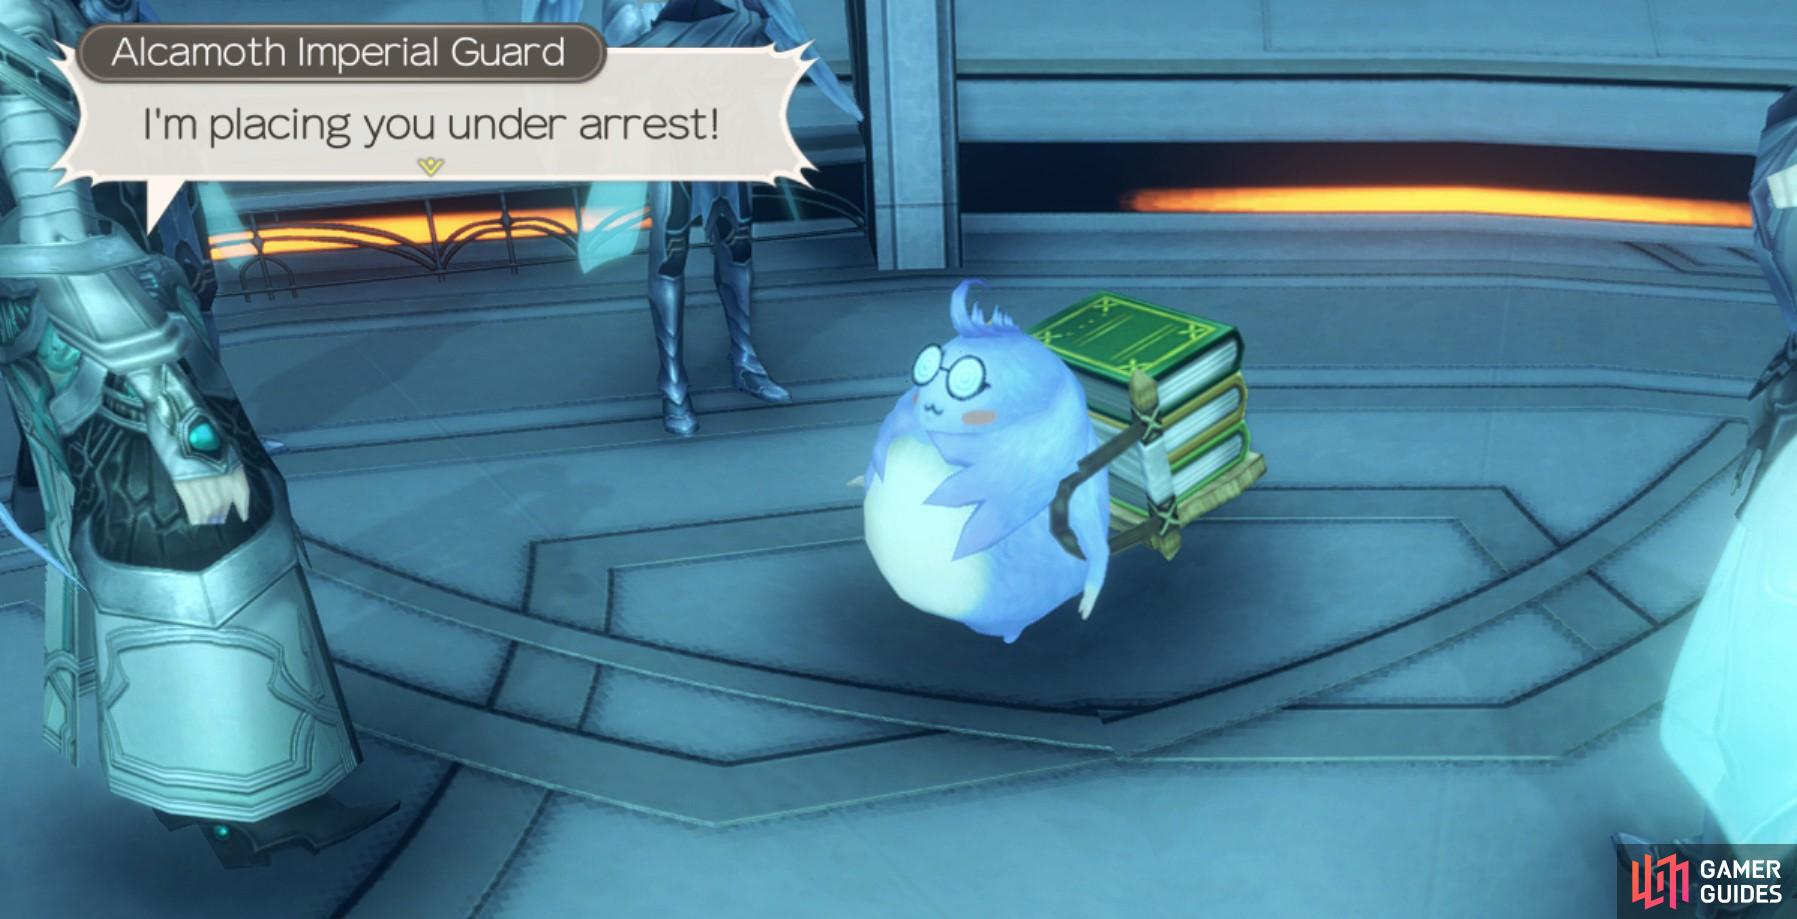
Several scenes will open the Chapter with many revelations as you regain control of Shulk in Whitewing Palace once again. Head to Ascension Hall and then take the northern transporter and head north to reach the Imperial Villa Landmark where you’ll trigger more scenes. Travel to the Ascension Hall and take the transporter to the Audience Chamber once again to trigger more scenes. Once you regain control, use the transporter to return to Ascension Hall and then follow the path all the way to the west to leave Alcamoth (Skip Travel is disabled for now) and trigger more scenes. Once it’s over, you’ll receive a pair of Story Quests and will regain the option to use Skip Travel again.
Your next destination is Prison Island via the Story Quests in Eryth Sea however you’ve not explored Alcamoth fully with all of the Quests that are there. Now that Melia has rejoined the party, now is the time to take care of all of that.
Tour of the City
As always with new hubs, it’s best to map out the city so you have it unlocked with easier to hit Landmarks. Begin by starting from the Main Entrance Landmark and head north along the edge, making your way in to the east once you pass the second small fountain to unlock the Fountain of Eternity Landmark. While on the same path, make your way southeast now, past the large escalator and you’ll reach another large fountain, unlocking the Fountain of Hope Landmark. Make your way to the Ascension Hall Landmark now and take the transporter up nearby and head into the Audience Chamber where you’ll find a Heart-to-Heart beside the throne and then take the transporter to the south to unlock Revelation Hall by heading to the left.
This should complete the map but head to the Fountain of Hope Landmark and head east to register one Heart-to-Heart and then warp to the Imperial Villa to register another. While you’re here, now is a good time to enter the Time Attack Portal, another battle awaits you.
| Challenge Name | Difficulty | Rewards |
|---|---|---|
| Oh, Brother | 2/4 | Eryth Corsage, Top, Bracelets |
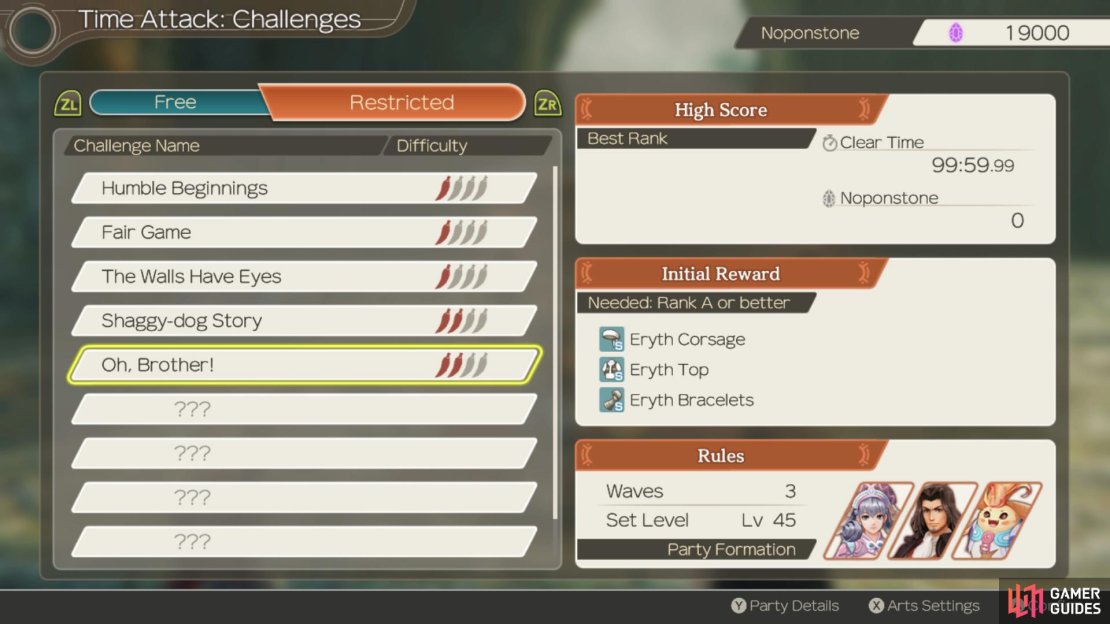
(1 of 4) Melia is the party leader for this Time Attack
-
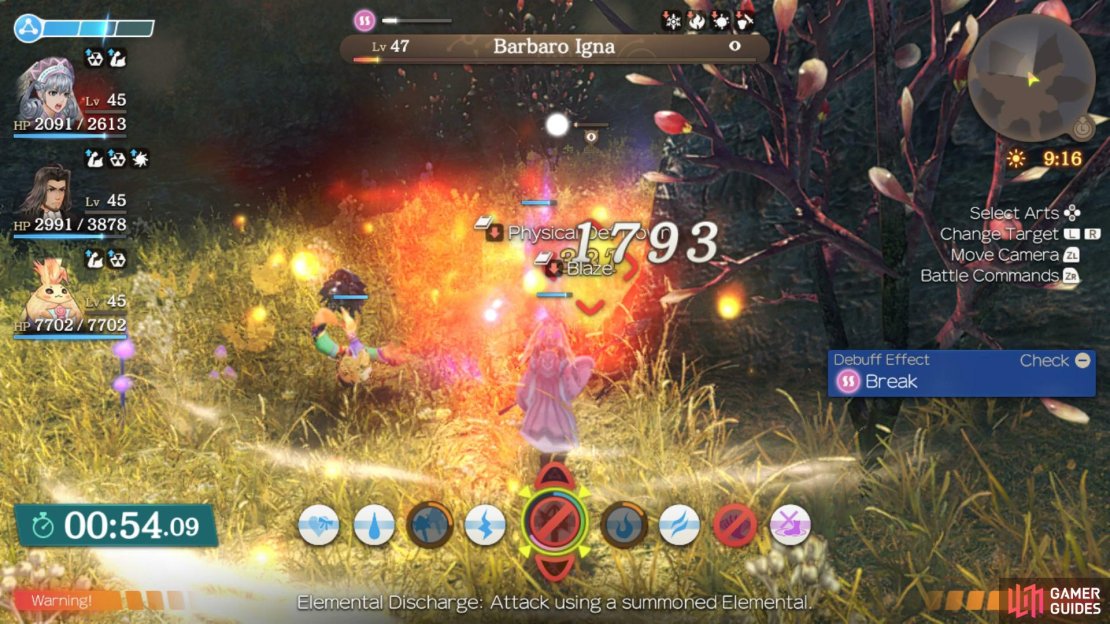
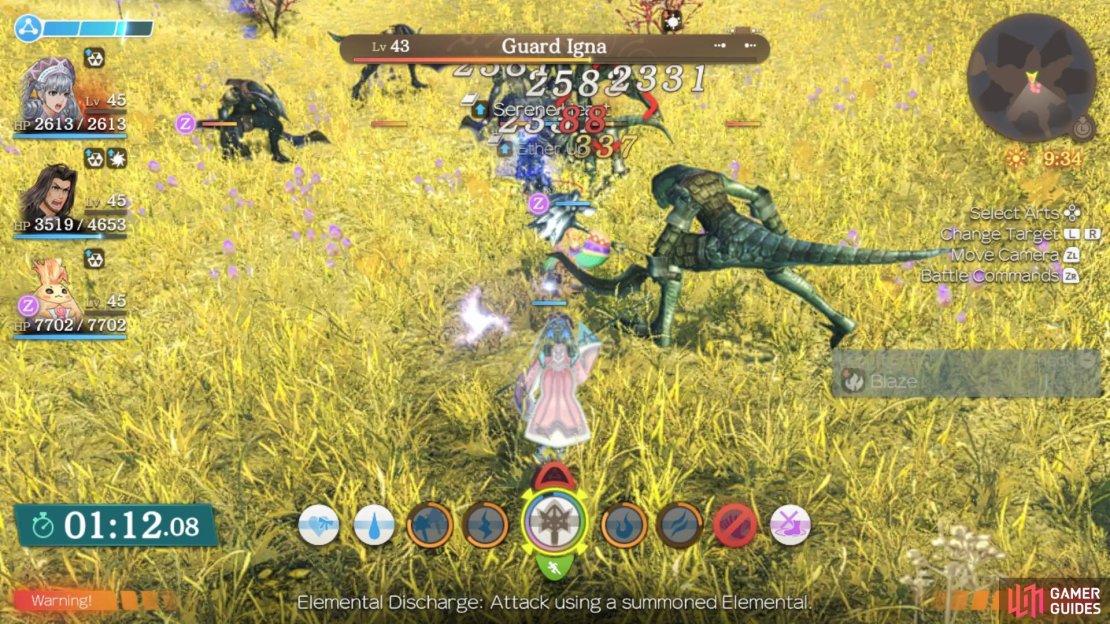
Wave 1: - You’ll be in control of Melia for this Time Attack and how difficult this is all lies on how used to Melia’s playstyle you are. You’ll want to keep one Summon Bolt active at all times for the Ether Up buff (using Summon Copy after) and then making use of Flare and Wind to hit groups of enemies at once while avoiding Aqua and Shadow Stitch at all costs. The first wave sees you up against a Lv 47 Barbaro Igna and a Lv 47 Mistol Igna, simple enemies that should go down quickly however pay attention to Riki’s state, wake him up should he use Bedtime.
-
Wave 2: - There are more enemies to contend with in the second wave, you’ll be up against three Lv 43 Guard Ignas and four Level 43 Maleza Ignas. As you may expect here, the Arts that hit multiple enemies are useful here, once again keep Summon Bolt active for the buff and then make use of both Flare and Wind to hit the entire group. Should your Talent Gauge fill during this battle, be sure to hit all enemies with Mind Blast.
-
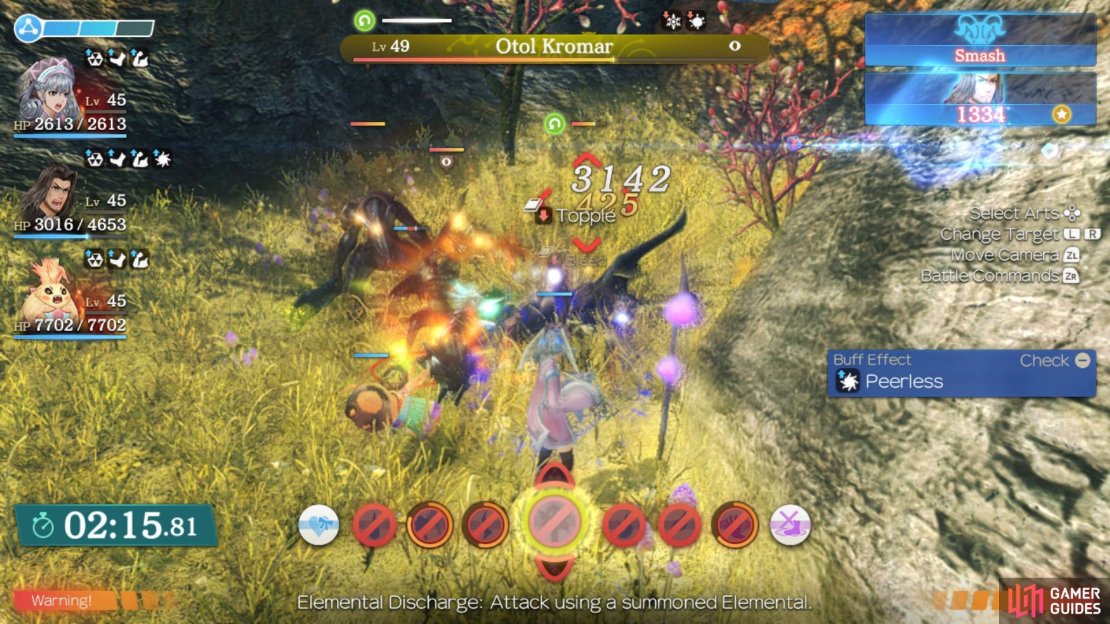
Wave 3: - The final wave is up against a Lv 47 Fighter Igna, a Lv 47 Otol Kamar along with another Lv 49 Otol Kamar. You’ll want to focus all your attention on the Otol Kamars so that they can’t inflict Arts Seal on the group, this will almost certainly stop you from getting an A+ Rank. Like most Time Attack Mode battles, avoid Chain Attacks unless necessary, they take up too much time for the bonus they offer. The same pattern as before is true here, keep Summon Bolt up and make use of the others to pile on the damage.
Next on the agenda is to take a tour of the city itself, meeting the citizens and accepting Quests. Begin by warping to Main Entrance, changing the time to 09:00 and speaking to the Nopon to the north, Baroba then head north to find Popipo who will offer Going Out to Play. Continue north to a fountain now where you’ll find an Alcamoth Citizen who will offer Material Quest 1. Make your way northeast, past the Fountain of Eternity and you’ll find both Kurralth and Zain who will offer Preparing for Adventure. Head north of the escalator here and you’ll find another Citizen who offers Search Quest 3 while to the far northeast you’ll find Elior. To the south a little from Elior is another Citizen who offers Challenge 4 while you’ll find the Nopon, Piko nearby.
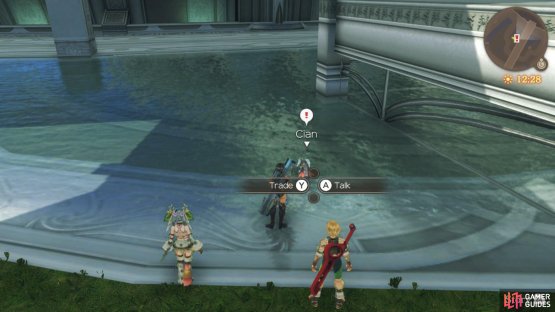
Return to the Main Entrance Landmark, reset the time to 09:00 and then head to the east of the escalator leading up to find Jer’ell. Just south from her is an Imperial Guard who will offer Material Quest 3 and then at the small fountain to the southwest of him you’ll find Talonyth who you can invite to Colony 6 should you already have both Housing and Commerce at Lv 1. Make your way to the eastern wall here to find another moving Citizen who will offer Collection Quest 2 and then head southwest to the Fountain of Hope where another Citizen will offer Collection Quest 3. Make your way east now and you’ll find Atael and his sister, Cian while you’ll also find Vol’aren nearby who will offer Looking for a Lost Son.
Return to Main Entrance once again but this time, switch the time to 21:00 and then head east to the bottom of the escalator to find Lunara then head to the northern side of the escalator to find Yura.
Make your way to the small fountain to the southwest of the Fountain of Eternity now to speak to Arielle and then head northeast of the northern escalator to find Rozeal and Ricoth. Go northeast from here to speak to Don Argentis and then head northwest from there to find another Citizen who offers Challenge 2. Return to the Main Entrance again and reset the time to 21:00 and then head south of the main escalator to find Scarlen who offers How Do They Feel?. Make your way to the southeast here to find another Citizen offering Search Quest 1 and then head southwest to a small fountain to find another Citizen who offers Search Quest 4. Head southeast from the Fountain of Hope to a large fountain where you’ll find both En Argentis and Zel Argentis then make your way northeast to find Nelo who offers Losing the Taste for Alcohol. Make your way northwest from the Nopon to find another Citizen who offers Challenge 1 and then head to where the Heart-to-Heart is to the east to find another who offers Search Quest 2.
That should be all for the ground floor so return to the Main Entrance, take the escalator up to the next level and change the time to 09:00. Begin by speaking to Teelan to the south who will offer Looking for Gold Bugs and then head southeast along the top of the stairs to find a Citizen offering Monster Quest 1 - Parts 1 - 3. You’ll find Mir’leiz on the southern part of the square and then return to the shop, by some much needed Arts Manuals for Melia and speak to another nearby Citizen who offers Material Quest 4. You’ll find Ma’crish to the north of the shop who you can and should invite to Colony 6 and then head north from here to find Naroth.
On the bridge to the northwest you’ll find another Citizen, this one offering Monster Quest 3 - Parts 1 - 3 and then head to the eastern section again and head north to find another who will offer Material Quest 2. Head up the stairs now and follow the northeastern edge around to the northwest to find Merisa who offers Bring Back My Son!. Follow the western outer path all the way to the south, picking up the Heart-to-Heart along the way, to find a Citizen that offers Collection Quest 1 while further south you’ll find Vidian. While you’re here, change the time to 21:00 and if you’ve already completed the Paola and Narine Quest which requires high Affinity between Sharla and Melia, you’ll be able to activate this Heart-to-Heart.
| Heart-to-Heart | Characters | Location | Affinity | Answers |
|---|---|---|---|---|
| Ancient Astrology | Sharla + Melia | Outer Path at night | Purple | Of course I do!, Yes, I do. |
Make your way back to the shop at 21:00 and then head east to find an Imperial Guard that offers Monster Quest 2 - Parts 1 - 3 and then explore north first to find a Nopon, Kaleka and Caul to the northwest of him. Return to the shop now and head southeast from it to find both Talia and Miriall by the fountain then go southwest from this fountain to find Lesunia walking about. Head east from here to find Ruthan who offers The Deciphering Machine while another Citizen east of him offers Collection Quest 4.
Warp to the Imperial Palace Landmark now and change the time to 09:00 to begin exploring to the east of this floor. Head east towards the two sets of stairs near the mural and speak to both Galvin and Lecrough who will offer A Friend in Need. Just north of Lecrough is another Imperial Guard who will offer Challenge 3 and then head up the stairs to the east and speak to Kaelin near the transporter. Switch the time to 21:00 while you’re here and speak to Donnis now standing at the transporter then head to the stairs to the southwest to find an Imperial Guard who offers Monster Quest 4 - Parts 1 - 3. Make your way down the stairs now and you’ll find both Galdo and Lar’shen have taken up posts while Galdo will then offer Back Pain after speaking to both of them.
That’s all of the NPCs registered so return to the Fountain of Eternity after 18:00 and speak to Arielle again to accept the Building Bridges Quest and then it’s time to get to work on clearing these Quests.
The Deciphering Machine
A team investigating ancient ruins have found some ancient writing, but the problem is that deciphering them will take a long time. The team has decided to build a machine to quicken this, but needs some materials. Ruthan wants 6 pieces of Sturdy Armour, which can be gotten from Flavel Andos at Eryth Sea. Flavel Andos can be found on Hovering Reefs 1, 3, 6 and 8, and you won’t find a lot of them on those reefs. It is much easier to trade for the Sturdy Armours, as both Jer’ell and Galdo have them at one star, and Cian has them at two stars. However you get them, bring the items back to Ruthan to finish.
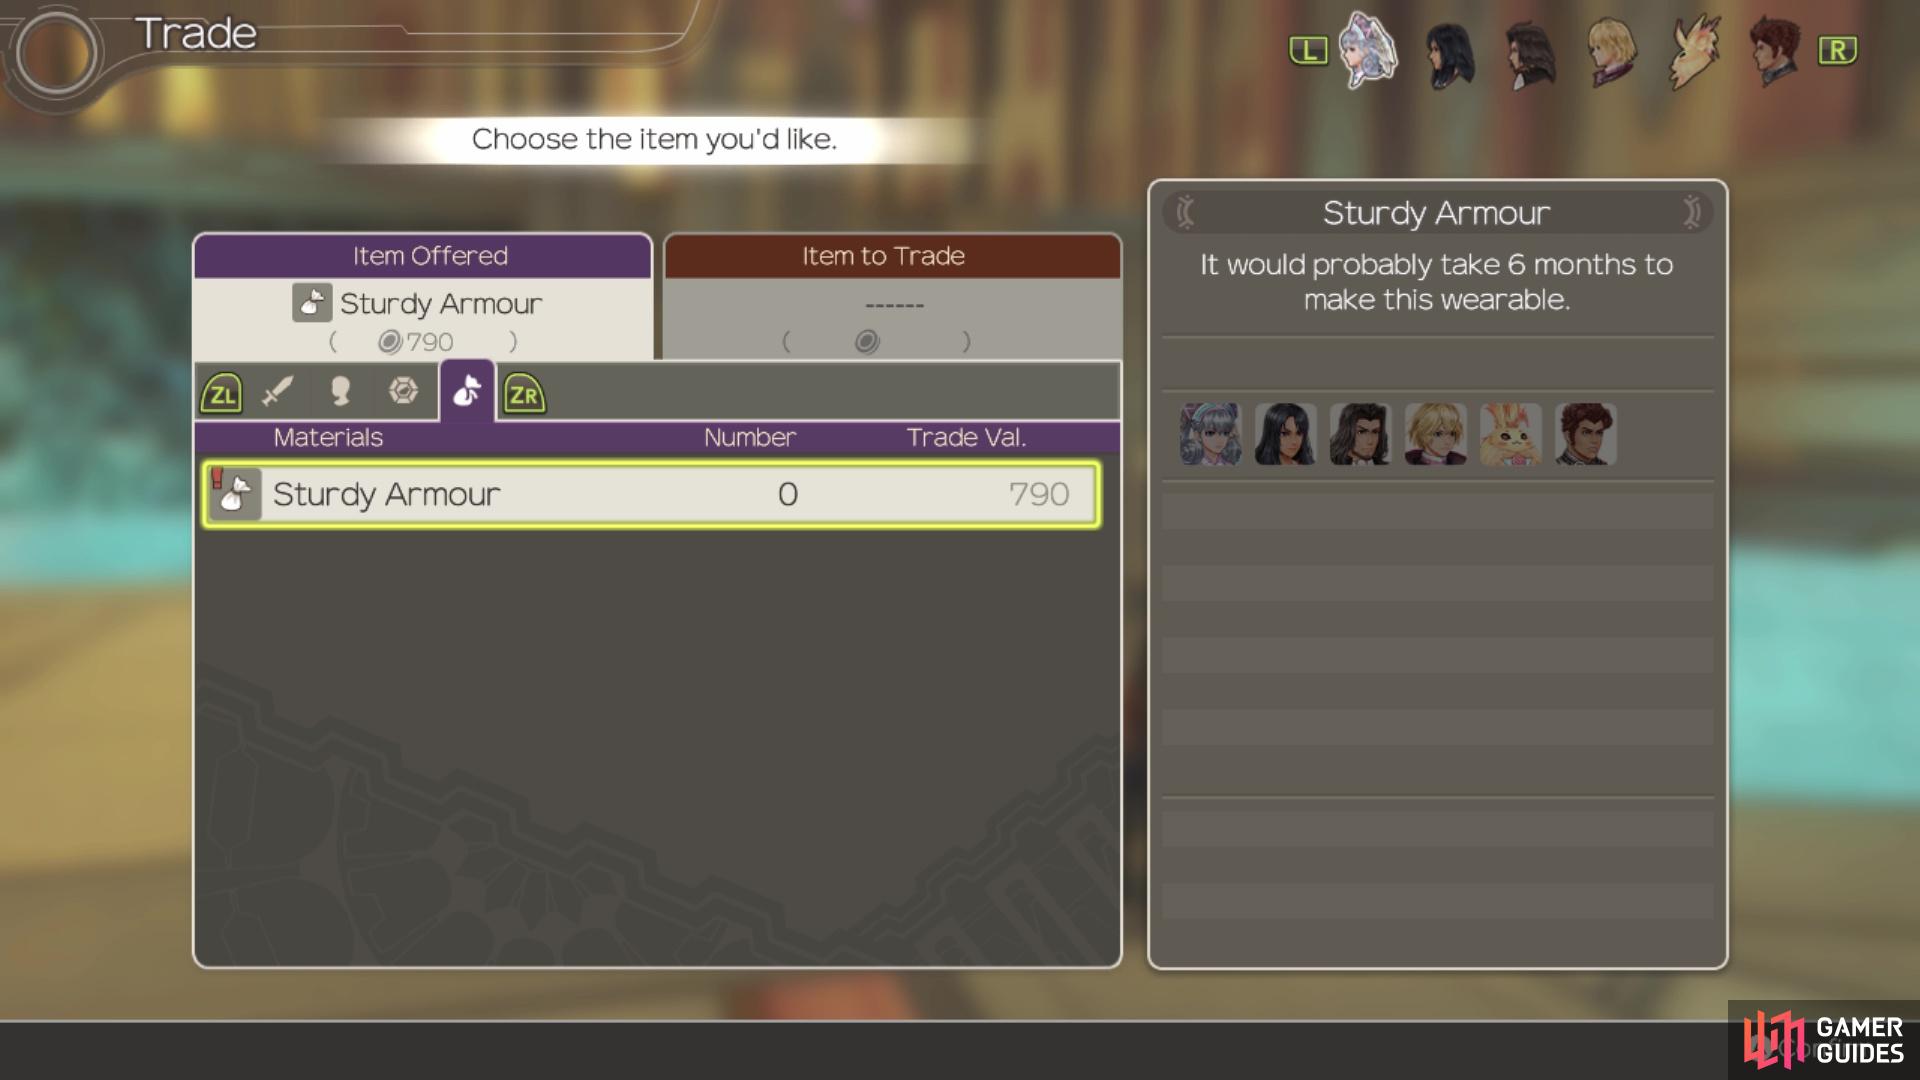
It’s a lot easier to trade for the Sturdy Armours
Bring Back My Son!
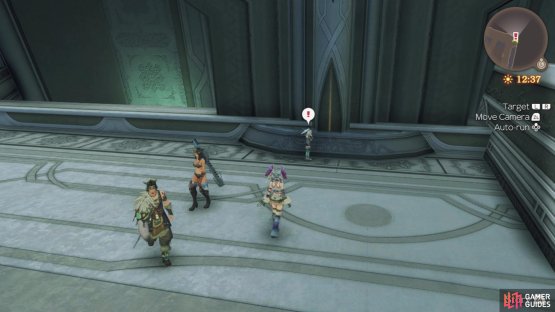
Mir’leiz went to train at the Eryth Sea and it’s very dangerous there, so Merisa wants you to bring him back. He can be found on Hovering Reef 1, which is the first floating island that you could visit when you first got to Eryth Sea. He’s in one of the alcoves on the island, so speak with him to have him return to Alcamoth, then go back and talk with Merisa.
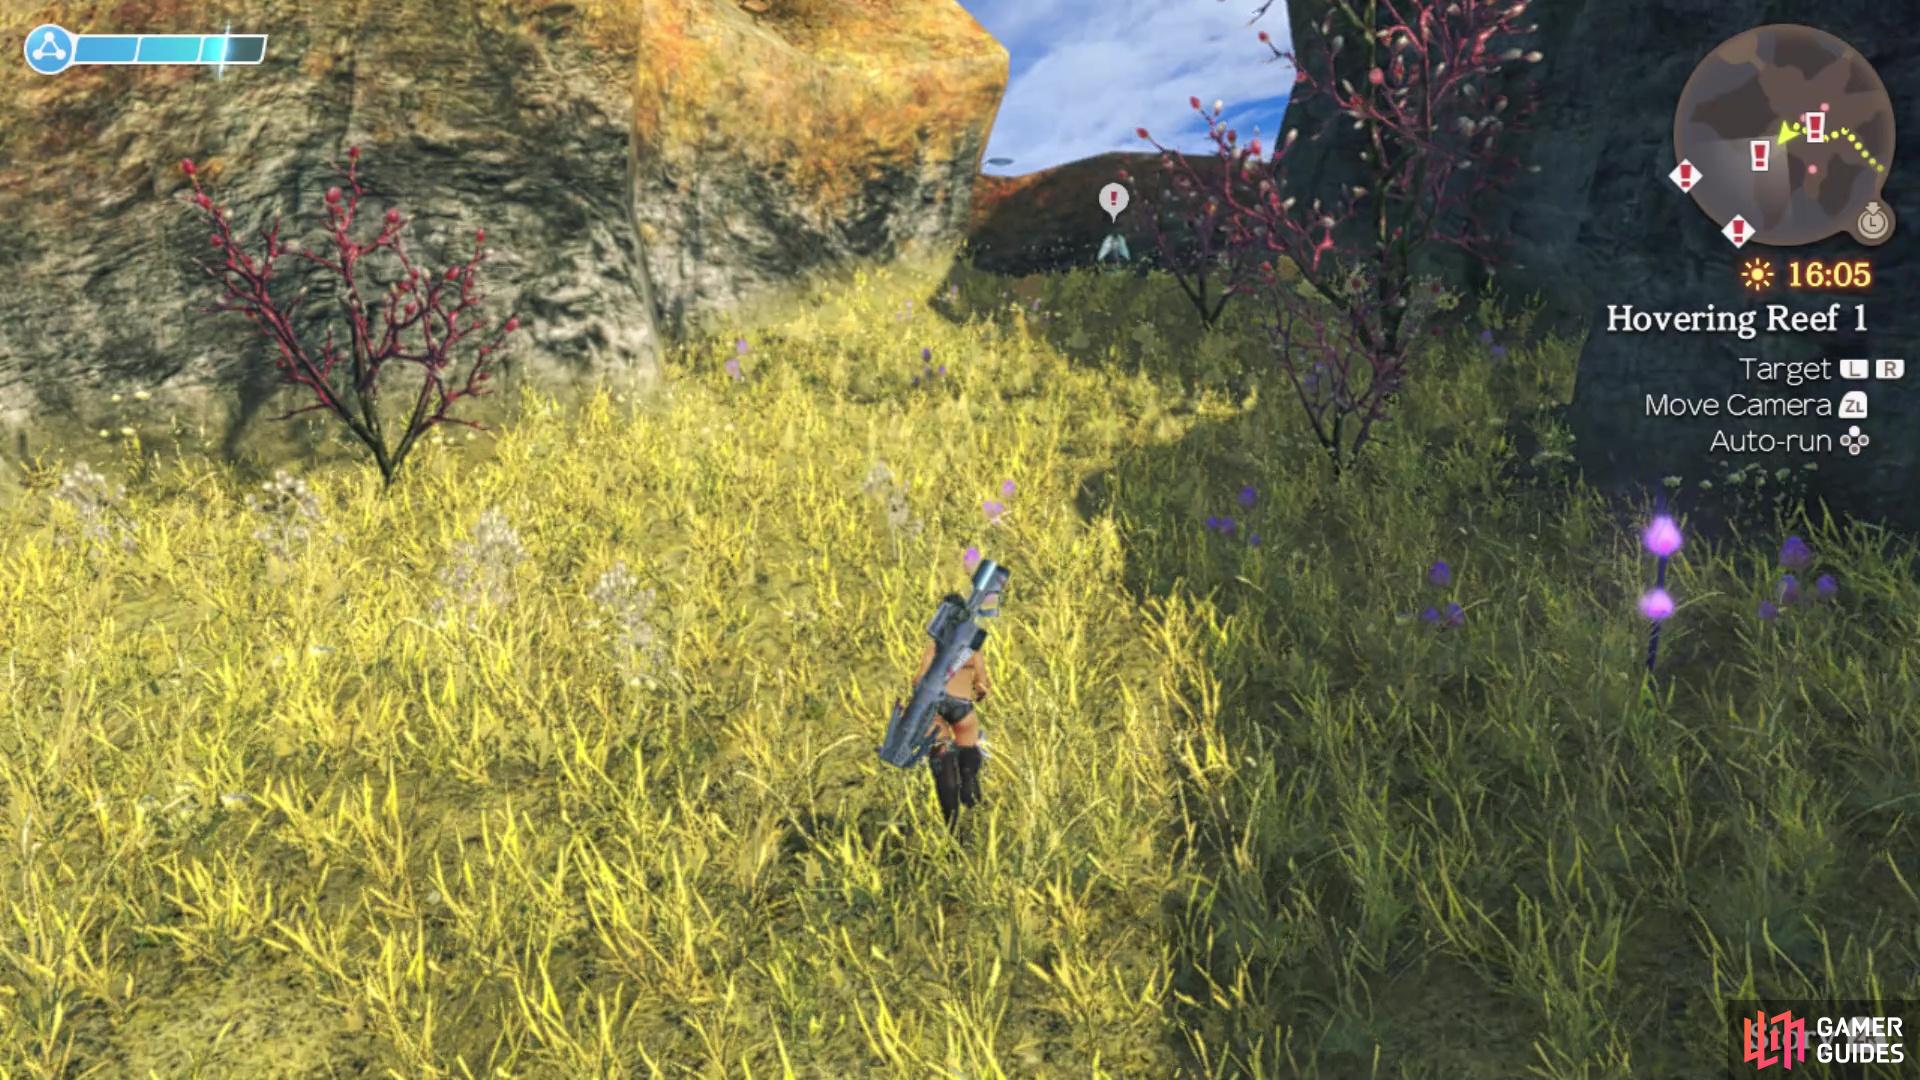
The location of Mir’leiz for Bring Back My Son!
After turning these two Quests in, head to the Imperial Palace Landmark and head northwest to find Naroth who will offer A Necessary Upgrade while if you head to the southwest, you’ll find Mir’leiz is now offering Teaching Materials.
A Necessary Upgrade
You will need to complete The Deciphering Machine before this quest becomes available. The accuracy of the deciphering machine is pretty low, so it’s not going to be possible to read the ancient texts at this rate. Naroth wants you to go collect some materials to make improvements. He will need 5 Green Diodes, which are a collectable inside of the High Entia Tomb. The other item he needs will be 3 Asta Remote Units, which drop from Hover Astas in the High Entia Tomb. If you travel to the Tomb Robber Pool landmark, two Hover Astas will spawn in the northernmost and southernmost rooms of the area. Once you have both sets of items, bring them back to Naroth.
Teaching Materials
In order to get this quest, you will first need to complete Bring Back My Son!, then you will find Mir’leiz to the southwest of the Imperial Palace landmark during the day. After being rescued, Caul has agreed to become Mir’leiz’s instructor, but doesn’t have the teaching materials he needs. You will need to speak to Caul, who is available during the night (18:00 - 06:00) and can be found north/northwest of the Imperial Palace landmark. The items he needs to begin the instruction are 3 lots of Murky Eluca Water from Perna Elucas in Eryth Sea. You can find some of these enemies on Latael Shore, so defeat them, loot the chests and if you don’t get the item in question, then fast travel to the same landmark (Latael Shore) to try again, which should make the enemies you need respawn.
Note that both Kurralth and Jarack (Eryth Sea; Ether Plant) have the Murky Eluca Water as an overtrade item; you’d need to trade something that has a difference of 1,510G with the item you’re trading for. Also, if you managed to get the Upper Bionis area’s affinity to two stars, then Baroba in Alcamoth has the item for trade (same price as listed above). Once you have the items, return to Caul, then report back to Mir’leiz.
How Do They Feel?
Scarlen seems to have fallen for two of his friends and wants to know how they feel about him. You will need to speak with Ricoth first, who can be found northeast of the Fountain of Eternity, at night. Once you’re finished with her, speak with Rozeal, who should be right next to Ricoth. When you’ve talked to both of them, return to Scarlen.
How Do I Feel?
You need to complete How Do They Feel? before this quest becomes available. After helping out Scarlen before, both females approached him and told him they have feelings for him. So, now he has to pick one of them and depending on who you pick, there will be different quests following this one. Note that the decision by Scarlen will be whomever you speak with first, so talk with that one before the other. Upon speaking to the first person, talk with the other, then return to Scarlen to hear his decision. Ricoth will be Route A, while Rozeal will be Route B.
I Love You No Matter What
This quest is only available if you chose to speak with Ricoth (Route A) first during How Do I Feel? Finally, Scarlen has decided to tell Ricoth he likes her. However, since Rozeal is always near Ricoth, he wants you to go in his place and deliver her a letter. Deliver the letter to Ricoth, then return to Scarlen.
Together Forever
This quest is only available if you chose to speak with Rozeal (B Route) first during How Do I Feel? Scarlen has decided to answer Rozeal’s declaration with a letter, but since Ricoth is always near, he can’t do it himself. Deliver the letter to Rozeal, then return to Scarlen.
A Friend in Need
It seems like that Lecrough’s friend, Galvin, was defeated by some monster and he’s making another attempt at it. The problem is that Lecrough has been assigned to another mission, so he needs you to help Galvin defeat this monster. You will need to defeat 6 Eryth Hilns to complete this quest, which are the smaller flying creatures found all throughout the map. Upon defeating the required number, return to Lecrough to report your deeds.
Brave Actions and Protect the Capital!
In order to begin these two quests, which are kind of joined together, you need to have finished both A Friend in Need and Teaching Materials. Once you have, speak with Mir’leiz, who mentions that there has been an unusual increase in monster numbers at Eryth Sea. He wants you to go speak with Lecrough, so go ahead and do that. Lecrough asks you to defeat 2 Buono Nebulae in the Eryth Sea, but he will also give you another task to do, which will trigger the beginning of Protect the Capital! This task will add 2 Bono Nebulae to your list of targets. If you wish to complete both tasks, simply take down two Bono Nebulae first, auto-completing Protect the Capital, as turning in Brave Actions before completing the other will make it so it’s completely gone.
Bono Nebulae can be on Hovering Reefs 1 and 4, during clear weather, while Buono Nebulae can be found on Latael Shore, Anu Shore and Hovering Reef 5, during any weather that isn’t rain. While Protect the Capital! will auto-complete as soon as you defeat two Bono Nebulae, you will have to return to Lecrough, then Mir’leiz.
Preparing for Adventure
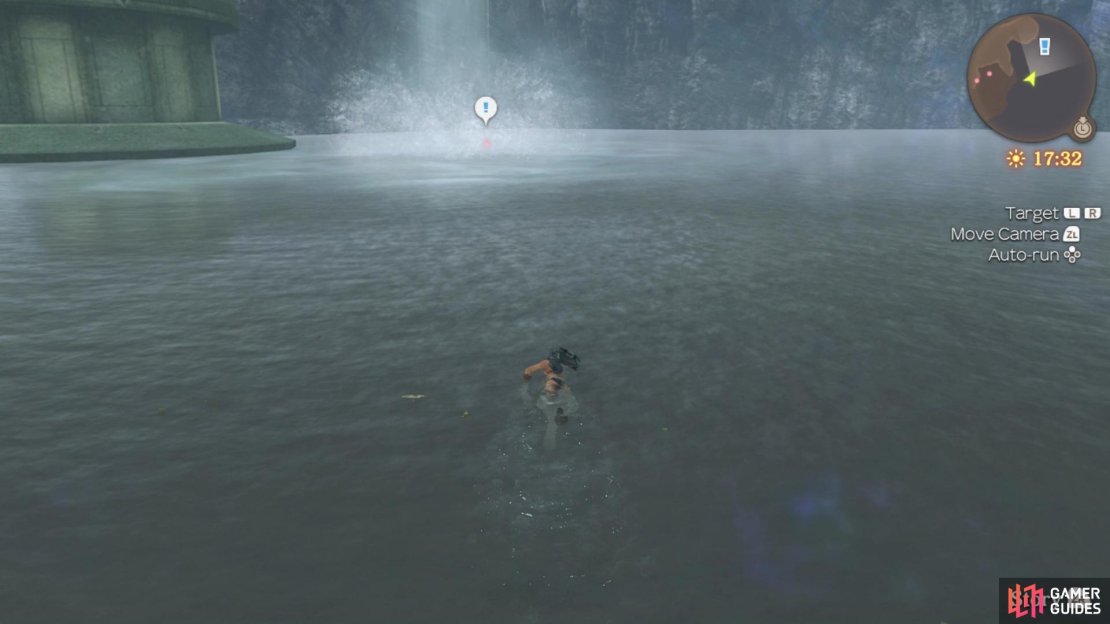
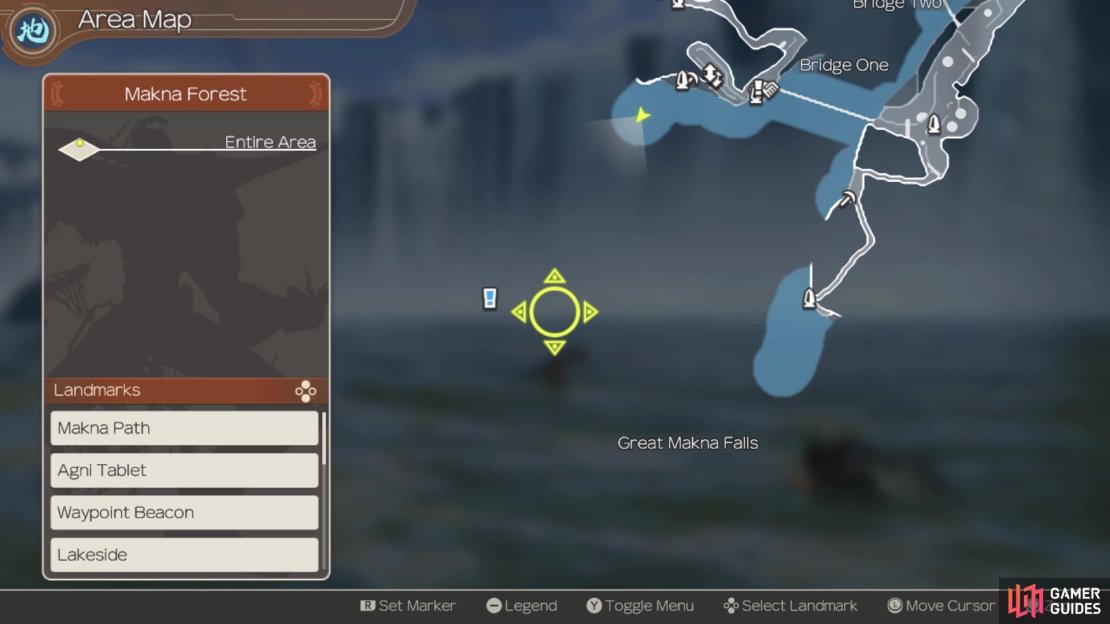
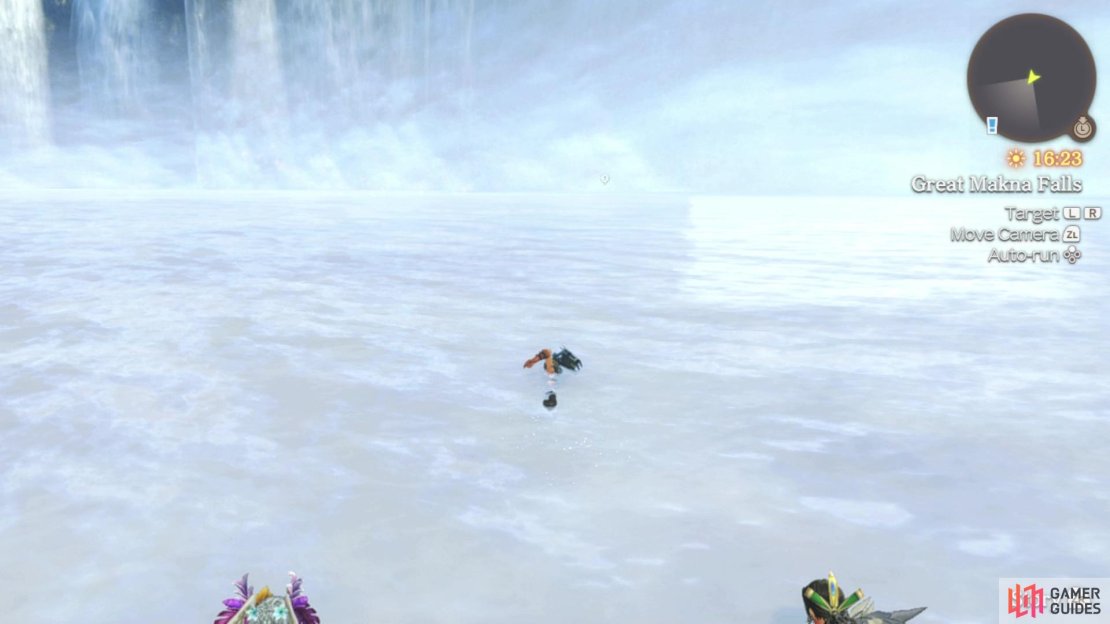
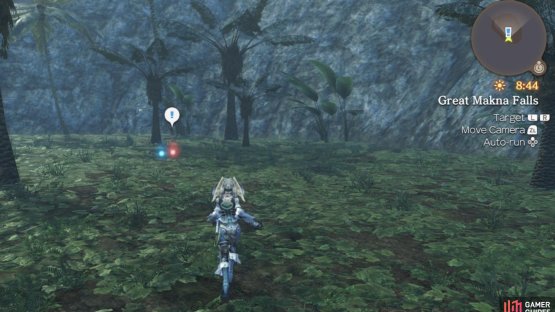
Both Zain and his partner, Kurralth, are preparing for an adventure and need some water that won’t freeze on their trip. He will need three water samples from three different waterfalls, which are from Kasharpa Falls on Bionis’ Leg, near the Sororal Statues in Satorl Marsh, and Great Makna Falls in Makna Forest. You are looking for three red orbs at each location, which aren’t too hard to find.
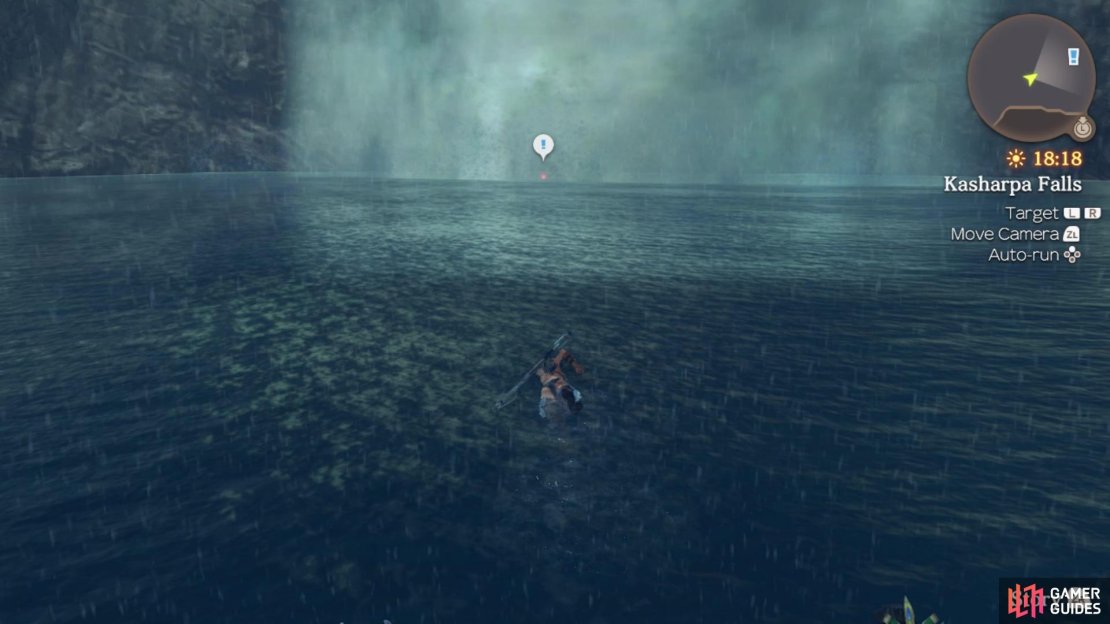
(1 of 4) The location of the Kasharpa Water
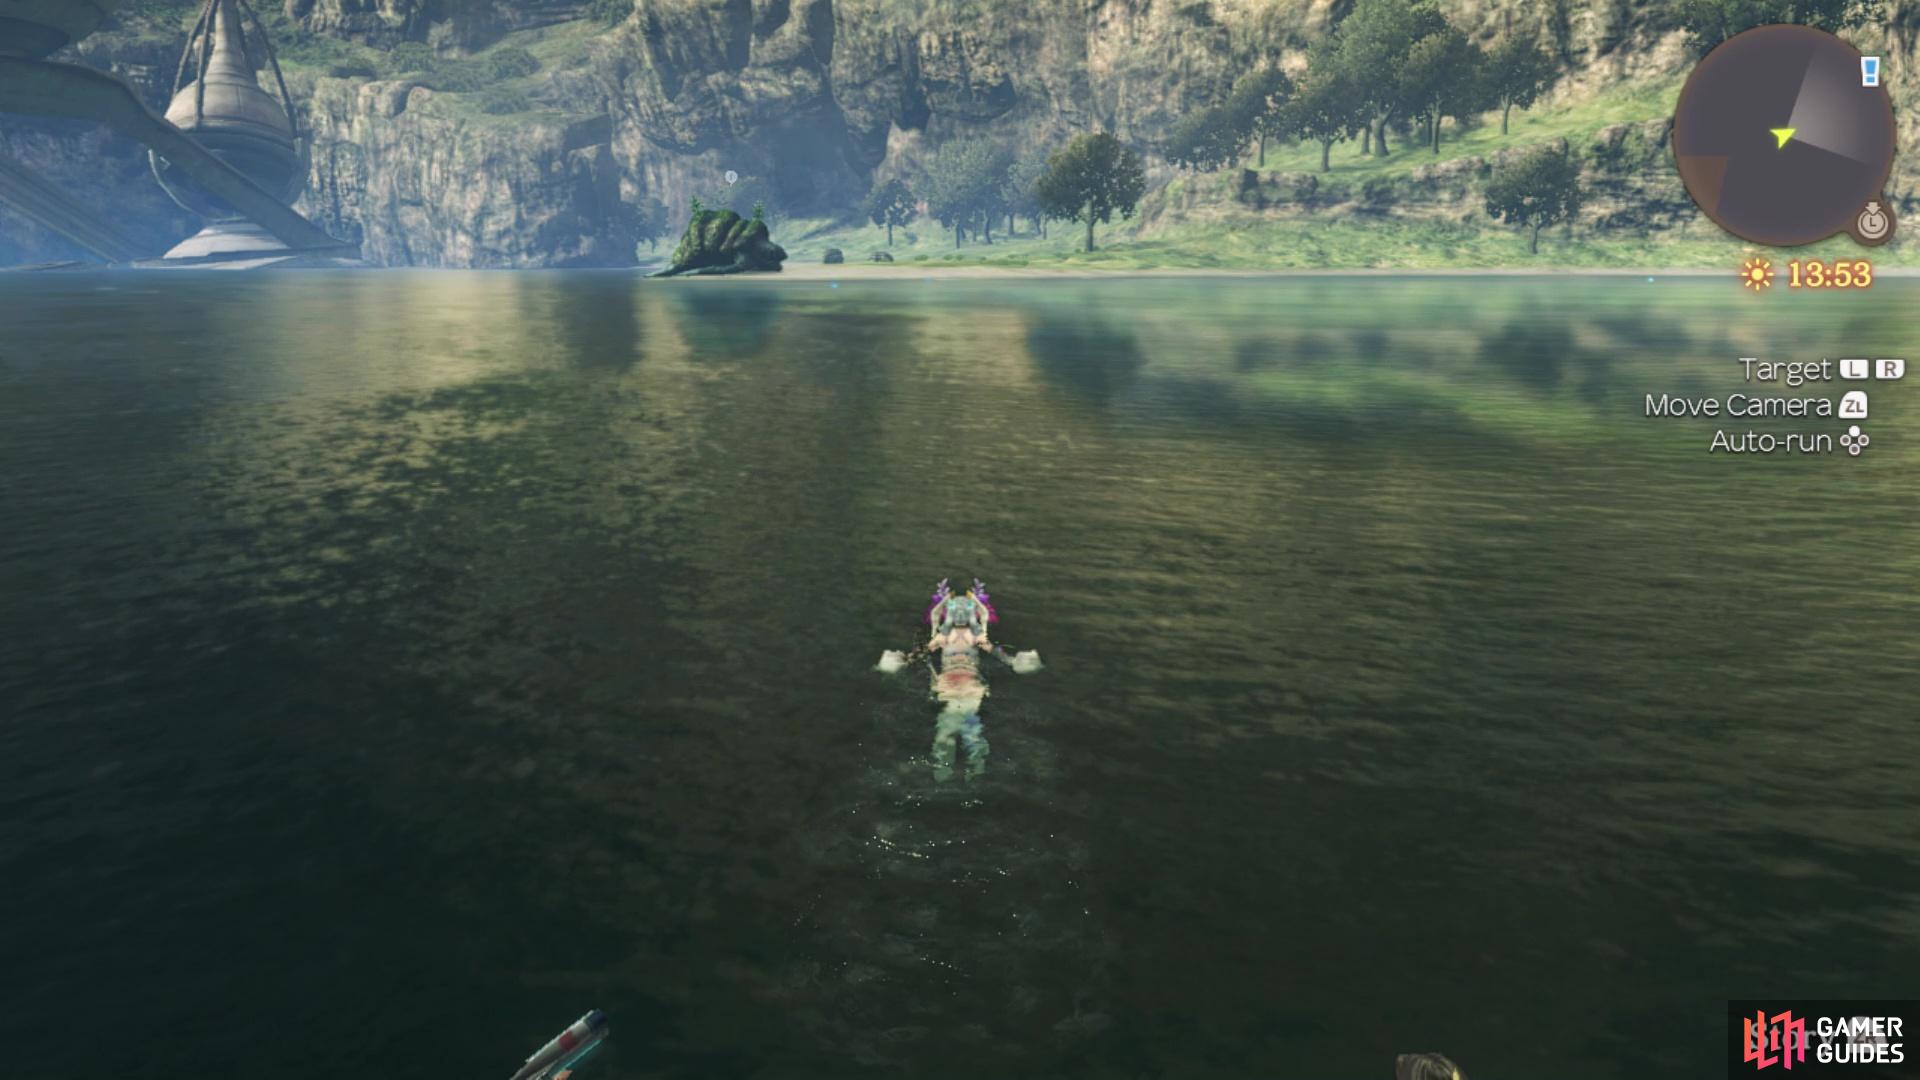
Kasharpa Falls is on the upper level of Bionis’ Leg and is just north of the Bask Cave Passage landmark; the Kasharpa Water is right underneath the waterfall. When you go to Satorl Marsh, fast travel to the Sororal Statues and jump in the water, then look north by northeast to find the Statue Water. For the Makna Water, you will need to swim out a good ways to the waterfall out in the distance, by Lakeside and Bridge One. It will take a while to get to the item, but there’s no enemies or anything, so you can turn on auto-run. Once you have all three water samples, return to Zain.
Preparing for Adventure 2
You need to have completed Preparing for Adventure to be able to start this quest. Kurralth has lost a container of cream which is necessary for travelling in cold climates. He says he dropped it near an ether deposit at Eryth Sea. The item in question is located on Anu Shore, so if you have the High Entia Tomb landmark in Eryth Sea, it’s best to travel to that. Jump off the platform (use the ramp to get over the railing), then use the cave to get to the upper portion of Anu Shore. The red orb will be right next to the edge of the map, on the right side, towards the middle. Note that you should be careful up here, as Lightspeed Sonid can spawn, which is needed for the Challenge 4 quest in Alcamoth. Return the item, once you have it, to Kurralth.
Preparing for Adventure 3
You need to have completed Preparing for Adventure 2 before this quest becomes available. Zain asks you for another favor before he goes out on his adventure, which is to defeat Lakebed Orthlus, as its liver is sure to be invaluable on their adventure. Lakebed Orthlus is a quest-exclusive Unique Monster, so you will only be able to find it during this quest. Anyway, Lakebed Orthlus is located on Agora Shore in Colony 9, which is on the eastern side of the map there. It is level 40, so fight it and it will drop the Orthlus’ Liver key item. Bring this back to Zain in Alcamoth.
It’s very easy to spot Lakebed Orthlus, as it is pretty big
Starlight Seeker
To get this quest, you have to complete Preparing for Adventure 3, as well as have Miriall registered on your Affinity Chart. She can be found southwest of the Imperial Palace landmark, in the night time hours. Speak to Elior to start the quest. He looks up to Zain and Kurralth as adventurers and wishes to do something similar when he grows up. He wants to learn about the stars, so he asks you to find Miriall, who knows all about them. Find Miriall and she will express interest in this boy, but he will need his own telescope to view the stars. She asks you to procure the materials, which will be 2 Silver Eks Plates, that drop from Stella Eks in Eryth Sea.
If you’ve explored Eryth Sea a lot, then you might have these already. If not, you can find Stella Eks at any time, in quite a few locations. Such places include Anu Shore (the upper section), Hovering Reef 7 and 10, Khatorl Seal Island, and the small island below Hovering Reef 5. Beat them up until you get the plates. Alternatively, Lar’shen in Alcamoth offers them for trade at two stars, plus Lunara in Alcamoth and Shalen in Eryth Sea have them as overtrades (2,160G is their value). However you get the items, return them to Miriall, then bring the telescope to Elior.
Starlight Gazer
This quest will become available once Starlight Seeker has been completed. Elior is looking for a smart Nopon to help him improve the telescope he got, so he can see even more. He sends you to a Nopon named Kaleka, who can be found on the second level of the city, north of the Imperial Palace landmark, but at night. He says he can improve it, but needs the material first, mentioning that it’s in the High Entia Tomb. The item you need is located in the Second Treasury, which is a hidden area in the tomb. Travel to the Tower of Trials - Bridge landmark and head backwards, into the hallway just before it.

(1 of 2) The secret passage is easily visible behind the enemy blocking it
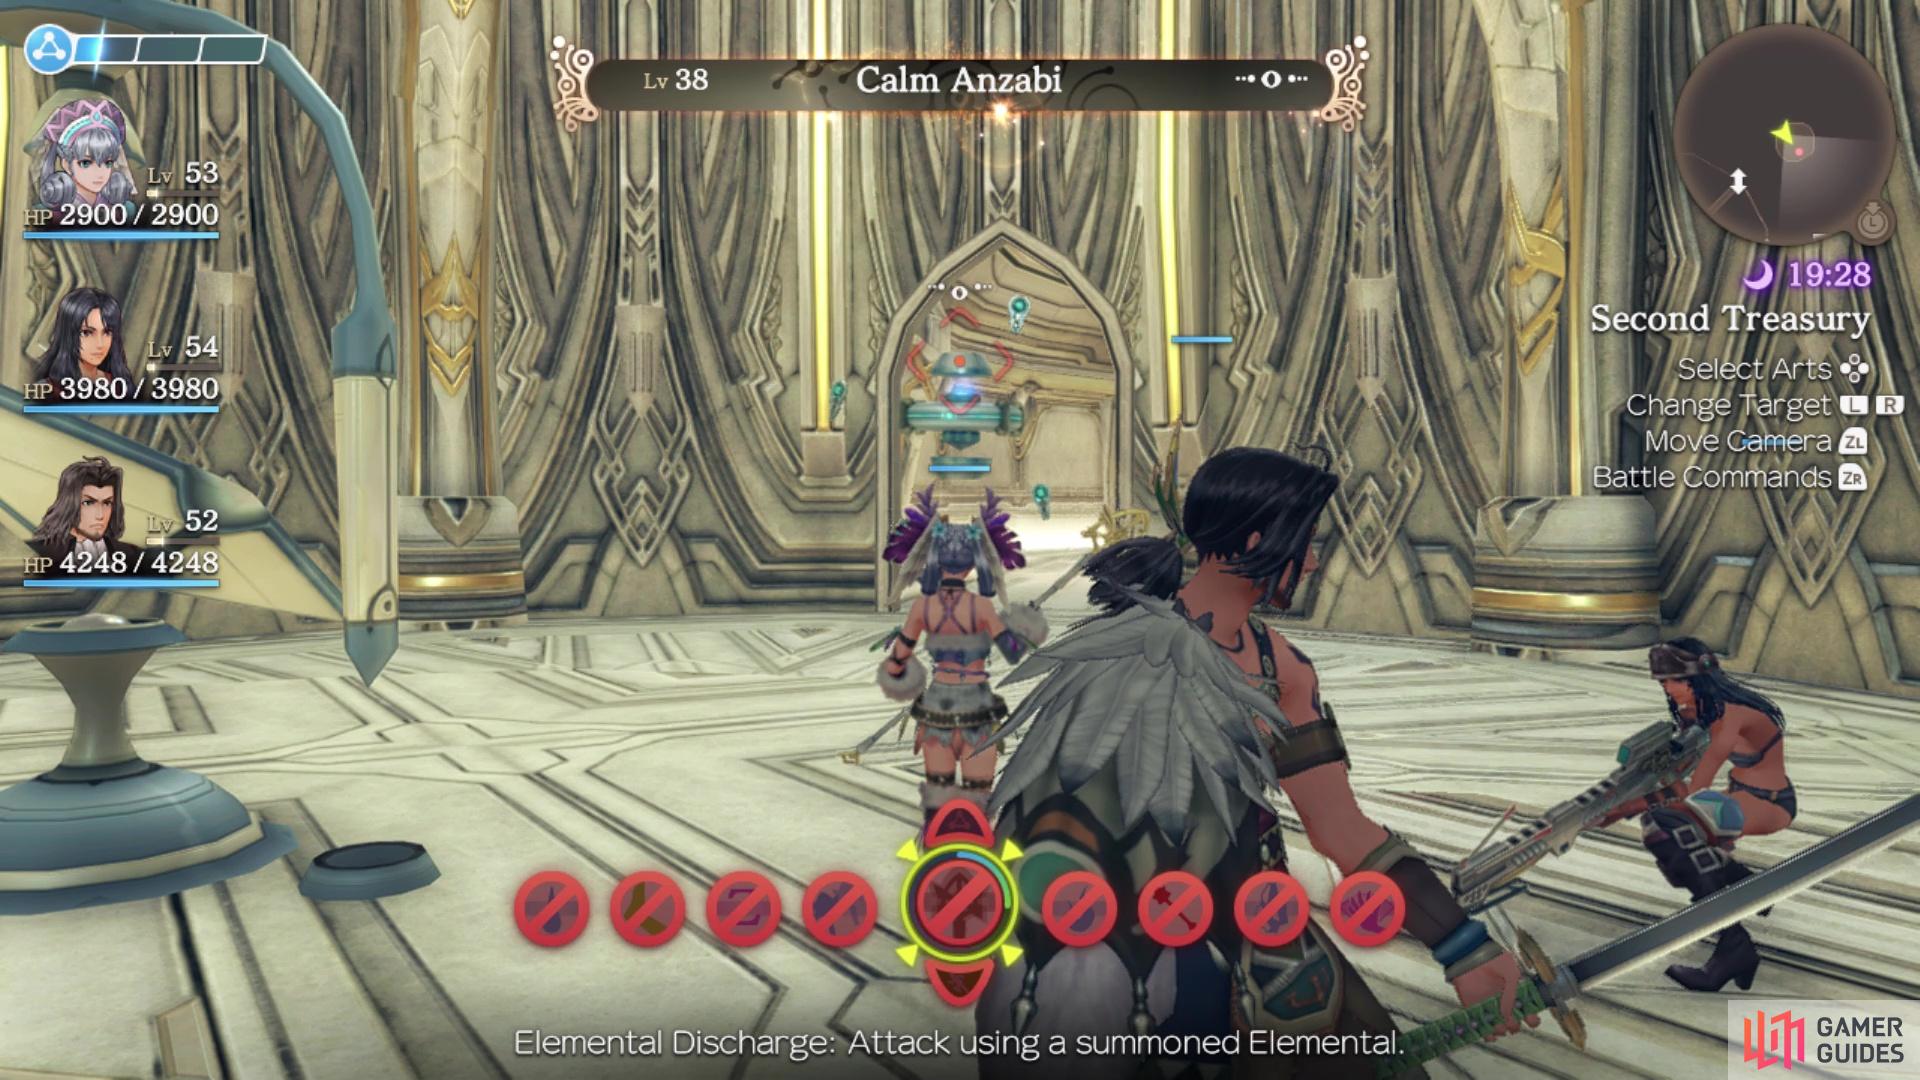
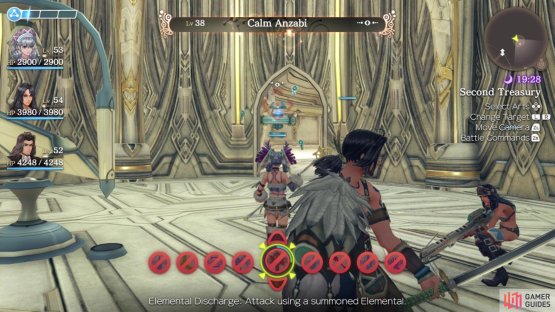
The secret passage is easily visible behind the enemy blocking it (left), Calm Anzabi will appear once you’re in the room (right)
The second recess, on the northern side, will have a hallway that doesn’t show up on the map. This leads to the Second Treasury, where you will find the Attachment Part needed for the quest. Note that a Unique Monster, named Calm Anzabi, will spawn at the doorway to this room. It is level 38 and completely independent of the quest, so as soon as you grab the item, you can fast travel out without having to fight the Unique Monster. Anyway, bring the item back to Kaleka, then return to Elior with the improved telescope.
Building Bridges
Arielle’s daughter has suddenly started hating Homs and Nopon, and has no reason why this occurred. Her daughter is named Lesunia and she can be found on the second level of the city, southwest of the Imperial Palace landmark (at night); you must have Melia as party leader when speaking with Lesunia. She feels she can tolerate a conversation with you, if you can bring her 2 pieces of Marine Marble from the Eryth Sea. This is one of the items needed for the Collectopaedia, so you may already have them. If not, then go collect them and bring them to Lesunia (once again, Melia needs to be the one speaking to her). Report your findings back to Arielle.
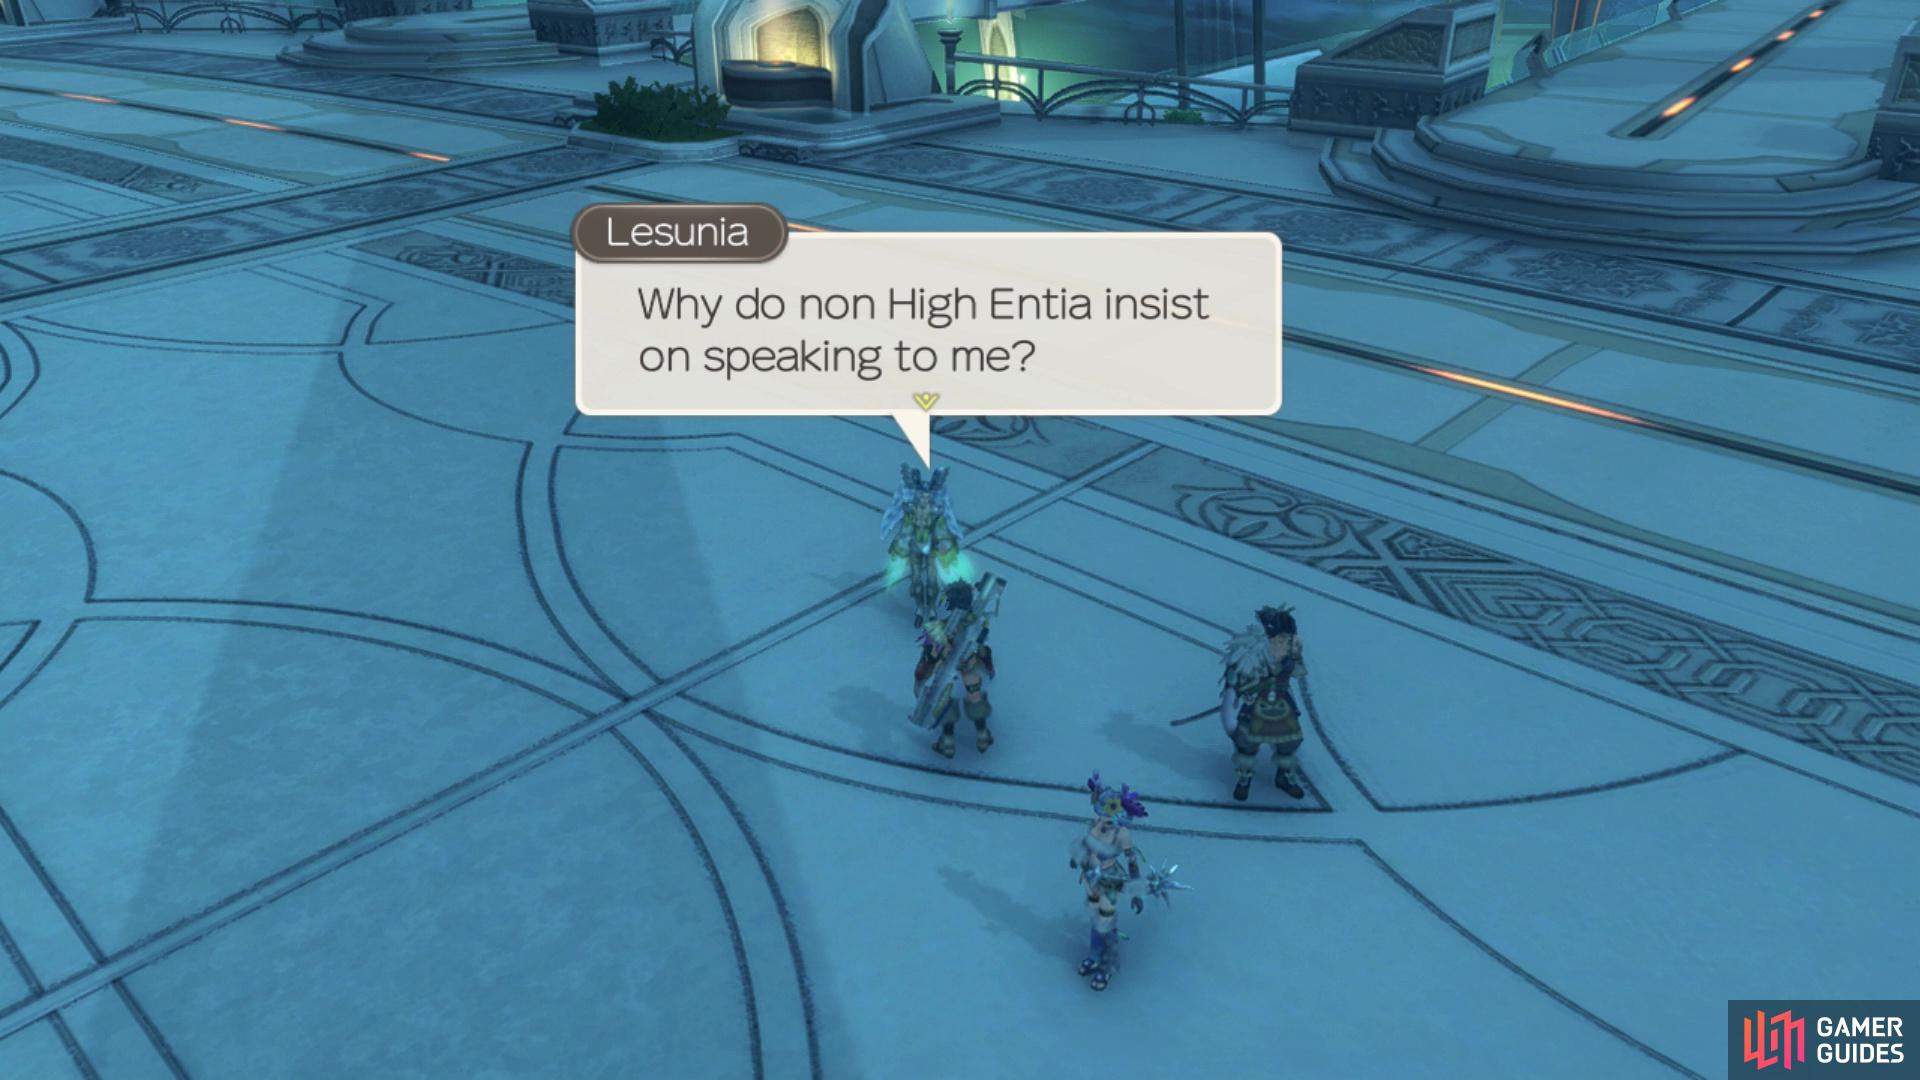
Lesunia will not speak with anyone but Melia, so make sure she’s in the lead
You should find yourself at 2✰ Affinity at this point and you’ll be able to accept a new Quest from Talia near the shop at night.
Talia’s Research
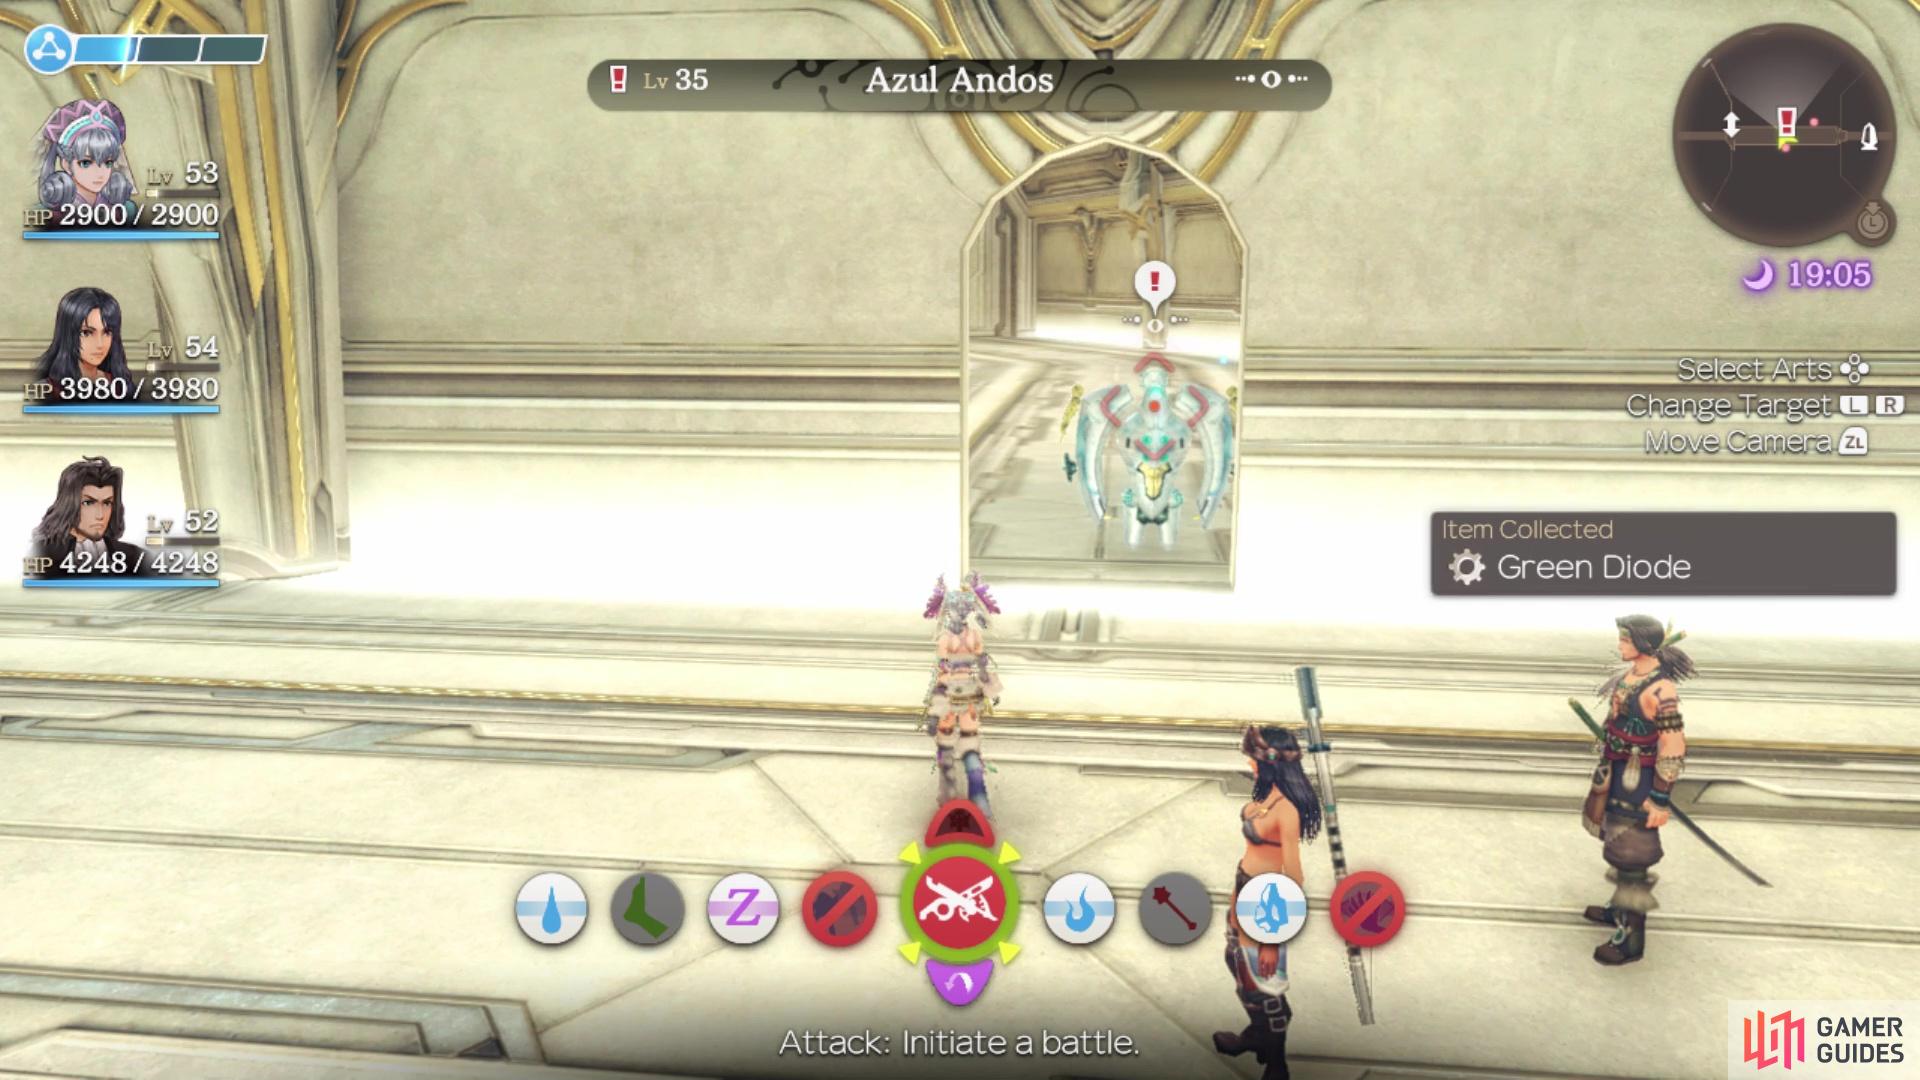
You need to have finished A Necessary Upgrade for this quest to appear on the map. While speaking to Talia, you have a vision that says she’s going to the Satorl ruins alone. She doesn’t want you following her there, despite all of the warnings that it is dangerous. In particular, she is headed to the Place of Judgement, so that’s where you will be heading. Whenever you fast travel there, you will receive another vision. Either way, this place can be dangerous, as there are level 80+ Gogols patrolling, but the Place of Judgement has a level 35 Dogmatic Gogol standing on it. You will need to defeat it, but be wary of the nearby patrolling high-level Gogol. Once you defeat the Dogmatic Gogol, speak to Talia nearby to complete the quest.
Back Pain
A guard is suffering from back pain as a result of overexertion, but he still wants to go on a subjugation mission. Galdo wants you to go in his place, so he wants you to defeat 6 Archer Hodes in Eryth Sea. You can find Archer Hodes on Showdown Cliff, Hovering Reef 2, and the shore right next to the Ether Crystal Deposit locations. Upon defeating six of them, return to Galdo to report your deeds.
Looking for Gold Bugs
Teelan wants to grow up to be a scientist and is looking for a particular bug, which happens to be the Gold Caterpillar. He needs a whopping 9 of them, and you can find them in Tephra Cave, as it’s one of the collectables there. If you don’t feel like running around and searching for them manually, you can also trade for them with two NPCs in Colony 9. Jolele has them at three stars Affinity, while Francoise has them at four stars Affinity. Once you have the bugs, return them to Teelan.
Losing the Taste for Alcohol
Nelo wants to go drinking with his friends, but he gets drunk very easily. He heard there’s something he can take that will make him want to drink less, but he needs you to go get the ingredients for it. The ingredients he needs are 2 lots of Feris Blood and 5 Pagul Hot Pots. The Feris Blood is dropped by any of the Feris enemies in Makna Forest (Makna Feris or Lupus Feris), but both Gadada (2 stars) and Nopon Sage (4 stars) offer it for trade. The Pagul Hot Pots will drop from Cruz Paguls in Eryth Sea, but you can also procure them by trading with Popipo in Alcamoth (2 stars). Once you have all of the items, bring them back to Nelo.
Looking for a Lost Son
Vol’aren’s two children were playing outside, but his son is now nowhere to be seen. Since he can’t leave his daughter’s side, he wants you to go find his son for him. Atael can be found northeast of his father’s position, in the corner on the ground floor (during the day). Speak with Atael, then return to the father.
(1 of 2) The location of Atael for Looking for a Lost Son


The location of Atael for Looking for a Lost Son (left), The location of Cian for Looking for a Lost Daughter (right)
Looking for a Lost Daughter
After completing Looking for a Lost Son, speak with Vol’aren again to find out his daughter is missing this time. East from the Fountain of Hope is the ramp that leads to 1F of Alcamoth. Staying on the ground floor, follow the ramp to the north (on the western side), and you will find Cian standing in the shallow water. Talk with her, then return to her father.
Going Out to Play
Popipo’s son hates to be outside lately, so he wants you to talk to him and work out what the problem is. Baroba is Popipo’s son and he is right next to the Main Entrance, so speak with him to find out Baroba doesn’t like to be picked up, so he asks you to bring him something stinky. To solve this problem, Baroba wants you to bring him 5 Ether Roses, which are a collectable in Satorl Marsh. They shouldn’t prove very hard to find, so once you do, bring them back to Baroba. Report back to Popipo after finishing the previous objective.
That should be the last of the Unique Quests you can do right now in Alcamoth but there are a few more to tackle in Eryth Sea. Go ahead and warp to Syrath Lighthouse and pick up Monster Quests 1 and 2, Challenge and Collection Quest 1 and Collection Quest 2. Be sure to speak to Shalen while you’re here and then warp over to the Ether Plant to find and begin Jarack’s Unique Quests.
Trouble at the Plant
Jarack at the Ether Plant has explained to you that one of the wind turbines was attacked by Hodes and needs fixing! He also wants you to teach the Hodes a lesson so they might think twice about attacking again. This quest activates two other quests: Punish the Hodes and Mend the Plant. In order to proceed with and complete this quest, the other two quests must be completed.
Completing both Punish the Hodes and Mend the Plant will simultaenously complete this quest too. Following this quest, you will be forced to accept the surprise quest, Hode Attack.
Punish the Hodes
This quest is received once you have activated Jarack’s quest, Trouble at the Plant. You must finish this quest in order to complete Trouble at the Plant. Jarack has asked you to teach the Hodes who attacked the Ether Plant a lesson. You must defeat Funeral Gozra at the Hode Refuge in Eryth Sea. Hode Refuge can be found east of the Ether Plant. If you jump off of the ledge where Jarack is found, you can swim to the island where Hode Refugee is located. Conveniently, all over the island you will find Hodes that you can farm the Luxury Hode Wood from that is required to complete Trouble at the Plant. Once you have fought your way through the barrage of Hodes, you will have to swim a short distance to a small alcove where you will find the level 42 Orluga-type unique monster, Funeral Gozra, who is flanked by several lower level Hodes. Once defeated, this quest will be completed.
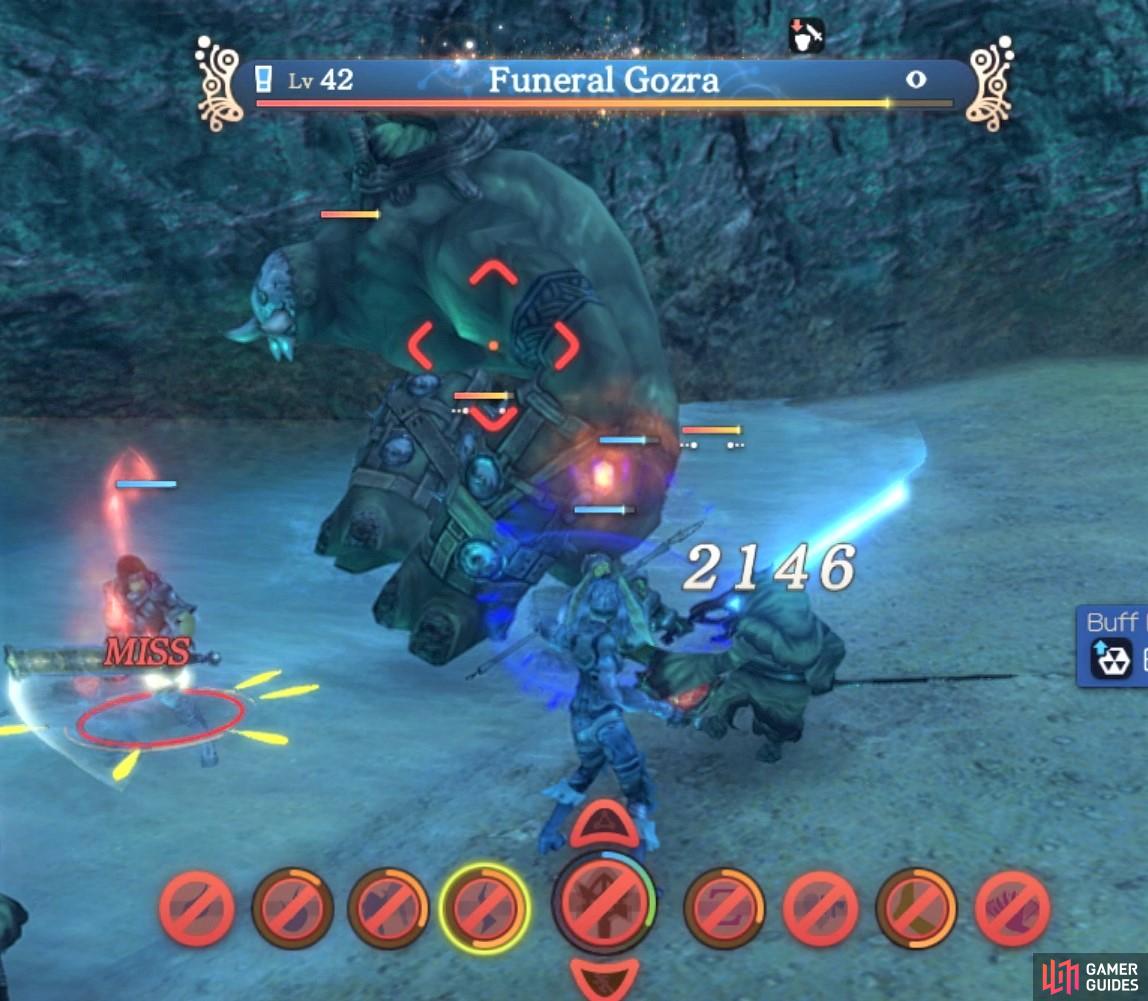
The Funeral Gozra is the Leader of the Hodes in Eryth Sea.
Mend the Plant
This quest is received once you have activated Jarack’s quest, Trouble at the Plant. You must finish this quest in order to complete Trouble at the Plant. Jarack needs you to find 3 Luxury Hode Planks so he can repair the wind turbine. These are dropped by Hodes across Eryth Sea, however, it is easiest to farm these at Hode Refuge since you must go there to defeat Funeral Gozra for the other quest required to finish Trouble at the Plant, Punish the Hodes. Once you have the required amount, return to Jarack, who will then ask you to repair the turbine for him. Head over to the furthest turbine on the right and press ‘A’ to repair. After repairing the turbine, return to Jarack to complete the quest. This will also simultaneously complete Trouble at the Plant.
Hode Attack
Once you have completed Trouble at the Plant, the Hodes will lead a surprise attack against the Ether Plant, triggering the quest, Hode Attack. Jarack will run and hide beneath the plant, whilst you fight off 2 Confusion Ekidnos. Once defeated, return to Jarack to complete the quest.
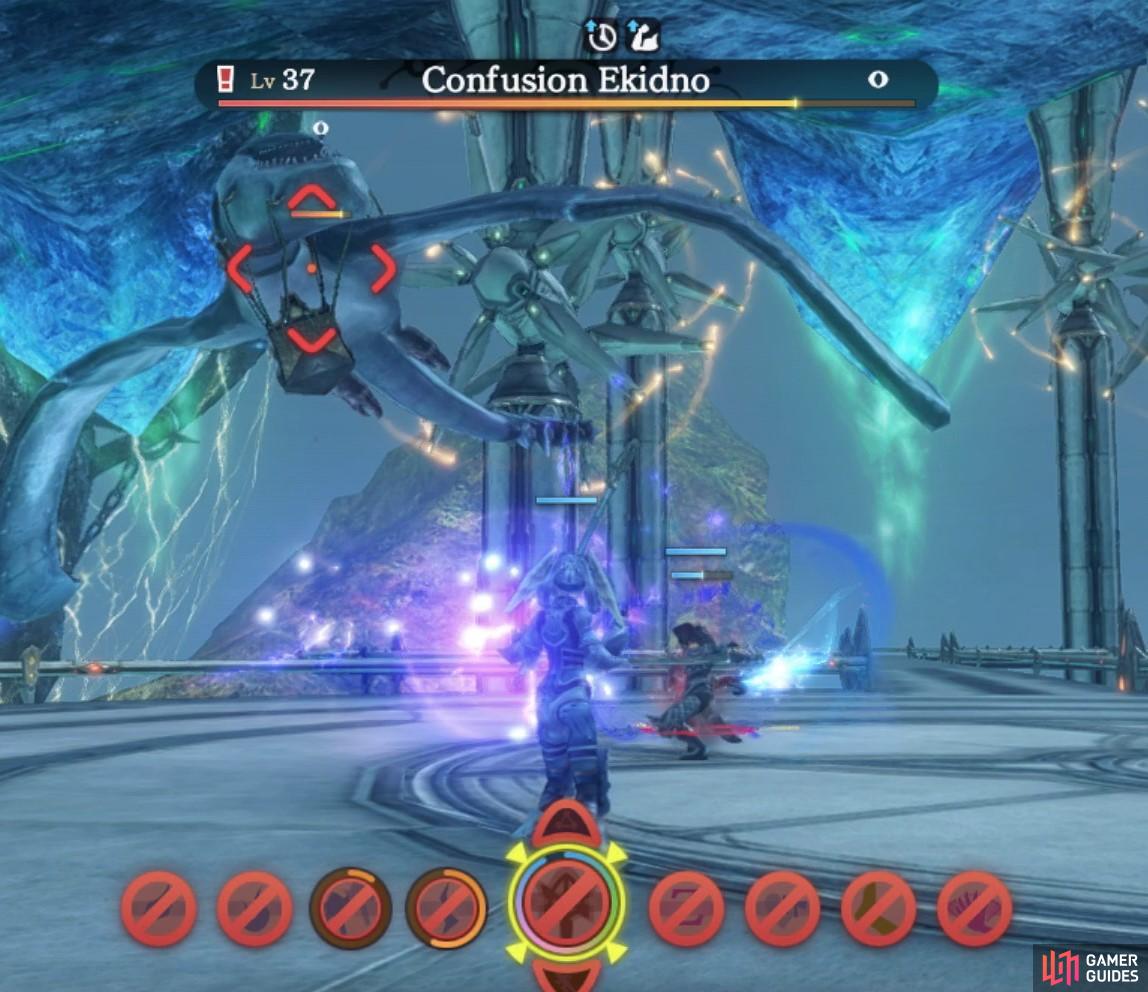
The Confusion Ekidno are looking to avenge their leader.
Trouble at the Lighthouse
This quest is available to you once you have completed Hode Attack!. And you may only activate it with Melia as the lead. Shalen will ask you to defend the lighthouse when the monsters attack at night, whilst they repair the lights. Your task will be to defeat Decay Ekidnos near Syrath Lighthouse at night. They will be waiting at each balcony on the upper level of the lighthouse. When you have defeated them, return to Shalen to complete the quest.
Upon the completion of the quest, Melia will unlock her fourth skill branch, Reticence.
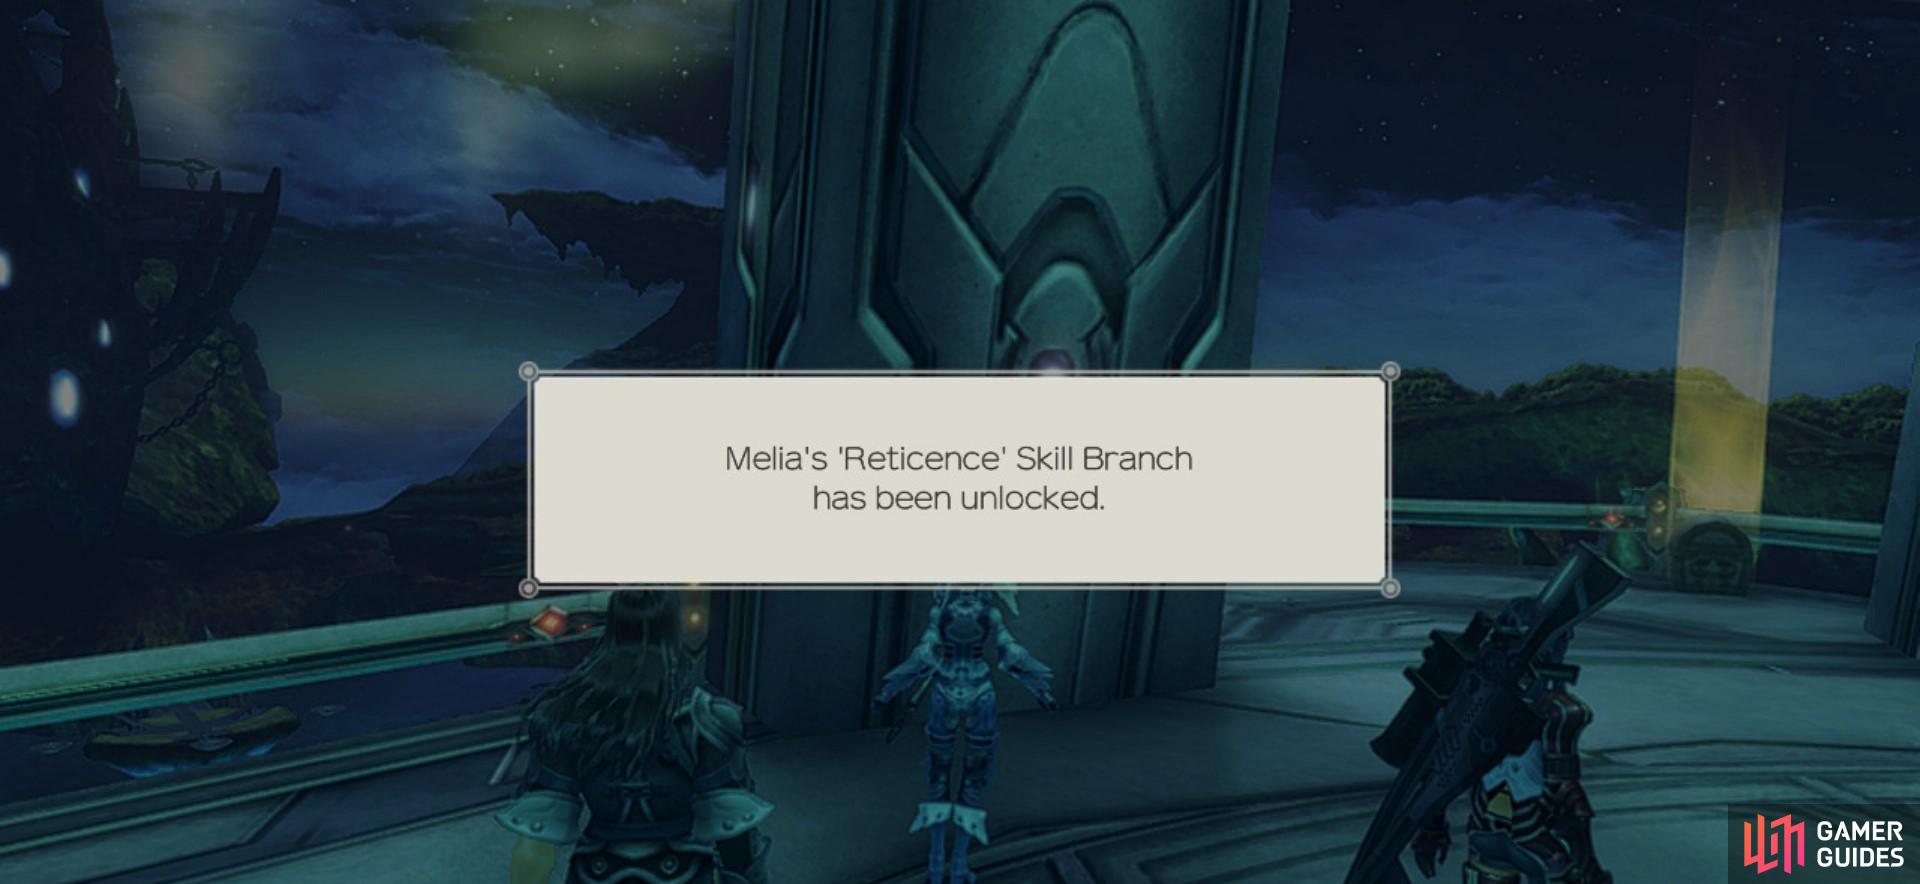
Completing this quest will unlock Melia’s skill branch, Reticence.
Questing Around Colony 6 and Frontier Village
That’s all the Quests you can do around Eryth Sea for now so make your way back to Frontier Village where you’ll find some more Quests have become available. Begin by heading back to Colony 6 and speak to the new residents to accept all of the new available Quests here (you may have to go back to Alcamoth to send both Ma’crish and Talonyth here if you didn’t do so earlier).
Cook-Off Counter Attack!
In order to activate this quest, both Hoko and Talonyth must now reside in Colony 6. For Hoko to move, Housing and Commerce must be at level 2, and for Talonyth to want to move they must be at level 1. Talonyth lives in Alcamoth so to have him move you must have reached Alcamoth in the main story quest. Once all the prerequisites have been satisfied, Hoko will offer up this quest. He tells you that his cooking is awful and he needs better ingredients to beat his rival, Talonyth.
| Material | Dropped by | Monster Location | Trade (Optional) |
|---|---|---|---|
| 3 lots of Thick Armu Milk | Daughter and Leg Armus | Gaur Plain (Bionis’ Leg) | – |
| 3 White Brog Liver | Detox Brogs | Crown Tree (Satorl Marsh) | Bokoko overtrade (Satorl Marsh) |
| 3 Juicy Wild Meat | Stella Eks | Khatorl Seal Island, Hovering Reef 7 and 10 (Eryth Sea) | Caul and Lecrough at 1✰ in Alcamoth |
Once the required materials are collected, head back to Hoko in Colony 6 to complete the quest.
Cook-Off Comeback?
This quest can be activated when Ma’crish and Pokapoka have moved to Colony 6. To have Ma’crish move in, Housing and Special must be at level 2 in the reconstruction process. For Pokapoka, you will need Housing at level 2 and have a population of at least 30 people. You must also have completed the quest Cook-Off Counter-Attack. Since completing his last quest, Hoko’s food has gotten much better! He has asked you to get some even more ingredients so that he can make food that is better than Talonyth’s.
| Collectable | Location | Trade (Optional) |
|---|---|---|
| 4 Charcoal Legs | Ether Mine | Talonyth at 1✰ (Colony 6) |
| 4 Honey Rhubarb | Makna Forest | Kuriku and Pepa at 1✰ (Frontier Village) |
| 4 Tropical Radishes | Eryth Sea and Colony 6 | Ricoth at 1✰ (Alcamoth) |
Once you have all of the required collectables, head back to Hoko to complete the quest.
Cook-Off Final Blow?!
Because of your help, Hoko’s food is now the best in town and no one likes Talonyth’s food anymore. He has asked you to fetch him a Sky Frying Pan so that he can improve his cooking. The Sky Frying Pan can be found near the Sky Stage north of Viliera Hill on the Bionis’ Leg. Once retrieved, head back to Talonyth and he will then ask you to collect the Nature’s Stove from near the Eks Watering Hole in Makna Forest. It is easy to locate, it is just to the east of the watering hole, on a small shore. Once you’ve retrieved the stove, take it back to Ma’crish to complete the quest.
A Delectable Delicacy
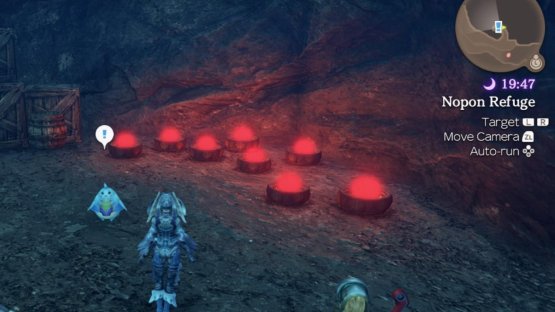
To activate this quest, you must have completed Cook-Off Comeback? and have 2✰ affinity in Colony 6. Pokapoka must also have moved from Frontier Village to Colony 6 and to achieve this you need to have Housing at level 2 in the reconstruction process and a population of at least 30. Once you’re able to activate this quest, Pokapoka will ask you to fetch him 3 Bunnia Hams which are dropped by Ether Bunnias in Satorl Marsh. These Bunnias are found most commonly just north of Glowing Obelisk, nearby the Nopon Refuge. Once you have collected 3 pieces of ham, head back to Pokapoka to complete the quest.
Missing Lodger
Ma’crish can move to Colony 6 once Housing is at level 2 and she is originally found in Alcamoth. This quest can be picked up once the Special category is also at level 2 in the reconstruction process. Ma’crish has asked you to locate the missing Nopon, Nopo’rikh who hasn’t returned home yet. He can be found in the Armu farm near Reconstruction HQ. Finding him and telling him to return home will trigger him to move into Colony 6, he is a new NPC that appears once this quest has been accepted. Head back to Ma’crish to complete the quest.
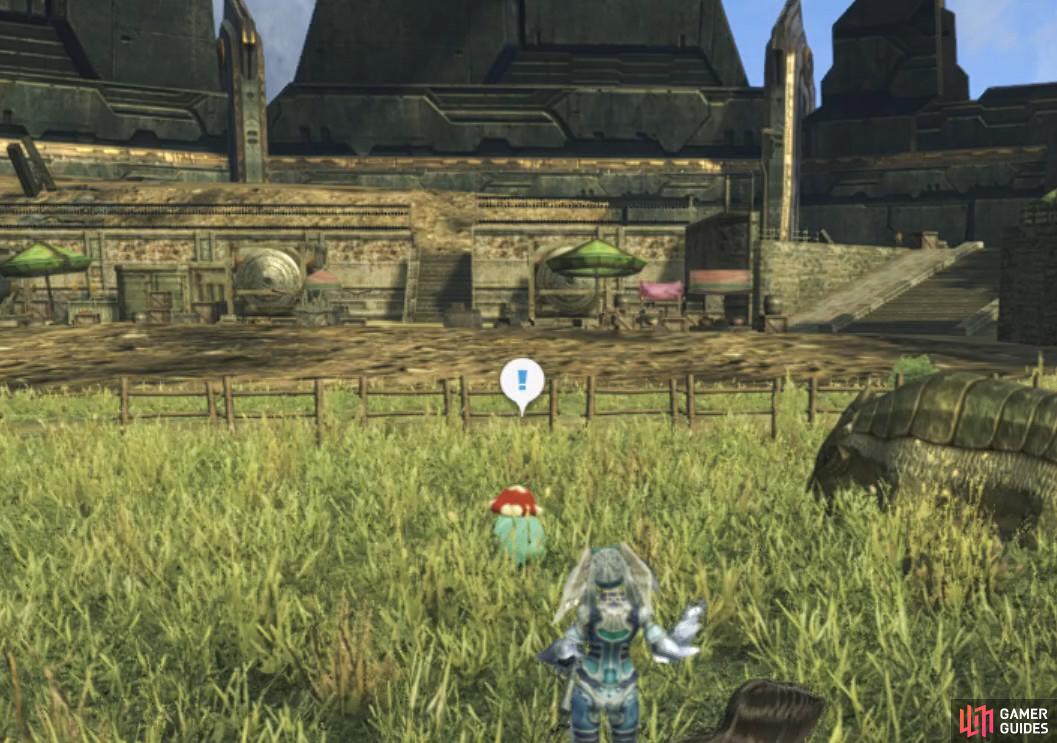
Nopo’rikh can be found in the Armu Farm of Colony 6.
Looking for Freedom
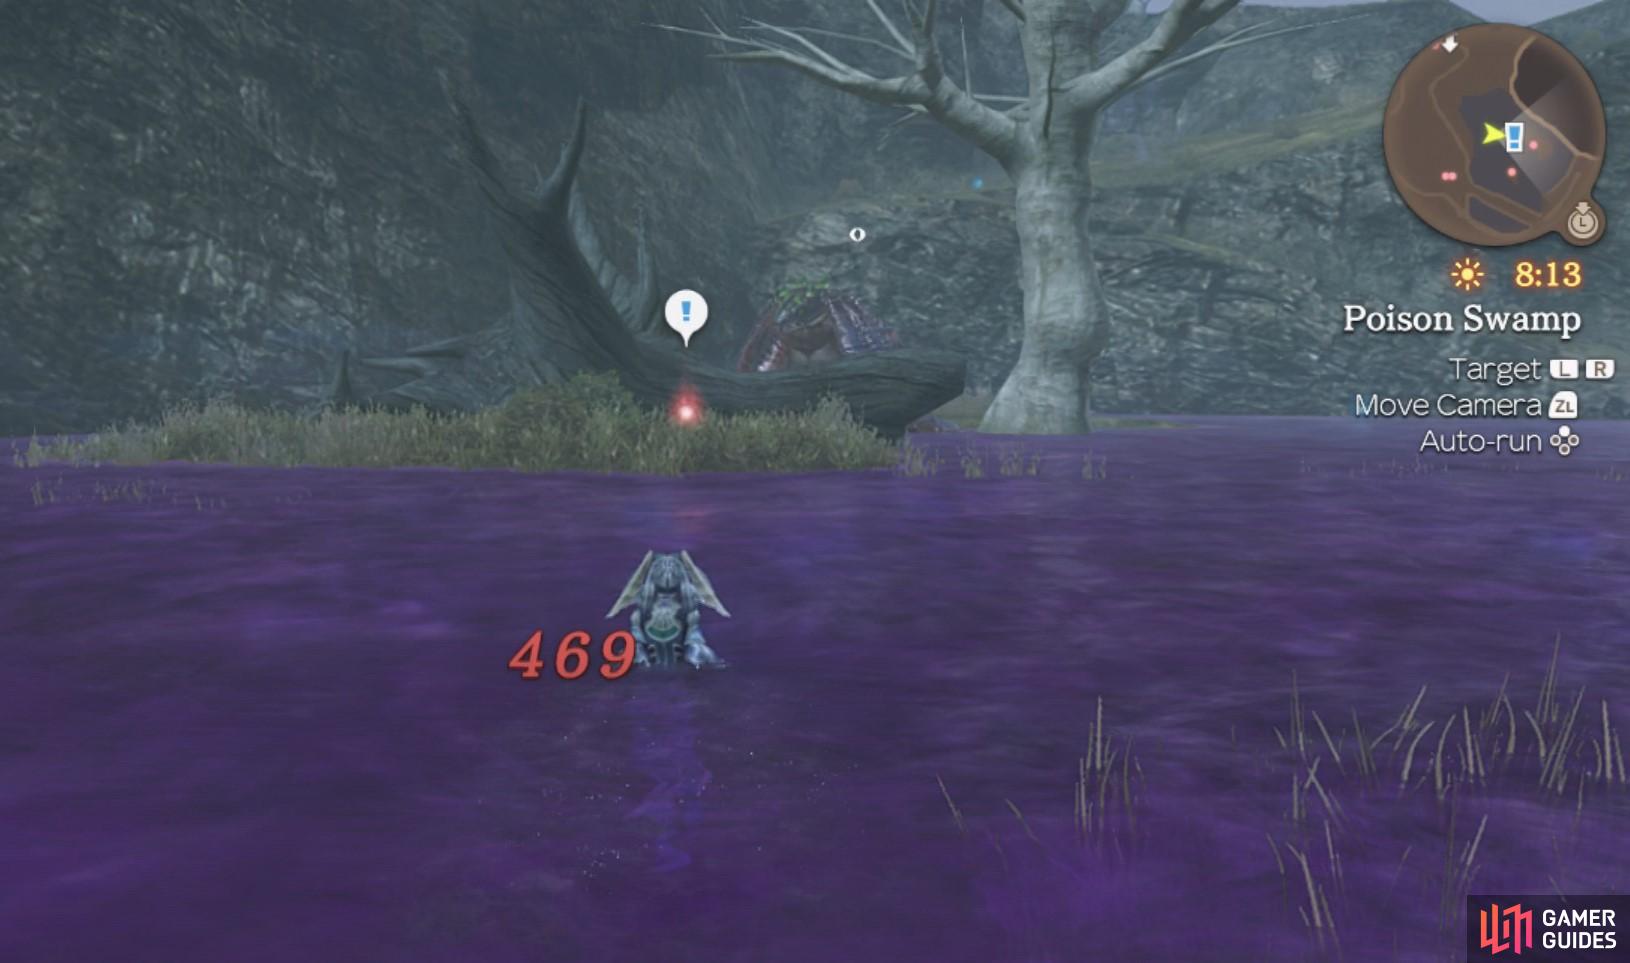
This quest can be unlocked once Missing Lodger has been completed and you have 2✰ affinity with Colony 6 residents. Hoko will tell you that Ma’crish treats him more like a pet than a person. He wants to teach her a lesson and has asked you to collect Smelly Perfume from the Poison Swamp in Satorl Marsh. This quest has two routes, each one yields a different reward.
-
Collect Smelly Perfume (Route A) - If you choose this route then you want to head to Poison Swamp in Satorl Marsh. You will have to swim through the poison and this will damage you over time, so be careful not to stay in the poison for too long. Once retrieved, head back to Nopo’rikh to complete the quest. The affinity between him and Ma’crish will change to a negative link labelled, I’m Free!
-
Report to Ma’crish (Route B) - If you choose this route then head over to Ma’crish and tell her of Nopo’rikh’s plan. She will ask you to fetch some Pure Perfume instead, to trick Nopo’rikh. You can collect Pure Perfume from Great Makna Falls in Makna Forest. Just jump of the ledge into the water from the Divine Sanctuary landmark and swim to the small island infront of the falls. The Pure Perfume can be retrieved from the small island. Head back to Colony 6 and hand the perfume to Nopo’rikh. Once he’s been given the perfume, speak to Ma’crish again to complete the quest. The affinity between Nopo’rikh and Ma’crish will change to a positive link labelled, I’m Not a Pet!
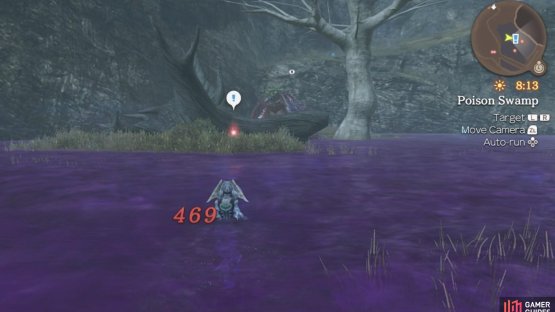
(1 of 2) Smelly Perfume is found in Poison Swamp
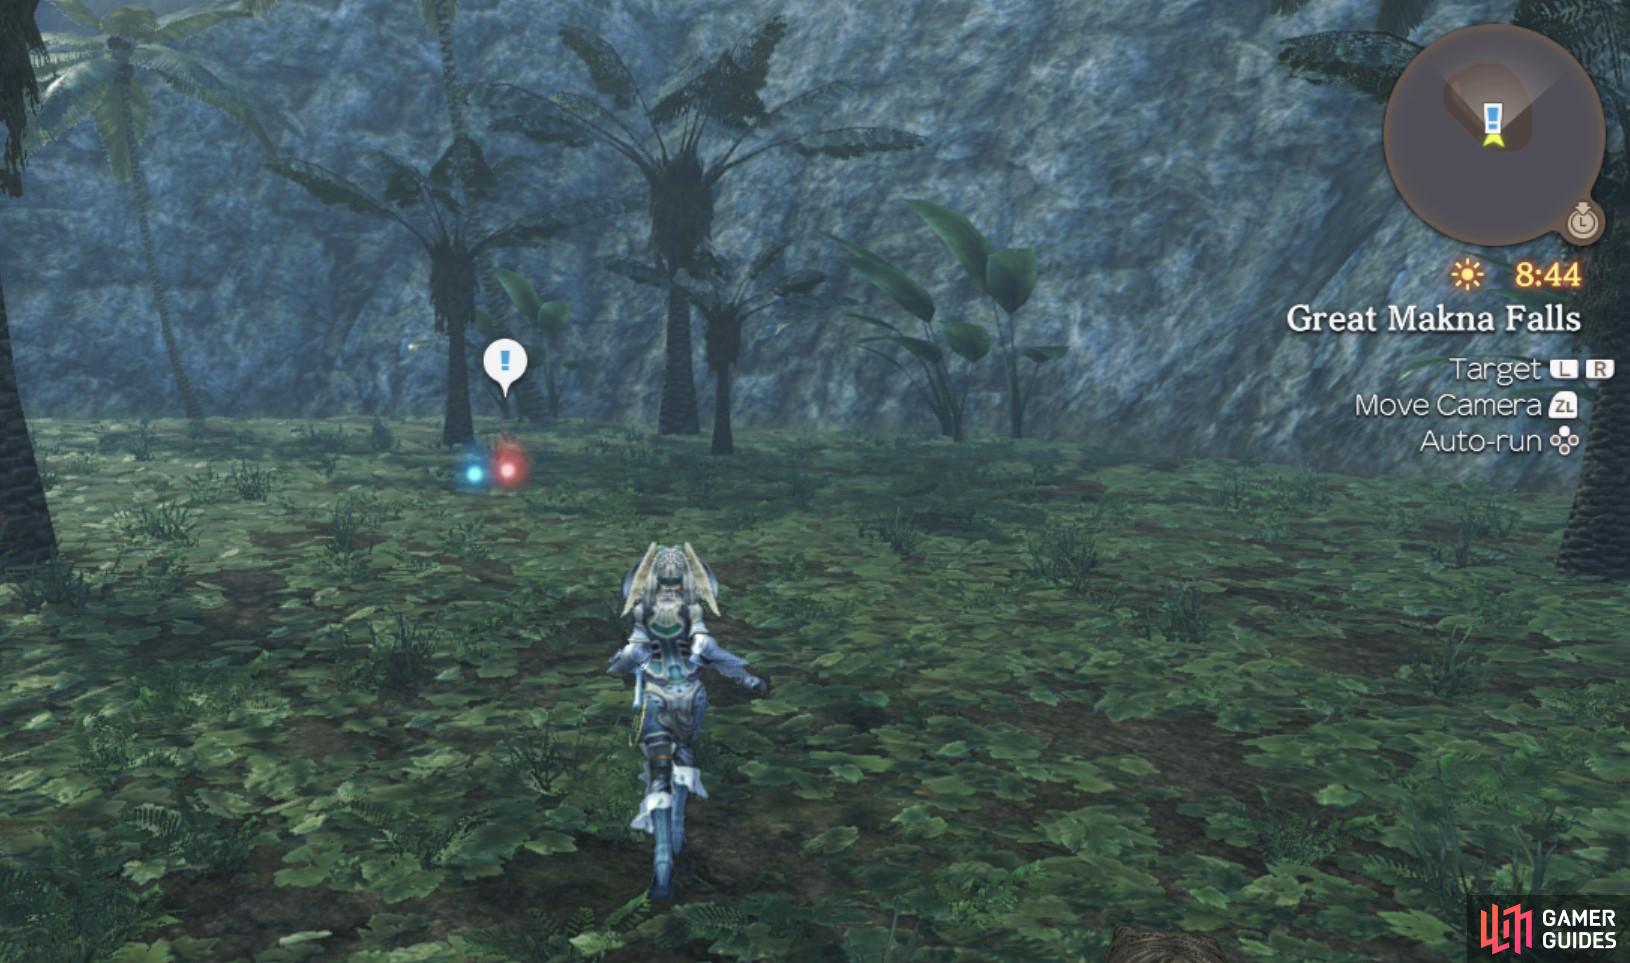
Smelly Perfume is found in Poison Swamp (left), and Pure Perfume is located near Great Makna Falls (right)
That’s everything in Colony 6 for now so warp back to Frontier Village to discover another set of Quests are now available.
Dangerous Ambition
To activate this quest, you must have already completed The Master’s Successor, however, your choice in successor does not affect being able to pick this quest up. Cherri will tell you that Gadada has gone missing, and she asks you to help find him by asking his friends about his whereabouts. On your affinity chart, you will see that Gadada is friends with Bana. You can find Bana in Central Plaza from 18:00 to 06:00. He will give you a vague idea of where Gadada might be, for example he mentions Clear Waterfall and a deadend. You might be tempted to head straight for Clear Waterfall and navigate to the ! marker from there, however, the area that Gadada can be found in is raised and you can only get to it via the Nopon bridges. The bridges start from Village Entrance, and you just want to follow the bridges in a northeast direction until you reach an elevated area where you will find Gadada. When you reach him, it will trigger a cutscene where you discover that a High Entia has tricked him into handing over a Red Pollen Orb, which are rare and hard for the Nopon to make. Once the cut scene is over, head back to Cherri to finish the quest.
Find the Kingpin
Once you have reached Alcamoth in the main quest and have completed Dangerous Ambition, Gadada will offer up this quest. Following on from the story developed in Dangerous Ambition, Gadada wants to find out who it was who tricked him into giving over the Red Pollen Orbs. Firstly, you must speak to Bana, who can be found in Central Plaza between 18:00 and 06:00. He will tell you about the Nopon Merchants who gave the order. After speaking to Bana, return to Gadada to tell him the news. He will then ask you to speak to some Nopon Merchants and obtain proof from them. There are many Nopon Merchants across the Bionis, however, you will need to speak to Daza in Colony 6. First though, you must complete or have completed Daza’s quest, Secret Mission, which is the third and final instalment in Daza’s quest chain. During Secret Mission you are given Top-Secret Data as a reward. This is the proof that you need to hand over to Gadada. Once you have given him the proof, the quest will be completed.
Adviser Hunt and Gather Information
Gadada has read the Top Secret Data and has found that it was Debadeba who was misusing the Red Pollen Orbs! He has asked you to go to Debadeba’s home to investigate. When you arrive at his home though, there is nobody there. Head back to Gadada to tell him what you found. He will then explain that Debadeba has been receiving packages from a Nopon in Satorl Marsh. The quest objective says to find a “Suspicious Nopon” in Satorl Marsh. You may remember that when you completed the quest A Gift? you were instructed by Zazadan to deliver Highmore Caviar that was made from Red Pollen Orbs to Debadeba. Head over to Glowing Obelisk in Satorl Marsh and walk north to Nopon Refuge to talk to Zazadan. Upon talking to him, you will activate the surprise quest, Gather Information.
Gather Information - this quest requires that you interrogate Zazadan to find out what he knows about the black market. You will be given a series of questions to ask him, for the best results pick the following:
-
“What happens if it’s processed?” - Zazadan will tell you that Red Pollen Orb becomes a highly addictive substance when processed. The addictive substance is Highmore Caviar, the “food” you made when you completed his quest, A Mysterious Delicacy.
-
“We don’t blame you” - Zazadan tells you that his secret Nopon society is selling the Highmore Caviar to High Entia because it is an easy way to make a lot of money.
-
“Ask where Debadeba is” - Zazadan cannot say where Debadeba is because the chairman will kill him!
Upon completion of the interrogation, you will receive an item labelled Zazadan’s Memo. After finishing Gather Information, head back to Gadada and give him the memo to complete Adviser Hunt.

(1 of 2) Zazadan is in a lot of trouble

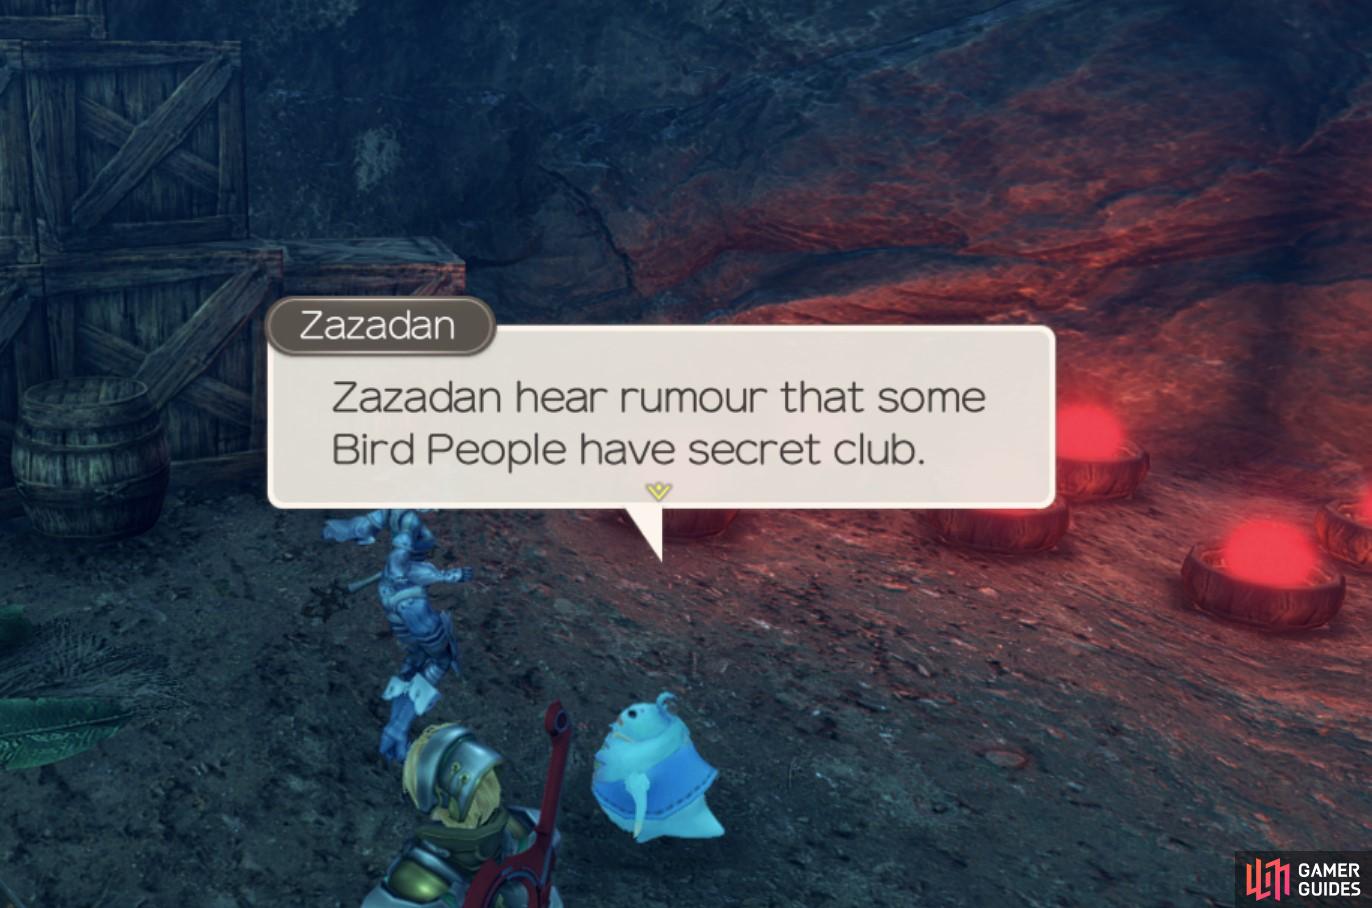
Zazadan is in a lot of trouble (left), but under interrogation, he reveals their secret business. (right)
Evidence Collection
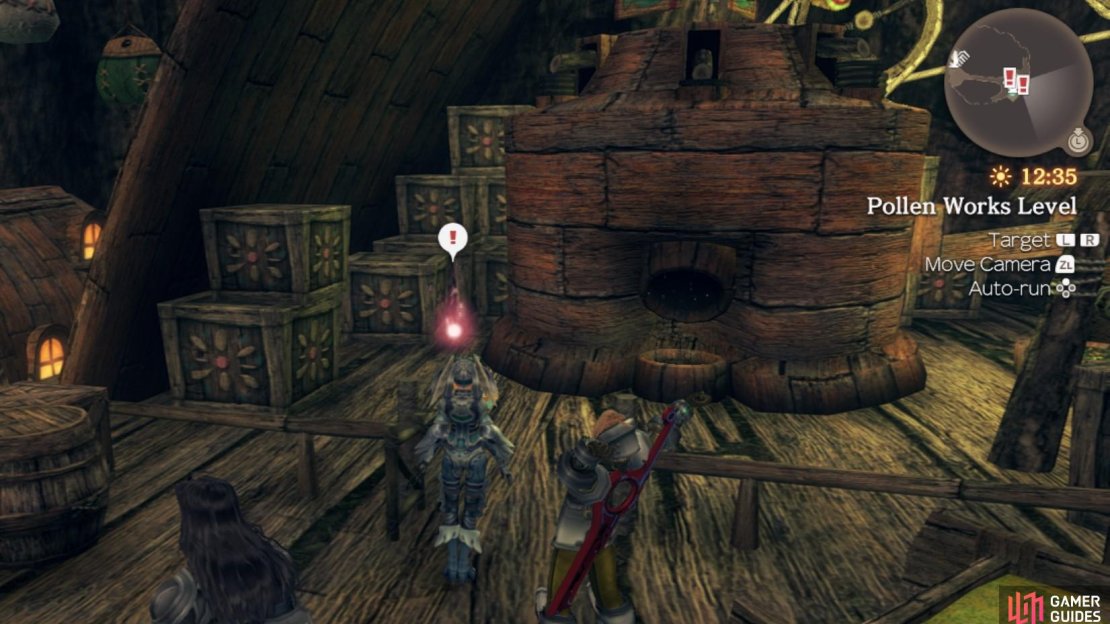
Gadada needs you to find pieces of Debadeba’s Evidence across Frontier Village so that he can finally expose him to the Chief. There are four pieces of evidence to find in total, and they are relatively easy to locate. Two of them are found in Gadada’s immediate vicinity. One is behind Debadeba’s house on the Orb Storage level, and then the last one can be found in the Underground Store. Once you have all of them, head back to Gadada to complete the quest.

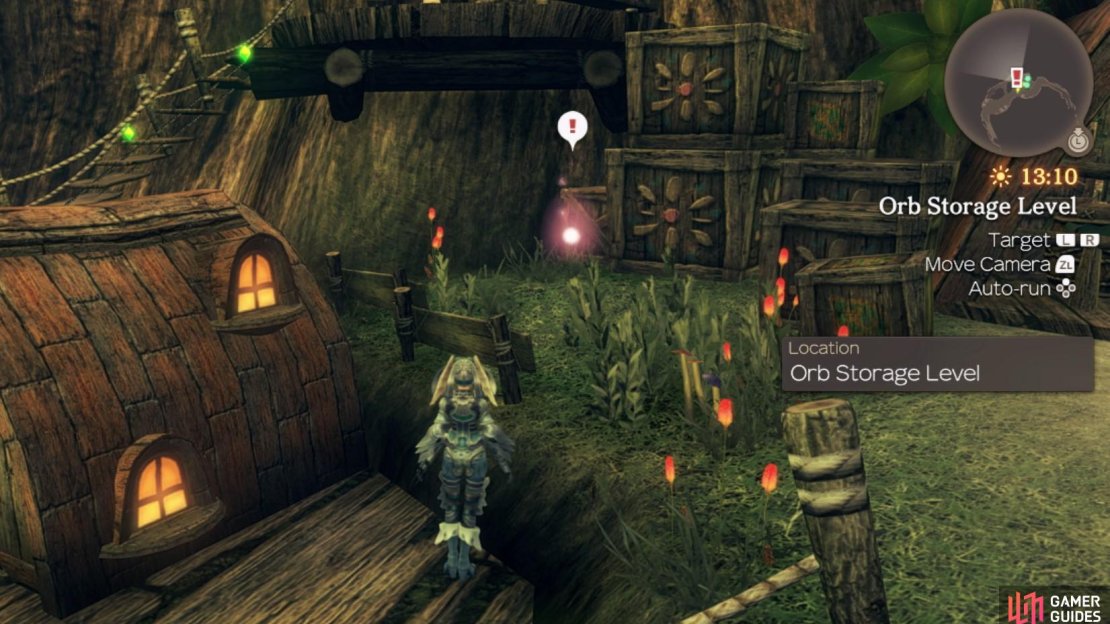
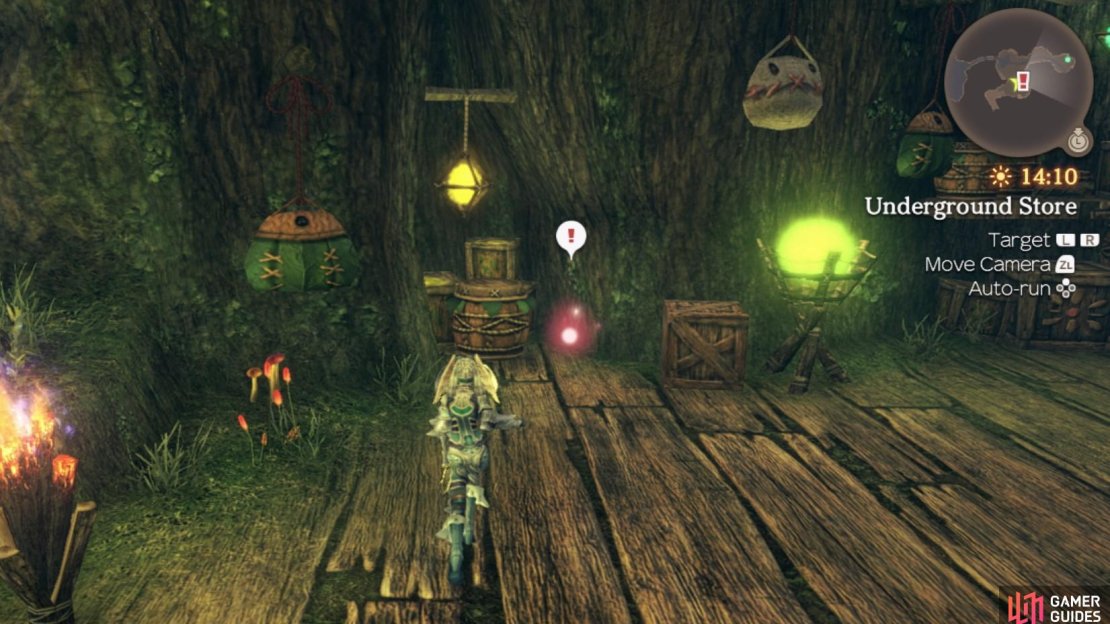
(1 of 4) Location of Proof 1/4
Destroying the City Trade and Getting a Member’s Card
Now that Gadada has the evidence, he’s ready to make Debadeba pay! He has asked you to find the location of the Secret Club in Alcamoth. Once you have found the club and speak to the Bouncer, you will trigger a Surprise Quest called Getting a Member’s Card. This quest must be completed in order to progress with Destroying the City Trade.
Getting a Member’s Card - This Surprise Quest requires you to find a Secret Club Card so that you can access the club. You can obtain a Member’s Card from Nelo who is found near the Fountain of Hope from 18:00 to 06:00. He will lend you his card on the condition that you fetch him 3 Rufus Control Units from Orluga Rufus in the High Entia Tomb. They can be found specifically on the Tower of Trials and the material required is a fairly common drop so you shouldn’t have to farm for too long. Take the items back to Nelo so that you can retrieve the Member’s card and complete the Surprise Quest.
Once you have the Member’s card, head back to the Secret Club and show the Bouncer your new card. He will let you in and you can go and talk to Debadeba. You will witness a short cutscene where Debadeba is arrested. He confesses that he has been framed and is not the Kingpin. After the cutscene you can head back to Frontier Village and talk to Gadada to complete the quest.
Debadeba is getting his comeuppance!
With that completed, there’s no more Quests to undertake right now so it’s time to press on with the story and activate the seals to reach Prison Island. Before you do head back to Eryth Sea, take a look at the Heart-to-Heart list and complete any available for the extra Affinity Boost.
No Comments