


New Allies
Following the scenes, you’ll gain a new objective, Prison Island by means of Satorl Marsh while Dunban will officially join the party. Dunban is a rather interesting character and one that you should certainly add to the party at the expense of Sharla. Sharla’s heals are handy but for the most part, they’re not needed and Dunban, when set up properly, is one of the most effective characters in the game.
He has the unique ability to damage Mechon without needing Enchant and what’s more his Arts all deal plenty of damage. More importantly, until now it’s been suggested to have your characters work across their Skill Trees in order to unlock more Skills but once again, you’ll want to treat Dunban a little differently. If you take a look down his Wisdom tree, you’ll notice he has plenty of useful Skills that send his Evasion sky high when equipped with no Armor making him an even better tank than Reyn when he has most of those Skills, after all it’s better to take no damage at all.
Before you head off to Satorl Marsh however, there is more optional content to take care of. Begin by heading to the nearby portal to reach the Noponsage and another Time Attack battle that has opened up.
| Challenge Name | Difficulty | Rewards |
|---|---|---|
| The Walls Have Eyes | 1/4 | Festival Set |
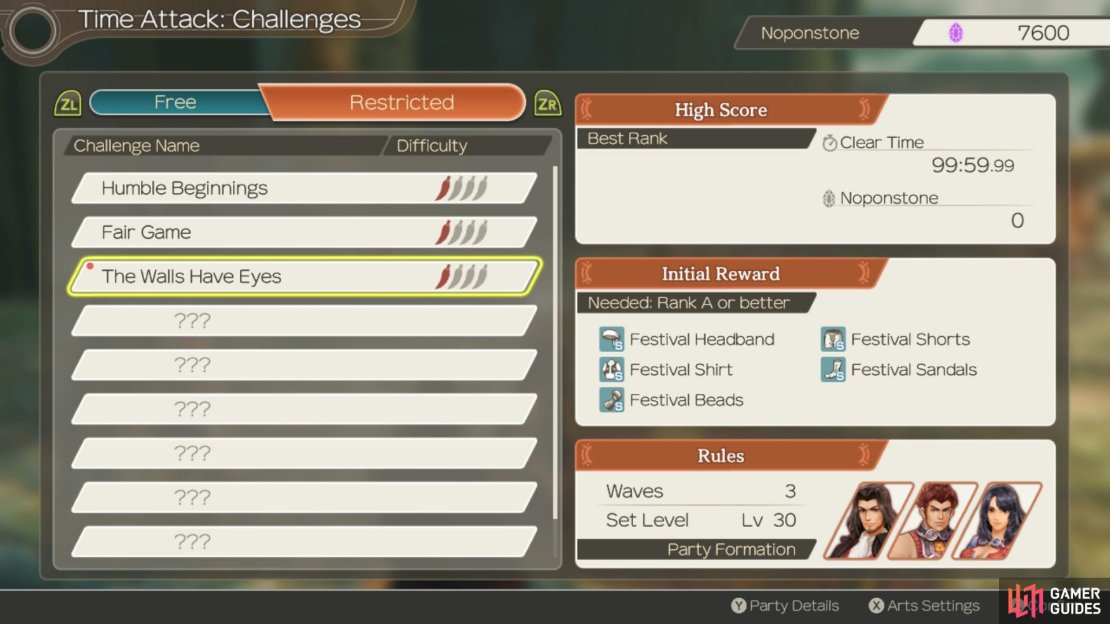

(1 of 4) You’ll be in control of Dunban for this Time Attack
-
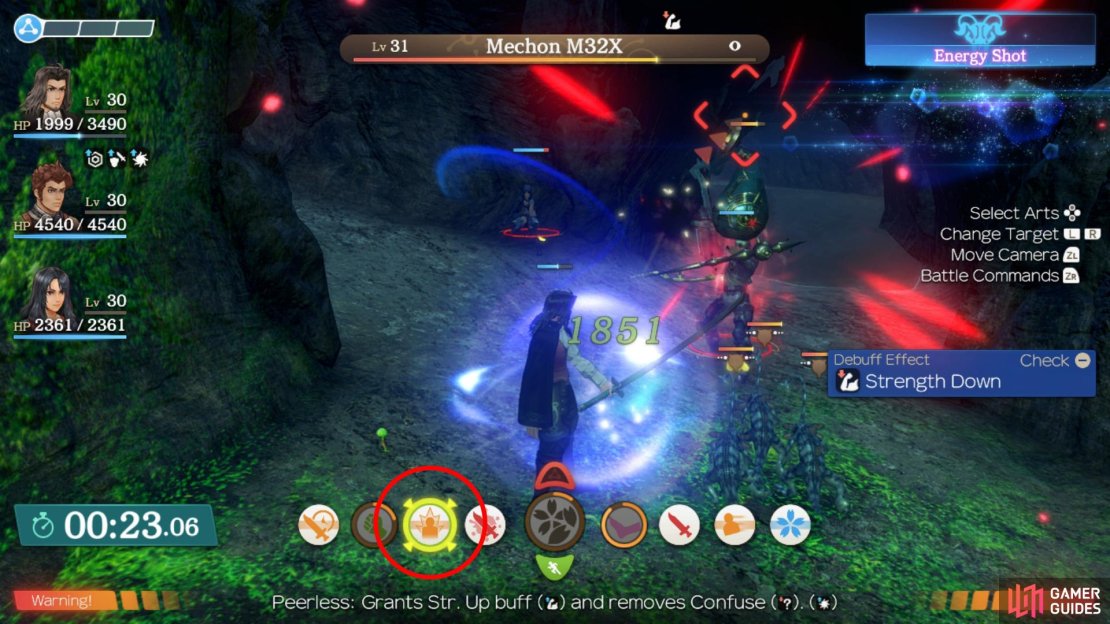
Wave 1: You’ll be in control of Dunban and up against three Lv 30 Colony Upas and a Lv 31 Mechon M32X. You’ll want to make the Mechon your main target and remember that for your allies to deal damage, you’ll need to Topple it first. Keep Dunban in his Peerless Aura for the Time Attack, it’s the most useful one you can use.
-
Wave 2: Next up is a Lv 31 Materia Krabble and two Lv 32 Mechon M53X so dispatch the Krabble to leave you with just the Mechon to deal with. Remember to use Gale Slash before you make use of Dunban’s other chaning attacks and whenever Blosom Dance is available, unleash it on the enemy.
-
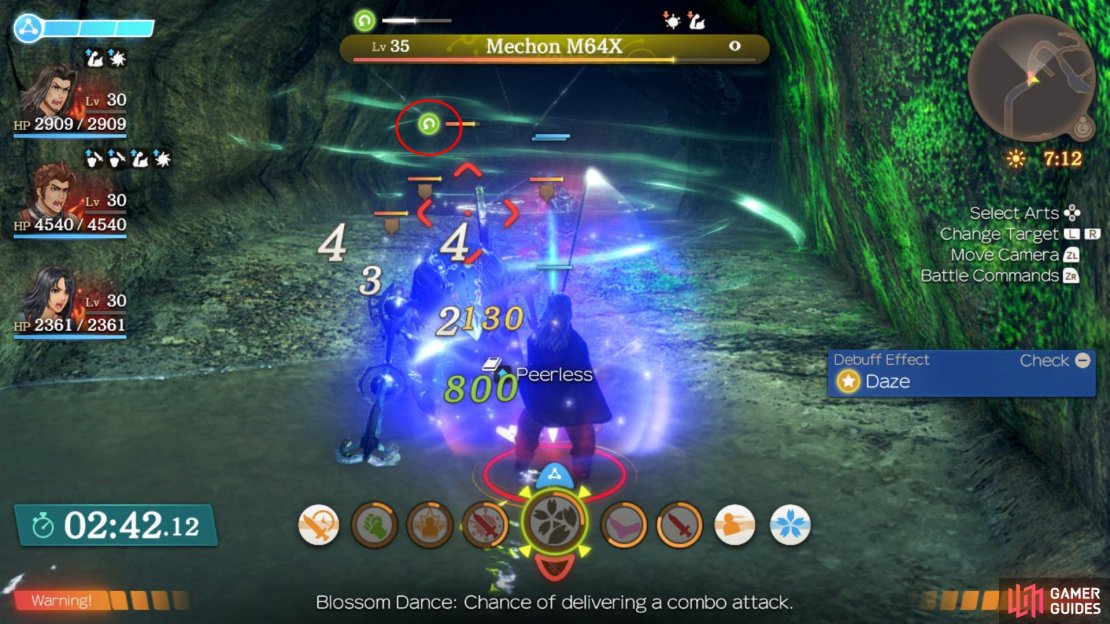
Wave 3: Make your way further south to encounter the final wave which includes four Lv 30 Colony Lizards and a Lv 35 Mechon M64X, your first priority here. You’ll have to make full use of Peerless and Dunban’s ability to Topple the enemy to defeat it but once it’s down, the rest should be simple to dispatch. If you’re aiming for an S Rank here, ignore Chain Attacks, the time it takes for the damage output isn’t worth it, especially given Sharla’s choices here.
From your location at the portal, make your way west to register another Heart-to-Heart and then head towards the elevator to unlock Freight Elevator. Head east from the portal now and at the intersection, take the slope up to the northwest to unlock Pod Depot. Continue north and you’ll find a Lv 25 Unique Monster, Drifter Jutard and then head north to find a way on to the higher level where you can retrace your steps to another Heart-to-Heart to register. Speaking of Heart-to-Hearts, there should be two you should be able to activate if you’ve been increasing Sharla’s Affinity with both Shulk and Reyn.
| Heart-to-Heart | Characters | Location | Affinity | Answers |
|---|---|---|---|---|
| What’s on Reyn’s Mind | Reyn + Sharla | Bionis’ Leg - Refugee Camp | Green | You, by a whisker, You have…dignified qualities. |
| Heart-to-Heart | Characters | Location | Affinity | Answers |
|---|---|---|---|---|
| What Visions May Bring | Shulk + Sharla | Bionis’ Leg - Raguel Bridge North | Green | I wish I had it, You can save someone’s life! |
Make your way back to Colony 6 and take the southern path from the Freight Road to unlock the Misty Path Landmark and pass into Satorl Marsh.
Satorl Marsh
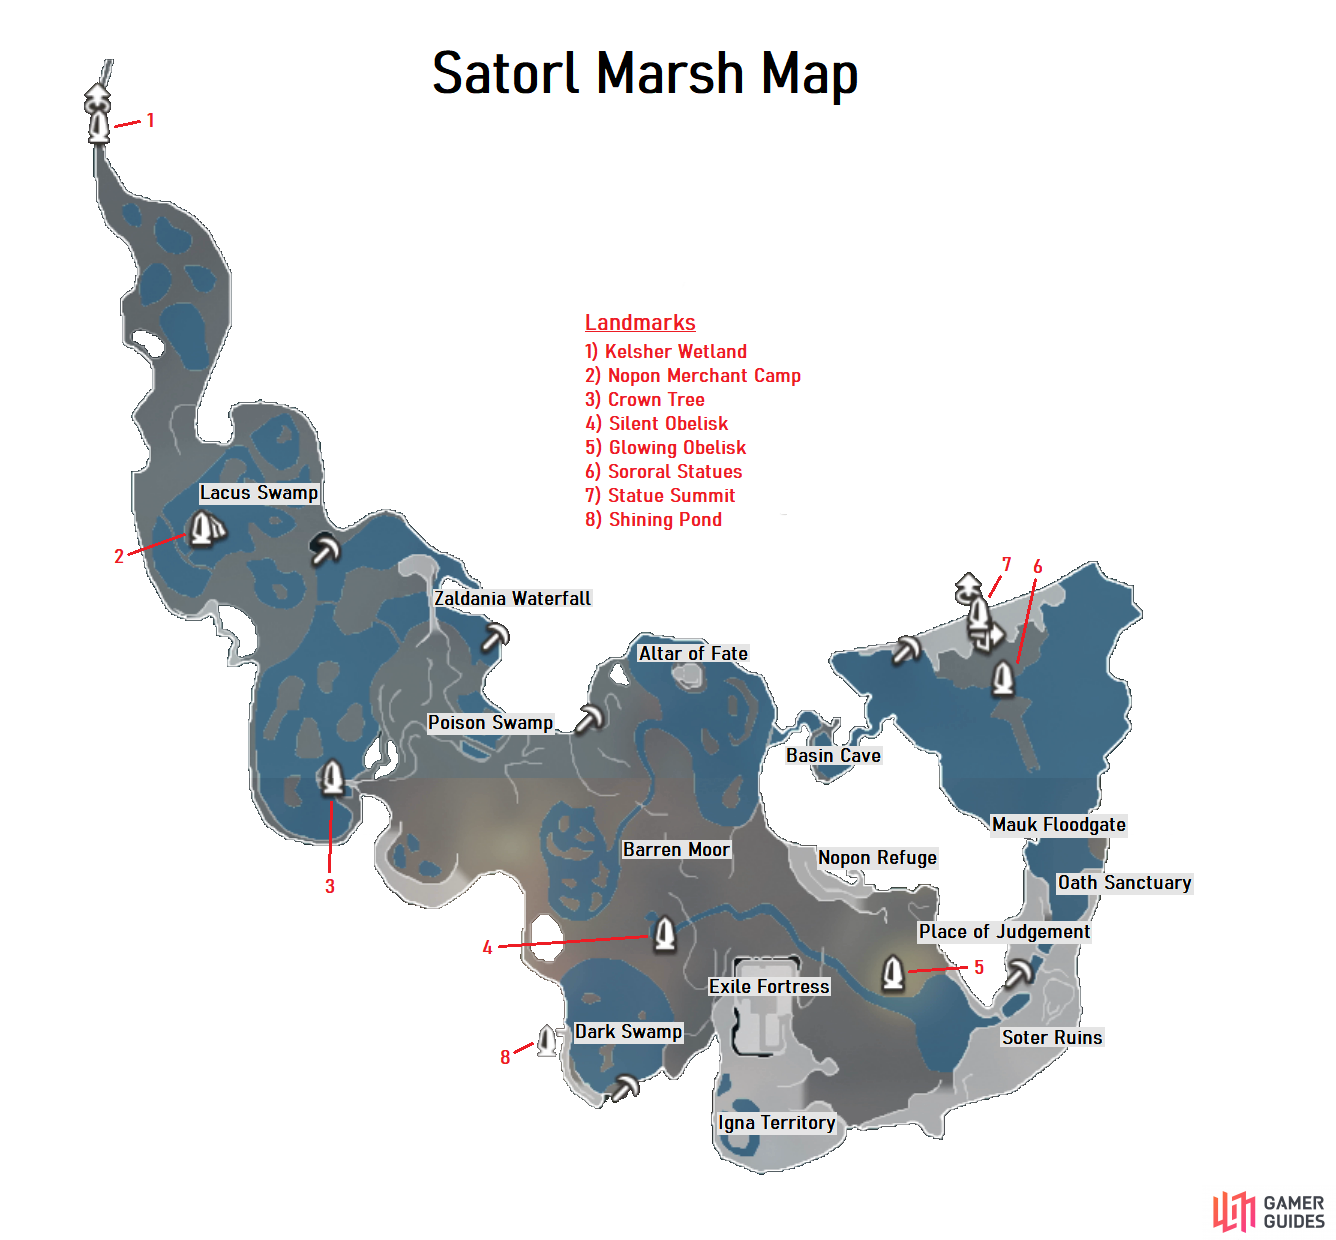
You’ll unlock Kelsher Wetland as soon as you enter the area and as you pass south, you’ll trigger a cutscene. Following this cutscene, make your way south towards the Story Flag, watching out for the flying enemies that attack from the trees. Head southeast after to unlock the Nopon Merchant Camp Landmark and head over there to find a Shop selling Arts Manuals for Dunban that you should pick up and then talk to the various Nopons around here to accept the following Quests from the Nopon Merchant: Monster Quests 1-4 and then speak to Bokoko to accept Kacha’s Kidnapping.
Your objective is far to the southeast but it’s a good idea to take care of the new Quests you’ve just opened up along with finishing off the last part of a Quest you picked up back in Colony 9.
Kacha’s Kidnapping
Bokoko will ask you to find the scholar, Kacha, who was carried off by Ignas. Head to Exile Fortress to save Kacha. There are two ways you can save Kacha.
-
If you like a good fight and you’re a high enough level (around level 30), then consider taking the main entrance into the fortress. There will be several Igna enemies and a Unique Monster called Reckless Godwin who will all be ready to fight you upon entering through the main entrance.
-
Alternatively, if you want to save Kacha without the tough fight, then you will need to locate the Rear Door Key, which can be found a short distance away from the Silent Obelisk landmark. Once you have the key you can unlock a separate entrance and save Kacha without alerting the enemies. Once Kacha is saved, head back to Bokoko to finish the quest.
While you’re at the Silent Obelisk, head south to locate Dark Swamp and take the hill up to reach Shining Pond where the final item awaits for the Mementos of a Lost Son Quest. Continue along to the east to trigger the next cutscene before you continue with the rest of the Quests, you’ll need to access the eastern side of Satorl Marsh and you’ll unlock the useful Glowing Obelisk Landmark. Return to the Nopon Merchant Camp now and pick up the new Quests from Bokoko and Kacha.
The Giant’s Key
Upon rescuing Kacha and completing Kacha’s Kidnapping, Kacha will ask you to defeat 5 Deluded Ignas to stop them from getting their hands on the treasure of the Giants. You’ll find the Deluded Ignas on an upper level near the Dark Swamp and you can get to it by walking down southeast from Exile Fortress. Once you have defeated the Ignas, you can head to the edge of the plateau and dig up the Giants’ Key. You can use the Giants’ Key to open a secret door in Exile Fortress. You can use the rear entrance or the main entrance of the fortress and then head to the wall behind the throne. When you examine it, it will be called the Wall of Sin. When examined, it will reveal a secret tunnel to the roof of the fortress. When you reach the roof, head over to the Altar and examine it. It will tell you that you need to offer something to the altar. Once you’ve examined it, head back to Kacha to complete the quest.
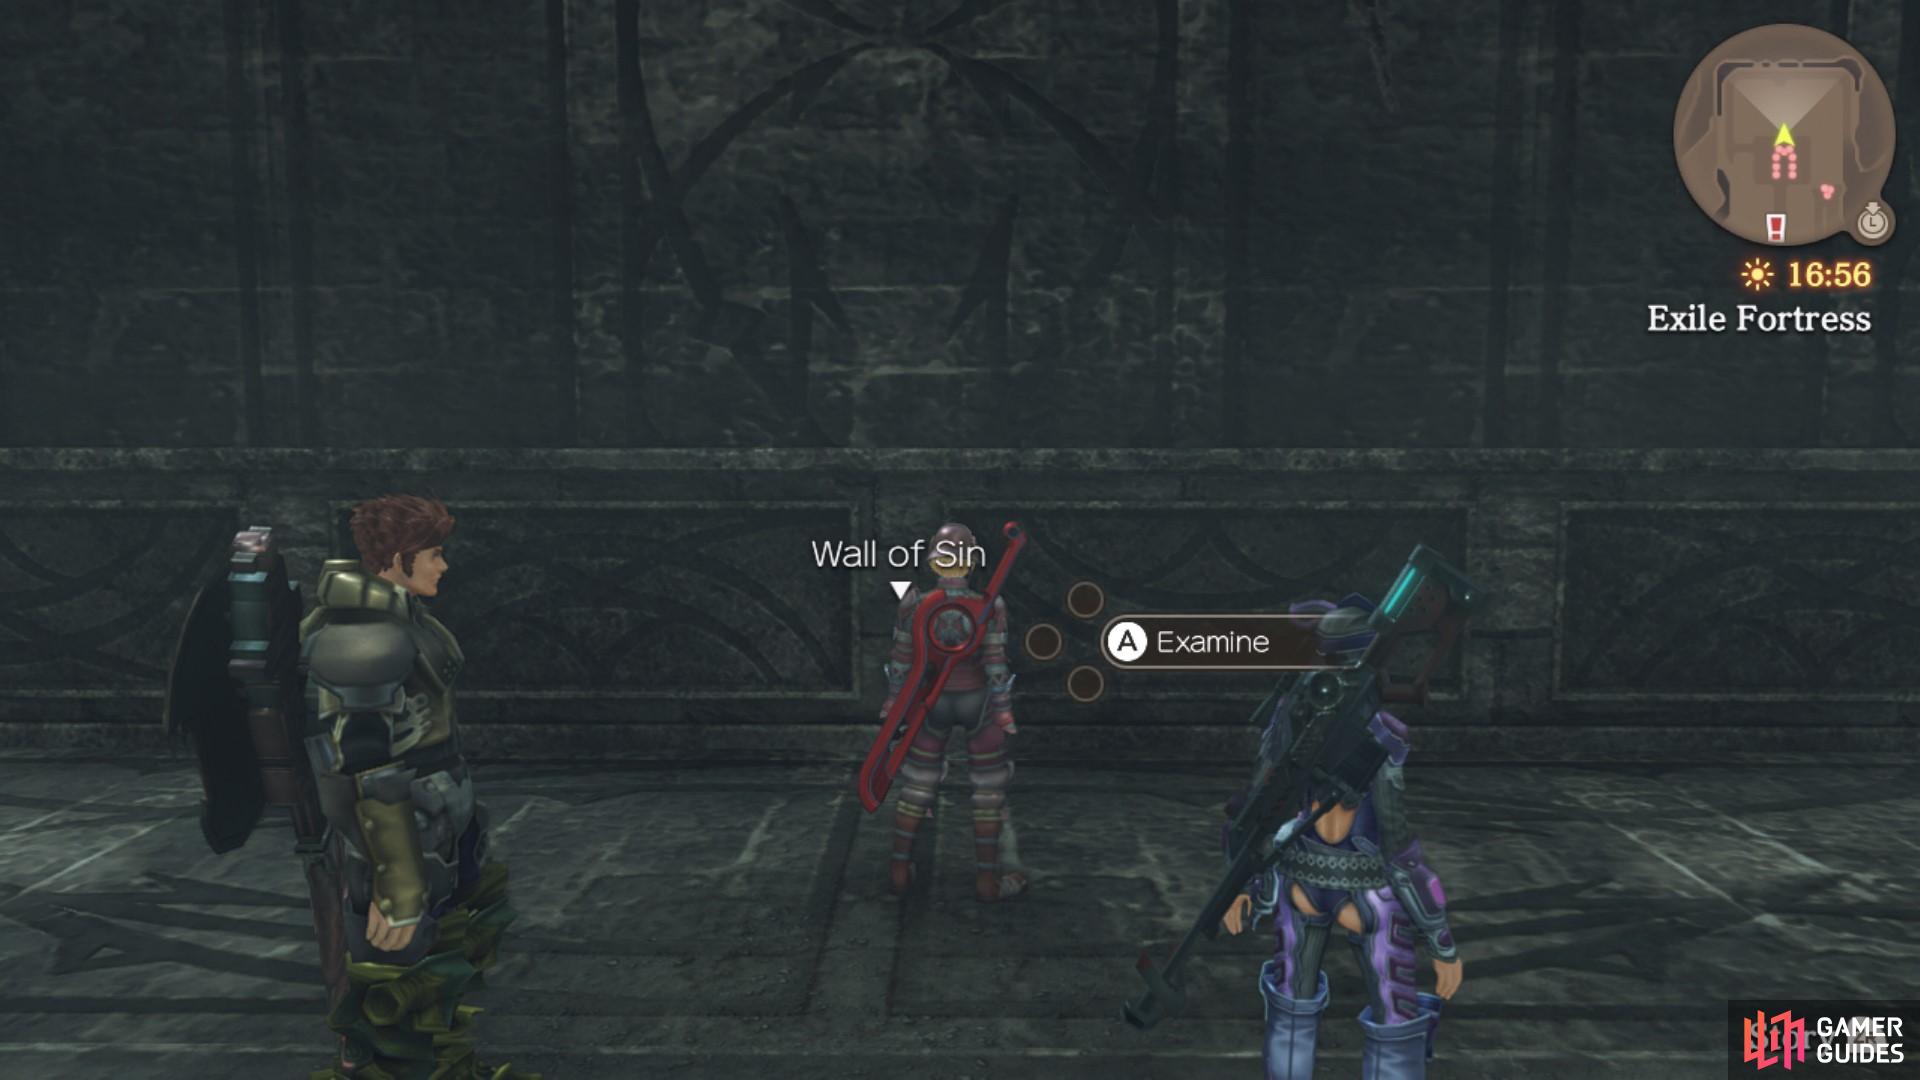
The wall behind the throne is actually a secret tunnel to the roof.
The Giant’s Treasure
Once you have completed The Giants’ Key, Kacha will ask you to retrieve the Giants’ Mirror. You will find the Mirror nearby Daksha Shrine on the Bionis’ Leg. Be careful around Daksha Shrine, as the Unique monster, Clifftop Bayern lives there and will attack on sight. You do not have to fight it to get the Mirror though. Once retrieved, head to Exile Fortress to offer the Mirror on the altar. When you place the Mirror on the altar, you will receive the item Daring of Giants. Once you’ve accepted the treasure, 3 quest-exclusive level 32 spiders called Deified Queens will appear. This is quite a tough fight but you don’t actually have to defeat them to complete the quest. So whether you defeat the enemies or run away, head back to Kacha once you have the treasure to complete the quest. She will also let you keep the Daring of the Giants and hints you may need it in the future.
Making Camp
Upon completing Kacha’s Kidnapping, Bokoko asks you to help gather materials to make a bed for his new camp because he is too ill to get the items himself.
| Material | Material Location |
|---|---|
| 4 Glowing Upa Seeds | Dropped by Upas in Satorl Marsh |
| 3 Fancy Volff Hides | Dropped by Volff in Satorl Marsh |
| 4 Feather Leaves | Collectable item found across Satorl Marsh |
| 3 Wool Rocks | Collectable item found across Satorl Marsh |
Once you have collected all the items, head back to Nopon Merchant Camp and speak to Bokoko again to complete the quest. Return to the Glowing Obelisk Landmark now and head north to find a small cave and unlock Nopon Refuge where you’ll find Zazadan who will offer you a new Quest.
Preventing Starvation
You can find Zazadan in a small, elevated cave just north of the Glowing Obelisk Landmark in Satorl Marsh. He tells you he is very hungry and asks you to retrieve 2 Twin Flamii Eggs and 5 Lemon Stones. Lemon Stones are collectables found across Satorl Marsh, and Twin Flamii Eggs are dropped by Flamii. Lacus Flamii near the Altar of Fate drop Twin Flamii Eggs, but it is an uncommon drop. The Lacus Flamii also only appears when there is no fog. Once you’ve found the items, return to Zazadan to complete the quest.
Zazadan in Danger
After completing Preventing Starvation, Zazadan will ask you to defeat the monsters outside his cave. He asks you to kill 8 Ogre Bunnias around the Glowing Obelisk landmark. Once you’ve defeated all of the Ogre Bunnias, return to Zazadan to complete the quest.
Zazadan Still in Danger
After completing Zazadan in Danger, Zazadan announces that he is still in danger of being eaten by monsters in Satorl Marsh. He asks you to defeat the Unique monster, Sunlight Schvaik, who is a level 30 Rhogul-type monster flying around Barren Moor. Once you’ve defeated the enemy, return to Zazadan to complete the quest.
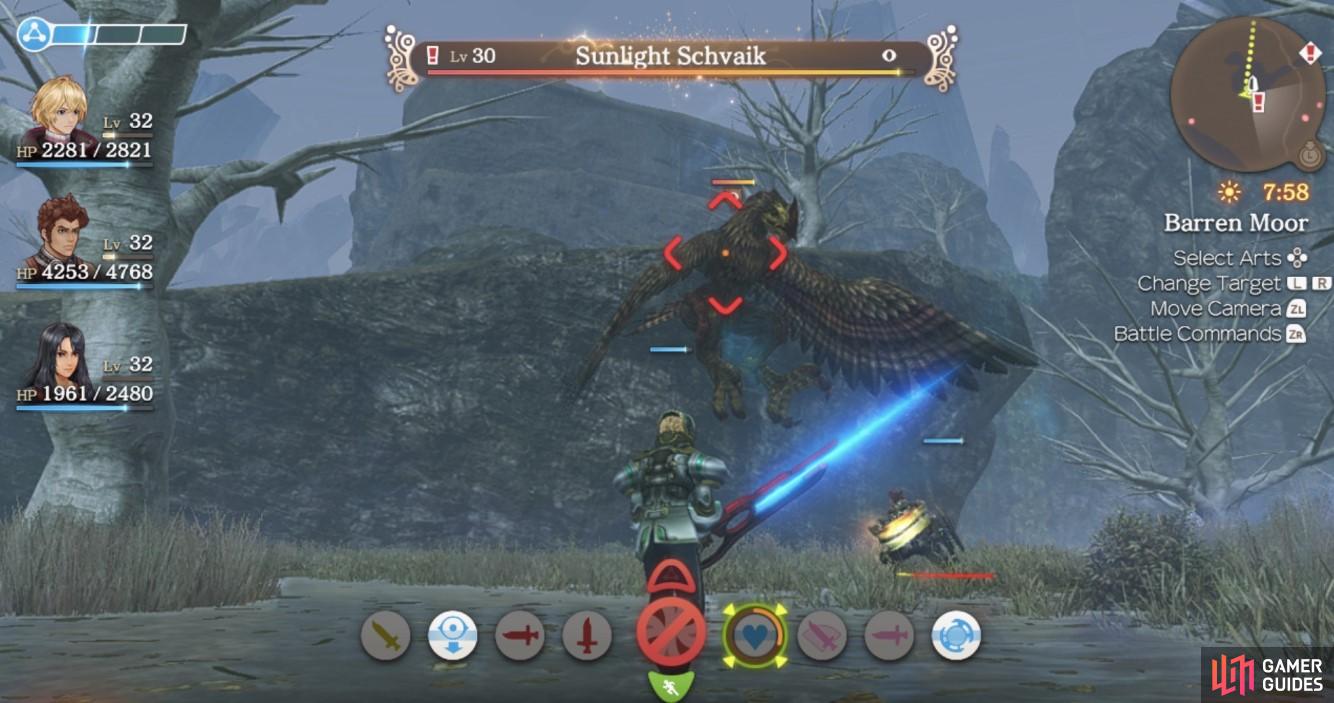
The Sunlight Schvaik is a Unique Rhogul-type monster.
It’s All in the Mind
Zazadan is no longer in danger but he now feels too ill to travel. He asks you to fetch some Nopon Potion from a cave near Lacus Swamp. The cave is just south of Nopon Merchant Camp. Once you’ve picked up the Nopon Potion, head back to Zazadan to complete the quest.
A Mysterious Delicacy
After you have helped Zazadan out so many times, he decides to thank you by giving you a Red Pollen Orb. He believes something amazing will happen if you dip the orb into the Shining Pond. The Shining Pond is a Secret Area up a hill south of the Dark Swamp. There are lots of enemies in the Dark Swamp, and you will also need to traverse through the poisonous waters to get to the path that leads to the Shining Pond. This will lead you to taking poison damage every few seconds whilst you’re in the water. Luckily, once you have found the Shining Pond, it will become a landmark that you can fast travel to on the map, so you won’t need to damage yourself by swimming through the poisonous waters every time you wish to go there.
When you place dip the Red Pollen Orb into the Shining Pond, Highmore Caviar will appear. Return to Zazadan to complete the quest and he will tell you that you just don’t understand how delicious the caviar is. He suggests that he should have the caviar, it looks like you might have been tricked into running another errand for Zazadan.
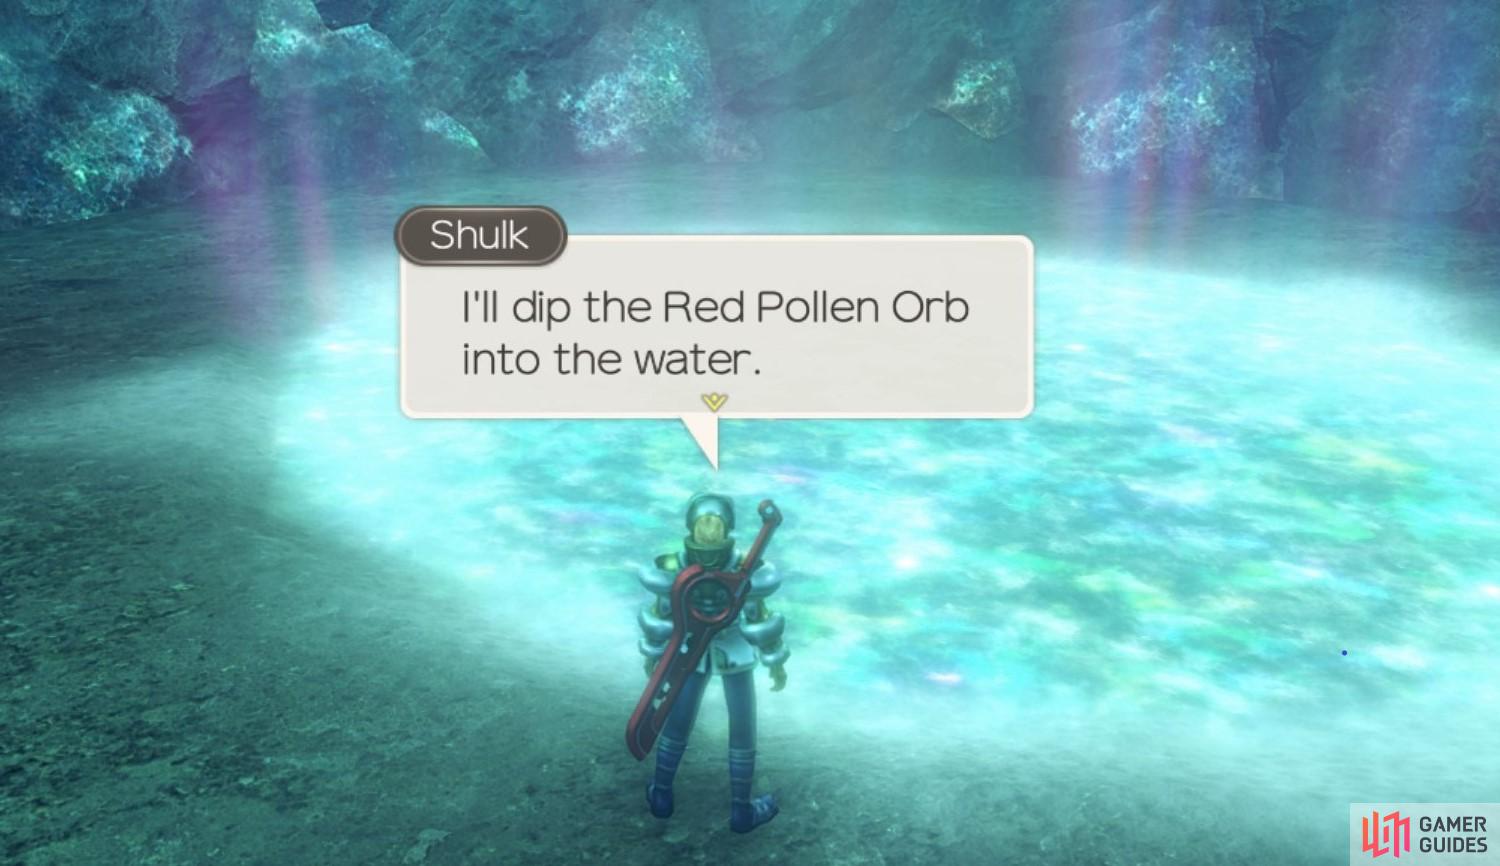
Press ‘A’ to dip the Red Pollen Orb into the Shining Pond.
You won’t be able to complete A Gift for now, you’ll need to progress the storyline a little so with that in mind, it’s time to progress a little by heading east from Glowing Obelisk and to the edge to unlock Soter Ruins while avoiding the high level enemies. Continue north and cross over to the western side to unlock Place of Judgement before heading back to the northeast to unlock Oath Sanctuary. Drop down from here and head north to unlock yet another location, Mauk Floodgate and then approach the Sororal Statues to the north to trigger a cutscene.
Following the cutscene, you’ll get a tutorial on how you can help out rebuilding Colony 6 and this is part of a rather large Side Quest that spans the entire game. There’s plenty of rewards to be had so it’s well worth pursuing but for now, as you’re nearing the end of Satorl Marsh, it’s a better idea to finish the area off before heading back. Start by registering the nearby Heart-to-Heart and then speak to the Nopon Merchant to begin a Story Quest.
Ancient Ceremony Offerings
You’ll need to track down four offerings so that you can complete the Ancient Ceremony so hopefully you’ve already explored most of the area as it will make this a lot easier. Begin by heading through the water to the west to enter Basin Cave and follow it until you can reach a bit of land to the west. Head up the slope, taking out the Vangs in the process and then cross over to the other side to find an enclosing with the White Radiant.
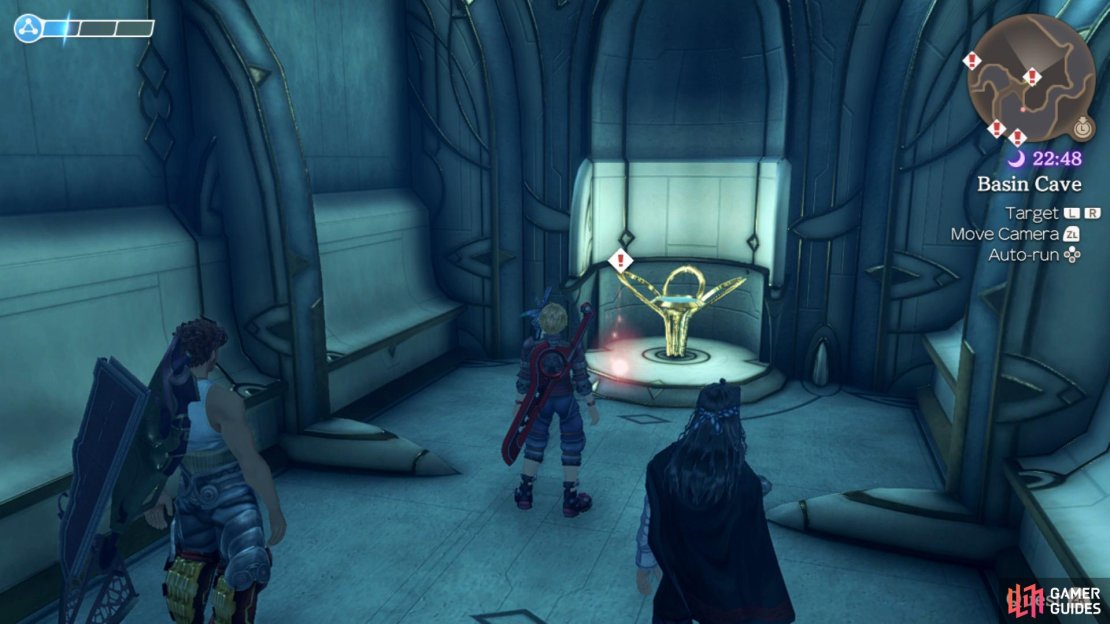


(1 of 4) Search Basin Cave for the White Radiant
Exit Basin Cave to the west and you’ll find the Altar of Fate to the west where you can climb to some more raised land to reach the Rainbow Radiant. Warp over to Shining Pond now and leap off it into the Dark Swamp below where you’ll locate the Dull Radiant behind a Poison Brog. Finally, make your way to the Glowing Obelisk and head southwest to reach Igna Territory where you will find Aggressive Cornelius guarding the final item, the Blue Radiant which will complete the Quest.
The Ancient Ceremony
Return to the Sororal Statues and interact with the Adulthood Emblem to trigger a battle with a Lv 28 Satorl Guardian. Despite the music once again, this is nothing more than a Unique Monster and as such, you’ve fought far more challenging enemies in Satorl Marsh already. Beware of Tornado Spin which will hit all targets in a circle around it and when you see Ultra Poison Stab III, be sure to activate Monado Shield so long as you’ve increased it to Level III already (if not, be sure to do so after this battle). Following its defeat, some stairs will rise to the north and the Quest will complete.
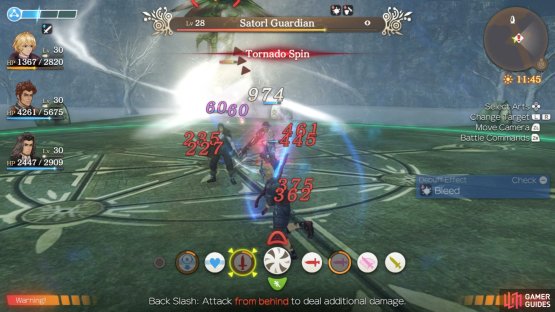

(1 of 2) Tornado Spin will cause Knockdown and damage to targets around a circle

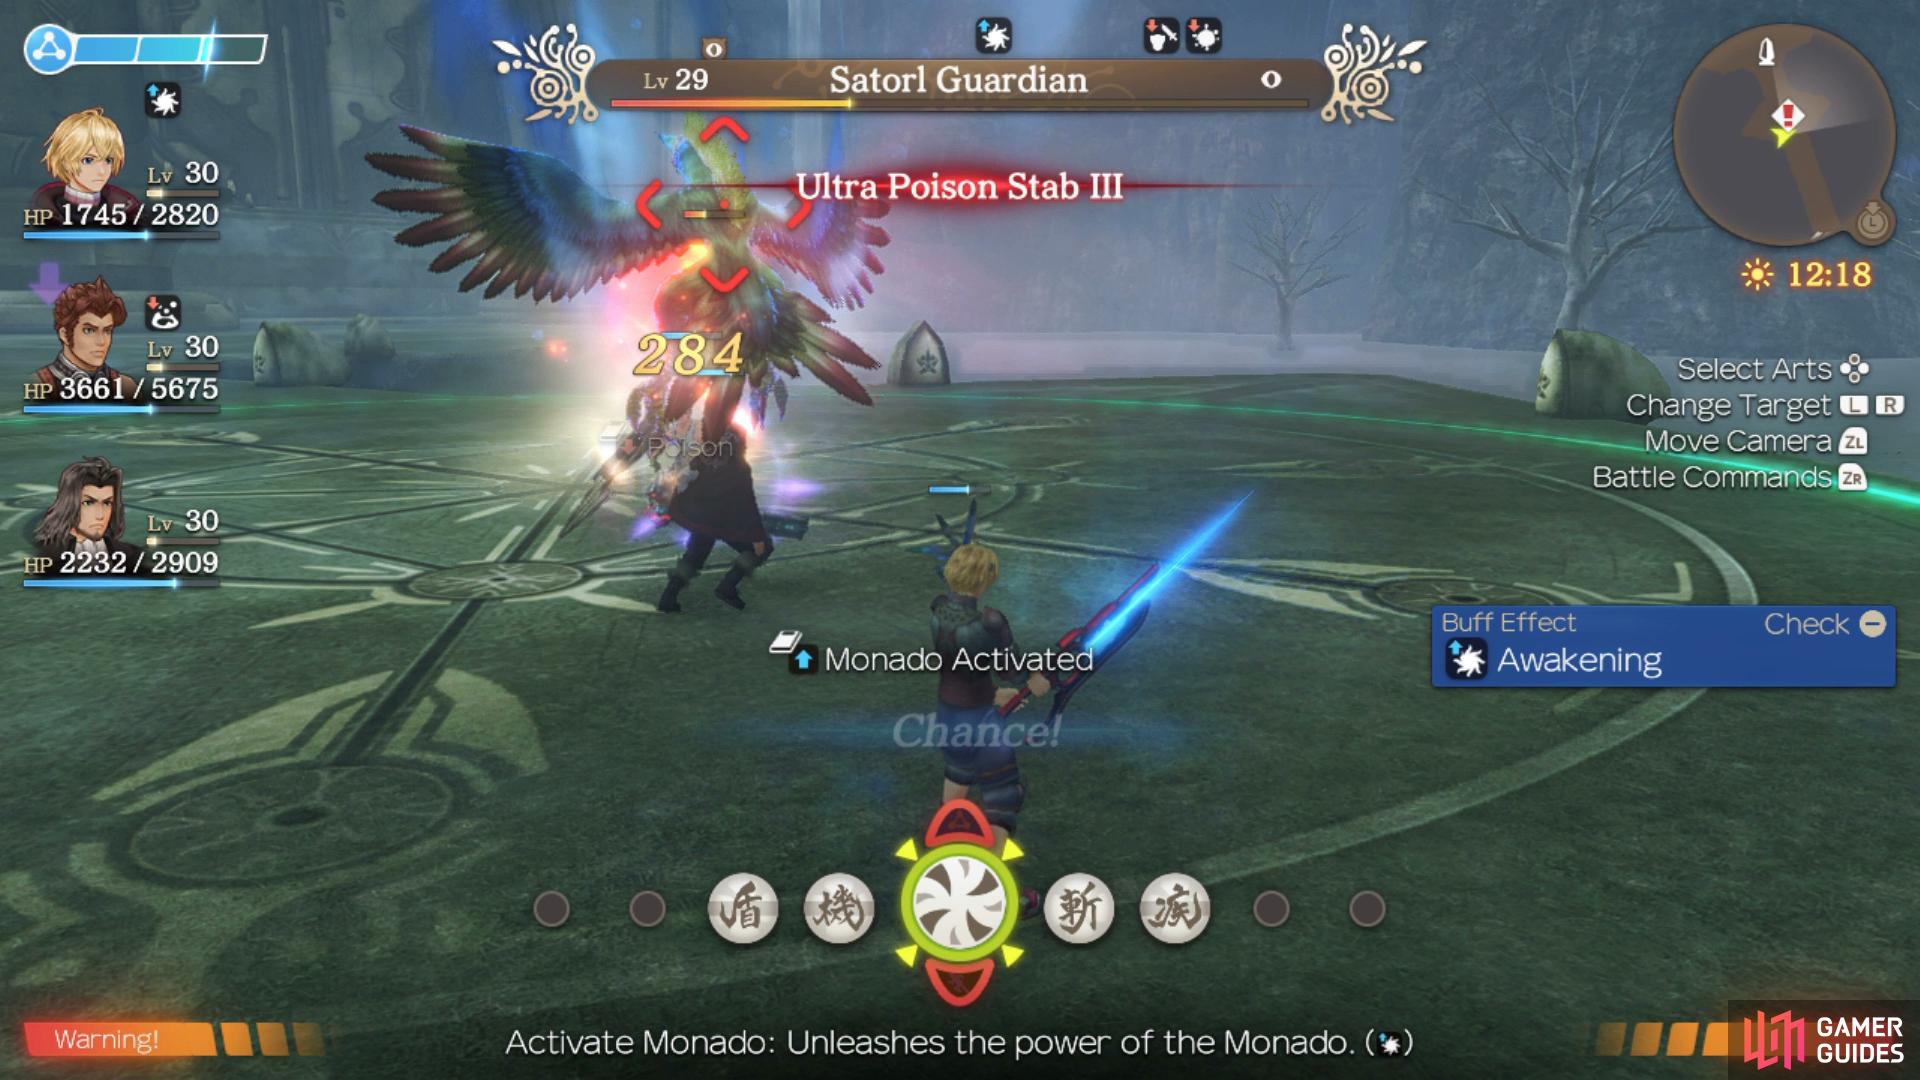
Tornado Spin will cause Knockdown and damage to targets around a circle (left), you’ll need Monado Shield at Lv III if you want to block its Talent Art. (right)
Proceed up the stairs and the group soon discovers that the lift is out of operation, prompting them to decide to climb the wall if they want to reach to the top. Make your way around to the west and you’ll find somewhere to climb, do so and take the slopes up to the north where you’ll find the next set of vines to climb. Look to your west to find even more vines that you can ascend followed by more to your east and you’ll find the next set of vines to your east before the final set in the center where you will unlock the Statue Summit Landmark. Head to the Story Flag to trigger a cutscene and then pass through the entrance.
Bionis’ Interior
You’re now inside the Bionis itself and you’ll need to pass through in order to reach Makna Forest. Your first visit here is just a short one and there’s nothing you can do but progress the story. Start by heading forward to trigger a cutscene and then follow the slope north to unlock Third Lung. Head east here and into the liquid where you’ll find a geyser that will shoot you up higher where you can follow the path to unlock Upper Trachea which leads back outside the Bionis and ends the Chapter.
No Comments