


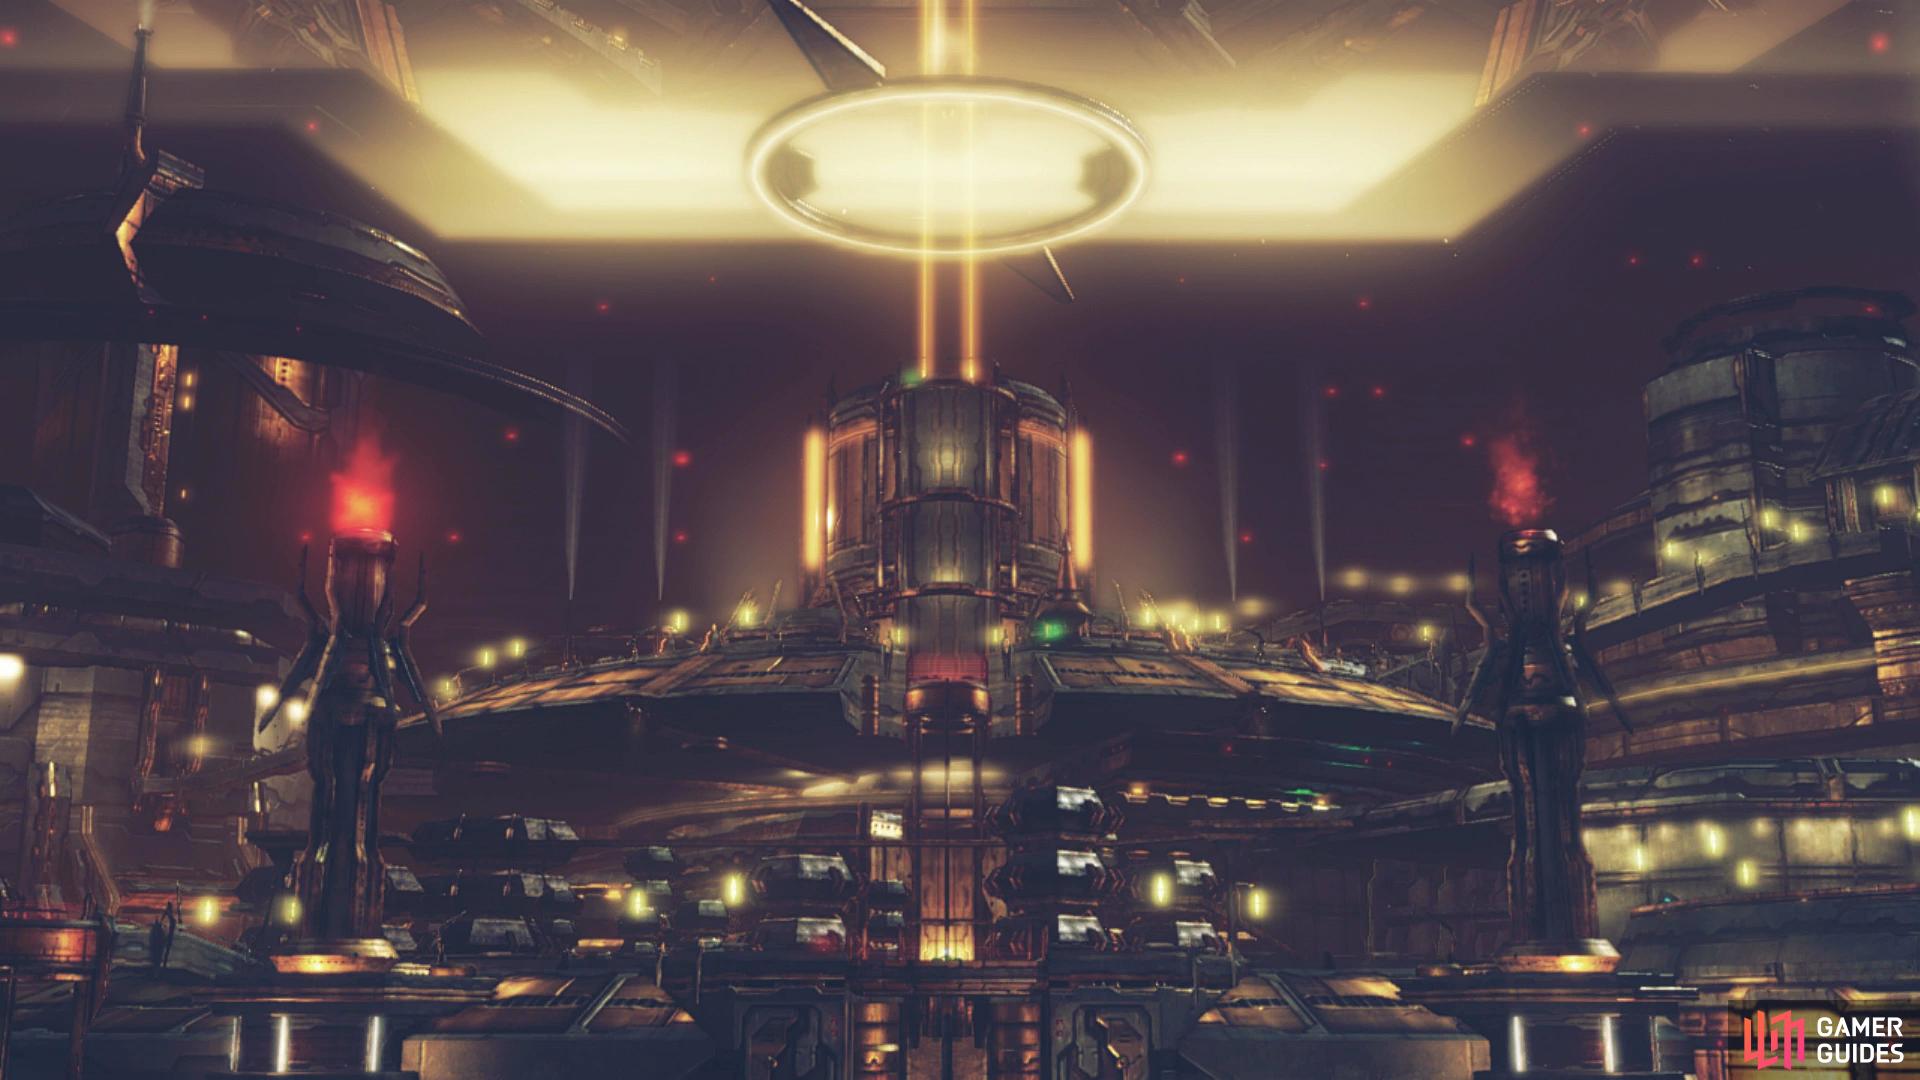
Following the scenes that took place at the end of Chapter 13 and the start of this one, the party finds themselves at the scene of the battle against Jade Face. Make your way south down this long stretch to unlock the final Landmark, 2nd Gamalt Bulkhead, completing the map in the process. Continue south from here to ride the lift up to exit Mechonis Field and into Central Factory where you’ll unlock Port Terminal and trigger a scene just ahead.
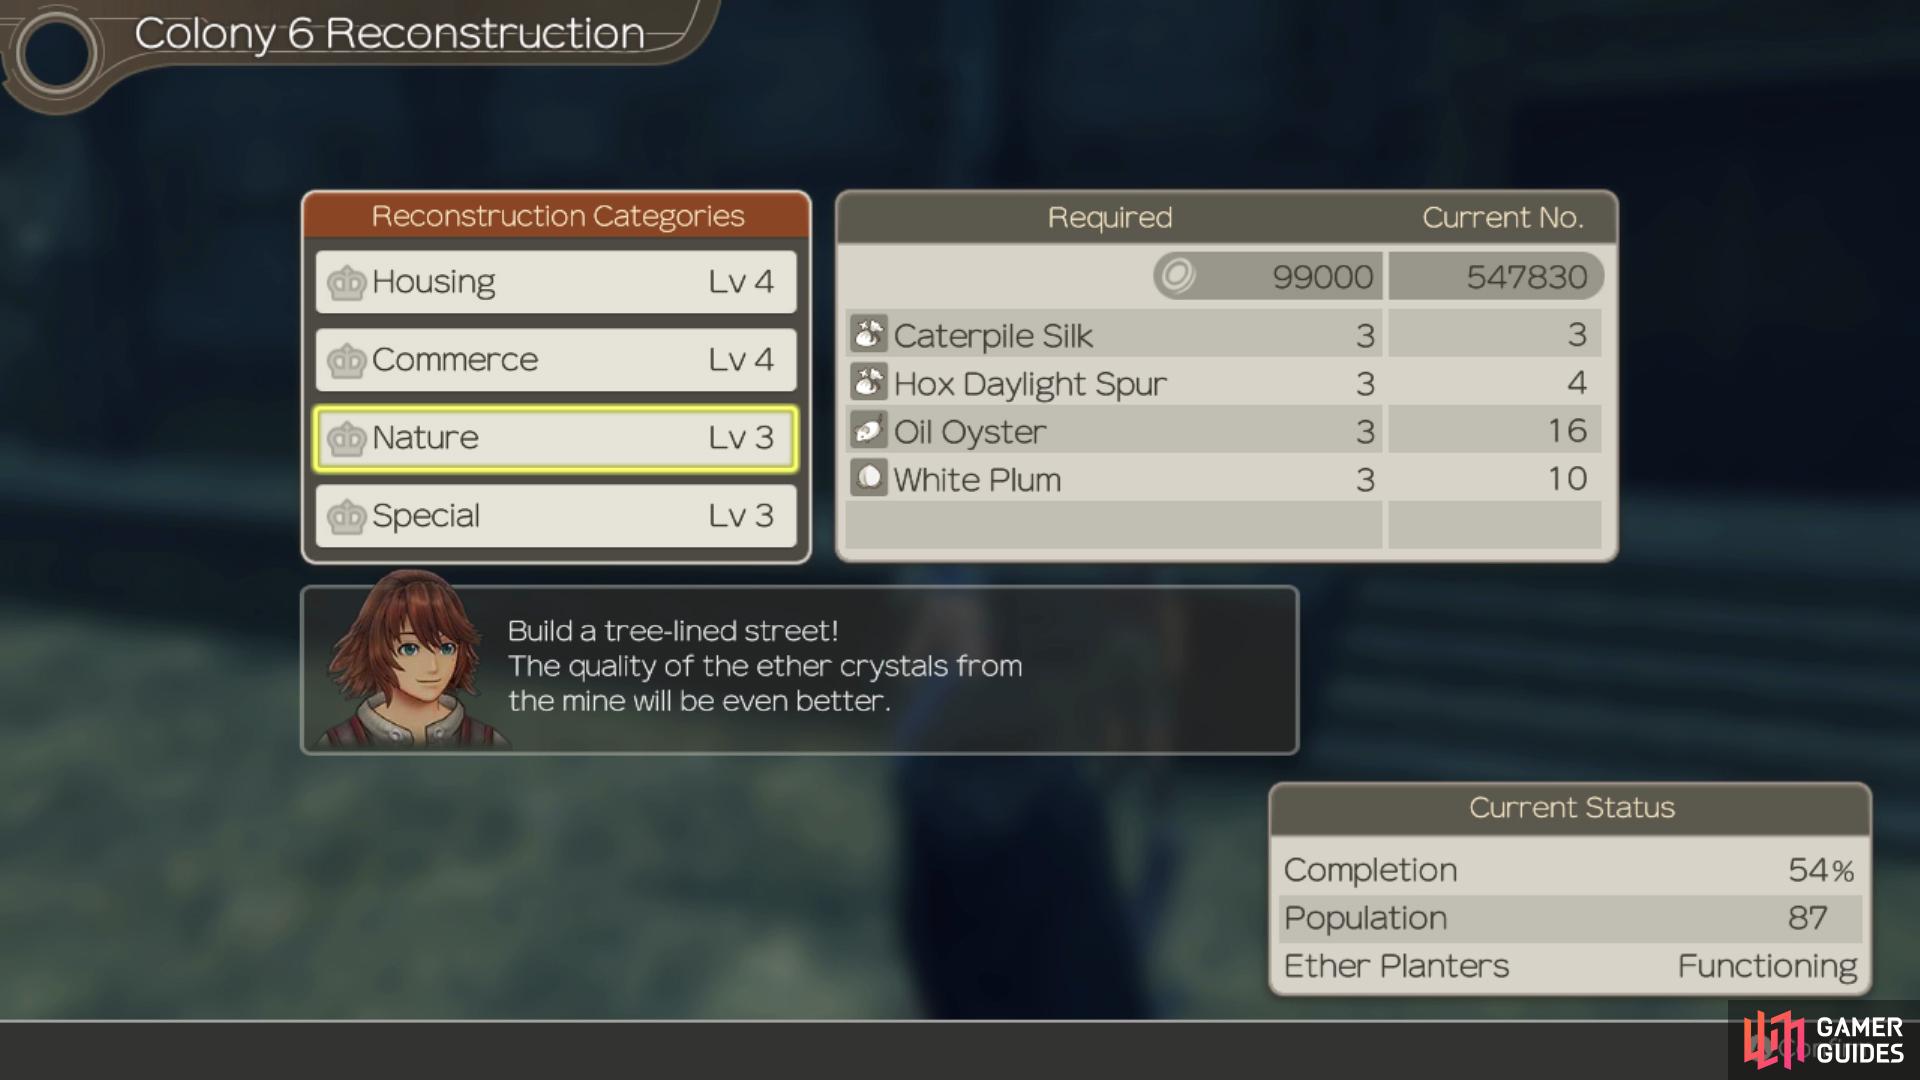
Colony 6 Reconstruction Level 3
This is the ideal time to head back to Colony 6 to continue it’s development. At this stage of the game, you’ll want to make frequent trips every now and then to allow yourself to recruit more civilians and thus, accept more Quests. Begin by heading back to Juju to see the list of requirements for this current construction level.
| Category | Material Requirements | Gold |
|---|---|---|
| Housing | 5 Ponio Hoof Seal, 3 Royal Volff Hide, 3 Warning Lamp, 2 Retro Diode | 120,000G |
| Commerce | 5 Piranhax Fishmeal, 8 Silver Antol Fibre, 3 Sour Turnip, 2 Mossy Panel | 100,000G |
| Nature | 3 Caterpile Silk, 3 Hox Daylight Spur, 3 Oil Oyster, 3 White Plum | 99,000G |
| Special | 3 Flexible Selua, 3 Steel Selua, 2 Rainbow Slug, 2 Azure Hollycock | 130,000G |
-
Housing - Ponio Hoof Seals are a drop obtained from Ponios on the Fallen Arm. They are found in abundance around the Giant Mechon Debris landmark during the day. Caelum Volffs which drop Royal Volff Hides are found in around the same area, except they spawn at night instead. Both are relatively easy enemies to farm, however if you’d prefer to trade, then you can grab Ponio Hoof Seals from Eleqaand Royal Volff Hides from Xekit at 5✰ affinity. Warning Lamps are a collectable found across the Fallen Arm, but they can be traded with Karlos at 5✰ affinity as well. Retro Diodes are also a collectable, however they are found in the Mechonis Field.
-
Commerce - Piranhax Fishmeal is dropped by Fair Piranhax, which can be found on Radiocarpea Coast on the Fallen Arm. It is a relatively rare drop, and there’s no available trade option, so you may have to farm for a while. Alternatively, if you are able to buy items from the Arch Nopon Sage, then you can buy Piranhax Fishmeal for 2,900 Noponstones. Silver Antol Fibres are a rare drop obtained from slaying Antols on the Fallen Arm. There are a fair few in the 5th Pulse Zone, however, you are able to trade for them with Shilx at 3✰ affinity, so it may be easier to just trade for this particular item, as you need 8 of them. Sour Turnips are a collectable and they are also found on the Fallen Arm. You may also trade for them with Eleqa at 3✰ affinity with Hidden Village. And finally, you will need 2 Mossy Panels, which are collectables found in the Mechonis Field.
-
Nature - You require 3 Hox Daylight Spurs and 3 Caterpile Silks, both of which are obtained from high level enemies on the Bionis’ Leg. The Caterpile Silks are dropped by level 75 Royal Caterpile in the Windy Cave. The Hox Daylight Spurs are obtained from defeating level 75 Dark Hox and White Hox found near Raguel Bridge. Alternatively, you can obtain Caterpile Silks through overtrading with Sylviane in Colony 9, and you can trade Hox Daylight Spurs from Bozatrox in Machina Refuge (Mechonis Field) at 4✰ affinity. Oil Oysters and White Plums are fairly common collectables across the Fallen Arm. However, you can also trade for the Oil Oysters with Shilx at 3✰ affinity. The White Plums can be traded for with Prox at 3✰ affinity too.
You’ll be able to trade for the rarer items that require access to higher Lv enemies.
You’ll be unable to complete the upgrade on the Special category for now, this will require access to one of the final areas in the game. Upgrade the three other categories however and you’ll unlock a new Surprise Quest.
Defend Colony 6 - Elite
This time around, you’ll need to defeat a Lv 50 M71 Fire Support that’s appeared near the Freight Elevator. This should be vastly lower level than you current party so simply head there and dispatch it to complete this simple Quest.
Next up, it’s time to recruit some more civilians for Colony 6 so begin by heading to Colony 9 with Shulk as the party leader and speak to Rosemary to have make the move. Next, speak to Peppino to have him make the move too before heading off to Alcamoth. Here you’ll find both Jer’ell and Don Argentis ready to make the move to complete this latest recruitment spree. Return to Colony 6 and pick up the new Quests that are now available.
Odd Smoke - Investigation
There are a couple of prerequisites to fulfill before you will be able to access this quest. Firstly, you must have spoken to Miqol in the Hidden Machina Village. You must also have invited Jer’ell from Alcamoth to move to Colony 6 and to do this you need to have Housing at Level 4. Once you have been able to pick this quest up, Arda will ask you to speak to the owner of the home where smoke is coming from. You will then have to speak to Jer’ell outside of her home, but you can only do this at night. After speaking to Jer’ell, head back to Arda to complete the quest.
Odd Smoke - Resolution
A few prerequisites need to be fulfilled before you may access this quest. Firstly, you must have completed Odd Smoke - Investigation. You need to also have invited Mefimefi or Perrine to Colony 6. Lastly, you must have a 2✰ affinity with the residents of Colony 6.
The source of all the smoke from Jer’ell’s home is a broken machine. She has asked you to find the materials needed to repair it. She needs 3 Dated Plugs from old flying Mechon and 3 Dated Cranks from old scout Mechon. These enemies can both be found on the Fallen Arm. Scout Unit Prototypes can drop Dated Cranks, and they can be found around the Giant Mechon Debris landmark. M35 Prototypes can also be found in the same area, and they drop the Dated Plugs needed.
Nopon Determination
After you have completed Odd Smoke - Resolution and reached 3✰ affinity with Colony 6 residents, you may pick this quest up from Mefimefi. She tells you that Jer’ell has insulted her intelligence. She asks you to fetch the following materials so that she can prove Jer’ell wrong!
| Material | Item Type | Location |
|---|---|---|
| 5 Spicy Papayas | Collectable | Fallen Arm |
| 2 Broom Icicles | Collectable | Valak Mountain |
| 3 Igna Stone Pots | Dropped by Ignas | Satorl Marsh |
Once you have all the required items, head back to Mefimefi to complete the quest. The other Quest, In Pursuit of Love can’t be completed until you gain access to Housing Lv 5 so for now, return to Central Factory. Before you continue with your ascent on Mechonis, you’ll notice there’s a Time Attack Portal next to you, head inside to discover a new trial waiting for you.
| Challenge Name | Difficulty | Rewards |
|---|---|---|
| Sparks Fly, You Die | 3/4 | Resort Set |


(1 of 3) You’re back in control of Shulk for this Time Attack
-
Wave 1 - You’re back in control of Shulk for this Time Attack however note that he doesn’t have Monado Eater or Armour available to him and as such, you’ll want to use his Talent Gauge on Buster only. For the first wave, you’re up against two Lv 65 Defensive/ONIONs and a Lv 68 Infernal Crocell. Be sure to focus the ONIONS down first and then unleash a Chain Attack on the Infernal Crocell if possible to clear this wave as quickly as possible.
-
Wave 2 - This wave is a lot tougher as you’ll be up against two Lv 67 M57/FAITHs and a Lv 70 Revolutionary Bifrons, the more difficult target here. You’ll notice immediately that Bifrons has a Spike Aura so focus on taking down it first and then use Chain Attacks to force Topple on it to disable the Spikes. Keep up the assault, keeping it Toppled at every given moment and use a Chain Attack as soon as it becomes available and once Bifrons is defeated, finish off the FAITHs.
To the Central Tower
With all of this side content out of the way it’s time to turn your attention back to reaching the Central Tower here in Central Factory. From your initial position, head north to Landing Strip 2 and take the path up to the east to reach 1F where you’ll find a Lv 58 Unique Monster to the south, Mild Florence that you should take out. Return to the Port Terminal Landmark now and head south this time, unlocking Landing Strip 1 and finding another path leading up that you should take to find an Ether Deposit.
Head back down to GF and head west to dispatch a group of Mechon and then use the conveyor belts to reach Maintenance Entrance 1. Climb down either of the walls here to reach the Maintenance Wing and then continue west to complete the Story Quest. Continue down to the west and you’ll spot a Lv 59 Unique Monster, Faithful Lancelot that’s waiting to be scrapped. You’ll unlock the Control Tower Landmark here and then head north to loot an Ether Deposit and take the path up to trigger the next Story Quest.
Maintenance Wing Escape
There’s a barrier preventing you from continuing north so head south here instead and defeat the Mechon that ambushes you. Activate both the Hangar Access Panel and the Barrier Control Panel to complete this short Quest which will open the doors for even more Mechon. Make your way back down to where the hangar doors opened and you’ll notice three Faced Mechon, one of which is a difficult Lv 65 Unique Monster, Temporal Gawain. If your level is not quite high enough, leave him for now but remember to come back and defeat it before you’re done with Central Factory. Return to the barrier you deactivated a moment ago and head down the path to the west to trigger a Surprise Quest.
Eliminate the Backup!
You will be tasked with defeating the level 60 unique Mechon enemy, Beautiful Vagul. It is surrounded by several other lower level Mechon units that are unavoidable, meaning they will join in on the fight when you aggro Beautiful Vagul. If you are having difficulties with the amount of enemies to deal with, then you can hard focus on the Beautiful Vagul and defeat him before the other enemies, then opt to run away once the quest has completed.
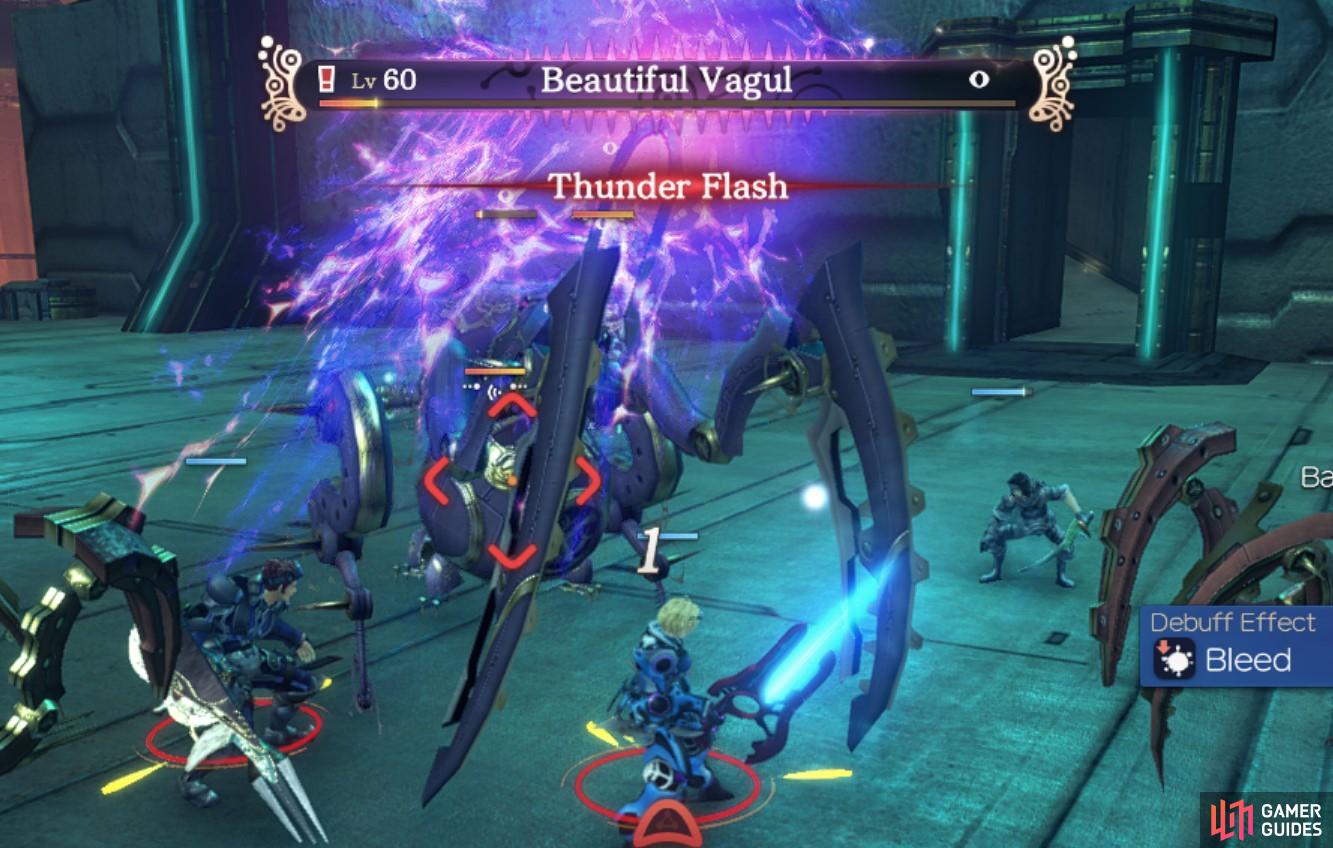
The Beautiful Vagul is a unique Mechon enemy found in the Storage Depot at Central Factory.
Return to the east and continue north to find the Call Panel and then board the lift to head higher where you’ll unlock the Central Warehouse Lift Landmark and the next Story Quest.
Find a Path to the Top and Materials for a Bomb
Begin by heading northwest here to unlock the Large Mechon Store location and then head south a little along the western wall to unlock Central Tower Lift. From here, head to the east where you’ll spot a Lv 61 Unique Monster, Synchronized Gaheris that should dispatch while keeping an eye on the massive Mechon stomping around. With this defeated, continue to the east to unlock Central Lift and then ride it while keeping an eye to the north to see a platform you can jump to.
On this new path, follow it north and then head down the slope first to find some Mechon and an Ether Deposit. Return to the north and this time head up the slope to unlock Training Ground Roof and a Surprise Quest.
Roof Battle
This Quest will ask you to defeat the Venerable Focalor, which is a level 64 Unique Mechon enemy that shouldn’t cause too many issues. Upon defeating it, the quest will automatically be completed.
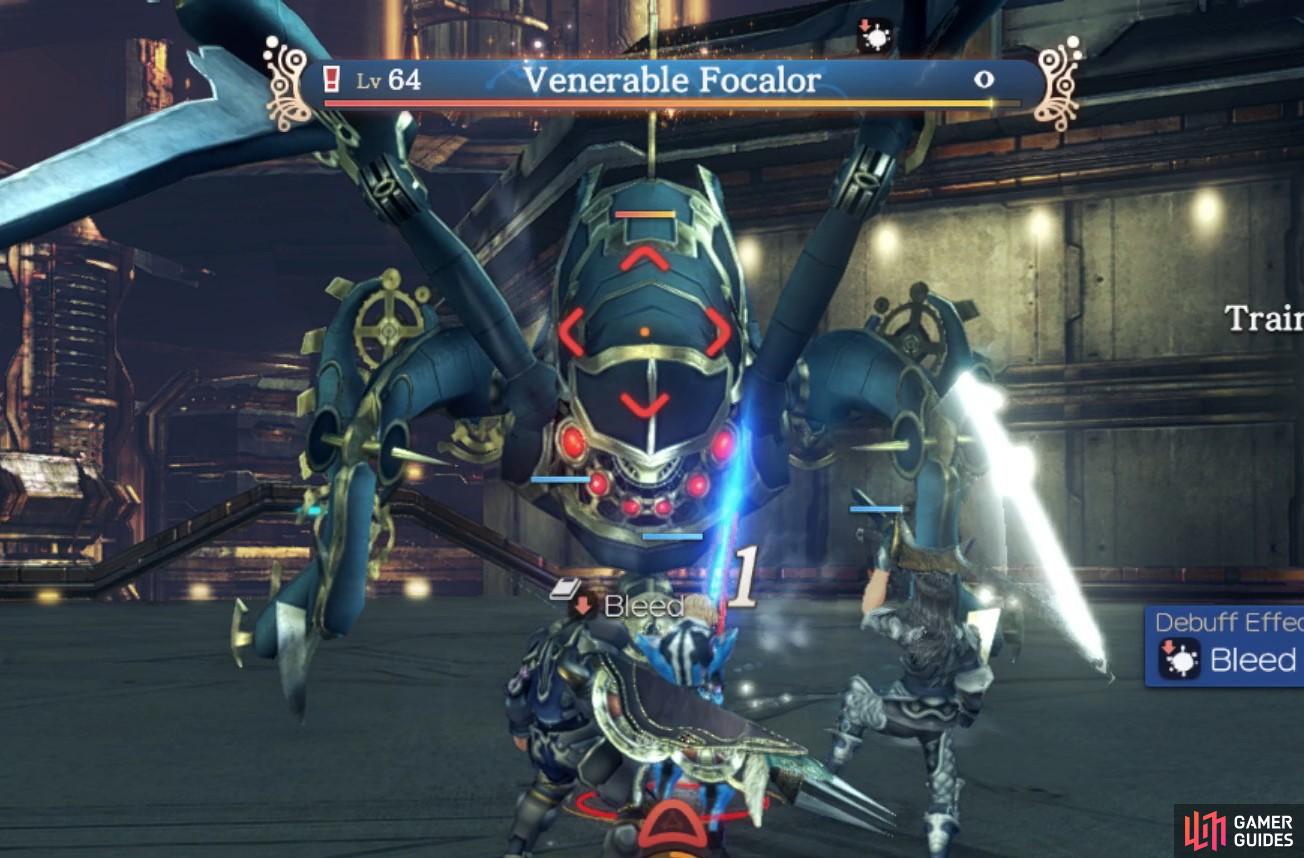
The Venerable Focalor is found on the Training Ground Roof.
Drop down to the southwest here and then head to the far southwest to reach Main Factory Gate where you’ll find the M53/THANK enemies that will drop the Advanced Frames needed to finish the A Weapon Just For Me Quest you accepted back on Fallen Arm. Be sure to use the Landmark to farm these items and then quickly travel back to Fallen Arm to complete the Quest. Return to the Central Warehouse Lift Landmark after and head southwest again, this time to the Story Flag to unlock the Factory Vent Landmark and begin another Story Quest, Materials for a Bomb.
In order to blow a hole through the vent, you’ll first need to gather the necessary materails from the nearby Mechon to make a bomb. Begin by heading northwest to find the M88 Watchtower needed for the Electrical Fuse and then head to the center of this floor and up the walkway to reach the Offensive Scout that has the Timer. Finally, make your way to the Large Mechon Storage to find the M97 Commander that has the final item, the Ether Explosive which completes the Story Quest at the same time.
Return to the Control Tower Landmark on GF now and use the Weapon Creation Panel to create the Explosive and bring it back with you to the Factory Vent to blow the passage up, completing the Find a Path to the Top Story Quest in the process. Follow the new path to the south and climb up at the end to reach the Mechon Factory. Follow the pipe south and then head west, following the path to the end where you’ll trigger the next Surprise Quest.
Daring Assault
You will be asked to defeat 1 M96 Crisis Unit and 2 Crisis Response Units. They should be right ahead of your path, as the Surprise quest is activated when you walk towards them. The M96 Crisis Unit is a level 61 Mechon, whilst the Crisis Response Units are at level 60. The quest wil be completed when you defeat all 3 enemies.

The Surprise Quest will be activated when you walk towards the M96 Crisis Unit.
With the Quest completed, continue along to the northeast to reach the Central Tower Roof and follow the path east to unlock the next Story Quest.
The Central Tower Barrier
You’ll now need to find a way to deactivate the barrier here if you wish to progress further in Central Factory. Begin by heading north to unlock the Tower Boarding Gate Landmark and then continue around to the north and once you head up the slope, you’ll spot a group of Mechon you’ll need to dispatch. Once the area is clear, access the control panel to remove the barrier and then head back and take the northeast path and follow it to reach the Face Maintenance Bay.
Go southwest here and climb the path in the small alcove to the south to unlock the Regeneration Control Landmark and then head northeast and follow the path to a very fearsome Lv 70 Unique Monster, Majestic Mordred. Ensure that you’re at least Lv 65 here and apply as many Agility buffs as possible to deal with this difficult opponent. If it’s too difficult to defeat right now, you’ll get one other chance a little later so consider holding off for now.
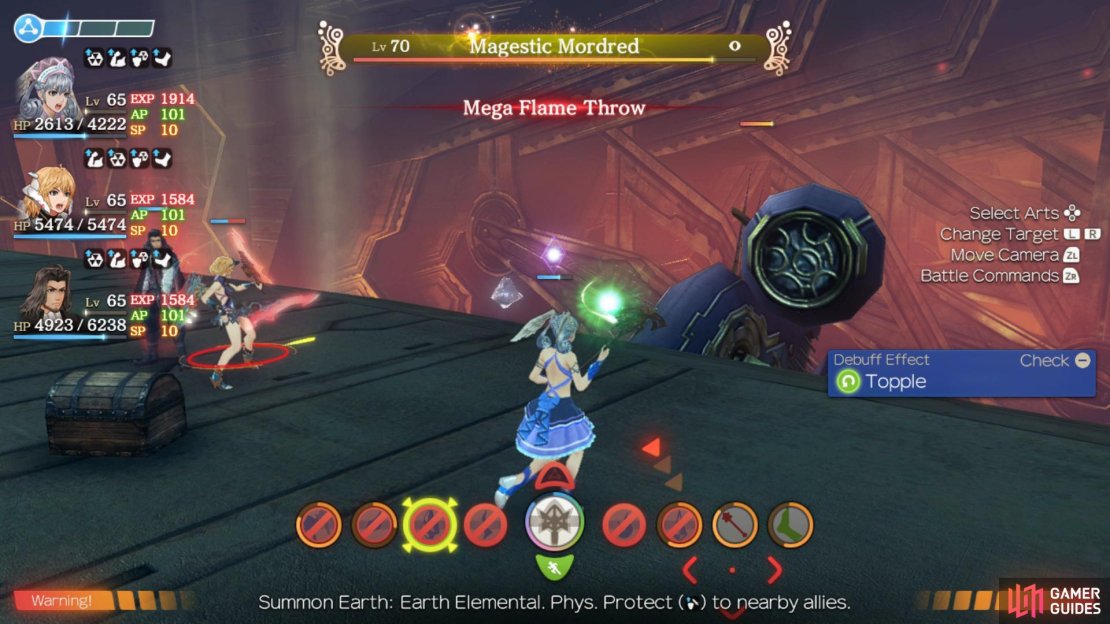

(1 of 3) You may need to return after your visit to Agniratha to deal with Mordred
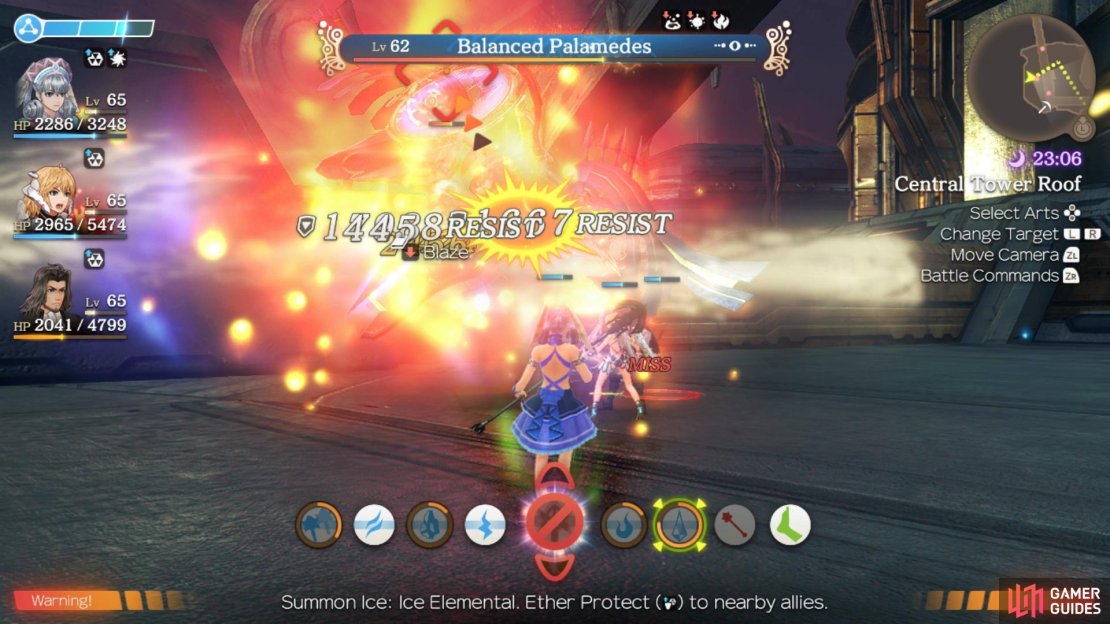
Return to the Tower Boarding Gate Landmark now and head west to proceed into a forced battle which is nothing more than a regular battle. Make use of area of effect Arts here to deal with the enemy and focus on one at a time and avoid using Topple and you’ll scrap these Mechon easily. Once the battle is over, head to the south room first to find a Lv 63 Unique Monster, Sinful Lamorak who you’ll want to either Topple or use Monado Purge on to remove it’s deadly Spikes. Likewise, to the north you’ll find a Lv 62 Unique Monster, Balanced Palamedes to defeat. With both enemies defeated, head west now to unlock the final barrier.
Once again, make sure you’ve finished everything you can on Central Factory before taking the lift up. You’ll be making another brief stop here later so you can focus on taking on the Lv 70 Unique Monster then if it’s a bit out of your depth right now. Be sure that the Collectopaedia is complete however along with having an extra 2 Black Styrenes and 2 Angel Engine Xs that you’ll need for Colony 6. Once you’re fully prepared, take the lift up to reach Agniratha Transporter and head to the transporter to complete the Story Quest and trigger a scene as you head to Agniratha.
No Comments