
This page details how to complete the Excavation Site quest, part of Halo Infinite campaign. Includes where to find all the collectibles at the excavation site: two Spartan Cores, one Mjolnir Armor Locker, one Banished audio log and two UNSC audio logs. This quest begins immediately after Recovery.
How to Complete Excavation Site
Excavation Site Collectibles - Spartan Core 1
As you approach the excavation site from the southwest, you’ll see a cliff edge with the excavation site beneath it. The first Spartan Core can be found on this cliff, overlooking the site. This should be an easy find, but if you can’t see it as you approach the cliff, use AI Scan to highlight it in yellow and walk along the cliff until you see it.

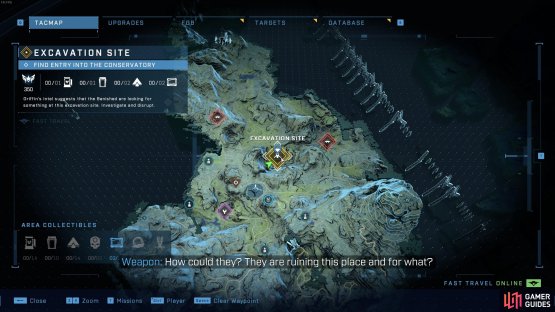
(1 of 2) You’ll find the first Spartan Core overlooking the excavation site.


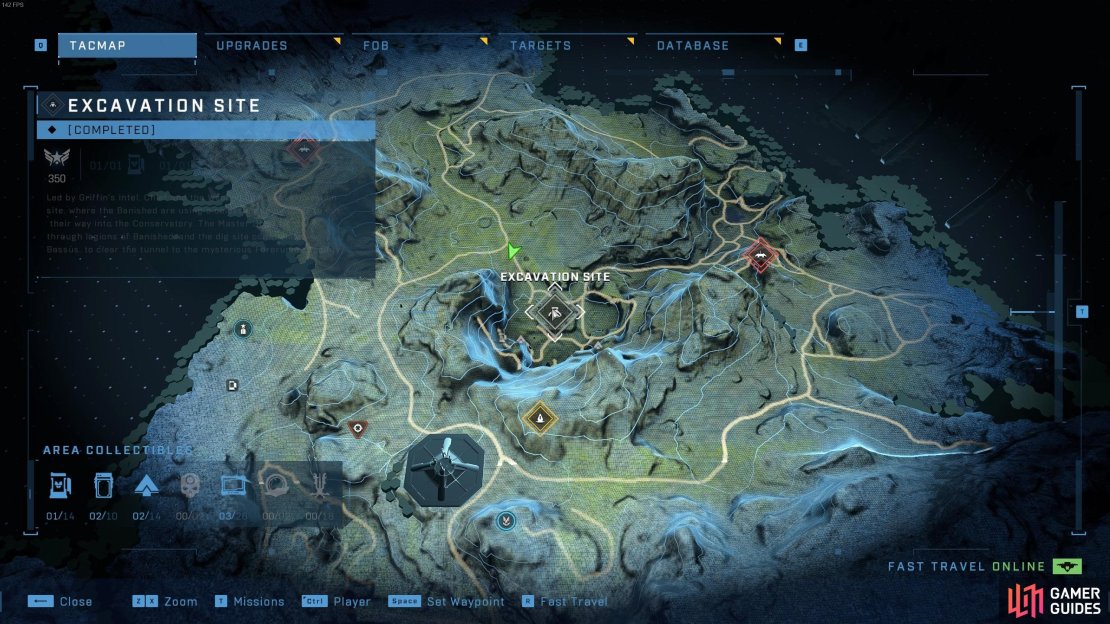
You’ll find the first Spartan Core overlooking the excavation site. (left), The location of the first Spartan Core on the map, as you approach the excavation site from the southwest. (right)
Excavation Site Collectibles - Spartan Core 2
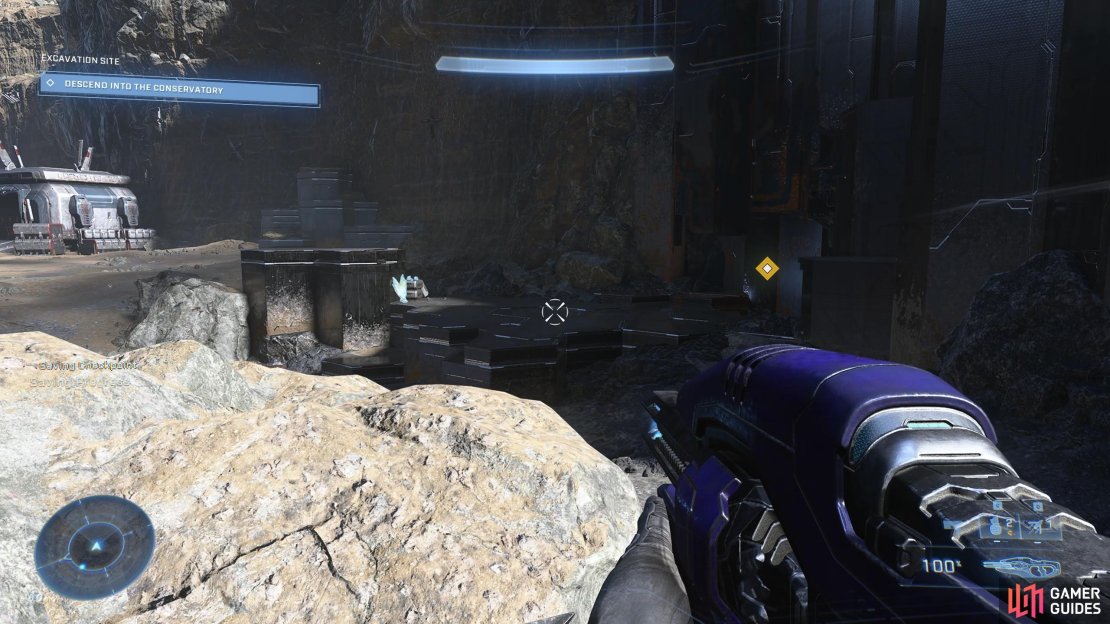
The second Spartan Core can be found in a small structure within the excavation site on its southeastern side. If you haven’t triggered the conservatory cutscene yet, you should be able to walk over to it and collect it without any problems, as shown below. Once you’ve got the second Spartan Core, remember to upgrade your equipment if you have enough cores saved up.
Excavation Site Collectibles - Mjolnir Armor Locker
Once you’ve got the second Spartan Core, there’s one more collectible that you can obtain from the excavation site in peace, before triggering the event at the conservatory. You’ll find the Mjolnir Armor Locker with the Banished Nameplate reward just a short way from the conservatory, as shown in the gif below.
Interact with the Conservatory & Destroy the Mining Laser
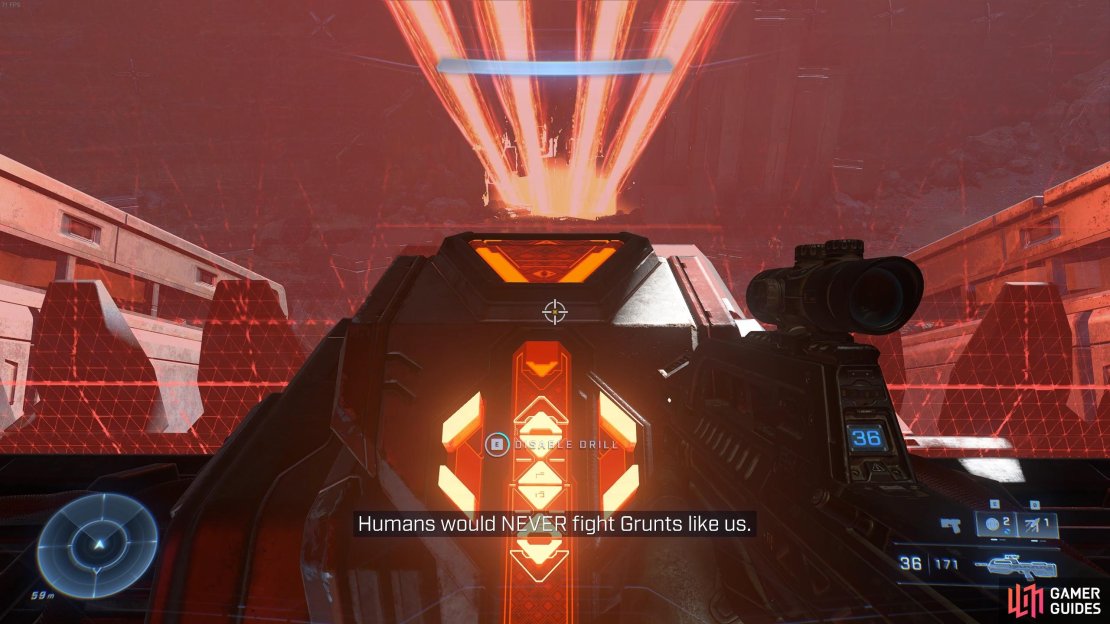
Now that you’ve obtained the two Spartan Cores and the Mjolnir Armor Locker outside at the excavation site, it’s time to trigger the conservatory event. All you need to do is walk over to it to begin a cutscene. The cutscene will be brief, as it becomes obvious that the strange lack of Banished at the site is explained by an ambush. The mining laser will be activated at this point, and you’ll be attacked by numerous Brutes, Jackals, and Grunts of various types. The usual gang. You’ll be exposed and surrounded after the cutscene, so the first thing you should do is run for cover to avoid being overwhelmed by incoming fire. Once you’ve found some cover you can begin the work of clearing the site of enemies. You’ll find plenty of weapon racks and resupplies of grenades in the area, so be sure to make use of them.
Excavation Site Collectibles - UNSC Audio Log 1
After clearing the site of most enemies, you’ll need to enter the machine at the centre of the site, from which the laser is being fired. Get to the top of the machine and then jump down to one of the doors which were previously locked. You’ll find a UNSC audio log close to the entrance here, but you’ll need to kill some Grunts if you want to interact with it in peace first.
Excavation Site Collectibles - Banished Audio Log
Once you’ve obtained the first UNSC audio log, continue into the heart of the machine to find the Banished audio log opposite the laser controls, as shown below:
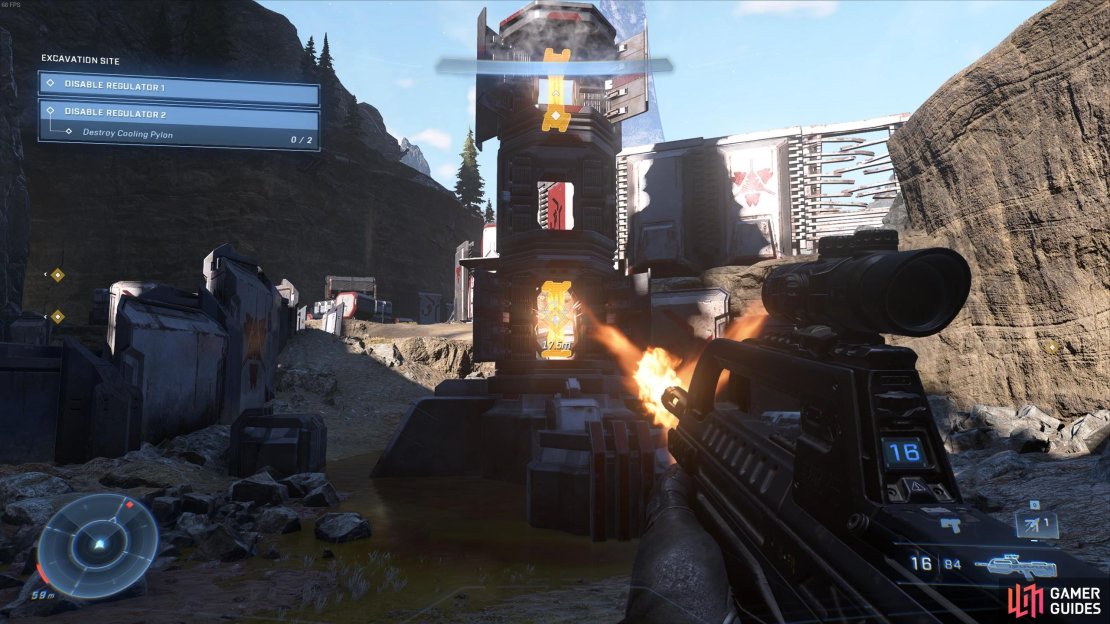
Disable the Regulators and Destroy the Cooling Pylons
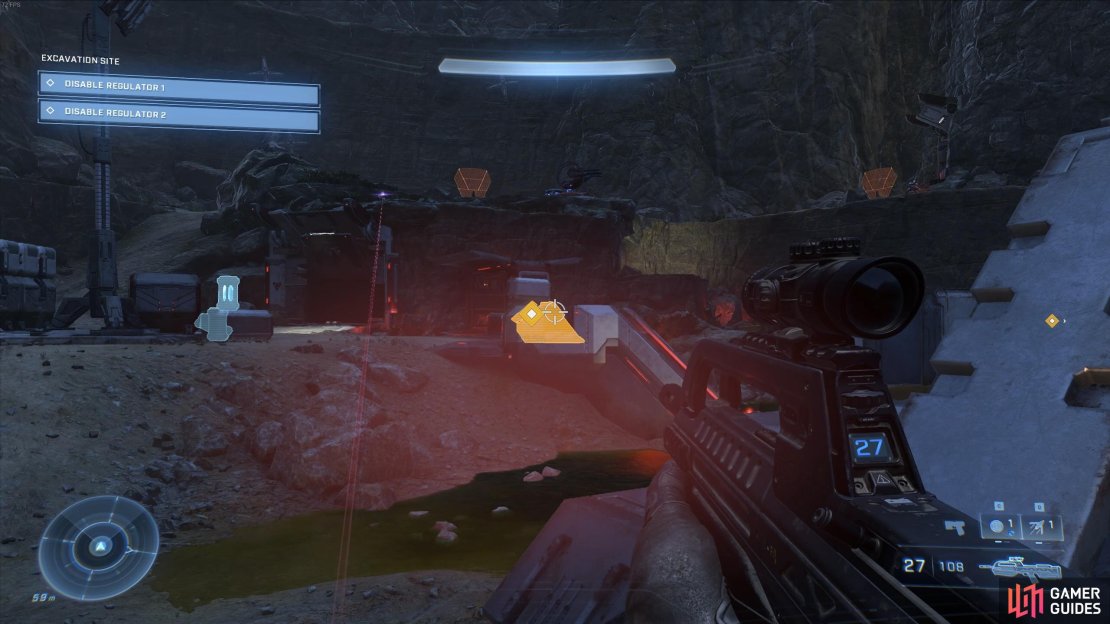
After looting the Banished audio log, interact with the laser controls to trigger another cutscene. You’ll soon find that the Weapon can’t automatically shut down the mining laser. Instead, she suggests that you expose the cooling pylons associated with two power regulators attached to the machine outside, thereby causing the machine to explode. When the cutscene ends, you’ll be attacked by a new wave of Banished. There are quite a lot to contend with outside, so be ready for a big fight. You can take most of the enemies out at close range fairly easily, but you’ll need to look out for the Jackals with Stalker Rifles located on the cliffs around the machine. Take these out as soon as possible to avoid being hit by a nasty surprise when you least expect it. You should be able to locate them easily since they shine a beam of light at you when they’re aiming in your direction.
When you’ve killed enough enemies to disable the regulators in relative peace, you can interact with one of the terminals which are highlighted by an AI Scan. This will trigger another wave of enemies, so be ready to defend yourself. At the same time, you’ll need to destroy the two cooling pylons which are now exposed by shooting them. It will take a few shots, but keep at it until they explode, then move on to the next terminal and do the same thing. Each time you interact with a terminal a new wave of enemies will spawn, so it’s a good idea to clear the area before you interact with the next regulator terminal.
Return to the Mining Laser Control Room
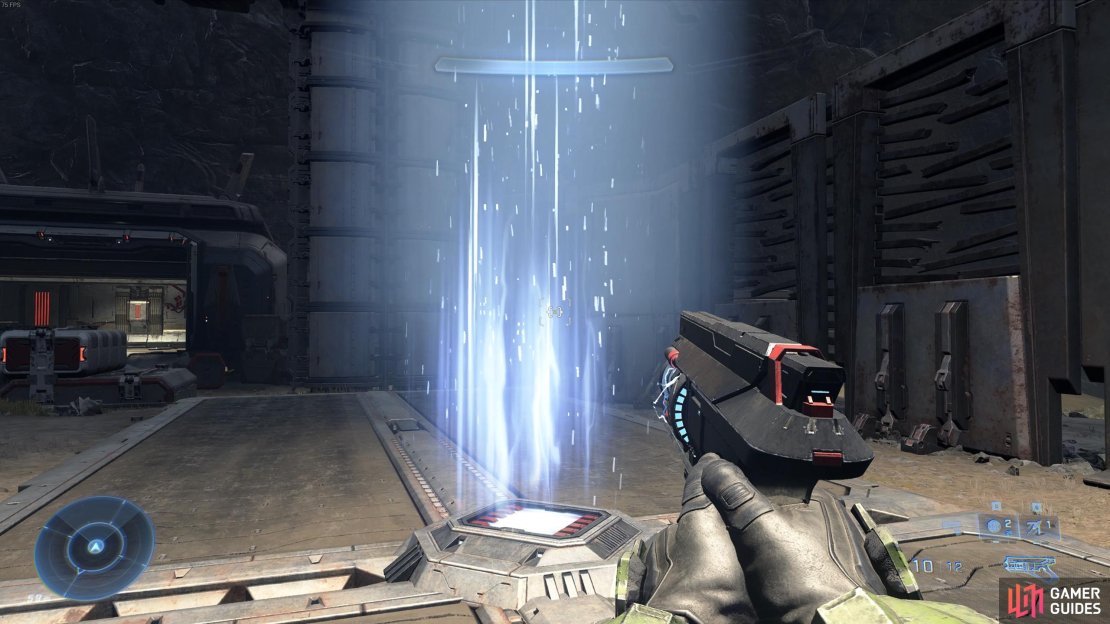
Once you’ve disabled both regulators and destroyed their cooling pylons, you can return to the laser control room and interact with the terminal there. Use one of the nearby gravity lifts to gain access to the interior of the machine again. As you interact with the terminal, you’ll be interrupted by a boss fight with an Elite Brute named Bassus. This can be a tough, chaotic fight, so you’ll need to know the best way to deal with him before jumping into the fight.
Boss Fight: Bassus
The fight with Bassus can be a real punch in the gut out of nowhere if you’re not prepared for his fighting style. He’s a relentless Brute who inflicts massive melee damage with his energy-powered weapon. Not only that, he has incredibly tough armor and health which can be difficult to eat through without the right weapons and tactics. You’ll find that many of the weapons available to you will be fairly useless at chipping away his armor, so don’t waste your time with them. Instead, the first thing you should do is create some space between yourself and Bassus. You can do this by running and sliding, but you can also use your Grappleshot.
Once you’ve created some distance between yourself and Bassus, the main thing you should aim to do is equip the nearby Sentinel Beam This is a powerful energy weapon which can be found on the floor just opposite the mining laser controls, as shown in the gif below.
The Sentinel Beam inflicts massive damage to Bassus compared with most other weapons, and it will make the fight much easier to get through. However, another way to speed the fight up and kill Bassus quickly is by using the nearby blast coils which are scattered around the interior of the machine. You can pick one of these up and throw them at Bassus to inflict massive damage if you have time, but failing that you can try kiting Bassus near to a bunch of blast coils, then shoot them to trigger a massive explosion. This will inflict a lot of damage to Bassus and give you enough time to finish him off with the Sentinel Beam, or with a few energy grenades. When you’ve defeated Bassus, you’ll unlock the Unearthed achievement.
Excavation Site Collectibles - UNSC Audio Log 2
Now that you’ve destroyed the mining laser machine and defeated Bassus, you can find the last collectible in the area in the form of a UNSC audio log. This is located northwest of the excavation site in some ruins along the road, as shown below:
No Comments