
This page details where to find all the skull collectibles in Halo Infinite. You’ll encounter 12 skulls in total throughout the campaign, some of which can be difficult to find. It’s important that you acquire them as you play through each mission, since some areas will be blocked off after you leave them.
Halo Infinite Skulls Overview
Below is a table which details all 12 skulls in Halo Infinite, a brief note on where they’re found, and what effect they provide. The first 6 skulls can be found during the main campaign missions, while the last 6 are found in the open world map.
| Skull | Location | Effect |
|---|---|---|
| Boom Skull | Warship Gbraakon | Doubles explosion radius |
| Cowbell Skull | Foundation | Acceleration from explosions is increased |
| IWHBYD Skull | Recovery | Rare combat dialogue becomes more common |
| Mythic Skull | The Command Spire | Enemies have increased health |
| Grunt Birthday Party Skull | Repository | Grunt headshots lead to glorious celebrations |
| Bandana Skull | Silent Auditorium | Grants unlimited weapon ammo and grenades, and removes equipment cooldown |
| Blind Skull | South of Ransom Keep | HUD and weapon do not display on screen |
| Fog Skull | West of Fob Alpha | Disables motion tracker |
| Black Eye Skull | South of northern beacon, between Fob Kilo & Riven Gate | Your shields only recharge when you melee enemies |
| Thunderstorm Skull | West of eastern beacon | Upgrades the rank of most enemies |
| Catch Skull | On island north of Outpost Tremonius | Enemies throw and drop more grenades |
| Famine Skull | On island south of eastern beacon, northeast of Command Spire | Weapons dropped by enemies have half the ammo they normally would |
Boom Skull
The Boom Skull can be found in a room with two levels on Warship Gbraakon. From the upper level on the right side of the room you’ll see some platforms moving up and down. Look up to your right and use AI Scan to find the skull highlighted in yellow. To reach the skull, all you need to do is wait for one of the platforms to rise, then jump onto the one beneath it. As the platform rises you’ll be brought to the small area where the skull is located. Loot it to unlock the Headstrong achievement, then jump back down to the main level just after one of the platforms rise.
Cowbell Skull
This skull is acquired during the Foundation campaign mission.
After the scene during which you find the Weapon, the platform you’re on will rise and take you to a different part of the complex. A collectible in the form of the Cowbell Skull can be found here, so don’t run through too quickly. Head up the stairs in front of you and go through the two automatic doors highlighted in blue. You’ll encounter a few Grunts in this next cavernous room, and the Weapon will note that there’s something up ahead, hinting at the nearby skull.
Once you’ve dealt with the Grunts here, look up and to your right, using AI Scan. You’ll see the skull highlighted in yellow on top of one of the structures. To reach it, you’ll need to use your Grappleshot at least twice, as shown in the gif below:
IWHBYD Skull
The best time to collect the IWHBYD Skull is after you’ve defeated Chak ’Lok. This is because you’ll have access to a higher platform which is closer to the top of the tower, however you can still access the top of the tower later if you don’t want to do it yet, or if you still need to upgrade your Grappleshot with the Quickshot upgrade. It will take a total of 3 Spartan Cores to upgrade this, and you can always come back later if you don’t have enough yet. Assuming you have enough, you can begin to grapple the side of the tower and chain the grapple shots to lift you to the top of the tower. This can be a tricky thing to do, but with enough persistence you should be able to manage it. You’ll find the IWHBYD Skull at the centre of the top of the tower. See the gif below for a demonstration:
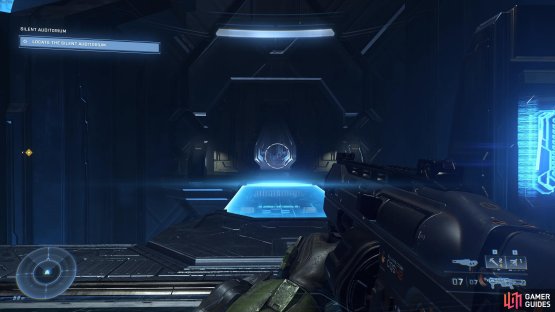
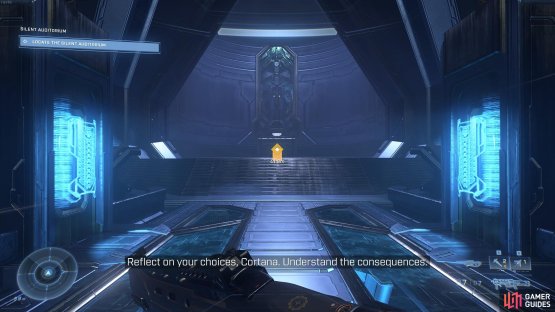
This page details where to find the Bandana Skull during the Silent Auditorium campaign mission.
Mythic Skull
Once you’ve killed all the enemies in this large production room, you can locate the Mythic Skull in peace. To do this, you’ll need to [Grappleshot](Grappleshot “Grappleshot”) onto one of the moving structures, then onto a nearby ledge and finally, onto a platform which leads to a hidden room. See the gif below to find out exactly what you need to do to reach the Mythic Skull:
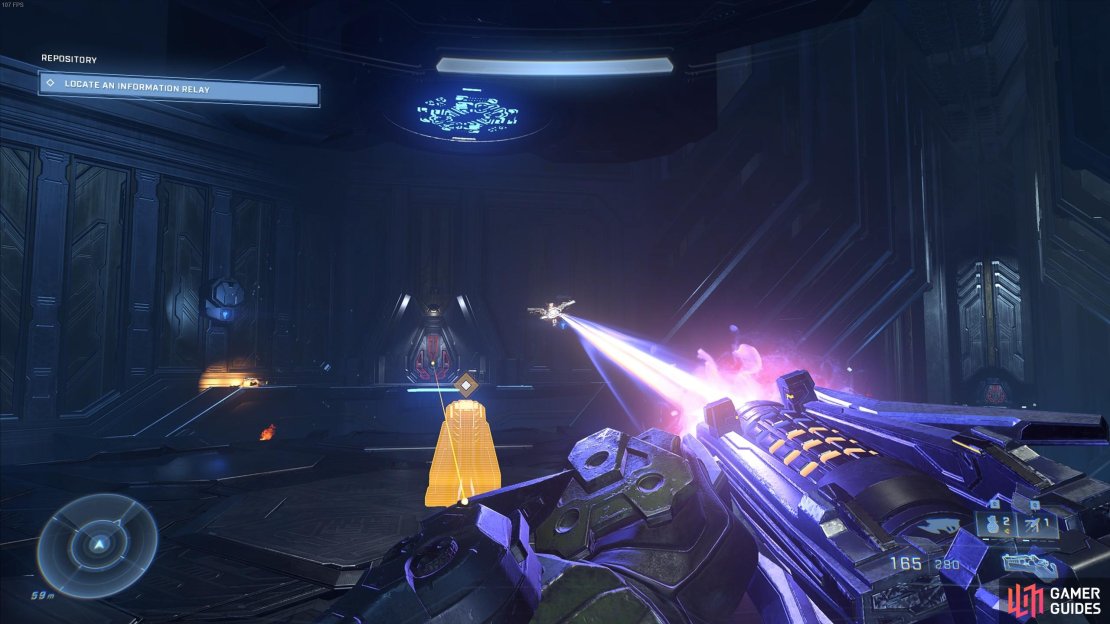
Grunt Birthday Party Skull
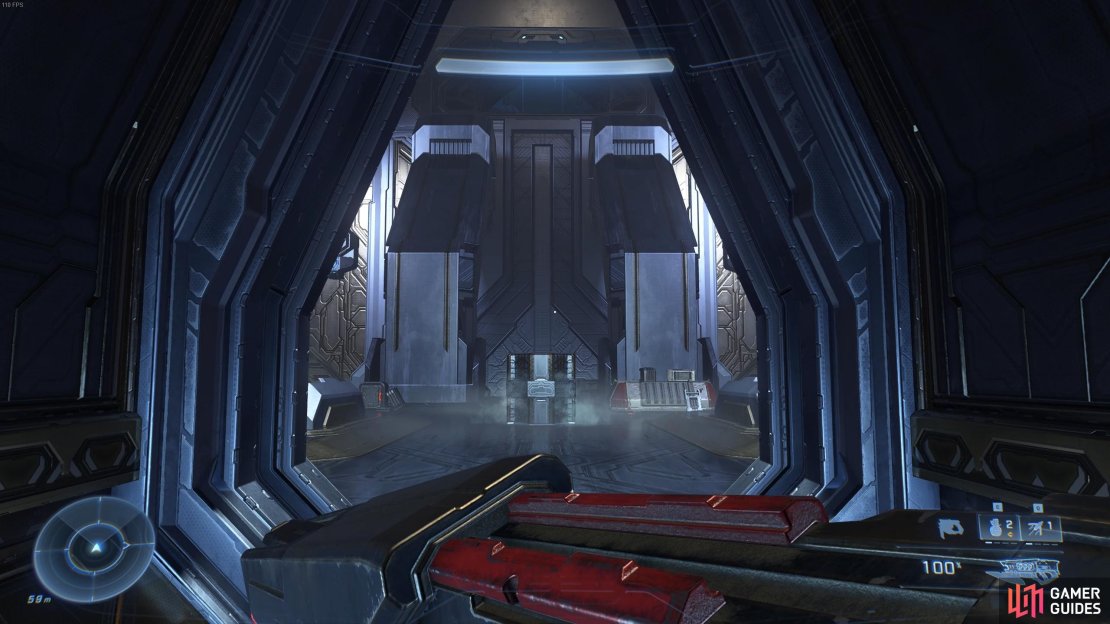
Once you’ve placed the power seed in the crucible, continue on through the door marked by the quest marker (use AI Scan to highlight this if necessary). You’ll face a number of enemies in the rooms ahead including Sentinels, Jackals, Grunts, and a few Elite Brutes. This is nothing you haven’t seen before, you shouldn’t have any issues here. Remember to focus fire on heads to kill Elite Brutes quickly. Eventually you’ll reach a room with a large window looking out at the surface of the ring, with some Banished ships in the distance and a structure of unknown purpose.

(1 of 3) Interact with the terminal near the beginning of the level to trigger a cutscene, after which the red doors will turn blue.
Turn left from the window and follow the ramp up, killing Sentinels as you go. You’ll soon reach a room with some Skimmers and Brutes. Kill these and then head through the door marked by the objective marker. This leads to another room with two Elite Brutes wielding Ravagers and a few more Sentinels. Kill these and then look up at the window, above two large pillars. This is where the energy barrier was which you deactivated by moving the power seed earlier. You can use Grappleshot to get in the room beyond the window, but you’ll need to be extremely careful. The skull is at the centre of the room, but it’s guarded by four Elite Brutes who wield Energy Sword and use Active Camo. This makes for a tough fight if you’re not prepared for it, so be ready to use Threat Sensor as soon as you enter the room, and use grenades to force the Brutes out of their hiding places. So long as you stay near the window the Brutes will remain at the back of the room for the most part, but they can use grenades so you’ll need to look out for these and dodge them when necessary.
Once you enter the room with the skull at the centre of it, you’ll be locked inside until you kill all four Elite Brutes. Try to focus on killing one Brute at a time so you have less to worry about later in the fight, as your ammunition will undoubtedly begin to deplete. If you run out of ammo completely, you can use Grappleshot to acquire one of the Energy Sword from a dead Brute, which should be lying on the ground. You can then aim Grappleshot at a Brute with energy sword in hand, and then strike them with the sword as soon as you reach them. After this you’ll want to get out of melee range as quickly as possible, so you can grapple towards the window or even up at the ceiling for a few brief seconds, potentially allowing your energy shield to recover from any hits.
Bandana Skull
Once you’ve fought through numerous rooms with Banished and the odd Sentinel (or ran through them to avoid killing Sentinels!), you’ll eventually encounter the Adjutant Resolution for a third time in the story, but this time it will be friendly and apologetic. Follow it through the rooms towards the Silent Auditorium, and when you reach a large room with a blue bridge and an elevator at the end of it, stop here and go through the door over the smaller blue bridge opposite the door from where you just entered. If you didn’t kill any Sentinels, this door will be active (glowing in blue light) and you’ll be able to enter the room to find the Bandana Skull inside.
(1 of 2) If you killed any Sentinels along the way through this mission, the door leading to the room with the Bandana skull will be locked.


If you killed any Sentinels along the way through this mission, the door leading to the room with the Bandana skull will be locked. (left), Use the elevator to the Silent Auditorium once you’ve acquired the Bandana skull. (right)
Blind Skull
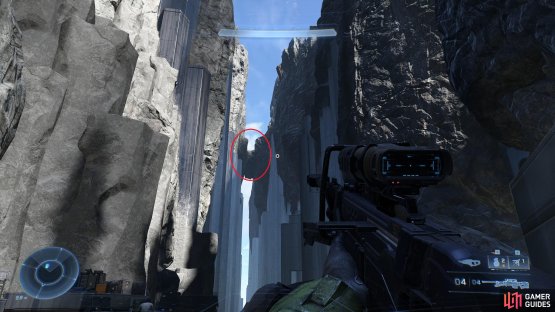
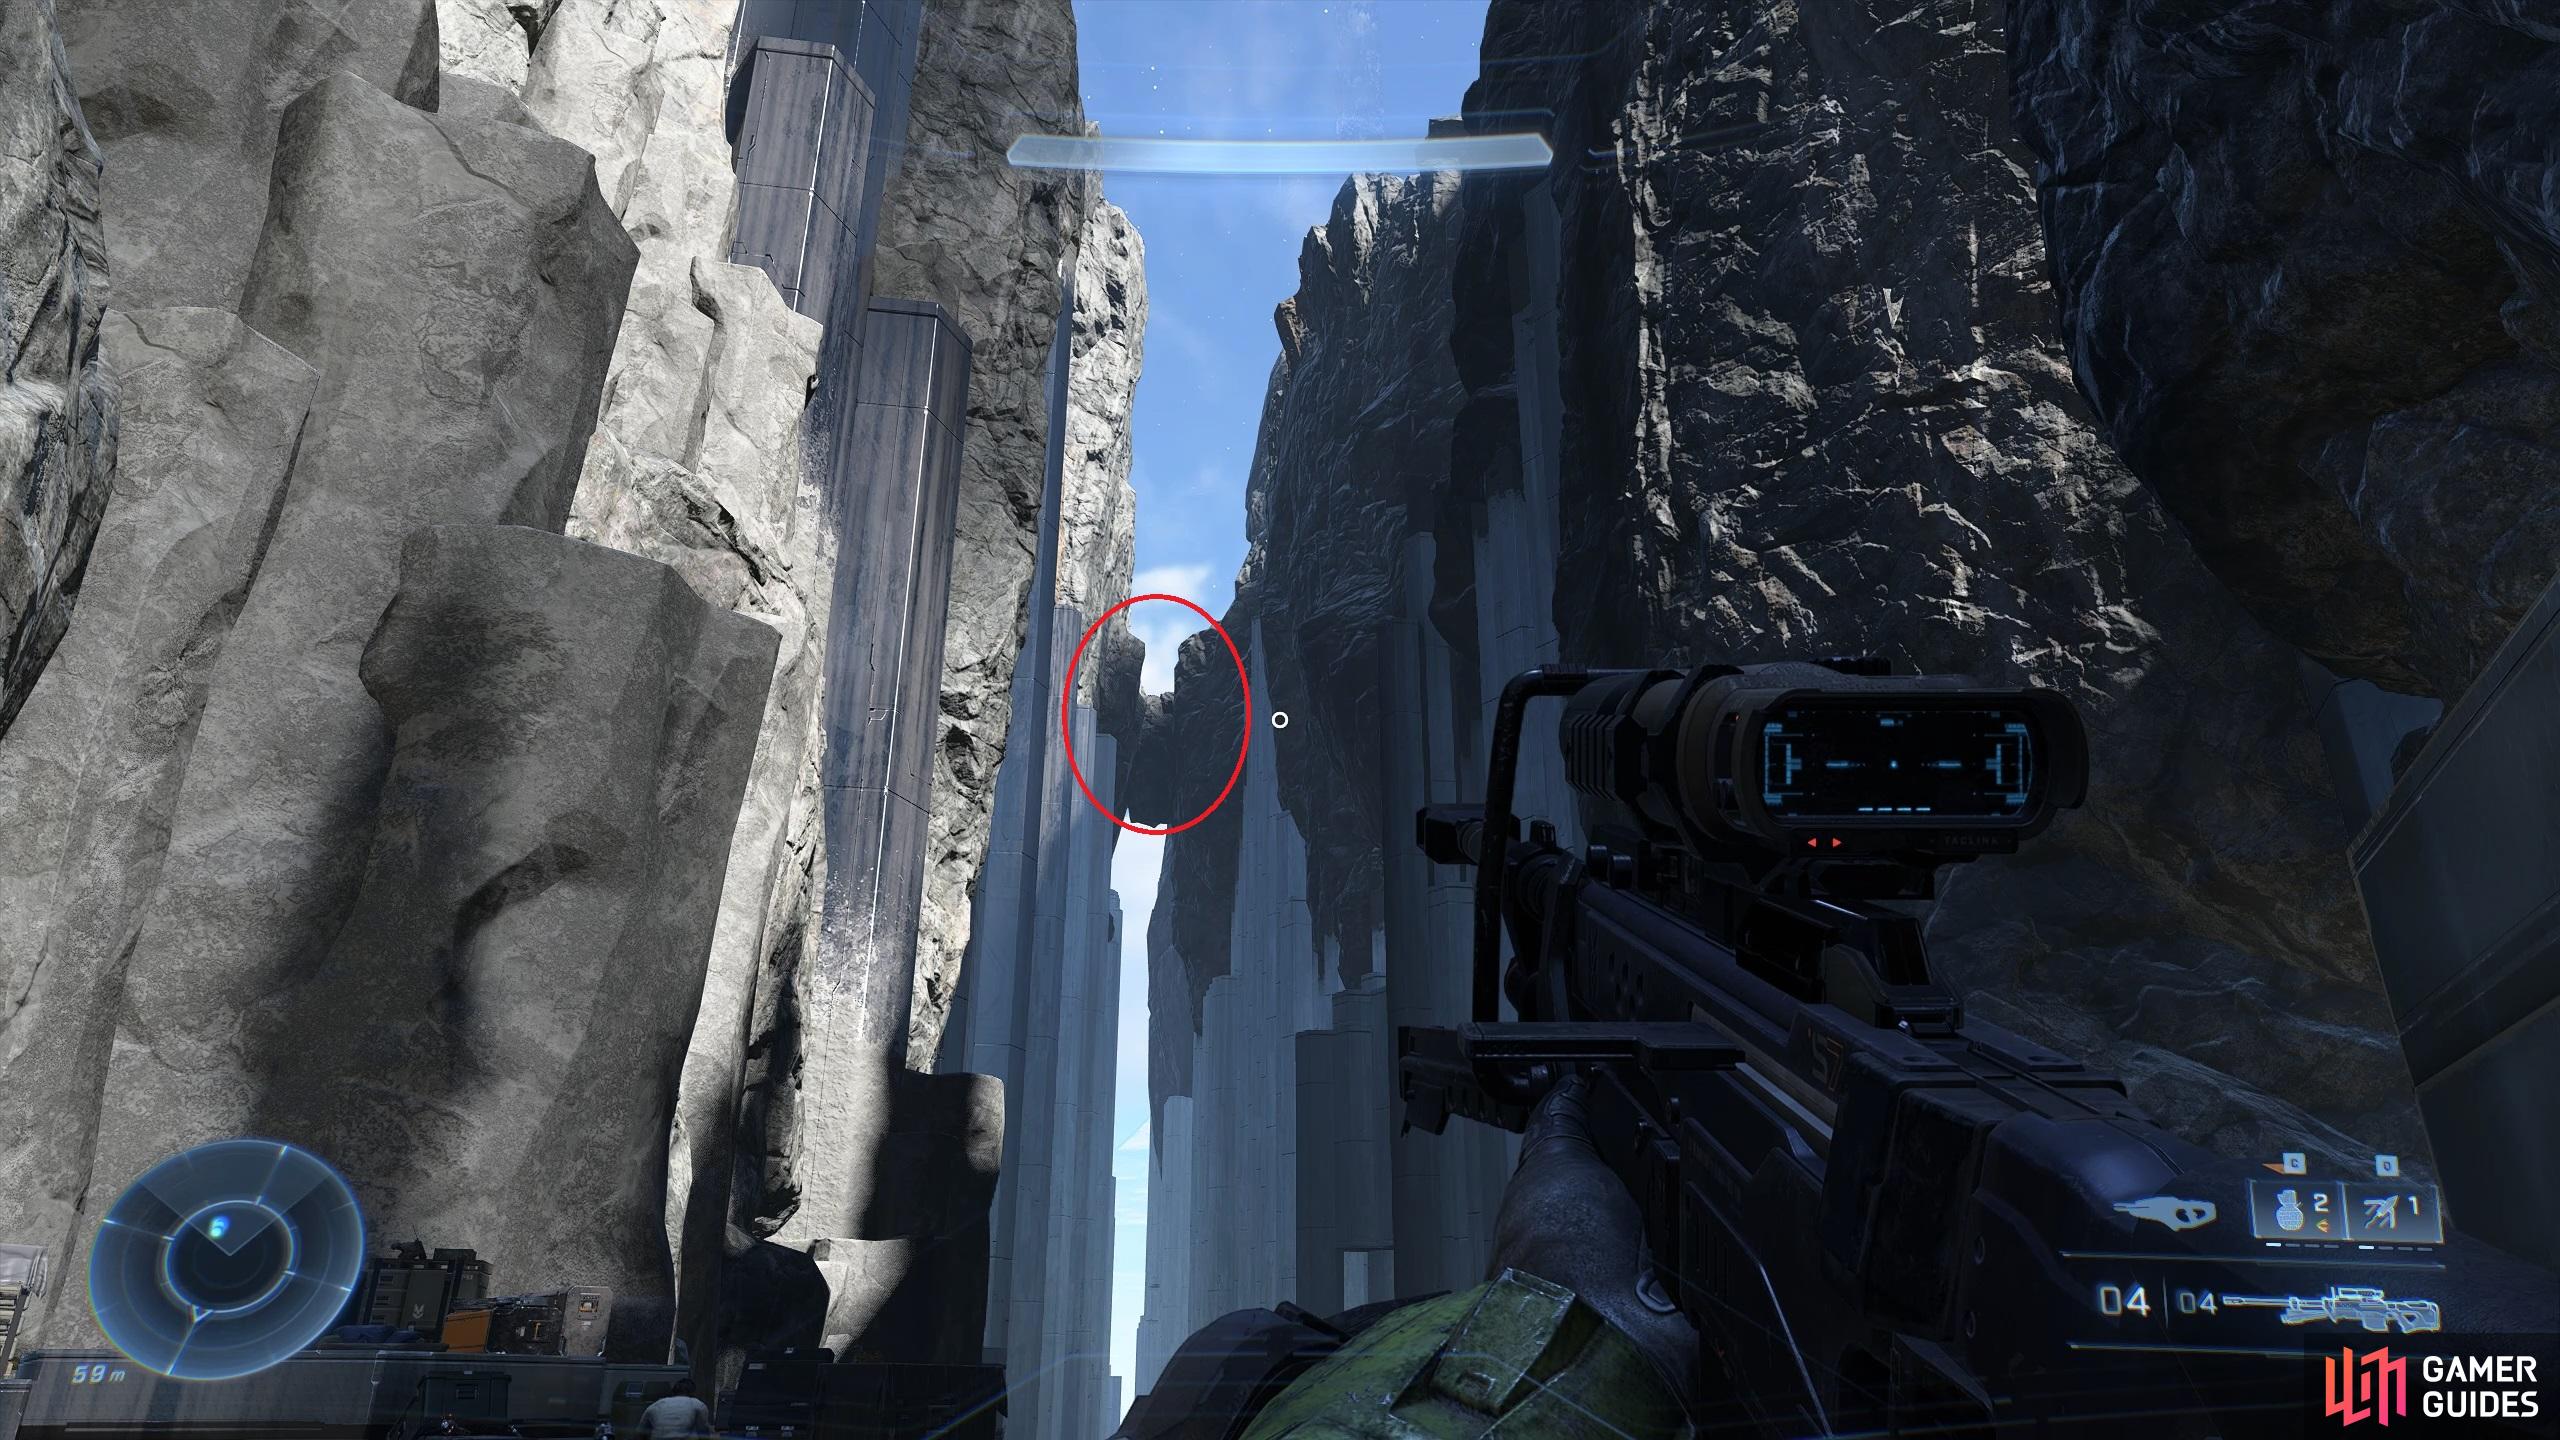
This skull can be found in a rift between two mountains located just south of Ransom Keep, as shown on the map below. You can use Grappleshot to navigate the western mountain, or drop down from above if you manage to reach the top of either mountain. A AV-49 Wasp or Banshee will be helpful to reach the top if necessary, but it’s doable without them.
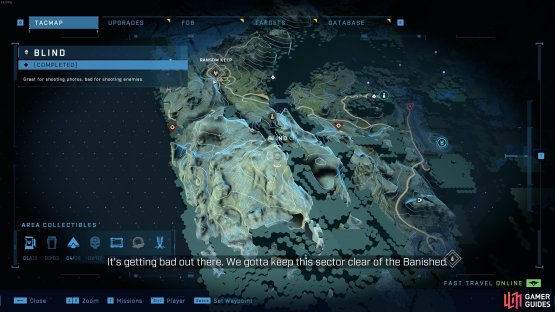
(1 of 2) The location of the skull, in the rift south of Ransom Keep.

The location of the skull, in the rift south of Ransom Keep. (left), You’ll need to reach the bridge between the rift and drop down from there to find the skull. (right)
As you drop down to the rocks which bridge the two mountains between the rift, you’ll be attacked by a Banished ship. You don’t need to worry about this, since you can just drop down and follow the blue lights to the skull, as shown in the gif below:
Fog Skull
The Fog Skull is located just to the west of Fob Alpha, tucked away in the structure of the ring. You’ll need to go up the hill to the west of Fob Alpha and then down again. You’ll see a creepy doll as you near the ring structure, then you’ll need to use Grappleshot to reach the skull, as shown in the gif below:
The location of the Fog Skull on the map:


(1 of 2) The location of the Fog Skull, just west of Fob Alpha.
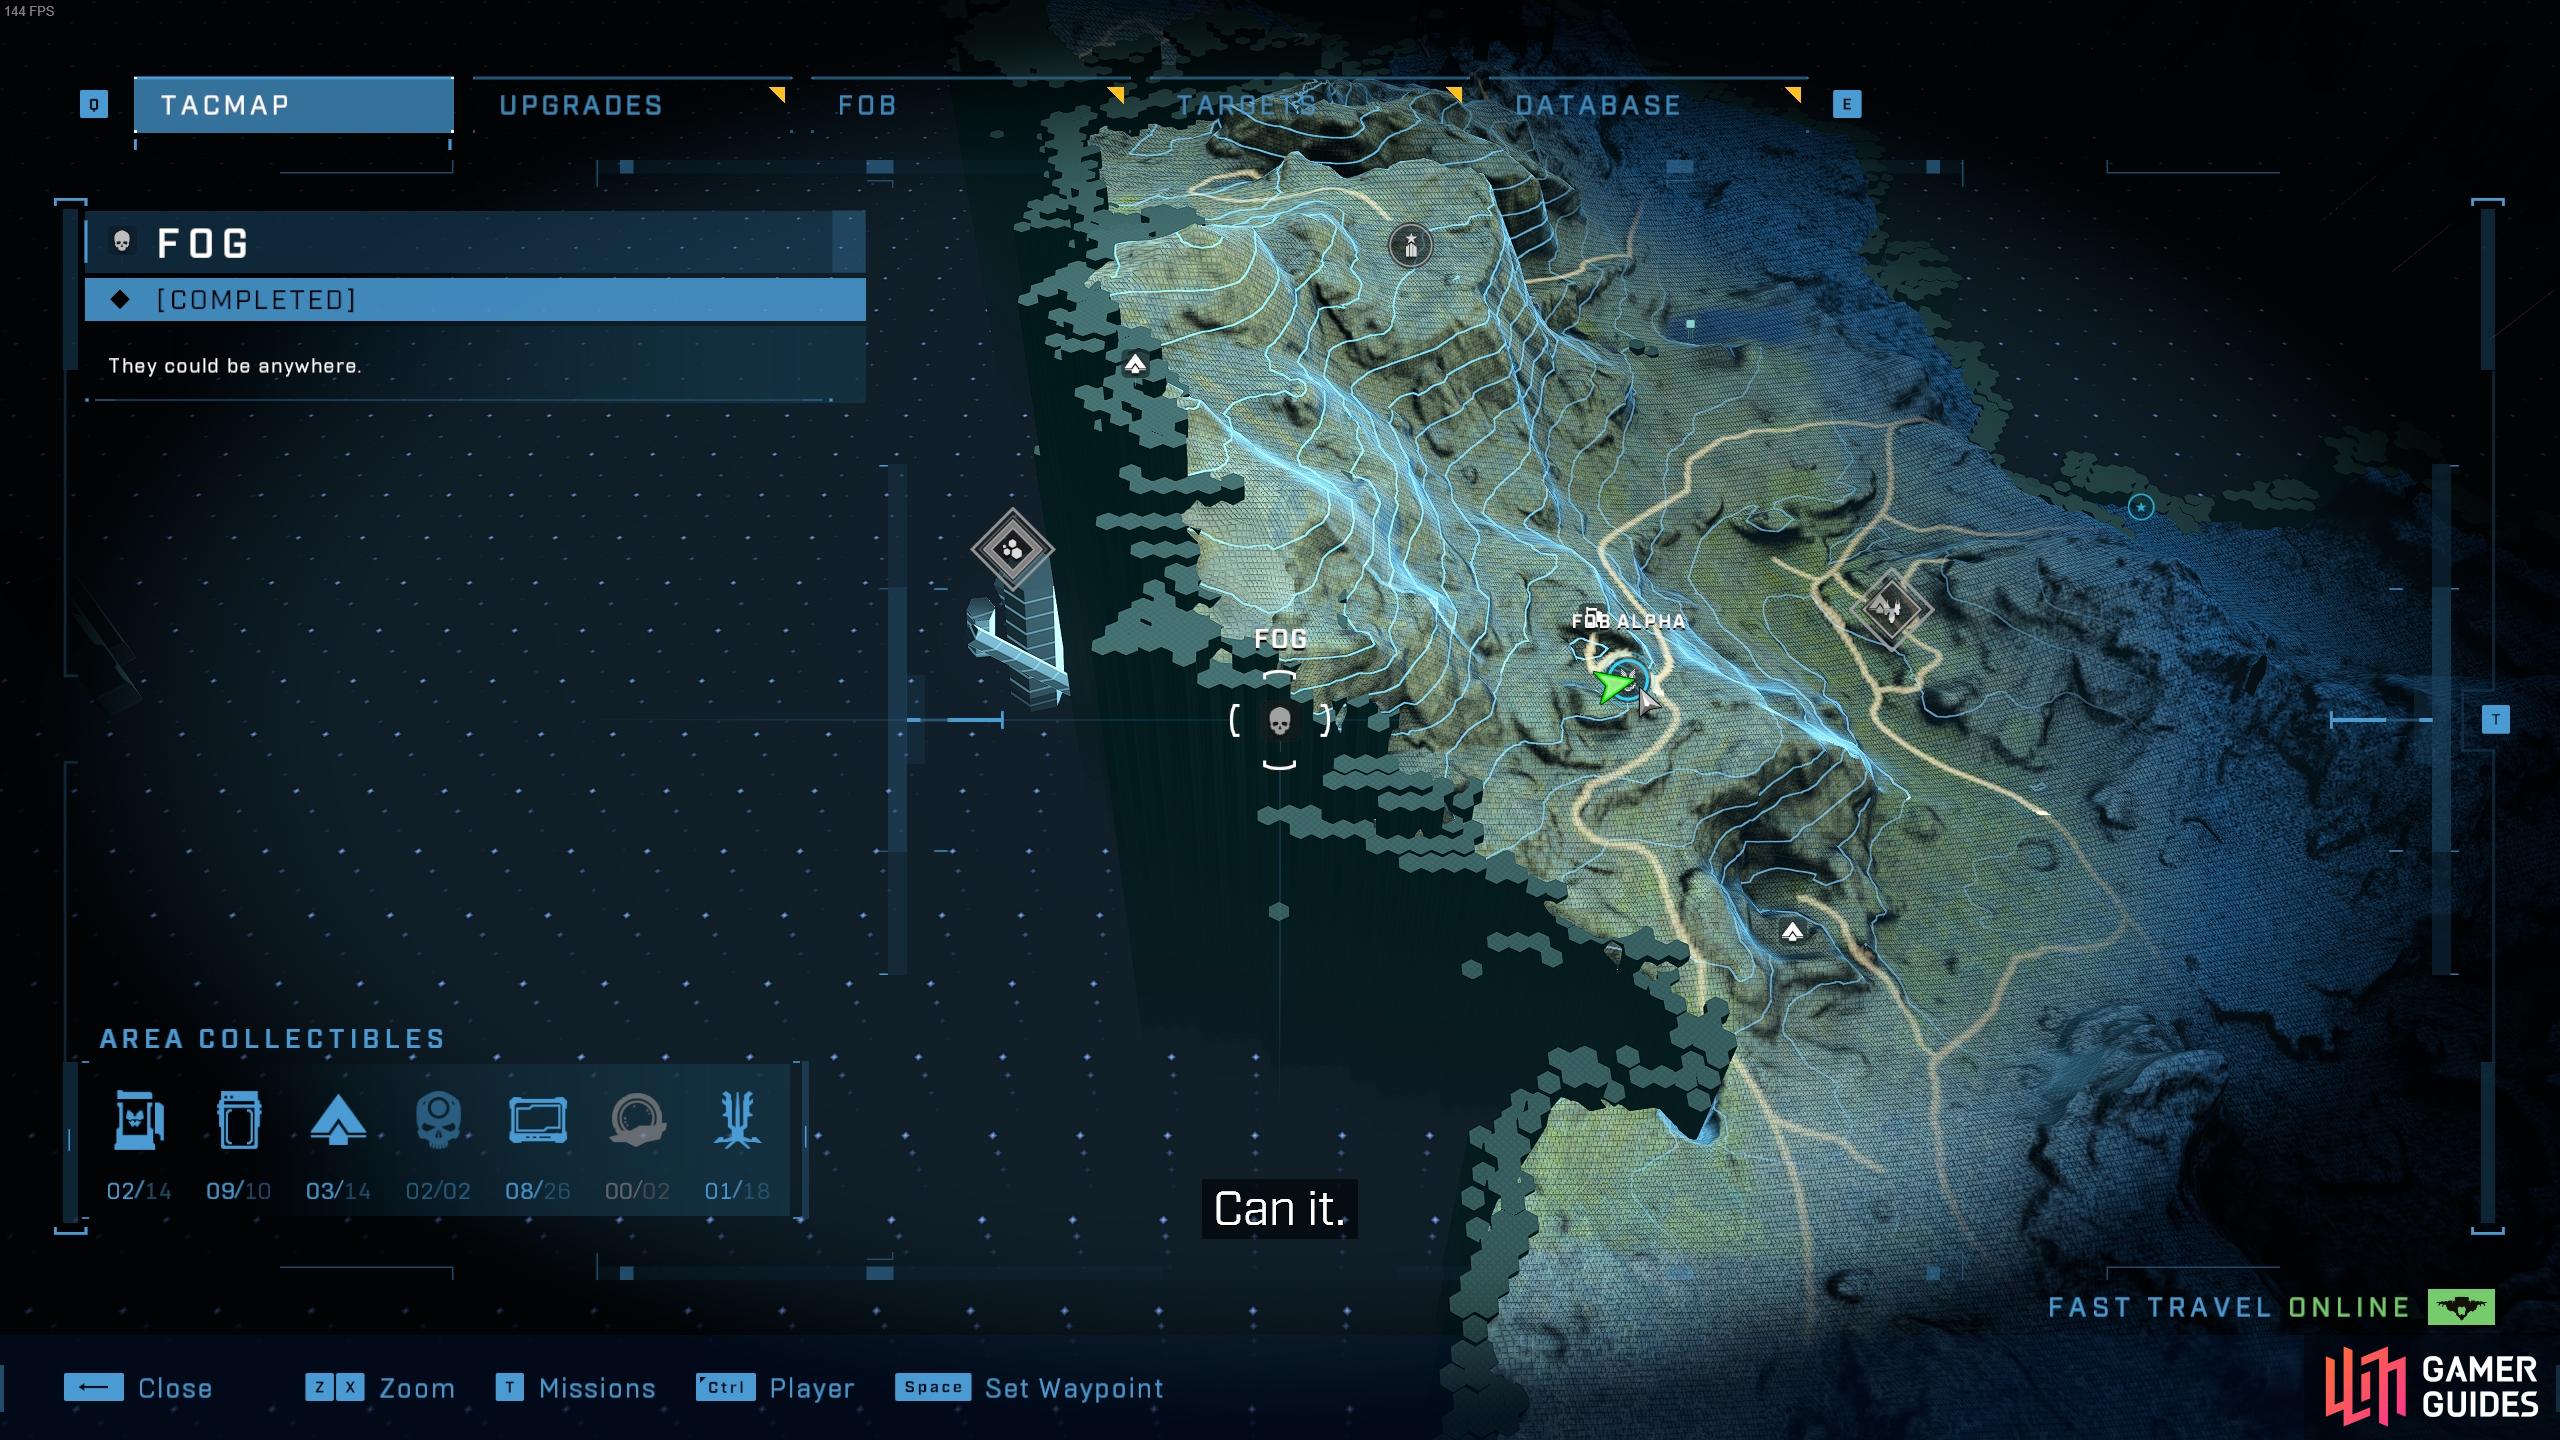

The location of the Fog Skull, just west of Fob Alpha. (left), You’ll see this creepy doll when you reach the area you need to be in before using Grappleshot to reach the skull. (right)
How to reach the Fog Skull with Grappleshot:
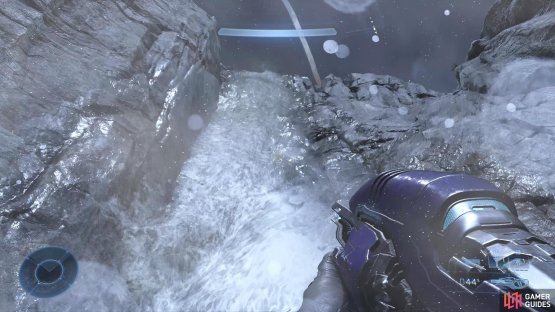
Black Eye Skull
The Black Eye skull is located south of the northern beacon, which you encounter during The Sequence main mission. More specifically, you’ll find the skull behind a waterfall, which itself is located between Fob Kilo and Riven Gate. The cave behind the waterfall can be tricky to enter, and you’ll need to use Grappleshot to reach it. The entrance to the cave is roughly in the middle of the waterfall length, and you’ll need to crouch to enter it.
Black Eye Skull Location:

(1 of 2) The location of the Black Eye Skull, south of the northern beacon.
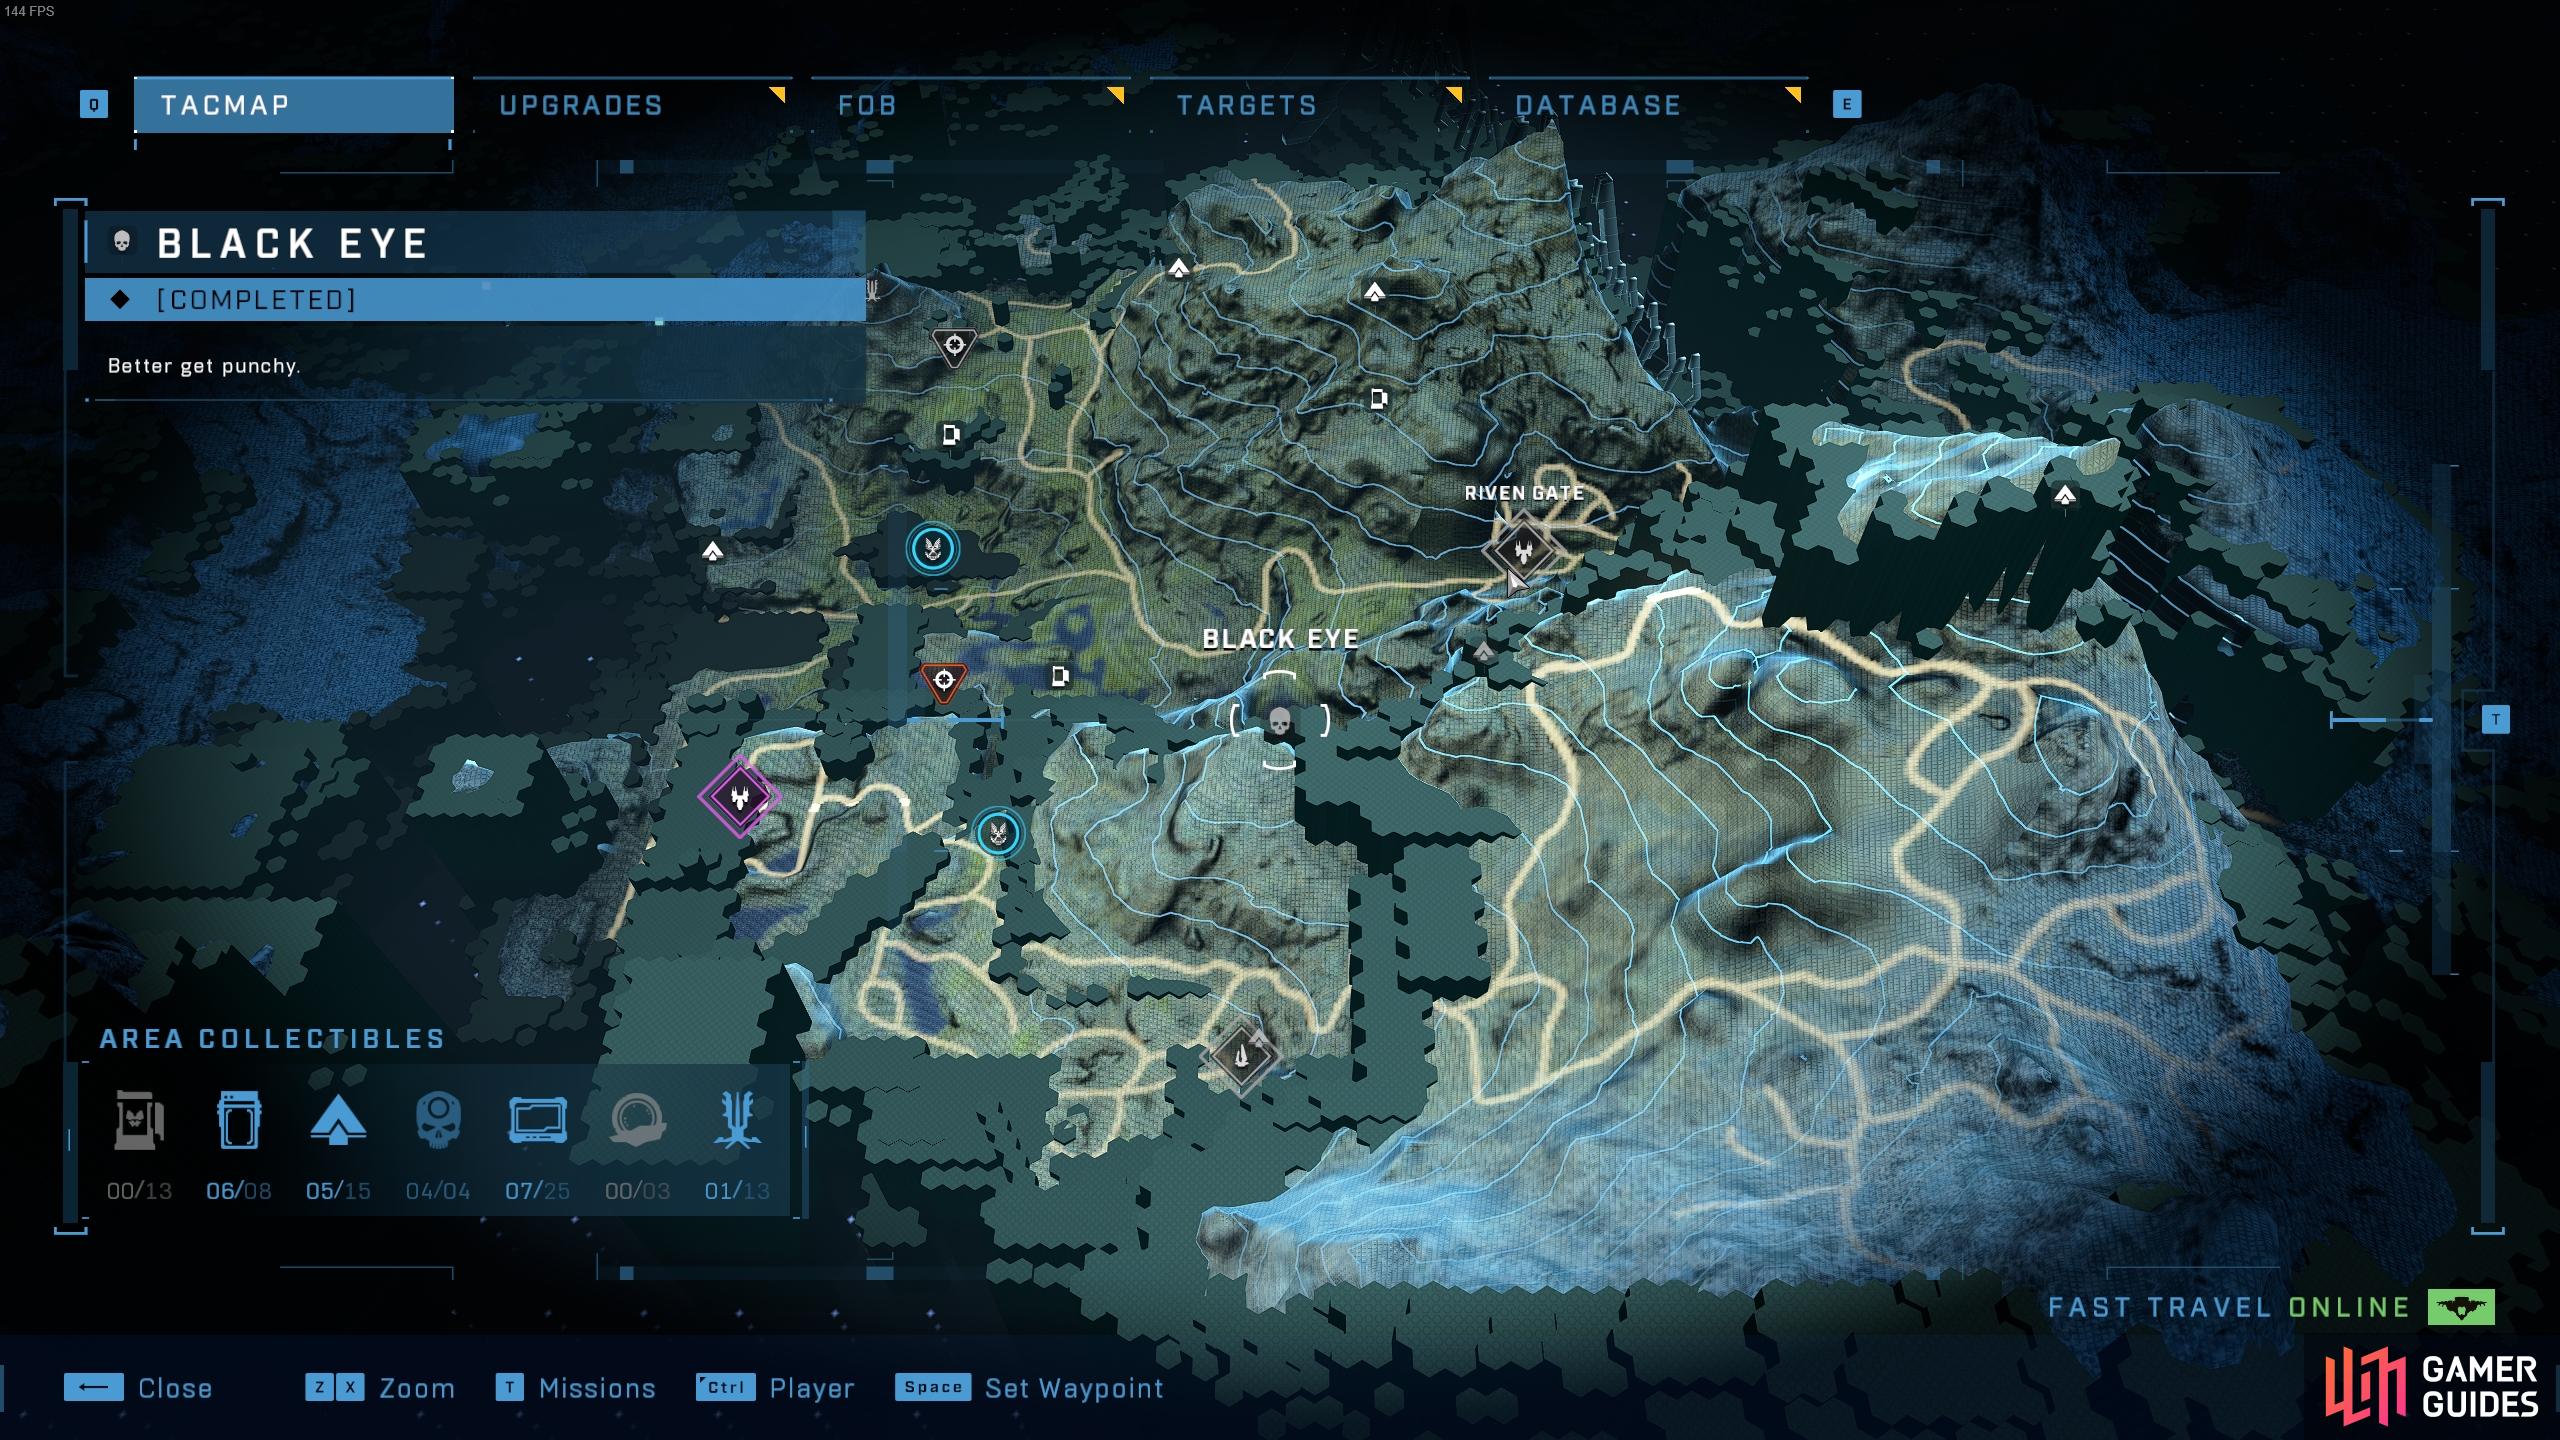

The location of the Black Eye Skull, south of the northern beacon. (left), You’ll need to aim with your Grappleshot roughly in the middle of the waterfall to reach the entrance. (right)
How to Reach the Black Eye Skull:
Thunderstorm Skull
The Thunderstorm skull is located on a tall pillar of ring structure just west of the eastern beacon, which you encounter during The Sequence main mission. So long as you’ve upgraded your Grappleshot with the quickshot upgrade, it should be easy to reach once you’ve located the pillar.
Thunderstorm Skull location:
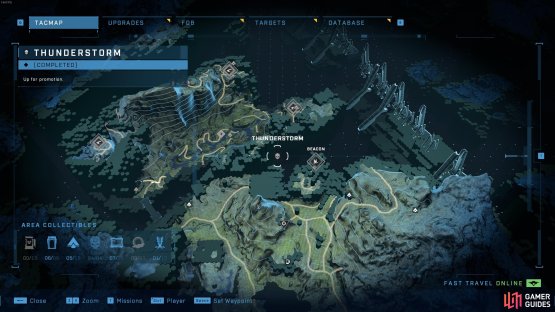
(1 of 2) The location of the Thunderstorm skull, just west of the eastern beacon.

The location of the Thunderstorm skull, just west of the eastern beacon. (left), You’ll be able to see the eastern beacon just below the pillar with the skull on top. (right)
How to Reach the Thunderstorm Skull
Catch Skull
The Catch Skull is located on the northernmost part of the map, north of Outpost Tremonius, on an island which is very difficult to reach without a AV-49 Wasp or Banshee. So long as you have either of these, you’ll be able to reach the location of the Catch Skull without any problems. However, once you arrive in the area you’ll soon discover that the skull is being protected by two powerful Hunters. These are even tougher than regular Hunters, so you’ll need to inflict a lot of damage to take them down. You can do this on foot with powerful weapons such as the Ravager, M41 SPNKR - Rocket Launcher, Skewer, Heatwave, Sentinel Beam, or Cindershot. However, if you’d rather take the skull without the danger of a ground fight with the Hunters, you can easily kill them from the sky in a AV-49 Wasp. You’ll need to avoid their powerful fire, but with enough distance you should be able to evade most of their hits. This may take longer than a ground fight, but it ensures relative safety. If you’d rather not bother with any fight, you can try to approach the two Hunters, goad them away from the skull, and then quickly loot it before they reach you.
Catch Skull Location:
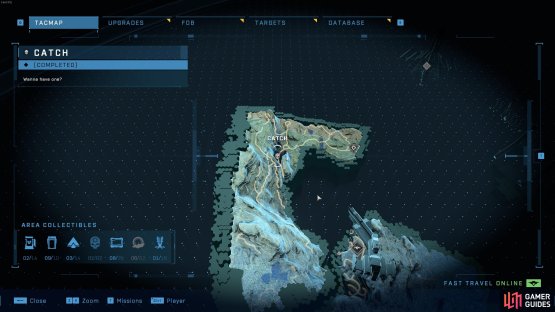

(1 of 2) The location of the Catch Skull, on the island north of Outpost Tremonius.

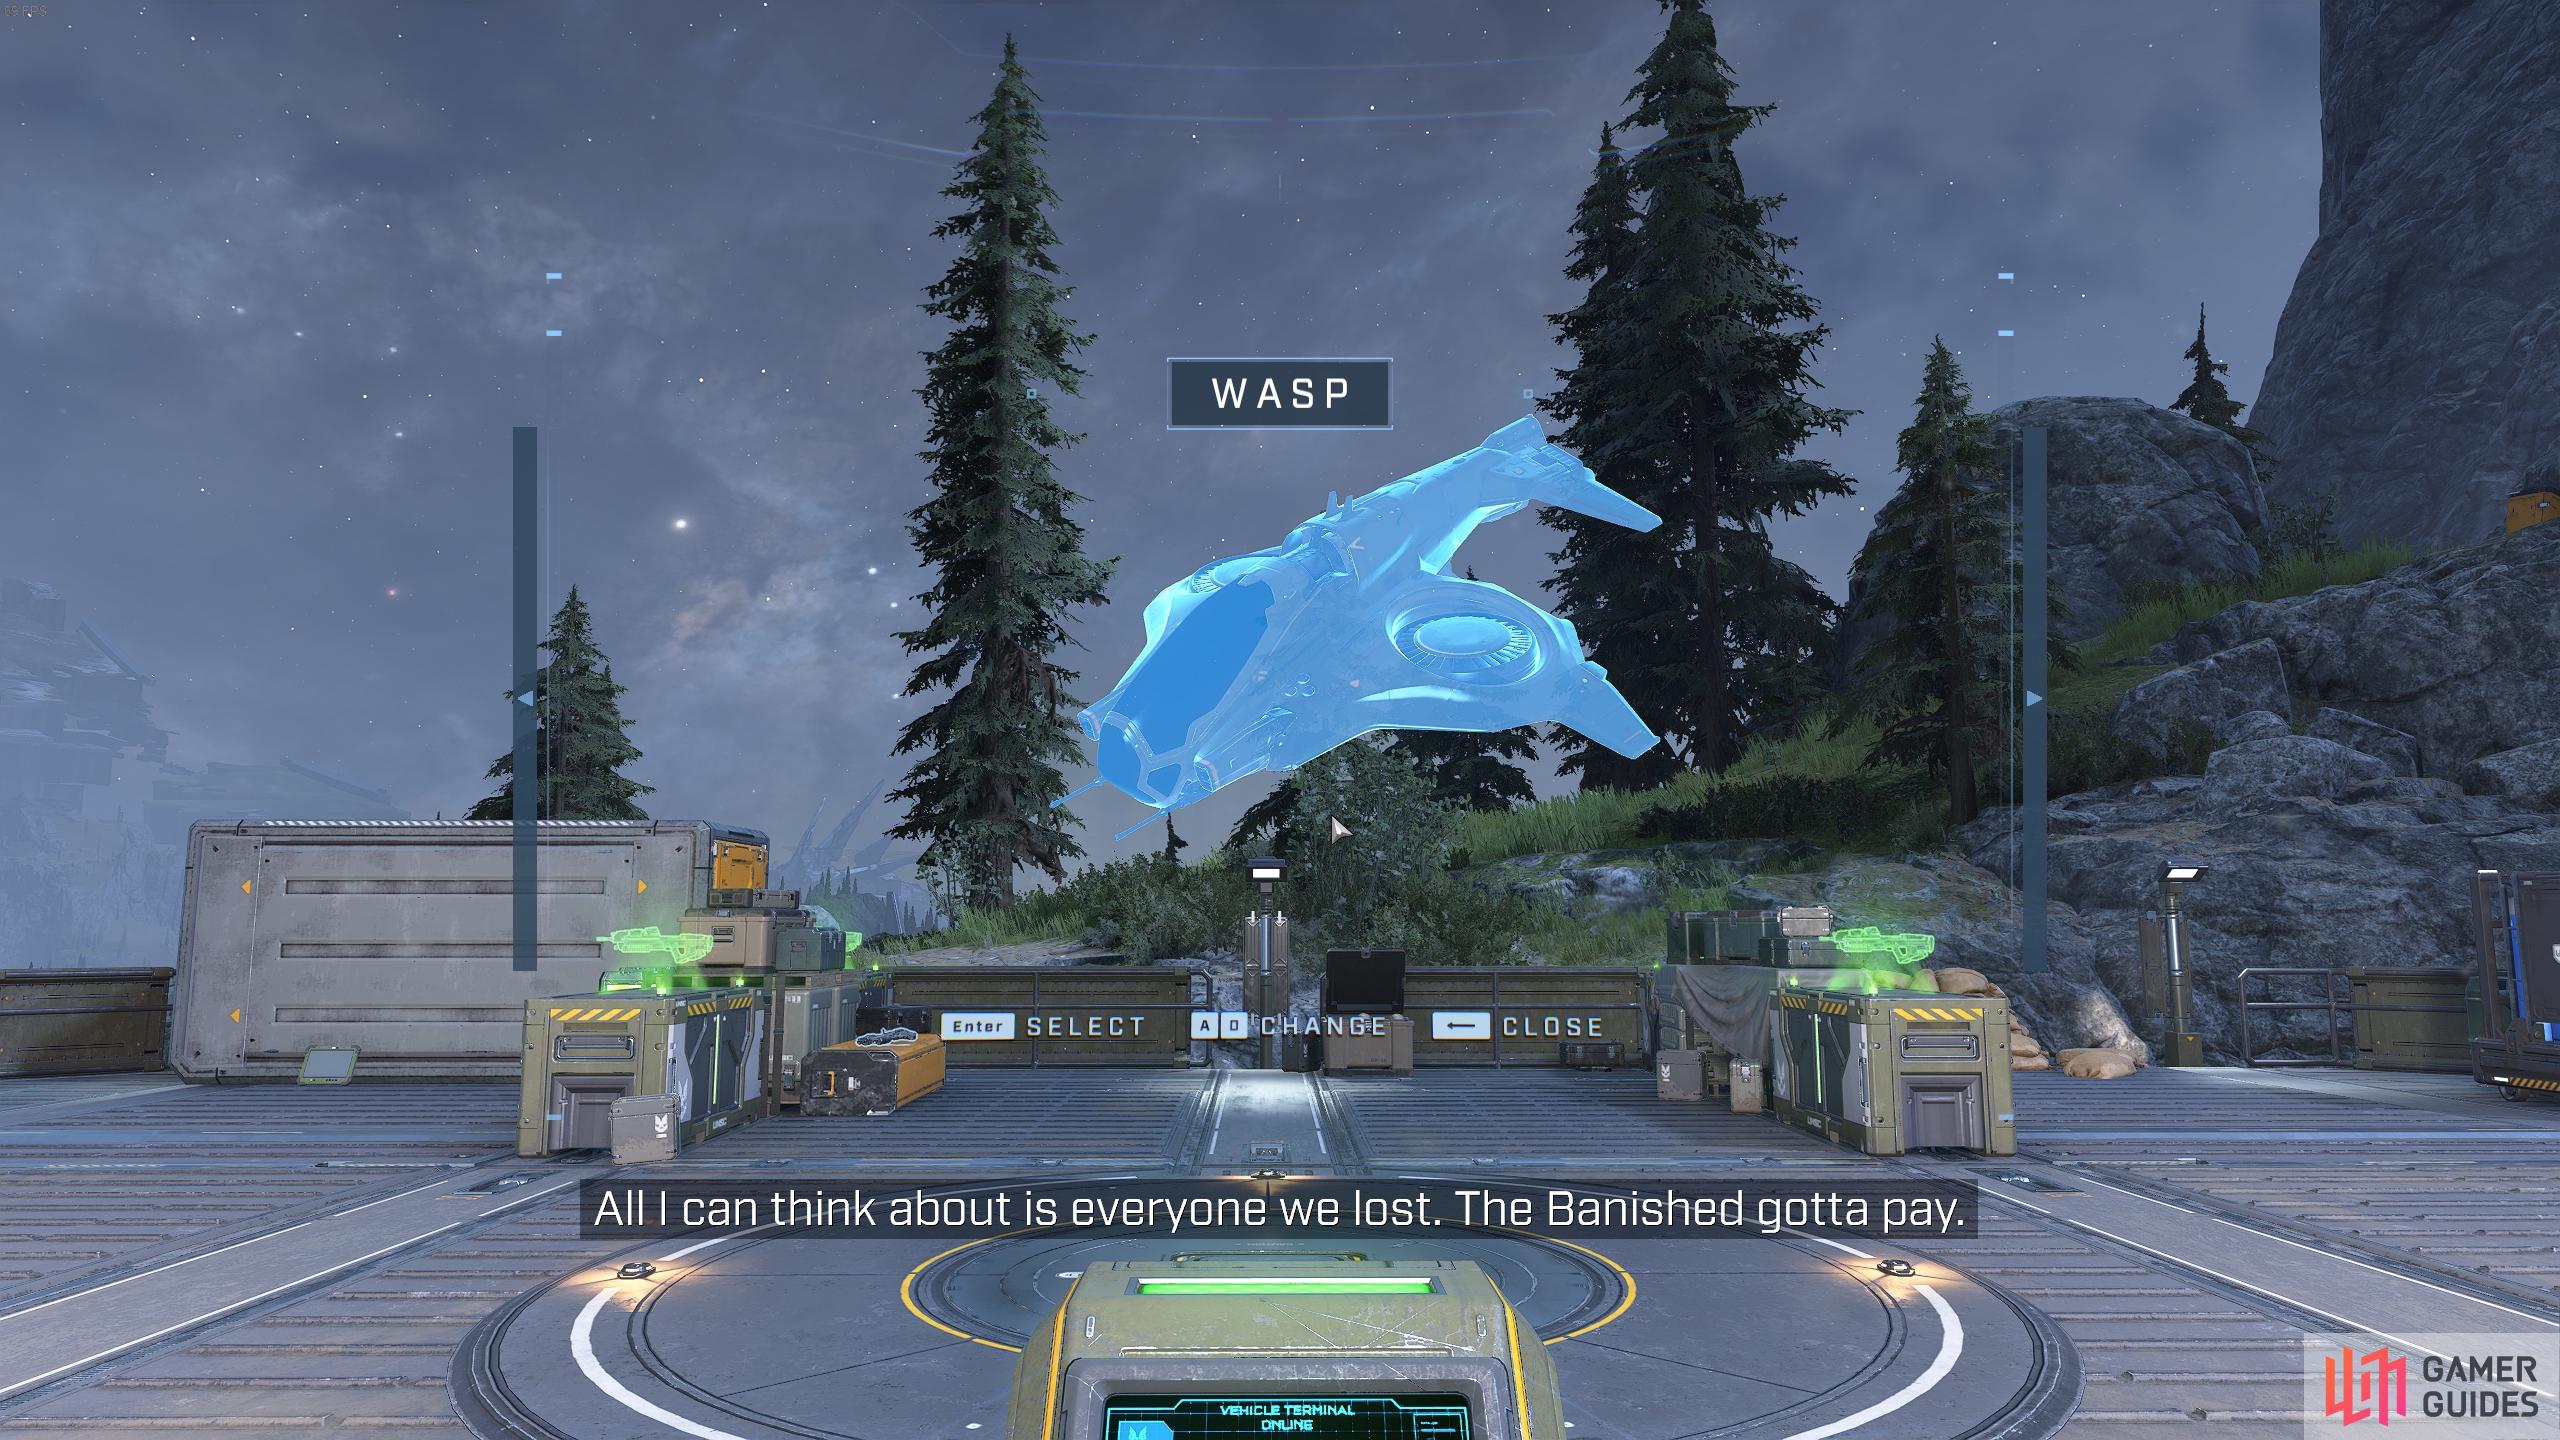
The location of the Catch Skull, on the island north of Outpost Tremonius. (left), You can summon a Wasp from a fob once you’ve acquired 2,600 Valor by completing objectives on the map. (right)
How to Reach the Catch Skull:
Famine Skull
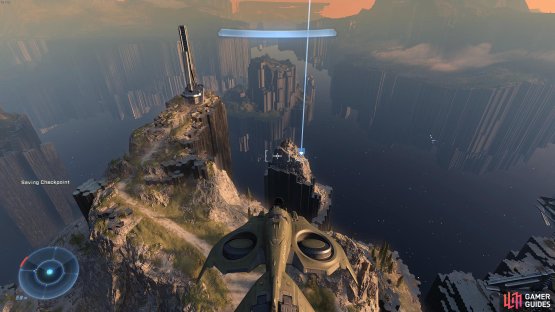
The Famine skull is another which you’ll find much easier to reach using a AV-49 Wasp or Banshee. This one is located on a small island near the southeasternmost point of the map, just south of the eastern beacon which you encounter during The Sequence, or northeast of the Command Spire. This is one of the easiest to reach with a flying vehicle, as shown in the gif below:
Famine Skull Location:

(1 of 2) The location of the Famine Skull, south of the eastern beacon.
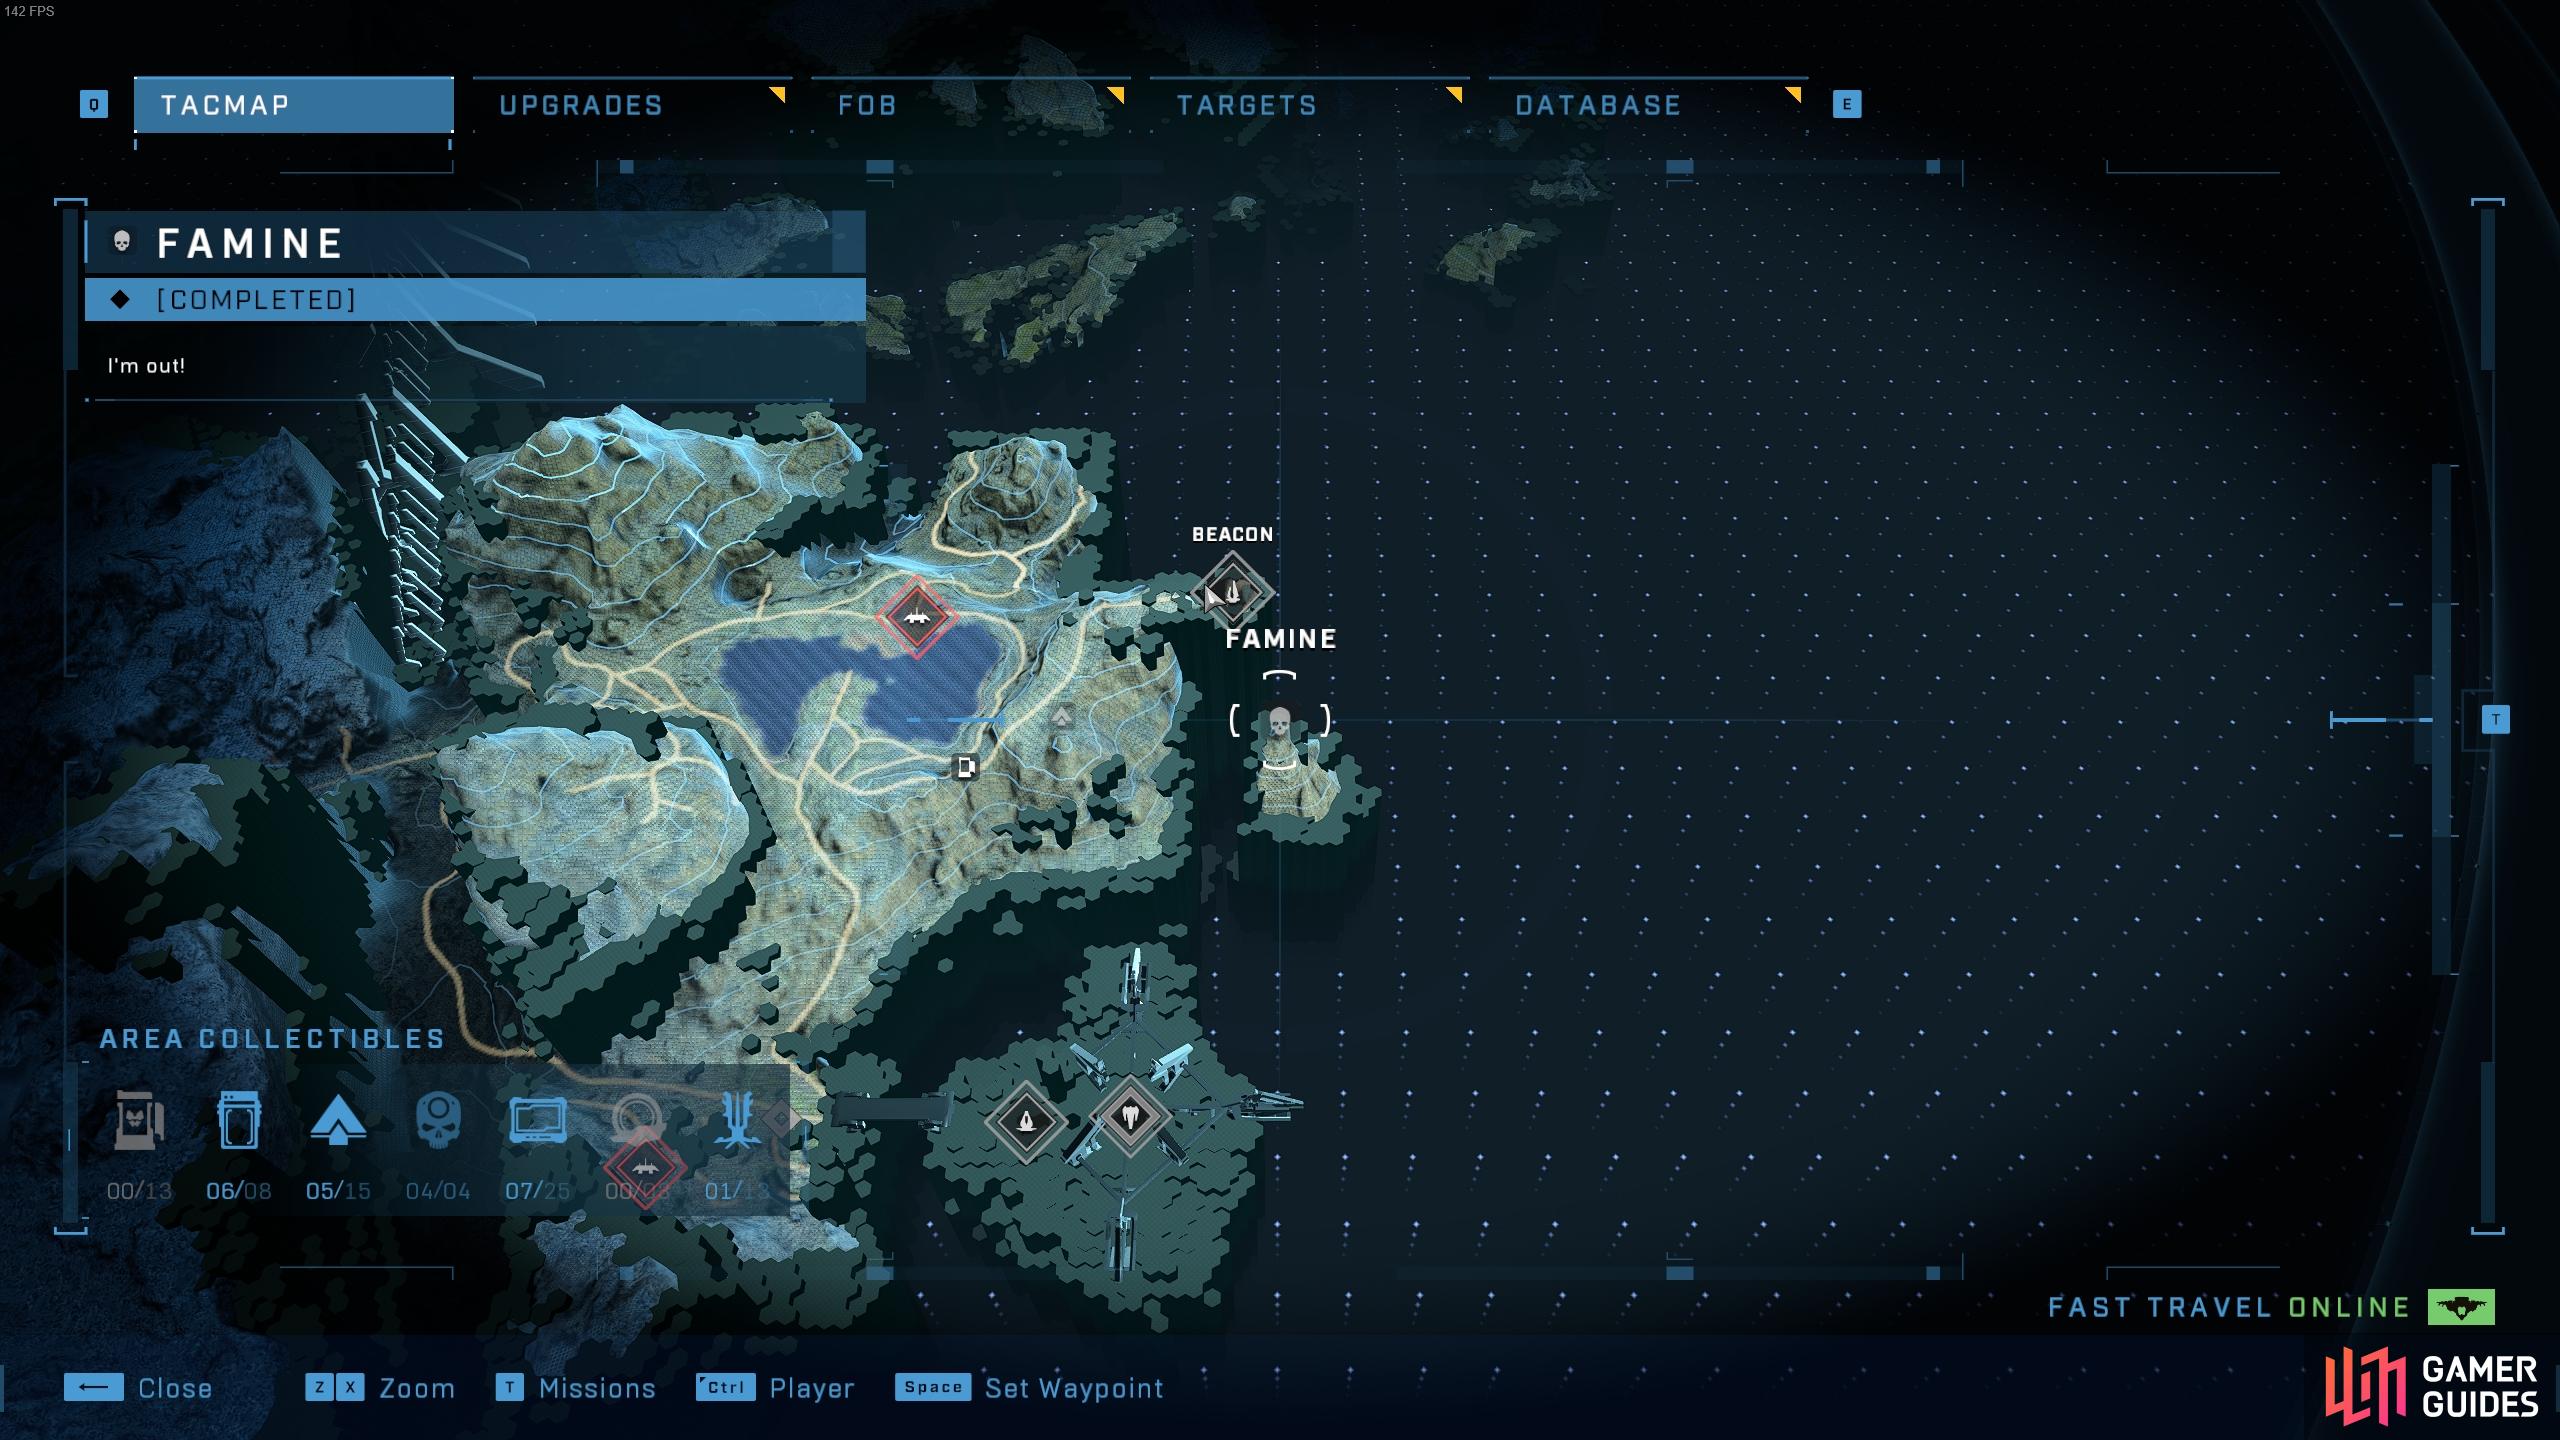

The location of the Famine Skull, south of the eastern beacon. (left), The Famine Skull is on a small island south of the beacon. (right)
No Comments