This page details how to play the Total Control game mode in Halo Infinite. Includes the basics of point scoring, how to play well with a team, and how to control all zones at the same time to score and win a round.
Total Control Match Conditions Overview
Big Team Battle Match Conditions
| No. of Players | Rounds to Win | Time Limit | Special Conditions |
|---|---|---|---|
| 12 vs 12 | 3 | 15:00 | Start with MA40 AR automatic rifle, friendly fire off, radar on |
Scoreboard Points for Total Control
| Defend Zone | Capture Zone |
|---|---|
| 25 Points | 50 Points |
How to Win a Total Control Match
The Total Control game mode is exclusive to Big Team Battle matches. The mode is similar to Strongholds in that you need to control three capture zones labelled A, B, and C. The difference here is that in order to score and win the round, you need to control all three at the same time. You don’t need to control the zones for a specific amount of time to score points, but instead you need to ensure that you have total control over all three zones, without any one of them being contested, in order to win the round. It can take quite a long time to achieve this, and some games of Total Control may end in a draw if neither time was ever able to capture all three zones at least once. The first team to capture all three zones three times wins the game. If neither team has captured three zones three times by the end of the time limit, the team with the most rounds won wins the game.
Don’t Linger Inside Zones
However tempting it may be, try not to stay within a zone for too long, whether you’re defending one or attempting to capture one. The main reason why you should avoid this is that the larger scale of battles in Big Team Battle games means that you can be taken out from any direction at any time with much more frequency. The best way to avoid this is to find positions where you can use map features to take cover, and only rush into a zone when there are enough of your own teammates in the area to make a good offensive. There will be exceptions to this when you find yourself in a zone with few enemies around, so you can try to take it sneakily in these scenarios.
In general, zones will have few defensive features that you can use to your advantage. Worse still, any zone will have a fairly constant flow of grenades and other AoE (Area of Effect) damage ammunition being thrown at it. This will make it a death pit for anyone who lingers too long in a zone. If you aren’t able to capture a zone after trying for a good length of time, there’s no shame in briefly retreating while you wait for reinforcements. Staying in a zone when you’re outnumbered will almost always result in your death, which hinders the chances of the rest of your team making a successful push with fewer players in the area to back them up.
Defend Zones From Afar
Once you’ve captured a zone, you’ll find it much easier to defend from a position outside of the zone area. This is because most enemies will see a zone without any players in it and think that it’s free to capture, so they’re likely to let their guard down for a bit. If you’re waiting in a good defensive position on top of a nearby rock or behind some constructed platforms, you can take the enemy by surprise when they least expect it, especially if you’re in a good group of four people with decent voice communication. The key to defending a zone is not being close enough to it so that the enemy can see you on their radar. You’ll want to find a position which far enough away so that they won’t be able to detect you when you launch a defensive, so try not to wait too close around the boundaries of a zone.
One of the most effective ways to defend a zone from a position outside of it is to pick up the S7 Sniper Rifle and wait for enemies to sit still within the zone. If you try to pick them off as they’re running into the zone, you’ll find it much more difficult if your aiming skills aren’t the best. Most enemies will try to find a position within a zone where they think they’re safe from incoming fire, but the lack of map features to hide behind within zones will make that difficult for everyone. Wait for the enemy to assume, they’re safe, then pick them off with headshots when you can. If you have good aiming skills you’ll be even more effective in this role, and you can defend a zone by yourself if the S7 Sniper is used effectively in this way. Another option would be to use a high damage AoE weapon such as the M41 SPNKR rocket launcher.
Rather than rush into zones, try to clear them of enemies from afar by using map features such as rocks, then occupy the zone with allies:
Focus on Localized Teamwork
If you’re playing alone in any Big Team Battle, you’ll find the experience much more chaotic than regular 4 vs 4 game modes, and most of the time you’re going to be vulnerable to groups of other players sweeping in and taking you out in a flash. Even if you’re part of a good group of four players in a fire team, you still need to rely on the other eight players to be reasonably organised. In the random assignment that comes with Big Team Battle games, your chances of creating a full 12-player organised defence or offensive will be low. In any case, this isn’t necessarily the best strategy. You want different groups of players fighting in different parts of the map, to keep the enemy distracted or bogged down while the others capture zones or muster a defence.
Although you’re unlikely to have an entire team of 12 who can be well organised in Big Team Battles, you can still rely on your own fire team of 4 if you’re playing with people that you know. This is where Big Team Battles become the most fun, since you can get a feel of what your team of 12 are good at, and where their weaknesses might be. Some teams of 12 will be effective in mounting an offensive, but they might lack in defence, or vice versa. Your task as a team of 4 is then to identify what the team as a whole is lacking, and try to patch that weakness. So, for example: if you find that your team is able to capture zones quickly, but they lose the zones to the enemy soon after, you might want to consider finding a good position on the map where you can rotate between two zones and defend both effectively, allowing the rest of the team to focus on the offensive for the last zone. This kind of localized teamwork can make a big difference in an otherwise chaotic game.
Use Vehicles and Power Items
As ever, power weapons and equipment will be important items for you to control, often giving you an advantage which can turn the tide of battle in your favour. The spawn points for these will be different for each map, but you can learn about each from our Maps section. You’ll find that most spawn points for power equipment are exposed in parts of the map where you can be seen from all angles, while power weapons are scattered around and usually found in more enclosed spaces. The more you learn about the map, the more prepared you’ll be to take these powerful items before your opponents. Defensive power equipment such as the Overshield and Wall Drop have obvious uses in Total Control matches, but you’ll also find that items such as the Repulsor and Active Camo can be extremely effecitive, both when defending zones and capturing them.
In Big Team Battles you’ll encounter a lot more vehicles throughout the game, and the rate at which the vehicles are spawned will increase the longer that the match goes on. If you don’t know how to use vehicles competently they can actually be a hindrance to your chances of survival. The moment you step into a vehicle you’ll become a target for all your enemies, and you’ll be much more visible throughout the map. With that said, there’s only one way to improve your skills in effectively controlling a vehicle, so it’s worth trying to see whether you could potentially enjoy it at least. Many of the vehicles have powerful weapons which can be used to destroy a group of enemies quickly, but they can also be used (especially the larger ones such as Wraith Tanks) to smash through enemy lines and plunge their defence into chaos.
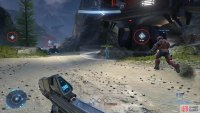
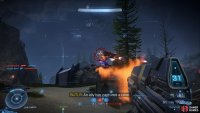
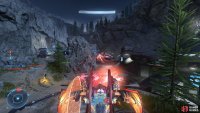
(1 of 3) Keep an eye on map icons throughout a match to see when zones are being captured.


No Comments