
This page details an overview of all power items / equipment in Halo Infinite Multiplayer. Includes where to find them and how to use the Overshield, Active Camo, Drop Wall, Grappleshot, Thruster, Repulsor, and Threat Sensor.
All Power Items in Halo Infinite Multiplayer
There are currently seven different pieces of power equipment available in Halo Infinite Multiplayer, some of which will be familiar to Halo veterans and all of which have their uses in competitive play, capable of turning the tide of a match in your favour if you can get your hands on them. We’ll cover each power item below with a brief description of what they are, how to find them, and some tips on how to use them.
Overshield
The Overshield is one of the most powerful pieces of equipment, since it effectively doubles the effectiveness of your defence, acting as a second shield while it’s active. This will make you twice as tough to kill, which can be invaluable in terms of giving you that extra time to deal with a group of enemies.
Aside from at the beginning of a fight, you can also use the Overshield to replace your regular shield if it has just been depleted, leaving you vulnerable to a one-hit kill. The best time to do this is while you briefly run from the enemy before turning around to surprise them, since the activation animation is somewhat slow, and you could be killed during the time that it takes to activate.
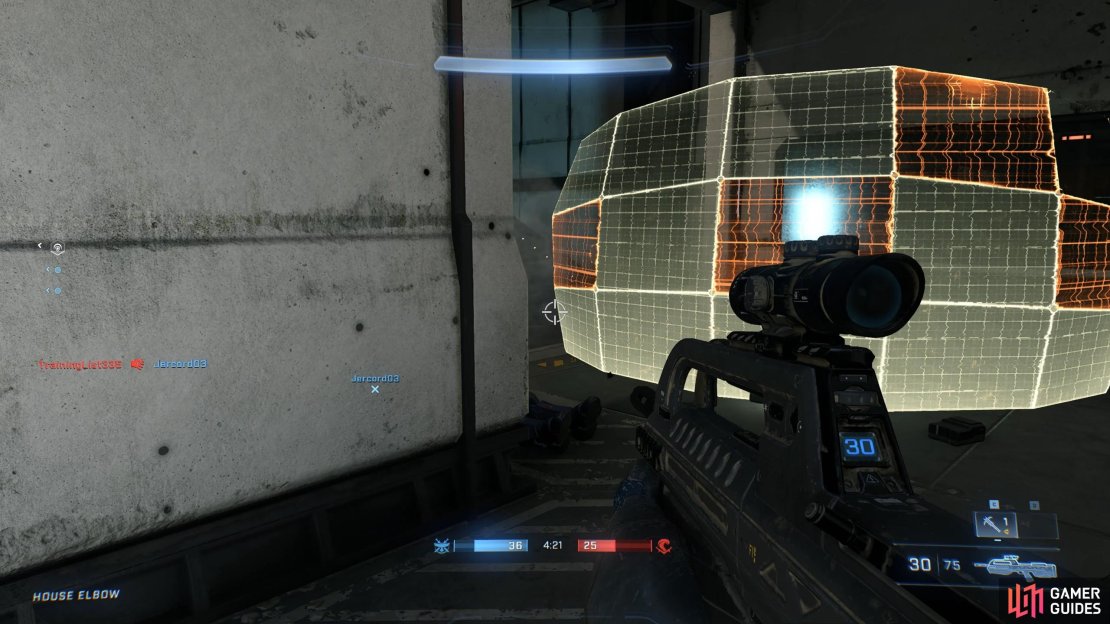
Active Camo
The Active Camo power effectively makes you almost entirely invisible for 30 seconds. However, there are some actions that you can take which will cause you to instantly become visible again. This will happen if you begin to sprint, fire a weapon, throw a grenade, or use a melee attack. So long as you move normally and you time your attacks well, the Active Camo can allow you to take out a group of enemies quickly. You can enter a fight by flanking groups of enemies without being seen, allowing you to choose the right moment to attack with a power weapon or a series of grenades. Alternatively, you can wait in the shadows until enemies are weakened to the point where one melee attack will kill them.
The only limiting factor of the Active Camo power is the timer. You may find yourself using it in a situation where no enemies are nearby, so you’ll effectively waste the use. You’ll need to learn when to use it most effectively for specific game modes. One of the most effective ways you can use Active Camo is during Stronghold matches. Here you can wait on a captured position to defend it, and use the Active Camo when enemies are approaching. In this context you’ll have the advantage and you can take the enemy by surprise with powerful melee attacks or by lining up your shot to hit two enemies at once.
An example of Active Camo being used to distract and surprise the enemy:
Drop Wall
The Drop Wall is a useful piece of defensive power equipment, allowing you to provide an extra layer of defence to a choke point in an instant. The wall consists of 15 individual shields which are connected, and each one can be destroyed in just a few hits, so you’ll need to move around the shield if you want to take full advantage of it. The shield is particularly useful in tight spaces that you’re trying to defend, but it can also be used in a regular one-on-one fight with an opponent, allowing you to shoot through it without damaging the shield elements, but still protecting you from the other side.
The shield is useful for general defence, but it can also be used to protect key features of a specific game mode. For example, during Capture the Flag there will be times when you need to stay in the circle which surrounds a flag for a number of seconds in order to return it back to the original spawn point. You’ll be a target of enemy fire during this time, so the shield can buy you those few extra valuable moments to make sure that you get the shield home. Similarly, the shield can be used towards the end of an Oddball game if you or your ally needs to hold onto it for just a few extra seconds in order to win the round. In a close game, the extra layer of defence can make all the difference.
Grappleshot
The Grappleshot is primarily useful to quickly navigate a map and outmaneuver your opponents. You’ll be able to latch onto pretty much any surface including walls, ceilings, and ground surfaces, so long as you’re in range. This can allow you to escape a sticky situation if you’re outnumbered, or reach a group of allies in need of help. However, there are other uses for the Grappleshot which aren’t immediately obvious. For example: you can actually use the Grappleshot to latch onto enemy bodies, quickly launching you towards them so that you can execute a deadly melee attack. In addition, you can use the Grappleshot to bring weapons to you from a distance, whether they’re on a power weapon spawn point or just lying on the ground. In this way you can quickly steal a power weapon from the enemy if they’re close to picking it up.


(1 of 3) You should try to reach power items just before they spawn to ensure that you get your hands on them before the enemy.
If you use the Grappleshot on a vehicle, you will automatically enter it depending on where you aim. If you aim for the driver seat, you’ll automatically jump into it and take control of the vehicle, assuming it’s empty. If you aim for a gunner seat or stance, you’ll automatically gain control of the gun. In terms of specific game mode uses of the Grappleshot, you can actually use it to pull a flag towards you during a Capture the Flag match. However, you can only do this once the flag is out of its starting position, so the window of time that you’ll have to make use of it is limited. It’s particularly useful if you’re right next to your own flag spawn and you need to quickly capture the flag as enemies are running towards it. The same applies to Oddball: using the Grappleshot on the ball will pull it towards you and into your hands.
Thruster
The Thruster does what you might expect: it thrusts you into a specific direction when you use it. It’s useful to know that the Thruster only works horizontally, so you won’t be able to thrust vertically. The Thruster is arguably the weakest of all the power items, since its use is limited and it may even be a hindrance in some situations where you’re stuck in the animation. However, it can be particularly useful to quickly escape a grenade that has been thrown next to you, a rocket that has been fired from a decent range, or to get inside the circle of a flag which is about to be returned to the enemy spawn point. You can also use the Thruster to quickly get in melee range of an enemy to finish them off.
Below is an example of the Thruster being used to quickly reach an enemy within melee range:
Repulsor
The Repulsor is a fairly simple power item which does what it says on the tin: allows you to repel things away from you with a blast of energy. Although the concept is simple, the item can be used in a number of useful ways which makes it one of the more versatile options. The most obvious use of the Repulsor is to blast enemies away from you, especially if they’re about to finish you off with a melee attack. This can give you enough time to make an escape or retaliate with a quick burst of fire or grenade throw. Speaking of grenades: you can use the Repulsor to push grenades away from you if you’re fast enough in reacting before they explode. This will often cause the grenade to explode near the enemy that has thrown it. The same applies to other projectiles such as rockets.
Aside from repelling attacks, the Repulsor can also be used to navigate the map more effectively. If you face down at the ground and use the Repulsor, it will propel you upwards and allow you to jump higher than you’d normally be able to. This can be useful to reach enemies with the high ground, escape overwhelming odds, or reach an important item such as a flag in Capture the Flag or the ball in Oddball. In terms of other game mode-related uses, you can actually use the Repulsor to blast the ball away during an Oddball game. This can be useful to deny the enemy from capturing the ball if you’re about to die, or alternatively to pass the ball to an ally who might be in a better position to hold onto it.
In terms of other game mode uses, the Repulsor can potentially be used to propel a bunch of power seeds during the Big Team Battle Stockpile game mode. However, with so many seeds heading in the same direction at the same time, you’re going to need a good defence from allies and you should be ready to fight off any attackers as they come, rather than get lost in moving the seeds.
An example of the Repulsor being used to deflect a rocket:
Threat Sensor
The Threat Sensor is used as a projectile which you can fire onto surfaces, giving you the ability to see if there are any enemies behind the walls in the area. The sensor pulsates in a radius for roughly 5 seconds, and any enemies within the radius will be visible to you, regardless of what they’re hiding behind. The enemy will need to come within the radius to be seen by the sensor initially, but they will remain detected for a few moments even after they leave it.
As with the Spike Grenade and Plasma Grenade, you can fire the Threat Sensor onto an enemy body and it will stick to them for the duration that it lasts. This can be useful to track a group of enemies when they’re moving together, or if you need to track a specific enemy who might be wielding a powerful weapon, such as the rocket launcher.
No Comments