
The Armorcharm is arguably one of the most important items outside your weapon and armor, and it’s no different in Monster Hunter Wilds. This time, you won’t craft the defense-buffing item like the previous games, but you’ll need to complete a side quest instead. Read on to find out when and how you can acquire the Armorcharm.
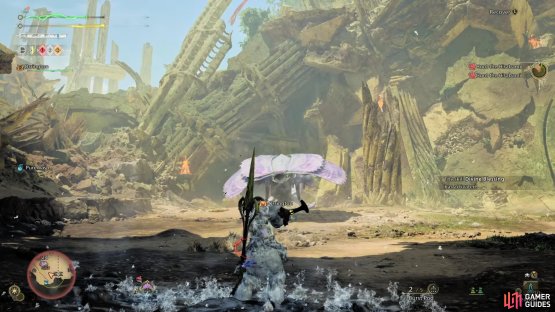
Wounded Hollow is the arena in Wilds.
Table of Contents
If you want to jump to a specific section, click on the links below.
Quest Start
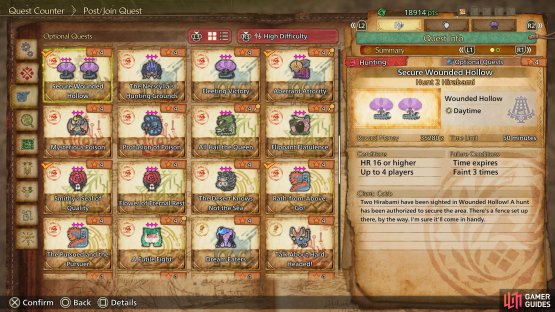
To get the Armorcharm, you’ll need to complete the Secure Wounded Hollow quest and to start this, you’ll need to have completed the story mission, 4-2, Lurking Shadows, which is available at Hunter Rank 15. Once you’ve met these conditions, make your way to Suja, Peaks of Accord, and find Cobb, who should be outside your Base Camp. Speak to him to find out that two Hirabami have been spotted in Wounded Hollow, and that he’d like you to take care of them for him. This will be added as an optional quest called “Secure Wounded Hollow”, which can be accepted by speaking to Alma, selecting “Optional Quests” and locating the mission.
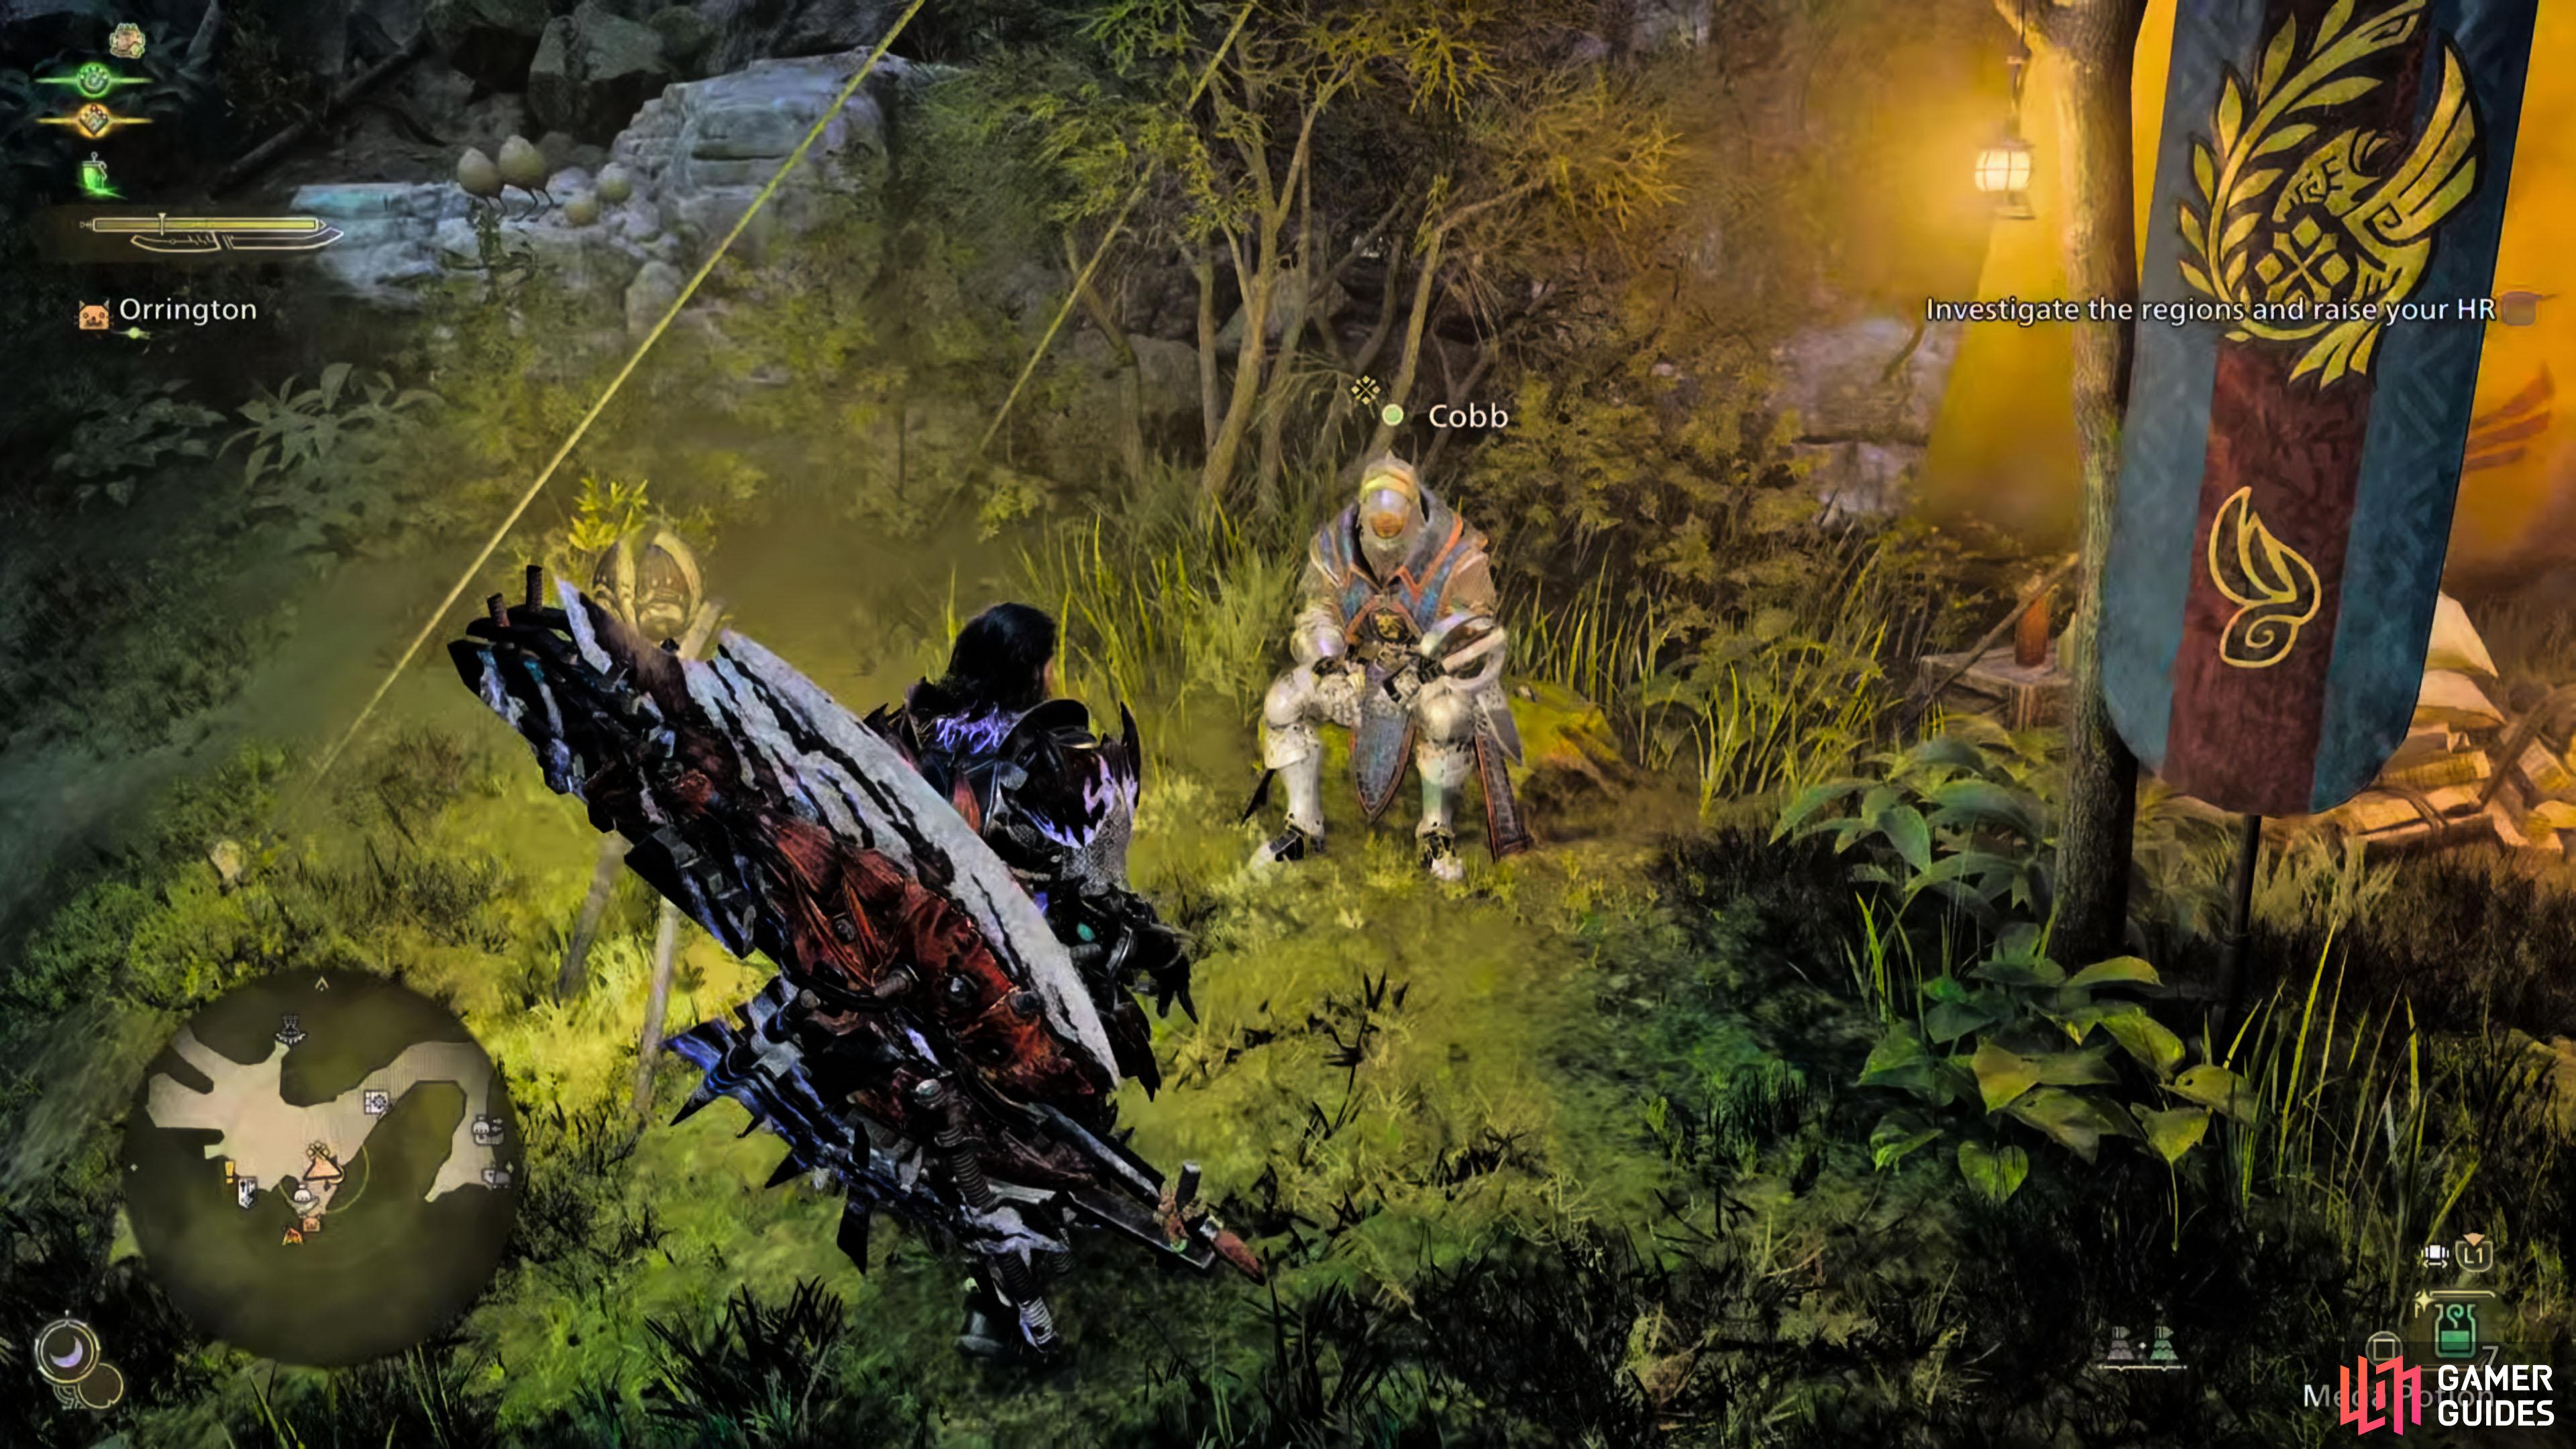
(1 of 2) To start the quest, speak to Cobb in Suja.
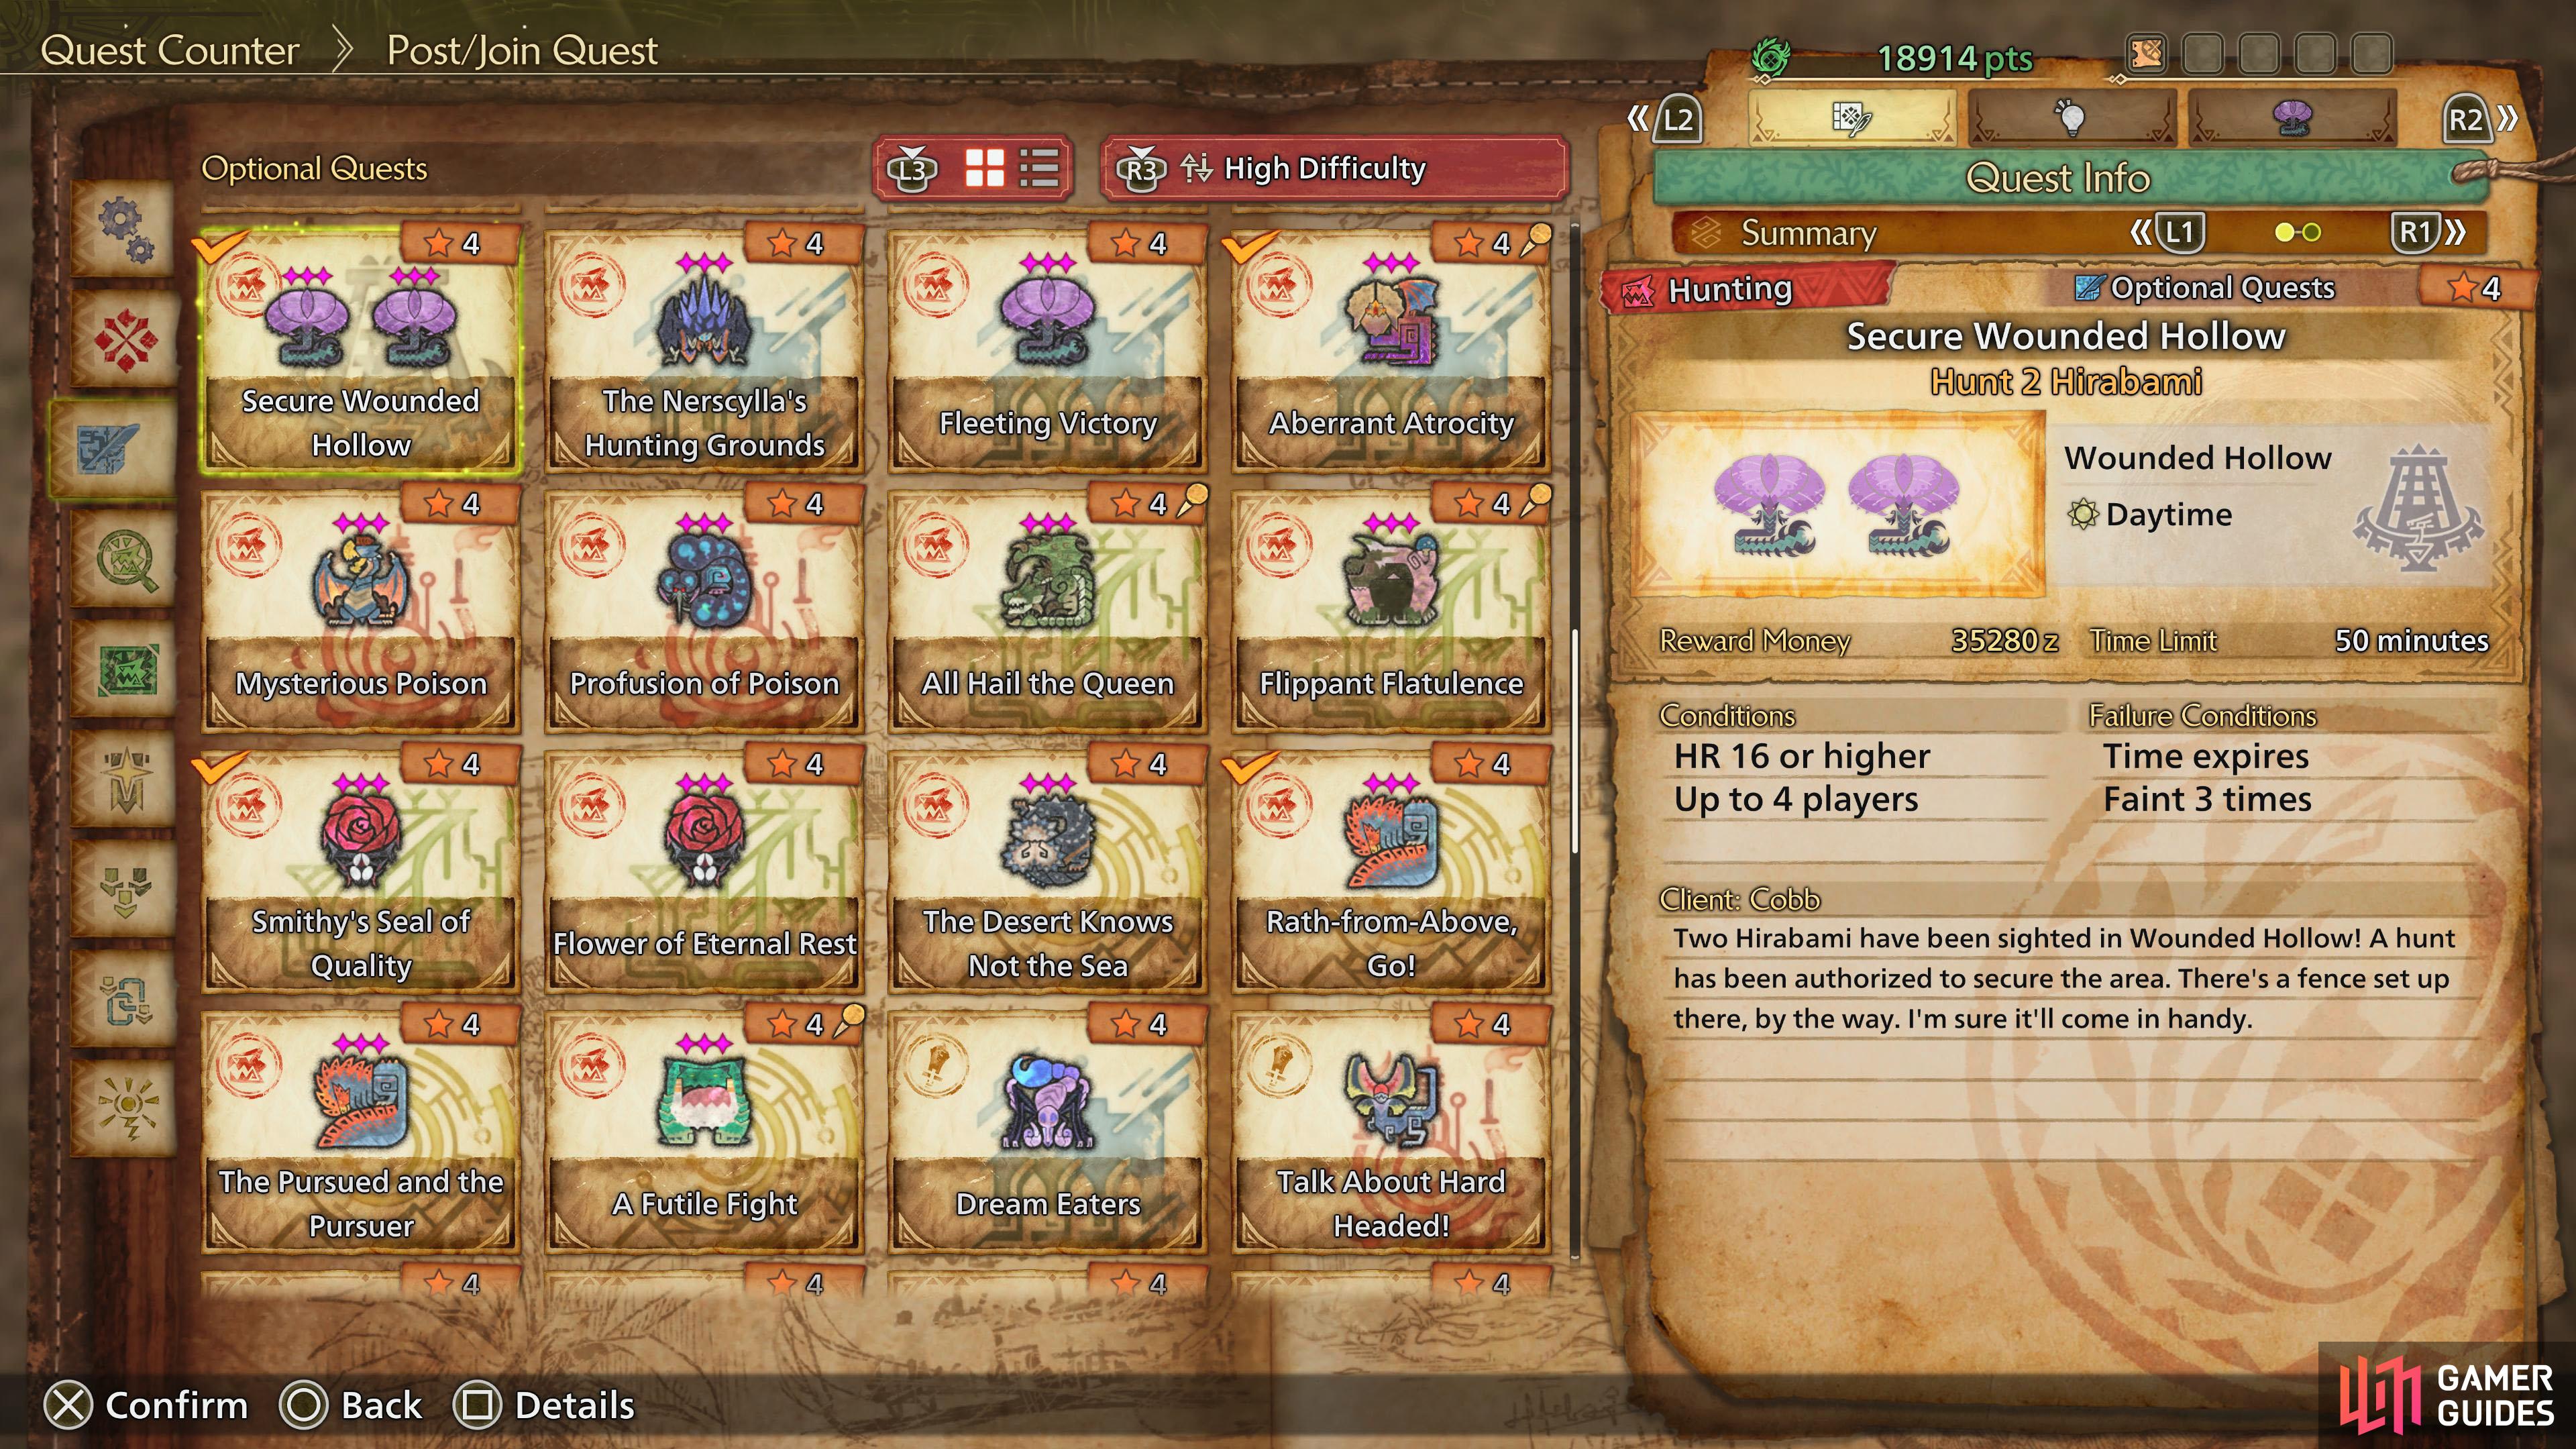
To start the quest, speak to Cobb in Suja. (left), Accept the Optional Quest from Alma to begin. (right)
Defeat Two Hiribami’s
Wounded Hollow is the arena in Monster Hunter Wilds, and it comes with everything you’d expect to see in it, including a large fence in the center of the stage that can be used to separate the monsters, allowing you to tackle one at a time. Before you set off on the quest, make sure you prepare beforehand by stocking up on your Potions and Mega Potions, as well as eating a hearty meal.
Hirabami Guide
Hirabami are Leviathan-type monsters that have sharp pincer-like tails and peculiar membranes that allow them to stay upright. The most difficult part of fighting Hirabami’s is reaching their mouth, which is where you’ll find their weak point. Unfortunately, this leaves you only having access to their tails for most of the fight, which is where their most dangerous attacks come from. They are weak to both Fire and Thunder and susceptible to most status ailments, with Poison and Sleep leading the way.


(1 of 2) Hirabami’s most dangerous attack is its icicle attack, as it can root you in place.
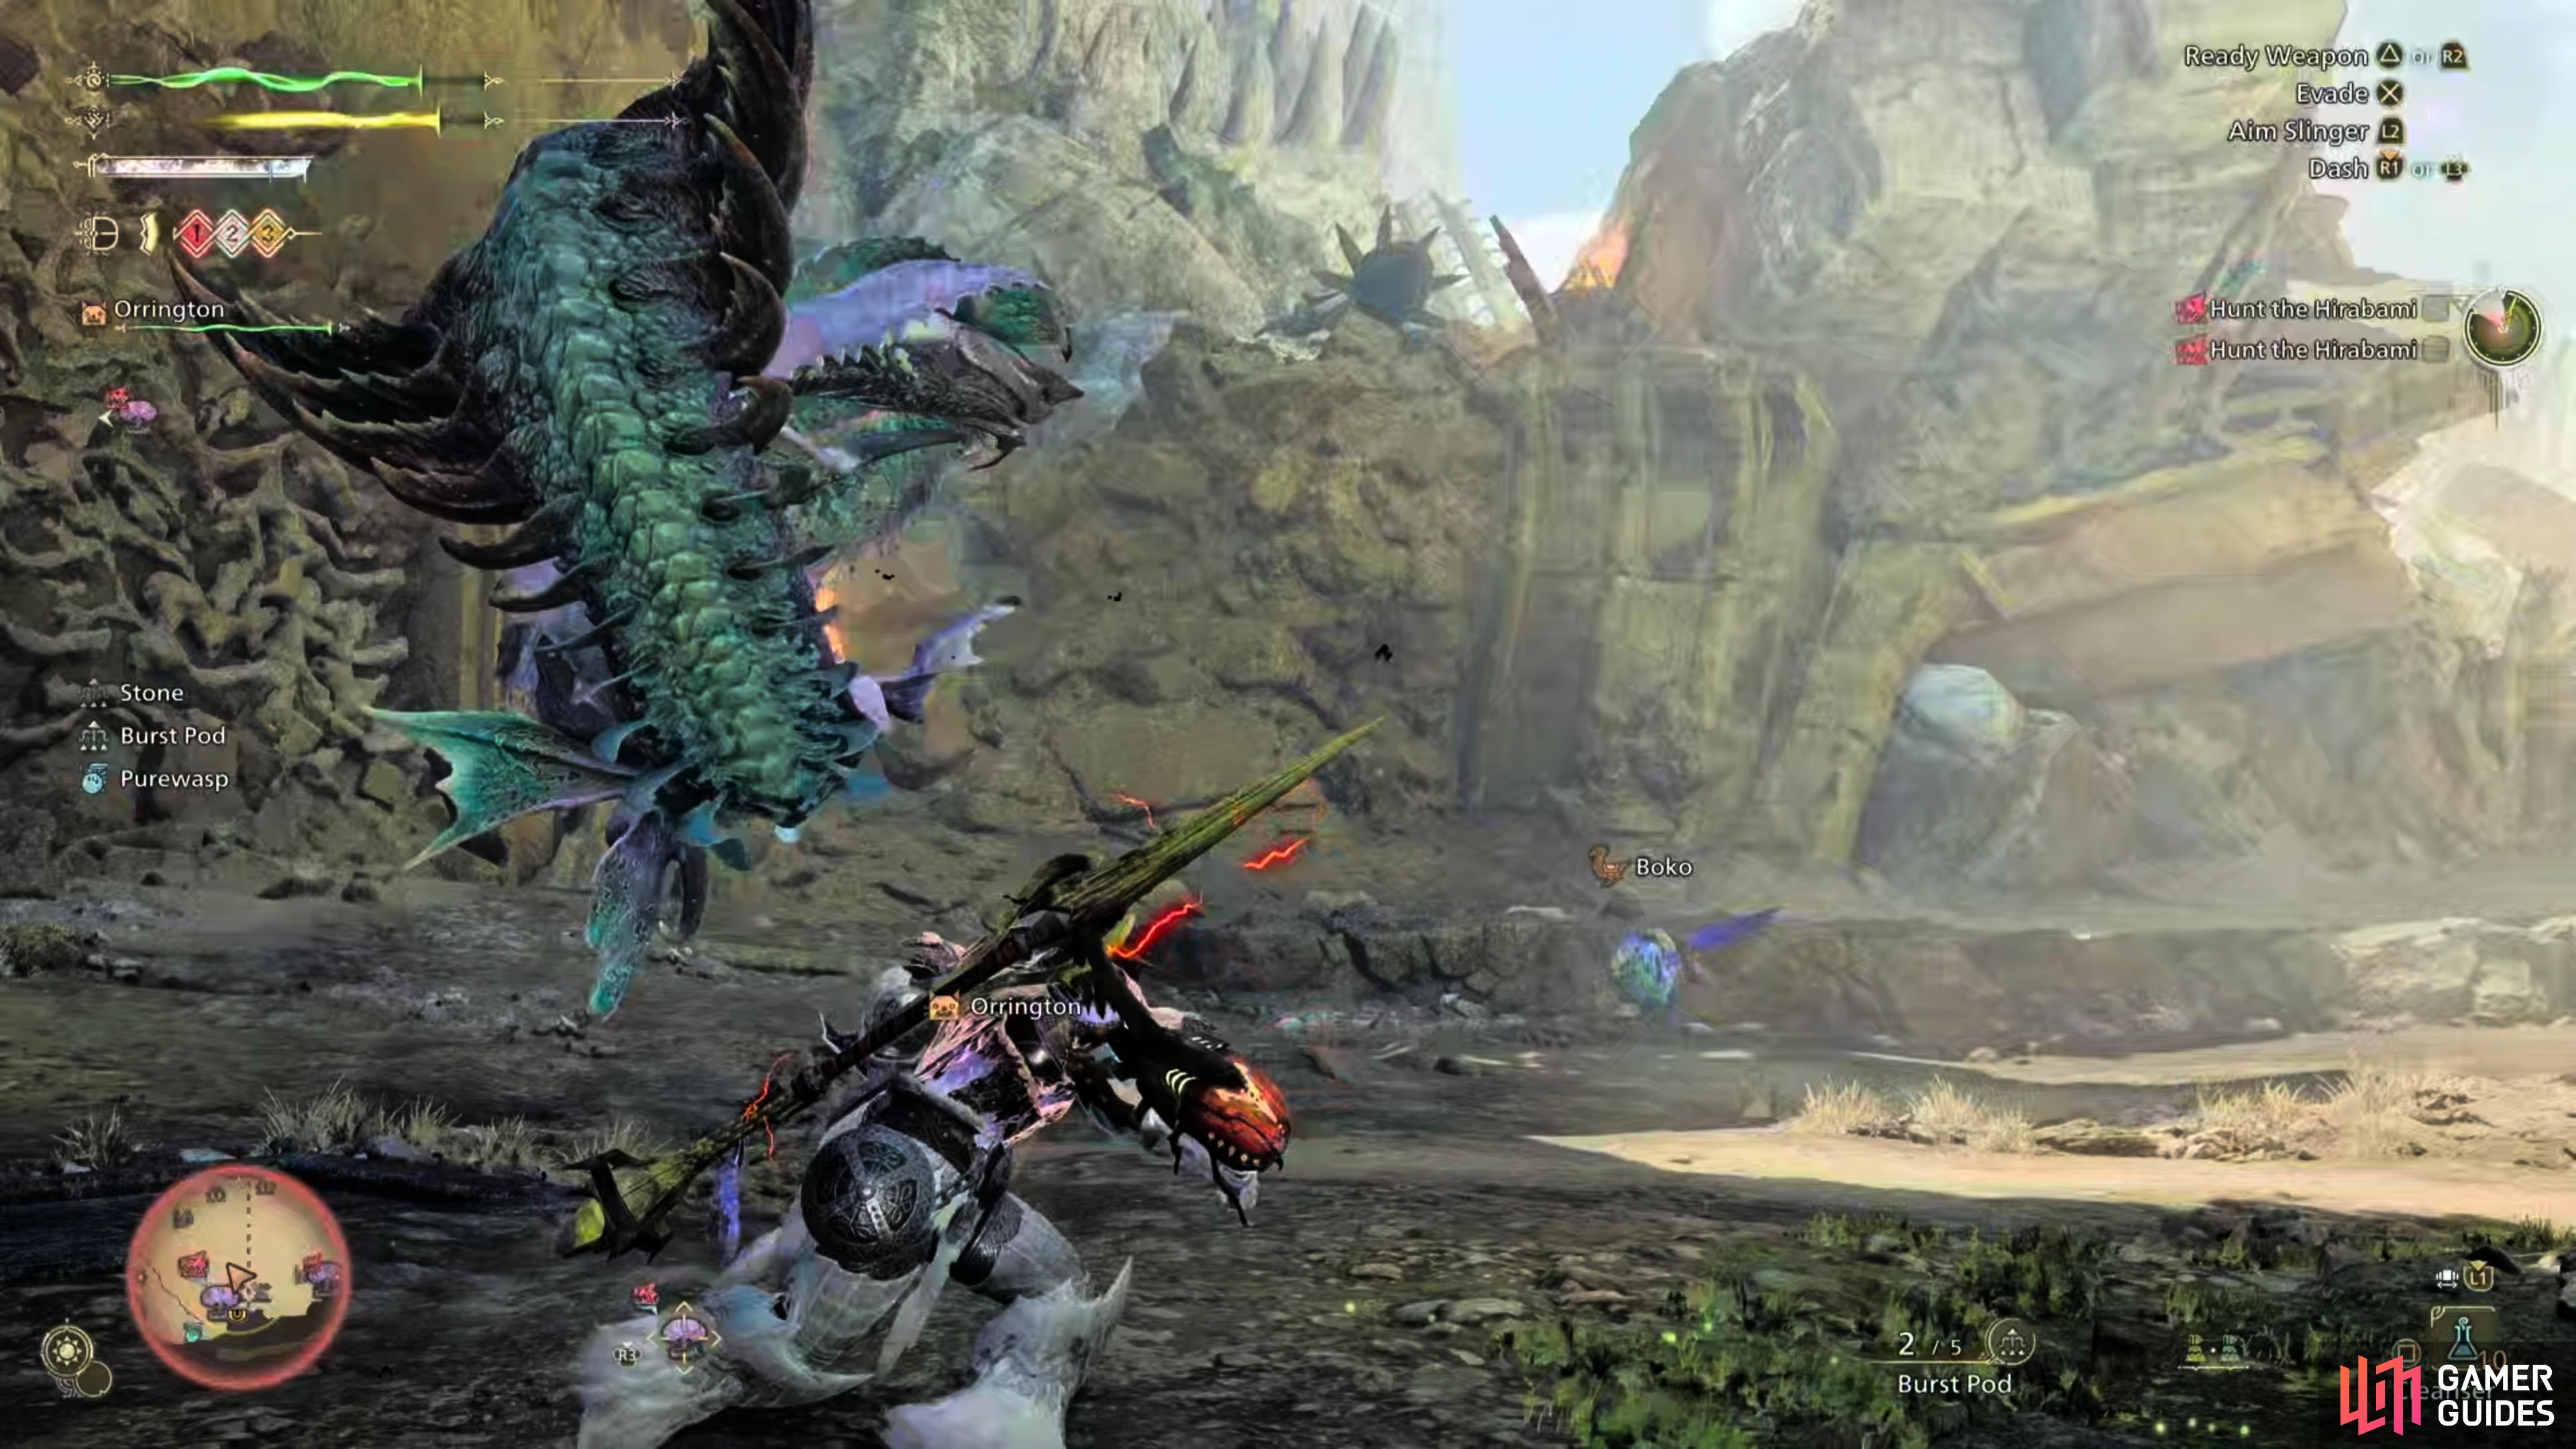
Hirabami’s most dangerous attack is its icicle attack, as it can root you in place. (left), This is normally followed-up with slamming its tail at you. (right)
Hirabami Weaknesses and Breakable Parts
| Body Part | Cut | Blunt | Ammo | Fire | Water | Thunder | Ice | Dragon |
|---|---|---|---|---|---|---|---|---|
| Head |  |
 |
|
 |
 |
|
 |
|
| Neck | |
|
|
|
|
|
|
|
| Torso | |
|
|
|
|
|
|
|
| Left Foreleg | |
|
|
|
|
|
|
|
| Right Foreleg | |
|
|
|
|
|
|
|
| Left Hindleg | |
|
|
|
|
|
|
|
| Right Hindleg | |
|
|
|
|
|
|
|
| Tail | |
|
|
|
|
|
|
|
Hirabami Status Resistances
As for status effects, Hirabami is vulnerable to Poison and Sleep and moderately weak to the others.
| Status Effect | Effectiveness |
|---|---|
| Poison | |
| Sleep | |
| Paralysis | |
| Blastblight | |
| Stun | |
| Exhaust | |
Hirabami Item Resistances
The Hirabami is vulnerable to several items, including the Flash Pod, Shock Trap and Pitfall Trap. Sonic Bombs are ineffective against this leviathan.
| Items | Effectiveness |
|---|---|
| Flash Pod | |
| Sonic Bomb | |
| Shock Trap | |
| Pitfall Trap |
Special Attacks
| Special Attacks |
|---|
| Weak Roar |
Frostblight  |
Hirabami Strategy
The easiest way to take out the Hirabami’s is to use ranged weapons such as the Light Bowgun, Heavy Bowgun, and the Bow, preferably with either Fire or Thunder Ammo. The reason for this is that the Hirabami’s mouths are difficult to reach with most melee weapons, and that’s their weak point.
If you wanted to go melee, the Insect Glaive would be your best bet, as that can vault up to reach the weak point. Although these are the best methods to fight the monster, you can take out the Hirabami’s with relative ease with any other weapon, but the aforementioned weapons above will make the hunt quicker.
When you enter Wounded Hollow, you’ll be at camp. Walk forward and jump off the ledge to find both Hirabami’s below. What you want to do is to separate the pair, but you’ll need to wait around ten seconds or so before you can interact with the fence in the center.
To use the fence, target the lever with your slinger hook, and pull it again to release the fence. This will split the battlefield into two, ideally with a Hirabami on the other side. If they don’t leave each other alone, fire some slinger ammo at one, and then pull the lever as soon as one crosses.
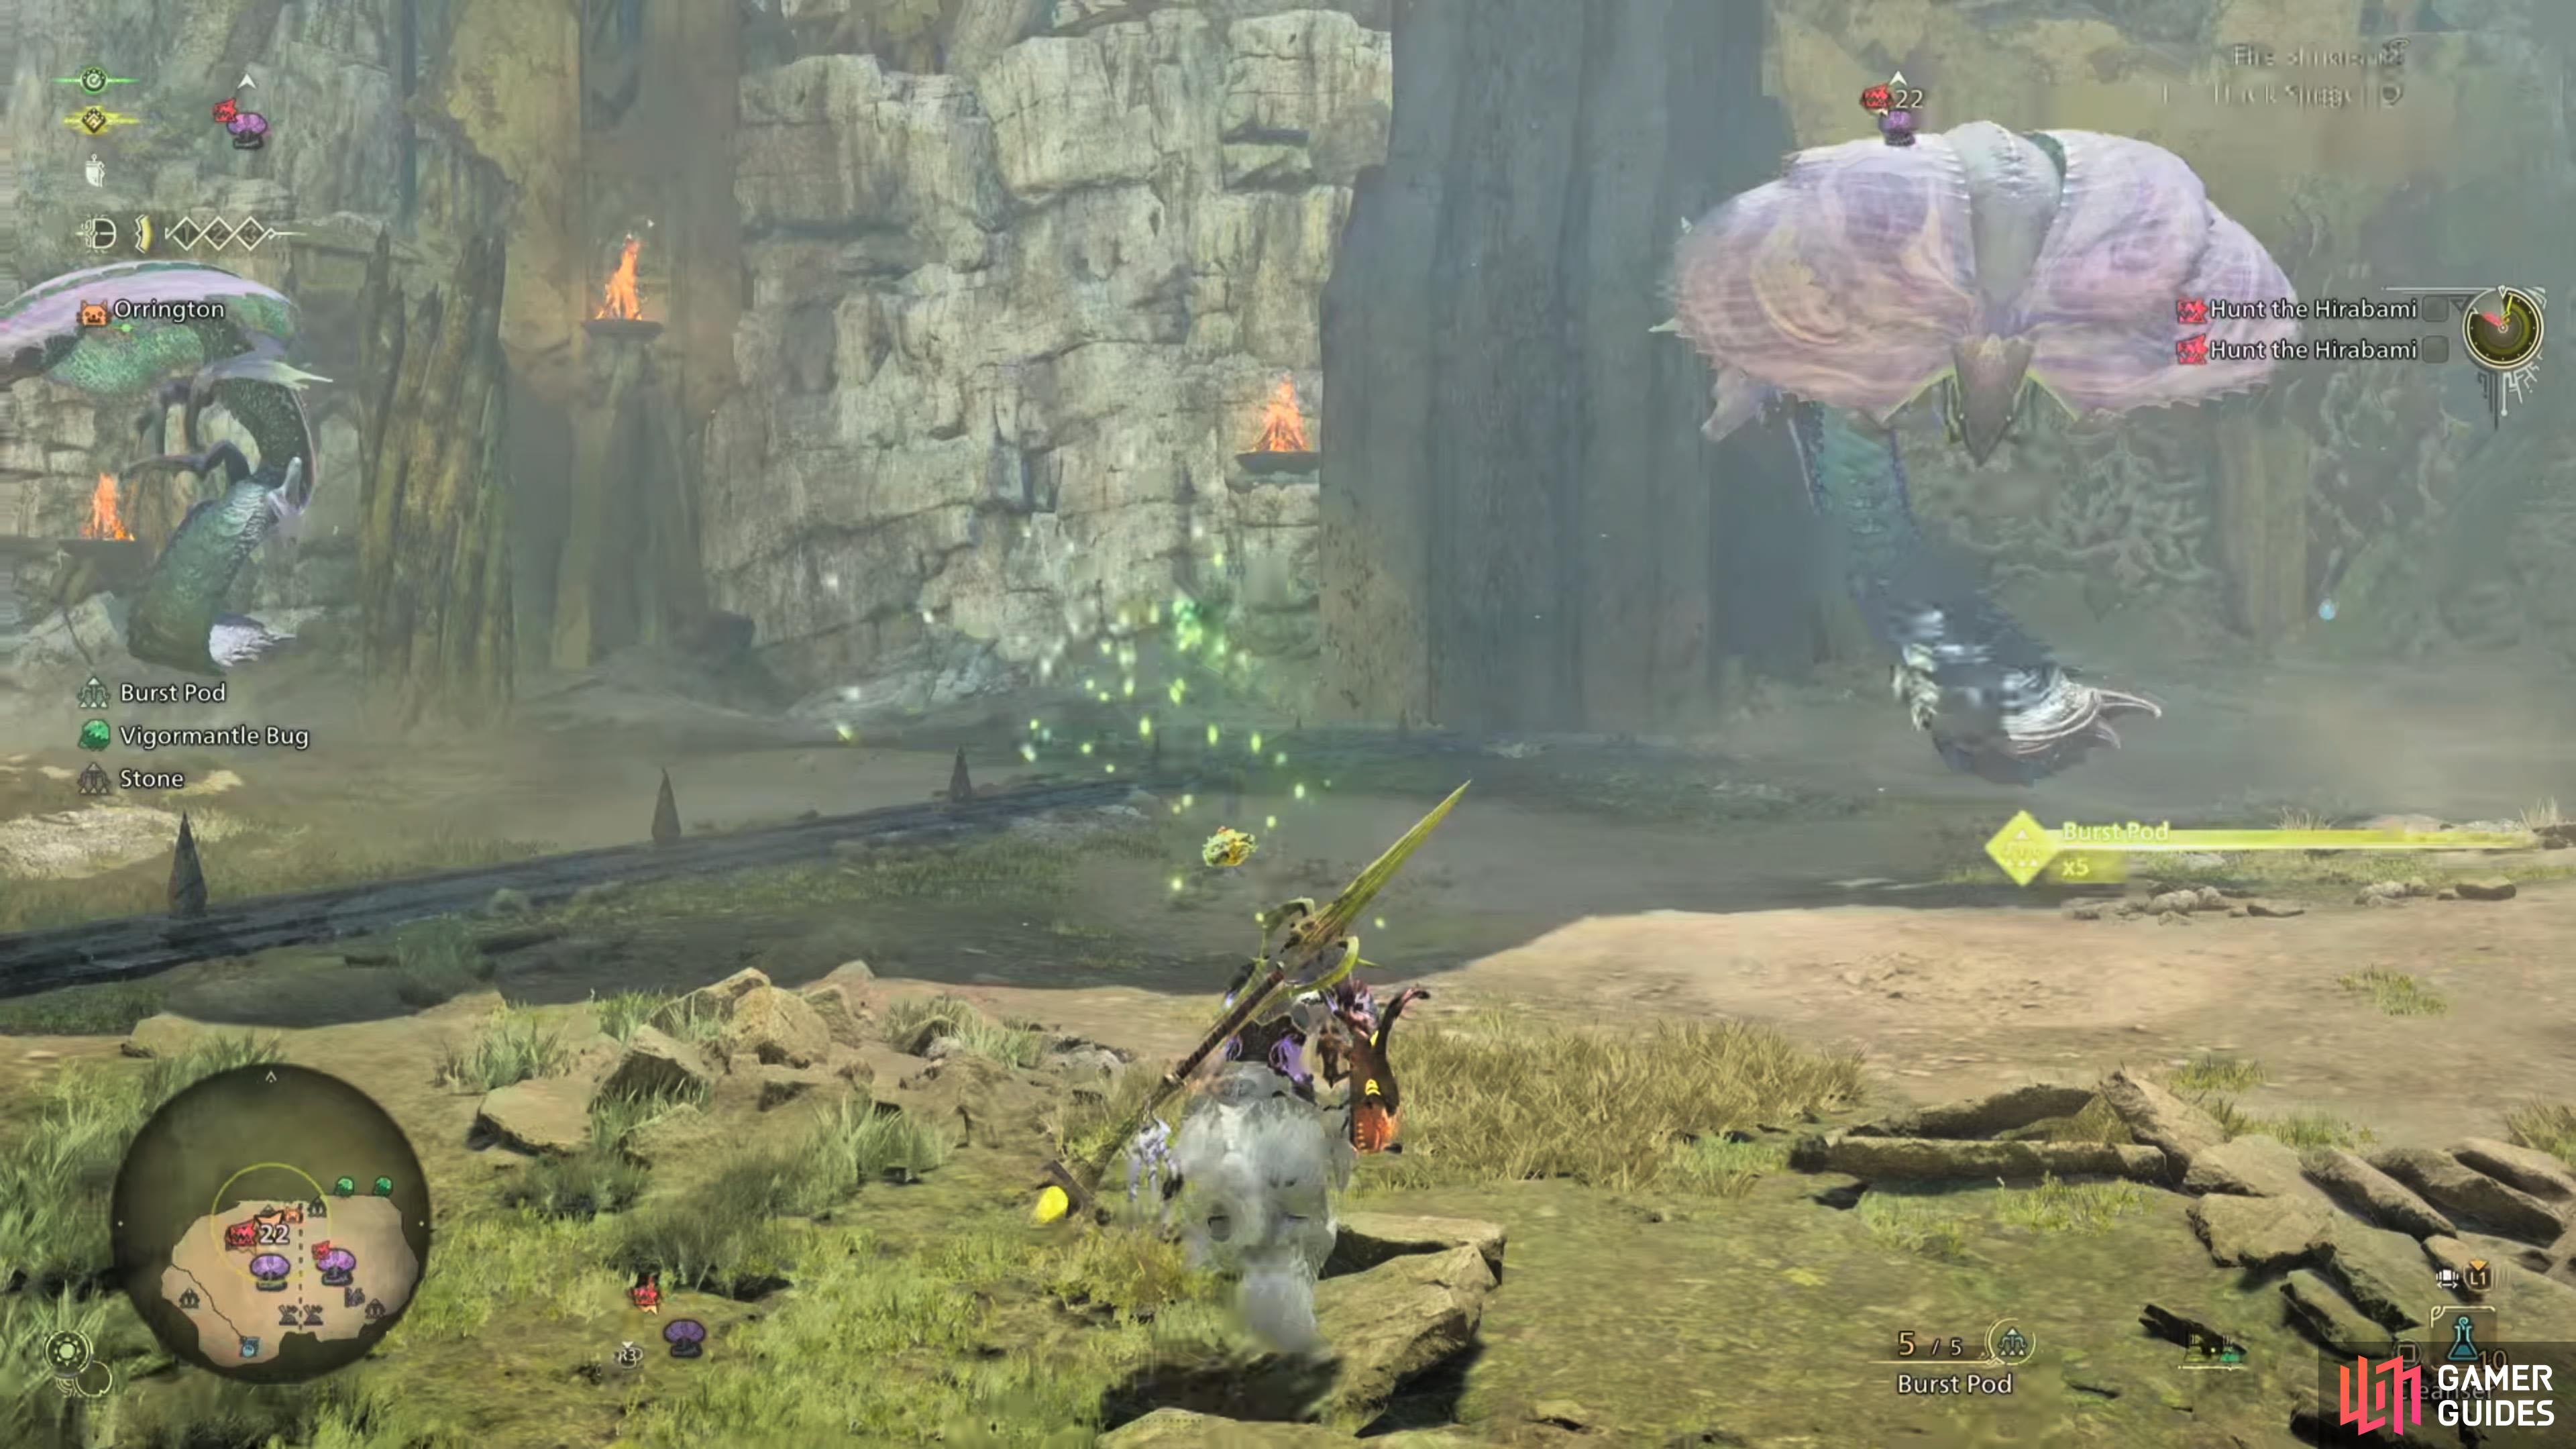

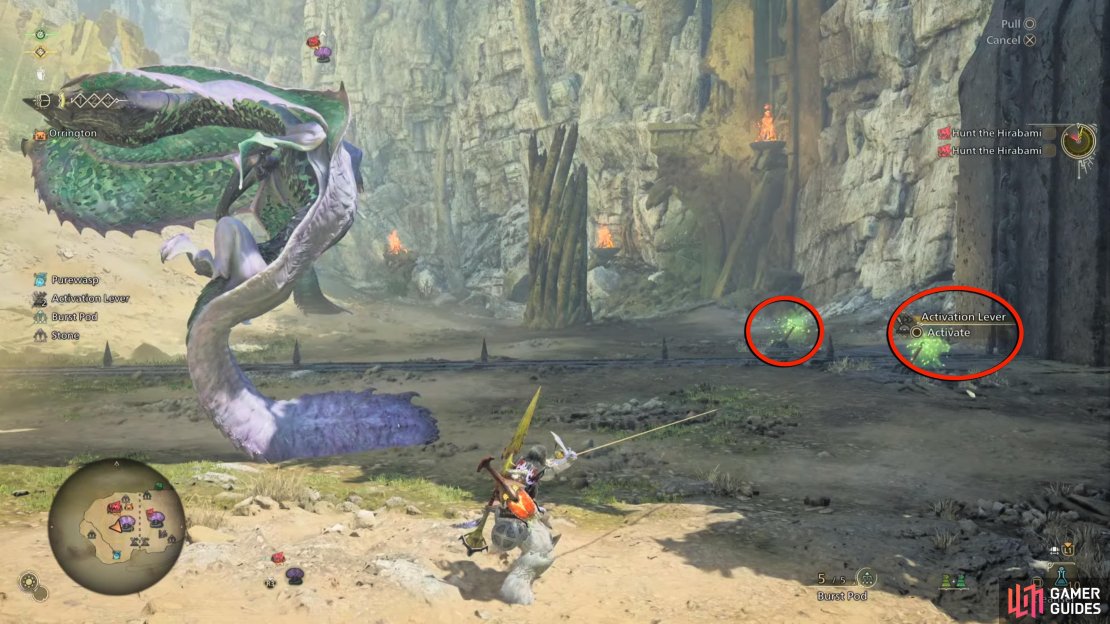
(1 of 3) Try to separate the Hirabamis with slinger ammo.
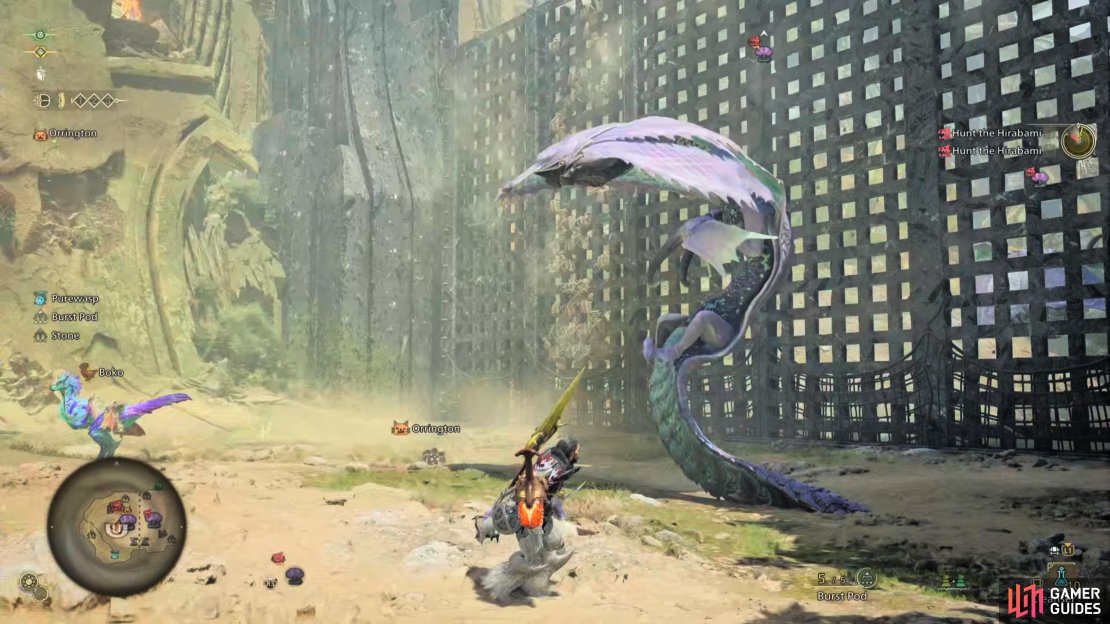
Hirabami is an unusual monster to fight as it moves between being horizontal and vertical almost instantly, but it doesn’t have too many attacks. When it’s vertical (upright), it’ll either fling the tip of its tail toward you multiple times, or it’ll unleash three icicles that root you in place should you get hit by it. If you do, wiggle your analog stick to break loose, or pray that your palico breaks you free. This will usually give you Frostblight that drains your stamina, so make sure you have a Cleanser ready to remove it. Another attack it’ll do when it’s vertical is it’ll briefly turn away from you before slamming its tail at your position.
When Hirabami is horizontal, it’ll either dive at your location, nudge its head forward to perform a bite or coil up around you. There’s not too much to worry about with Hirabami’s attacks, although when it enrages, it can unleash a barrage of icicles at you, and that is by far its most dangerous attack.
In short, avoid getting hit by the icicles, and you won’t have anything to worry about. Generally, Hirabami will fire one icicle in each direction (left, center, right), but when it enrages, the icicles will generally go to your last position. That’s pretty much it for Hirabami. Finally, when the fence comes back up, you’ll need to wait for around 10–20 seconds before raising it again. During that time, keep your distance from the pair until you can separate them again.
Reward
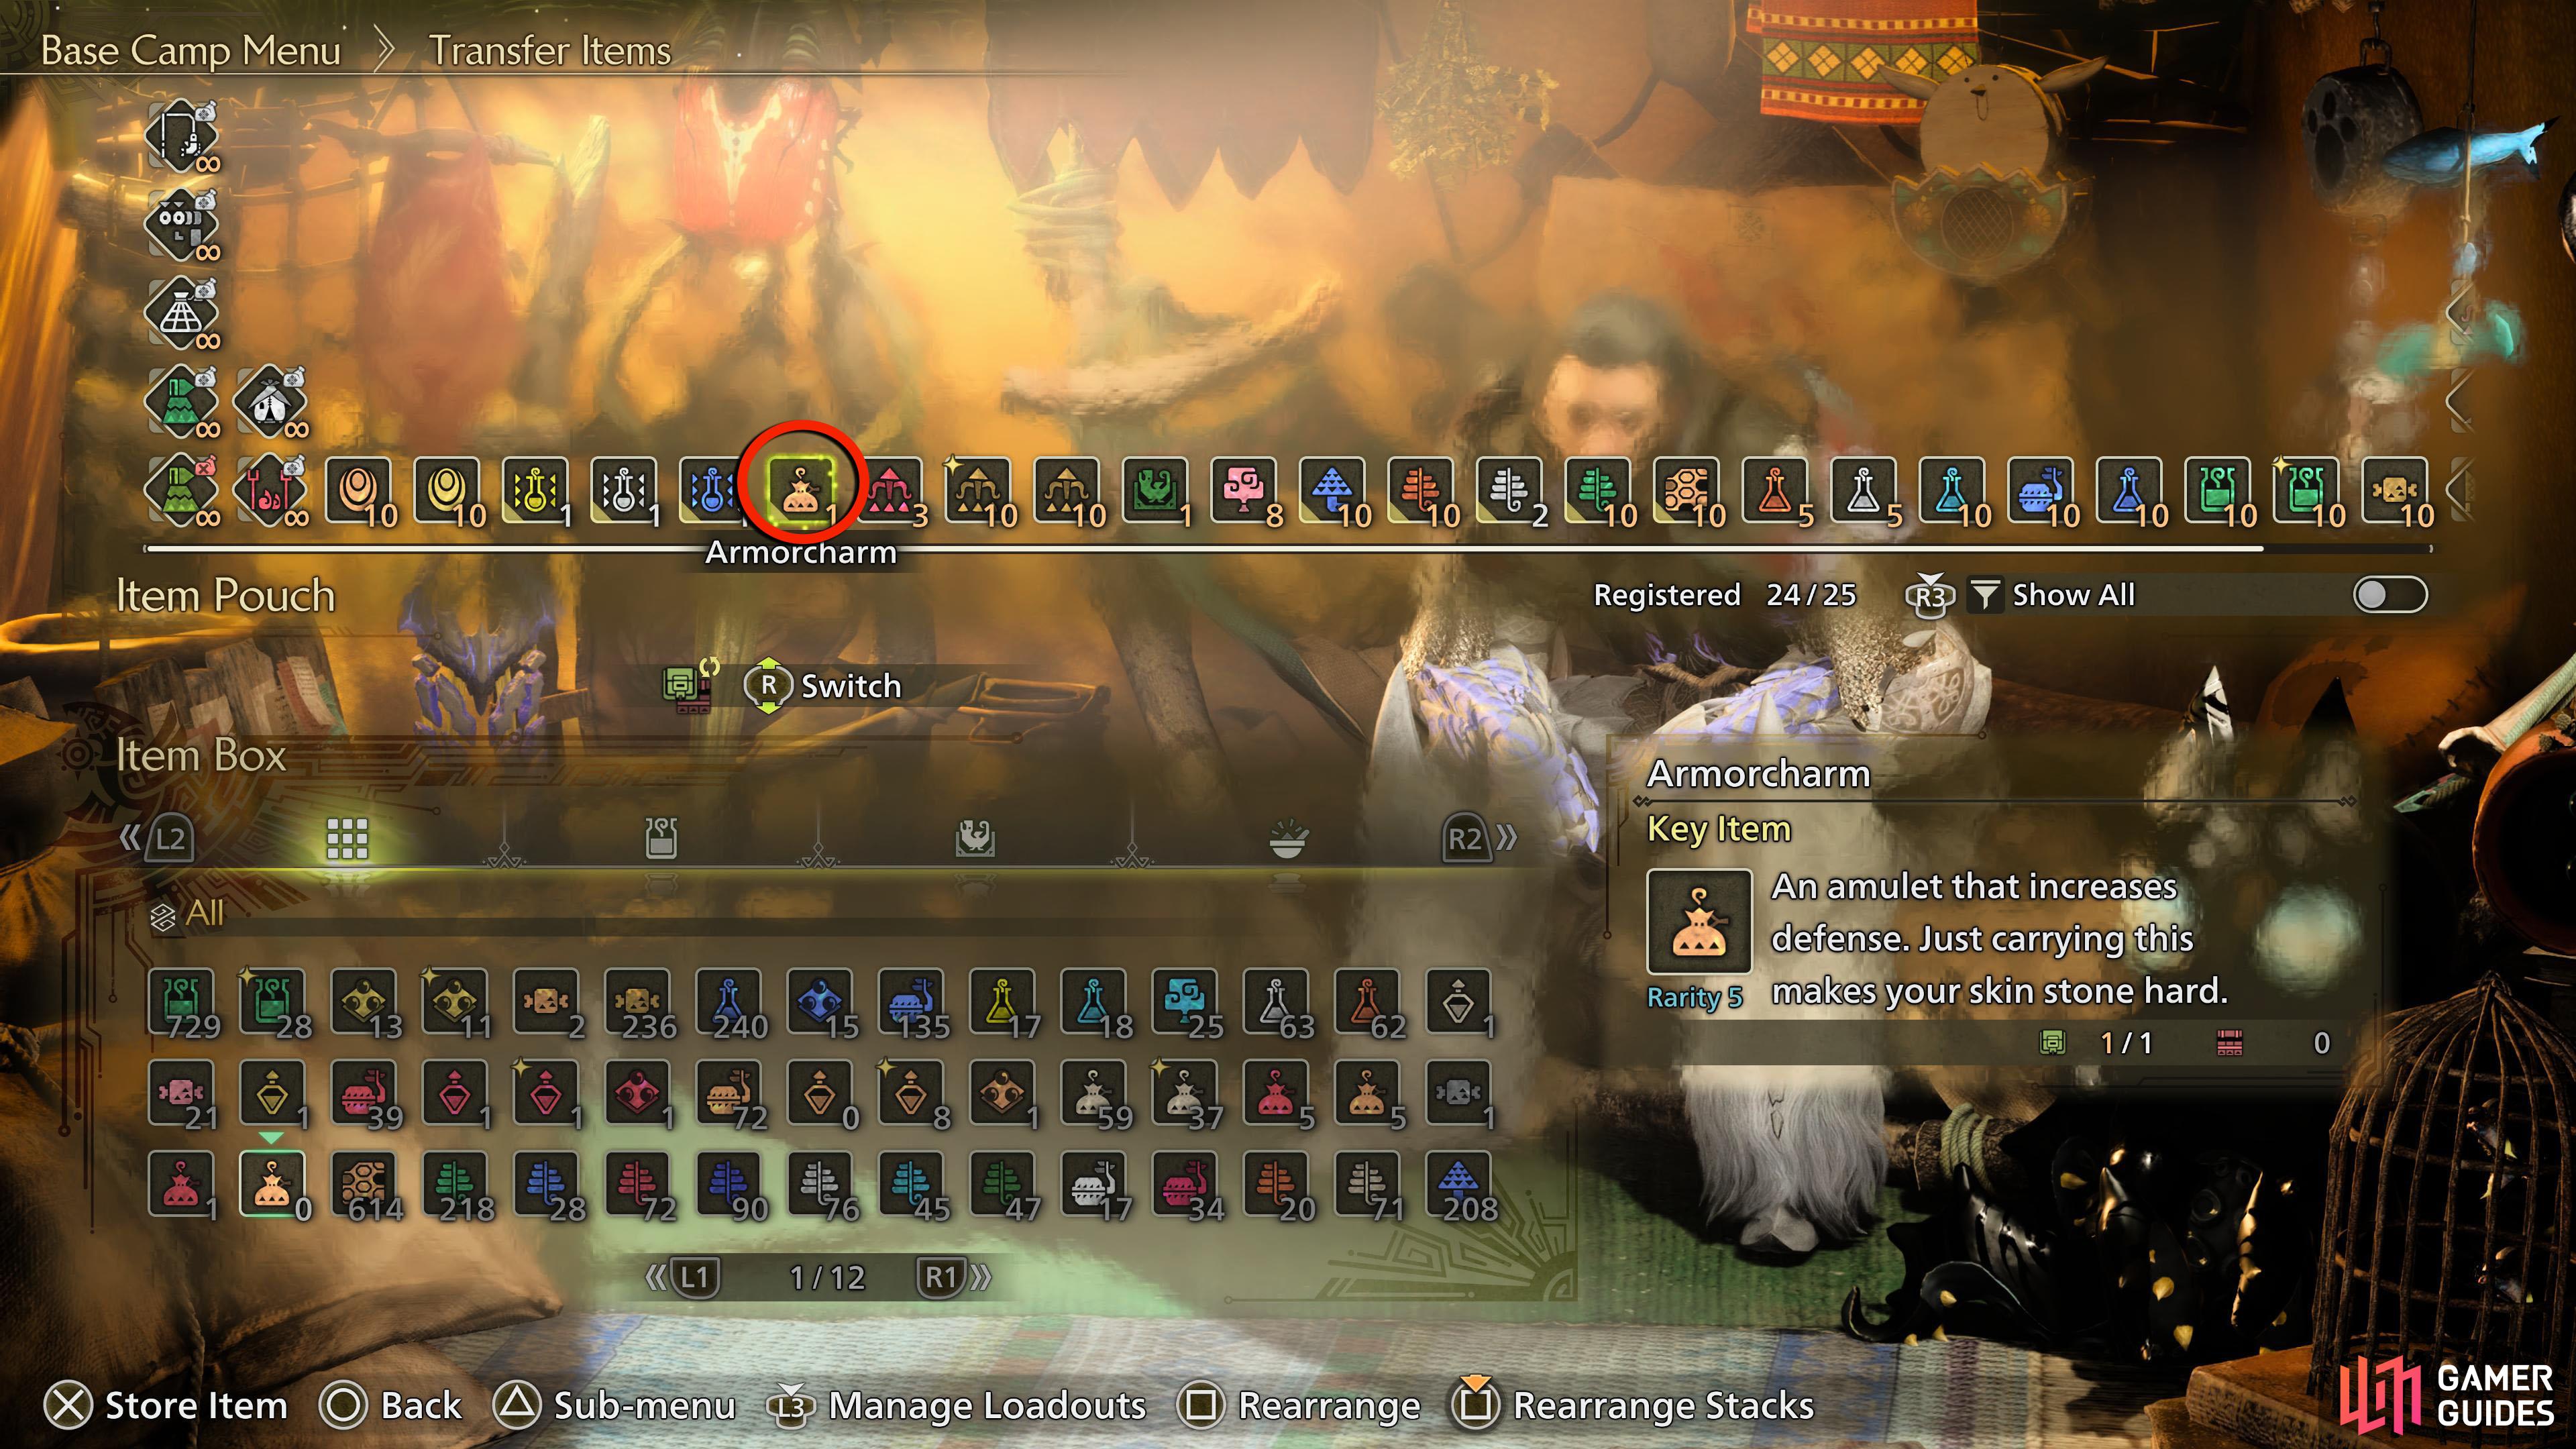
The main reward from this quest is the coveted Armorcharm.
The main reward for completing this quest is the Armorcharm, which bolsters your defense when placed in your inventory. That alone is worth doing the quest for, but you’ll also receive, 8x Advanced Armor Sphere, 5x Hardshell Powder, 3x Wild Seed Oil, and 150 Guild Points for your troubles.
No Comments