

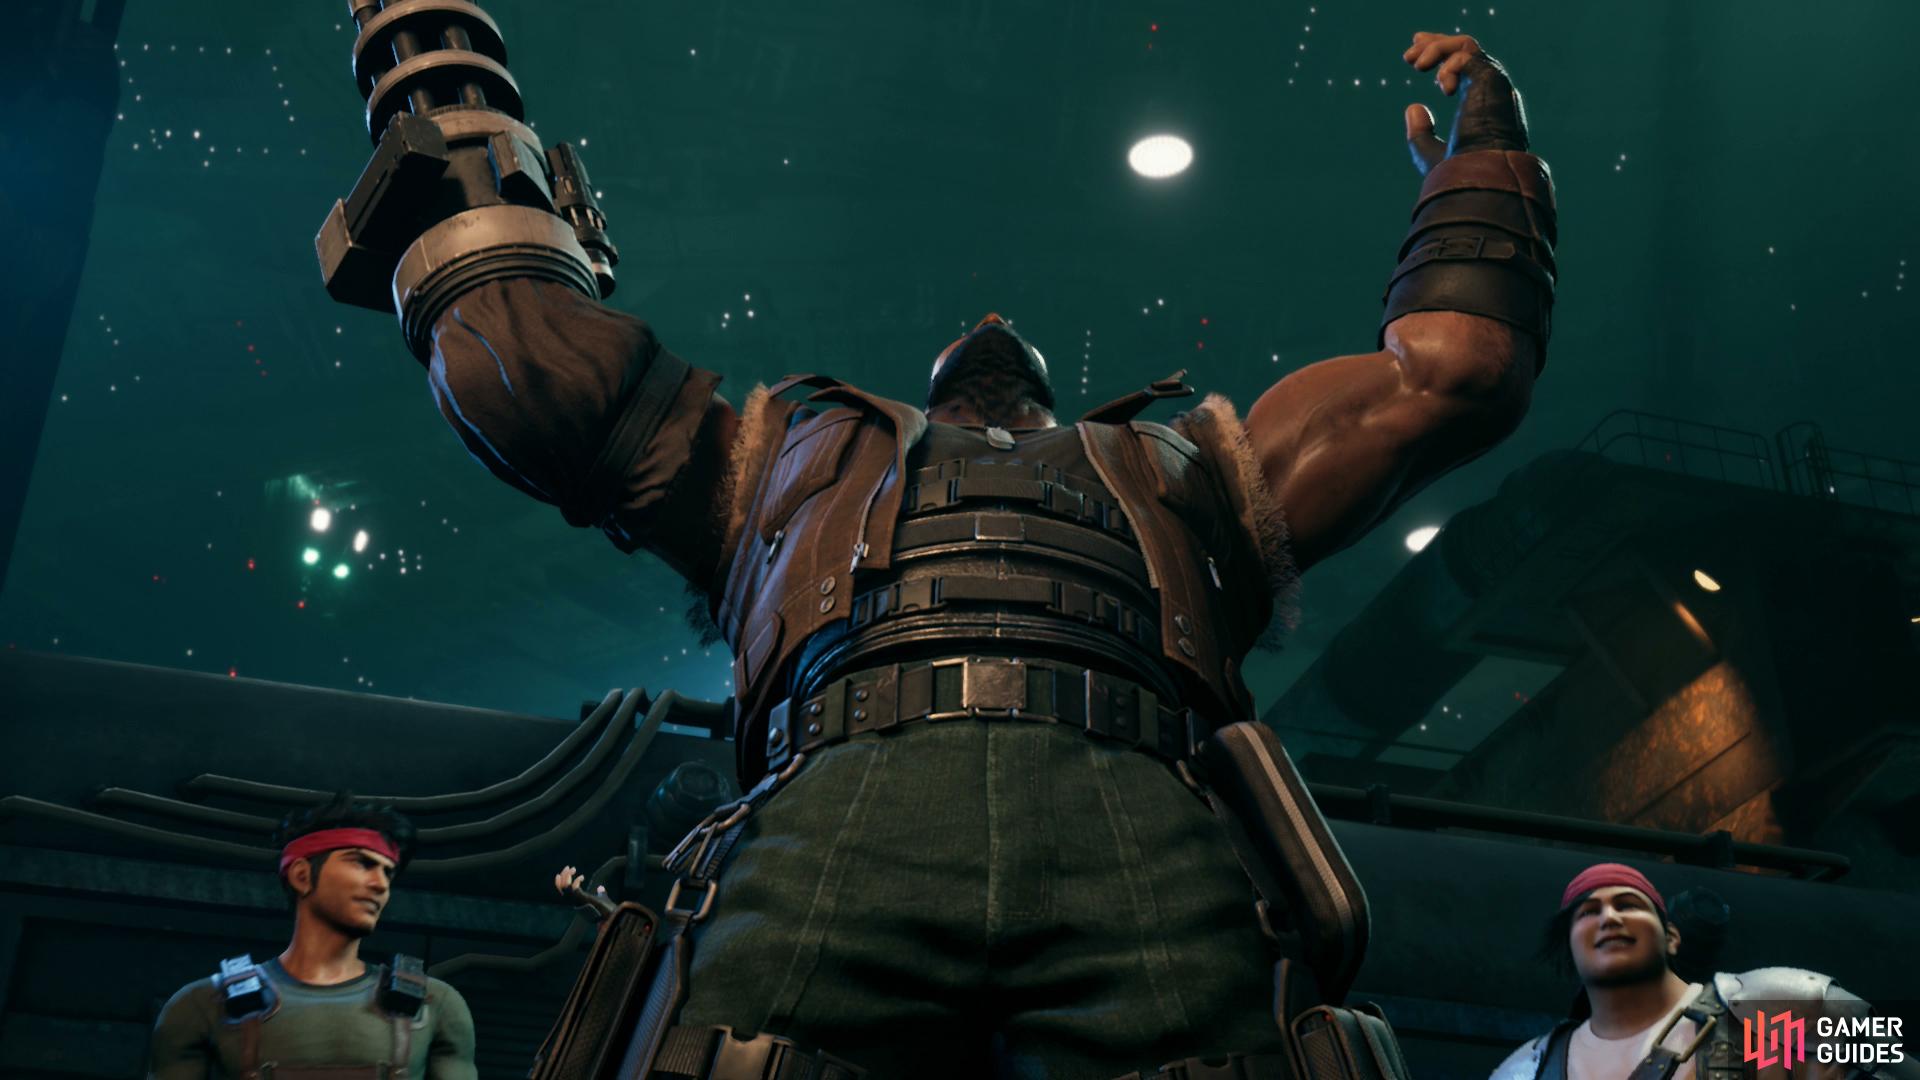
The train will arrive at the station and after disembarking - and some incriminating celebrations - the AVALANCHE members will split up and return to Seventh Heaven, the bar where Tifa works.
Return to Base
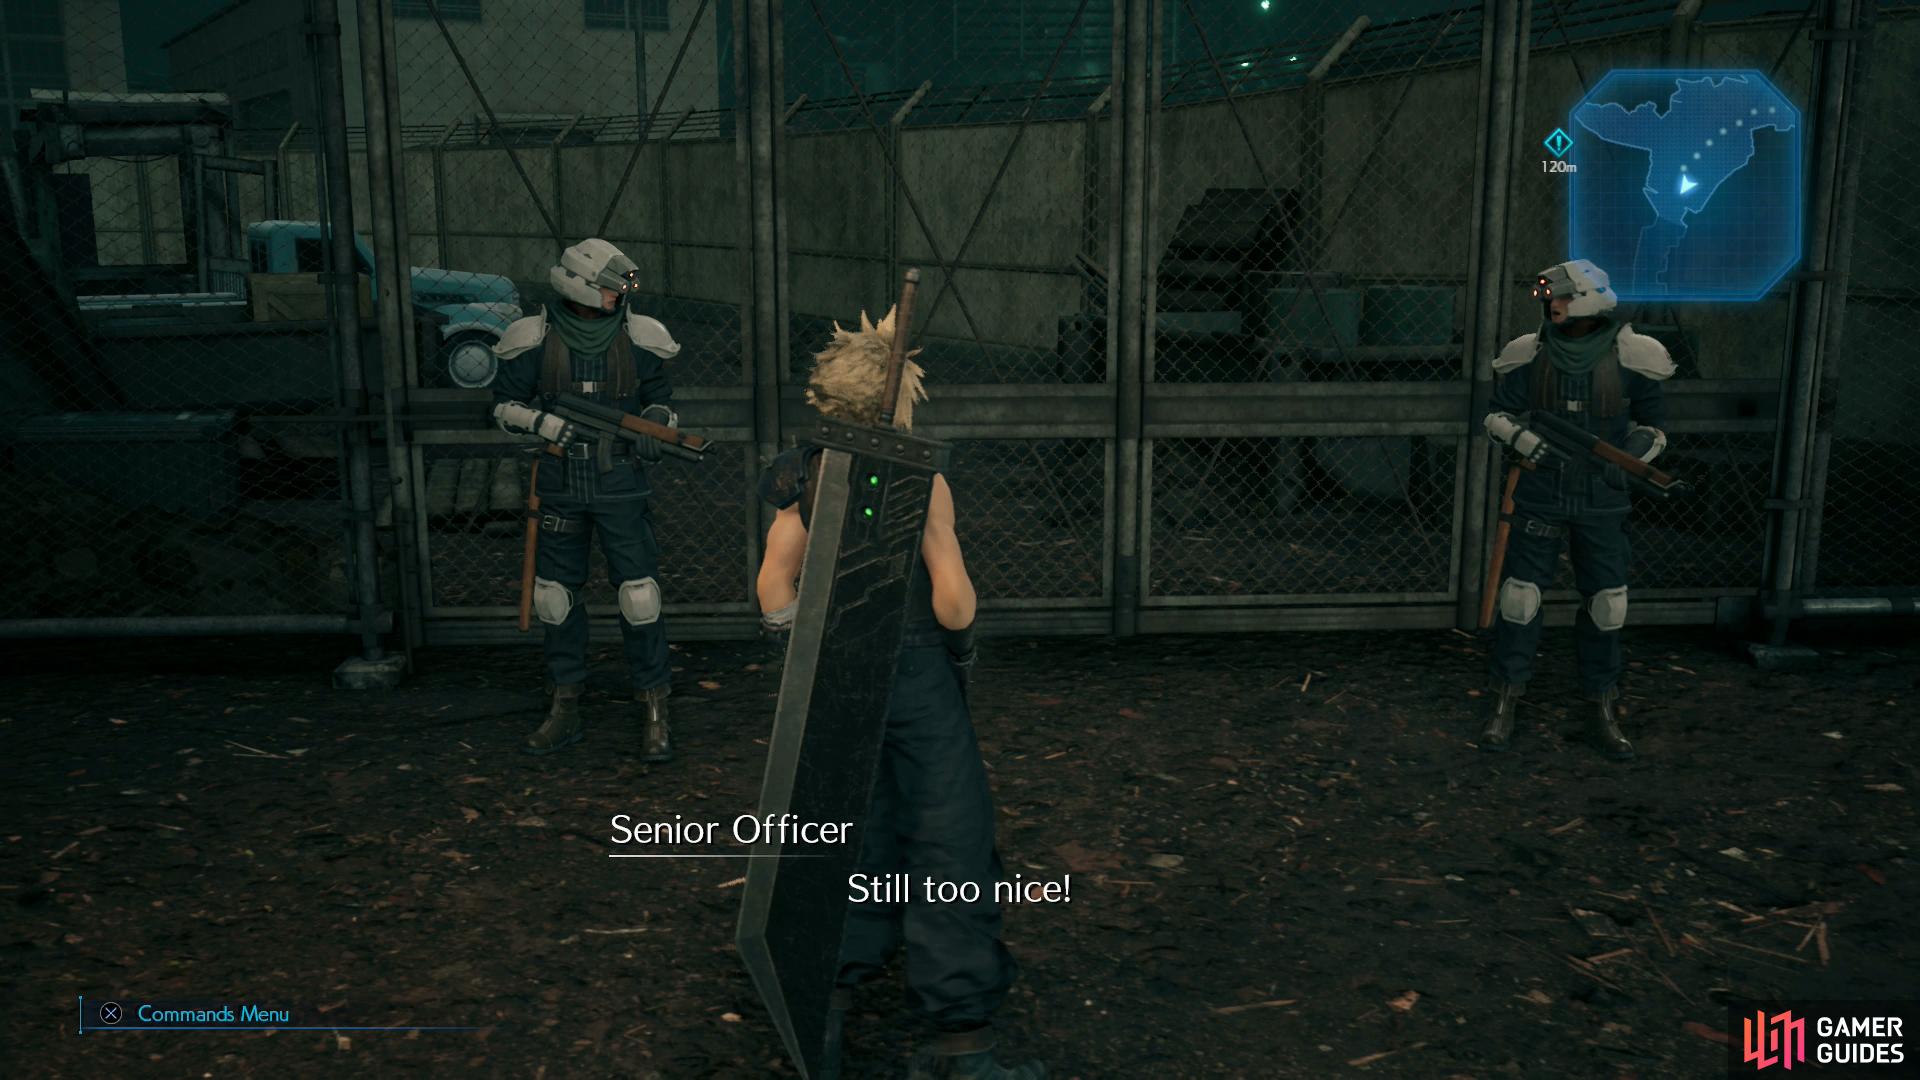
Leave the train platform and head west to trigger a scene where you’ll run into the unknown entity again before regaining control. Must be a slow day at Hogwart’s. There are several different areas branching off from the humble hub you find yourself in (Pillar Plaza): to the northeast is the Pillar, to the northwest is an area sealed off due to “fiends” and to the southwest is a gate guarded by two Shinra goons, one mean, one nice. All of these areas are inaccessible to you right now, so continue west to reach the Residental Area of Sector 7.

(1 of 2) The nice guard and mean guard from the original game return, and that should be celebrated.
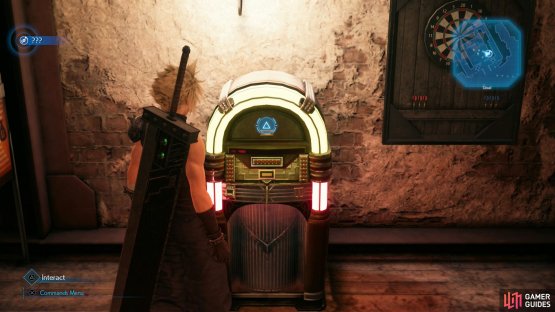
The nice guard and mean guard from the original game return, and that should be celebrated. (left), In Seventh Heaven, search the jukebox to obtain the “Tifa’s Theme” Music Disc. (right)
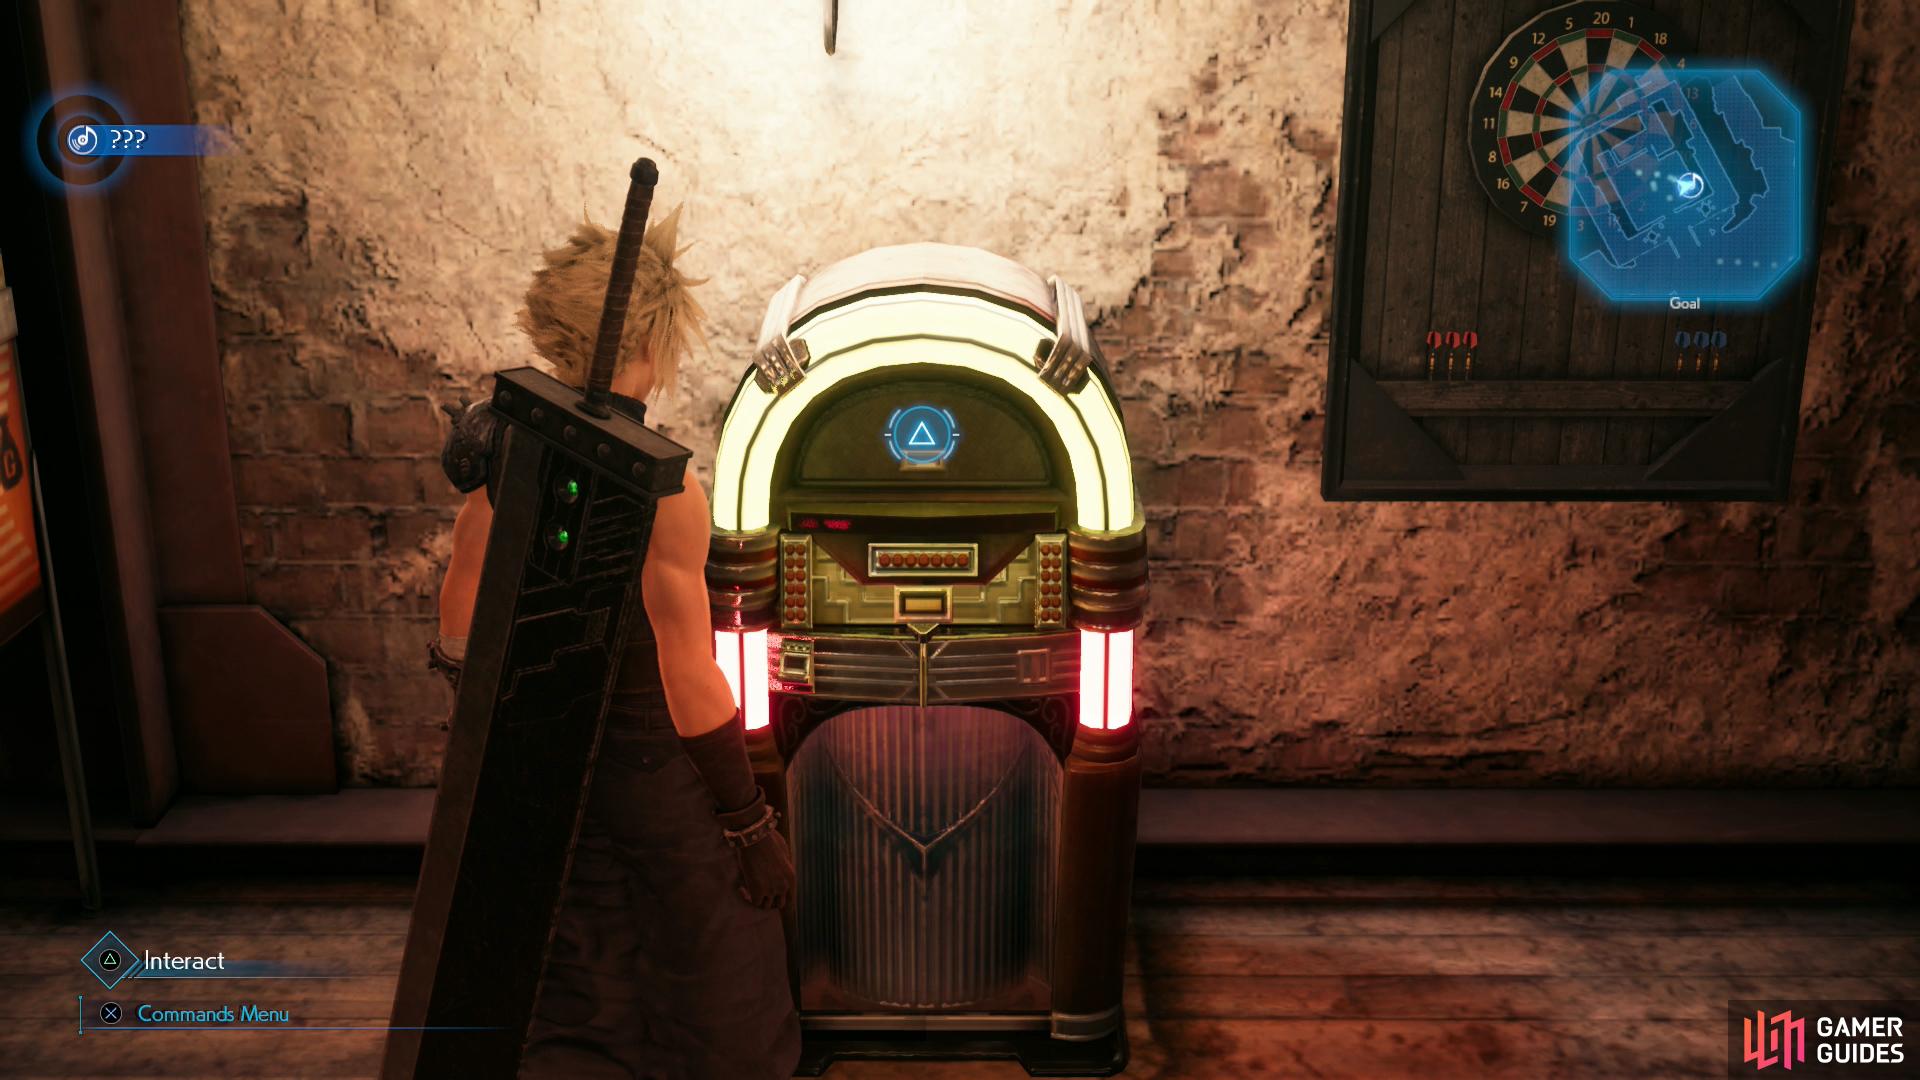
Your exploration is limited for now but there’ll be plenty of time for that later, so just keep heading west to find Seventh Heaven where you’ll be introduced to Marlene and Tifa. Head inside and speak to Barret to discuss the matter of payment while speaking to Marlene will… well, she’s got a healthy stranger danger response, and Barret has a rather unhealthy response to anything that startles Marlene. After the drama with Marlene, Tifa will head outside and wait for you. Before you head outside to speak to Tifa, examine the Jukebox to obtain Tifa’s Theme, your first Music Disc.
Head outside the bar now to speak with Tifa, who will inform you about an empty apartment down the road. Follow her until you reach the apartment building - Stargazer Heights - where she’ll show you to your room. It’s a hovel, but it’s free. Head inside and Tifa will finally get to your pay, or what little of it she can make good on at the time. You’ll earn 500 Gil, after which she’ll mention getting some more money tomorrow, a task Cloud agrees to help with. Cloud’s tough-guy mercenary routine is no match for a manipulative childhood friend, it seems.
Sometime later that night Cloud will be interrupted by… odd noises coming from his neighbor’s apartment. The same neighbor Tifa declined to elaborate on earlier. Nothing for it, looks like you’ll have to investigate. Leave your apartment and head northeast to your neighbor’s apartment door. Skip it for now and instead continue northeast, round the corner, climb a ladder and loot a chest to score a Phoenix Down. With that out of the way, climb back down and investigate your neighbor’s apartment. Talk about foreshadowing…

(1 of 3) Take a meandering route to reach Seventh Heaven to score some loot, like some Grenades,
Life in the Slums
When you wake up the next day, leave your apartment and head downstairs to meet with Marle, your new landlady. You’ll learn that Tifa’s gone on ahead to Seventh Heaven, so you should probably ignore the lure of exploration and instead head directly there to meet with Tifa once more. Of course, taking a roundabout route to reach Seventh Heaven doesn’t really constitute exploring, does it?
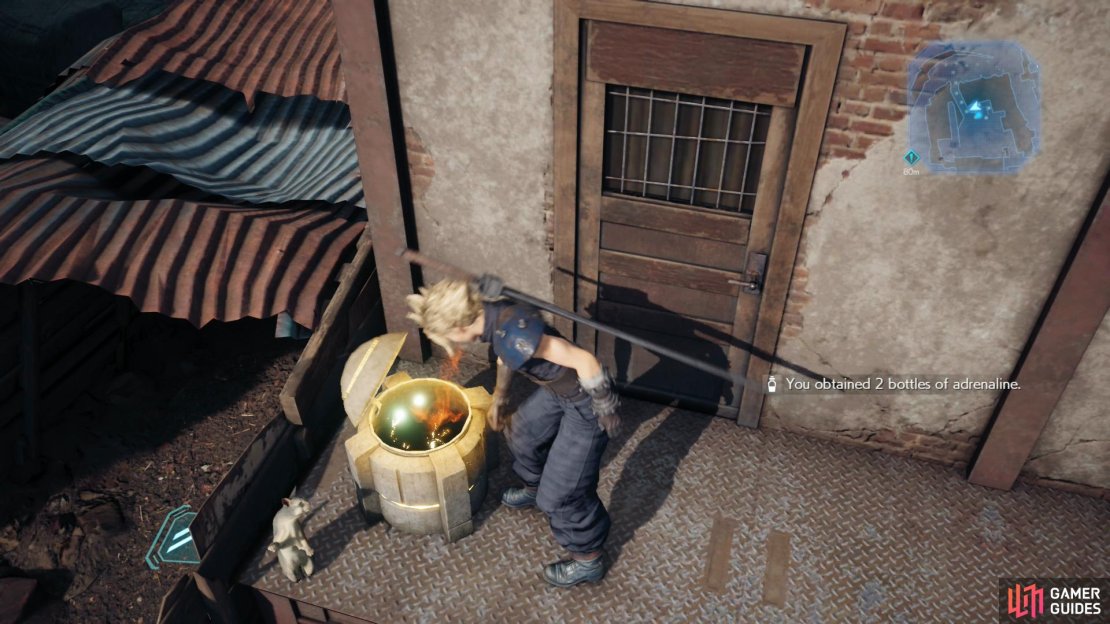
From the Stargazer Heights apartment building head downhill to the east and when you reach an intersection, turn south and get around a fence, then backtrack to the west. Keep your eyes to the south as you go and when you find a small metal shed you can crawl through, do so. Once through the shed turn east, head up some stairs and loot a chest on a porch to score 2 Adrenaline.
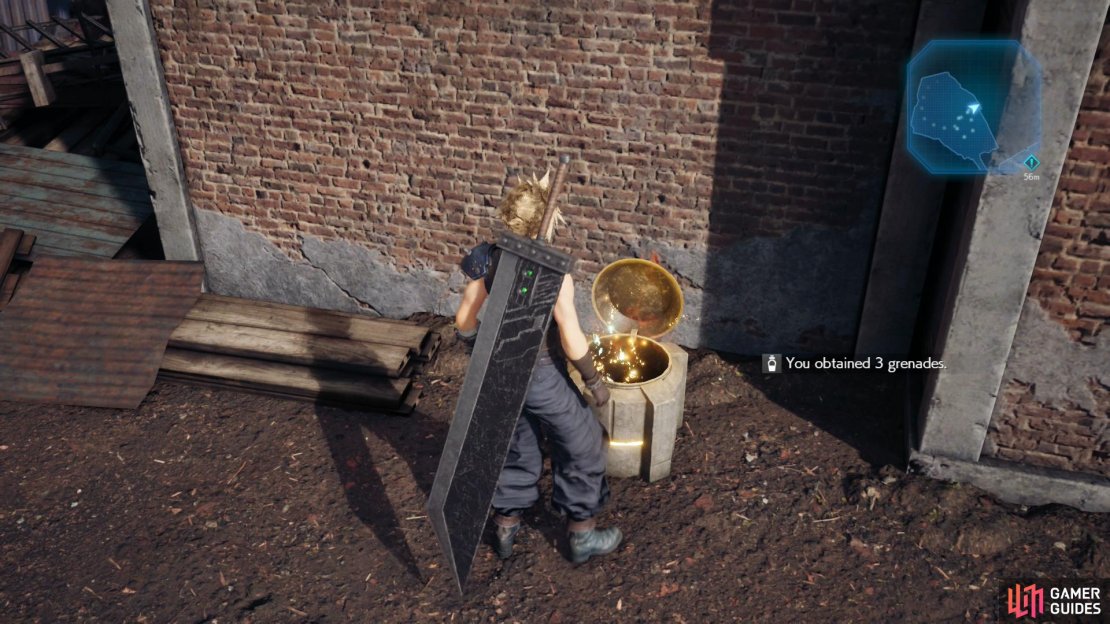
Backtrack north through the shed, then continue north and east around the fence and back onto the main path heading east. Be sure to stay on the northern-most route available at any given time. Keep your gaze to the north, however, and when you find some stairs leading into a cylindrical structure, take them. Continue northwest through the structure and when you reach a fork in the path, continue northwest through a hole and when you’re outside, search near a brick wall to the east to find a chest contianing 3 Grenades.
Head back through the hole you crawled out of earlier to return to the interior of the cylindrical structure and this time take the fork to the northeast, and when you find your progress blocked by a fence, turn northwest and head down two flights of stairs. Once outside again continue southeast until you’re blocked by some junk, at which turn right (southwest) head up some stairs and immediately turn left (northeast) and head around a corner to find another chest, this one containing 2 Hi-Potions.
Head back down the stairs and from them continue northeast to find a man standing next to a green barrel. You should also hear some rather iconic music playing as you approach… Talk to this man - a DJ, apparently - to obtain the Hip Hop de Chocobo Music Disc. No sense in putting it off any longer, time to meet up with Tifa, and fortunately you’re right next to Seventh Heaven. Just head down an alley to the southeast and turn right (southwest) to reach the front of Seventh Heaven.

(1 of 4) Tifa will convince a reluctant Cloud to help her sell some filters to raise money.
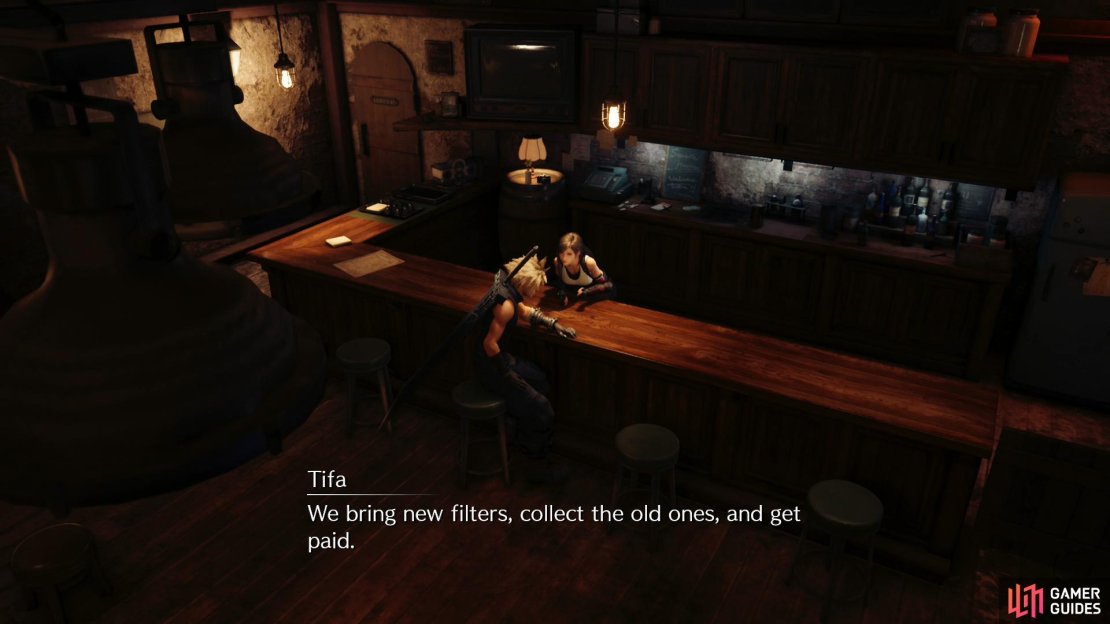
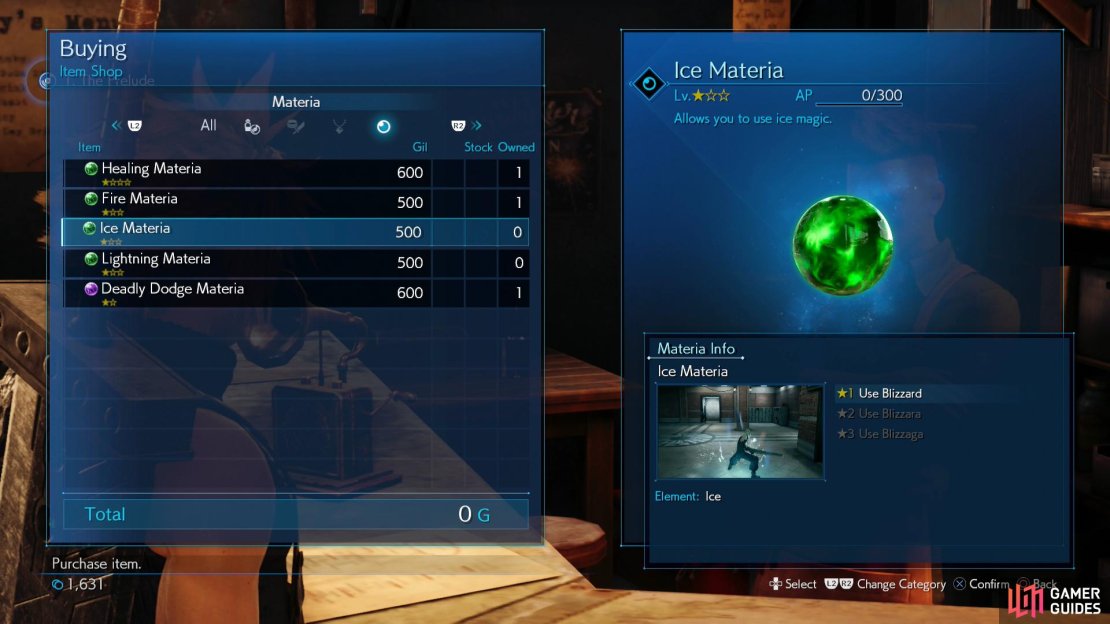
As mentioned last night, Tifa’s got a job that’ll earn her some of the money she needs to pay Cloud, which she wants Cloud to help her with, which he’ll reluctantly agree to do. Follow her outside and head west to reach your first stop, the Item Shop. After introductions you’ll receive 200 Gil and gain access to his wares. Of particular note is the next Music Disc, The Prelude. He also has Ice and Lightning Materia for sale and although you’ll find some of these later, consider picking up an Ice Materia (Barret already has Lightning Materia on him). We like to have three of all the basic elemental materia so everybody can make use of it, but you’ll find more as you play through the story. Equally importantly, you’ll find better money-making opportunities later, so there’s no need to feel too pressured to splurge just yet.
Sector 7 Residential Area Item Shop
| Item | Cost (Gil) |
|---|---|
| 1. The Prelude (Music Disc) | 50 |
| Potion | 50 |
| Phoenix Down | 300 |
| Antidote | 80 |
| Materia | Cost |
|---|---|
| Healing Materia | 600 |
| Fire Materia | 500 |
| Ice Materia | 500 |
| Lightning Materia | 500 |
| Deadly Dodge Materia | 600 |
Next on the tour is Stargazer Heights, the location you just left this morning. Marle will introduce you to the Rest Mechanic along with handing over another 200 Gil before sending you on your way.
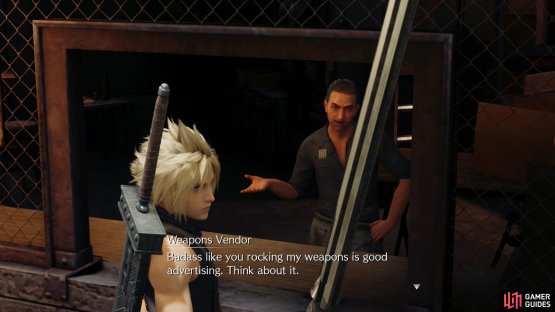
The final stop for your current task is the Weapons Store, and this particular vendor is less friendly than your previous clients. He’s not so tough that Cloud’s presence doesn’t scare another 200 Gil out of him. Despite Tifa’s suggestion, this merchant won’t do business with you just yet - must be sore about the… you know, fraud.
Fortunately Tifa has another suggestion: help out the neighborhood watch, build up a reputation, and use this reputation to secure jobs as a mercenary. That’s right, despite being fairly antisocial it seems a little networking is in order if Cloud is going to achieve his dream. Follow Tifa upstairs and head around the corner to find Tifa waiting for you outside a door. Ignore her for now and continue past her, turn a corner and loot a chest to score an Ether. Once done, return to Tifa and go through the door she stands by to meet up with Biggs and Wedge who will give you the lowdown on the Weapon Upgrades system.

(1 of 3) Tifa will sell Cloud on another job after the filters are sold and she does have a point, but man is she good at manipulating our protagonist…
Weapon Upgrade System
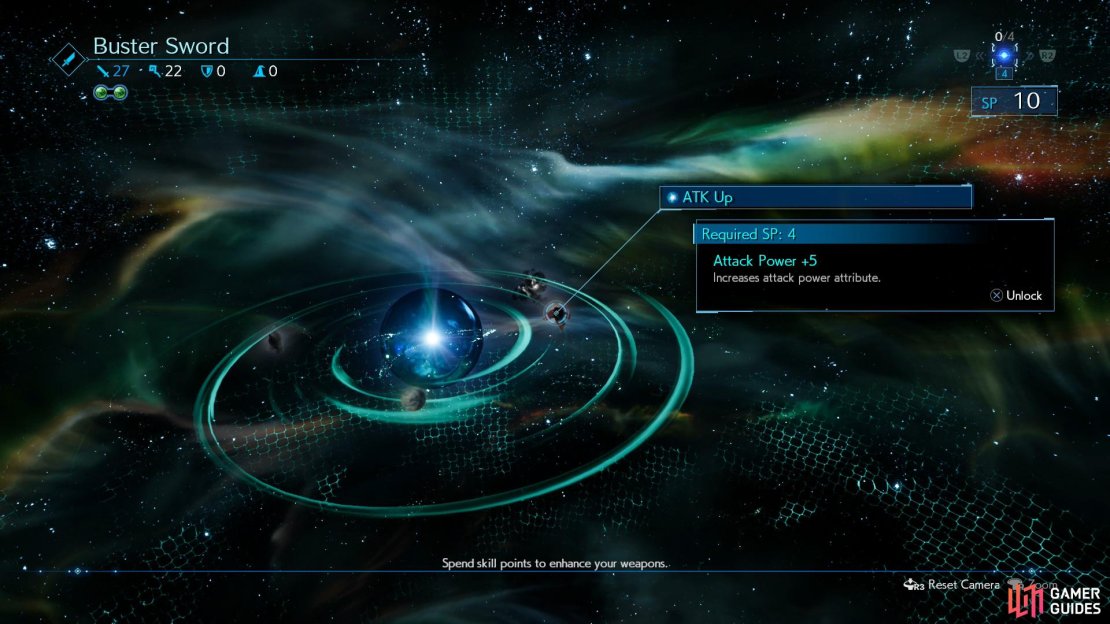
Every weapon in Final Fantasy VII Remake is unique, it’s not just a matter of equipping the newest weapon you come across. To begin with, each weapon will come with a unique Weapon Ability that you can learn permanently by fulfilling certain conditions (usually using the skill in battle). The Buster Sword already has it’s ability - Focused Thrust - learned. What’s more, every time you Level Up, you’ll receive SP which can be used to acquire Passives from a set of nodes unique to each weapon. This SP pool is also unique to each weapon so you’ll never have to prioritize what weapon to spend your SP on. Additionally, as you continue to obtain SP, your Weapon Level will increase, unlocking new sets of nodes for higher SP costs on the weapon. You’ll initially be unable to learn every node for a weapon but you can reset them by speaking to a certain person whom you’ll meet later, so you don’t have to be too picky about what nodes you purchase for each weapon, at least, not yet.
Limited SP and different types of upgrade nodes on each weapon means each weapon is ultimately a vehicle for character builds, focus on Attack Power upgrades and you’ll end up with a more powerful physical attacker, while if you focus on Magic Attack Power you’ll end up with a better caster. It’s down to you how you want your particular character to play and where their strengths will lie, although for the more difficult fights down the line we may recommend different builds, weapons and materia loadout. Most of this is, fortunately, a matter of merely swapping out equipped weapons and materia. For now, until you gain your first Weapon Level, it’s not a bad idea to just unlock all the nodes on the first Core.
A Job for the Neighborhood Watch
Tifa’s Strengths
Tifa is a martial artist and as such, she’ll be up close and personal at all times. She’s arguably the strongest physical attacker you’ll have and it’s a good idea to take her on the path of Attack Power upgrades. What’s more, her Speed stat is very high and many of her weapons come with Speed upgrades so be sure to learn them when you can to increase the rate at which her ATB charges.
As for her Unique Ability, you’ll find the Whirling Uppercut ability, which is rather unremarkable by itself, however, there is more to it than meets the eye. For one ATB charge, Tifa can power herself up using the ability “Unbridled Strength”; using this will power up Whirling Uppercut into Omnistrike. Use another ATB Charge on “Unbridled Strength” and Omnistrike will change into Rise and Fall; you can then set up a combo with all three abilities to really deal some devastating damage. This combo will also raise the Stagger %, increasing the damage you inflict to Staggered foes so it’s a good idea to use this potent combo whenever you have a foe in Stagger.
Consider setting the Ice Materia you purchased a moment ago to Tifa to cover another element and be sure to purchase some Weapon Upgrades for her too before moving on - both Attack Power +5 and Speed +5 are hard to ignore for now.
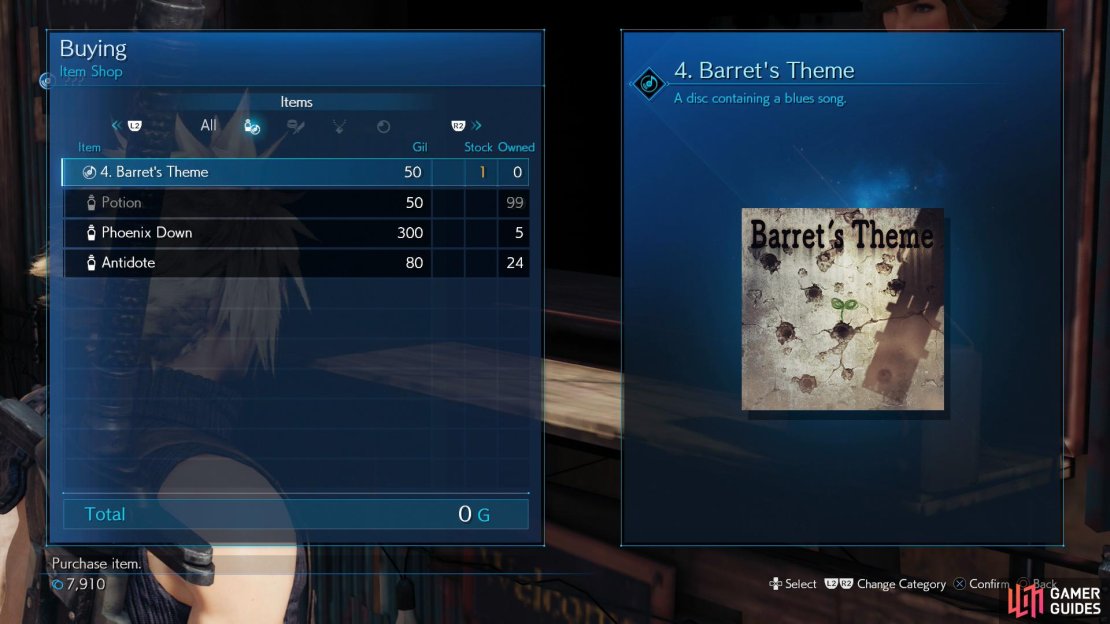
Before heading to Scrap Boulevard, there’s one bit of loot worth getting yet. Return to Seventh Heaven and from there head southeast. When you reach a fork, ignore the southern path and continue heading east, leaving the Residential District. Keep taking the only available path here and you’ll reach the Station once again, only this time you can now use the Item Vendor who will sell you Barret’s Theme for a paltry 50 Gil.
Sector 7 Undercity Station Item Shop
| Item | Cost (Gil) |
|---|---|
| 4. Barret’s Theme (Music Disc) | 50 |
| Potion | 50 |
| Phoenix Down | 300 |
| Antidote | 80 |
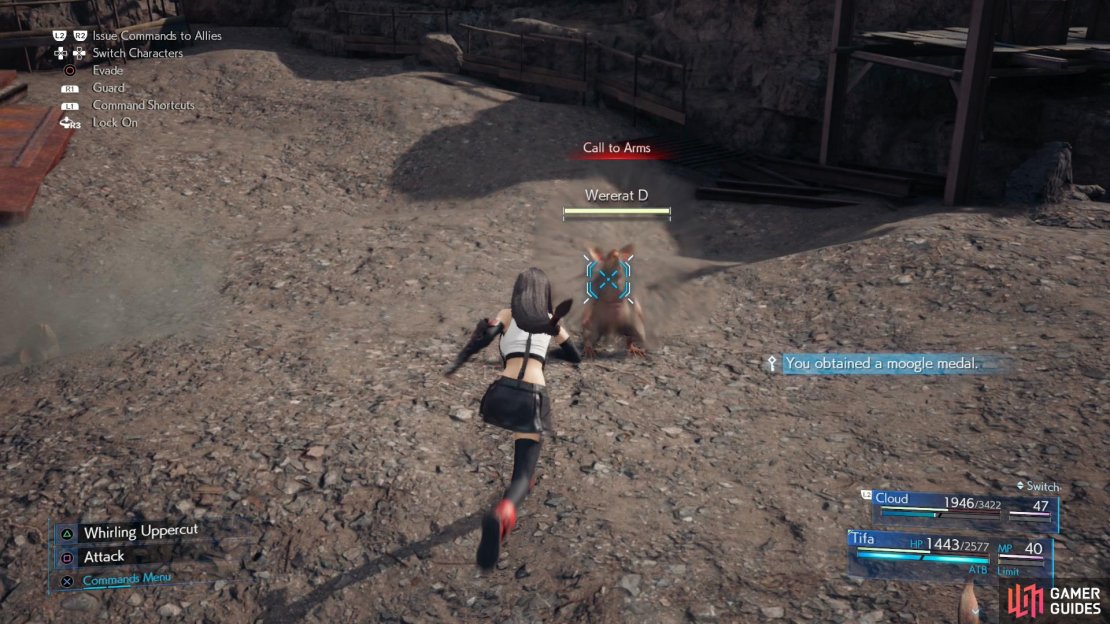
(1 of 4) Wererats can summon more allies with their “Call to Arms” ability.
That’s all for now so return to the Residential District and take the path to the southwest to enter Scrap Boulevard for a spot of monster hunting.
You’ll have several paths open to you here, but there’s a nice little loop you can run that’ll clear this area out without much backtracking. Ultimately you’ll want to end up heading west from the gate, after which turn southwest, west, northwest and east, fighting four groups of enemies as you go. In order you’ll face:
- 2x Gorgers
- 2x Wererats
- 1x Gorger and 1x Wererat
- 2x Gorgers
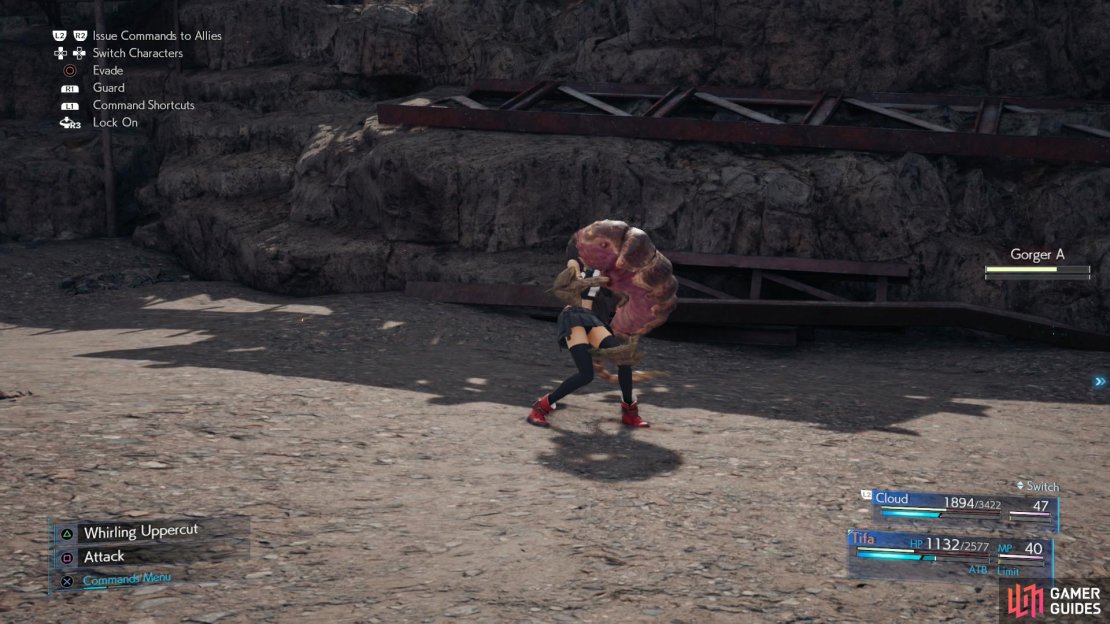
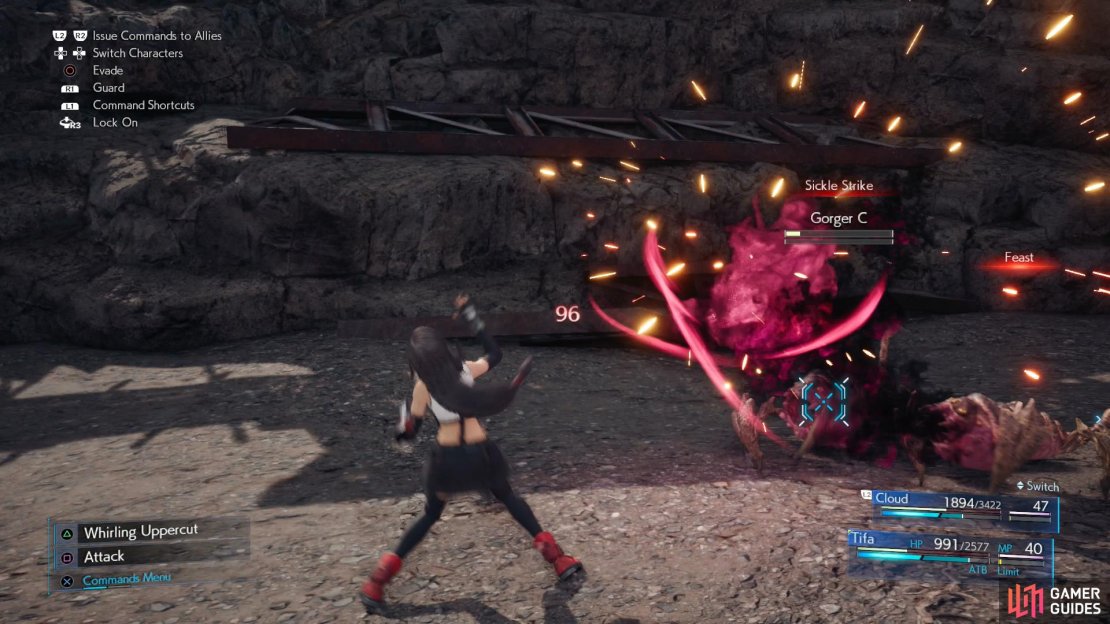
Doing this run through Scrap Boulevard you’ll face off against two new foes: Gorgers and Wererats.
Gorgers aren’t terribly sturdy foes, but they do have one nasty trick available to them, the “Feast” Ability, which will inflict a character with the Bound status. Unlike the Sweeper’s “Stomp” in Reactor 1, this doesn’t do a whole lot of damage, and other enemies aren’t able to chip in, making it mostly a nuisance. If you do get Bound, however, be sure to switch to the other character and try to break the Bound character free by attacking the offending Gorger. Gorgers can also inflict Poison, which will drain your HP over time. Fortunately they can drop Antidotes, and Poison will wear off after battle, making it an inconvenience more than anything else. Finally Gorgers have a “Sickle Strike” attack, which they’ll need to charge up before unleashing, but it deals fairly heavy damage if it connects.
Wererats, like the Gorgers before them, are weak to Ice. They’re also pushovers but they can get reinforcements with the use of the “Call to Arms” ability. They also have a fairly annoying “Dust Cloud” ability that does little damage, but can stun-lock a character briefly while hitting multiple times.
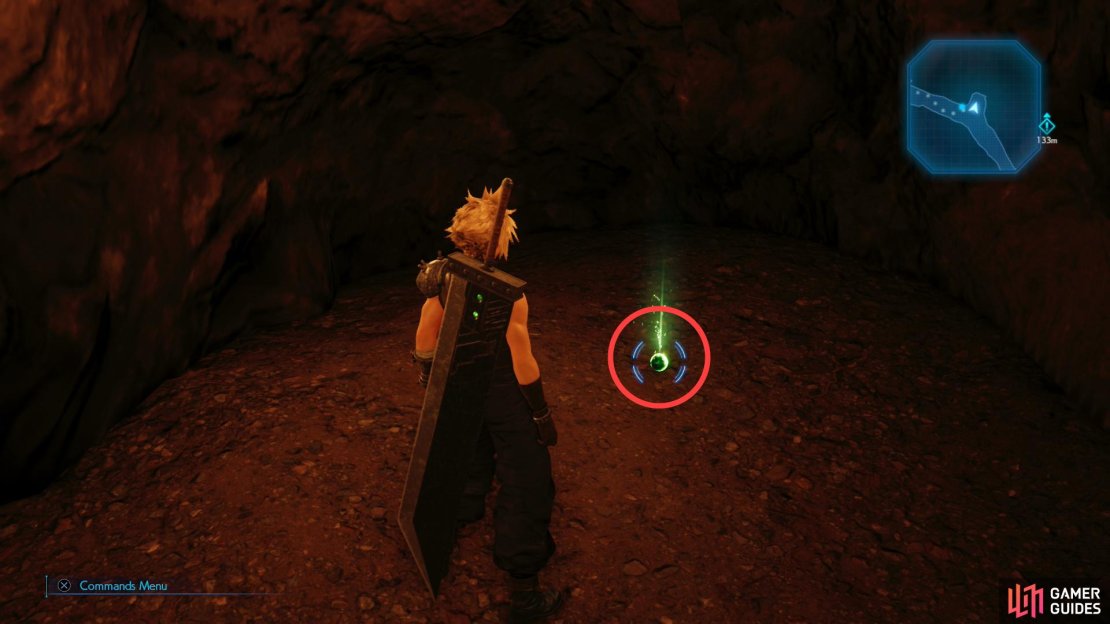
Along the way you’ll find several clusters of Shinra Boxes to smash, and in the northeastern corner of Scrap Boulevard is a chest containing 2 Antidotes. After defeating the final group of foes (2x Gorgers) continue east into a cave to find an Ice Materia in a cubby to the north. There’s nothing else for you here so make your return to the Residential District and return to Biggs and Wedge to report the completion of the job.

(1 of 2) Talk to the owner of the Weapon Shop and he’ll make peace by giving you a new weapon.

Talk to the owner of the Weapon Shop and he’ll make peace by giving you a new weapon. (left), You can also now use his shop to buy armor and accessories. (right)
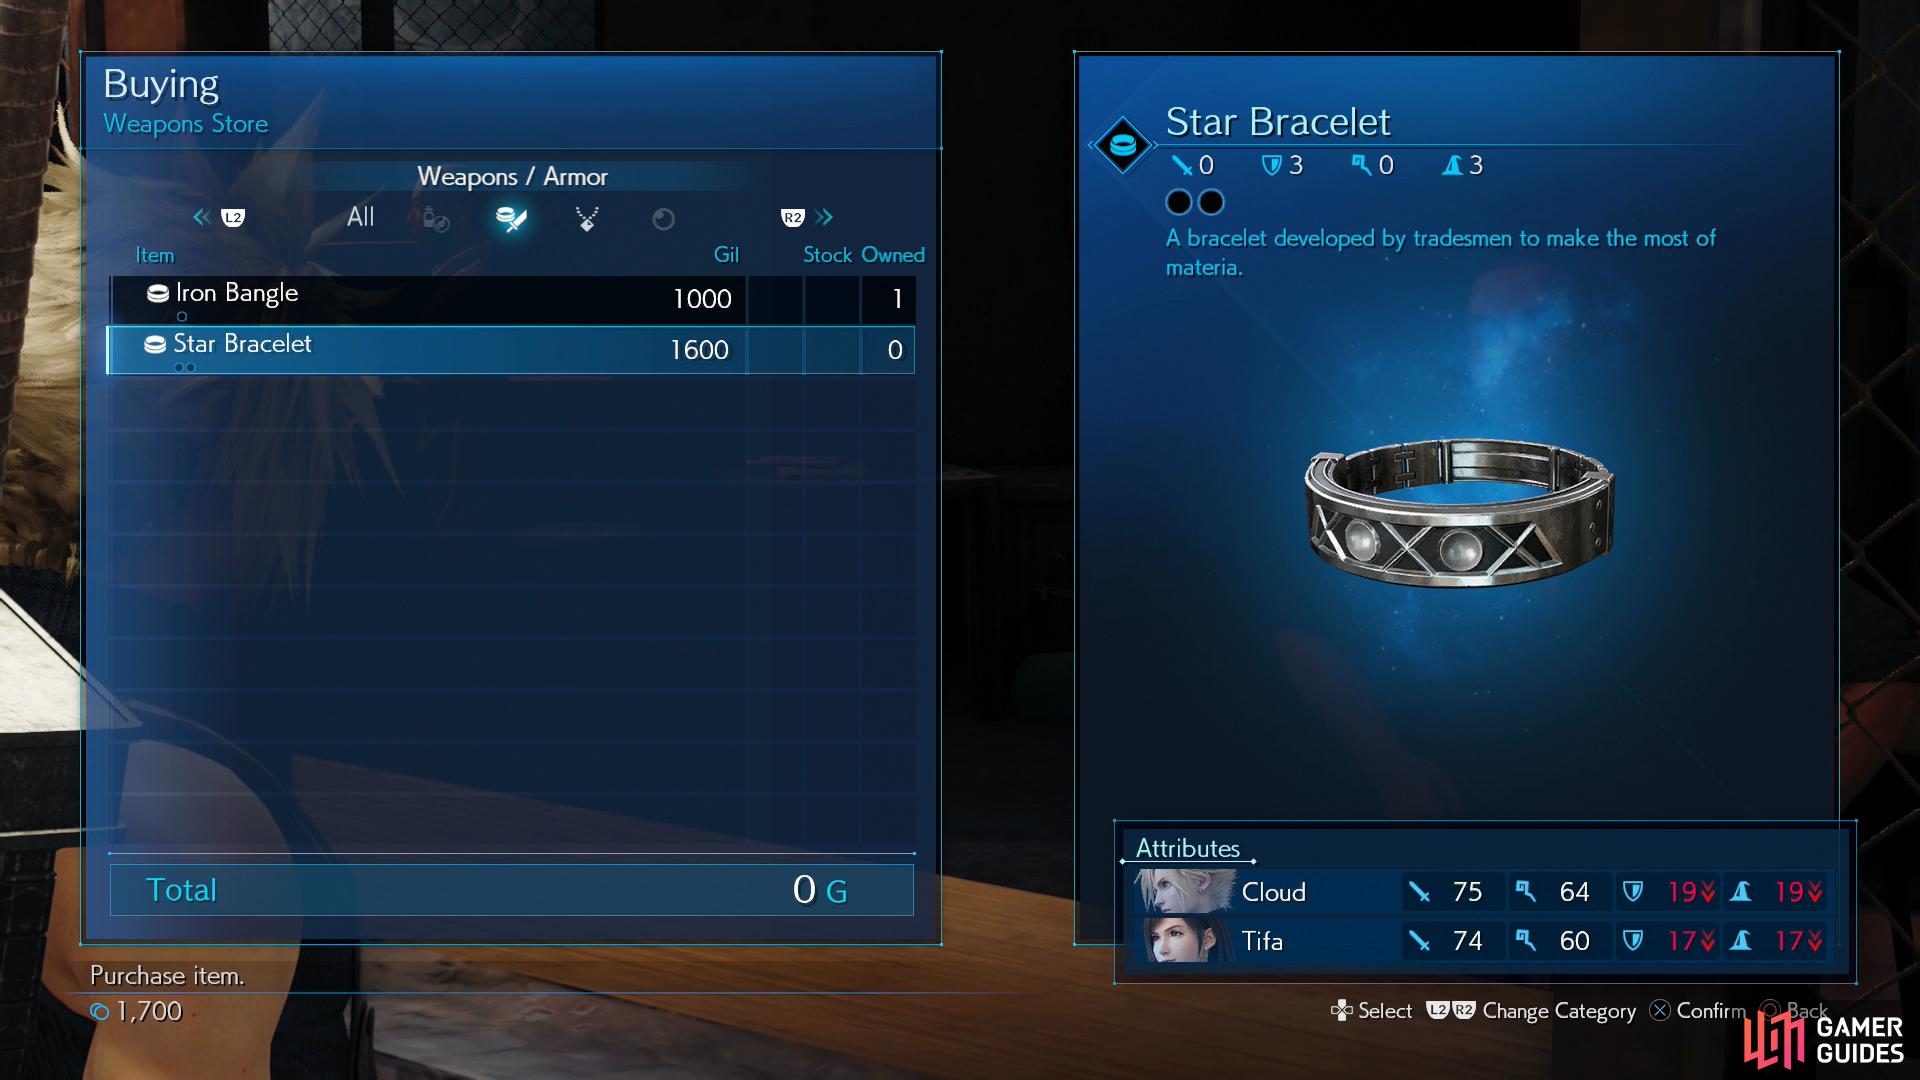
Chat with Biggs and Wedge and they’ll assure you they spread the word about your deeds while you were gone, and based on the warm reception you’ll get around the slums, they sure seem to have done a great job. Make your way back downstairs after the scene and speak to the Weapons Vendor to obtain an Iron Blade, a shiny new weapon for Cloud. You’ll also have the opportunity to purchase some new Armor and Accessories for Tifa, although they can be quite pricey. The Iron Bangle offers superior Defense and Magic Defense and the Star Bracelet will grant you an extra Materia Slot while you may want to consider purchasing some Power Wristguards for Tifa - her speed and Attack Power make her an ideal candidate for your physical powerhouse.
Sector 7 Residental Area Weapon Shop
| Armor | Cost |
|---|---|
| Iron Bangle | 1,000 |
| Star Bracelet | 1,600 |
| Accesories | Cost |
|---|---|
| Power Wristguards | 800 |
| Bulletproof Vest | 800 |
| Earrings | 800 |
| Talisman | 800 |
| Revival Earrings | 500 |
Cloud’s new weapon, the Iron Blade, is an interesting one, not in the least because of the Weapon Ability that it comes with. “Triple Slash” packs a punch, moving a moderate distance before each attack and slicing three different enemies, making it great for clearing out weaker mobs. Once you master it, you can chain some more regular strikes after the ability, as well as use the ability even with other weapons should you prefer. What’s more, it’s more balanced in Attack Power and Magic Attack Power so you finally have a choice in if you want to make Cloud a physical attacker, magical attacker or more balanced. You’ll only have 10 SP on you for now but consider making Defense +5 and the Punisher Mode Counter Damage 5% Boost your first purchases.
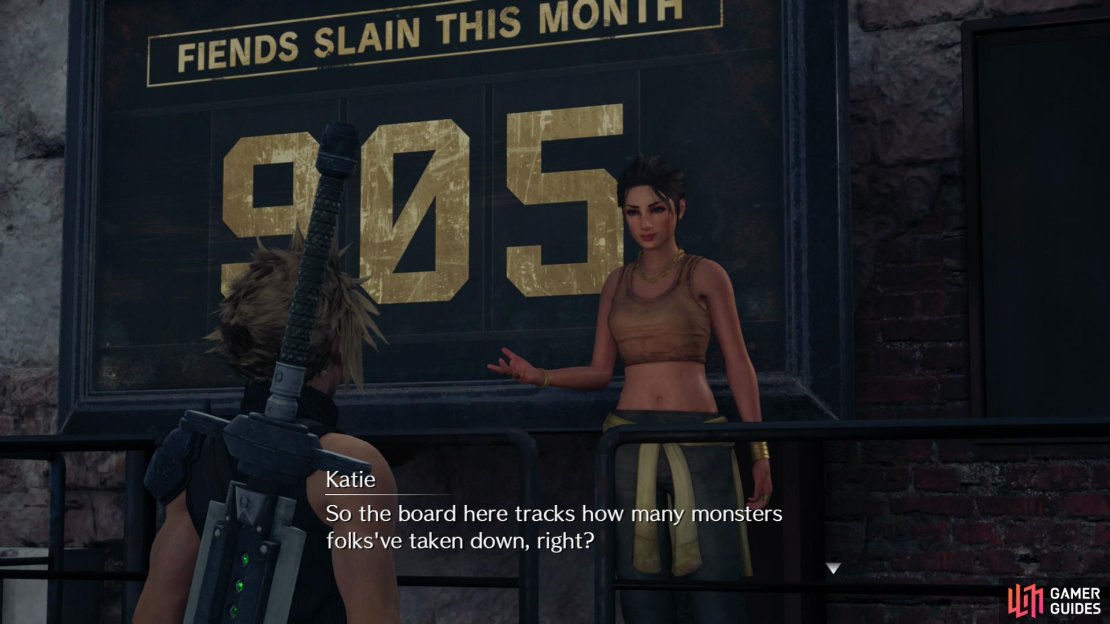
(1 of 3) Katie will task you with killing monsters,
Problem Solving
For now, Tifa suggests paying a visit to Wymer at the Neighborhood Watch Office. Leave the weapon shop and head west to find Katie standing near a board - she’s offering rewards based on the number of fiends slain around the Slums. While not strictly a Side Quest (this won’t count towards the Trophy), it’s a task you should work on while you’re here.
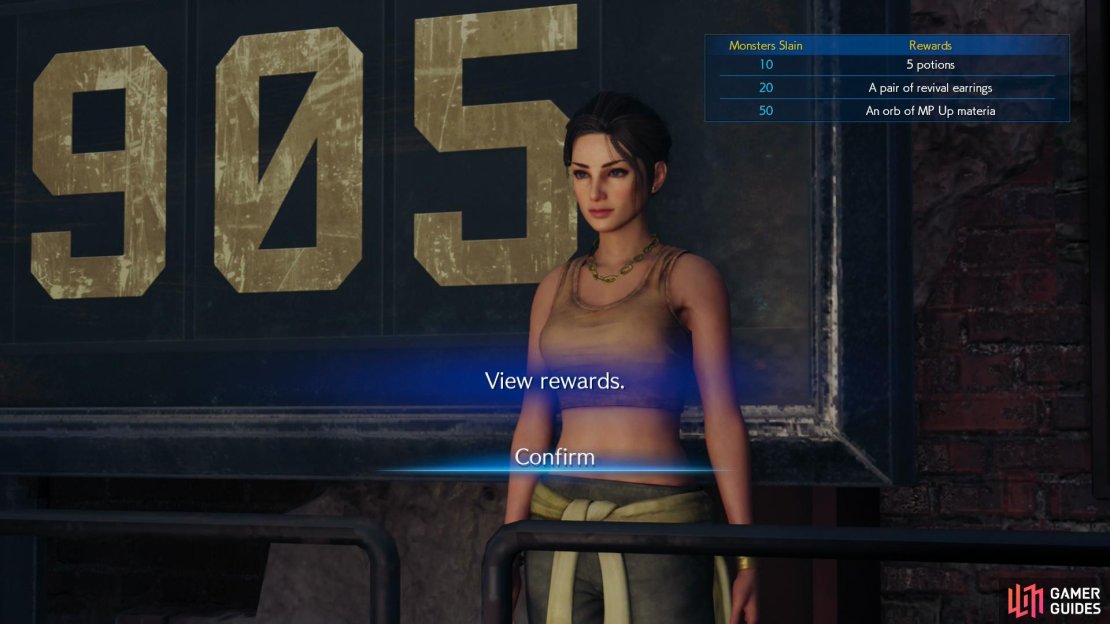
| Monsters Slain | Rewards |
|---|---|
| 10 | 5 potions |
| 20 | A pair of revival earrings |
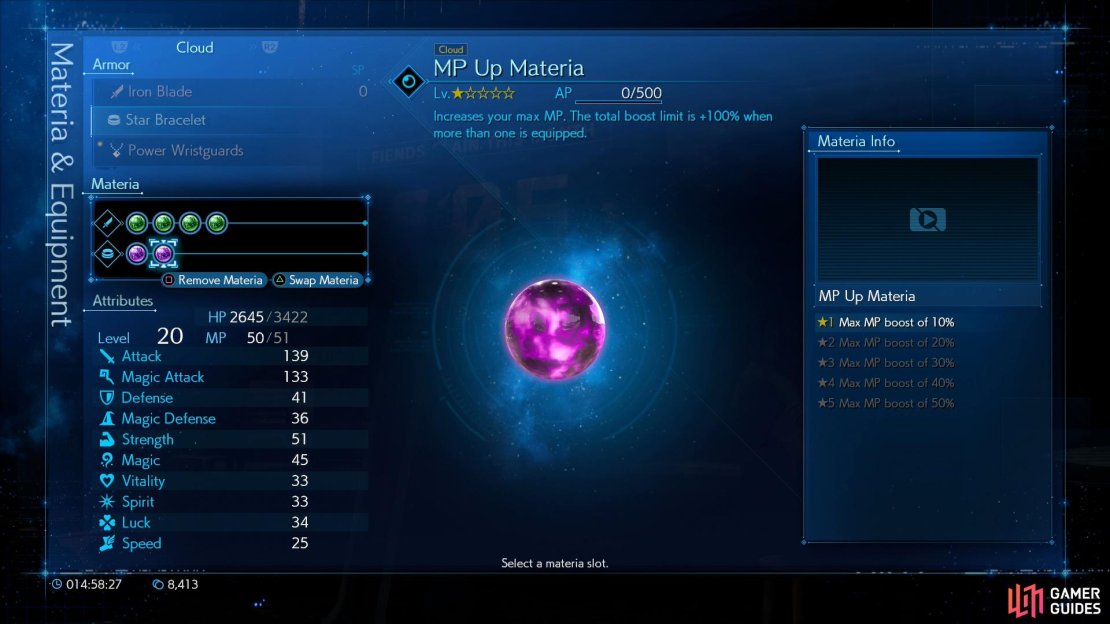
| 50 | An orb of MP Up materia |
The main winner here is the reward for 50 monsters slain, the MP Up materia, this is a handy materia you’ll want to work on levelling up as soon as possible.

(1 of 2) Talk to Wymer to learn about quests,

Talk to Wymer to learn about quests, (left), after which you’ll be able to check out the currently available quests by pressing R2 while on the map screen. (right)
Continue on to the west and you’ll run into Wymer himself so speak to him to learn all about Quests. At certain points in the story, you’ll have the opportunity to undertake Quests for the denizens of Midgar and you can take on more than one at a time. You can view the Quest List by opening the Map and pressing the [R2] button which will also show you how many available Quests there are in a particular Chapter. Quests are useful for all manner of reasons such as rewards or just learning a bit more about Midgar in general. What’s more, there’s a Trophy, Best in the Business, to be had for completing all of the Quests in the game so be sure to be diligent about tracking every last one down.

(1 of 2) Talk to Chadley and he’ll ask you to help him gather Battle Intel.

Talk to Chadley and he’ll ask you to help him gather Battle Intel. (left), This will open the Battle Intel option in the main menu - fortunately the feats Chadley wants you to perform are tracked whether you’ve unlocked them yet or not. (right)
Straight after the quests tutorial you’ll be introduced to Chadley, an intern for Shinra’s Research and Development Division who will ask for your assistance and hand over the incredibly useful Assess materia. This will unlock “Battle Intel” selection in the main menu, where you can view the various tasks Chadley has for you. He’ll only give you a certain set of tasks at a time and you’re free to complete them at your leisure but always plan to complete them - as there’s a lot of useful Materia locked behind these tasks. What’s more, as you unlock more tasks down the line, the game will keep track of your progress beforehand. For example, should Chadley ask you to hit a certain number of weaknesses later in the game, it will take into account all of the weaknesses you struck before you even began the task.
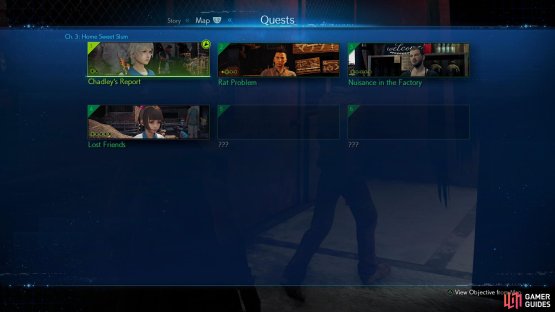
Be sure to slot the Assess Materia and then open your map and head to the Quests screen (press [R2] while on the map screen). You’ll notice there are four Quests you can undertake right now with a further two more to unlock after - you may also notice the circles on the bottom-left of each quest image, which represent the steps for each Quest, giving you a crude idea of how complicated the quest will be.
| Quest | Prerequisite | Location | Rewards |
|---|---|---|---|
| Chadley’s Report | -- | West of the Weapons Store | 500 Gil, Unlock Auto-Cure Materia, more Battle Intel missions |
| Rat Problem | -- | Item Store | 5 Hi-Potions |
| Nuisance in the Factory | -- | Scrap Dealer - North of Seventh Heaven | 500 Gil |
| Lost Friends | -- | Betty - Childrens Park to the southeast of the Weapons Store | Maiden’s Kiss |
| On the Prowl | Complete Rat Problem | Wymer - West of the Weapons Store | Elixir |
| Just Flew in from the Graveyard | Complete Nuisance in the Factory | Pillar Plaza | Star Bracelet |
You’ll need to complete at least one of these Quests before you can progress the Main Scenario so get to work on them straight away. Both Rat Problem and Lost Friends can be completed without needing to leave the Residential District and completing Rat Problem will upgrade the stock available at the Item Shop including the handy Cleansing Materia - this will allow you to cast spells such as Poisona, Esuna and eventually, Resist so be sure to purchase it while you can.
Chadley’s Report is easy enough to complete while you’re doing other tasks and in doing so, you’ll unlock Battle Intel Reports 2 - 4. You’ll also unlock the ability to reset your Weapon Upgrades with Chadley; although not needed right now, this is a useful feature for later in the adventure. The Auto-Cure Materia you unlock can be useful if you don’t want to micromanage healing yourself but there’s far more useful Materia to make use of your slots.
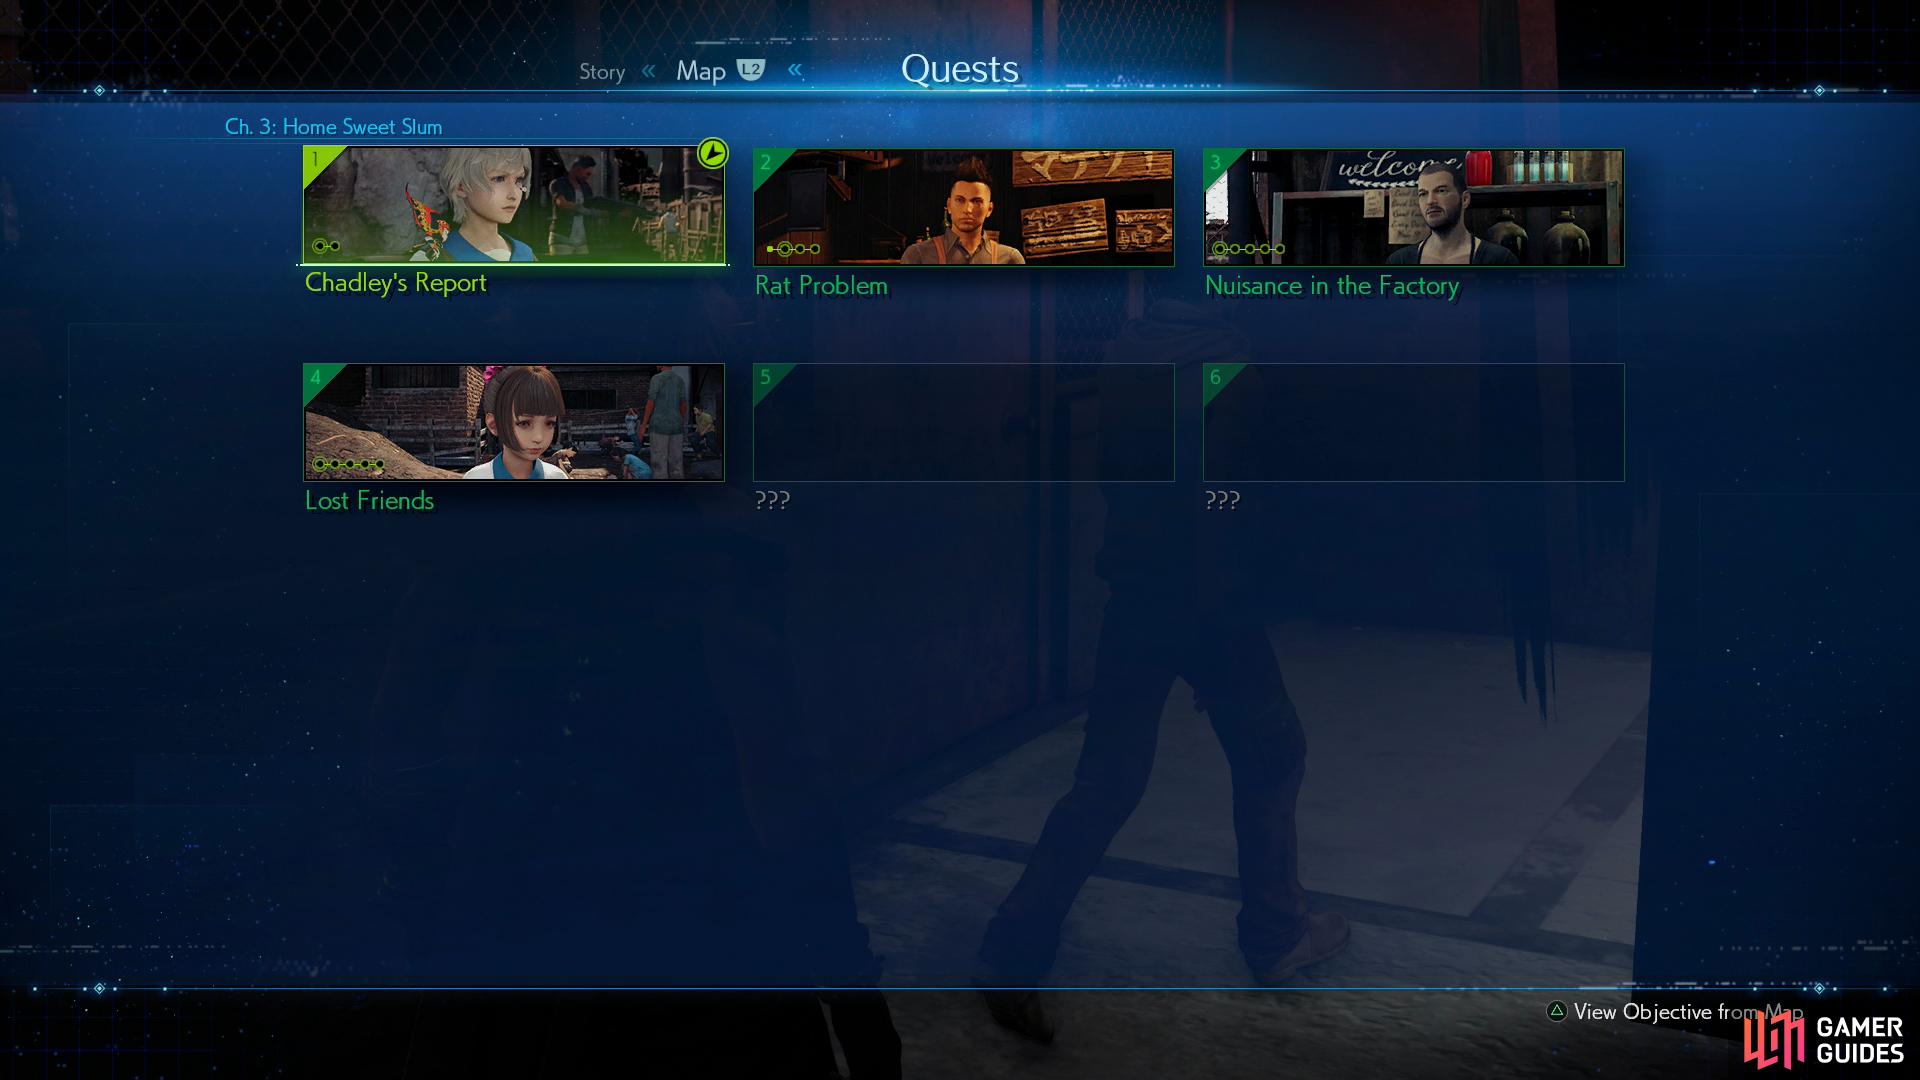
| Battle Intel | Conditions | Reward |
|---|---|---|
| Monster Bio Pt. 1 | Assess 2 enemy types | Auto-Cure Materia |
| Magic Elements Pt. 1 | Strike an enemy’s weakness to Fire, Ice and Lightning | Wind Materia |
| The Stagger Effect Pt. 1 | Use unique abilities on staggered enemies and charge the ATB gauge 10 times | First Strike Materia |
| The Stagger Effect Pt. 2 | Stagger 15 enemy types | ATB Boost Materia |
If you’ve been taking care to hit the Weaknesses of at least three enemy types, you should complete Report 02 right away, allowing you to purchase the incredibly useful Wind Materia. This will allow you to cast Aero and will be useful for the Nuisance in the Factory Quest so be sure to purchase it and slot it. The other two require a little more work: it’s not even possible to Stagger 15 different types of enemies yet while Report 03 requires a bit more of a grind. The unique abilities that this refers to are the abilities assigned to the [TRIANGLE] button - this is a task that becomes a lot easier once you have Barret in your party again as his Overcharge makes short work of it.
You’ll have to do a lot more work for Nuisance in the Factory by heading to the Abandoned Factory to the east of the Residential District after speaking to the Scrap Dealer. This is a larger area with new monsters to Assess; you’ll also find another Fire Materia while you explore the area. Head on over to the Quest page to find out more on what you can do in the Abandoned Factory. Completing that Quest will also unlock a follow up, Just Flew in from the Graveyard; both that Quest and On the Prowl will deal with Variant monsters, deadlier versions of regular enemies.
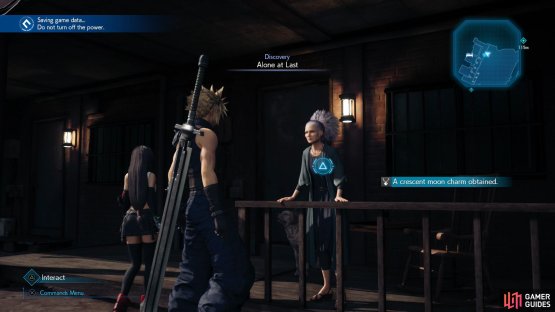
(1 of 2) If you complete all the quests in Chapter 3 you’ll be able to spend some quality time with Tifa, where your opinion may have some far-reaching consequences…

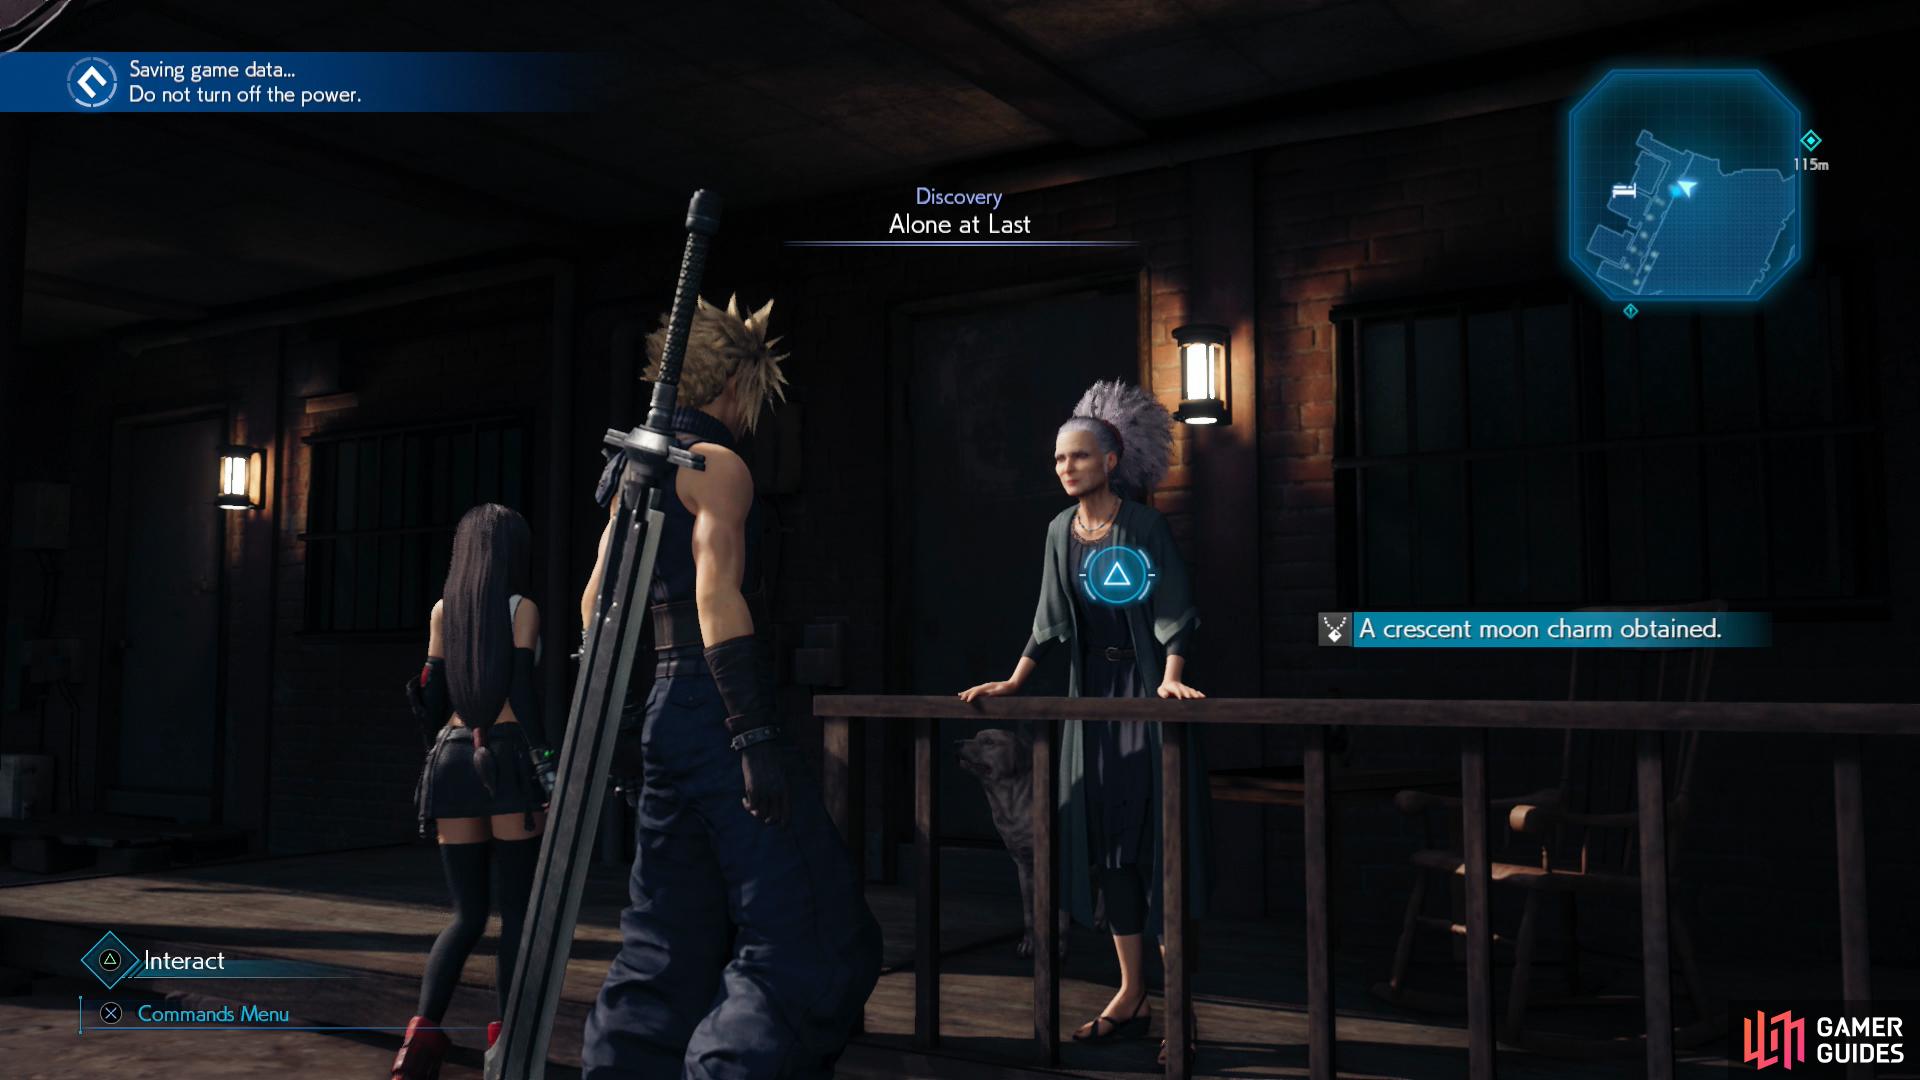
If you complete all the quests in Chapter 3 you’ll be able to spend some quality time with Tifa, where your opinion may have some far-reaching consequences… (left), You’ll also get the Crescent Moon Charm from Marle. (right)
Once you’ve wrapped up the Quests (assuming you complete them all), Tifa will talk to you and mention going back to the Stargazer Heights apartment building. Look at your map and sure enough you’ll spot a new “Discovery” map marker there, labeled “Alone at Last”. These are optional events that can appear after meeting certain requirements, so always be on the lookout for them - this particular one’s requirement is to finish all the available Quests. To begin this one, head back to Stargazer Heights to share a moment with Tifa, during which you’ll get a choice about a future night out.
Once you regain control, head back downstairs to talk to Marle and obtain a Crescent Moon Charm - this curious Accessory will reduce the damage taken by your characters when not controlled by yourself. With everything taken care of finally, make your way to the bar to spot some commotion outside someone’s house. Head over to meet the eccentric Johnny being escorted away by some Shinra grunts.

(1 of 2) Investigate the commotion near Seventh Heaven

Investigate the commotion near Seventh Heaven (left), then follow and defeat a group of Shinra soldiers. (right)
Shinra Reacts
| Enemy | Weaknesses | Notable Loot |
|---|---|---|
| Security Officer | Fire | -- |
| Guard Dog | Fire | -- |
| Elite Security Officer | Fire | -- |
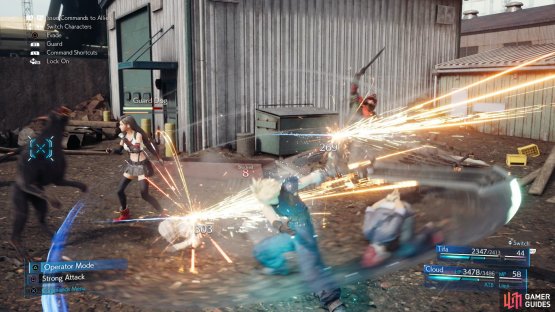
Follow Tifa to the northeast and use the nearby sign to eavesdrop on Johnny and the Shinra grunts. Continue through the gate and take cover at the cargo container to continue listening in on Johnny. Make use of the nearby bench to recover if need be and then continue north to help out Johnny.
You’ll be up against two Security Officers, a Guard Dog and an Elite Security Officer. Before you do anything, be sure to Assess as many of the enemies as you can; they should all be new entries and then get to work on taking out the enemies. You should know how to handle the regular Officers and Guard Dogs by now but the Elite Security Officer will mix in melee attacks when you get close enough; this is the perfect time to use Punisher mode and Counter.
Speak to Johnny following the battle and after he’s run off make your way back to Seventh Heaven to seek out the last of your payment. As you approach the bar, you’ll be given a choice to head back into town or not: if you’ve yet to do all the Quests, make sure you do them before heading into the bar and advancing the story.
Barret requests Tifa’s presence for an AVALANCHE meeting however she’ll offer to pour you a drink first. Your choice has no bearing on the story here so go with what you feel is best.
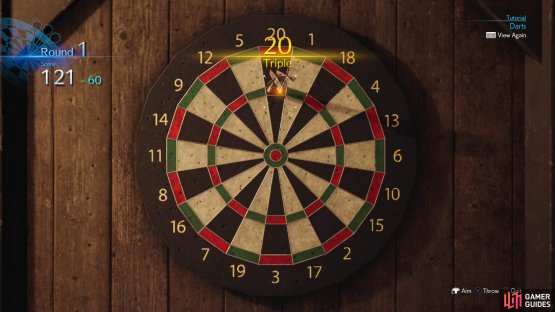
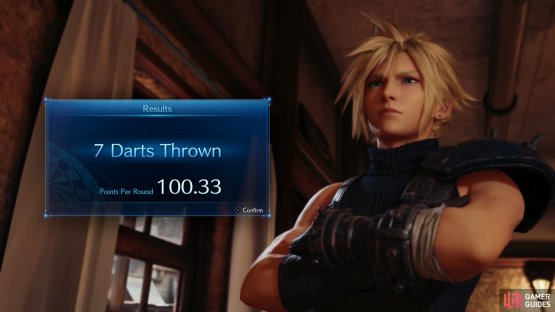
(1 of 2) Try to aim for high-point areas,


Try to aim for high-point areas, (left), as you’ll need to score 301 points in seven darts to break the record. (right)
Talking Strategy
While the meeting goes on without Cloud, you’ll have the opportunity to kill some time and there’s nothing better than a game of Darts to fill that time. Head on over to the corner and interact with the Dartboard to get a tutorial on how to play. Take your time and play to your heart’s content, beating the High Score (no more than 7 Darts) will result in a reward later in the adventure along with unlocking the Heavenly Dart Player Trophy so be sure to stick around until you achieve it. You can find out more on how to beat the High Score in the Darts page.
Once you’ve played at least one game of Darts, head back to the bar and take a seat to wait for Tifa. She’ll return, shortly followed by the rest of the AVALANCHE group as Barret finally hands over the rest of Cloud’s pay - 1,050 Gil. Once you regain control, leave the bar.
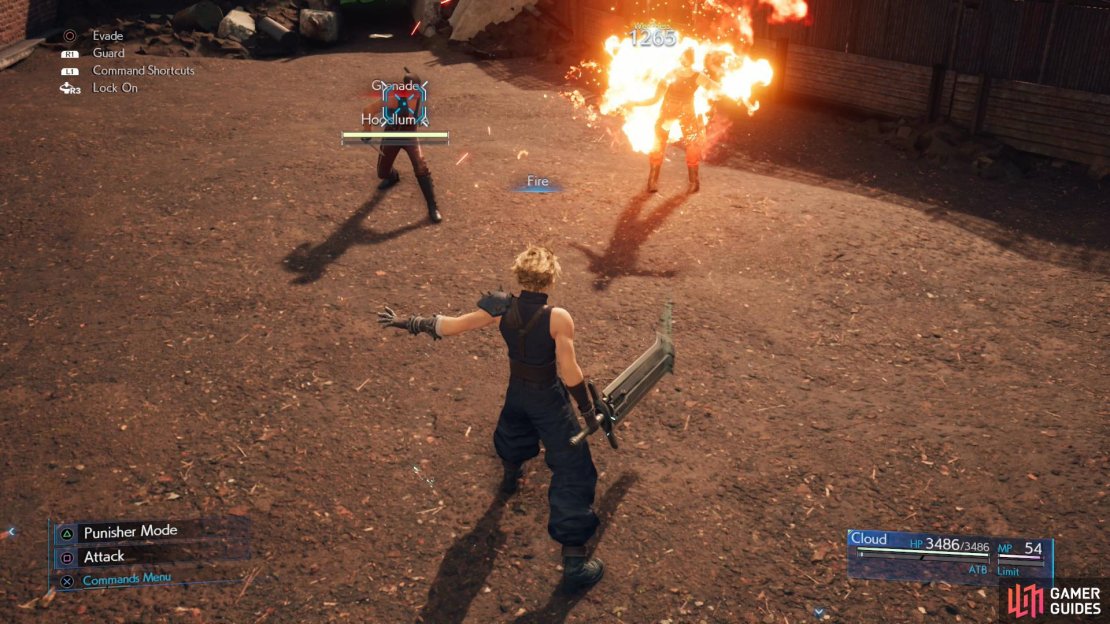
Ominous Shadows
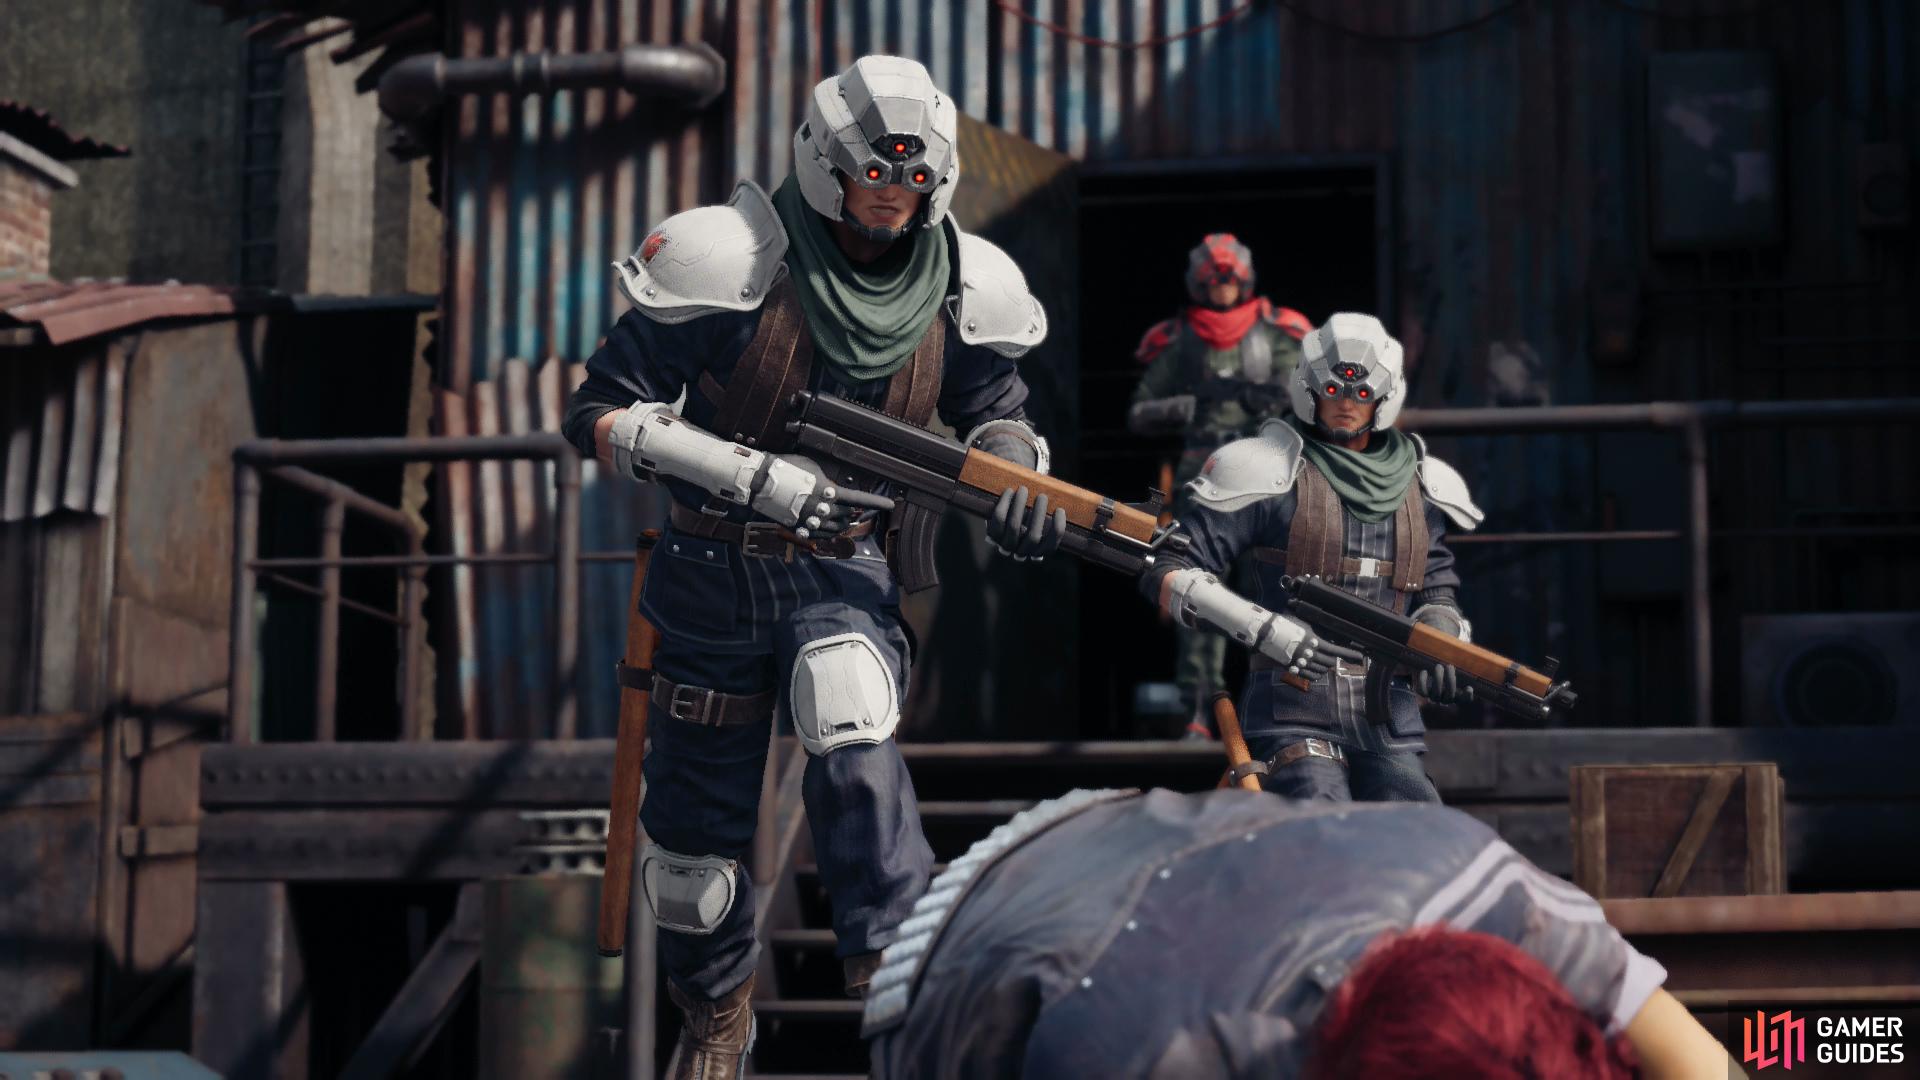
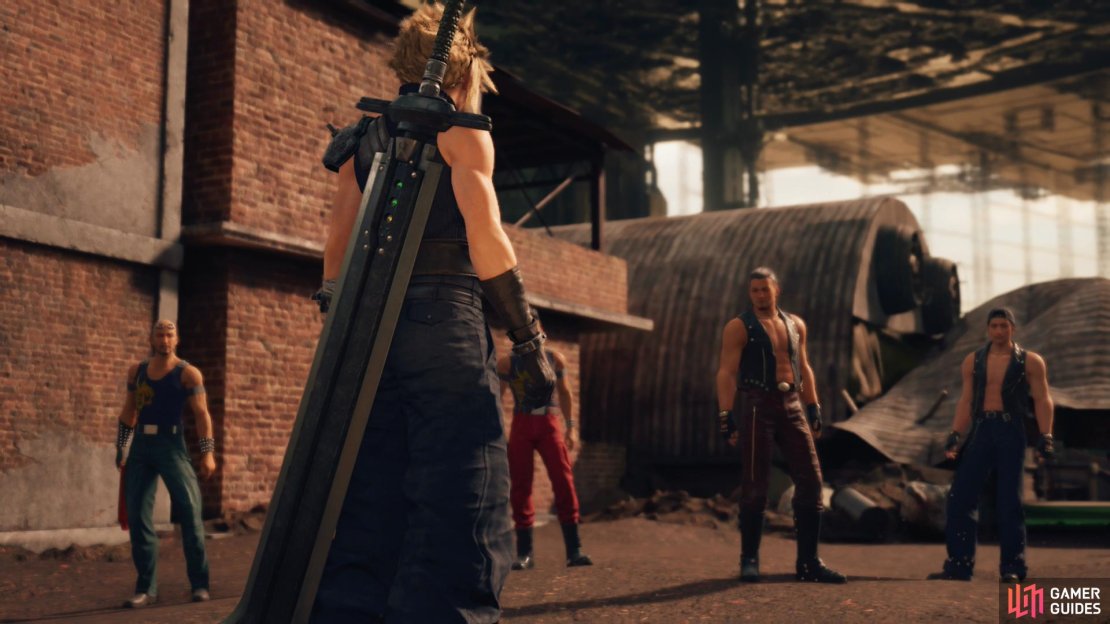
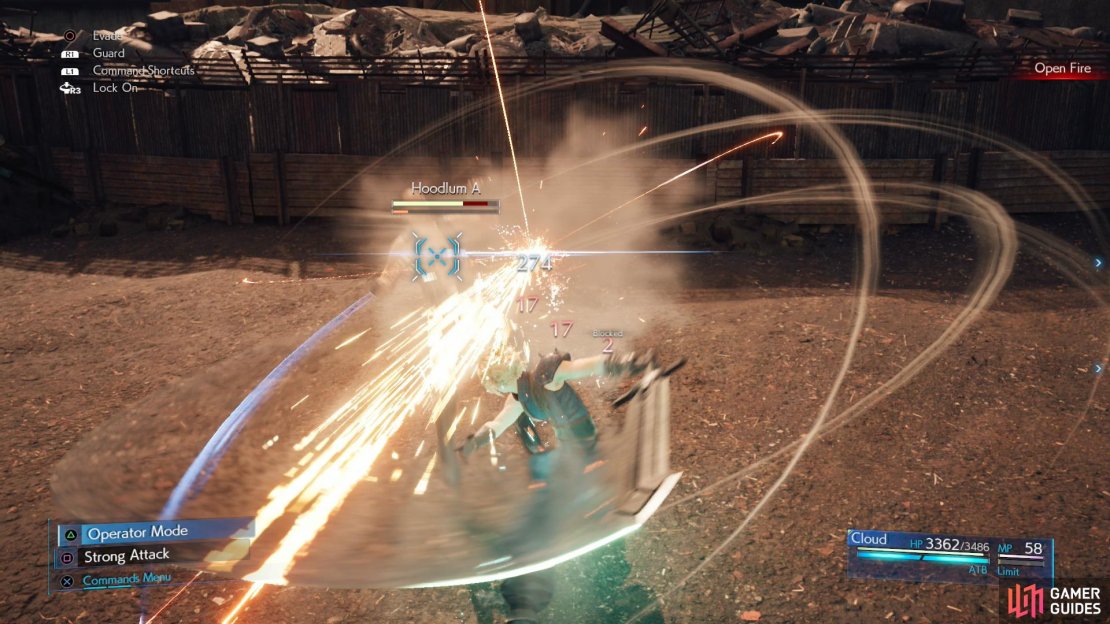
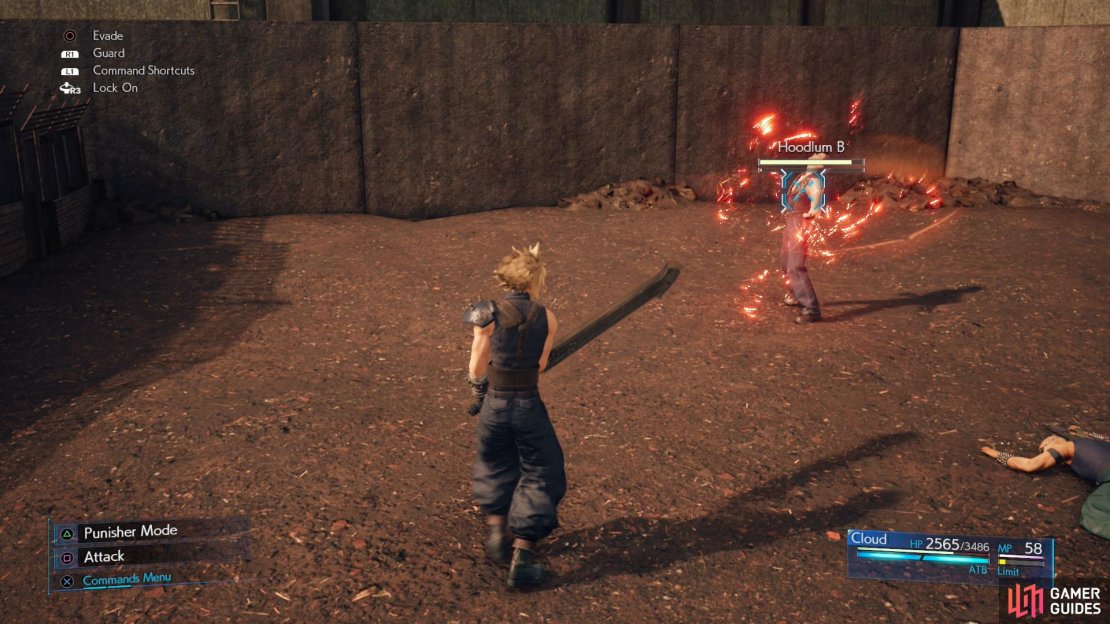
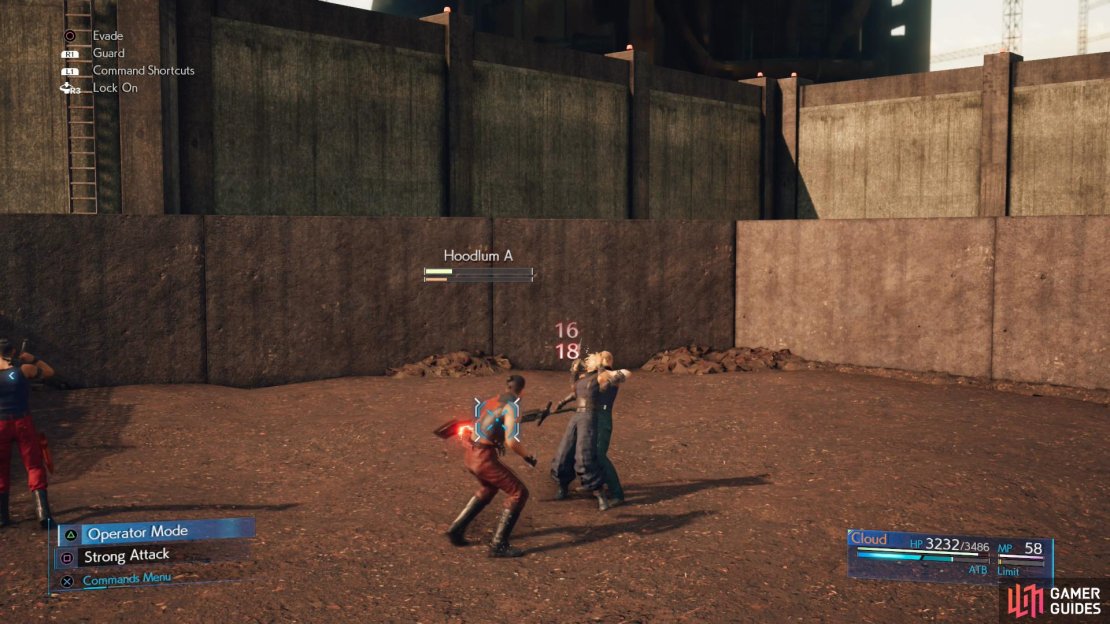
As you exit, you’ll spot a group of suspicious men so head on over to find out what’s going on. After making what appears to be a deal with the Hoodlum, follow him and you’ll make your way to the area to the west of the Junk Shop - specifically to where you may have faced the Doomrats during Rat Problem. Once you’re alone, negotiations don’t go quite the way the Hoodlums planned and you’ll be forced into battle with them.
You’ll only need to Assess one of the Hoodlums for the Enemy Intel so don’t waste your time on using it more than once. Despite being outnumbered, your opponents aren’t anything to write home about and they maintain the Fire weakness from before. You can make use of your new Triple Slash ability if you so choose. They’re also easy to counter with Punisher mode and quick to Stagger however be sure to finish them off once you get their HP low or else they’ll drink a concoction which stops their attacks from being interrupted or cause Stagger. Focus on one at a time and keep your HP up and you should have no problems teaching these Hoodlums a lesson.
After pondering what hole they crawled out of, return to Stargazer Heights to find Jessie there, waiting for you. She’ll come asking for a favor from Cloud with a shiny new Ifrit Materia as part of the deal.
Be sure to slot it in the only Summon Slot you have and then speak to Jessie once you’re ready to go and end the Chapter, obtaining the Mercenary Endeavors Trophy.

No Comments