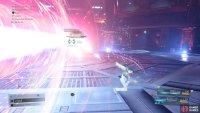
This page is for tips regarding the second boss in INTERmission, Scarlet and The Crimson Mare on the Hard Mode Difficulty.
Boss: Scarlet and the Crimson Mare
Scarlet and The Crimson Mare are far more challenging on Hard Mode.
| Enemy | Weaknesses | Notable Loot |
|---|---|---|
| Crimson Mare | Lightning | – |
| Scarlet | Fire | – |
| Yuffie | Item |
|---|---|
| Weapon | Boomerang |
| Armor | Chthonian Armlet |
| Accessory | Ribbon or Götterdämmerung |
| Materia | Healing + Magnify, Revival, Chakra, HP Up x2 (~8000+ HP), MP Up x2 (~120 MP+), Steadfast Block |
| Sonon | Item |
|---|---|
| Weapon | Marshalist’s Staff |
| Armor | Firebird Armlet |
| Accessory | Kindred Cord or Götterdämmerung |
| Materia | Healing + Magnify, Steadfast Block, HP Up x2 (~9000+ HP), MP Up (~100 MP+), Prayer, Elemental Materia + Lightning (on weapon) |
Strategy
Unlike the rather simple Gigantipede on Hard Mode, Scarlet and The Crimson Mare is a much more suitable threat. Not only are there two new attacks to contend with, but some of the more deadly attacks, such as the Makocannon Beam will deal devastating damage and are hard to avoid, if you’re not confident with Brumal Form, you’ll have to rely on guarding with a MAX Steadfast Block Materia before healing up after. What’s more, this isn’t the final boss of Chapter 2, so you’ll want to be somewhat conservative with your MP still.
In Phase One and all other subsequent Phases, focus on taking out any Sentry Launchers that spawn as a result of Directive: Deploy. The damage that they inflict while you’re focusing on Scarlet will all add up over time, wasting precious MP in the process. The same tactics apply here like the Normal Mode battle, target Scarlet with Windstorm and then focus on The Crimson Mare once she’s unconscious.
(1 of 2) Take out the Sentry Rays at the start of the battle
Take out the Sentry Rays at the start of the battle (left), and any Sentry Launchers as they’re spawned. (right)
It begins to get more dangerous once she reaches Phase Two and equips the Makocannons. Not only will the Makocannon Beam do large damage as above, but she’ll also add a deadly new attack, Fusillade. This sees The Crimson Mare shoot projectiles followed by a large beam resembling the Makocannon Beam. You’ll want to Guard through the projectiles (better yet, Precision Defense) and then hopefully use Brumal Form to evade the beam shortly after. If you’re not confident in evading with Brumal Form, you’ll have to just try and Guard through it and heal up after although this will take up your resources (Pray works well here on Sonon should he have two ATB Charges available). To limit Scarlet from using this attack too often, focus your attention on the Makocannons themselves first, this will prevent her from using both of these deadly attacks and make this phase a lot more manageable.
(1 of 3) Either Precision Defense or use Brumal Form to avoid the deadly Fusillade
Once Phase Three rolls around again, she’ll equip the Claymore and Shield once more and with it, bring another new attack to the table. Fulgent Blade is a deadly sword-based combo that will deal devastating damage should you take every hit and even moderate - large damage if you Guard through it. If you can time Precision Defense, that will help greatly as will Brumal Form. If you’ve yet to use Banishment by this point and have it charged to level III, unleash that on the Sword to prevent Fulgent Blade and then go all out on the Shield during this phase.
Phase Three is also a good time to make use of any Limit Breaks or Summon Ramuh should they be available as she’ll just cycle between these two modes for the duration of the battle, and you want to defeat The Crimson Mare as quickly as possible to save your MP. Upon victory, you’ll obtain the Secrets of the Ninja & Secrets of the Staff Vol. XII Manuscripts.


No Comments