
| Important Items in This Area |
|---|
| AER14 Prototype |
| Tales of a Junktown Jerky Vendor |
The Thorn
First, however, it’s time for a little detour which will prevent you from having to backtrack later, made more palatable by the fact that Westside - the detour’s location - is also fairly close to Vault 22. There are two entrances to Westside, as was pointed out earlier during Contreras’s mission. The Westside West Entrance is, of course, to the west, but south-east of there is the Westside South Entrance, near which is a manhole cover leading to The Thorn, which also has its own map marker. Enter the The Thorn (at least, before midnight and after 6:00 am) and head south to find an area.
On a low platform overlooking the arena you’ll find Red Lucy, who will tell you about The Thorn. Here you can bet on bloodsport, or participate for rather more money. Right now your options are rather limited; you can fight up to three Giant Mantises (30 Caps), three Radscorpions (60 Caps) and three Giant Radscorpions (120 Caps)
Ask Red Lucy about herself, then hit on her and she’ll turn you down… at least, until you prove your prowess. Ask her how you can pay “tribute” to her and she’ll tell you to find a dozen Giant Mantis eggs, which can be found in Vault 22. What a coincidence! This starts the quest Bleed Me Dry .
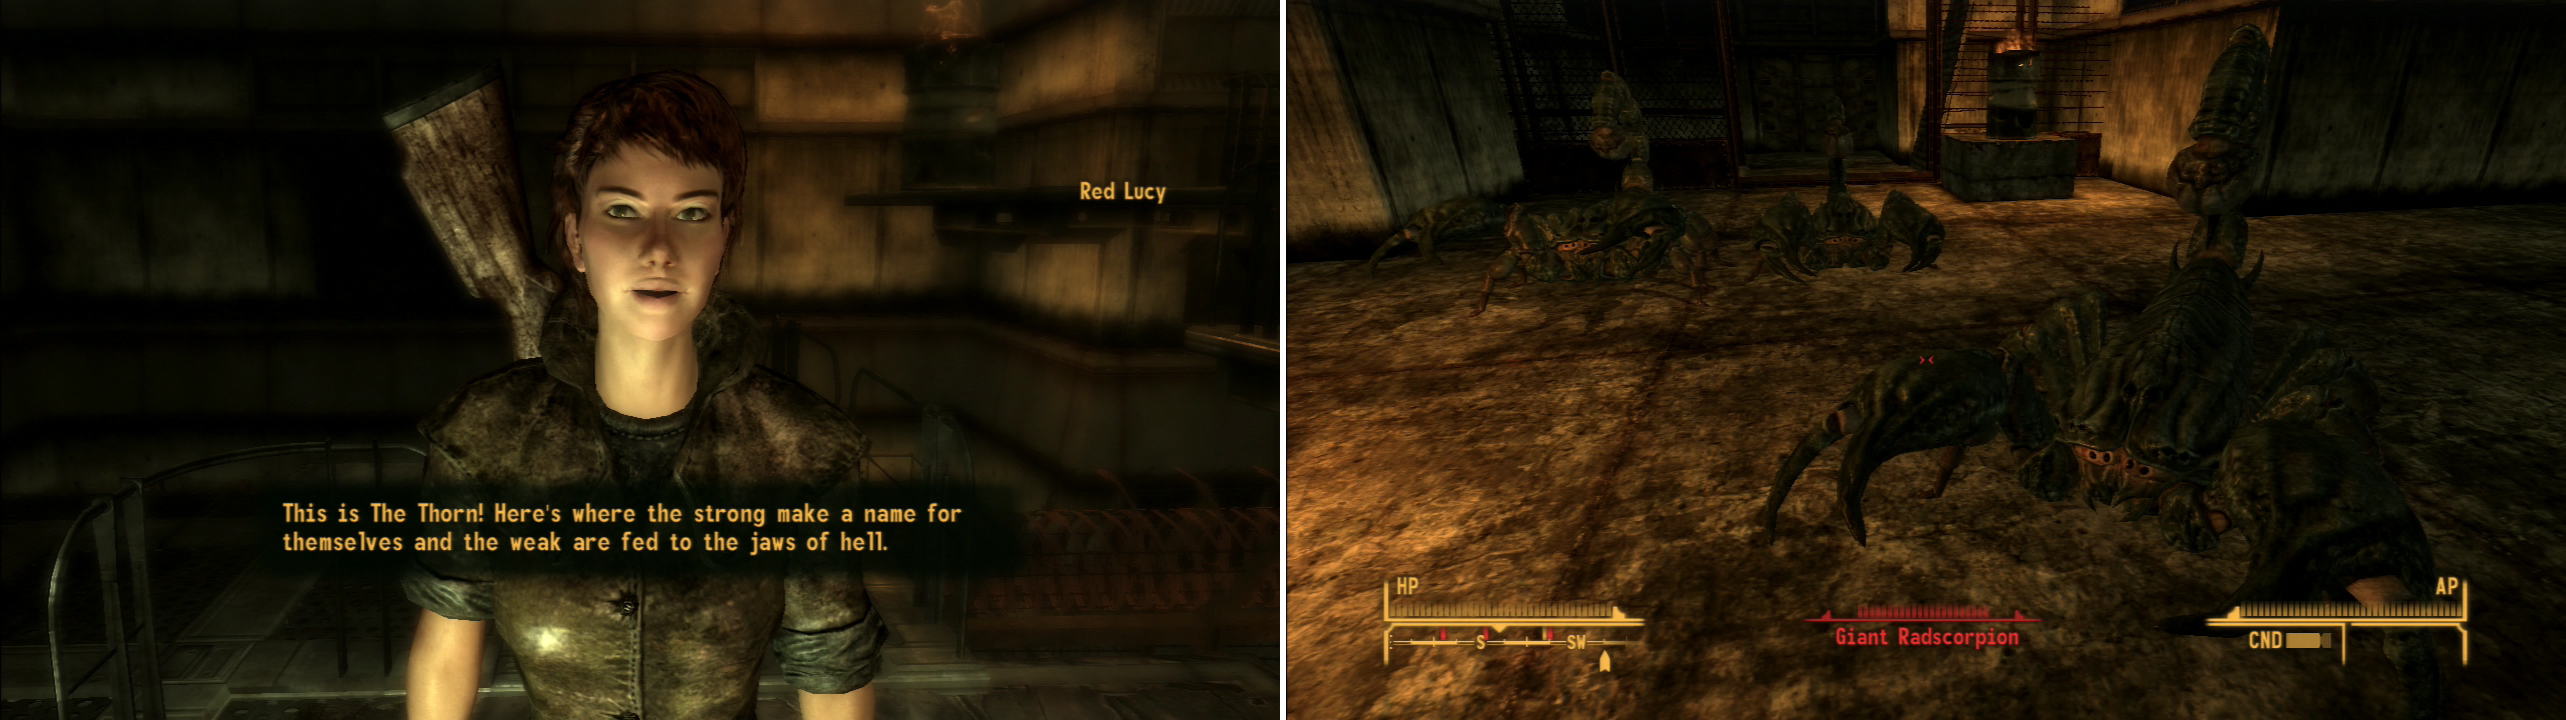
Talk to Red Lucy at The Thorn and she’ll ask you to find some Mantis Eggs for her (left). You can also indulge in some pit fighting, if you’ve got the mettle (right).
Vault 22
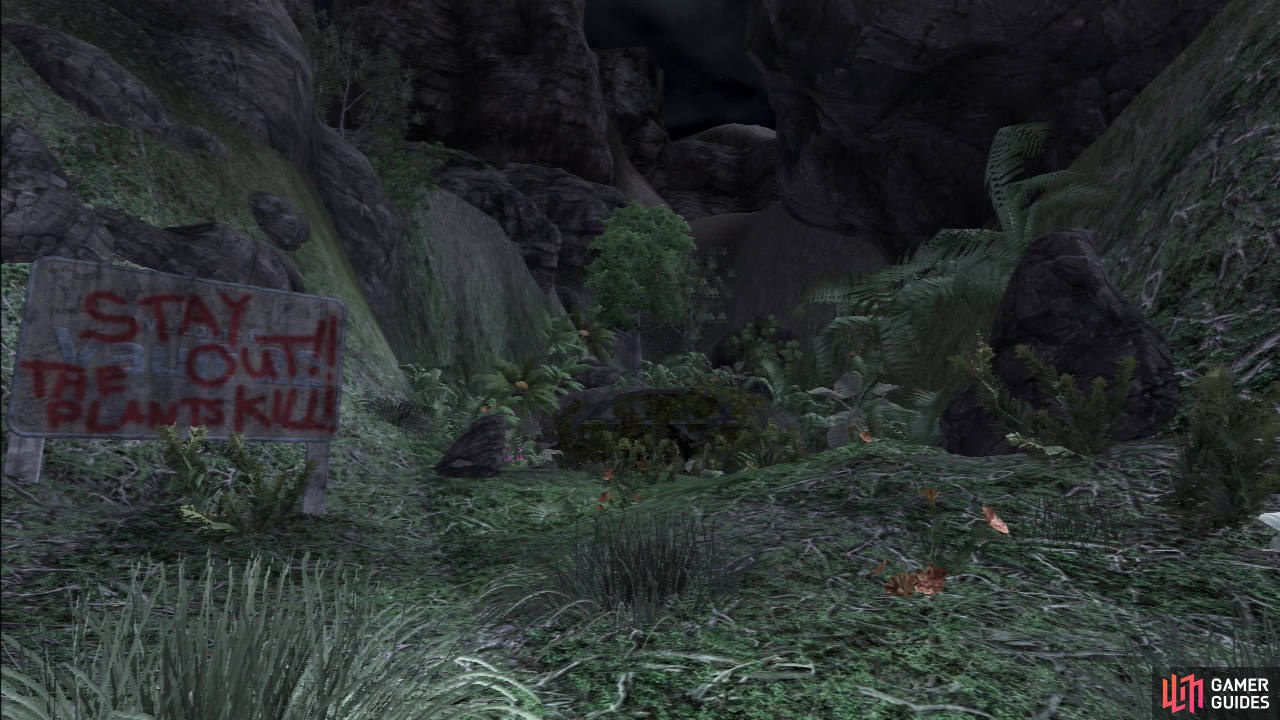
Leave The Thorn and head west to find Vault 22. You’ll know you’re getting close when you start seeing plant life covering the ground. Be wary, as Cazadores can roam around the entrance of the vault. There are also some Giant Mantises hiding amidst the greenery you’ll need to smash. Once you kill whatever insects are lurking around outside the vault make your way inside.
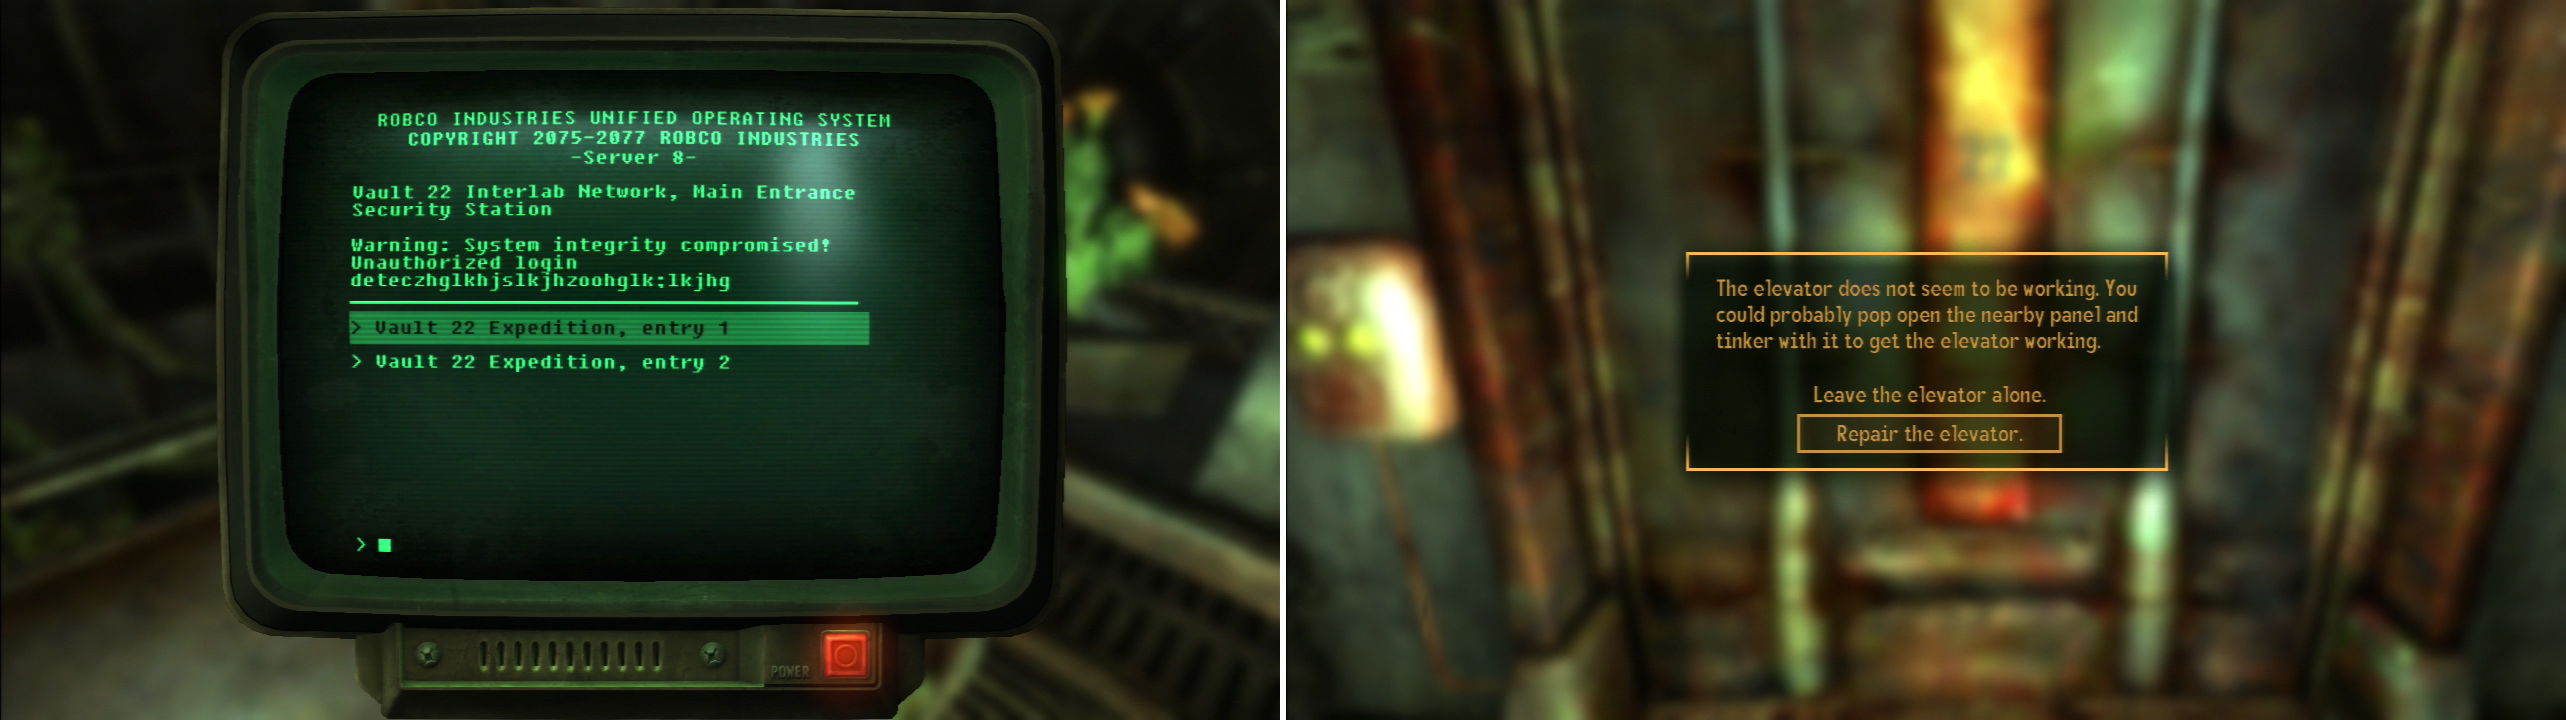
Search various terminals to find some of Keely’s journal entries (left). If you repair the elevator, you’ll save yourself a good bit of time (right).
Vault 22 - Entrance Hall
In the room you enter into, search a table to the south to find a “Restored Terminal” and read some expedition entries to learn a bit about Keely’s early exploits. Once done, go through a doorway to the west, then down some stairs to reach a four-way intersection. Loot a Vending Machine to the north, then repair an elevator [Repair 50] to the west before. In case you can’t repair the elevator, head north through a doorway, down two flights of stairs, and through a door to Vault 22 - Oxygen Recycling. For the sake of catering to the lowest common denominator - and to loot the entire place thoroughly - it will be assumed you can’t access the elevator, which will be largely ignored.
Vault 22 - Oxygen Recycling
Either way, you’ll end up in more or less the same place. Make your way to a four-way intersection, then enter a room to the east. Go through another doorway to the south, then into a room (also to the south) where you can find a Terminal with more expedition entries. After you’re done messing with this terminal you can find a Restored Terminal with some noise complaints on it, just head into the hallway outside, make your way east, then north, and enter the first room to the east to find it on a table. Once done, return to the hallway, continue down it to the north, turn west, enter the room to the south, then turn west again to reach the four-way intersection at the beginning of the level. From here head north down two flights of stairs to reach the next area.
Vault 22 - Food Production
At the four-way intersection on this level you’ll find your first opposition inside the vault; a little green humanoid that hides, dormant and hidden amongst the plants. They’re not too terrible, but you should get in the habit of keeping an eye out for them every time you pass near clusters of plants.
Travel down a hallway to the east and enter the first room to the south to find another terminal with expedition notes on it. Leave the room and continue east until you find a hallway to the north. Follow it north and enter the first room to the west, where more creepy green men lurk hidden amidst some plants. Prune them, then explore to the north to find a small room with a Restored Terminal inside and some Food Additive on the same table nearby. The terminal has entries on it which include some insight into what may have happened to this vault’s original dwellers… and what those little green humanoids might be.
Leave the room you’re in and return to the hallway, where you should backtrack to the south and continue south from there down a new hallway, In a room to the east you’ll find two terminals to play with; the Cave Door Access terminal which - in spite of its name - will not grant access to the caverns beyond the door, and another Terminal on a desk that details the deterioration of the vault by some unknown assailants. Spooky. Return to the four-way intersection at the beginning of the level and… yeah, head south down two flights of stairs to the next level. Almost becoming predictable, isn’t it?

The Flamer you can find may come in handy later… (left). The Vault 22 Cave Door Keycard will open to the door to the caves (right).
Vault 22 - Common Areas
No four-way intersection this time. Well, not really… the only way to go is east through a door to reach the atrium. Continue east, past a projector that’s somehow still functional and down a hallway to reach the Overseer’s office. If you manipulate a Terminal on a table you can pick the “Unlock Crew Quarters” and “Unlock Data Backup” options to unlock an [Average] door on this level and a [Hard] door on the next one, respectively. Of course, you can’t pick them this way, so you want the XP, don’t mess with the terminal. Also, the “Unlock Cavern Access” entry yields nothing. Drat.
Return to the atrium and head to the northern end of the atrium to find three rooms to the north and a doorway leading to some stairs to the west. Explore the three rooms to the north, first, looting the western room to find some food, in the eastern room you can find a First Aid Box on the wall and some Cave Fungus in a corner, while in the northern one you can find a Terminal with more expedition entries.
Leave the three rooms behind and head down the stairs to the west to reach the bottom floor of the atrium, where you’ll find several patches of vegetation with Spore Carriers lurking amidst them. Wander about and kill them, then go through a door along the southern end of the level to find a storage room with a few containers to loot. In another room to the west you’ll find a generator throwing off electricity. Grab a Laser Pistol and some Energy Cells off a table along the southern end of the room, then pick up a Flamer and some Flamer Fuel in the north-western corner of the room.
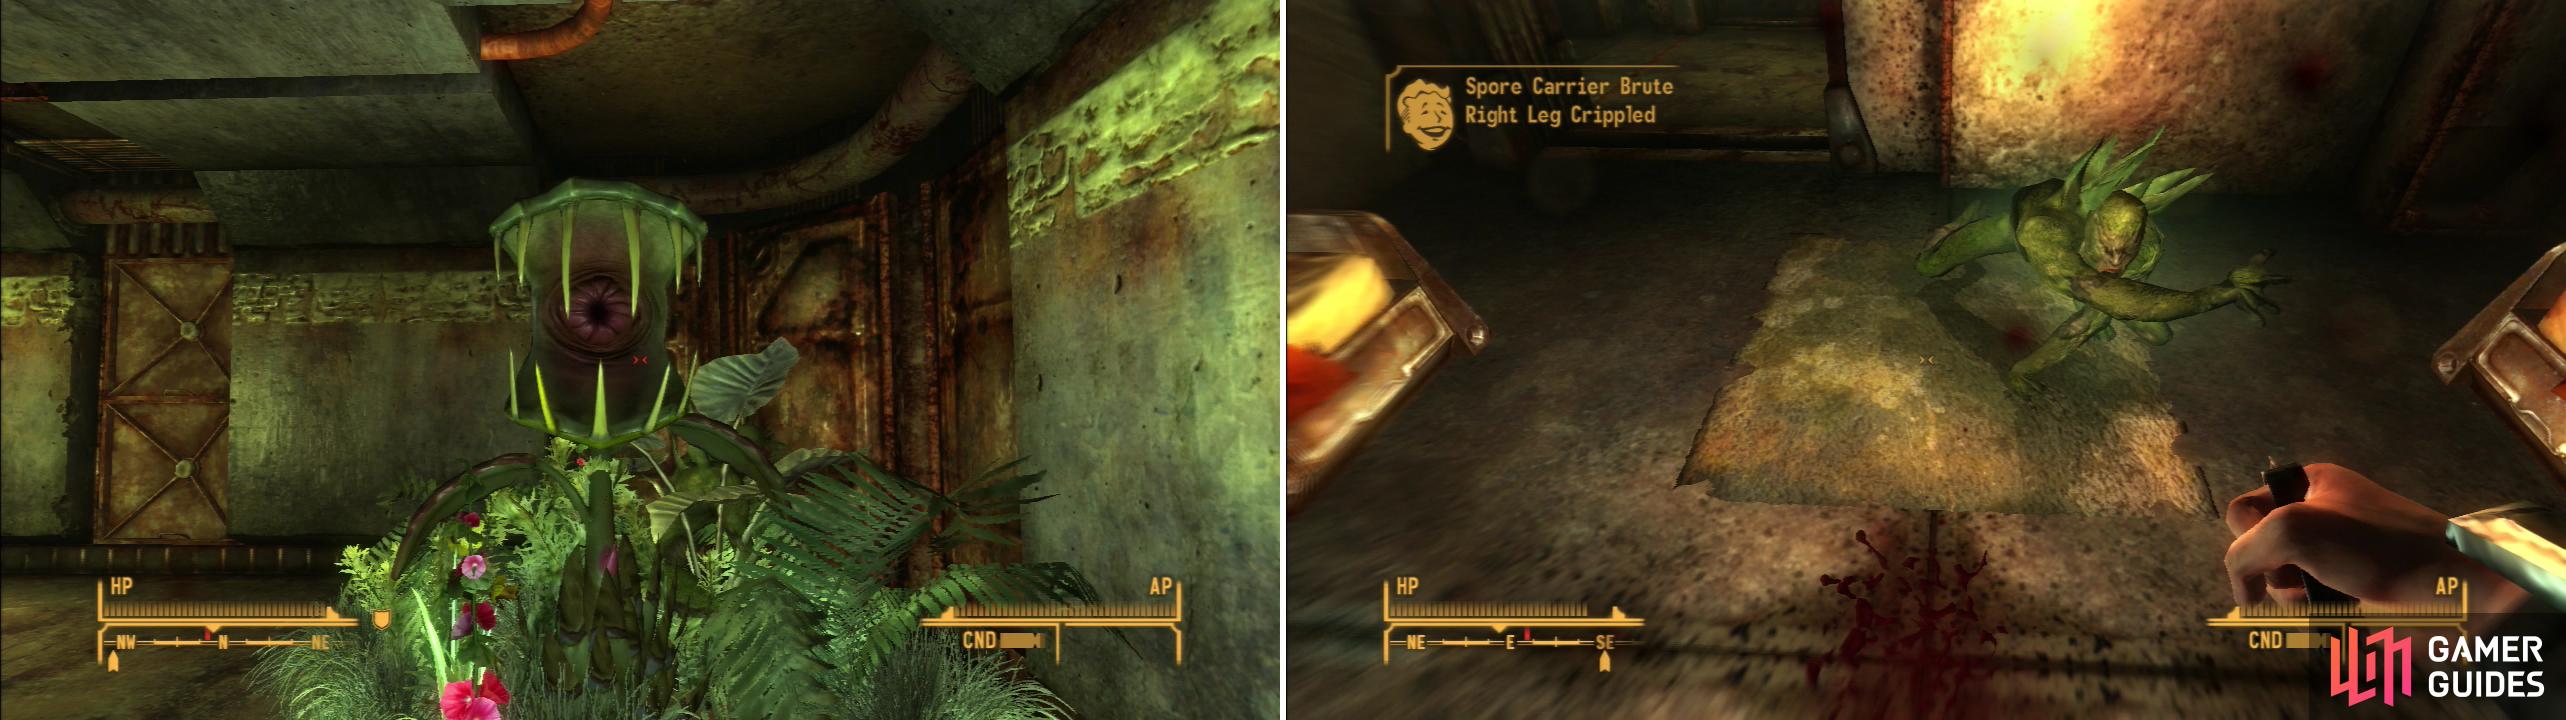
Although immobile, Spore Plants can spit caustic fluid at you (left). Spore Carriers present a more dynamic threat (right).
Make your way back to the atrium and go through a door to the north-east to find a clinic wherein you can find some Tool Cabinets, a First Aid Box and a Terminal which details the worsening condition of the original vault dwellers in Vault 22. Leave the clinic and go through a doorway along the north-western end of the lower atrium. This door will be locked [Average] if you didn’t disable the lock via the Overseer’s Terminal. Enter the hallway beyond and go through the first door to the west to find some Spore Carriers and, on a metal shelf, the “Vault 22 Cave Door Keycard”. This, finally, will give you access to the caves located on the Food Production level… but first, continue exploring the rest of this area. Explore the rest of the rooms in this hallway then head up some stairs to the north to find a Spore Plant - another old-school Fallout foe, the proverbial goo-spitting venus fly-trap - then search two more rooms to the west.
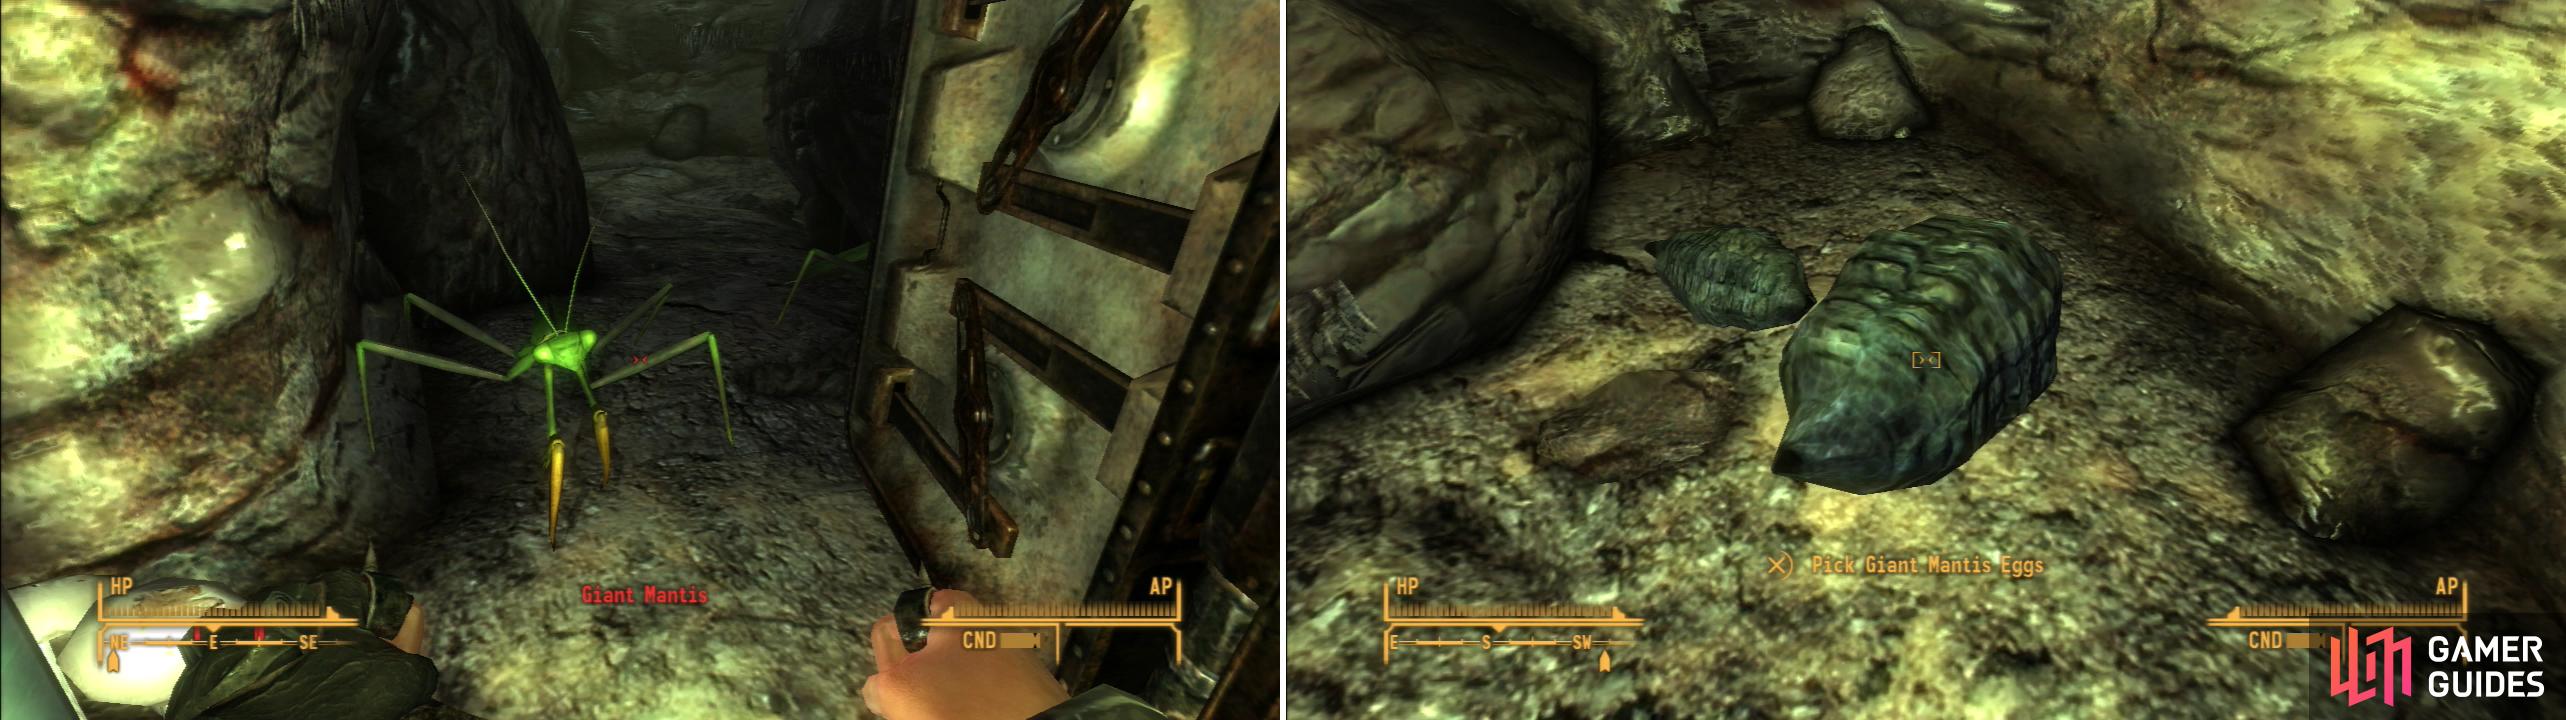
Beyond the door leading to the caves you’ll find Giant Mantises (left). Kill them all and harvest their eggs to appease Red Lucy (right).
Exploring the Caves
Backtrack up to the Food Production room and head east to find the Cave Door Access terminal, which you can now use to open the nearby door. Once done head through the door and crush some Giant Mantises, then proceed until you reach a “T” intersection. Follow the path south, uphill, and eventually back to Oxygen Recycling to find yourself in a room you previously couldn’t reach. Search a Footlocker in the north-eastern corner of the room to find six HEPA 20 Cartridge Filters, the final item requested by the Senior Knight Lorenzo.
Return to the caves, then to the “T” intersection near the entrance. This time follow the northern fork downhill until you reach a four-way intersection. If you go west you’ll find a door leading to Pest Control, which is your goal… but first, let’s clear out the caves. If you head east you’ll find a number of Mantises guarding a dead-end tunnel. Kill them, a Mantis Female, and their babies, too. Once done search south of the dead bugs to harvest their eggs, which will satisfy Red Lucy back at The Thorn. Yes, they’re different eggs than the type Mantises have on them normally, for whatever reason. Return to the four-way intersection and continue on to the Pest Control level.
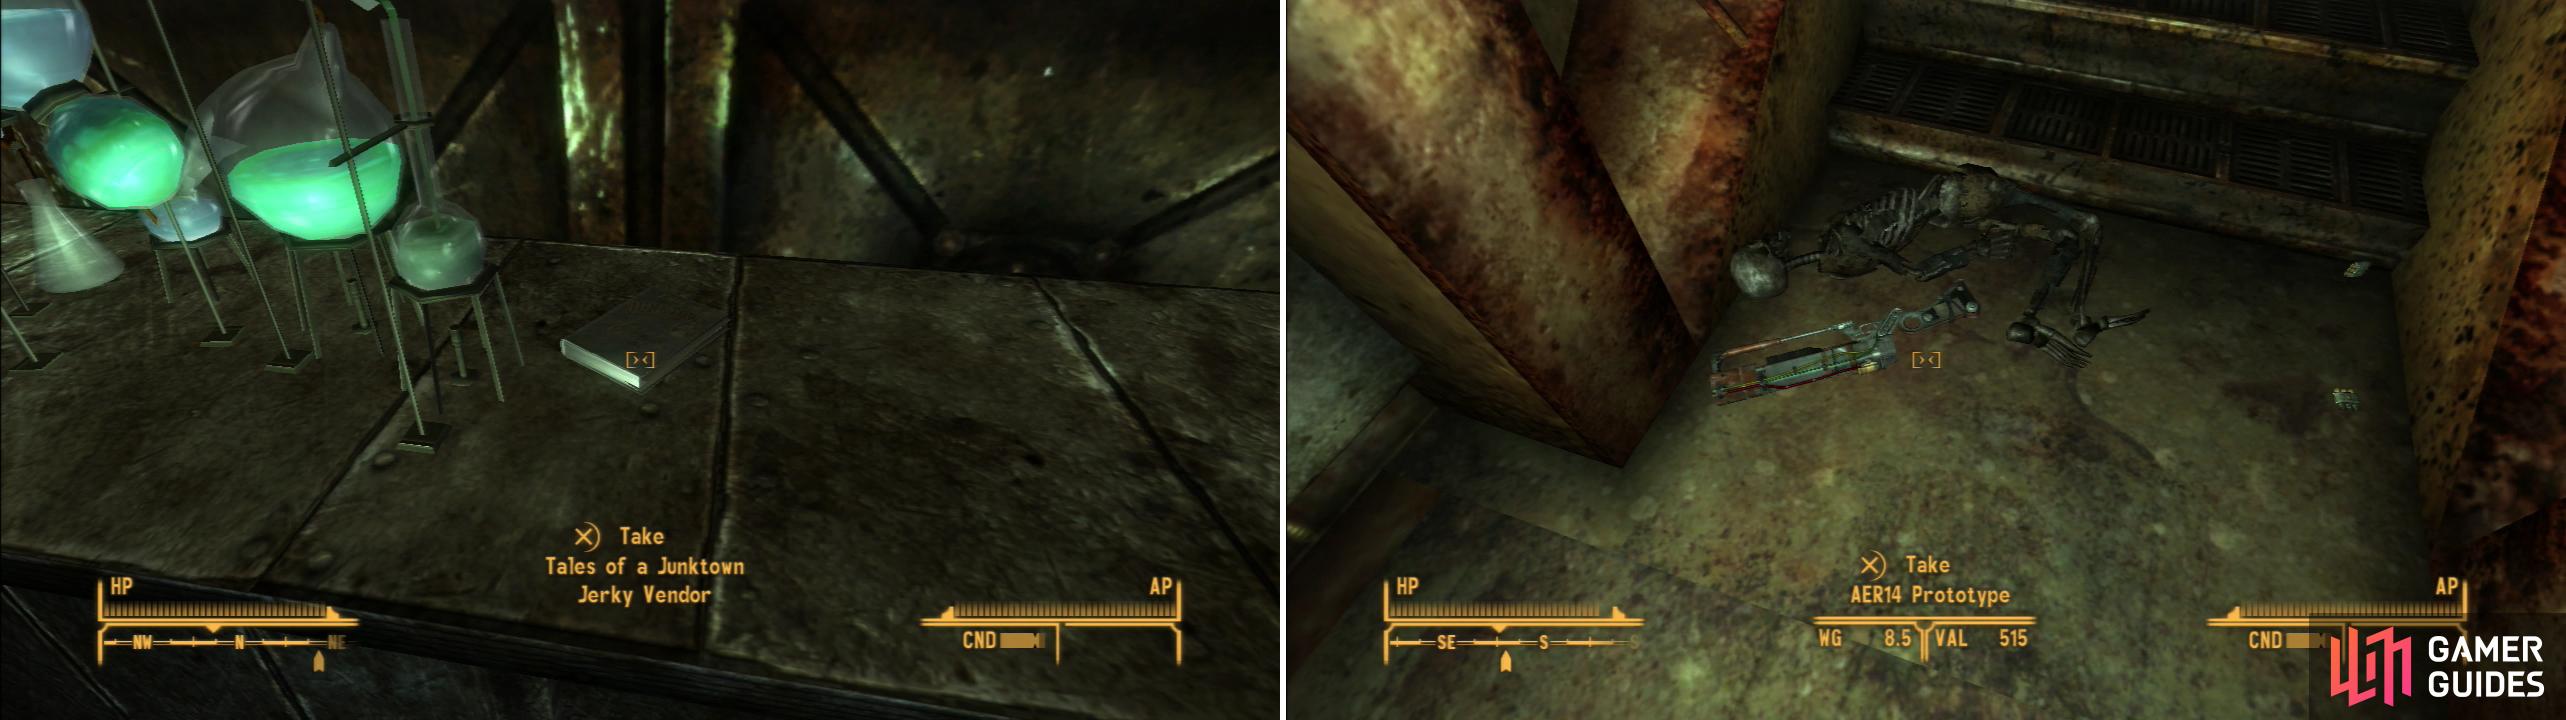
Grab a copy of Tales of a Junktown Jerky Vendor from a counter (left). The unique Laser Rifle - AER14 Prototype - can be found at the foot of an isolated staircase (right).
Vault 22 - Pest Control
First things first, grab a copy of Tales of a Junktown Jerky Vendor from the counter to the east, then hit a Terminal to the west to learn about some of the plants and insects the scientists were playing around with. Once done, head through a doorway to the north then down two flights of stairs to the west. Kill a new variety of Spore Carrier - the tougher Savage variant - then continue on until you reach a four-way intersection.
Continue south and open a locked door [Very Easy] to return to the Common Areas… albeit an area that you couldn’t reach earlier. Once you’re back in the Common Areas head upstairs and waste two Giant Mantises. At the base of another staircase you’ll find a skeleton, and more importantly, the AER14 Prototype on the floor next to it.
When you find the mainframe, download the data onto your Pip-Boy (left). After you clear a Spore Plant-infested cavern, you’ll find Keely (right).
Return to the four-way intersection in the Pest Control area, then proceed east down a hallway. You’ll want to enter the door to the south, although there is a dead-end you can explore if you continue east, then go down a hallway to the north. Aside from a few Spore Carrier Savages and a Spore Plant, there’s not much down this way, though. Anywho, in the southern room mow down a pair of Spore Plants, then continue east to find another door leading back in to the hallway you just left, but on the far side of a barricade blocking the way.
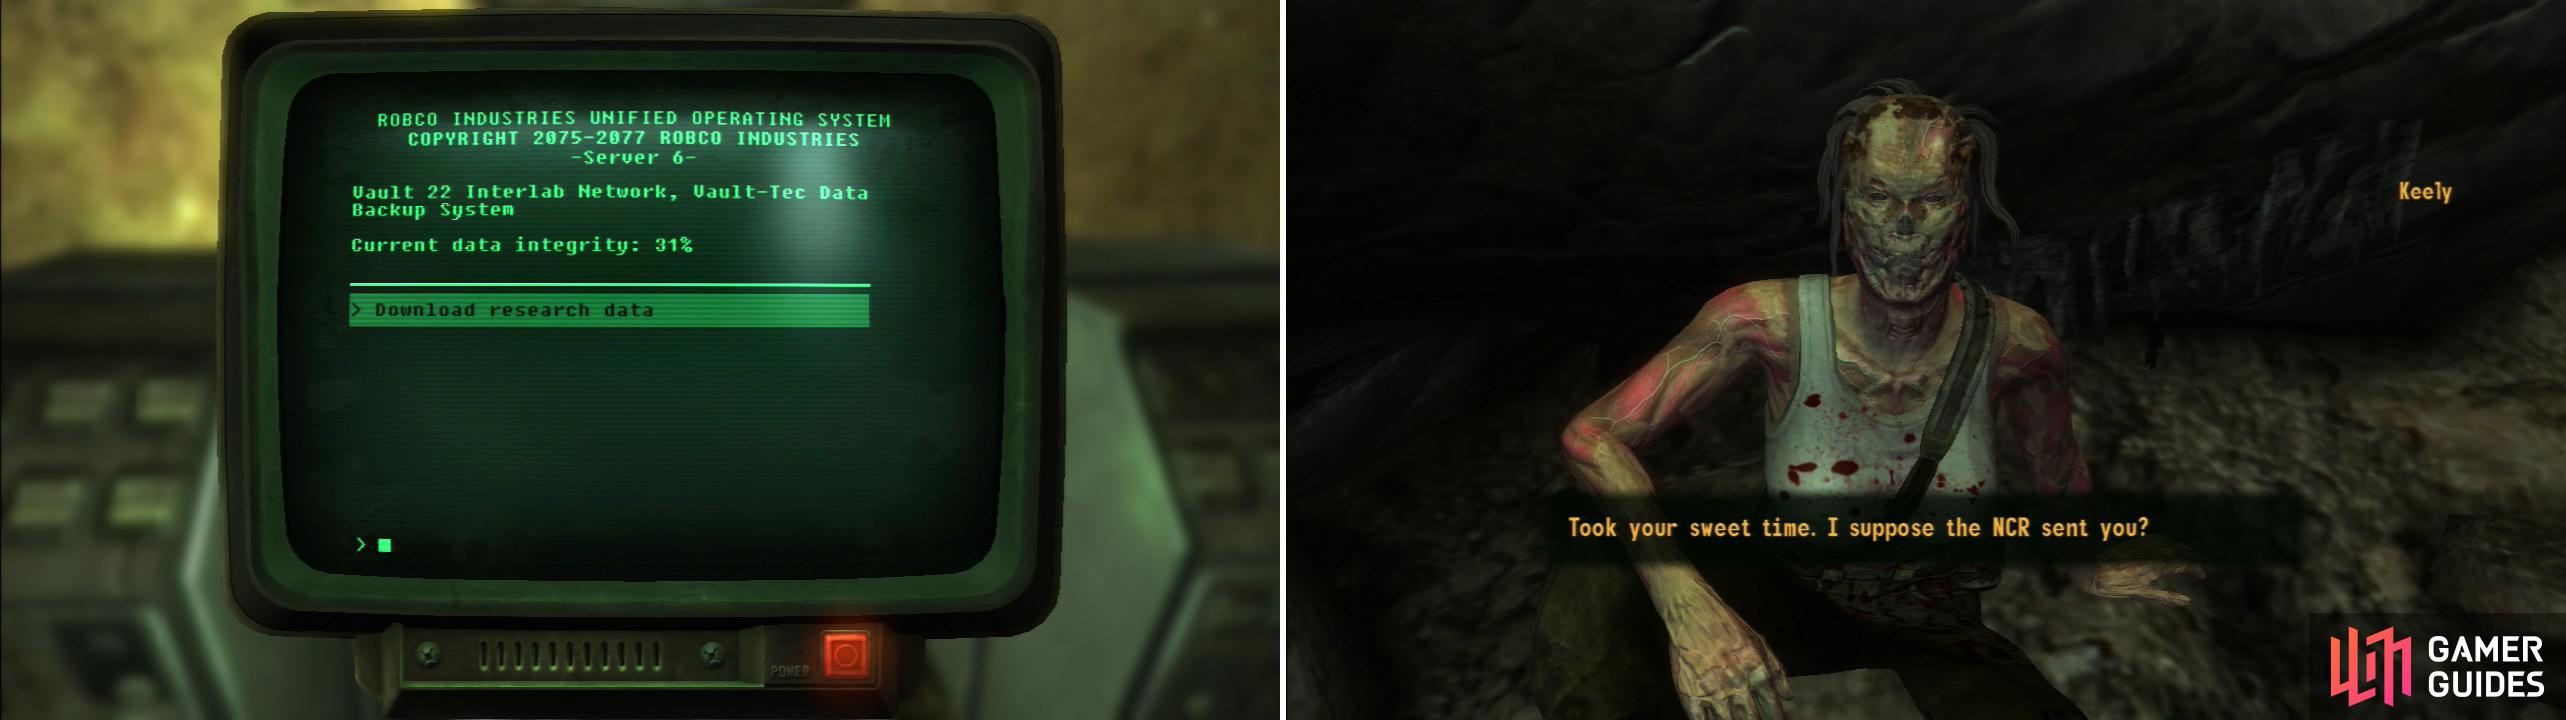
Continue down a hallway to the north, bypassing a door to the east [Hard] as you do so. This door provides a shortcut to the cavern area, but was meant as an egress, not an ingress, so that’s how it’ll be treated. Keep going north and turn down a tunnel to the west to find another locked door [Hard], which will be unlocked if you opened it with the Overseer’s terminal. Along the southern end of this room you can find a Terminal, from which you can select the option to “Download Research Data”. This is what Hildern sent you for.
Download it, then head north to find another room to the east, this one populated by Mantises and a Spore Plant. Kill them, then go through a hole in the wall to the east and follow the winding tunnel beyond until you reach a ledge over-looking a large cavern. Exterminate the numerous Mantises and Spore Plants down here, then find a passage to the south, in which you’ll discover Keely, who is very much alive. She also has a plan to exterminate the plants here, which she’ll elaborate on when you meet her back on the second level, Oxygen Recycling.
Keelys Curse
Head to the western end of the cavern to find a rock you can scale to reach another ledge… with a little bit of jumping. Follow the cave until you reach the room behind the locked [Hard] door that you bypassed earlier, which can now be opened with a Terminal. From here, make your way up to Oxygen Recycling (Keely will have repaired the elevator for you, if you hadn’t already, making it a fine shortcut) and find Keely in a room to the south-east. Talk to her and she’ll tell you her plan, her inelegant, dangerous plan. Spores are in the air. Bad spore. Make people go green and die spores. In this case, fire good. So, being too lazy to put her own plan in action (and her own ass on the line) she’ll tell you to ignite the gas she’s going to pump into the vault. Because of the inefficient nature of the gas she’s using, you’ll have to ignite it close to the vent it’s coming from and somehow survive the blast. Simply put, use a heat-based weapon (laser weapon or a Flamer, both of which were found in this vault) or an explosive to ignite the gas, which is being pumped out in the fifth level, Pest Control.
Loot Keely’s Duffle Bag in the north-western corner of the room to score six Frag Grenades, then take the elevator back down to Pest Control. You’ll find two of the vents you’re looking for at the end of the hallway north of the Data Backup room (the locked [Hard] room from which you were able to obtain the research backup Hildren wants). This is also adjacent to the entrance to the room which leads to the caverns. One easy way to ignite the gas without igniting yourself is to stand near the door, chuck a Frag Grenade down the hallway at the vents, then close the door immediately.
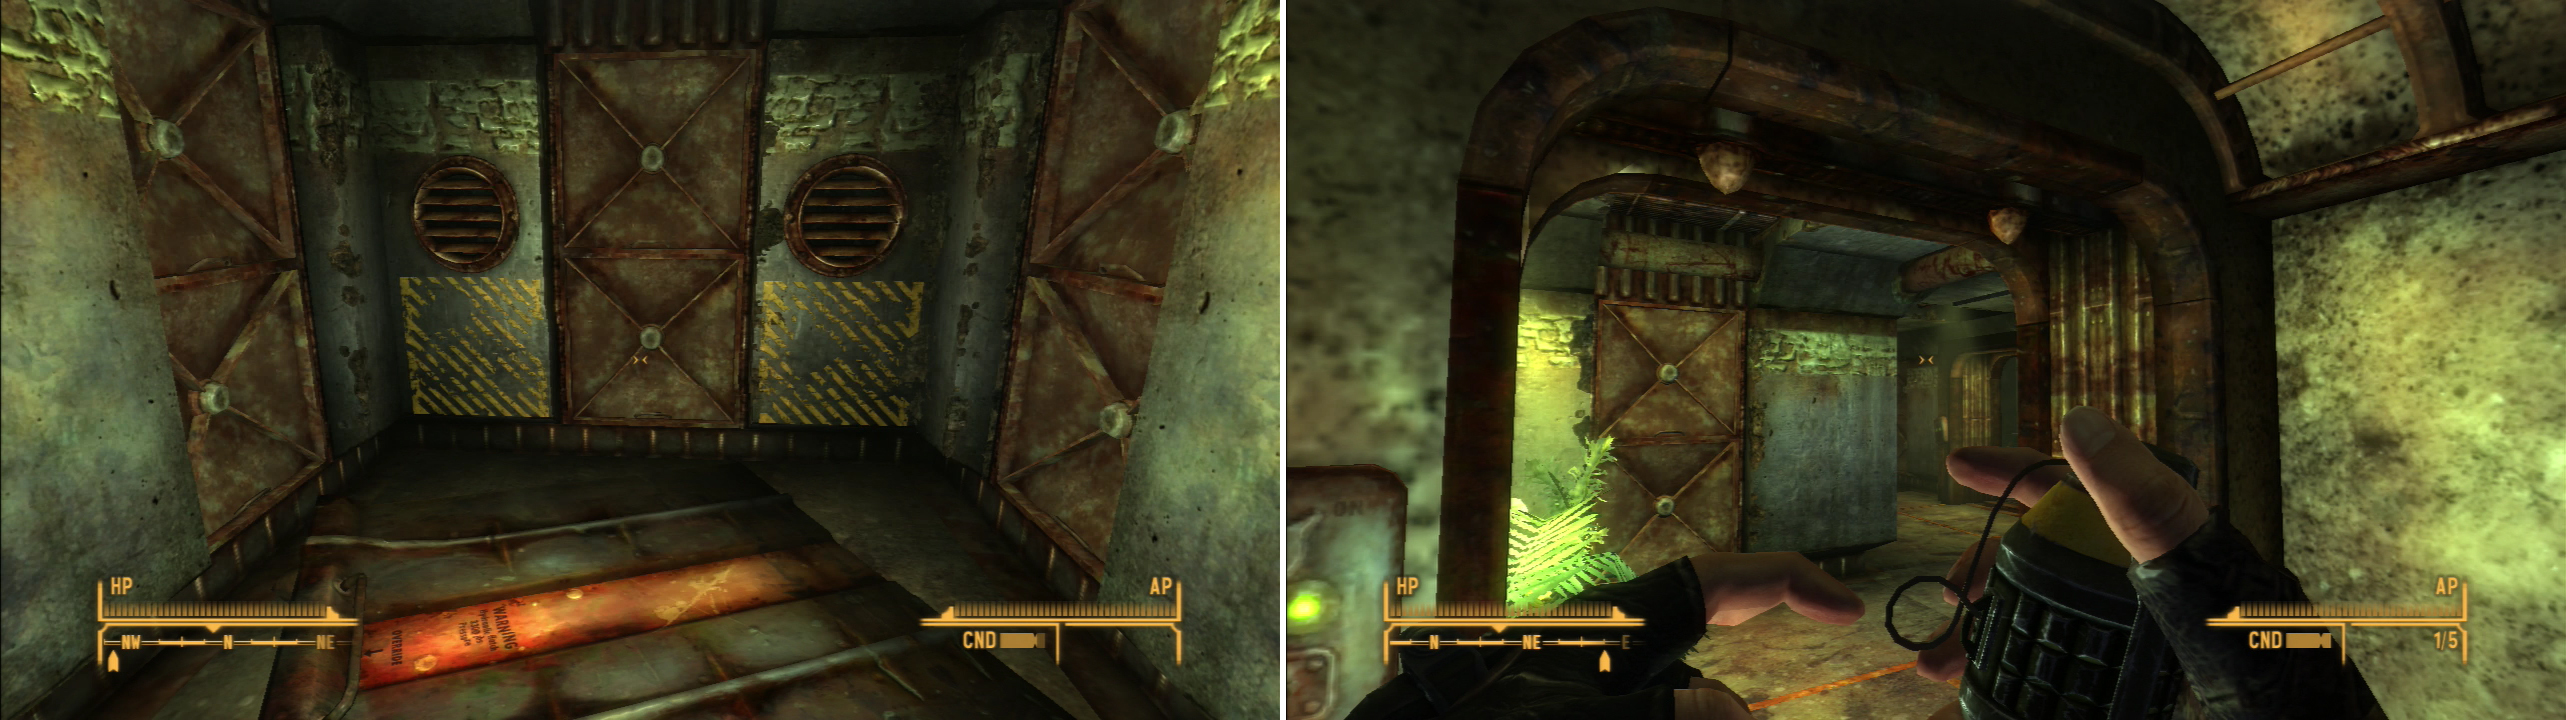
These vents are where the gas originates (left) a well-thrown grenade from the main frameframe room will ignite the gas and clear out the spores (right).
Once you obliterate the spores, return to Oxygen Recycling and talk to Keely, who will tell you that the next step is to destroy the research. She’ll go to do just that only to notice that said research has been copied, and she astutely fingers the only other sentient being in the room. When accused, tell her “Actually, I copied the files. Hildern sent me here to get them.” If you pass a [Science 70] check she’ll let you keep the data, otherwise you’ll have to choose whether to keep the data at the expense of provoking her, or letting her destroy the data Hildren wants. The latter two are sub-optimal choices, but since you can’t get out of her without appeasing or killing Keely, you’ll have to do what you must. If you kill her, be sure to loot her body to obtain “Keely’s Password”, which is your only way out of here.
Exit Vault 22, then make your way across the Mojave distributing gifts. Give Red Lucy her Mantis Eggs at The Thorn to get 200 Caps (300 Caps if you succeed at a [Barter 50] check), then ask for more work and she’ll task you with finding her some Radscorpion Eggs.
| Objective | Reward |
|---|---|
| For bringing Red Lucy some Mantis Eggs | 100 XP 200 - 300 Caps |
Once that’s dropped off, pay Hildern a visit at Camp McCarran and give him the data, for which you’ll be handsomely rewarded. Haggle for more caps and he’ll increase the already princely sum by 50%… provided you succeed at a [Speech 50] or [Barter 50] check. Next talk to Angela Williams and you’ll get a reward from her if you saved Keely. If you managed to do both, the reward can be quite lucrative, indeed.
| Objective | Reward |
|---|---|
| For giving the data to Hildern | 1200 or 1800 Caps |
| For talking to Angela Williams after rescuing Keely | 1200 XP 800 Caps |
Return to Hidden Valley Bunker L2, talk to Senior Knight Lorenzo and give him the components, then pay Elder McNamara a visit and give him an update. Your actions will bolster his resolve, and he’ll reward you for your efforts with delicious XP and the Brotherhood of Steel Safehouse Key. Talk to him again and he’ll announce that the lockdown has been lifted, and Hardin is already itching to pick a fight with the NCR. Some people never learn… Ask to join the Brotherhood and he’ll ask you to complete another task… because apparently everything you’ve done so far isn’t quite good enough. Oh well, agree to do it and he’ll give you the details. The next quest for the Brotherhood - Eyesight to the Blind - will take you to Black Mountain… but there are some other things to do first.
| Objective | Reward |
|---|---|
| For finding the components for the Brotherhood | 1000 XP Brotherhood of Steel Safehouse Key Brotherhood of Steel Key |
No Comments