| Important Items in This Area |
|---|
| Gobi Campaign Scout Rifle |
| Tesla-Beaton Prototype |
Searchlight Airport
From Camp Searchlight… head back east along the road into Searchlight, go under the bridge and follow the road there south through town and ultimately to Searchlight Airport. Along the way you’ll pass a moderately irradiated trailer park west of the road which can be searched for meager loot. Outside the airport, head through a tunnel which goes under the fence and grants you access to the airport. The airport runway itself is crawling with Radscorpions of various sizes. Once they’re dead, you can search near the control tower to the south to find two Trunks to loot, and along the western end of the runway you’ll find a plane with an Ammo Box and two Metal Boxes under it.
Searchlight East Gold Mine
South-east of Camp Searchlight and north-east of Searchlight Airport you can find the Searchlight East Gold Mine in a depression with some ramps leading down to the mine entrance. An abandoned gold mine? Yeah… not likely. It appears empty enough when you enter, but at the western end of the mine you’ll find four Viper Gunslingers (including a leader). As you leave the mine, another foursome will attack you. They’re not too tough, but depending on your level, the Viper Leaders might have Grenade Rifles. Kill and loot the Viper Gangers, then leave the mine.
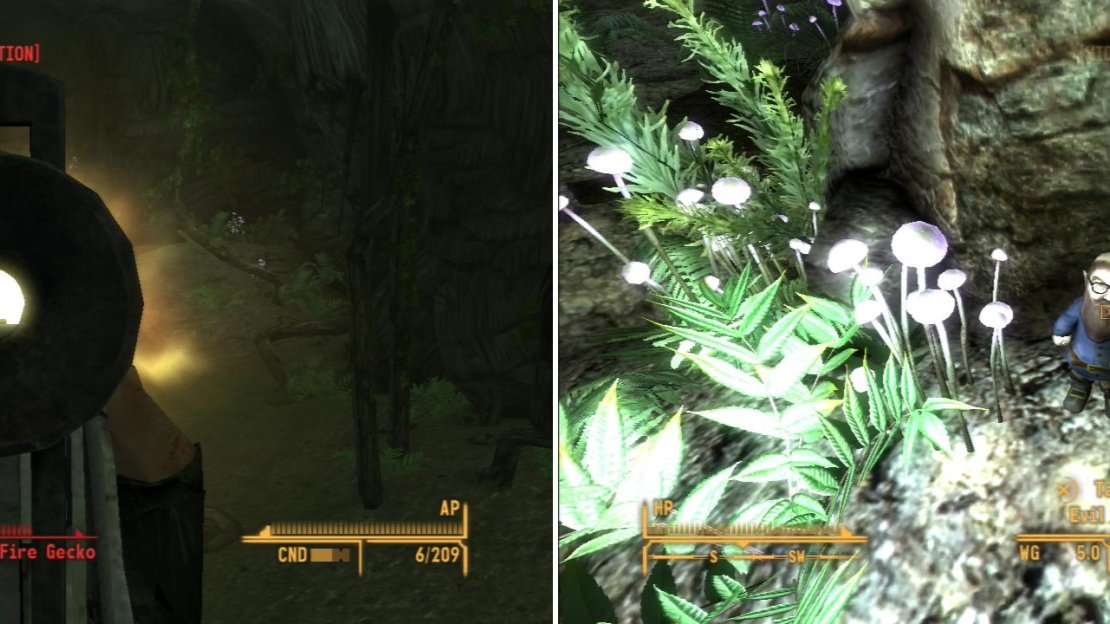
In the Fire Root Cavern you’ll be able to get the drop on some Fire Geckos, including a Legendary Fire Gecko (left). You can also obtain the enigmatic Evil Gnome (right). What makes good Gnomes go bad? Who knows, but you’d best keep your eye on this one…
Fire Root Cavern
South-east of Searchlight East Gold Mine you can find Fire Root Cavern. This area can be tricky to find, since it’s located along the cliffs. You can either drop down onto the ledge housing the entrance to this cave, or you can make your way to the low ground to the east and run south-east along the cliffs to find a natural ramp leading to the same ledge. Failing that, as long as you get close enough to discover the area, you can just fast-travel to it.
Once you find the entrance to the cave head inside and head west until you find a ledge overlooking some murky low-ground. Low-ground which is crawling with Fire Geckos. Fortunately, they can’t easily reach you on the ledge, and if you’re sneaky (and cheap) you can simply shoot them all down from the ledge with a humble Cowboy Repeater. It’s much safer doing it this way than leaping down and challenging the Geckos in their enclosed natural arena, especially since on of them is a Legendary Fire Gecko. How does a Fire Gecko become legendary? Apparently by getting picked off by Courier Six for not having the sense to live in a defensible lair.
When the Geckos are smote, follow the ledge around the southern end of their lair until you find a tunnel running south, which soon splits into a path leading down and to the west and another continuing south. The latter takes you back to the Mojave, so head downhill and follow the passage until you reach the watery cave where all the Fire Geckos were. There’s not much down here to loot, but you can at least harvest the Geckos you killed earlier. Return back to the tunnels and, at the junction where the paths meet, search near the top of the ramp that leads down to the Gecko lair to find an Evil Gnome. It serves no purpose… but it’s an Evil Gnome. How can you live with yourself if you don’t grab this collectible? You can’t, so grab it.
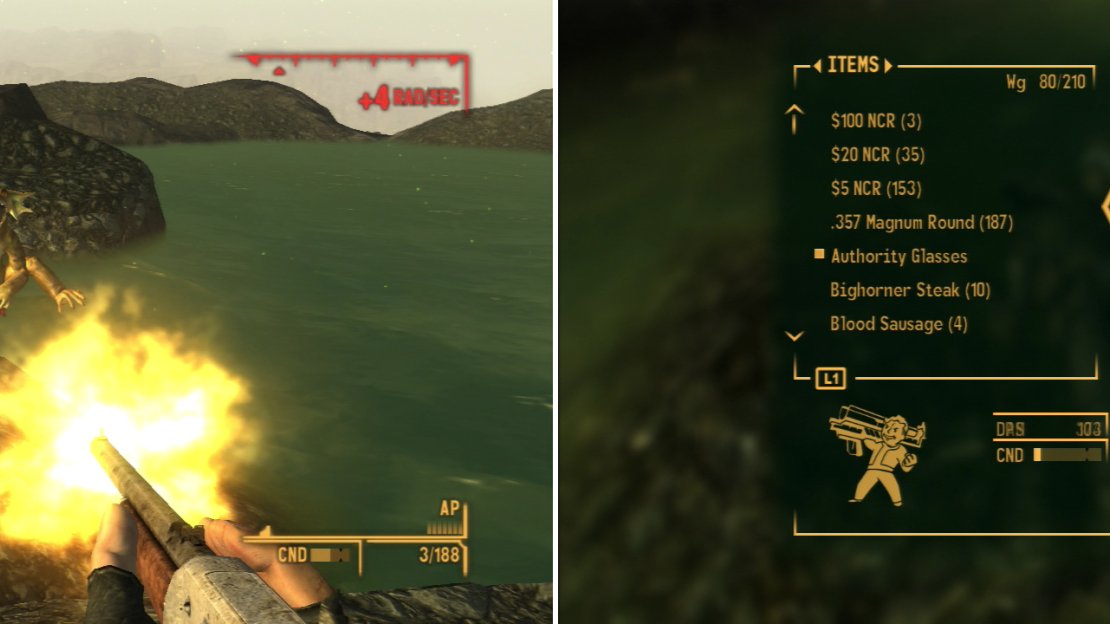
Behind the Fire Root Cavern you’ll find more Geckos (left) who guard a dead Prospector carrying a Fat Man (right).
Cottonwood Cove
Once done head down to the tunnel to the south and exit Fire Root Cavern to reach Cottonwood Crater, a moderately irradiated pond occupied by several Golden Geckos. Kill them and explore the rocky peninsula to the north-east until you reach the end, then turn north to find a dead Prospector lying near a mostly submerged rock. Loot the poor dead fool to obtain his loot, which includes a Fat Man.
Blue Paradise Vacation Rentals
After you loot the dead Prospector, continue north onto the rocks surrounding the radioactive pond and follow it clockwise. To the north-east you should spot the Colorado River in the distance, and this is your next objective. Pick your way carefully down the cliff face, but try to stay on high ground as much as possible while moving east, towards the Colorado. Eventually you should spot some buildings near - or more accurately, just beyond - the coast. Time makes fools of us all. Descend the cliffs and sneak towards the Colorado cautiously, looking for danger as you go. The coast here is protected by Lakelurks, humanoid crab-monsters that can rip you up in melee and can shoot powerful sonic blasts. A lone individual isn’t too terrible, especially with some Spiked Knuckles and Super Slam, but a group will be a problem. A problem that can be avoided with a few sneak attack criticals and a Cowboy Repeater, as it turns out. Kill as many of them as you can - there are about ten of them lurking around - then approach the houses to discover Blue Paradise Vacation Rentals.
You can search the northern and middle submerged houses to find some meager loot including one Sunset Sarsaparilla Star Bottle Cap in either house (on a counter in the northern house and on the floor in front of a fridge in the middle house) as well as a BB Guns and two unopened bottles of Sunset Sarsaparilla. More interesting, however, is the cave you can find by swimming east across the Colorado from these houses. The beaches around the cave are swarming with Lakelurks, though, so try to make ground north of the northern beach, where there’s a convenient hill overlooking the beach the Lakelurks are one. You know the drill. Sneak, Cowboy Repeater, dead Lakelurks, no hassle. Kill the half dozen or so Lakelurks on the northern beach, then head south to where the Lakelurks where and you should see an inlet separating the beach you’re on from the southern beach that the cave is on… which is, of course, crawling with Lakelurks. Snipe the half-dozen or so fresh-water man-crabs on the beach to the south, then head over to the cave, where you can find a dead Mercenary and two Duffle Bags worth looting, as one contains some Combat Armor, Reinforced.
Searchlight North Gold Mine
Enough Lakelurks for now. If you follow the western coast of the Colorado River to the north you’ll find Cottonwood Cove, but it’s crawling with Legion soldiers, and there are quests there which are wiser to do later… partly for story purposes, partly because of bugs. So avoid Cottonwood Cove for now and instead fast-travel back to Camp Searchlight.
From Camp Searchlight travel north-east to find the Searchlight North Gold Mine, which is occupied by Feral Ghoul Troopers. From the entrance head north until the tunnel splits into two paths; one running north-east and another running north-west. Go north-east first and explore a side passage to the west to find a Sunset Sarsaparilla Star Bottle Cap on a Sunset Sarsaparilla Crate and some Dynamite on the ground near some barrels. Leave the side-chamber and continue following the tunnel down to the north until you reach a cave in. West of the cave-in is another side-chamber, this one with a Dead Prospector to loot. Search her for a Searchlight North Mine Key then grab some Dynamite from the nearby metal shelf.
Backtrack to where the path originally forked and explore the north-western tunnel, which ultimately terminates at a gate [Hard], which can be opened with the Searchlight North Mine Key. Beyond the gate you can find two ammo boxes; one on a metal shelf to the east and one near a wooden crate in the north-western corner of the room.
Coyote Mines/Mine House
Leave the Searchlight North Gold Mine and travel a short distance north-east to find the Coyote Mines. Yay, more mines! Head into the mine house and search the first room to find a Sunset Sarsaparilla Star Bottle Cap on a table. In the room to the north-west you’ll find some First Aid Boxes and some food on and near some Metal Shelves, and a BB Gun on the floor behind some lockers. There’s more mundane loot upstairs.
When you’ve looted the mine house, head over to the actual mines, themselves, which are behind the mine house to the north-east, off the edge of a cliff. The mine itself is set up very similarly to the Searchlight North Gold Mine, in that it splits shortly on to the south and west. The western path ends in a cave-in and has two side-passages, both of which have a gate beyond which goodies can be found. Beyond the first gate you’ll find a bunch of Dynamite on the ground, and beyond the second you’ll find… more Dynamite on and near a metal shelf, as well as some Frag Grenades and Dirty Water. Down the southern fork you’ll eventually reach a large chamber beyond a gate where some Prospectors have set up camp. You can loot two Toolboxes and find some Hydra and Healing Powder lying around, but nothing interesting.
Snipers Nest
From the Coyote Mines head south-east to find the Sniper’s Nest area, a small shelter over-looking Cottonwood Cove. Here you can find a locked Gun Case [Very Hard]. It’s not easy to get into this container, obviously, as you’ll need a Lockpick skill of 100 to attempt the lock… of course, if you have Comprehension, wear a hat that gives Perception and pop a box of Mentats beforehand, you can artificially boost your Lockpick skill score and attempt to open this Gun Case with a base skill score as low as 74. Why go through all the effort? Because inside this Gun Case is the Gobi Campaign Scout Rifle , one of the best weapons in the game. If you’re a sneaky, Gun-using, critical hit junkie you will absolutely love this gun. Coincidentally, this guide’s suggested character build is pretty much built around this gun, and with it you can take on anything in the Mojave… and beyond. It will sometimes lovingly be referred to as “the Finger of God”. Oh, right… there’s also an Ammo Box next to the Gun Case and on a bench you can find a Sunset Sarsaparilla Star Bottle Cap and some .308 Rounds.
Pick the locked Gun Case [Very Hard] to obtain the almighty Gobi (left). This unique Sniper Rifle is a game-winning weapon (right).
Weapon Info - Gobi Campaign Scout Rifle
Wasn’t this gun covered enough earlier? No. There can never be enough superlatives thrown at this weapon. As said earlier, it’s pretty powerful on paper; but its range, increased critical chance and increased critical damage put this weapon over the top. If you combine this weapon with a build designed to make the most of it - like the one suggested in this guide - it goes from being powerful to nearly game-breaking. With Finesse, Better Criticals and a high Luck score, this weapon will obliterate anything you point it at… and at such a long range, the enemy might not be able to even respond, especially if your Sneak skill score is high. It does have a hefty 75 Guns skill requirement, however, as well as a Strength requirement of six. Once you can use it, however, you can pick off groups of Deathclaws with ease; nothing in the Mojave should be beyond your means.
There are a few more things to note about this weapon, however. It’s fairly expensive to maintain, although the Jury Rigging perk will increase your options (the Service Rifle will be the cheapest weapon you can use, in this case) and Weapon Repair Kits will always prove helpful. It also uses .308 Rounds, which are uncommon in the Mojave, but can be purchased in modest numbers from the Gun Runner Vendortron near New Vegas and from the Arms Merchant at the 188 Trading Post. The best place to buy them is the as-of-yet unexplored Camp McCarran, but you will not be expected to have a significant stock of .308 Rounds before that point, nor should you have to use the Gobi Campaign Rifle regularly at the point in the game. For most foes you’ve fought so far, the Cowboy Repeater will suffice; save the Gobi for Deathclaws, Super Mutants, Cazardores and large groups of monsters that must be quickly thinned out. Eventually you’ll get more regularly use out of it, but for now, if you use it sparingly, it’ll always be there in an emergency.
One last thing, this one pertaining to the Hand Loader perk. If you’re following the build for this guide you’ve had this perk a while, but unless you got experimental on your own, you probably haven’t made much use of it. If you ever find yourself with a surplus of .308 Rounds, visit a Reloading Bench and break them down and build yourself some .308 JSP Hand Load rounds, instead. You won’t get a full return on your ammo; you’ll only end up with about 66% as many JSP rounds as you had .308, but each round does 1.3x normal damage, which for a gun that’ll ideally kill strong foes in as few shots as possible is a good trade off. Keep in mind, however, that JSP rounds degrade the gun’s condition 50% quicker.
Ranger Station Echo
North of the Sniper’s Nest you can find Ranger Station Echo, although it might be easier to get there by heading back to the Coyote Mines and traveling north-east from there. The official entrance to the camp is to the north-east, but you can sneak around the fence to get inside just as well. The camp isn’t terribly interesting; Ghoul Rangers keep a lookout at the Legion movements at Cottonwood Cove, too weak to wipe out the Legion, too strong to be wiped out in turn. You can find out about this stalemate - and the ranger’s frustrations about it - by talking to the two non-Ghoul rangers here; Ranger Erasmus and Comm Officer Green. There’s an Ammo Box [Easy] you can rob near Comm Officer Green, two more in the watch tower, a First Aid Boxes and some chems in a tent and other, less notable loot, but none of this is terribly noteworthy.
Once you’ve explored this place, it’s almost time to get back on track to Novac. The idea of this section, “Exploring Around Searchlight” is already pretty dubious, given how far north this is, but on the plus side, you’ve covered pretty much all the areas in the south-western end of the Mojave, and scored a great gun, to boot. There is one more area that can be explore now that you have the Gobi Campaign Scout Rifle… assuming you can use it and you’re just a bit foolhardy. It’s a good test to see how powerful your character is now, so consider giving it a try at least. Save your game, make sure you have some healing items and ammo for the Gobi, then fast-travel back to Matthews Animal Husbandry Farm.
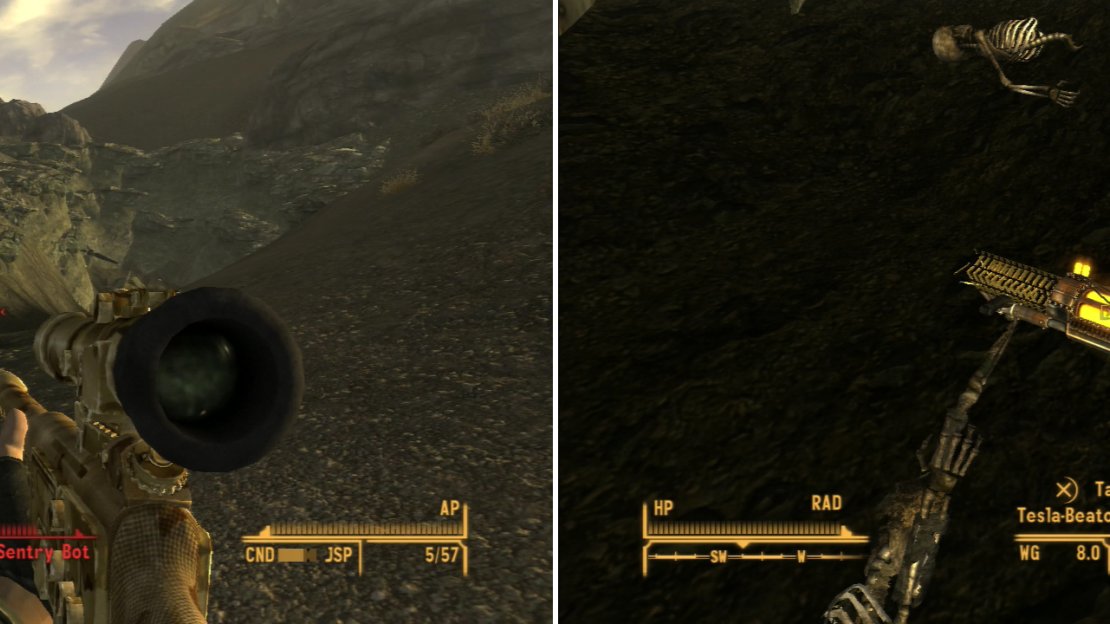
Tread carefully around the Crashed Vertibird, as powerful robots protect it (left). If you can fight your way through them, however, you’ll obtain the Tesla-Beaton Prototype (right).
Crashed Vertibird
Our actual destination is east of the Old Nuclear Test Site, but since the Ghouls may have respawned since you were last there, it’s safer to just fast travel to the farm. From here head south through the desert to find the Crashed Vertibird site, where a… well, a crashed Vertibird has dug a deep furrow into the ground. What was that thing made out of? In all reality, you’ll probably find the robotic guardians long before you see the crater, much less the Vertibird; scan with VATS and occasionally aim through the Gobi’s scope to spot them before they spot you. Once you’ve located them, try to get on high ground and proceed to snipe them, much like you did with the Lakelurks earlier, but this time with a much better weapon.
There are two types of robots down near the Vertibird; Hardened Mister Gustys and Hardened Sentry Bots. The latter are the more dangerous of the two as they carry Gatling Lasers and Missile Launchers. The former aren’t harmless, though, as they have a Plasma Rifle and a Flamer. The Gusty robots can be killed in one shot from the Gobi, but the Sentry Bots will likely take several shots, even if you get an a sneak attack critical. They are also very observant, and will likely at least be aware of you even if you are far away and have high ground, but it’s not impossible to kill them all without being detected. Snipe them from a distance to at least reduce their numbers, then approach the furrow and search near the Vertibird. On the ground near some skeletons you’ll find the unique Energy Weapon, the Tesla-Beaton Prototype .


![Pick the locked Gun Case [Very Hard] to obtain the almighty Gobi (left). This unique Sniper Rifle is a game-winning weapon (right).](/assets/guides/79/118844-1447027200.jpg)

No Comments