
Hardcore Mode Blues
This section will give some pointers to new players, or old players who haven’t tackled hardcore mode yet. But first, a word of encouragement; Hardcore mode isn’t very hardcore. Certainly having the Ultimate Edition to give you the ability to max all your skill points helps, but that’s besides the point. The mere fact that there aren’t really any serious build differences (save the odd, optional, convenience perk or two) for Hardcore mode gamers and normal gamers should say plenty.
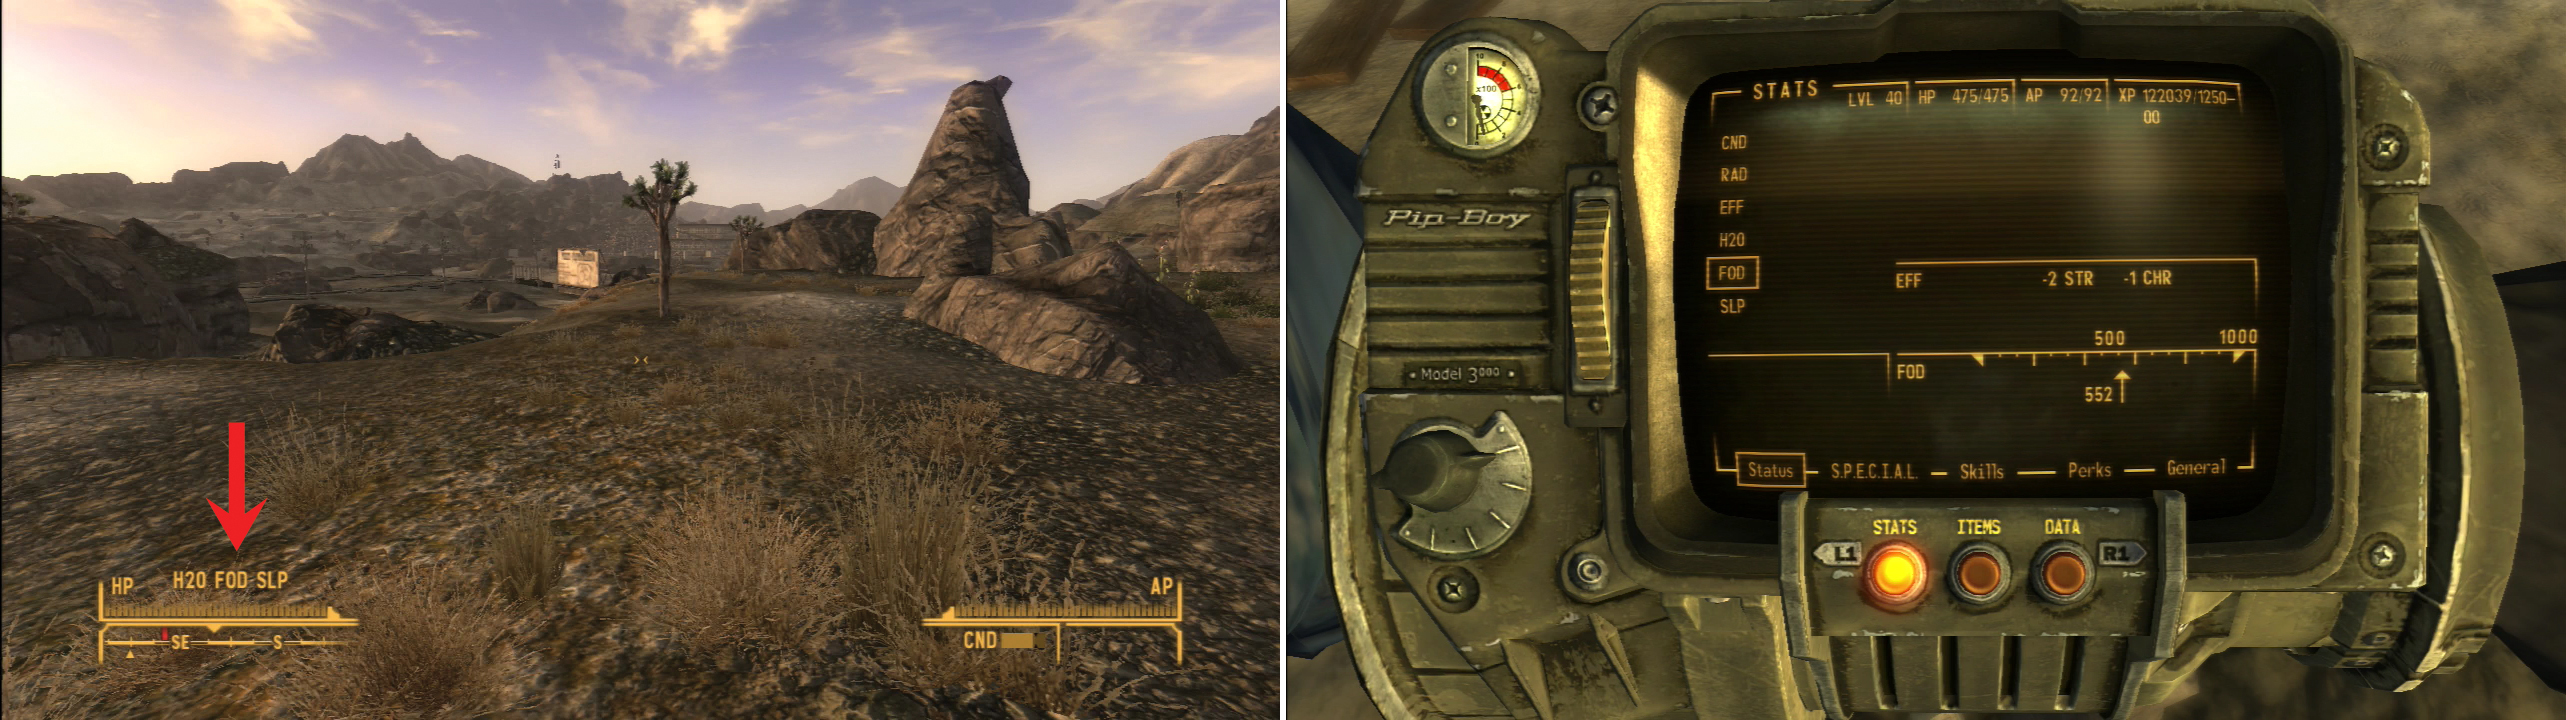
In Hardcore mode, not only do you have to keep an eye on your HP and RADs, but you’ll need to manage the necessities of life; water (H2O), food (FOD) and sleep (SLP). When you are deficient, you’ll be notified by icons above your HP bar (left). You can also check your levels via the Pip-Boy (right).
Survival of the Skilled
If you’re playing in Hardcore mode, an obvious move to make is to boost your Survival skill score. Tag! it, and boost it to 80 as soon as possible. This will make the restorative effects of food and water more potent, as well as allowing you to make superior meals at campfires.
H20
Water is a constant concern in Hardcore mode, as it’s the status that degrades the fastest. If you have the Ultimate Edition installed, then you’ll start out with a Vault 13 Canteen, which you’ll automatically drink from occasionally. This mitigates - but doesn’t eliminate - the need for water. Fortunately there exists plenty of sources of clean water you can drink for free! In pretty much every casino in New Vegas (even the Atomic Wrangler in Freeside) has free water, as well as the troths at Goodsprings Source, and… well, the whole freaking Colorado River. You should never have to seriously worry about dehydration.
Food
Keeping yourself fed is a secondary concern in Hardcore mode, as you’ll need food less often than water. Fortunately, getting plentiful food is quite easy to do. There are several locations where you can find herds of Bighorners, which can be killed by even low-level characters wielding melee weapons. Bighorner Meat can be turned into Bighorner Steak at any campfire, which becomes a great source of food, and healing, in a pinch. Places to find Bighorners include: along the railroad south-east of Goodsprings, north of Bonnie Springs, in the mountains west of New Vegas (around Ruby Hill Mine), and around the Wrecked Highwayman south of Novac. These aren’t the only places where they can be found, and they aren’t guaranteed to be free of risk (poke around the mountains too much and you’ll certainly find Cazadores, for example), but with a little caution Bighorners will provide for all your food needs. A Bighorner Bull gives 50 EXP, and will often drop 3-5 pieces of meat.
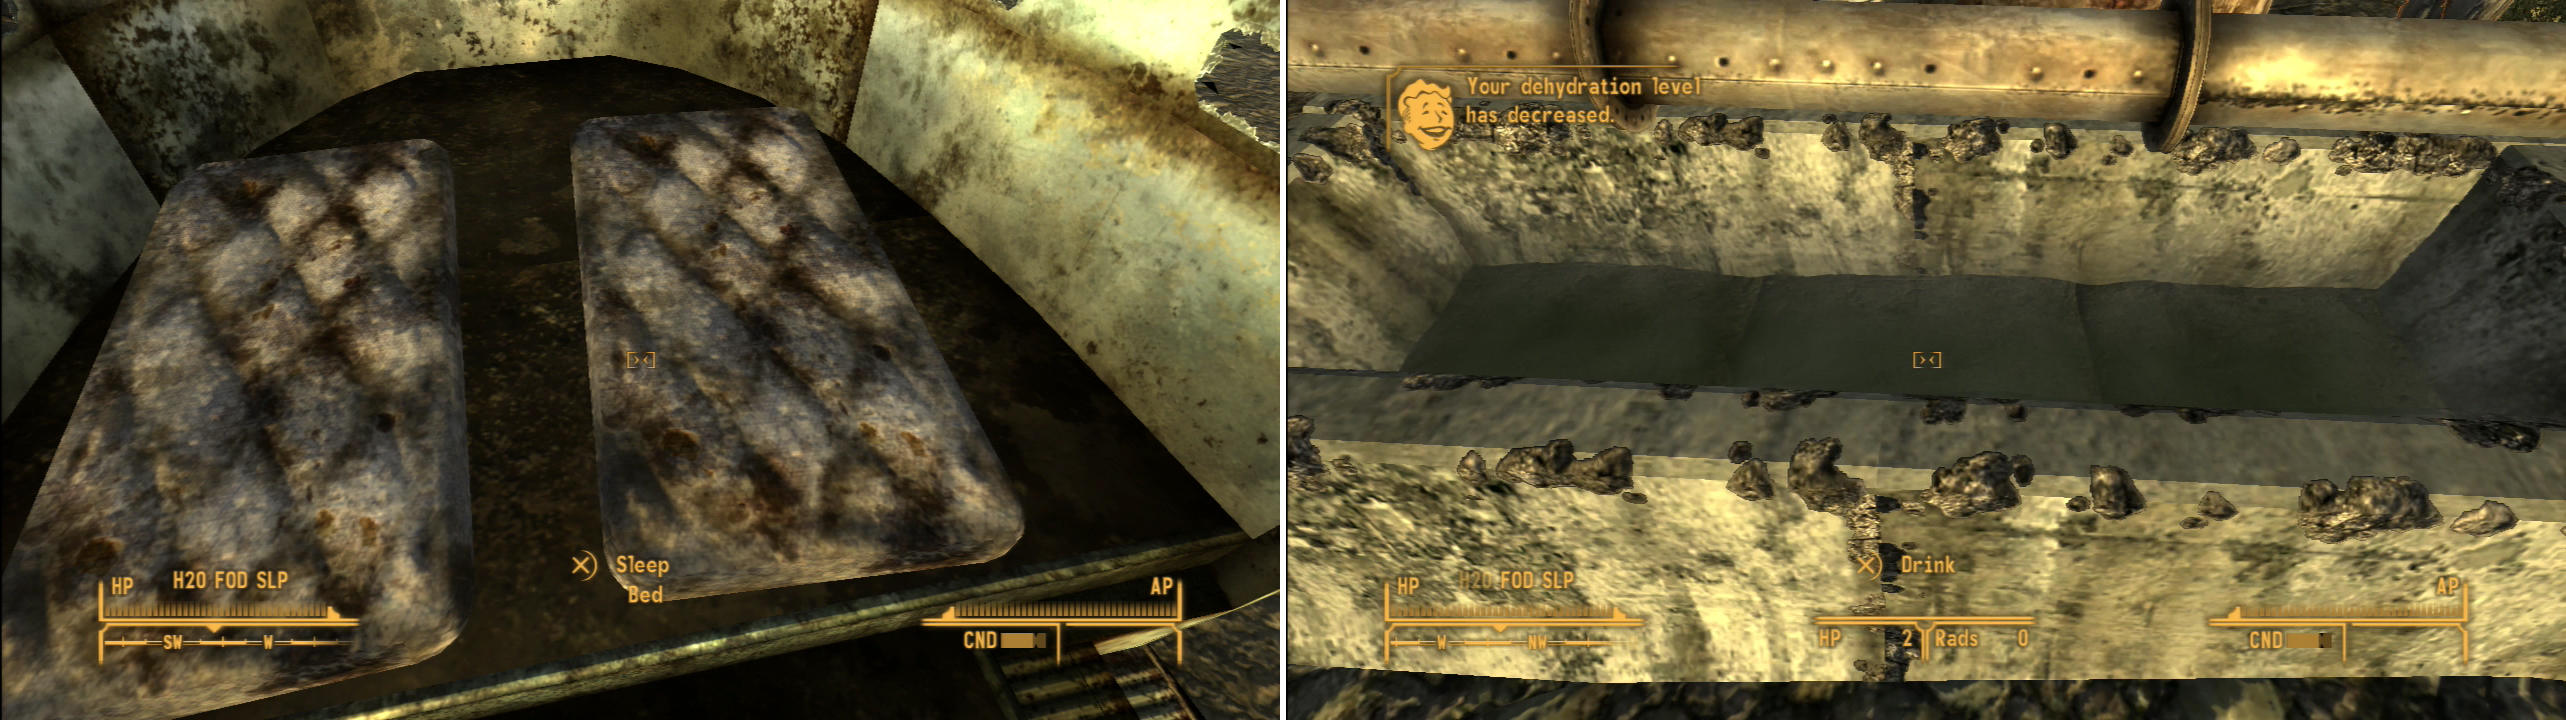
You can reduce your SLP by finding an unowned bed and getting some shut-eye (left), but passing the time in this way will, of course, raise you other needs. Keep hydrated by drinking water… there are stalls full of free water near Goodsprings, at the beginning of the game, so H2O shouldn’t be too hard to find… (right).
Sleep
Sleep is the least of your concerns, and if you find that you’re failing in Hardcore mode because of sleep deprivation… well, then you really just need to quit now. There are beds all over the place. The only concern with sleeping is that passing the time raises your other needs. So, sleep in a hotel, a safehouse, or near the Goodsprings Source, somewhere near water.
Tis But a Flesh Wound…
Healing in Hardcore mode is another, more serious problem. You have plenty of ways to get food, water, and kip, but healing takes time, and resources. You’ll have to use a variety of methods to keep your health up. These methods aren’t exclusive; you’ll have to be a lot more careful when you’re lower level and have fewer resources, and over time “graduate” to better methods.
- First, for low level characters, just drink from a clean water source. Each sip will heal you but only a tiny amount. The downsides are obvious, it’s annoying to sit there and click fifty times until you’re healed, and most of the safe sources of clean water are in towns. Cutting short your exploration is a bother.
- As you accumulate resources and levels, Bighorner Steak becomes a decent source of healing, as well as food. Ignore your hunger until you get hurt, and chow down on some steak. It’ll heal about 50 Hit Points per steak. Not great, but a hell of a lot more convenient than finding water, and cheaper than a Stimpak.
- Get the Monocyte Breeder Implant. This will cause you to slowly regenerate. It won’t save you in a fight, but it will allow you to wait and heal a bit. Also, just fast-traveling from place to place will heal you. It’s great supplemental healing; if you’re not shot up going into a fight, chances are you won’t need healing to stay alive.
- When you hit level 20, get the perk ‘Them’s Good Eatin’’, which will cause living enemies to drop Blood Sausage or Thin Red Paste 50% of the time. Most enemies in the game are living, and they don’t have to be particularly strong - a Bloatfly will drop you these great healing items as often as a Deathclaw. Plus, you’ll often get multiple drops when an enemy has these items on them. Both these items heal more Hit Points than a Stimpak, and you’ll be able to get your hands on far, far more without spending a single cap. Sure, they have weight, but Thin Red Paste only weighs 1/10th of a pound. You can spare five pounds of carry weight to drag fifty of these around and there’s a good chance you’ll constantly replenish your stock as you go.

FOD can be obtained from various sources, chiefly by killing tasty critters in the Wasteland. Just remember, food isn’t nearly as beneficial unless it’s been cooked (left). Once you hit level 20 you can pick the Them’s Good Eatin’ perk to get exceptional healing items from creatures you kill (right).
Ammo Weight Hate
One of the biggest pains of Hardcore mode is ammo weight. This is especially damning if you use Energy Weapons, as Energy Weapon ammo just weighs too damn much (save Electron Charge Packs). Still, how many ranged weapons do you tend to carry around at once? Ratslayer and the Gobi Campaign Scout Rifle should be all you really need. The fewer different weapons you have, the less different types of ammo you need. Just be frugal, only take one good ranged weapon, and a moderate supply of its ammo. This works better with the Ultimate Edition build, since you can now freely invest in Melee Weapons and Unarmed - they don’t require ammo, and they can deal with any enemy that gets too close, eliminating any need for a short-to-mid range alternative.
And Then There Was One…
When your allies bite the dust, they die for good in Hardcore Mode. Easily one of the most annoying aspects of Hardcore Mode, there are a few ways to mitigate ally deaths:
- Keep healing items on your allies. It’s not always convenient in a gun fight to run up to your buddy and tell them to heal themselves.
- Give them the best armor. Lets face it, Enclave Armor looks stupid, they’ll be able to wear it before you will, and nobody wants to walk around that slowly. Plus, unless you have the worst gaming reflexes ever, you’ll avoid damage better than any ally will.
- Most importantly, if you’re going into a fight where you just can’t babysit them the whole time, make them wait somewhere out of the fire. Hordes of Cazadores and packs of Deathclaws are usually good places to draw the line.
- Use weapons that don’t inflict collateral damage. This should be pretty easy, since most dangerous auto-fire weapons are low-damage, high DPS affairs; which is to say, they suck against anything that is armored and dangerous.
First Do No Harm
Doctors are an obvious source of health in the wasteland. Do not be afraid to visit a doctor to cure your Rads or heal you. Early on, it’s easier to just pay the 50 Caps for a full healing at Goodsprings (limbs and all) than it is to use healing items. And if you wait until your Rad count is high (600+) it’ll probably be cheaper to just pay 100 Caps to get rid of your Rads than it is to use RadAway.
Dont Mind the Grind
The higher your level, the more resources you’ll have to deal with your needs. Get your Survival skill high, and you’ll need to eat less. Get your Lockpick score high and you’ll be able to get the godly Gobi. Once you can obliterate Super Mutants, you can scourge Black Mountain for valuable weapons. It’s all got to start somewhere. Don’t be afraid to take your time, visit familiar locales for water and rest, and grind Bighorners for food and experience.
No Comments