
Suggested Level: 40
This quest will begin after you complete “ Gennadios the Phylakitai “, which will be one of the main quests once you reach Alexandria. After this quest, the Phylakes will be added to the map, and despite the quest’s Suggested Level, much of it can be completed as you explore Egypt, as the Phylakes range in between level twenty and fourty. Phylakes are, in essence, bounty hunters, singularly powerful enemies that stalk the map in search of their prey - you. Since they range over a wide area (perhaps not individually, but collectively) and their level varies so much, this will be a task you’re working on for most of the game.
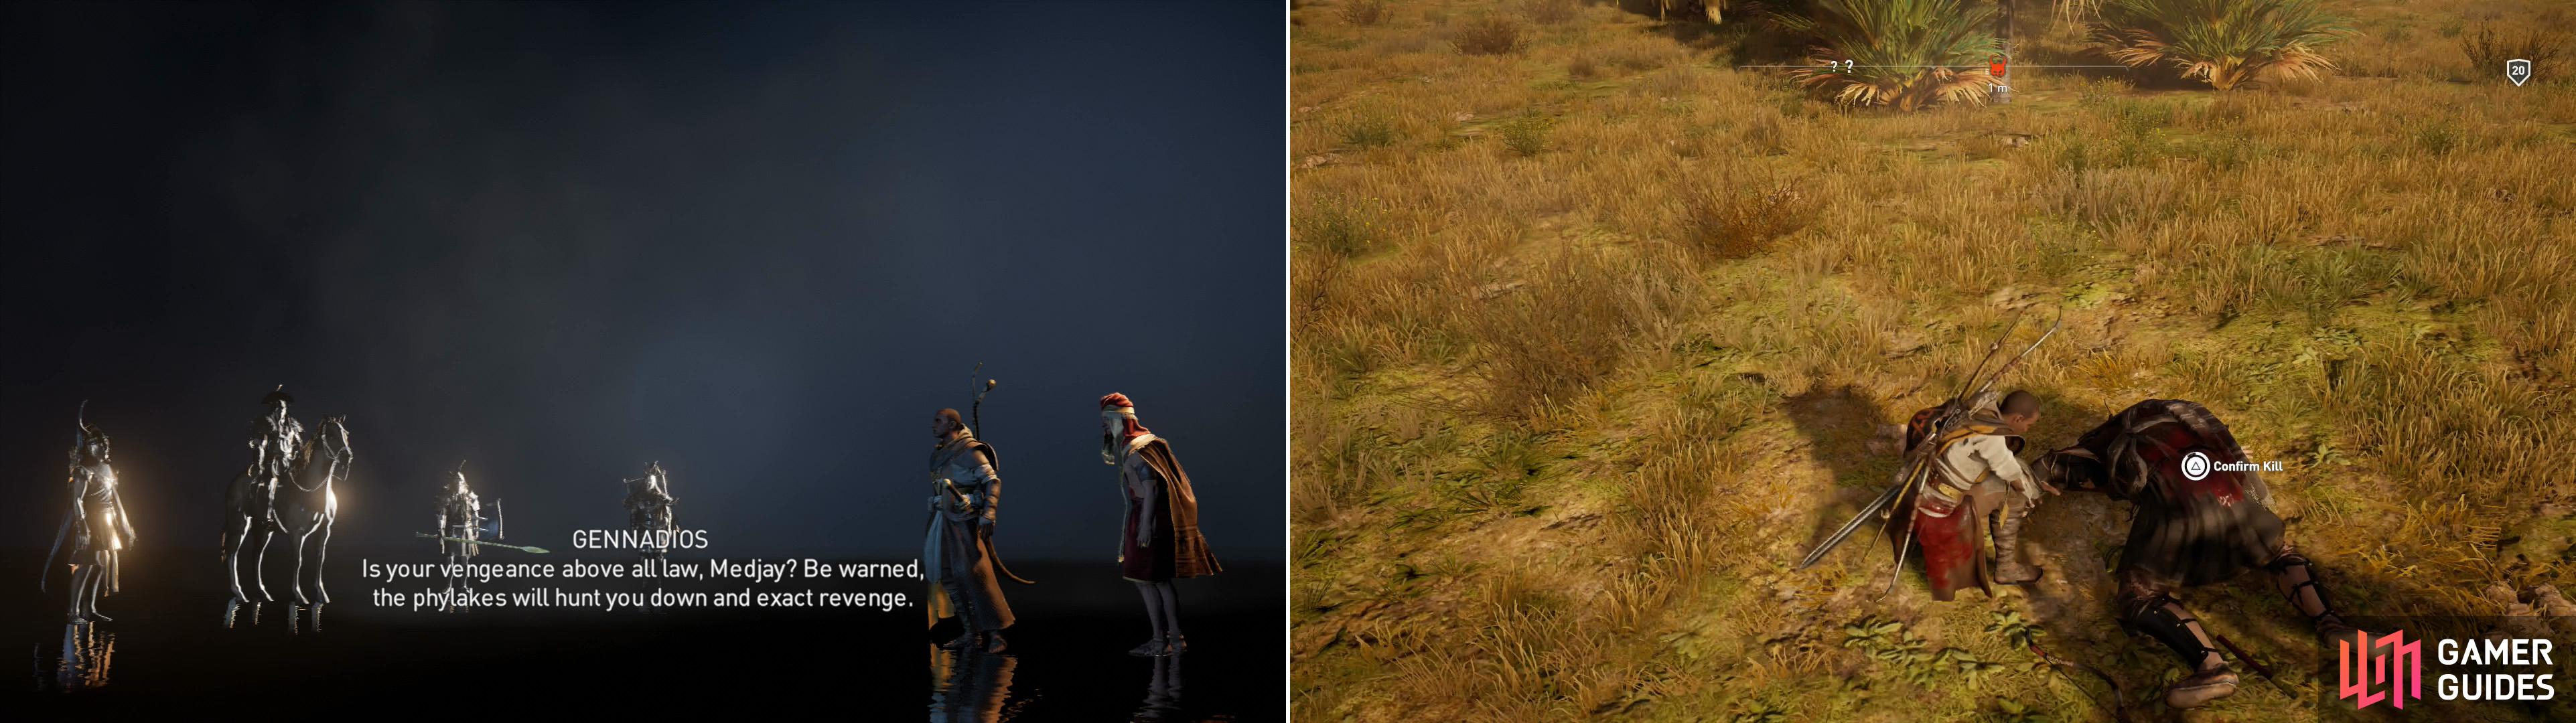
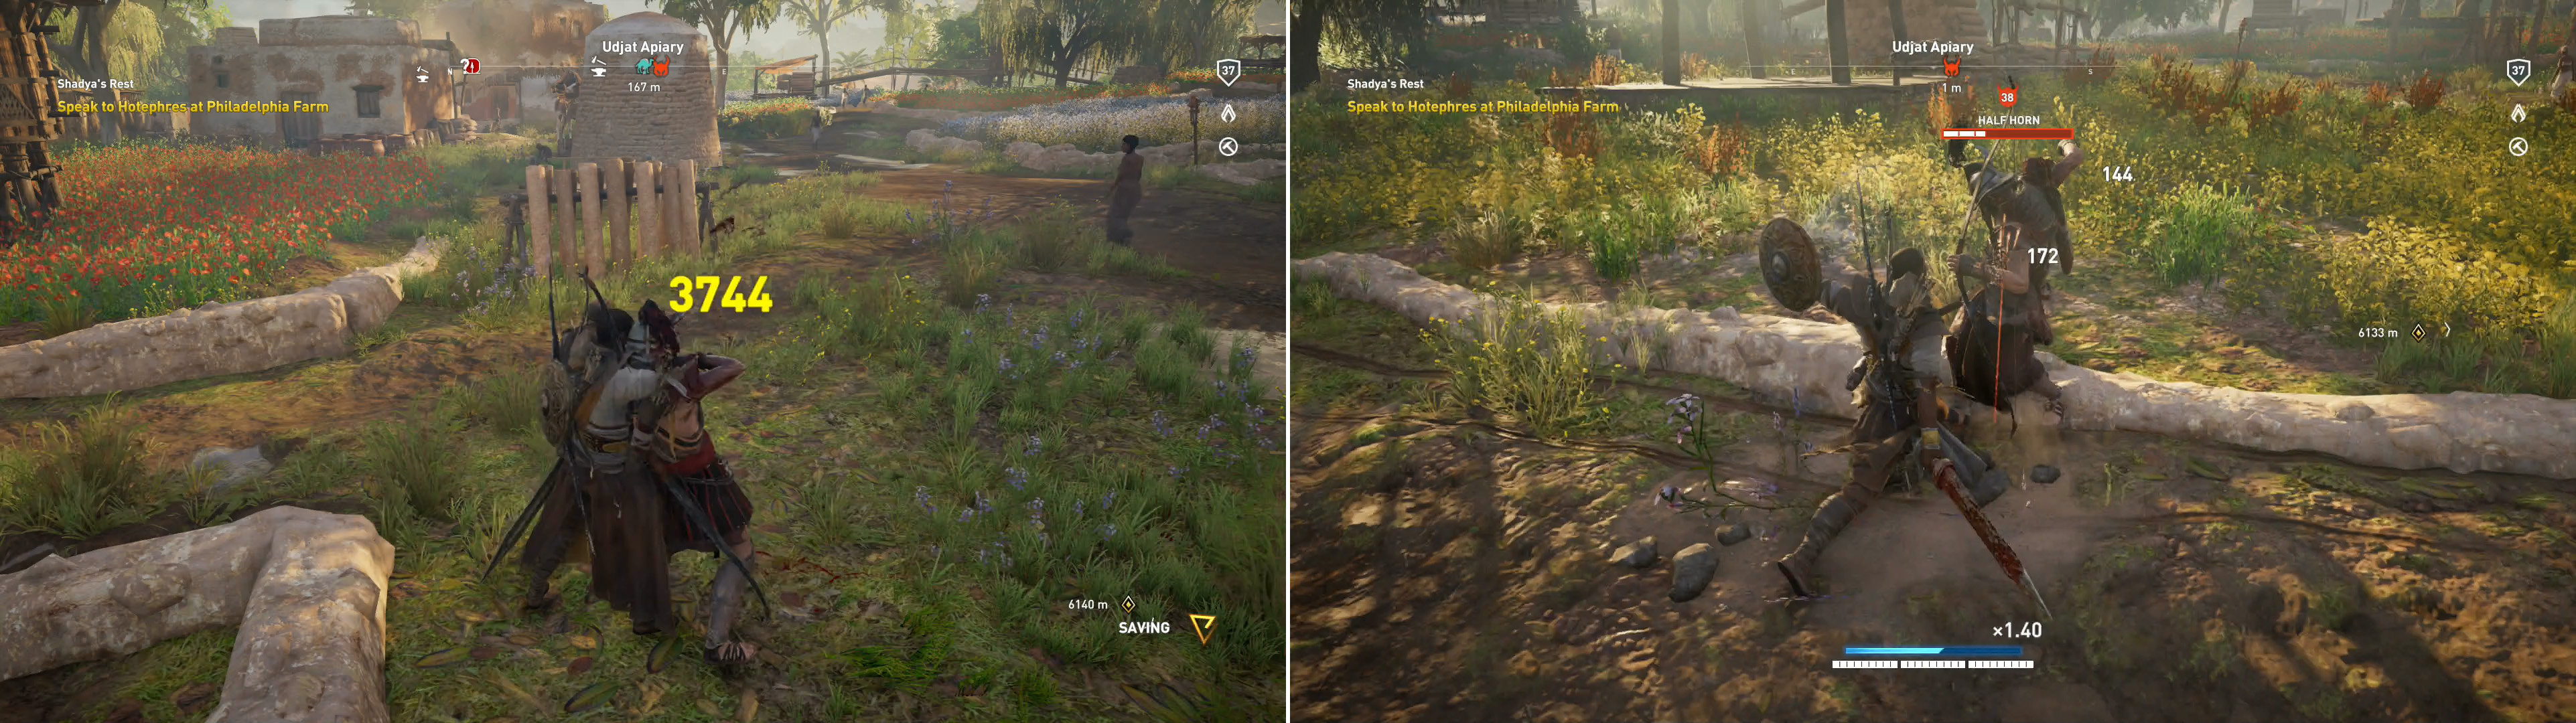
Phylakes will appear after you complete the quest “Gennadios the Phylakitai” (left). After you kill a Phylakes, be sure to confirm the kill (right).
So, then, some general tips are in order, as there’s a good chance you won’t be fighting Phylakes in any easily guideable sort of way, althoug their levels and locations roughly match the flow of the main quests. That being the case, some general tips will be presented to help you with your encounters with the Phylakes.
First, note that Phylakes come armed with the same variety of weapons you and many enemies can equip, and these armaments affect their fighting style quite a bit. Ptolemy’s Fist fights with a heavy blunt making him slow, but hard-hitting, Ra’s Mercy fight with dual swords, making him fast, The Iron Bull weilds a scepter, giving him reach, The Galatian has a tower shield and sword, necessitating you find a way to break his guard, and Half Horn uses a light bow, making him a pain at a distance, but vulnerable at close range. You’ll need to tailor your strategies depending on what weapon the enemy has. If the enemy can’t catch you easily, whittle them down with arrows, if they have a powerful ranged attack, get close to dissaude them from utilizing it.
-
While you can practice the tactics you’ll need to use against Phylakes against normal soldiers (most Phylakes emulate lesser soldiers, at least superficially), they have much more health than normal foes, so you can’t usually count on hacking them to death in a quick combo or two.
-
You can’t count on a single assassination attempt to kill a Phylakes, but it will still do great damage. Try to start out all fights with a sneak attack.
-
Overpower attacks are invaluable. If you get the Adrenaline 2 and Overpower Ultra abilities, you’ll be able to start out fights with an Overpower attack, and do more damage when you perform one. Combined with a sneak attack, it’s a great way to start a fight.
-
The Charge Heavy Attack ability is very, very helpful against Phylakes, especially when paired with an “Instant Charging” weapon, like Storm Blades. It’s often the easiest way to get past a Phylakes’ guard, and even against foes that don’t have a guard you need to bypass, it’ll often knock them down, opening them up for more abuse.
-
Weapons that inflict damage over time (fire damage or poison damage) are incredibly useful. Utilizing tools like Fire Bombs are a fine way of inflicting these effects, should you lack proper weapons.
-
Don’t be afraid to flee! Phylakes are tough foes, but if you can escape them, you’ll heal fully - they won’t. Best yet, you can restart combat with a sneak attack and perhaps another Overpower attack. Smoke Bombs assist greatly with this.
-
Use ranged attacks. You’re not earning style points, nobody will judge you if you exploit an enemy by filling them with arrows.
-
Choose your battlefield! Phylakes often rest near enemy camps, which are terrible places to fight, for obvious reasons. Sneak attack them, use your Overpower, then lure them away from enemy camps and off major roads. A Phylakes is a strong enough foe without having to worry about more enemies showing up to complicate matters.
With those strategies in mind, you should be a match for any Phylakes you come across… so long as they’re not more than three levels above your current level, anyways. Every time a Phylakes is slain you’ll need to confirm the kill afterwards, which will also score you their loot - usually a legendary weapon. Four of them - The Stranger, The Hill, Half Horn and The Galatian - also have an Ornamented Key, which you’ll need to obtain to properly finish the quest. Their levels, locations, and loot are as follows:
| Phylakes | Level | Location | Reward |
|---|---|---|---|
| The Outsider | 20 | Lake Mareotis | Golden Wolf |
| Ptolemy’s Fist | 22 | Sap-Meh Nome | Copper Mace |
| The Iron Ram | 25 | Ineb-Hedjet Nome | Smoke and Mirrors |
| The Stranger | 28 | Memphis | Sarissa Ornamented Key |
| Ra’s Mercy | 30 | Faiyum | Storm Blades |
| The Hill | 32 | Im-Khent Nome | Headsplitter Ornamented Key |
| Bane of Hathor | 35 | Atef-Pehu Nome | Deathstorm |
| Half Horn | 38 | Im-Khent Nome | Composite Bow Ornamented Key |
| The Galatian | 40 | Isolated Desert | Djoser’s Pride |
| The Iron Bull | 40 | Isolated Desert | The Fourth Plague Ornamented Key |
The Outsider
The first Phylakes you’ll likely face, he can be pretty rough at first due to your relative lack of diversity in legendary arms… unless of course you went crazy buying them. In any event, he’s got a shield, a sword, and a pila, the latter of which is surprisingly painful. Make sure you have the Charge Heavy Attack ability so you can get past his guard and consider bringing a sickle sword to the fray, as its Overpower attack - a rage mode in which you move faster - can deal great damage if you keep the pressure up. When vanquished he’ll drop the Golden Wolf regular sword.


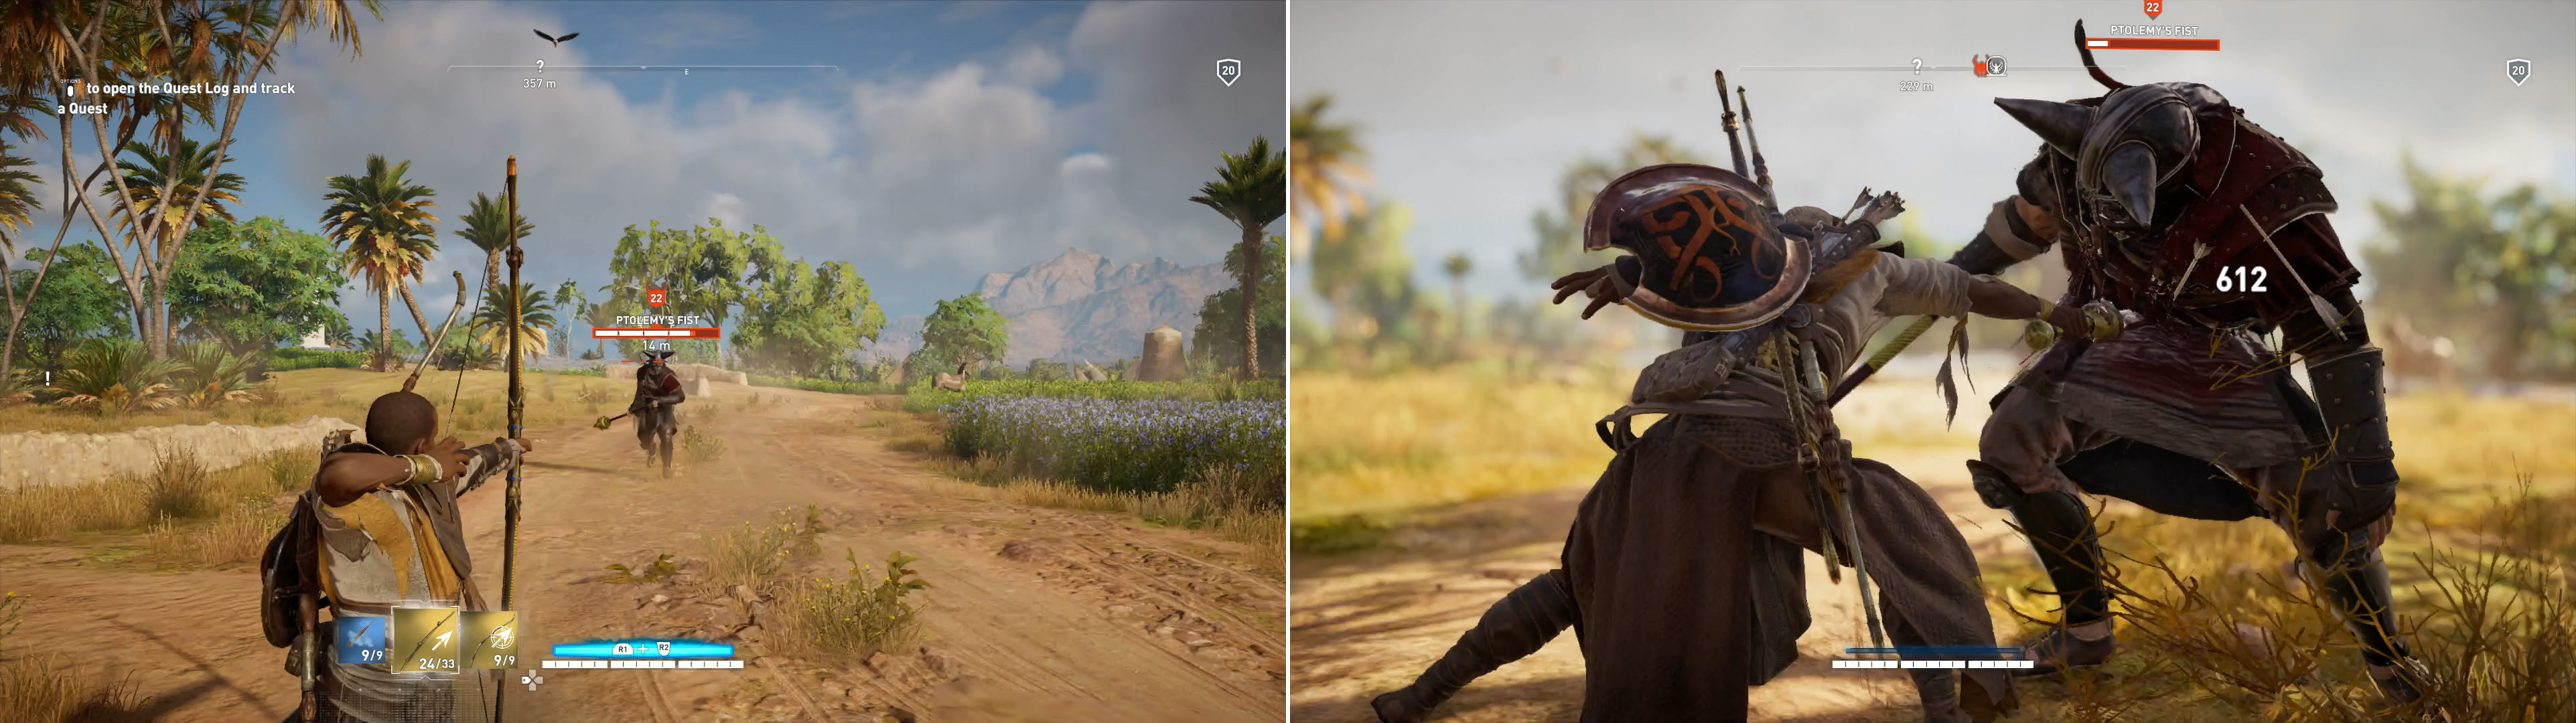
Ptolemy’s Fist is a slow-moving brute, whose lack of celerity makes him vulnerable to archery (left). Use archery to charge your Overpower meter, then expend the Overpower attack to deal massive damage (right).
Ptolemys Fist
One of the easier Phylakes, his heavy blunt ensure he hits hard, but also that he swings slow. Simply dodge his attacks, charge up heavy attacks, and after he misses, knock him down and rain light attacks on him. He’s also vulnerable to ranged attacks. Smite him and claim the Copper Mace from his corpse.
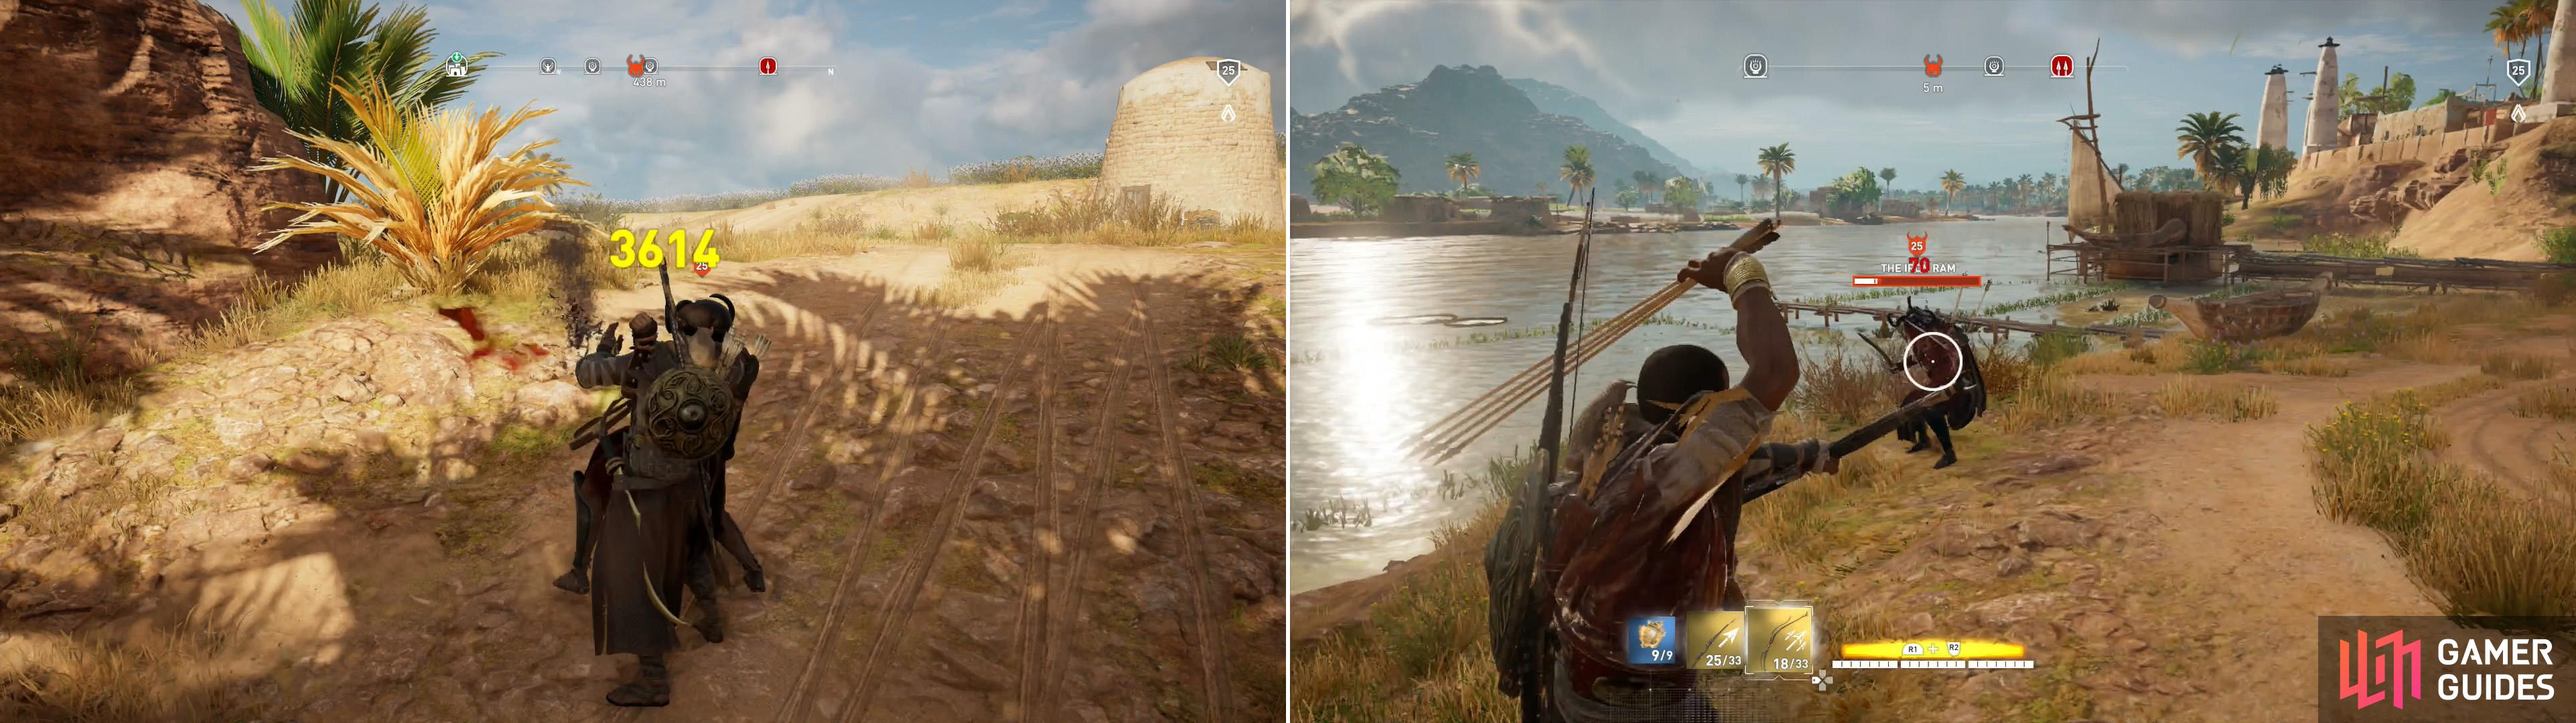
The Iron Ram may be quick, but he’s not observant enough to evade a sneak attack (left). You can also counter his speed in melee by simply keeping your distance and showing him the quality of your arrows (right).
The Iron Ram
His name may lead you to expect a somewhat larger foe, but names can be deceptive, as this Phylakes wields dual swords. Given his attack speed, you’re probably better off standing at a distance and using your bows as much as possible to whittle him down, as you don’t want to get caught in a combo, and his attack speed makes it likely that he’ll strike first. Besting the Iron Ram will allow you to nab the Smoke and Mirrors weapon from him.

As usual, Overpower attacks do great damage to a Phylakes (left), but failing that, charged heavy attacks work fine (right).
The Stranger
Prowling the streets of Memphis, he’s one of the Phylakes who is most likely to intervene as you work on main quests. He’ll come to battle with a large shield and a sickle sword, which means the tried and true charged heavy attack will likely be sufficient to cut him down with enough repetition. If you best The Stranger, you can claim the Sarissa , a cursed spear, and an Ornamented Key.
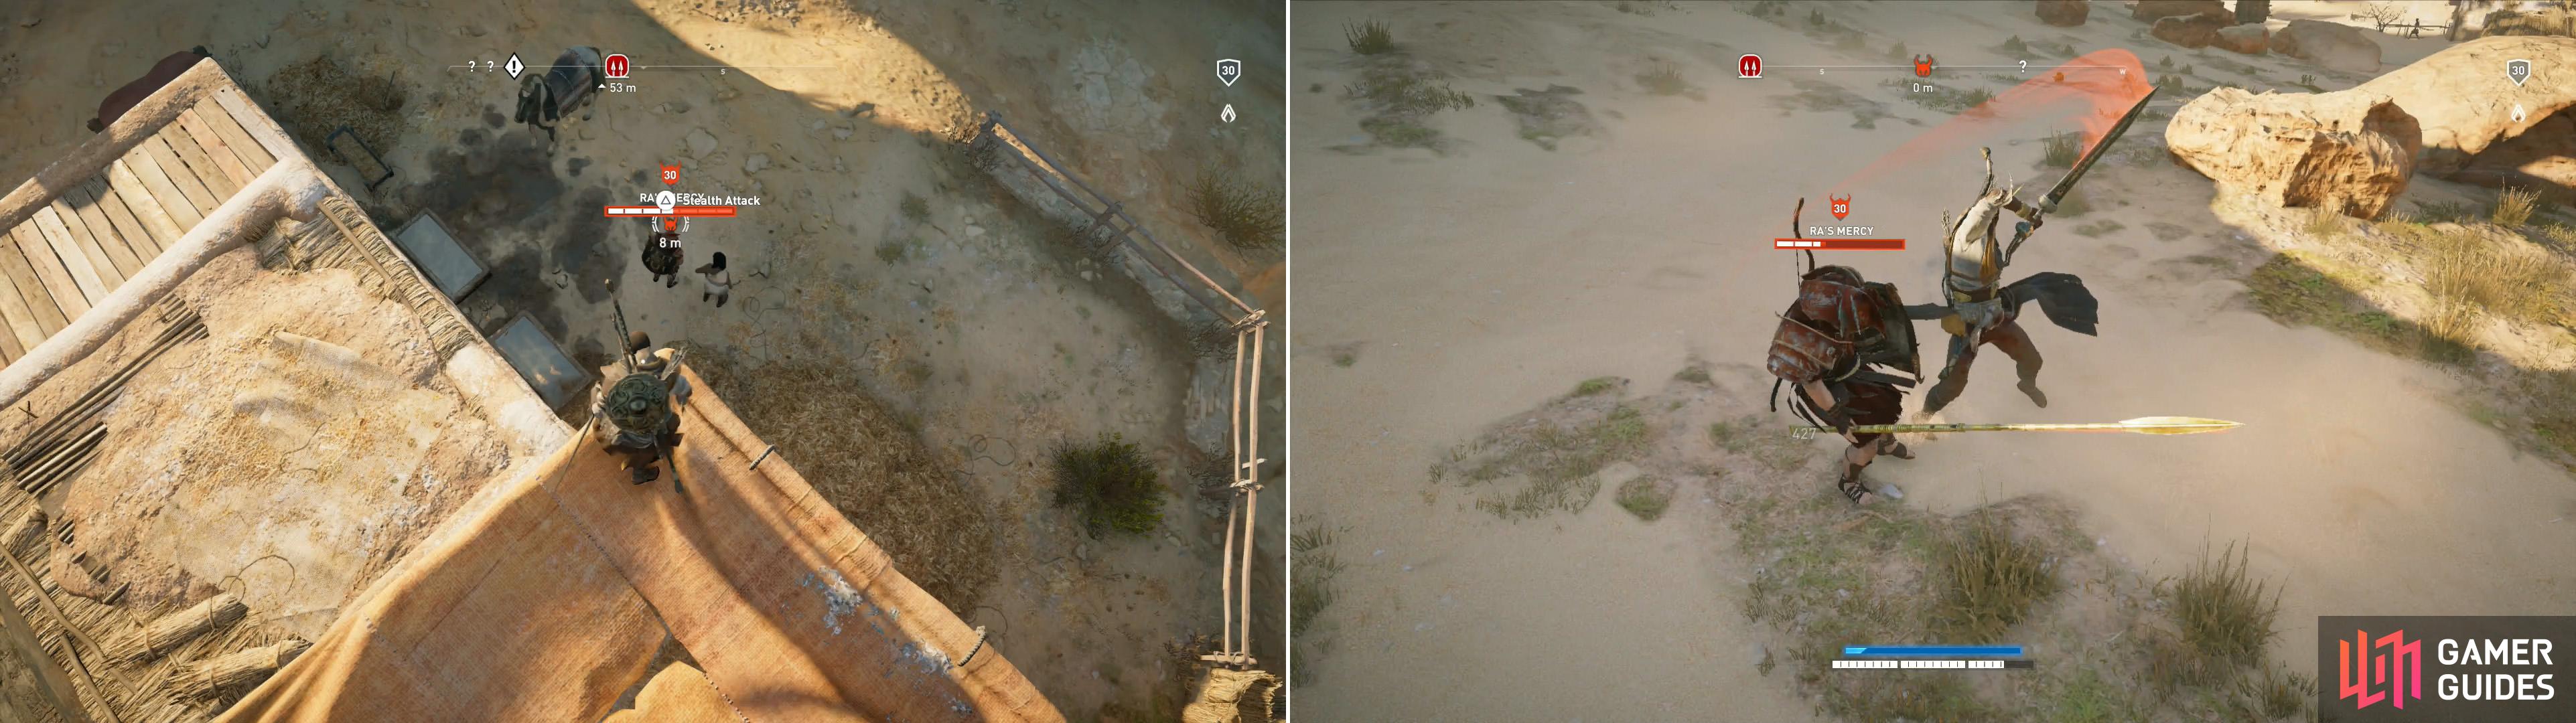
A sneak attack to start out any encounter with a Phylakes is always a good idea (left). Ra’s Mercy’s shield can be bypassed with charged heavy attacks (right).
Ras Mercy
Carrying a shield and a spear, he’s got range and his guard must be broken, but since a sword (regular or sickle) is faster than his weapon, you can usually charge it up, get in range, and strike before he does. Just be way of his lunging attacks and keep in mind that, while tempting, if you attack at a range he’s not above responding in kind. Ra’s Mercy will drop a pair of dual blades, Storm Blades when he dies.
The Hill
Unlike The Iron Ram, The Hill’s name does not decieve; he’s a brute, like Ptolemy’s Fist, and fights with a heavy, damaging, but slow weapon, in this case an axe. For the same reasons, he’s an easy kill, as he probably just can’t catch you if you back up and pelt him with arrows. Dispatch him to obtain Headsplitter and an Ornamented Key .
Bane of Hathor
Bane of Hathor is an odd foe, as he favors ranged weapons for combat. If you can sneak up on him, keep the pressure up, as there’s little he can do against a potent, determined attacker in melee. Put him down to obtain Deathstorm .
As usual, use a sneak attack to start out the fight with Half Horn (left). He prefers ranged weaponry, so deny him his preference by staying close (right).
Half Horn
Like Bane of Hathor, Half Horn prefers ranged combat to melee combat, and if you don’t indulge him, he should be a relatively easy kill. He’ll drop a Composite Bow and an Ornamented Key .

Sneak up on your prey - the massive damage to start out the fight will help (left). The Iron Bull’s reach and attack speed makes him a dangerous foe in melee combat (right).
The Iron Bull
The last two Phylakes, The Galatian and The Iron Bull can both be found in the Isolated Desert area. They’re the only level forty Phylakes, and the only two that are regularly found near each other. You do not want to fight them together, so take up a spot nearby and wait for them to part ways enough so that it’s safe to engage one or the other. Otherwise, the usual rules apply; start out with an assassination attempt, then immediately use your Overpower attack (assuming you have Adrenaline 2), which should go a long way to whittle down their health.
The Iron Bull, despite his name, is no heavyweight, instead being a scepter-armed foe who strikes quickly, and can often sneak in attacks before you can land one, yourself. Perform a charged attack to knock him down, taking what damage he deals, then hit him a few times while he’s down. After such an encounter you should keep your distance long enough to heal, while peppering him with arrows (especially fired from bows with “Health on Hit”!). Repeat the process and use Overpower as it recharges and you should emerge victorious. You can strip Djoser’s Shield from his body, as befitting a conquering soldier.
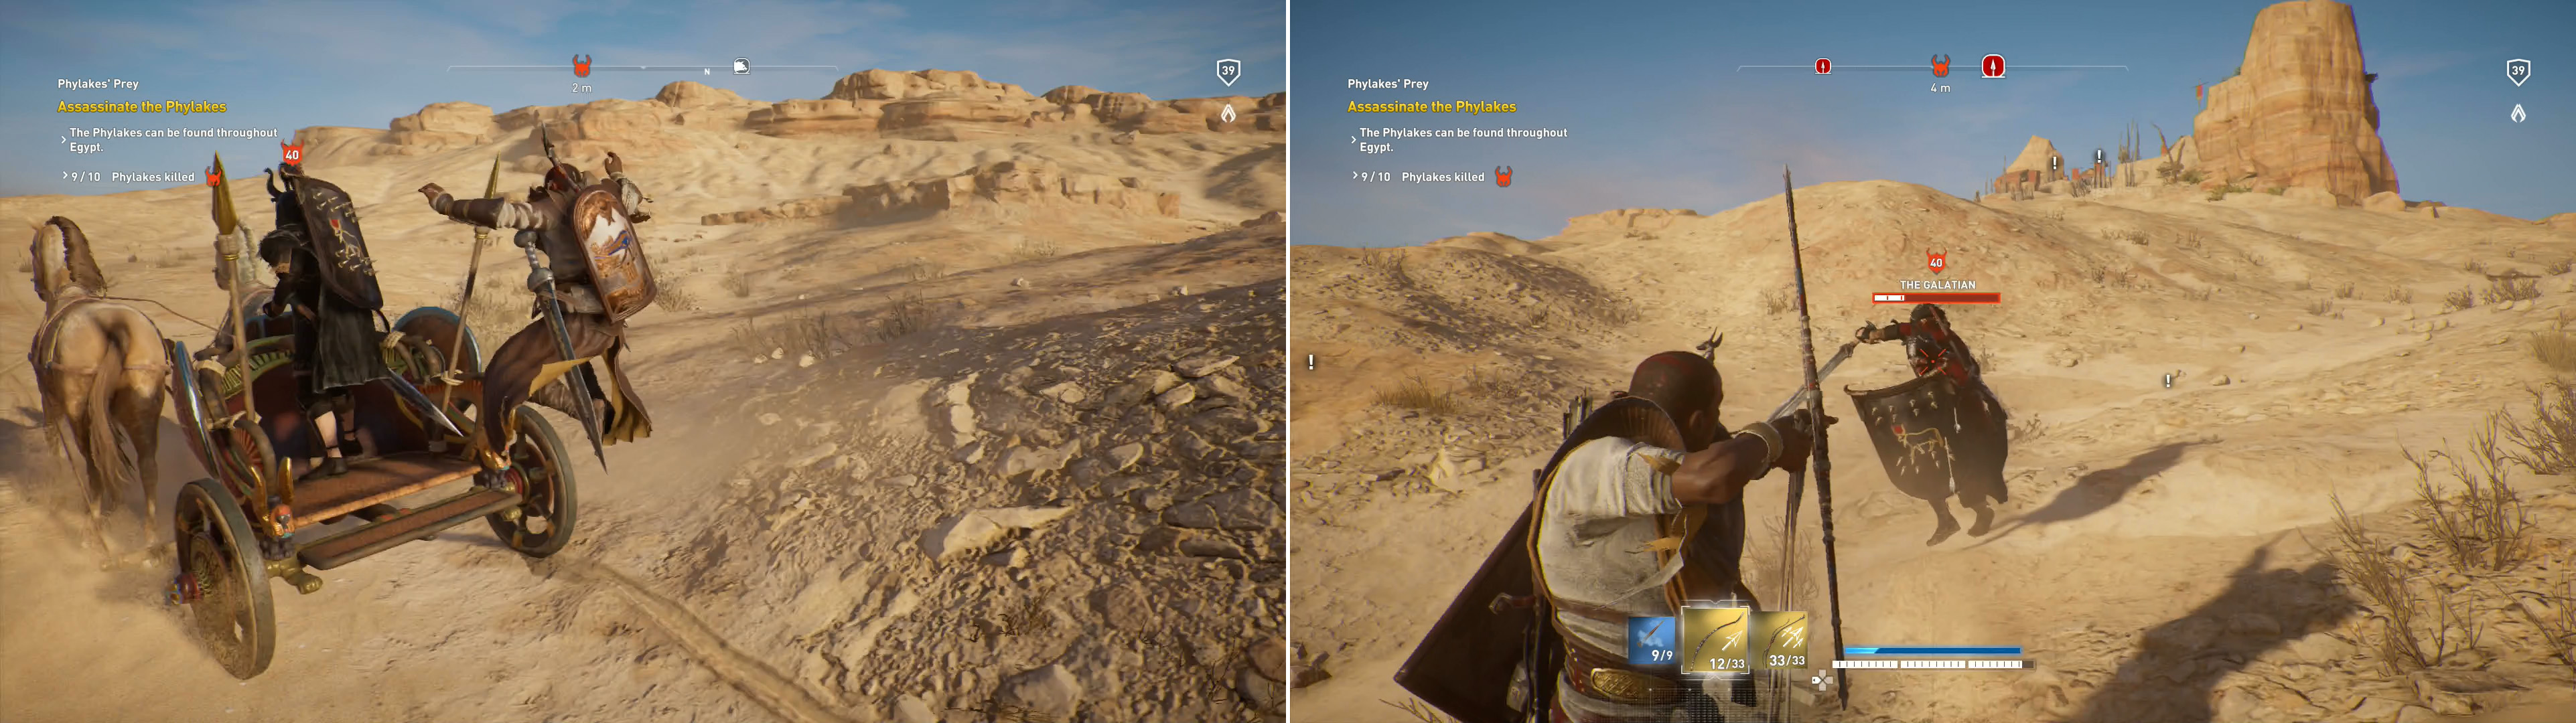
You’ll find the Galatian riding around the Isolated Desert in his chariot (left). You can get past his guard with either charged heavy attacks or archery (right).
The Galatian
The Galatian isn’t so dynamic as The Iron Bull, being your typical super-soldier enemy, albeit much more powerful. Armed with a tower shield, sword, and pila, he likely can’t out-range or out-speed you if you stick to charged attacks with a comparable weapon, which are necessary to knock him off balance. After killing the last two Phylakes, confirm their kills and from The Galatian you should obtain The Fourth Plague and an Ornamented Key , along with a note mentioning one Abar, who is retired and resides “in that pathetic fishing village east of Herakleion”. Looks like you’re not quite done yet.
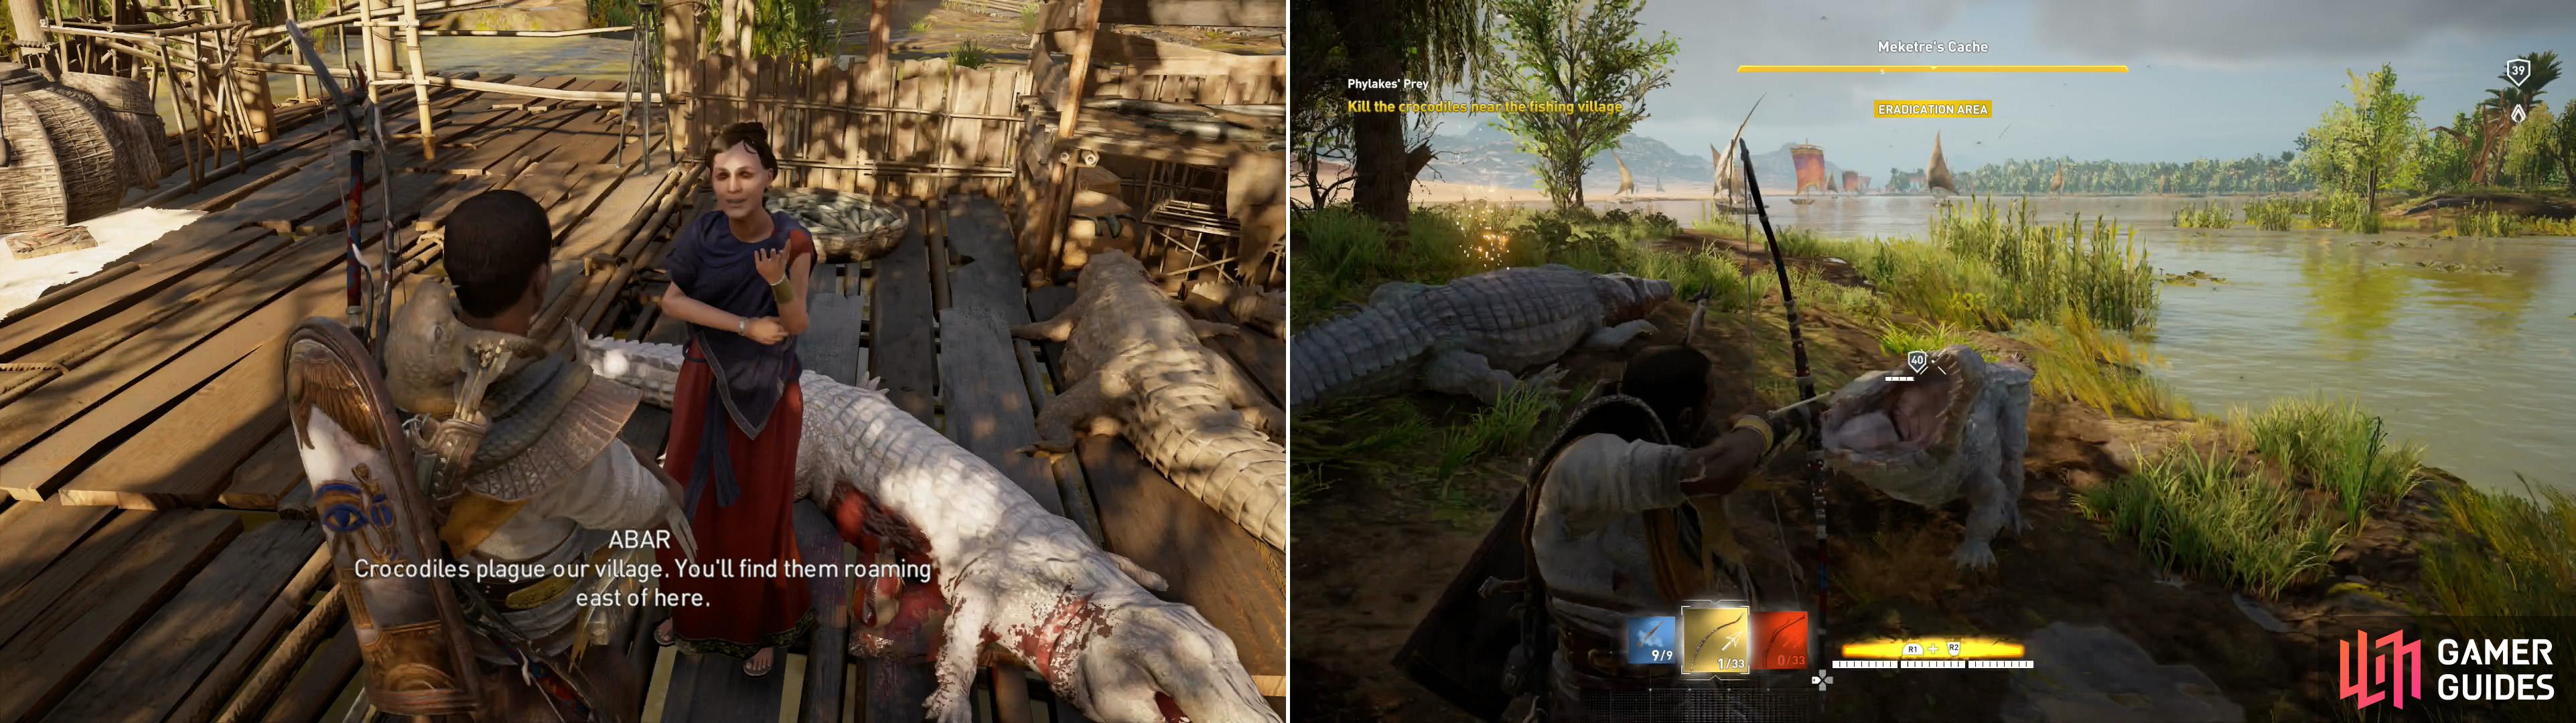
Find Abar in her secluded fishing village (left) then kill the crocodiles as she requested (right).
The Final Key
Fast travel to the Yw Huts fast travel point, which is east, southeast of Herakleion. When you approach the search area, deploy Senu to mark your target, then go to the village and introduce yourself to the woman indicated. In response to her demands, Bayek is blunt and honest, and she’ll make a rather mundane request of you in return for the key.
Make your way east to the Meketre’s Cache point of interest and kill seven or so Crocodiles (some of which are level fourty) to complete the eradication area and satisfy Abar. Before you leave, search the island for an abandoned campsite and loot a red chest within to complete the area. Again, might as well, since you’re here.
| Reward: For completing Meketre’s Cache |
|---|
| 450 XP |
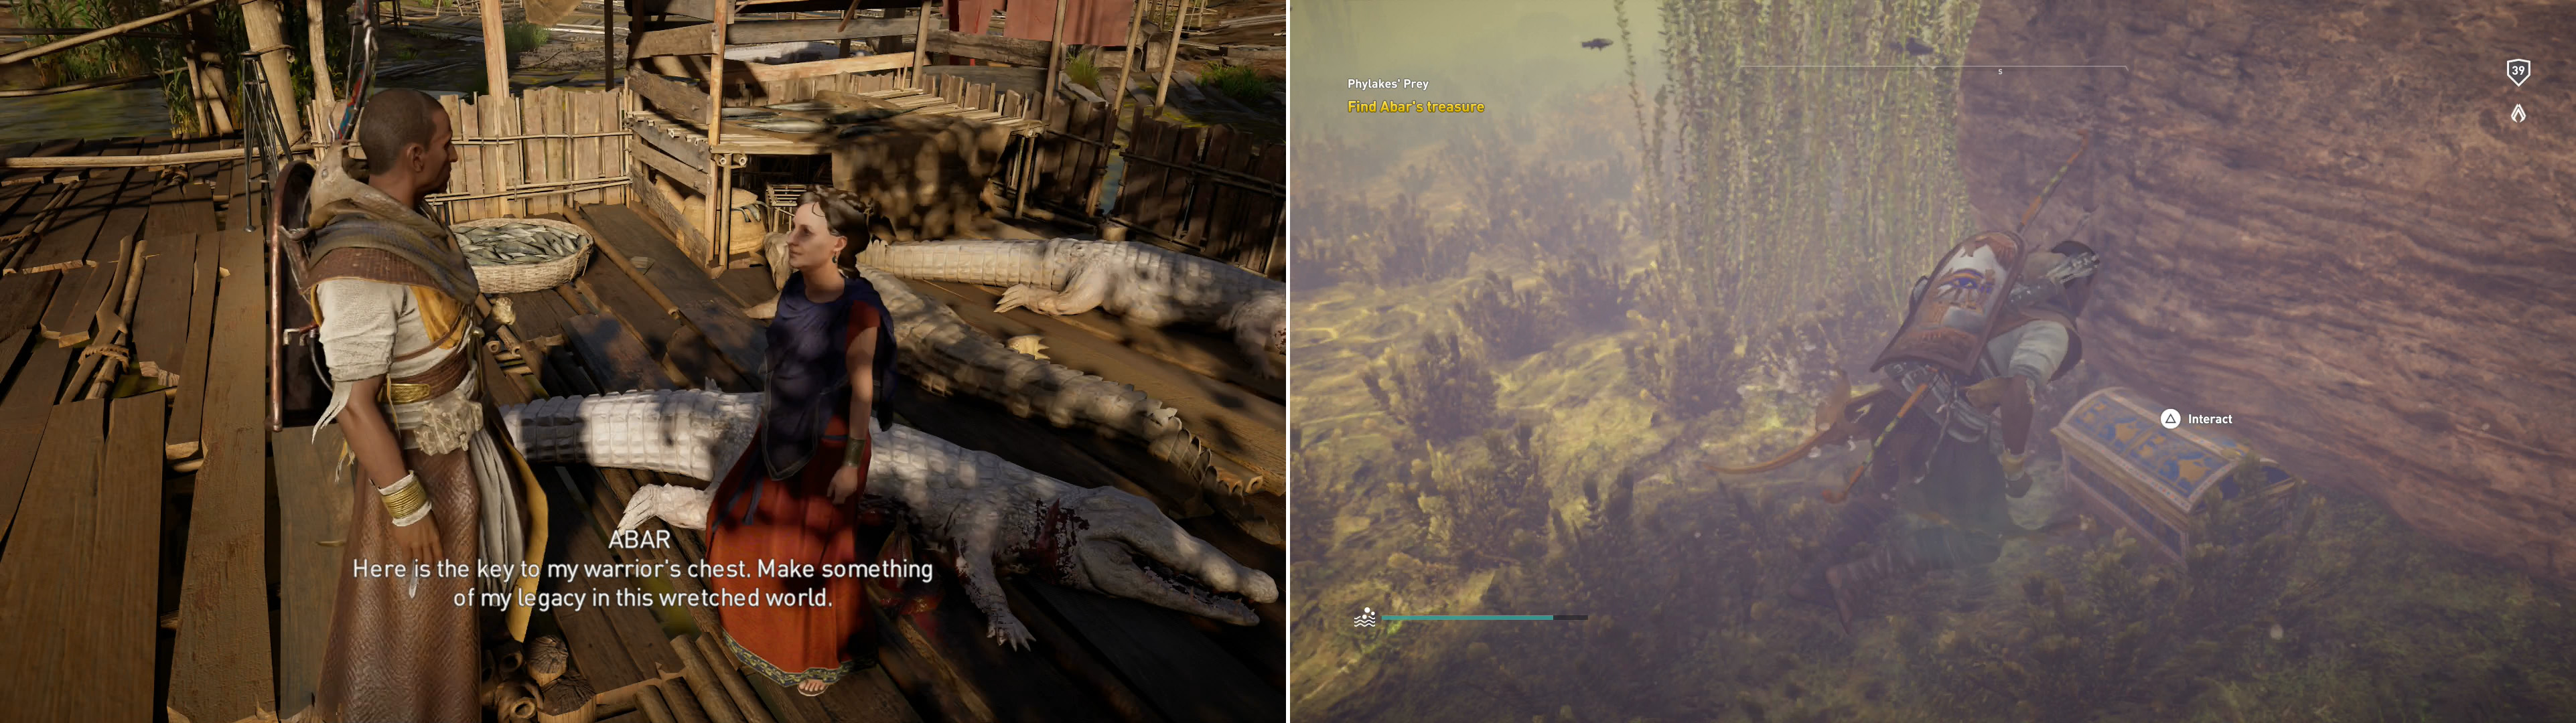
Return to Abar to get her key (left) then locate the Phylake’s submerged treasure (right).
Return to Abar in the Yw Huts village and she’ll just give you the fourth and final Ornamented Key you need, and point you south of the village… well, she says south, but the search area is more southwest. Head to the search area, use Senu to locate the treasure, then head over to the indicated area, fighting through whatever bandits and hippos block your way. Dive into the water to find the sunken chest, which, with the for Ornamented Keys you’ll be able to open and retrieve your prize for besting the Phylakes, the Black Hood legendary outfit.
| Reward: For completing the quest “Phylake’s Prey” |
|---|
| Black Hood |
No Comments