Head to the Great Morgan Falls in Lakehaven Heights and Wind Rush through the falls to reach the Water Trial.
Enter the shrine for a scene and pick up the Red Chamomile before you continue to a room full of eyes. These eyes will send you back to the start of the shrine if they see you and you need to use Spectral Cloak to avoid their gaze.
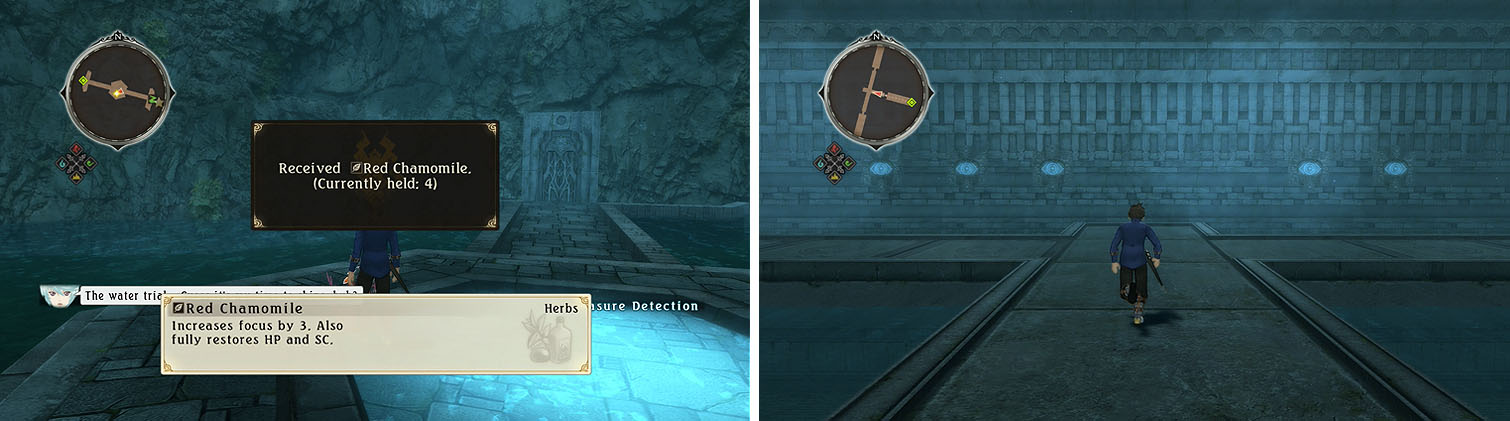
Collect the herb at the entrance (left) and make your way to the room with multiple non-decorative eyes (right).
The good part is that they can only see things in a vertical line from them, but the bad news is that Spectral Cloak will only last the length of the two large tiles. Because of this you will be unable to head south, since there are three eyes, so head north and then east to a chest.
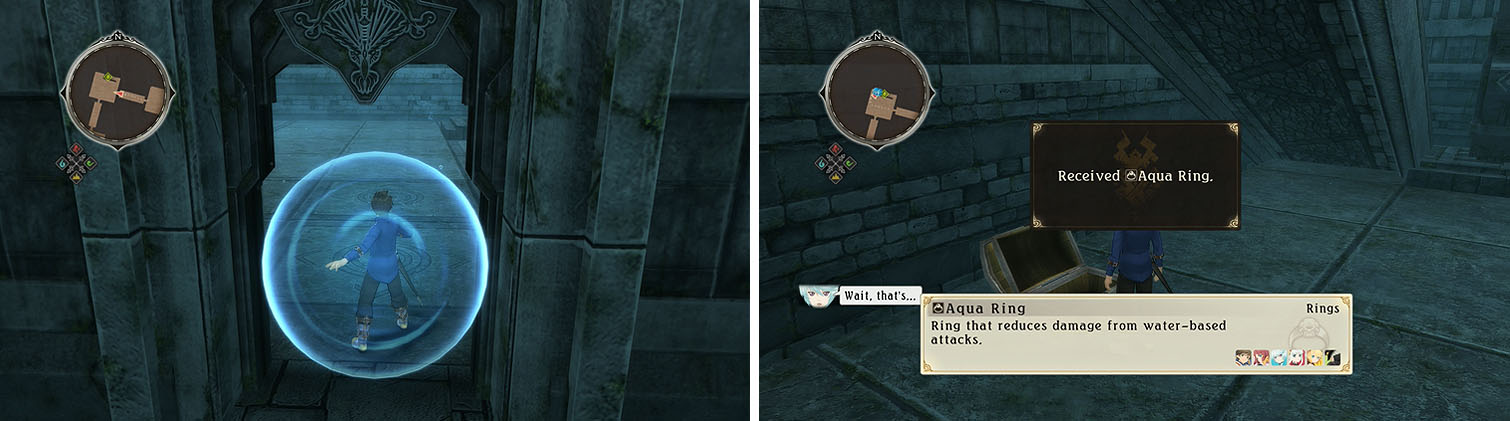
Head up the stairs and head northwest into a hall and when you reach the second door look at the floor to note the marks on the tiles. Use cloak to enter the room in a straight line and make sure to run all the way to the western wall and around the statue to reach the chest to the north for an Aqua Ring .
Use Spectral Cloak as you enter the room and collect the chest in the corner.
Backtrack the same way and use cloak again to exit the room to the south and then exit the hallway on the other side.
The majority of this room is covered with eyes, marked by the tiles on the ground, but if you look to the left of the statue straight ahead you’ll notice a blank tile. Use cloak to make your way to the unmarked tile and then use it again to enter the door to the east to find a Red Sage , Roll Cake , and Life Bottle .
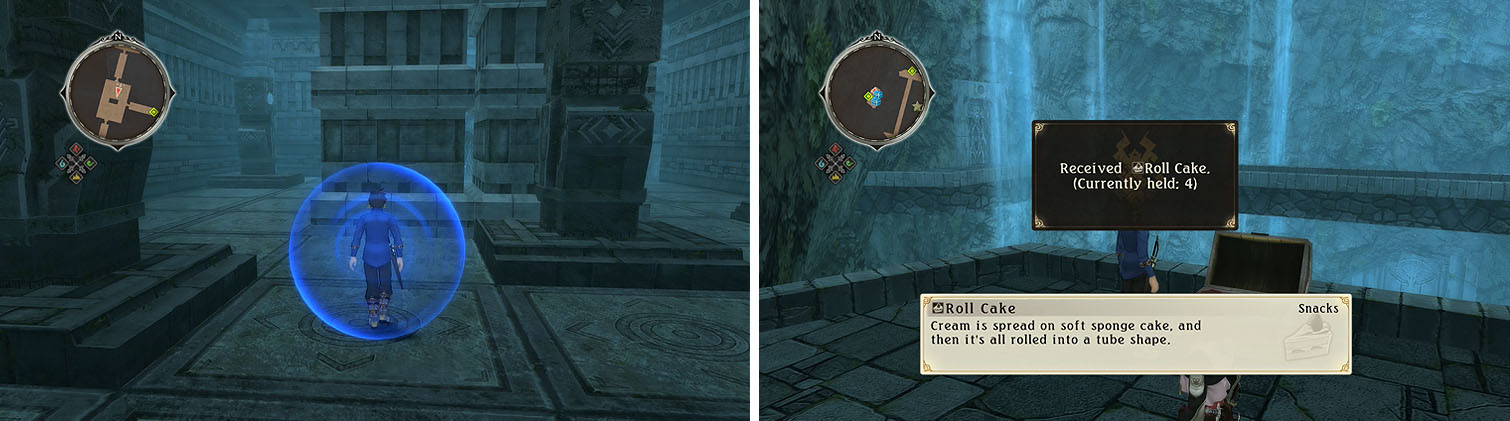
Look for the blank tile to the left of the statue (left) to reach the room with multiple treasures (right).
Get teleported back to the beginning and head back to the second floor and this time head south. The purple aura is a warp that you can activate to avoid a lot of backtracking, so hit it and then take the stairs down in the next room.
Head through the only door and when you exit the hall make sure to use cloak to reach the silver chest straight ahead with a 6000 gald and then cloak over the marked tiles to reach the Fatigue Ward . Get teleported back to the beginning and take the warp you activated to the 2F and head south again.
This time exit to the west instead of taking the stairs and open the chest in the next room for another piece to the story before heading north. Look left to spot a blank floor tile and use cloak to reach it and then use it again to reach the treasure with a Feldspar Tiara .
Make sure to check the statue for the Damaged Eyeball Statue discovery and the skit The Seraphic Civilization and then backtrack to the previous room to take the stairs.
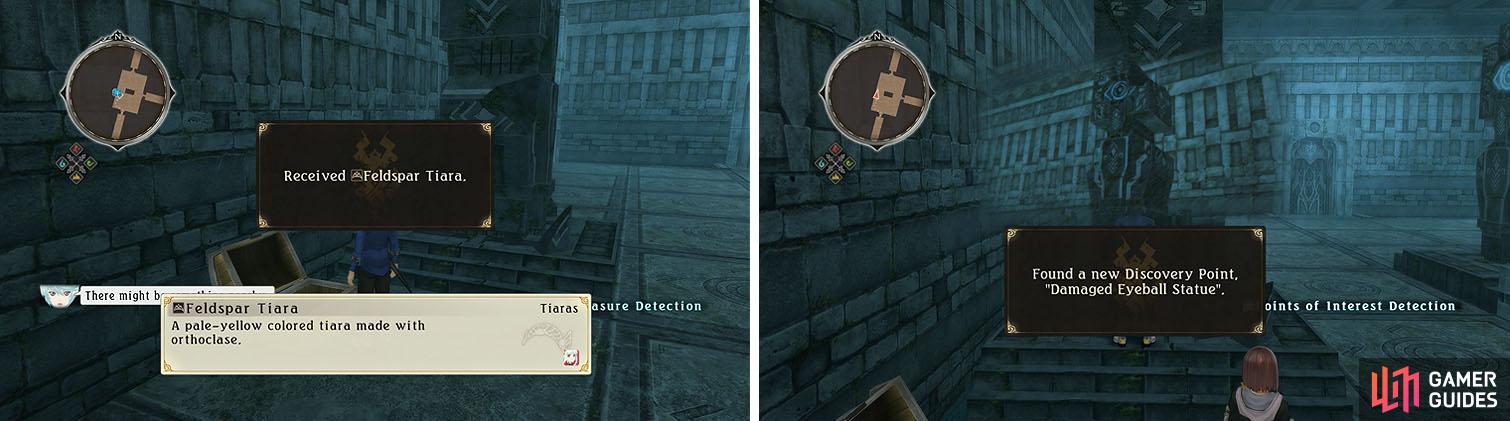
Grab the chest with a Feldspar Tiara and check the statue for a discovery and skit.
Head north to a room without marked tiles and walk right to the southeast corner of the room. Move forward one tile and then activate cloak to bypass the third tile and then enter the door to collect the Raspberry Mousse , Peach Gel , and the Normin Animili .
You can now backtrack, making sure to use cloak before walking out from behind the platform, and then return to the southwest room.
Head east and grab the Panacea Bottle in the corner by the door and then read the next chapter to the Shepherd’s tale before exiting north. Activate another warp and follow the path to a room with another part of the Shepherd’s diary and then head south to a new room with eyes.
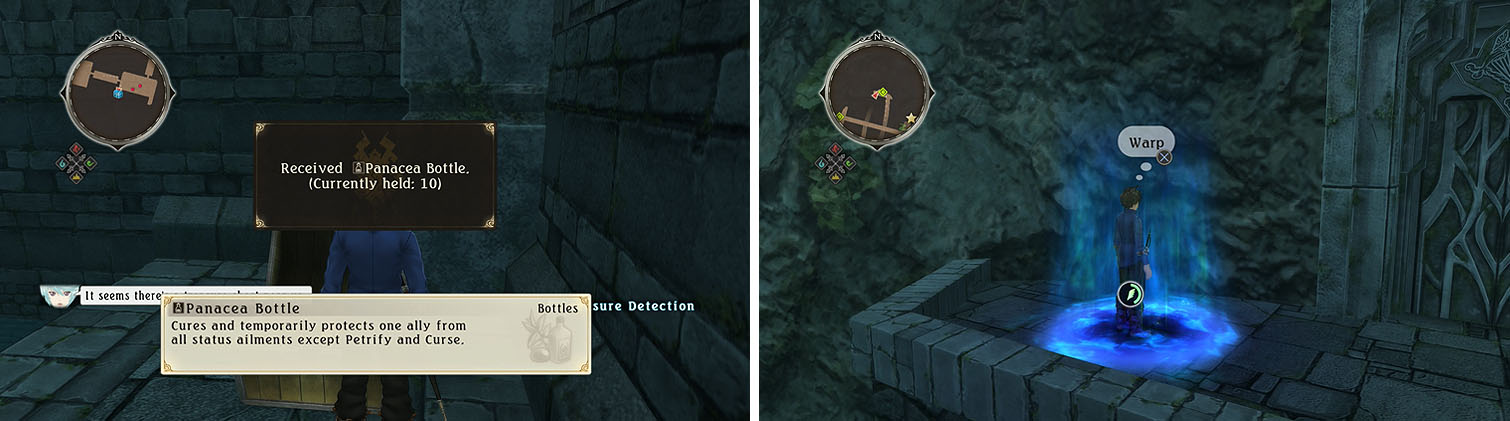
Collect the Panacea Bottle in the corner before you head up the path to a warp.
Use cloak to reach the corner of the room and wait for it to wear off and then activate it again to cross the next two tiles. Walk forward two more tiles, to the end of the platform in the middle of the room, and then activate cloak again to reach the opposite corner. You can now activate it once more to reach the exit to the south to the next room.
Walk around to the left side of the statue, facing south, and use cloak to pass over one tile and then turn right and activate cloak again to reach the chest with a Feldspar Staff .
You can now cloak back across the tiles to the east and then north to reach the same side of the statue and then walk forward a tile before you cloak across the last tile to reach the door to the east. You can now follow the path to the exit and take the ramp down to a Red Saffron .
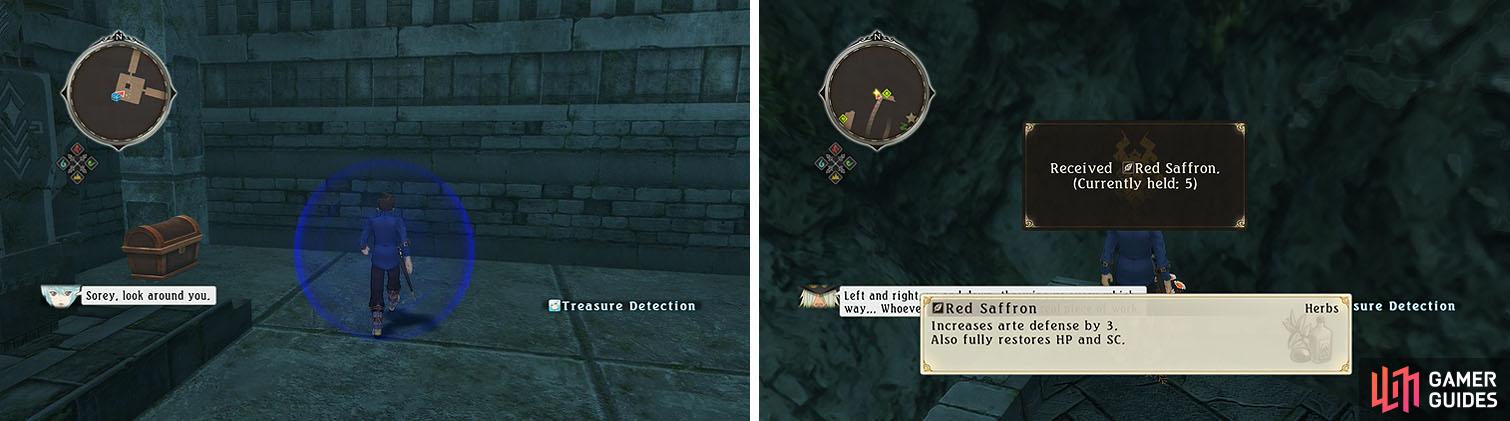
You’ll need to circle around the south side of the statue to reach the Feldspar Staff (left). Exit to the north and head down the ramp for an herb (right).
Open the chest in the next room for the final piece of the story and then follow the path west to the stairs, but ignore them since they are pointless.
Head south and take the stairs to a teleporter and make sure to cloak down the stairs to avoid being teleported back to the beginning. You can now head straight to the save for the Asura, the Hellion skit and then enter the boss room for a scene.
Boss: Asura
| HP | Category | Weakness | Resistance |
|---|---|---|---|
| 20,940 | Therian/Armored | Earth | Fire, Wind |
| Drops: **Blessing Orb** |
Armatize with Edna straight away to exploit Asura’s weakness and focus on using the marital artes like Rampaging Giant to create a Power Hit combo for your allies.
Since some of Asura’s attacks hit hard and are hard to interrupt, due to how fast they are, it’s a good idea to attack him from the sides or back and guard if he is targeting you. When he reaches low health Asura will start to chain his abilities together, including Asura Rampage - Storm, so be careful at this point while also trying to bring him down quickly.
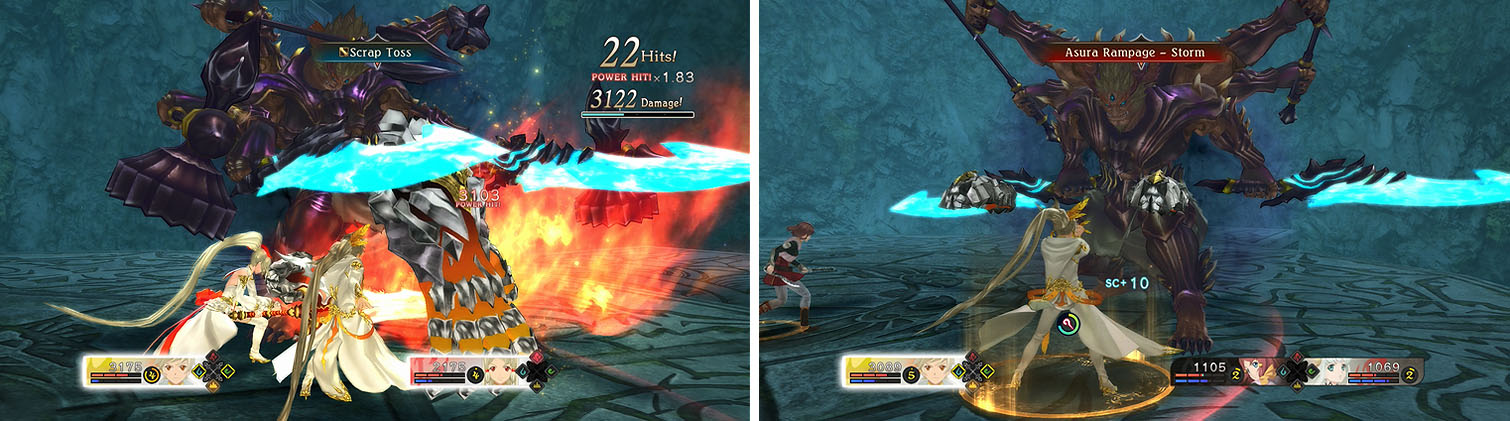
Armatize with Edna to maximize your damage while avoiding the major attacks.

Rest Azure'd
Conquer the fierce battle at Lefay, the Shrine of the Water Trial, without using any items!

After the scene you’ll obtain the Proof of Spiritual Power: Water and can backtrack to the entrance of the shrine for a scene. You can now exit to the save in Lakehaven Heights for the skit Maltran’s True Identity before returning to Ladylake.
Rest at the Inn for the skits Trial of the Heart and Seraphic Rebirth and then head to the Noble’s District to speak to Alisha for a scene to obtain the Therapy Cat fashion item. Afterwards, talk to Maltran to the southeast for a scene, followed by the skit Let Sleeping Dogs Lie (Dezel) .
No Comments