Local Enemy Bestiary
| Monster Name | HP | MP | ATK | DEF | Gil | EXP |
|---|---|---|---|---|---|---|
| Apocrypha | 1900 | 195 | 18 | 80 | 525 | 1200 |
| Behemoth | 5800 | 180 | 25 | 100 | 0 | 2055 |
| Brainpan | 1300 | 1000 | 24 | 120 | 600 | 550 |
| Dragon | 7000 | 850 | 45 | 130 | 0 | 2931 |
| Gigantos | 6000 | 1120 | 20 | 1 | 0 | 7550 |
| Misfit | 1750 | 140 | 26 | 105 | 786 | 750 |
| Ninja | 1650 | 130 | 22 | 135 | 520 | 694 |
| Platinum Dragon | 2802 | 200 | 35 | 150 | 1300 | 895 |
Once you arrive, you’ll notice that Shadow is nearby. Speak with him and he’ll reluctantly join the party. Use the nearby Save Point, then re-equip Shadow with the equipment I told you to buy earlier. (Also note that, since his dog is back in Thamasa, he won’t come in for those high-damage attacks for now. Damn.)
From the Save Point, go east and upstairs, then a path will clear for you. Cool. Go east and along the path south; a northeastbound path will open up as you go. Follow it and head east for a bit. Divert yourself northward at one point to find a blue orb; examine it to find the Murasame .
Go east and you’ll open up another southbound path; it leads to a monster battle with Gigantos. Beat it for a Sasuke knife, if you feel like it. You can use Catoblepas’s Demon Eye to (possibly) one-hit kill it, as well as Death, Break, and Lv. 5 Death. Your choice.
Anywho, back to the subject. After the potential fight, backtrack some and go into the small alcove in the northern wall to make another path. Go along it to the center of the upper platform and, on that differently-colored spot, you will be transported to another area. Sort of like the Mario games’ warp pipes, but without all the sewage.
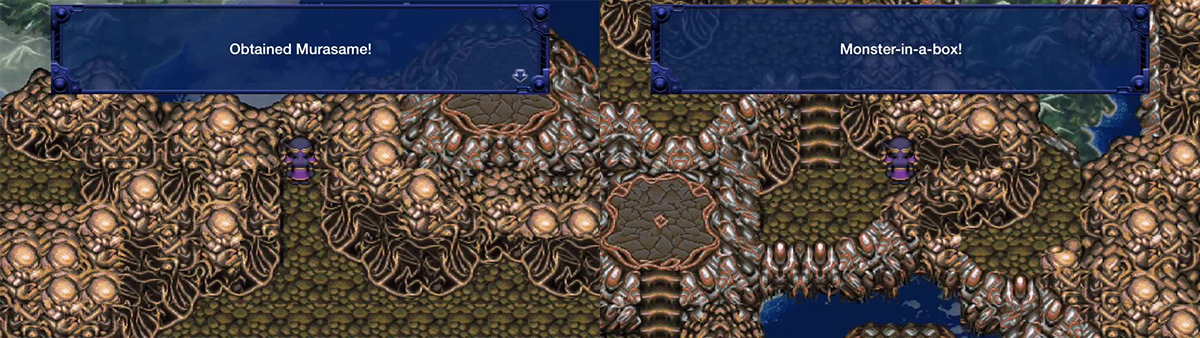
Examining the blue orbs offers up some nice items though beware as monsters can also lurk inside them!
Once you exit, go south and downstairs. Go east now and step on the switch to open up a path to the southeast. Take this path, then the staircase to the south. Go along this path, skipping the stairs, until you find another transport platform atop some stairs. Use it.
Once you exit from there, go south and onto the western platform to transport again. Once you exit for the third time, go southwest and onto the switch. Now go north, upstairs, and onto that switch to make a shortcut. Use it and go along the path south.
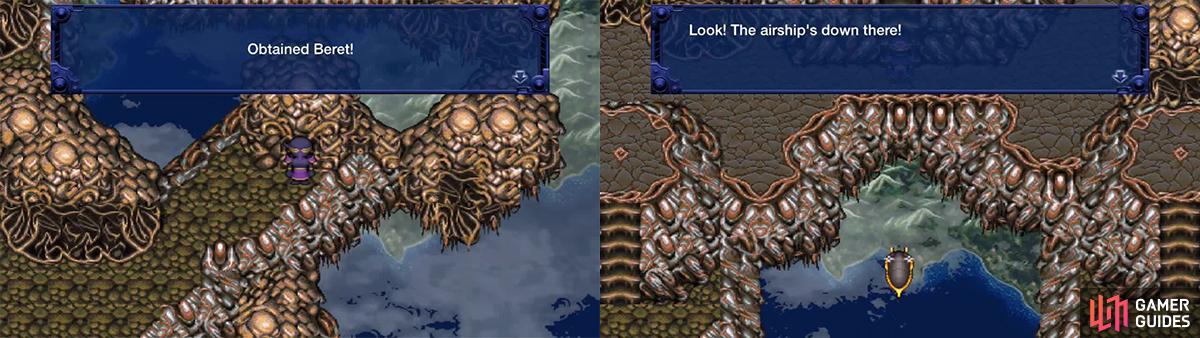
Go down the first staircase, then the next one. Go along this path for a while and you’ll eventually find a path and a switch to the south and east. Step on the switch, but ignore the opened path for the moment. Go east and examine the blue orb to find a Beret ; quite a useless item, in my opinion, but, hey, it’s my guide.
Go south and onto the transport platform to find a Save Point. If you’re like me, you’re really needing to use a Tent here. Do so, and also be sure to save.
Returning to the ship is only a good option if you are really low on supplies. You will have to cross the entire section again.
Exit by heading towards the light (by the by, don’t do this in real life) to return aboveground. Go onto the northern platform. Eventually, along the path, you’ll descend a staircase and be allowed to return to the Blackjack. It’s a decent option to undertake. For the three-boss series, this probably drained your Hi-Potions and Ethers, but probably compensated with Gil. But it’s your choice, and you’ll have to manually walk all the way back from the start. Personally, I did – you won’t see another shop for a while.
Anyhow, from that point, go west and along the path. You’ll see a beast in the middle of your path. Heal up, then speak with it to battle.
Ultima Weapon
The Ultima Weapon… This second variety (you encountered the first as a sword in the Cave to the Sealed Gate) is a beast created during the War of the Magi a millennium ago, created for the sole purpose of carnage and destruction. Expect a hard fight.
Its attacks include a basic one, Full Power (basic attack power doubled), Fira, Flare , Bio, Quake (Earth damage to all), Tornado (Wind/Aero damage to all), Graviga (percentage damage), Rasp (MP damage), Blaze , Meteor , Mind Blast (random statuses), and Flare Star (Fire-based damage).
What he can use is fairly specific at a given time:
~~ Until ~50% HP: Attack, Blaze, and Flare.
~~ After that, he’ll use Bio/Quake/Meteor; then Attack/Full Power; then Fira on everyone; then Mind Blast; then self-Protect, Haste, and Shell; then a while before Flare Star; then a loop from there.
~~ Below ~25% HP: Attack, Blaze, Graviga, Rasp, and Tornado. Flare also becomes a counterattack on occasion.
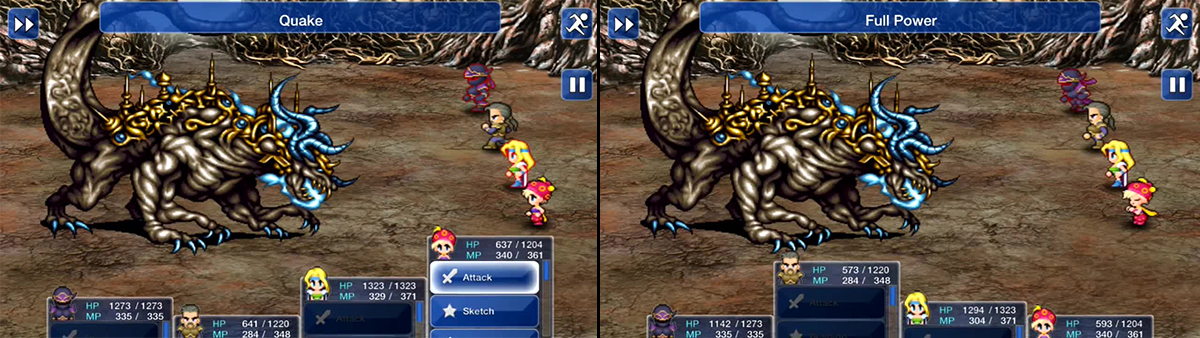
Ultima Weapon has a few powerful attacks, some of which can wipe out a character in one hit and reduce your party HP to low levels. Be vigilant!
What I did was this (I used Terra, Locke, Cyan, and Shadow) – Terra was constantly on party-wide Cura duty after she had used Kirin. Locke was abusing the two Hawkeyes he had on, occasionally going for the party-wide Cura or a Phoenix Down when needed. Cyan was using his #1/#4 Bushido, and Shadow was tossing a few Scrolls I had built up over time.
Dispel was used once after the Haste/Protect/Shell thing, and Shadow had summoned Unicorn when the Mind Blast came around.
After the battle, Shadow will flee. Questionably late, but whatever. Go north to find what you came for all along…
After the scene, Celes will have joined you in place of Shadow. Time to leave!
No Comments