Local Enemy Bestiary
| Monster Name | HP | MP | ATK | DEF | Gil | EXP |
|---|---|---|---|---|---|---|
| Antares | 480 | 15 | 20 | 120 | 270 | 290 |
| Lich | 590 | 90 | 1 | 50 | 350 | 374 |
| Outcast | 1100 | 50 | 18 | 110 | 442 | 740 |
| Provoker | 781 | 60 | 17 | 110 | 300 | 415 |
| Zombie Dragon | 1991 | 160 | 29 | 150 | 309 | 1072 |
Once you enter the area, go around and head south. As you do, investigate the chest at the end of the eastern side-path to find an Assassin’s Dagger . Exit via the southern door.
On B1F, go south and along the western side-path to find a Kazekiri in the chest; take the eastern path southward to the next area.
On B2F, you’ll notice that the bridges change every few seconds. The key to crossing is to note a tile that doesn’t go away and get on it, then cross when the change is complete. To start one side changing, step on a bridge tile.
There are two bridge sets; the western and eastern sets. From the path on the left, go east and onto the southern bridge. After the change, go south and east onto the rock. Wait for the change, then go south and along the first westbound path. Continue west to find a chest with the Heiji’s Jitte Relic within that is only useful for Setzer.
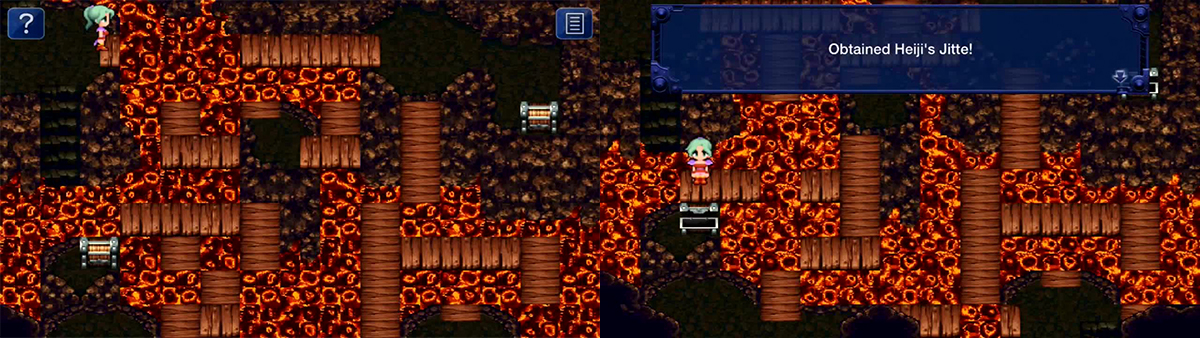
The moving bridges are annoying. If you fall, you will go back to the start. Memorise which bits remain when the bridges change so you can go across.
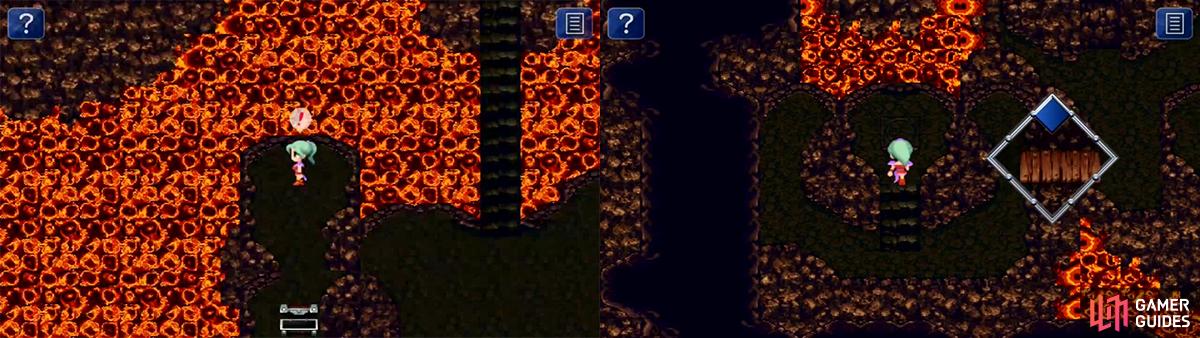
From here, backtrack onto the solid rock. Use the northern path to go eastward to find a rock platform with a chest; open it for an X-Potion . From here, go south onto the bridge and onto the bottom section. After the change, go south and west.
After the next bridge change, go to the east side and onto the south part, then wait for another change to go through the southeastern door.
On B3F, go east at the fork to find a chest; open it for a Hi-Ether . Return to the fork and continue along the other path for a while. You’ll reach a cave where you simply need to head north and east a bit. Go south, upstairs, and cross the bridge. Fiddle with the switch on the way to fall down and hear a distant sound. Go back west and north to find the bridge to the chest completed. Open it up for a Genji Glove !
Backtrack to the switch bridge, then go east and upstairs, along the main path. You’ll reach a platform with two switches, and a bridge with a switch nearby. Go to the two platform switches; trigger both to open up a new room and fight a Ninja. Afterwards, head to the newly-opened room to find a Save Point and a chest with a Tent . I’d advise at least saving here.
Back outside, go east and across the bridge. Trigger the switch on the bridge to open a … a big stairway. Sound familiar? Follow it to the bottom. There, get on the tile south of the stairs (when going down them, the first tile no longer on stairs).
Go west one step and examine that tile to find an Invisibility Scroll . Go four steps east and two south; examine the tile for a Water Scroll . Go four steps west and four south and examine the tile for a Gold Needle . Go south and around to the chest to get a Hi-Ether . Stand on the tile north of this chest and go three steps north from here to find 293 Gil .
Go into the cave to the east and go as far as you can north, then east, then north, then west, then north, then east, then north, and east to exit. Go south to find an Elixir in a chest. Go east and note the switches here; step on them if you want, or don’t. They’re a waste of pixels anyways.
Head southwest to find a switch here you should step on; it opens a room. Go on in to find four chests. Open them for two Magicite Shards, a Hi-Ether … and the Ultima Weapon. Please see the note after the monster bestiary.
Anywho, exit and go to the far east, then north across the two bridges. Hit the switch, then go east and north. Ignore the switch and go north to find a chest; open it for a third Magicite Shard . Go southeast and through the door.
There are many hidden items on the tiles in this area. This switch in this section opens the cave to many items including the legendary Ultima Weapon.
In this area, circle around and exit to the northeast. Out here, you’ll find the Sealed Gate. Everything seems quiet … too quiet, as you’d expect. As Terra proceeds towards the Gate, Kefka, apparently having followed you here with obvious motives, engages your other three characters in a battle. Smack him once to end said battle.
After the one smack, Terra manages to contact the Espers on the other side of the Gate. After the scene ends, go along to the new exit for a shortcut and return to the Imperial outpost.
No Comments