Return to the Warrior’s Rest Inn and make your way to the Ruins to the west. Make your way down the western stairs to find the door with the glyph is now open, head through and take the portal. You’ll find yourself in the Realm Between Worlds, head forward and save your game before stepping on the next portal.
Drustan’s Labyrinth - Path to Trial Isle
| Items | Area |
|---|---|
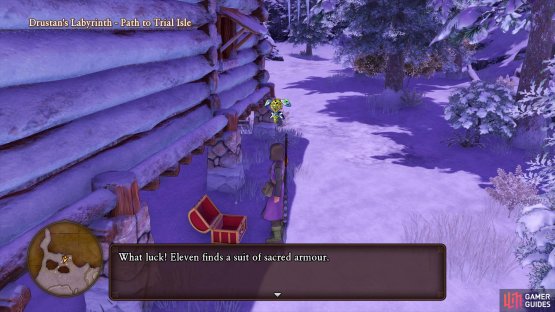
| Sacred Armor | North, behind the cabin, chest |
| Serpent’s Soul | West, across the arch, chest |
| Psyche Swiper | East, chest |
| Sparkly Spots | Area |
|---|---|
| Ice Crystal, Glimmergrass, Colourful Cocoon | Northeast, Flower gathering point |
| Sunny Citrine | South |
| Royal Ruby, Artful Amethyst, Savvy Saphire | South, Ore gathering point |
| Equable Emerald | West |
| Cumulonimbough, Sparkly Sap, Avabranche | North, Tree gathering point |
| Ethereal Stone | North |
| New Monsters | HP |
|---|---|
| Noble Dragon | ~2200 |
| Hooperman | ~1039 |
| Vicious Silver Sabrecat | ~651 |
| Vicious Terrornodon | ~406 |
| Vicious Dullahan | ~863 |
| Vicious Headless Horseman | ~1103 |
| Vicious Metal Dragon Slime | ~386 |
| Vicious Snowgre | ~1323 |
| Vicious Gigantes | ~1447 |
| Vicious Brollygarch | ~359 |
| Vicious Steel Siren | ~461 |
| Vicious Hoodlum | ~939 |
| Vicious Silhouette | ~297 |
The path to Trial Isle takes the form of the Snaerfelt Region however all the items, Sparkly Spots and monsters are all different. Turn around from your starting position to find a Flower gathering point containing a Glimmergrass, Ice Crystal and Colourful Cocoon. Follow the path west to the cabin and search behind it to find a chest containing a suit of Sacred Armor. There’s a bed you can use to recover your HP and MP should you need it during your time here.
Take the path to the southwest and follow it until you reach the southern part of the area. Head up the small ledge under the arch to find a Sparkly Spot containing a Sunny Citrine. Head to a small platform the west of this to find a portal you can take, this will transport you to the upper ledges to the south.
(1 of 2) You’ll find the first chest behind the cabin to the north
You’ll find the first chest behind the cabin to the north (left), you’ll need to use the Visor Kaiser mount to reach the upper area. (right)
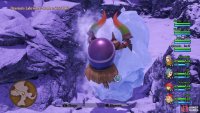
Head west along the arch to find an Ore gathering point containing a Royal Ruby, Artful Amethyst and Savvy Saphire. Defeat one of the glittering nearby Visor Kaisers and mount it, breaking the Ice nearby to reach the lower area once more. Return to the narrow path to the northwest and break more Ice to your right to reach the upper area again.
Go south and dismout to head onto the ledge and find a Sparkly Spot containing an Equable Emerald before crossing the small bridge north of this location to find a chest containing a Serpent’s Soul. Continue to follow the path north and then drop down to the ledge below to find a Tree gathering point containing a Cumulonimbough, Avabranche and Sparkly Sap. Follow this ledge to the west to find the final Sparkly Spot containing an Ethereal Stone before making your way back up to the upper ledges you just dropped from.
Cross over towards the direction of where the Royal Library stands in Erdrea and follow the cliff around to the east to find the final chest containing a Psyche Swiper. Head into the structure where the Royal Library stood to find another portal leading back to the Realm Between Worlds. Save your game and then head through the next portal to find yourself in a new area.
Trial Isle
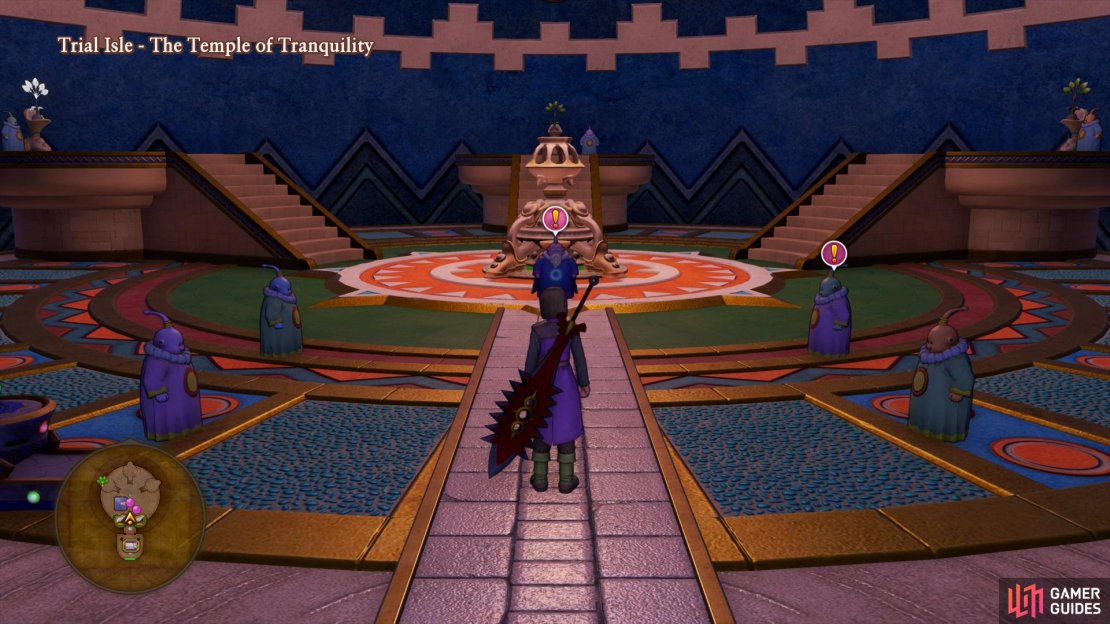
Head forward and enter the Temple of Tranquility to find the Watcher’s have taken up residence. You’ll find a Perfectionist Pearl shop, the Fun-Sized Forge, a Bank and a new Item shop. There’s a new Shield for Hendrick in the form of the Goddess Shield but more importantly, there are some fantastic materials for sale, many of which you’ll need for the best equipment in the game. Take the time to use the Forge to create some more powerful equipment while you’re here.
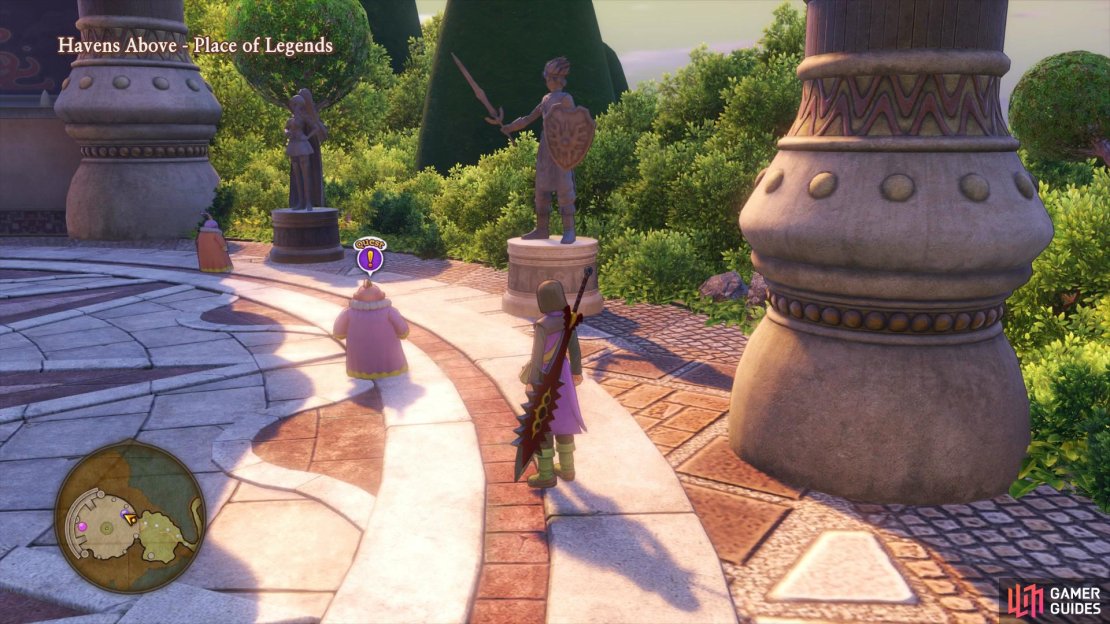
This area will act as a hub for your final challenges with each of the Seedlings granting access to a particular Trial. Note that you can also Zoom to this location now so if you wish to leave and tend to other matters you can now do so easily. This is a good time to Zoom back to the Havens Above and head to the Place of Legends, you’ll find a Watcher here looking for help. Agree to assist him to begin Quest 60 - Lost Lovers, you’ll find the item in the trial you’re about to head to. When you’re ready, head to the western Seedling and touch it to access your first Trial.
Return to Havens Above to accept this quest before starting the first Trial.
The Disciple’s Trial - The Cruel Crypt
| Items | Area |
|---|---|
| Mini Medal x2 | Upper Level, Northeast room, chest |
| Kings of the Rings | Lower Level, southeast, chest |
| Erdwin’s Bracelet | Lower Level, southwest, chest |
| Seed of Skill (Vicious Mimic) | Upper Level, central room, chest |
| Agate of Evolution | Upper Level, Southwest, chest |
| Sparkly Spots | Area |
|---|---|
| Gold Nuglet | Northwest |
| Densinium | Upper Level, south |
| New Monsters | HP |
|---|---|
| A3G15 | ~681 |
| Vicious Overkilling Machine | ~980 |
| Umbra | ~604 |
| Vicious Chasmonaut | ~467 |
| Vicious Heavy Hood | ~975 |
| Vicious Bad Hare | ~459 |
| Vicious Bloody Hand | ~333 |
| Vicious Mimic | ~2500 |
| Vicious Penny Pincher | ~434 |
| Phoenix | ~587 |
| Vicious Cureslime | ~291 |
You’ll find yourself in an altered version of the Cryptic Crypt, starting from the cells. Your objective is to reach the “???” to the south but be sure to loot the area of all its spoils, there are many great items to find in these trials.
Follow the linear path south until you reach the first intersection and head west to find a Sparkly Spot containing a Gold Nuglet before heading east to reach the first large room. Head into the northeast room here to find a chest containing two Mini Medals. Follow the path all the way to the southeast until you drop down to the floor below. Turn around to find the next chest containing a Recipe Book, Kings of the Rings which will allow you to forge the best rings in the game. Equipping two Catholicon Rings will make the wearer almost immune to all status ailments.
(1 of 2) You’ll find this Recipe Book by dropping down the southeast hole
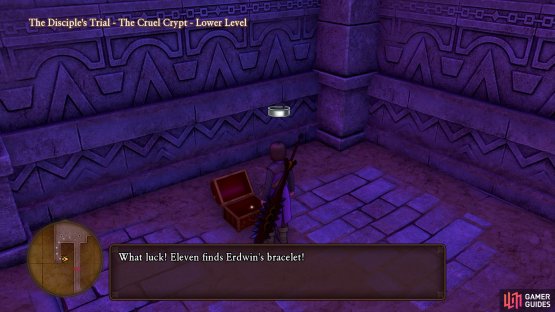
You’ll find this Recipe Book by dropping down the southeast hole (left), check the southwest corner while below to find the Bracelet for Quest 60. (right)
Follow the path and unlock the door to find a room full of Slot Machines, only two of these are Penny Pinchers while the rest all contain Casino Tokens. Regardless if you fight or not, head to the southwest corner to find a chest containing Erdwin’s Bracelet, the item needed for Quest 60. Defeat a glittering Vicious Demonrider and mount it, climbing back to the Upper Level. Ignore the first path south and take the second to find a chest containing a Vicious Mimic, defeat it to obtain a Seed of Skill.
Take the northern exit out of this room (the western exit leads to a hole) and take the first southern path now, following it to the end where you’ll find the final chest containing an Agate of Evolution. Follow the path east to drop down another hole and then use the ladder to the south to return to the Upper Level. Continue south and across the next intersection to find the final Sparkly Spot containing a Densinium before using the portal to the south. Save your game in the Realm Between Worlds and then use the portal to reach a new area.
The Disciple’s Trial - The Eerie Valley
| Items | Area |
|---|---|
| Lumen Essence | Phoenix’s Nest, chest |
| Mini Medal x3 | Central stream, chest |
| A Hero’s Book of Better Weapons | Southern golden barrier, chest |
| Devilry Drinker | East, ledge above caves, chest |
| Drustan’s Helm | Eastern caves, chest |
| Fire Ball x3 | Southwestern cave, chest |
| Sparkly Spots | Area |
|---|---|
| Cumulonimbough | North |
| Red Wood | Central stream |
| Dracolyte | Abandoned Campsite |
| Cumulonimbough | South |
| Dieamend | Eastern caves |
| Cumulonimbough | East of the central stream |
| Orichalcum, Densinium, Bright Rock | West, Ore gathering point |
| New Monsters | HP |
|---|---|
| Gaia Dragon | ~1859 |
| Vicious Dread Dragooner (Mount) | ~546 |
| Vicious Gryphon | ~490 |
| Vicious Cheater Cheetah | ~863 |
| Vicions Bobonga | ~815 |
| Vicious Cosmic Chimaera | ~451 |
| Vicious Sail Serpent | ~551 |
| Vicious Octopot | ~357 |
| Vicious King Crab | ~ 532 |
| Vicious Lobster Mobster | ~627 |
| Vicious Gold Drohl | ~481 |
You’ll find yourself in an altered version of the Eerie Eyrie, your objective is the portal to the southwest after you’ve looted all the items. Begin by heading west up the ledges to find a chest containing a phial of Lumen Essence, an Important Item that can be used in Hotto. Head south and throw the vine down to allow you to reach the lower area but before you head down there, nab the Sparkly Spot in the cave to your west containing a Cumulonimbough.
(1 of 2) Search where the Purple Orb was to find the Lumen Essence
Search where the Purple Orb was to find the Lumen Essence (left), this Recipe Book will provide the next level of upgrades for the Evolution Weapons. (right)
Climb down the vine and defeat one of the Vicious Dread Dragooners and mount up. Fly onto the ledge to the east to find a chest containing three Mini Medals and then fly to the south end of the stream to find a Sparkly Spot on a ledge containing Red Wood. While still mounted, fly east and check on the ledge to the south of the Abandoned Campsite to find another Sparkly Spot, this one containing a Dracolyte.
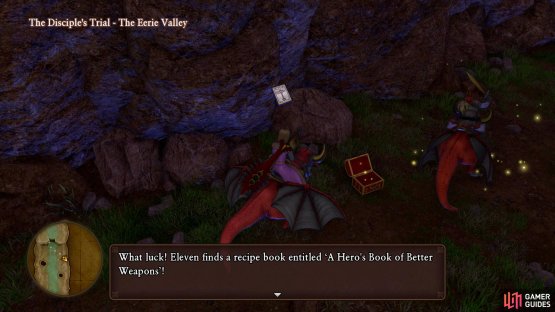
Continue southeast towards the golden barrier to find a chest containing a Recipe Book, A Hero’s Book of Better Weapons which will allow you to forge the Evolution weapons further. Fly north from here and onto the ledges above the cave to find a Sparkly Spot containing another Cumulonimbough. Follow these ledges to the end to find another chest, this one containing a Devilry Drinker.
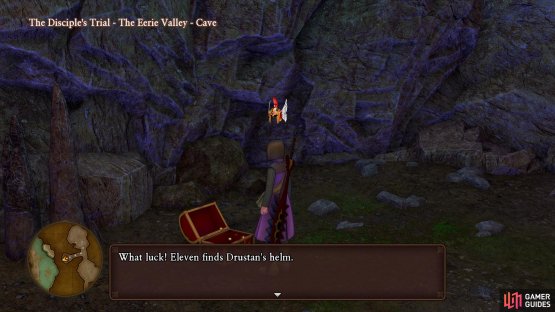
Dismount and enter the caves, following the path to the first intersection. Take the southeast passage to find a Sparkly Spot containing a Dieamend and then go north to the next intersection. Take the west passage here to find the next chest, this one contains Drustan’s Helm, equip this on Hendrick right away. Follow the northern path out of the caves and grab the Sparkly Spot containing yet another Cumulonimbough along the way before dropping back into the stream below to grab another mount.
(1 of 2) This Helm is the first part of Hendrick’s best armor set
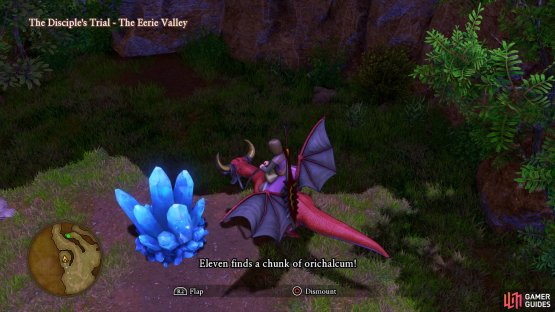
This Helm is the first part of Hendrick’s best armor set (left), you’ll find Orichalcum in this gathering point. (right)
Fly to the far south of the central stream and head up to the western path of the Valley. Continue south into a cave to find the final chest containing three Fire Balls and then follow the path north while keeping to the western wall to find an Ore gathering point containing a Densinium, Bright Rock and Orichalcum. Take the northeastern passage in this open area now to find the portal leading out of the Valley and back to the Realm Between Worlds.
Make use of the Goddess Statue to heal up and save your game before stepping through the next portal. Proceed forward to the statue of Morcant to meet with the Warrior King Drustan at long last. He will explain the purpose of the Trials and you’ll receive the rules of the first battle, the boss must be defeated in no more than 25 turns (each party member’s turn will count as one).
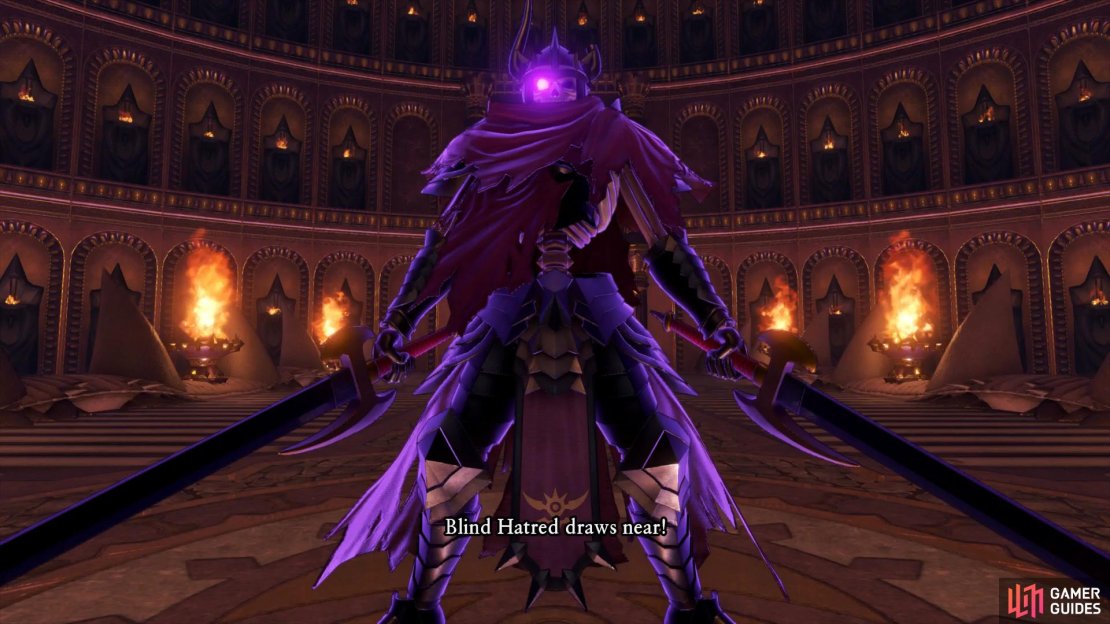
Boss: Blind Hatred (25 Turns)
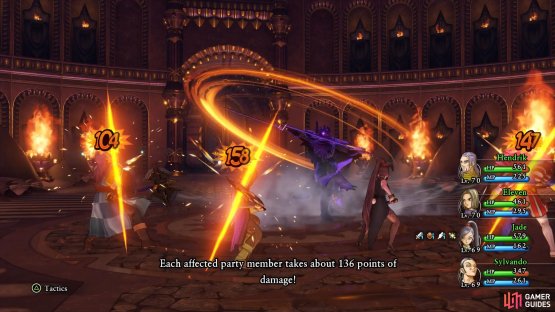
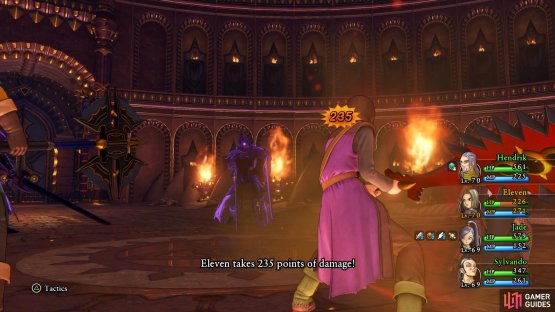
Blind Hatred is a more fearsome version of Tyriant that you fought back in the beginning of Act II. He now has 4200 HP and how you fare in this battle is down to your Level, attempt this without doing any of the events in Erdrea then you’ll struggle otherwise it should be a breeze at Levels 65+. He can still summon Shadows, of which they now have 900 HP and his Lash Out attack will hit the party for over 150 HP. When the Shadow is out, be sure to take it out as quickly as possible, his focused attacks can hit for over 250 HP on one party member.
(1 of 2) Lash Out will hit the party for over 150 HP
Lash Out will hit the party for over 150 HP (left), while his Shadows’ focused attacks hit for over 250 HP. (right)
Hendrick should be a given at this point, have him tank by using the Immense Defense and Forbearance combo. The Hero continues to be useful in either using Sword Dance or making use of his spells to support the group. Jade and Erik are both useful here, Re-Vamped Multifeet is as useful as ever and Erik’s Divide Pursecutter (provided you get Poison to land) is devastating, even more so with Oomphle on him. Finally, Sylvando is great to take along with Jade, Ladies First making Jade even more devastating and allow you to take Blind Hatred out quicker.
Following your victory, Drustan will provide you with a wish from five choices, the wishes are as follows:
- Super Powerful Weapon! - This will grant you the Recipe for the Supreme Sword of Light and is needed for a Trophy.
- Enter a top-level horse race! - This will unlock the Black Cup at Gallopolis and allow you to farm Mini Medals.
- A copy of Oogler’s Digest! - This will grant you the Digest as an accessory which increase Pep rate.
- Gemma and I were married! - This will marry the Hero and Gemma and is purely a story based choice although it is requried for a Trophy.
- Change Serena’s hairstyle! - This will grant you the Ring of Changes which will change her hair back to her short hair from Act II, also required for a Trophy.
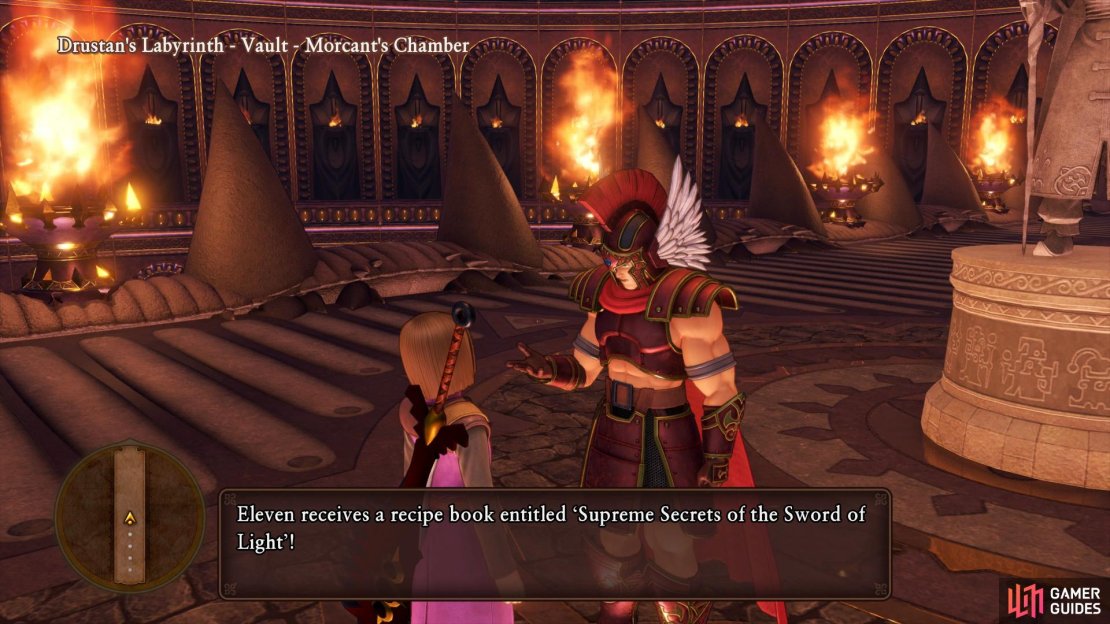
Finally, obtain all five wishes (this will be detailed later) to obtain a Recipe Book for the final form of the Evolution Weapons, the best in the game. To begin with, choose the Super Powerful Weapon wish to obtain the Recipe Book, Supreme Secrets of the Sword of Light along with a Seed of Deftness as a reward.
Be sure to choose the Supreme Sword of Light as your first choice.
You’ll be returned to Trial Isle following this with the Sage’s Trial now unlocked. Before rushing off to do this however, now is a good time to begin the process of forging your new weapon. Zoom to Havens Above first to turn in Quest 60 and power up the Hero’s Splitter abilities before making your way to Hotto.
Forging the Supreme Sword of Light
First things first, head to the Inn to find a man looking for help, accept his request to begin Quest 59 - The Legendary Treasure of Legend. Head over to the western Item shop now and speak to the man outside to learn he is looking for some Orichalcum, agree to sell it to him and he will set off on forging his legendary blade. Leave him be for now and make your way over to Mount Huji.
(1 of 2) Accept this quest in the Hotto Inn
Accept this quest in the Hotto Inn (left), you’ll find the treasure nearby, at the end of the path from the Secret Entrance of Mount Huji. (right)
Take the eastern path here and enter Caldera via the Secret Entrance. Follow the linear path to the end to find a golden Sparkly Spot containing the chest of Hotto Stuff. Evac back to the entrance and enter Caldera from the entrance to the north. Grab a Malicious Viser Kaiser mount in the Lower Area and use it to access the inner area where you fought Tatsunaga in Act II.
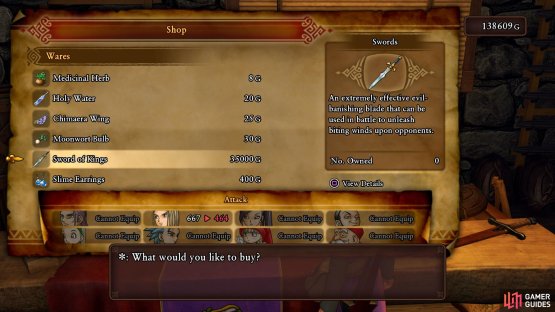
Speak to Miko to hear the tale about her cursed son again and she will mention that a drop of Lumen Essence will light up the mirror. Hand it over to her (you should have picked this up in the Disciple’s Trial) to heal her son. Back in Hotto, return to the Inn and hand over the Hotto Stuff to the man to complete Quest 59 and obtain three Uber Agates of Evolution. Head over to the western Item shop to discover that the Sword of Kings is now on sale so be sure to buy it (it’s an ingredient for the Supreme Sword of Light). Make your way to Miko’s Shrine now and speak to her within to obtain the Crucible Key while Ryu will hand over the Thousand-fold Katana, an exclusive Sword for Erik.
(1 of 2) The Sword of Kings should now be on sale
The Sword of Kings should now be on sale (left), aim for a Lap Time of around 22-23 seconds to win the race. (right)
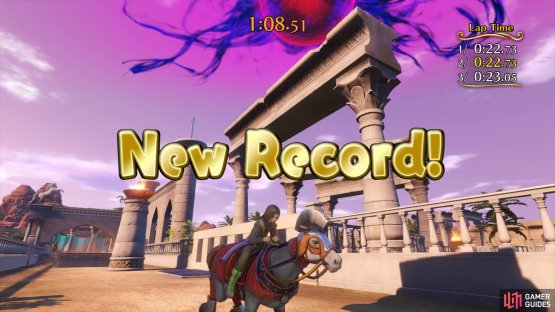
Zoom to Gallopolis now and head to the Racetrack to find some new Cups have opened up. You’ll have to win the Easy Gold Cup to unlock the Platinum Cup where the reward for the Easy race is the Forging Hammer. The races shouldn’t be too hard on the Easy difficulty as long as you remember to stick to the insides of the track and hit the gusts of wind along the way. The rest of the rewards for the races are not as useful as your current equipment so ignore them unless you wish to do them for fun (there’s no Trophy related to Horse Racing).
Finally, Zoom over to Sniflheim and head inside the Castle to speak to Krystalinda. You should have two Serpent’s Souls on you, exchange them for Crimsonites. IF you need more Serpent’s Souls, head to the Dundrasil ruins and steal from the Royal Reptiles for more. Make sure you have an Orichalcum on hand (if you need more, head to Battleground’s B9, behind the Ultimate Key door) and head to the Crucible, found on Mount Huji. Using the Crucible, you should be able to forge a new Sword of Light to go alongside your Super Sword of Light. Return to Trial Isle now and access the Forge to create the Supreme Sword of Light and unlock a Trophy.
At this point, if you’ve learnt Gigagash and Sword Dance then you’ll want to change the Hero to dual-wielding Swords. Equipped with the Super Sword of Light and the Supreme Sword of Light +3 (you may have to wait until you have more Focus Points to achieve this) is the best combination for the Hero. With that side project out of the way, head to the Seedling in the middle to begin the next Trial.
The Sage’s Trial - The Fierce Forest
| Items | Area |
|---|---|
| Serenica’s Circlet | East (ignore the portals at the top), chest |
| Uber Agate of Evolution | Central cave, chest |
| What a Wonderful World Tree | Northwest, chest |
| Mini Medal x3 | Central, chest |
| The Fandom of the Opera | Southeast, chest |
| Sparkly Spots | Area |
|---|---|
| Night Stick | North |
| Spectralite | Northwest |
| Red Wood | East |
| Spectralite | Southwest |
| Technicolour Dreamcloth x2, Yggdrasil Leaf | Northwest, Flower gathering point |
| Night Stick | Central |
| New Monsters | HP |
|---|---|
| Godsteed | ~768 |
| Infernal Serpent | ~1747 |
| Vicious Bomboulder | ~591 |
| Vicious Scourgette | ~484 |
| Vicious Prowler Jowler | ~1183 |
| Vicious Old Man of the Sea | ~403 |
| Viicious Ursa Major | ~527 |
| Vicious Rantingen Raven | ~537 |
| Vicious Kisser | ~315 |
| Vicious Hardy Hand | ~12 |
| Vicious Skelegon | ~941 |
This time, your location is an altered version of the First Forest and your objective is to the west. Begin by heading down the path and ignoring the two portals for now, dropping down to the north. Drop down the hollowed out tree in front of you and grab the Sparkly Spot containing a Night Stick. Take a west at the intersection and search behind the large tree to find a Sparkly Spot containing a Spectralite.
Follow the path east at the intersection and grab the next Sparkly Spot on the platform containing a Red Wood. Follow this path to the end to find a chest containing Serenica’s Circlet. Make your way back to the two portals at the beginning and take the northern one. Head into the cave behind you to find a chest containing an Uber Agate of Evolution and then head out the west exit. Follow the path north while keeping to the eastern wall to find a Sparkly Spot near the water containing another Spectralite.
(1 of 2) Ignore the portals to find the first piece of Serena’s best armor set
Ignore the portals to find the first piece of Serena’s best armor set (left), this Recipe Book will contain a costume for Rab. (right)
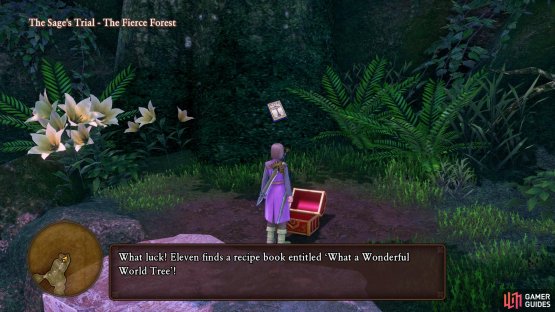
Follow this path to the end and climb the vine to the east to find a chest to the north containing a Recipe Book, What a Wonderful World Tree while to the south you’ll find a Flower gathering point containing two Technicolour Dreamcloths and a Yggdrasil Leaf. Make your way back to the two portals from earlier and this time take the southern one.
Head northwest from your starting position to find a chest in the water containing three more Mini Medals. Follow the path to the first intersection and head northeast to find a Sparkly Spot containing a Night Stick. Return to the intersection and head south before heading west at the next intersection, you’ll find a chest here containing another Recipe Book, The Fandom of the Opera. Follow the path east to a portal, heading straight forward to another portal after to exit the Fierce Forest. Rest and save your game at the Goddess Statue before proceeding to the next area.
The Sage’s Trial - Hoarder’s Keep
| Items | Area |
|---|---|
| Drustan’s Shield | Level 2, north, chest |
| Gold Bar | Level 2, southwest, chest |
| Eternal Elegance | Level 1, south, chest |
| Sparkly Spots | Area |
|---|---|
| Gold Nuglet | Level 2 |
| Gold Nuglet | Level 1 |
| Agate of Evolution | Level 1 |
| New Monsters | Area |
|---|---|
| Vicious Metal Dragon | ~1001 |
| Mechan-O’-Wyrm | ~1251 |
| Golden Goliath | ~1720 |
| Vicious Infernal Armour | ~1222 |
| Vicious Ghoul | ~1222 |
| Vicious Lurid Lumpling | ~482 |
| Vicious Gold-Plated Puppet | ~417 |
| Vicious Lump Shaman | ~466 |
| Vicious Gyldenbritches | ~1262 |
| Vicious Gyldenaut | ~583 |
| Vicious Skeleton Swordsman | ~761 |
| Vicious Skelegon | ~941 |
| Vicious Ham Shamwitch | ~437 |
| Vicious Whackolyte | ~459 |
| Vicious Hyperpyrexion | ~889 |
| Vicious Gold Golem | ~1241 |
| Vicious Token Taker | ~510 |
You’ll find yourself in an altered version of The Gyldenhal, starting from the Throne Room with your objective being the canon room. Begin by exiting the Throne Room via the door to the south and head around the edge of the room to reach the stairs down to Level 2. You’ll find a Sparkly Spot in the corner containing a Gold Nuglet and then open the next two doors.
At this intersection, take the stairs to the west down to Level 1 and then grab the Sparkly Spot in the corner containing another Gold Nuglet. Take the eastern stairs back up to Level 2, follow the path and ignore the stairs to the south to find a chest in the corner containing Drustan’s Shield. Take the nearby stairs down to Level 1 and unlock the two doors south of your location to create a shortcut to the central room.
Back where you came down the stairs, you’ll find a room of slots, three of these are Vicious Token Takers while the rest contain different denominations of Tokens. You can use Erik’s Peep spell to see which of them they are, the one’s with a Reddish Light are the ones to avoid. Open the two sets of doors to the east and west and then follow the west path around to a set of stairs in the southwest corner.
(1 of 2) This is Hendrick’s best Shield in the game
This is Hendrick’s best Shield in the game (left), while this contains the recipes for Veronica’s best armor in the game. (right)
Take these stairs up to find a chest containing a Gold Bar and then return back downstairs and open the eastern door to reach the entrance. Open the two doors to the north leading back to the central room and then search to the south to find the final chest containing a Recipe Book, Eternal Elegance which contains Veronica’s best armor. Open the eastern door and follow the path north through the next door to find a Sparkly Spot containing an Agate of Evolution.
Return to the stairs you just passed and take them up, following the linear path to the end where you’ll find the exit portal. Use the Goddess Statue to recover and save your game before heading through the next portal to reach Drustan once more and your next boss.
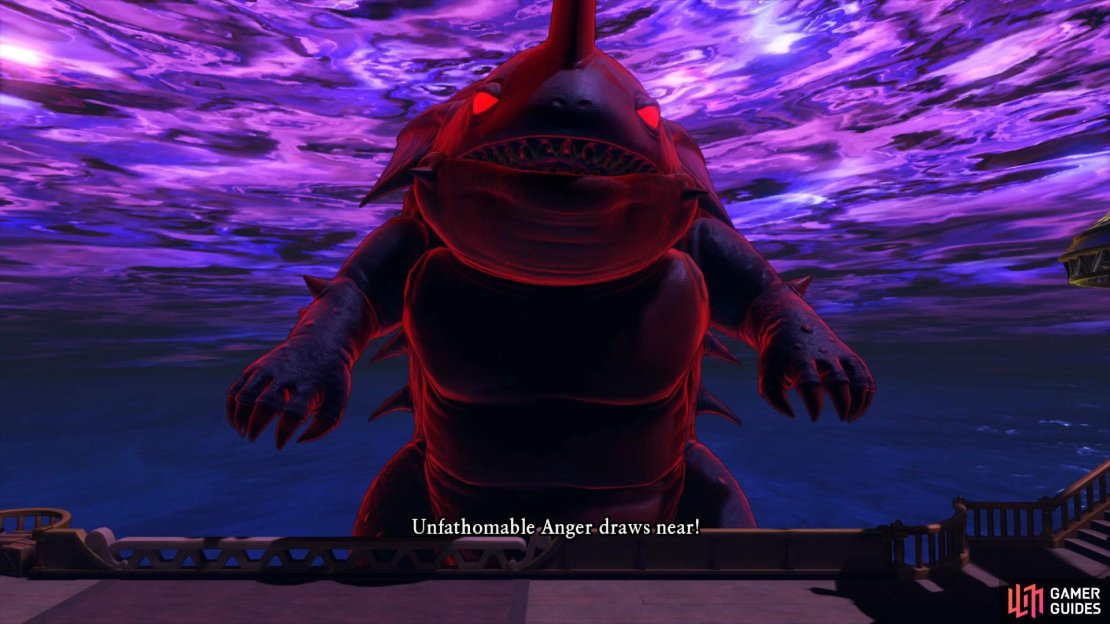
Boss: Unfathomable Anger (30 Turns)
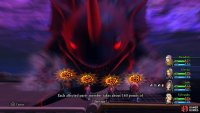
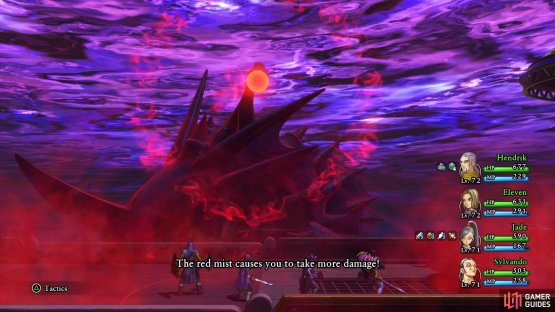
The boss this time is another Spectral Sentinel rematch, this time against Alizarin. His HP has increased to 7500 so you’ll want Sap on him to increase your damage, remember this is a race to finish within 30 turns. Hellfire deals around 100 HP on one party member and Rock the Boat will hit the entire party for around 150 HP with the chance to knock them over for a turn. His regular attacks still hit hard and he still has the ability to use Crimson Mist, increasing all damage from him.
(1 of 2) Rock the Boat is his most deadly attack
Rock the Boat is his most deadly attack (left), keep your HP up while Red Mist is active. (right)
Hendrick, now with Drustan’s Shield, should be able to block most attacks using the Immense Defense and Forbearance combo. The Hero should Sword Dance while Jade with a double Re-Vamped Multifeet should be doing at least 1000 damage at this point, with Sylvando passing her turns to make her even more deadly. As long as you keep Forbearance up with Hendrick, you shouldn’t have too much problems with Alizarin as he’s one of the more easier Trial battles.
With the battle won, you’ll have the opportunity to select another wish. None of the choices are overly great, the Horse Race allowing you to farm Mini Medals should you wish. Selecting to marry Gemma will unlock a Trophy however so consider going with that for now. You’ll also obtain a Seed of Defense from Drustan for your victory and be returned to Trial Isle once more.
If you chose to marry Gemma this time, head back to Cobblestone and speak to her in your Home to unlock a Trophy. You can check the photo on the wall to see how the happy day went down.
Head back to Trial Isle and access the forge, you’ll want to rework Drustan’s Shield into +3 along with creating Veronica’s new armor set if possible. It’s also a good time to return to L’Academie and hand over your Mini Medals, this should complete your album and reward you with Erdwin’s Shield and a Recipe Book, Making Things with Metal Kings. The Shield is useful if you want to conserve MP on the Hero, leave it in his inventory to equip should you need MP in a battle. The Metal King weapons are some of the best weapons in the game. You’ll also unlock the Medal Exchange which will allow you to trade your Mini Medals for some very useful materials or Pep Pips. Zoom back to Trial Isle and access the third Seedling to the east to access the game’s final dungeon, the Luminary’s Trial.
The Luminary’s Trial - Citadel of Spite
| Items | Area |
|---|---|
| Spectralite x3 | Level 2, south, chest |
| Seed of Skill (Vicious Mimic) | Level 2 exterior, west, chest |
| Ye Manifold Methods of Mighty Drustan | Level 1, northwest under the stairs, chest |
| Erdwin’s Coronet | Level 3, northwest, chest |
| Pep Pop (Pandora’s Big Bad Box) | Level 3, northeast, chest |
| Serpent’s Souls x3 | Level 3 exterior, under the bridge, chest |
| Drustan’s Sword | Level 3 exterior, bottom, chest |
| Slime Crown x3 | Level 4 exterior, west, chest |
| If I Could Turn Back Time | Level 4, chest |
| Big Hitters of the Battlefield | Level 4, chest |
| Pep Pip x4 | Level 4 (requires mount), chest |
| Uber Agate of Evolution | Level 3 (requires mount), chest |
| Mini Medal x5 | Level 2 (requires mount), chest |
| Sage’s Stone | Level 1 exterior, chest |
| Hell Sabre | Level 1, east, chest |
| Yggdrasil Dew | Level 4, east, chest |
| Drustan’s Armor | Level 1, red door, chest |
| Erdwin’s Tunic | Level 1, red door, chest |
| Serenica’s Surplice | Level 1, red door, chest |
| Sparkly Spots | Area |
|---|---|
| Chronocrystal | Level 2 exterior |
| Evencloth | Level 3 (requires mount) |
| Evencloth | Level 2 (requires mount) |
| Artful Amethyst | Level 1 |
| Sunny Citrine | Level 1 |
| Equable Emerald | Level 1 |
| Royal Ruby | Level 1 |
| Savvy Saphire | Level 1 |
| Mini Medal | Level 1 |
| New Monsters | HP |
|---|---|
| Crimson Killing Machine | ~1100 |
| Vicious Dark Dullahan | ~1102 |
| Vicious Dark Leger-De-Man | ~474 |
| Vicious Hard-Boiled Eggsoskeleton (Mount) | ~611 |
| Master Moosifer | ~1580 |
| Vicious Hellrider (Mount) | ~592 |
| Red Giant | ~1859 |
| Vicious Great Dragon | ~2600 |
| Vicious Headless Hunter | ~1321 |
| Vicious Manticore | ~1262 |
| Vicious Golden Girl | ~641 |
| Vicious King Cureslime | ~880 |
| Vicious Hooper Trooper | ~980 |
| Vicious Jerkules | ~1803 |
| Vicious Flamethrower | ~437 |
| Vicious Blizzybody | ~444 |
| Vicious Liege Lizard | ~1775 |
| Vicious Iron Maiden | ~820 |
| Vicious Vampire Succubat | ~684 |
| Vicious Boss Troll | ~1803 |
| Pandora’s Big Bad Box | ~3600 |
| Gold Grabber | ~621 |
| Fortune Filcher (Rare) | ~3880 |
| Vicious Metal King Slime | ~40 |
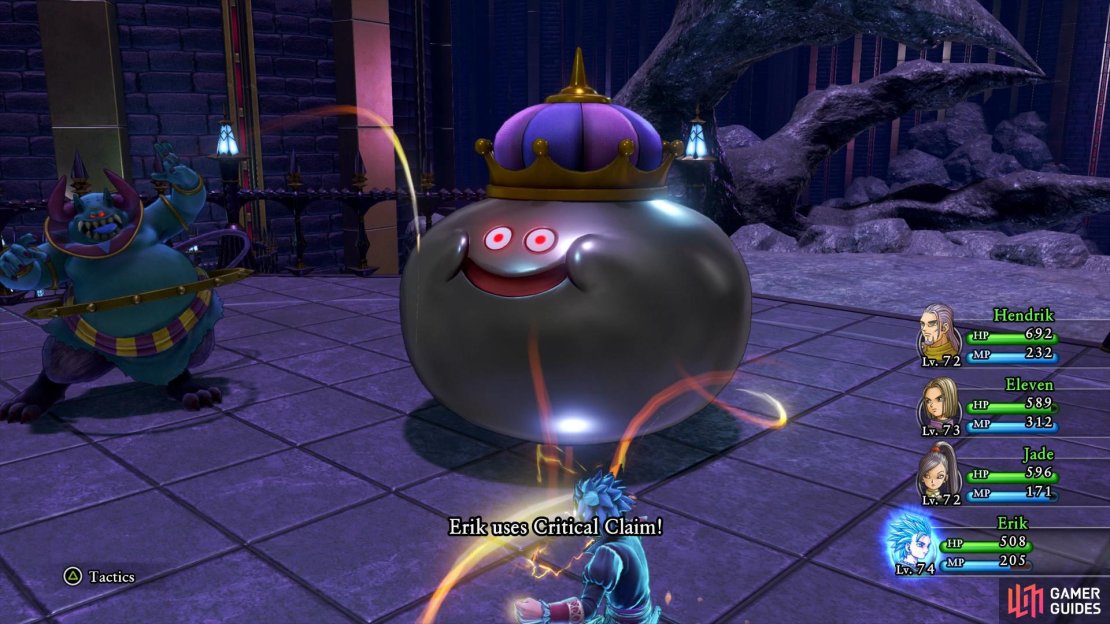
This time you’ll find yourself in an alternate version of the Fortress of Fear and for all intents and purposes, is the final dungeon in Dragon Quest XI. You’ll want to be at least Level 70 here and it’s a good idea to fight battles here, not only do the monsters reward a lot of Exp but they drop the rarest items and you have the chance of encountering a Vicious Metal King Slime too.
Metal King Slimes will usually award a character with at least two level increases.
You begin at the exterior of Level 2, follow the path south and down the stairs to enter back into the Citadel itself. Back inside, follow the path into the central chamber and through to the western side of this Level. At the intersection, head south first and follow the path all the way to the end to find a chest containing three Spectralites. Return to the intersection and head west next to find another chest outside containing a Vicious Mimic, defeat it to obtain a Seed of Skill.
Return to the intersection and head north to reach the stairs leading down to Level 1. Take the stairs down to the bottom and then search under them to find a chest containing a Recipe Book, Ye Manifold Methods of Mighty Drustan. Head south to the intersection and continue south, following the path to another portal.
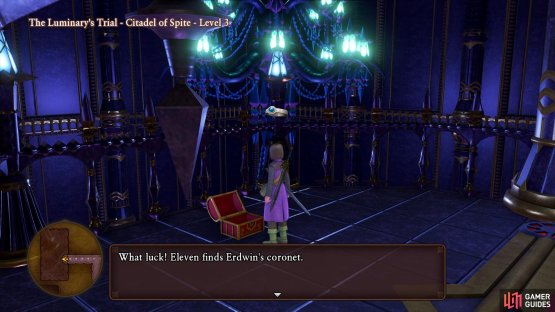
Grab yourself a mount and use it to spring onto the platform above, looting the Sparkly Spot containing a Chronocrystal and into the door. Follow the path to the first intersection and continue on to find a chest containing Erdwin’s Coronet. Continue to follow the path south until you hit the next intersection and head west first to grab yourself a Vicious Face Invader mount. Return east, across the electric floor and continue to the end to find a chest containing a large chest which upon opening, reveals itself to be a Pandora’s Big Bad Box. This mimic has over 3600 HP along with all the usual instant death skills so use your hardest hitting skills to put it down quickly. It will leave behind a chest in it’s defeat, open it up to obtain a Pep Pop. Return to where you got the mount and head north at the intersection to exit back outside.
(1 of 2) Erdwin’s Coronet is the first piece of the Hero’s best armor set
Erdwin’s Coronet is the first piece of the Hero’s best armor set (left), this Sword will allow Hendrick to tank easier. (right)
Head north and use the portal and head west to drop down the ledge. Head around the cliff without dropping again to find a chest containing three Serpent’s Souls and then drop down to the bottom, another chest can be found to the south here containing Drustan’s Sword. At this point, you’ll want to change Hendrick to Sword and Shield as this exclusive Sword will make enemies target Hendrick more often. Snag yourself a Hellrider mount and climb back to the bridge you dropped from and follow the path north to Level 4.
Head north and take the portal to the west, following it north and exiting through the western door, you’ll find a chest here containing three Slime Crowns. Head back in and take the other door to find a switch that will raise platforms to the north. Use the portal to head back and go north through the next two doors, to the left and right of you here will be chests containing two Recipe Books, If I Could Turn Back Time and Big Hitters of the Battlefield.
Head back to the previous room and grab yourself a Vicious Dread Dragooner mount and fly to the east to find a chest containing four Pep Pips. Fly down to Level 3 and search the west platform for a chest containing an Uber Agate of Evolution and a Sparkly Spot to the east containing an Evencloth. On Level 2 you’ll find you’ll find a chest to the north containing five Mini Medals and a Sparkly Spot to the south containing another Evencloth. Finally, on Level 1 you’ll find five Sparkly Spots containing an Artful Amethyst, Sunny Citrine, Equable Emerald, Royal Ruby and Savvy Saphire.
Take the south door here and follow it outside where you’ll find a chest where the Goddess Statue once stood containing a Sage’s Stone. Continue south from here to a portal that will take you back to Level 4. Follow the path here to the intersection, taking the eastern path to reach a chest containing a Yggdrasil Dew before taking the western door to hit the next switch. Head back to the south and use the portal to return to Level 1, heading north back to the central chamber.
(1 of 2) This will allow you to forge the Scepter of Time which is the best Wand
This will allow you to forge the Scepter of Time which is the best Wand (left), these three chests complete the armor sets for the Hero, Hendrick and Serena. (right)
Take the eastern door here and then go north at the intersection to find a Sparkly Spot containing a Mini Medal and south to find a chest containing a Hell Sabre. Take the eastern door to find another switch and then return to the central room. Grab another mount and return to Level 4, heading north to reach the platforms you raised and heading east to find the red switch. Return to the central room and fly back down to Level 1, heading through the now unlocked door to the north to find the final three chests in the game containing Drustan’s Armor, Erdwin’s Tunic and Serenica’s Surplice.
Return to Level 4 once more and head to the platforms you raised to enter the western door and find the final switch. You can now return to the platforms and cross over to the north to find the portal and exit the Citadel at last. Save and recover at the Goddess Statue in the Realm Between Worlds and then step forward to meet with Drustan, another boss awaits.
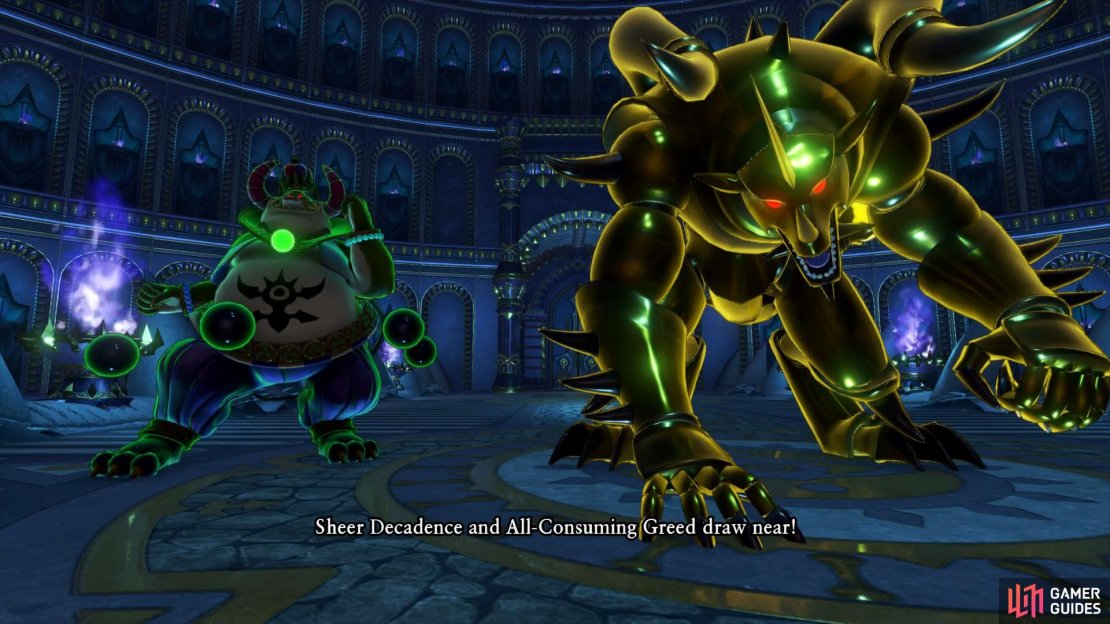
Boss: Sheer Decadence and All-Consuming Greed (40 Turns)
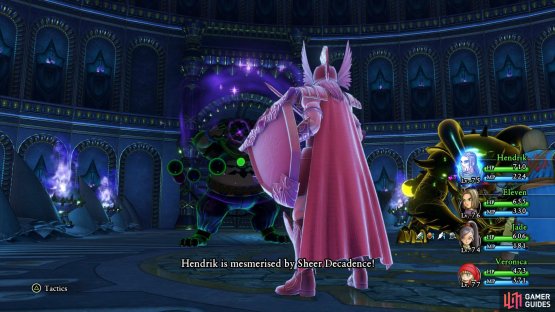
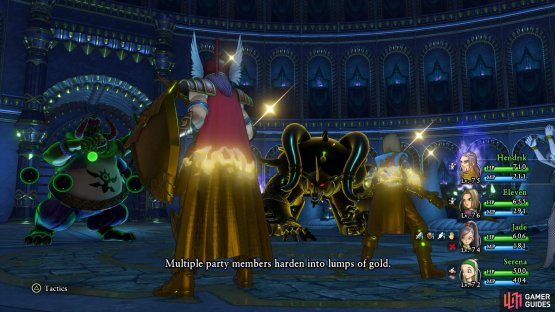
This boss is a huge step up in difficulty, hopefully you gained many levels during your time in the Citadel. Sheer Decadence has 4800 HP while All-Consuming Greed has around 2600 HP and you’ll have to take them out within the 40 turns on top of it. Sheer Decadence is the most deadly of the two, his ability to charm your party members is deadly as is his heavy hitting spells in the vein of Kafrizzle. Greed’s Rake ‘n’ Bake is as hard hitting as ever and Slice and Dice can really deal the pain to the entire party. On top of this, Decadence can disable characters with his dance and Greed with his Solid Gold while he’ll also call for allies.
(1 of 2) The biggest hurdle is stopping the bosses from disabling your characters
The biggest hurdle is stopping the bosses from disabling your characters (left), this eats up precious turns. (right)
Keep Hendrick tanking them with his usual combo of Immense Defense and Forbearance while the Hero supports with Omniheal or deals damage with Gigagash (while both are alive) or Sword Dance. Jade’s Re-Vamped Multifeet is useful and you’ll want to keep a healer such as Serena in at all times, she should have Omniheal by this point. It’s also a good idea to start the battle with Veronica in the line-up to unleash a Magic Burst before removing her, this can deal over 1500 HP to both bosses in the first turn alone.
Once again you’ll get the chance to select a wish from the remaining three, consider the Ogler’s Digest next as it has usefulness when trying to Level to 99. You’ll also obtain a Seed of Agility from Drustan before being taken back to Trial Isle.
At this point, you’ve cleared all the Trials and looted them fully of every item however you’re not done yet. There are two more bosses to encounter in the Trials, defeating both and obtaining all the wishes will reward you with a special Recipe Book containing the best weapons in the game. You can use any of the Trials to reach Drustan but do note that the Sage’s Trial is the quickest, in the Fierce Forest you can now take a portal behind to the Yggdrasil altar to skip the first part altogether.
Take the time to forge new gear and Rework those that you already have before using the Sage’s Trial to reach Drustan again to face off against the next boss.
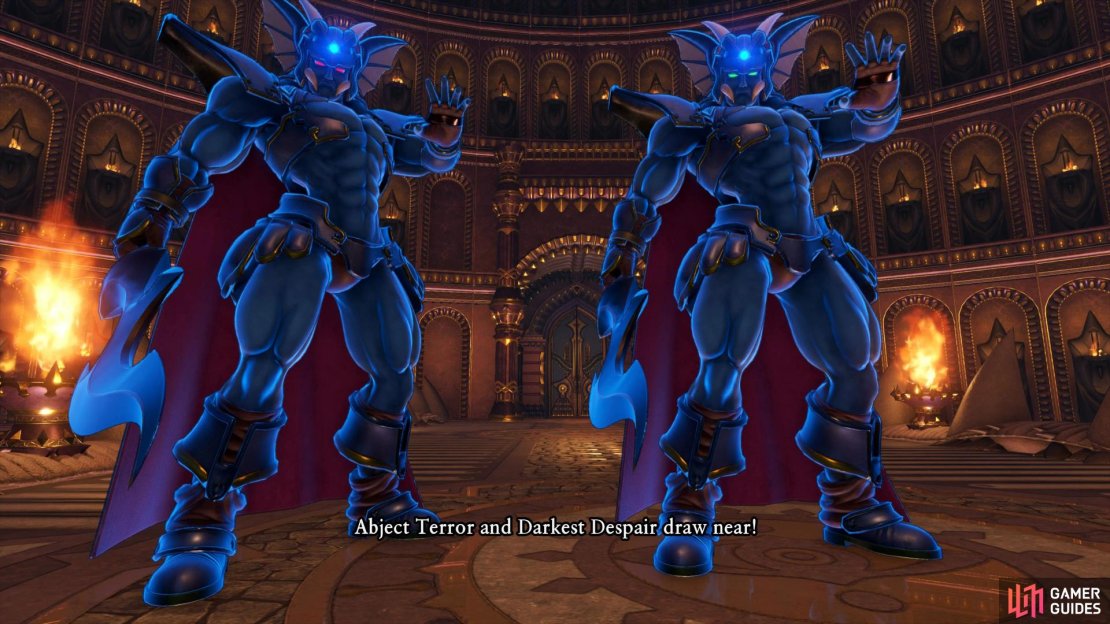
Boss: Abject Terror and Darkest Despair (50 Turns)
This battle is tough, not only do they have 7800 and 4200 HP respectively but you’ll also have to take them down together as they can Kazing each other. Abject Terror is weak to magic while Darkest Despair is weak against physical attacks, for that reason you’ll have to focus on getting one down to low HP before focusing on the other. Abject Terror can use War Cry to hit the party and knock them over, Darkest Despair will use Desperate Attacks that can knock characters over too. They also possess Gigathrow which will hit the entire party hard with the potential to inflict Paralysis. Finally, they’ll use Disruptive Wave at will so don’t waste too much time buffing your party up. If the two of them Pep Up, make sure you have Hendrick using Forbearance to lessen the damage a little.
(1 of 2) Warcry will hit hard and knock characters over
Warcry will hit hard and knock characters over (left), it’s better to let Hendrick that the hit from the Pep Power and Kazing him. (right)
Hendrick like always should be tanking using the Immense Defense and Forbearance combo while the Hero supports with Omniheal and Gigagash. Veronica is useful for Kaboomle and Kasap and Sylvando is good as a healer to pass turns to Veronica. Pink Tornado is useful from Jade, this will hit Despair hard and you can take turns with Jade and the Hero hitting both weakness easily.
Select the next wish upon your victory and Drustan will reward you with a Seed of Strength. Only the final Trial boss awaits but you’ll want a lot of preparation before fighting it, the boss is arguably the most difficult in the entire game, even moreso than the final boss of Act III. This is a good point to do your final preparations for the game’s final two bosses.




























No Comments