

Before you begin your journey to Arboria in search for Serena and Veronica, it’s a good opportunity to wrap up some of the many quests on hand. Before you get started on them however, Zoom back to Zwaardsrust (Sea) and sail to the nearby Vortex of Light to descend to Nautica once more.
It appears Nautica survived the assault on the kingdom from Alizarin and you’re free to see the Queen again, do so and have her shift you back into a fish. Finally you can check out the wares sold in the Weapon shop, both the Siren’s Staff and Corsair’s Coat are useful, the coat being a costume for Erik. Swim above the shop to the Royal Terrarium and speak to the turtle inside, agree to help it find the object to begin Quest 39 - Marking a Momentous Occasion.
Leave the Royal Terrarium and swim down to the depths of Nautica and over to the Courthouse. Speak to the mermaid there and listen to her plea, agree to assist her to begin Quest 40 - Justice is Brined. Once you’re finished with your business in Nautica, Zoom over to the Champs Sauvage (North) Camp and head back to the Eerie Eyrie.
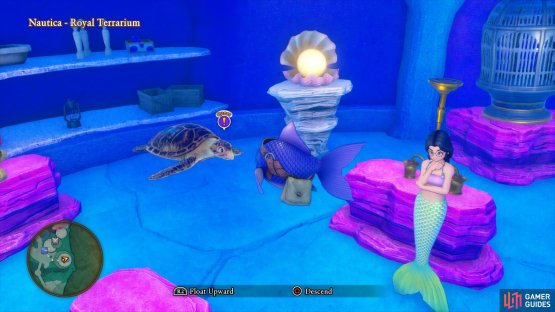

(1 of 2) There are two quests to accept in Nautica

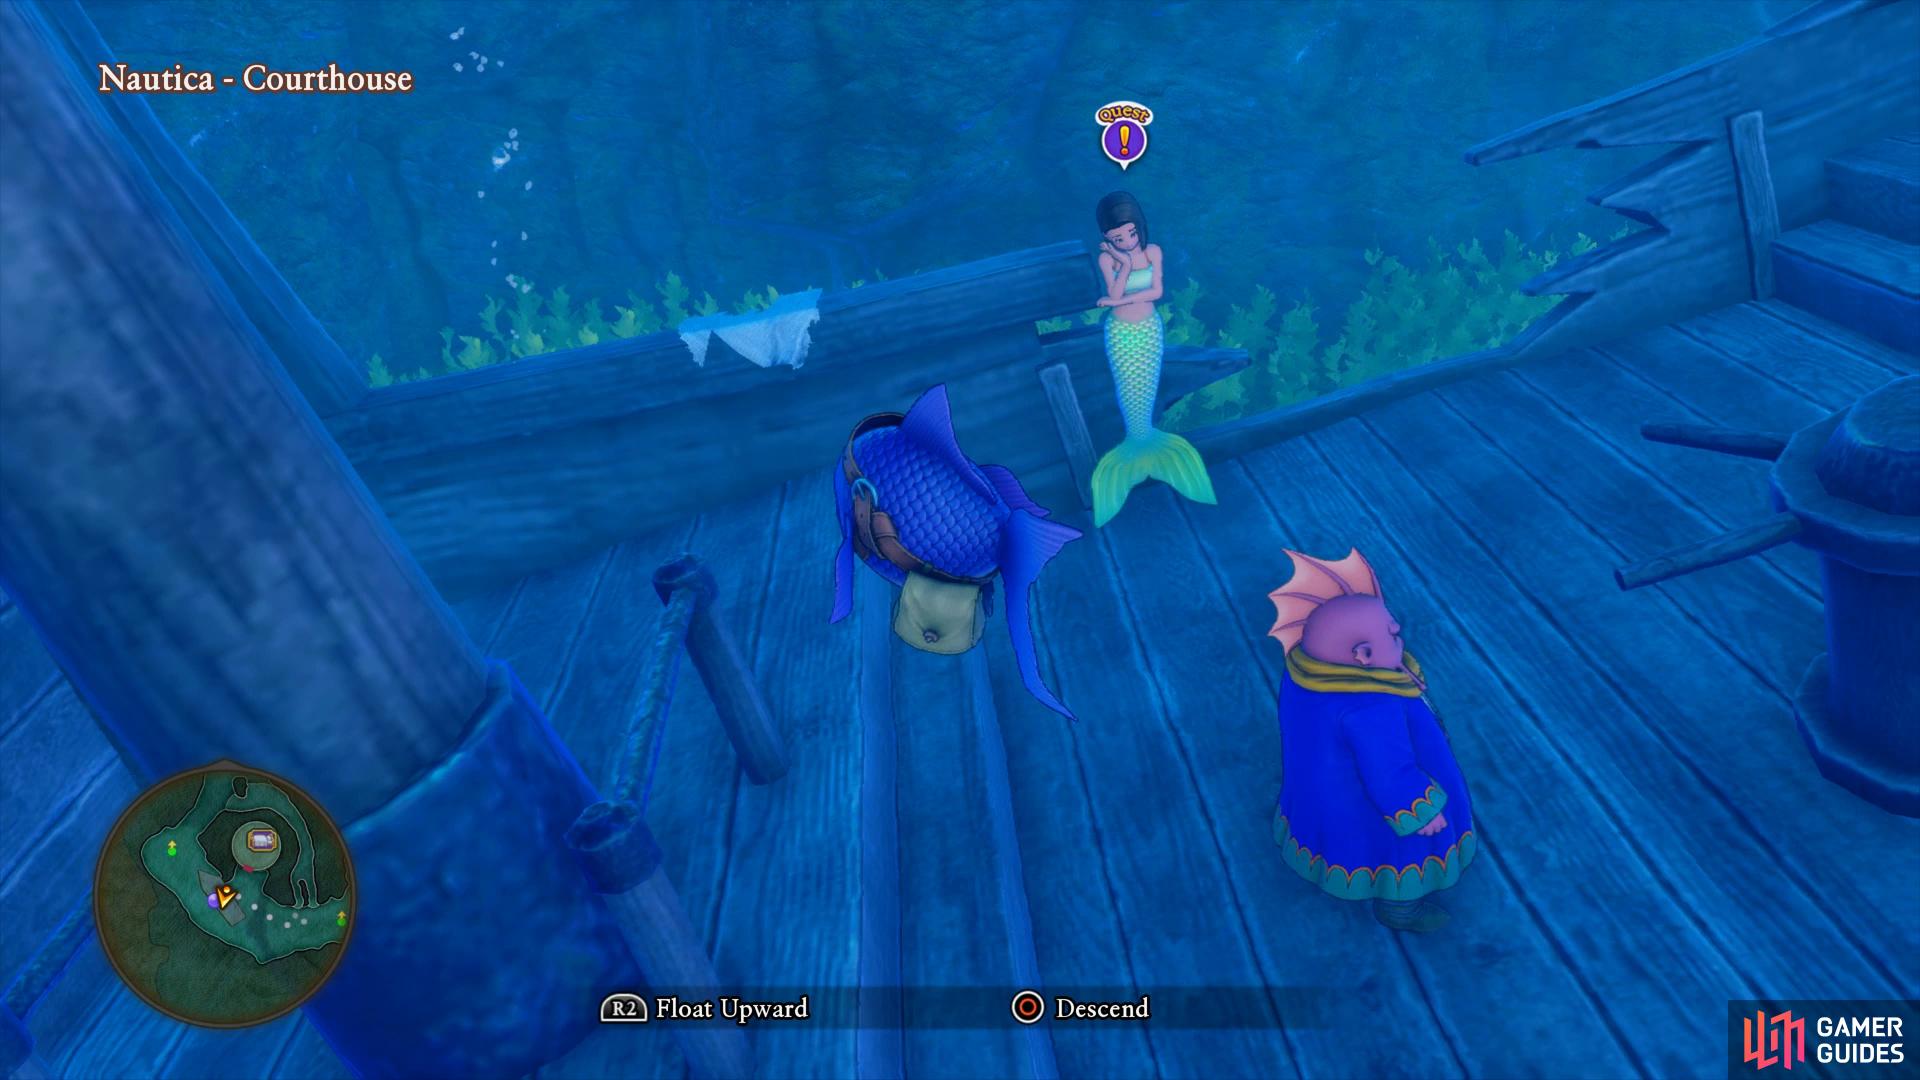
There are two quests to accept in Nautica (left), both of which require you to be in your fish form. (right)
Head up to the Camp and rest up to register this to your Zoom destinations and then work on getting the Hero, Hendrick and Sylvando Pepped Up, switching them with reserve members once they’re Pepped Up. Once all three are ready, look for the Knight Aberrant found to the east of the Camp and use the Arise Pep Power on it before defeating it. Return to Puerto Valor and report to the man near the entrance to complete Quest 34 and obtain a Metal Slime Shield.
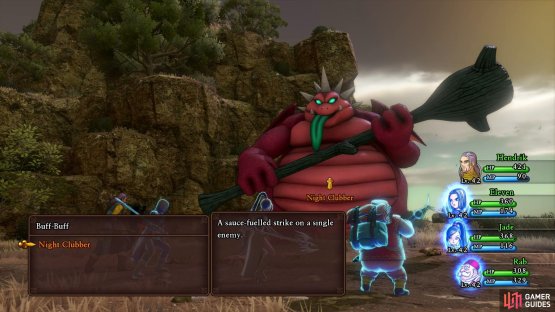
Zoom to The Strand next and sail south to Insula Incognita where you’ll find Night Clubbers to the southeast of the island. Make sure the Hero and Jade are Pepped Up and then defeat the beast with the Buff-Buff Pep Power. You’ll need to make sure you deal the last hit with it so wait until the monster’s name is in orange before unleashing it. Zoom to Lonalulu upon its defeat and speak to the man in the tavern to complete Quest 38 and obtain a Venus’ Tear. While you’re here in Lonalulu, head to the house north of the Item shop and speak with the Canon Lady to obtain a Kanono Canon.

(1 of 2) Use Arise against the Knight Aberrant in the Eerie Eyrie
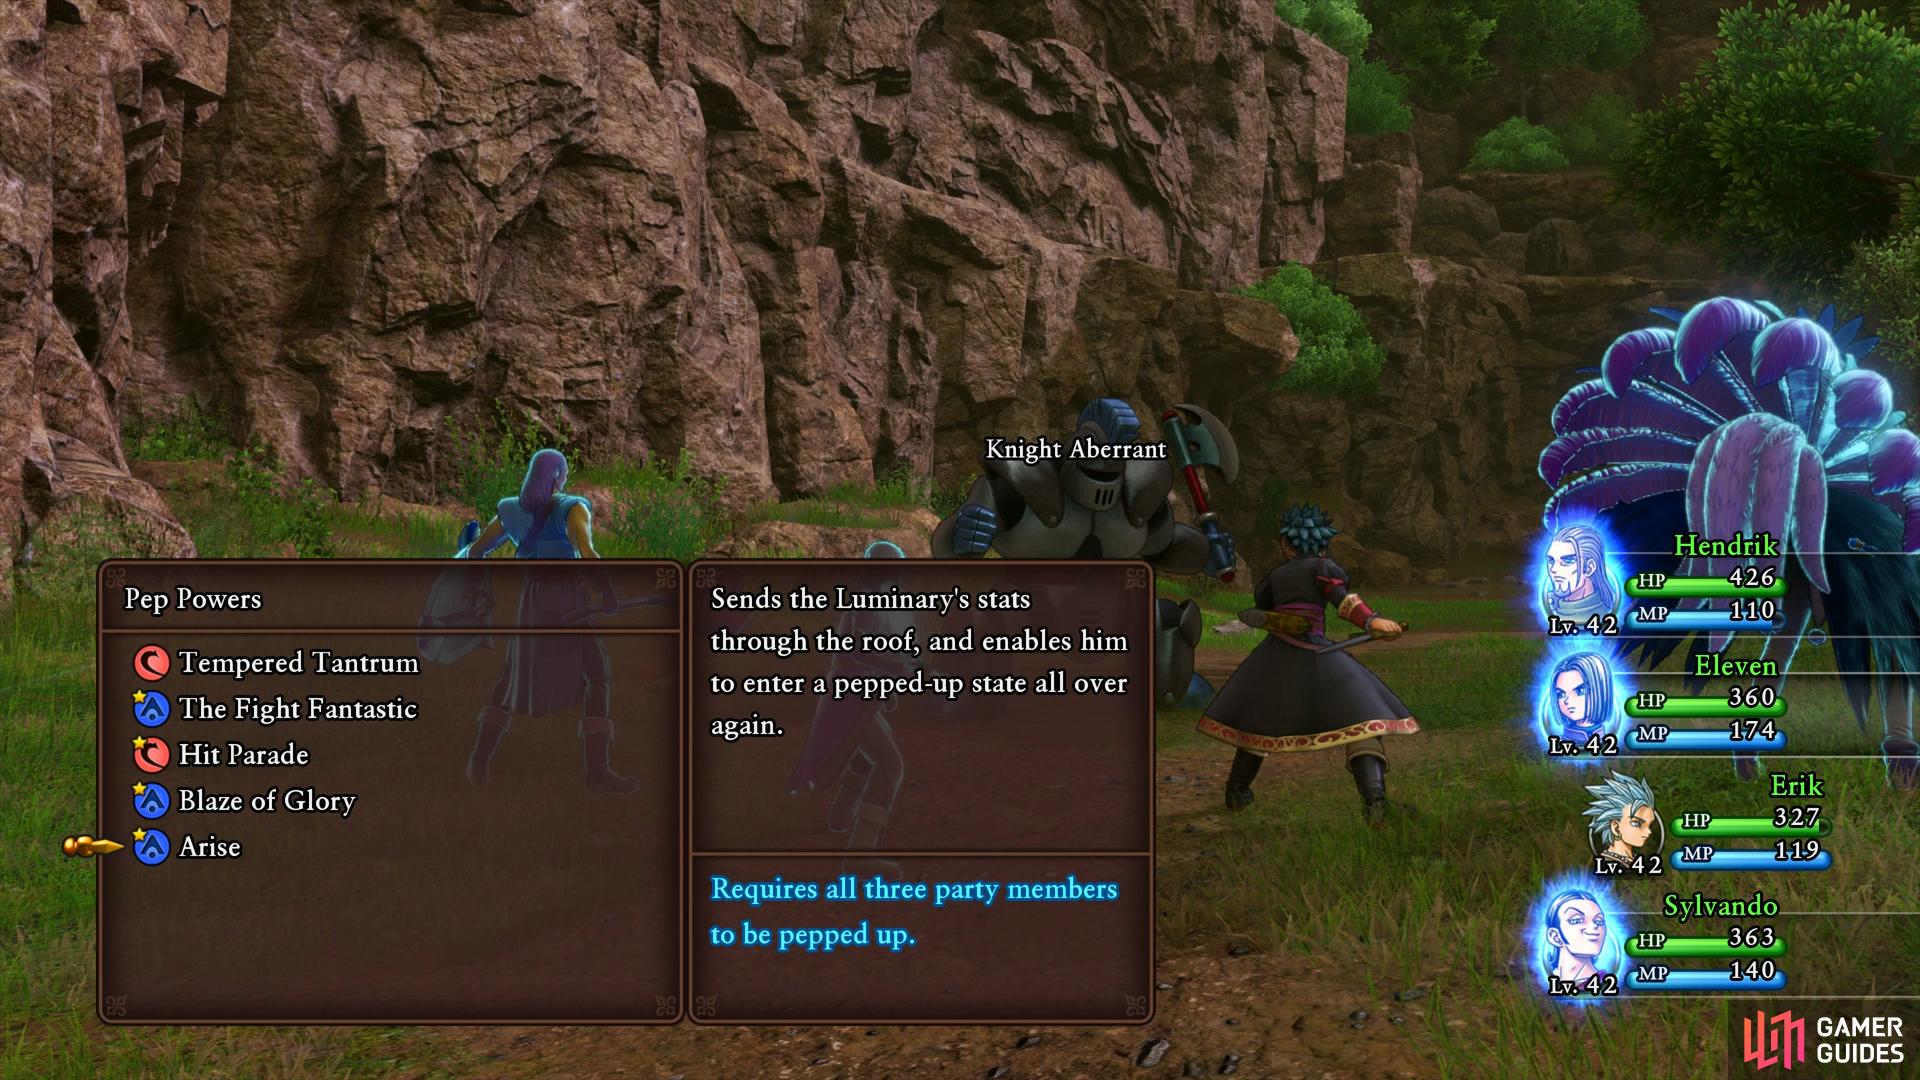

Use Arise against the Knight Aberrant in the Eerie Eyrie (left), make sure Buff-Buff is the killing blow. (right)
Access the sea from Lonalulu and head to the northern seas while Pepping up the Hero with Sylvando in the party. Once he’s Pepped Up, remove him from the party and wait until you encounter a Tentacular. Whittle down its HP until the Tentacular’s name is in orange and then finish it off with the Tempered Tantrum Pep Power to obtain the Kanaloamari. Return to Lonalulu and hand it over to the man to the left of the entrance to complete Quest 37 and obtain a Pentarang.
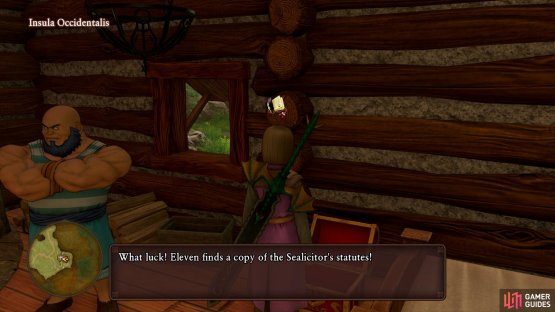
Zoom over to The Strand once more and sail north to Insula Occidentalis. You’ll find a cabin here and upon speaking to the man inside, will learn that the Sealicitor from Nautica died but he did however leave his stuff in the chest. Open it to obtain the Sealicitor’s Statutes and Zoom back to Nautica to turn yourself into a fish again. Swim above the Weapon shop to the Royal Terrarium and give the Kanono Canon to the turtle inside, this will complete Quest 39 and award you the Secrets of the Sunken Spirit Recipe Book.
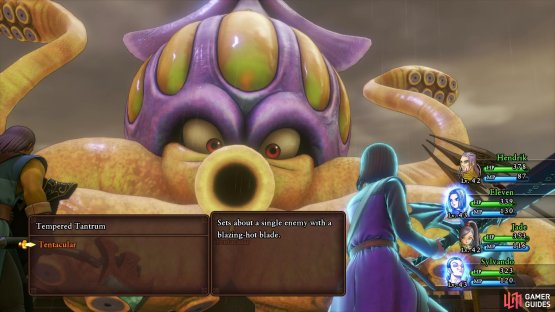
(1 of 2) Make sure Tempered Tantrum delivers the killing blow

Make sure Tempered Tantrum delivers the killing blow (left), you’ll find the notes for the mermaid in Nautica at Insula Occidentalis. (right)
While you’re still in Nautica, swim to the depths and over to the Courthouse to find the mermaid from earlier. Hand her the notes you just picked up on Insula Occidentalis to complete Quest 40 and obtain a Sovereign Seal.
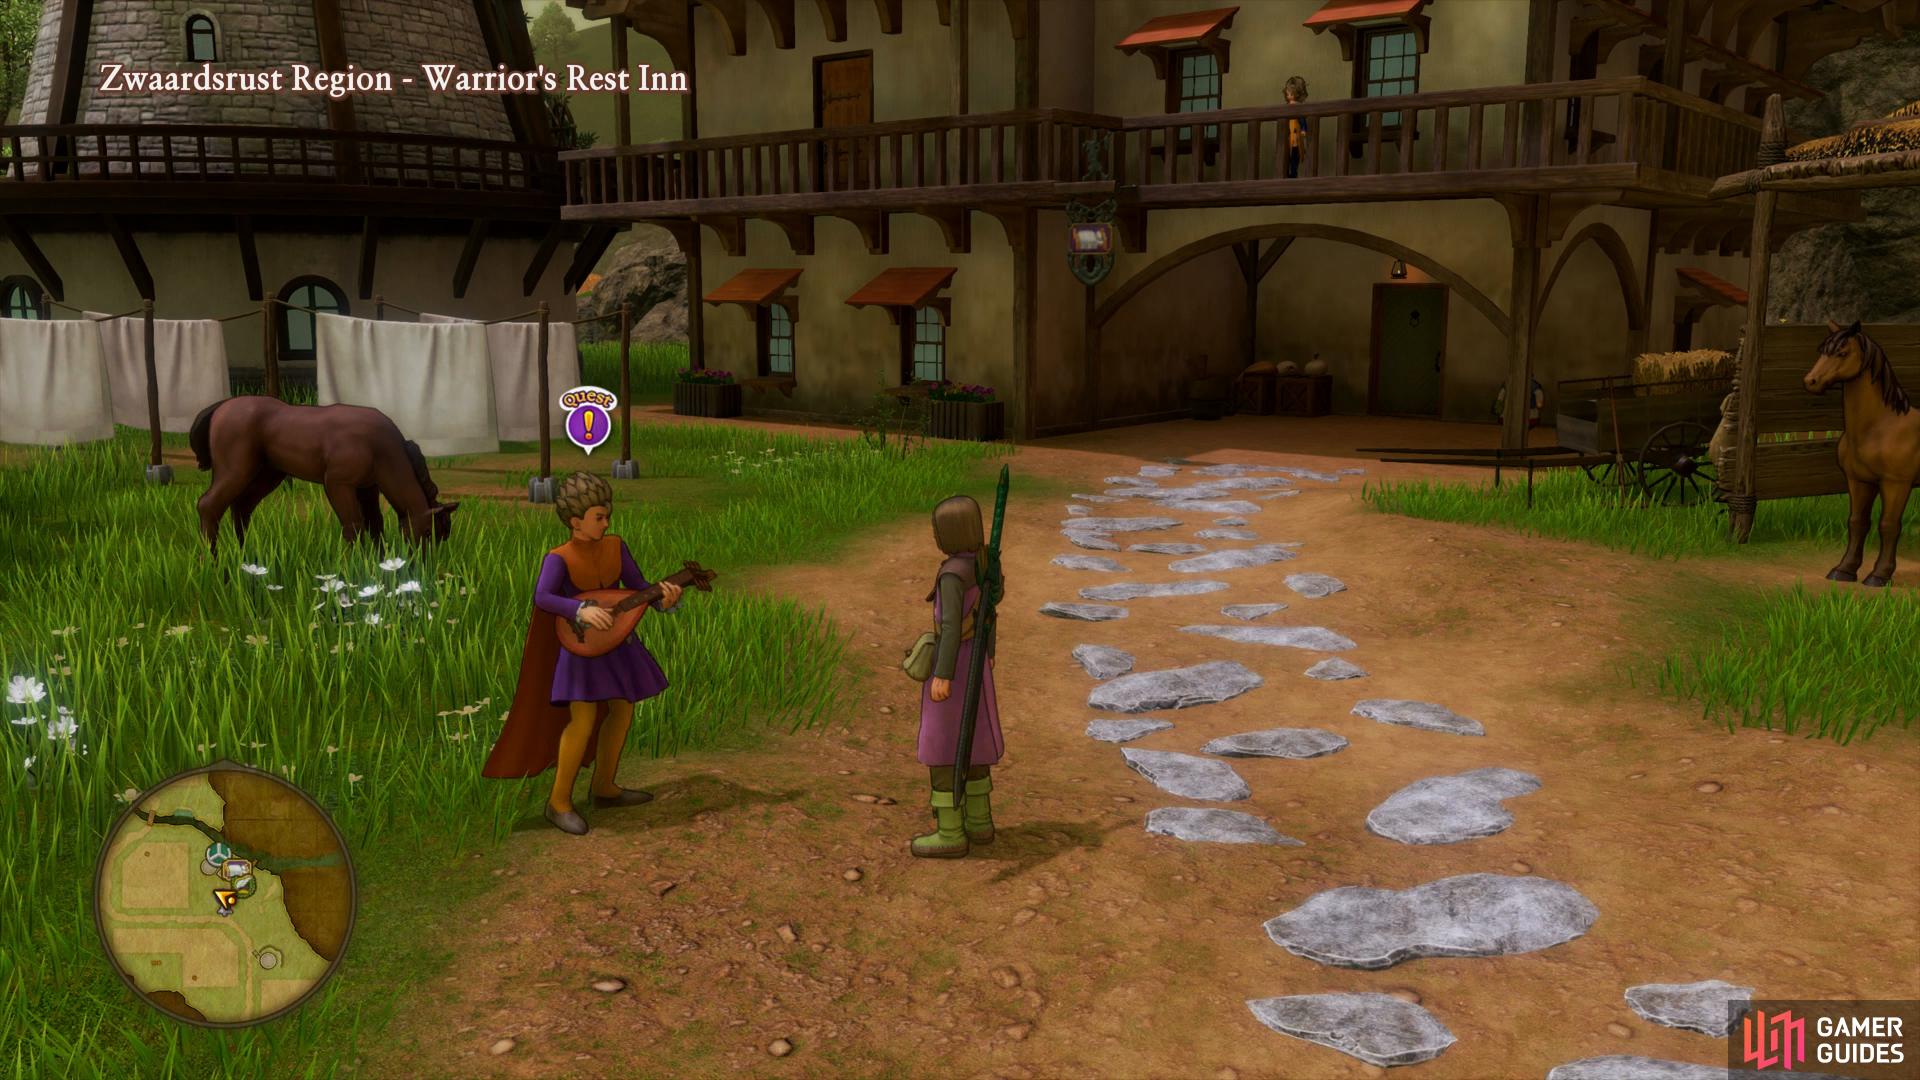
Zoom over to the Warrior’s Rest Inn now to find a minstrel with a request, agree to assist him to begin Quest 41 - A Ballad of Bravery. Zoom over to Dundrasil and make your way to the hut in the southwest that you stayed in earlier with Jade. You’ll find a chest inside containing Luter’s Opus, take this with you back to Luter Van Boss at the Warrior’s Rest Inn to complete the quest and obtain the Recipe Book Fine Fashions for Philosophers.
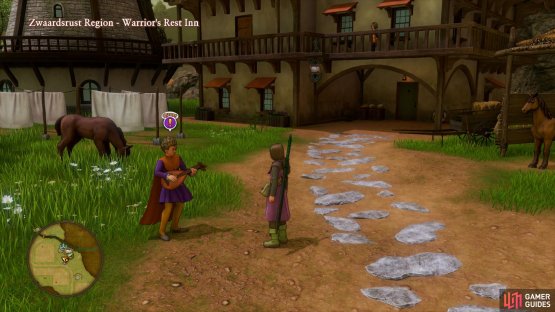
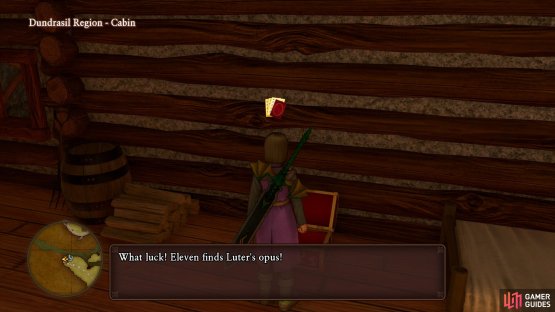
(1 of 2) Head to the Warrior’s Rest Inn to find a new quest
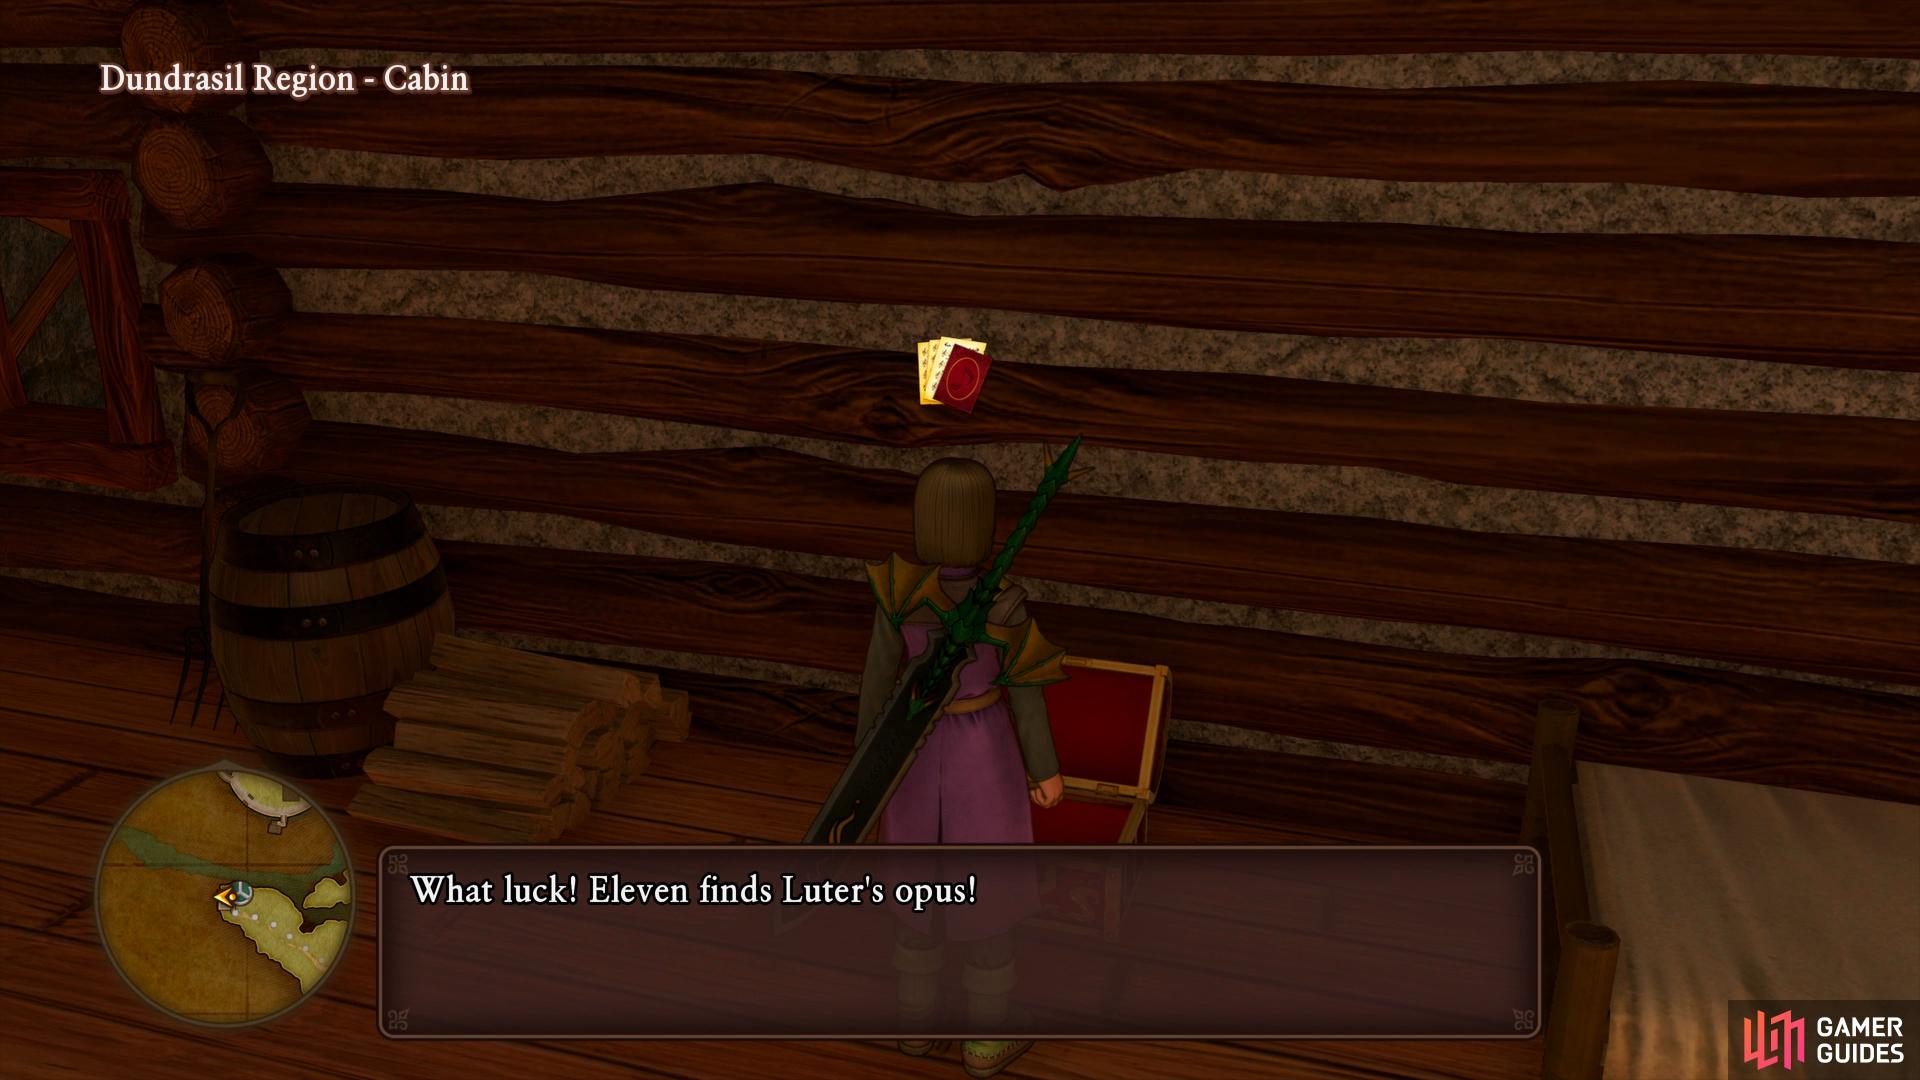
Head to the Warrior’s Rest Inn to find a new quest (left), you’ll find the music in the cabin to the southwest of Dundrasil. (right)
There’s only one more quest to take care of for now and it’s on your way to your next destination so Zoom back to Sniflheim and make your way back to the Snaerfelt.
The Snaerfelt
Make your way over to the hut south of the Hekswood and speak to the man inside, agree to assist him to begin Quest 42 - A Dish Served Cold. You’ll need to defeat a Type G0 which is a rare monster that will appear in battles with Killing Machines. Make your way south to the Camp and use it to register as a Zoom destination along with recovering your HP. You’ll find the Killing Machines around the Frozen Fjord, fight enough of them and the Rare monster will appear. Upon defeating it, return to the man and inform him to complete the quest and obtain some Metal Slime Armor.
Keep fighting Killing Machines until a Type G0 turns up.
Zoom back to the Camp, save your game and rest up, a tough boss is approaching. Make sure you’re around Level 44 and equip any paralysis protection you may have, it will be needed. When you’re ready, proceed past the Frozen Fjord and towards Arboria where the Dragon encased in Ice has broken free and is out for revenge.
Boss: Auroral Serpent

The Auroral Serpent is one of the toughest battles you’ve fought yet as the majority of his attacks are group based and have the ability to inflict multiple status effects. Get unlucky and you could see yourself knocked out in moments. Burning Breath will inflict Paralyze on the party while he usually follows it up by Crashing Down on the party for heavy damage. He can also deal heavy darkness based damage with Kazam for over 120 HP along with a shout which can knock your party over. As you can see, you’ll be spending many turns with party members out of action and taking constant group damage, your healer will need to be healing every combat round to keep up.
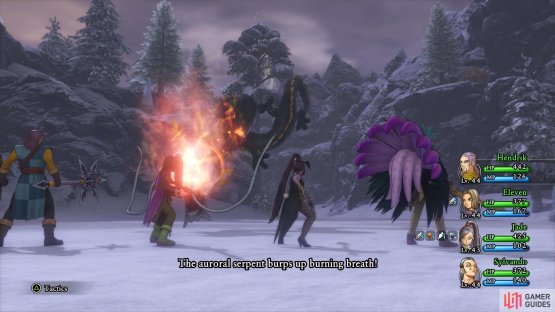

(1 of 2) Burning Breath can inflict Paralyze on multiple characters

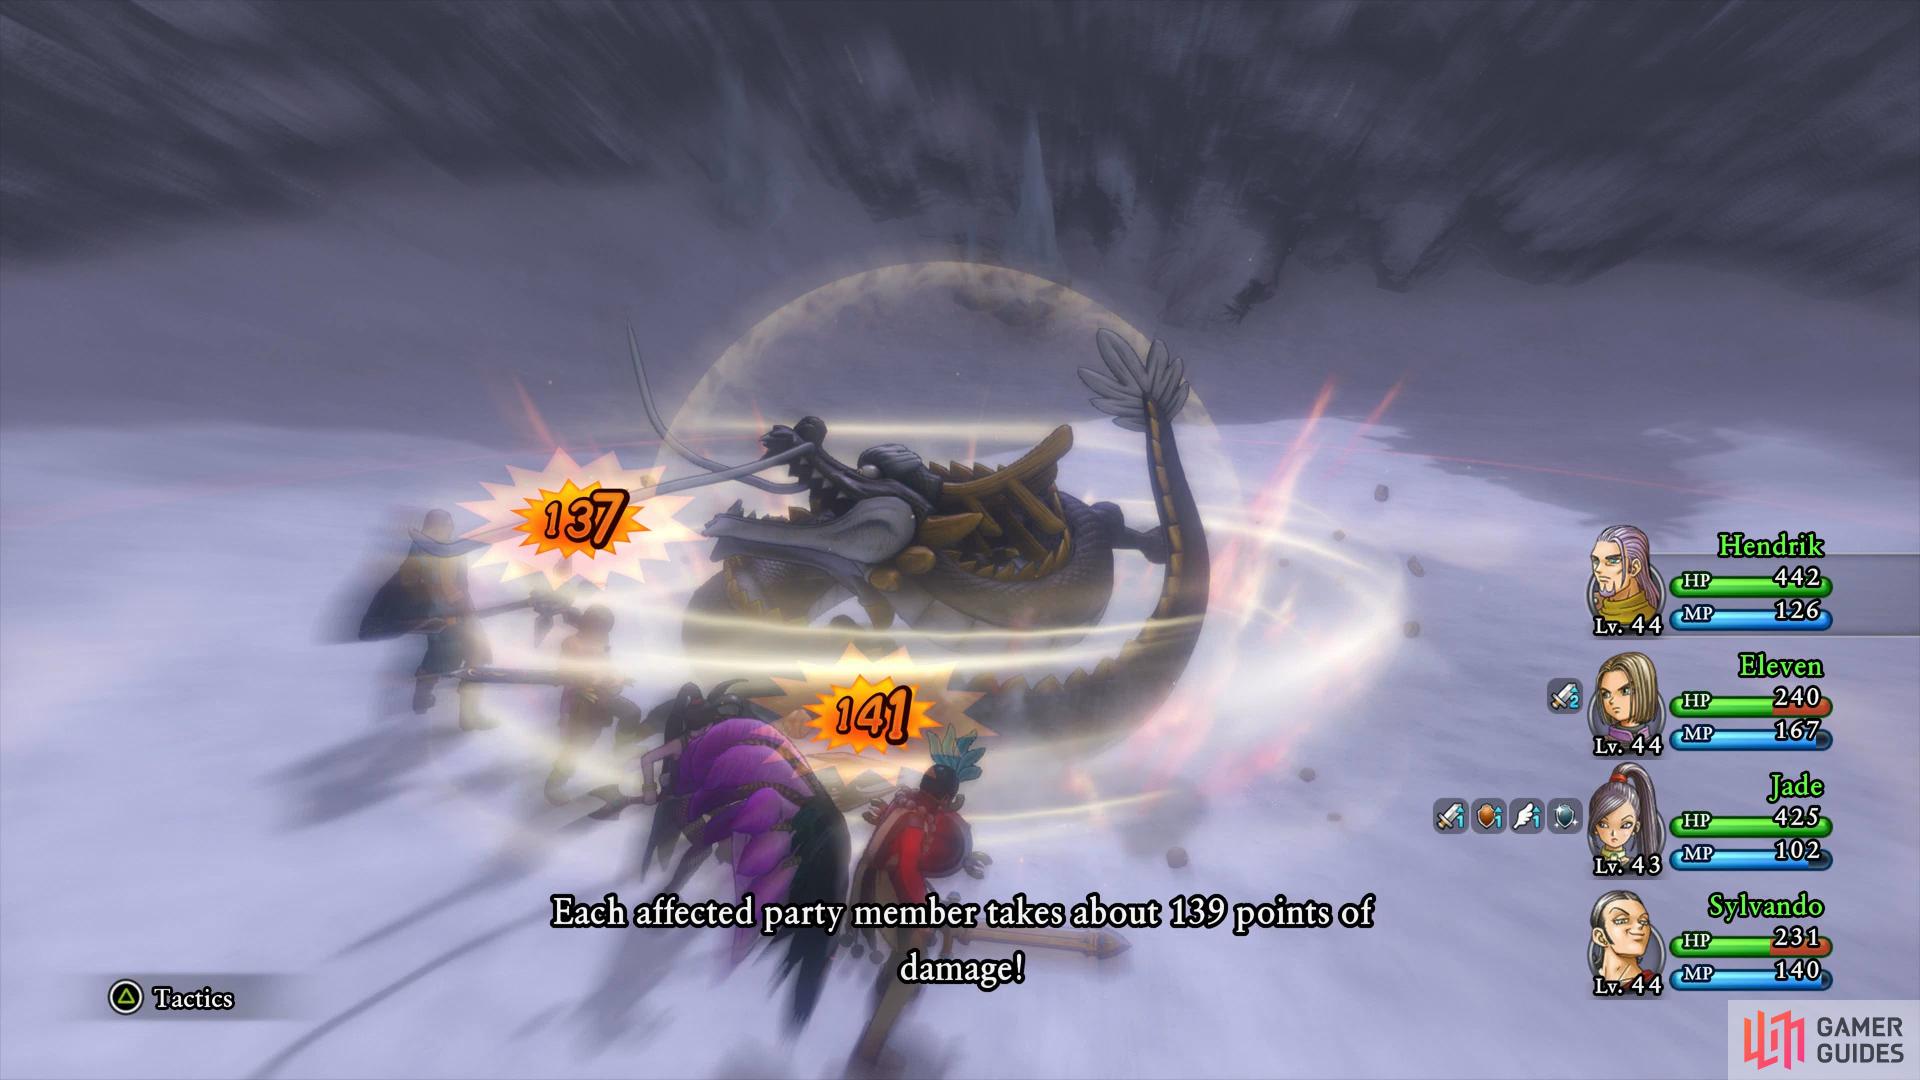
Burning Breath can inflict Paralyze on multiple characters (left), this is usually followed up with a Crash Down on the party. (right)
Jade will want to Re-Vamp twice before using Multithrust, the Hero should continue using Unbridled Blade boosted with Oomphle if possible while Hendrick provides support with Kabuff and healing spells. You can’t go wrong with Sylvando or Rab here however Sylvando has the ability to remove the Paralysis off your party with Tingle. The Auroral Serpent has around 4900 HP so you’ll want to Sap him to increase the damage Unbridled Blade and Multithrust does to him.
Following your victory, the Auroral Serpent uses Burning Breath on the party. When all looks to be lost, Serena appears to save the day with her Harp and rejoins the party shortly after. Once you regain control, follow the path back to the Arborian Highlands. The trek up the mountain to Arboria is no different than the last time you was here, grab a mount and bounce your way to the top where you’ll enter Arboria once more.
Arboria
Arboria was hit hard by the destruction of Yggdrasil and as Serena makes her entrance, she remarks that she can sense Veronica nearby. Make your way over to the Grove of Repose and head forward to witness some heartwrenching scenes. Leave the Grove when you regain control as Serena will inform everyone about Veronica’s passing.
Head up to the Cathedral to meet with Benedictus and he mentions that he had a vision about a legendary being named Cetacea. As he goes to look for more information, head back to the Inn and rest for the night. Upon waking during the night, head north of the Inn to find Serena playing her Harp and her grief overcomes her. With her hair now cut short, Serena inherits all of Veronica’s spells and abilities along with a new Character Builder.
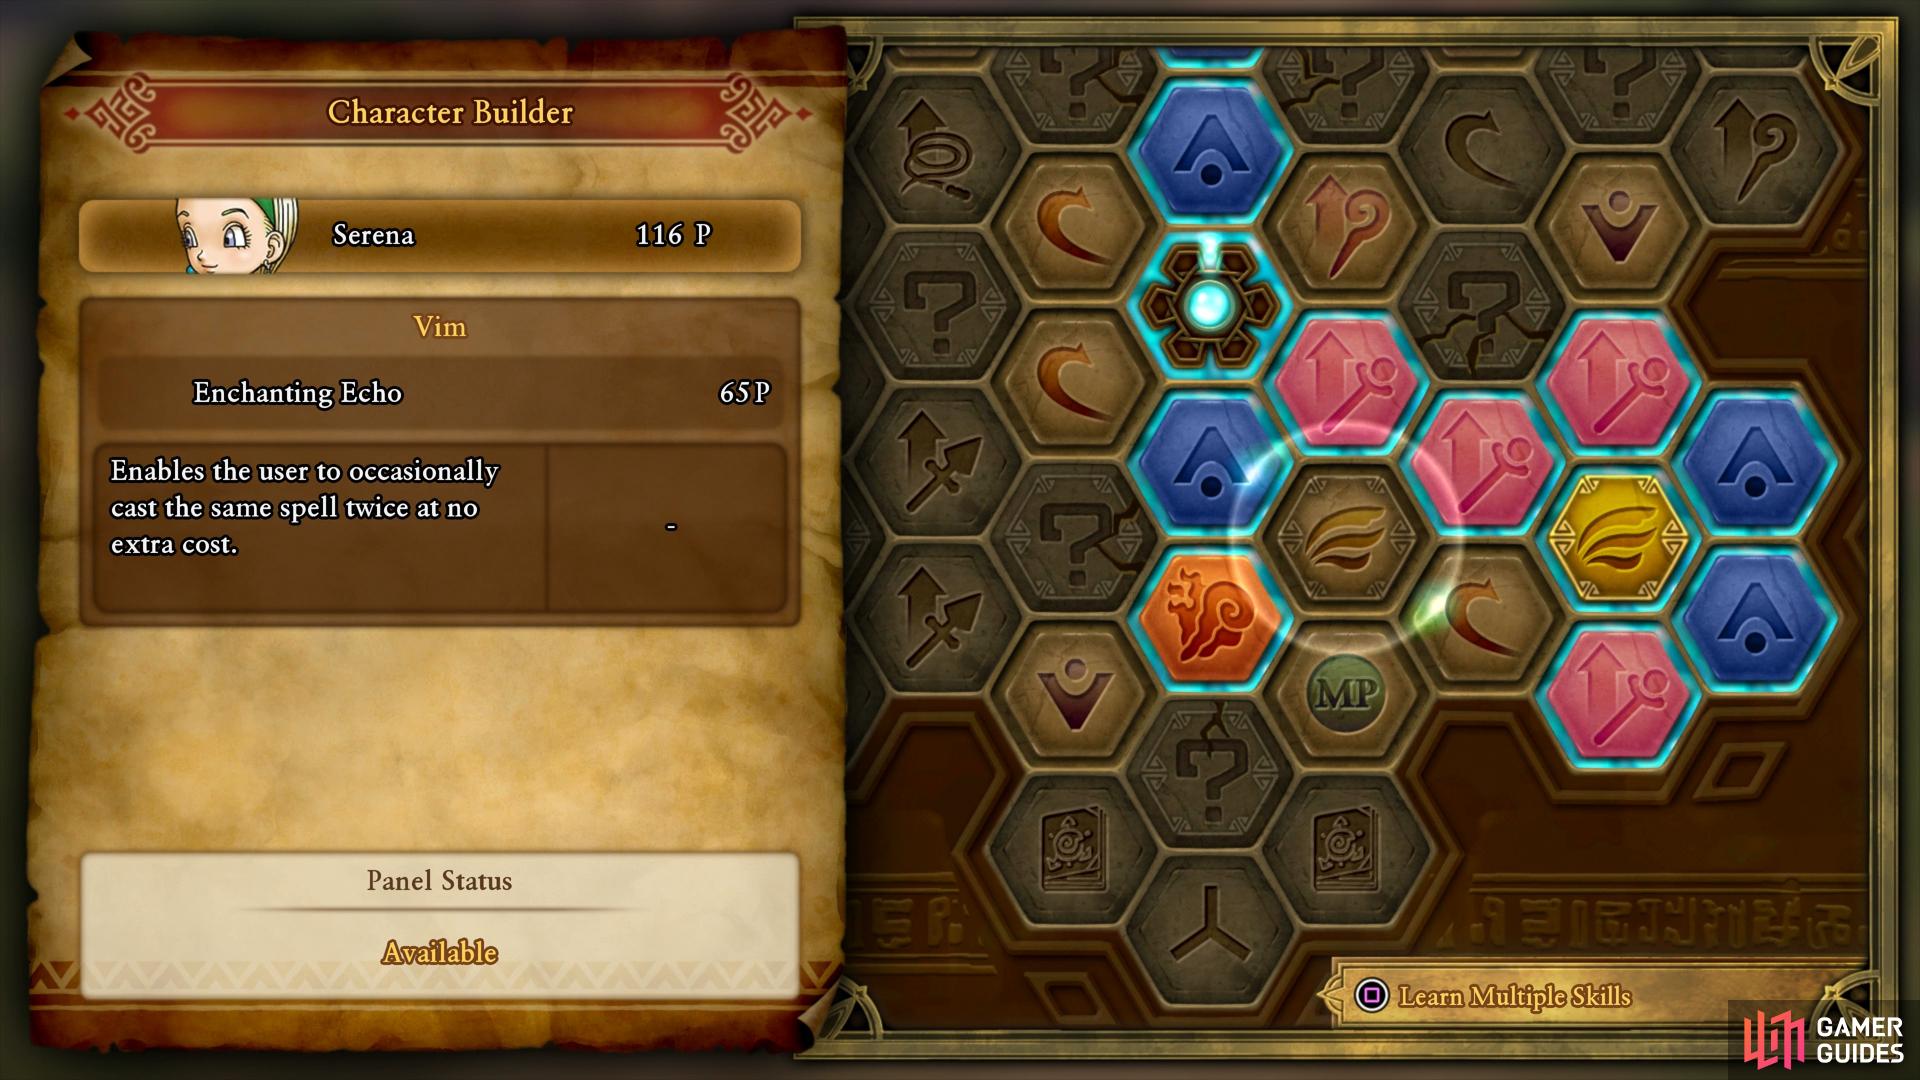
Be sure to learn Enchanting Echo straight away.
You’ll want to decide at this point what way you want to build the new and improved Serena. It’s a good idea to make her an offensive spellcaster, with Veronica gone and Rab and Sylvando able to also heal, you’ll need someone dealing heavy magical damage. Begin by unlocking some abilities in the Vim tree to unlock the Enchanting Echo skill, this will allow you to sometimes cast two spells a turn without using the extra MP. Following this, unlock Antimagic from the Heavy Wands tree to reveal another Mystery Panel, Grace of the Goddess which will bring Serena back from death if she is defeated during battle.
Head back to the Inn and rest up before speaking to Serena the next day who informs you that Benedictus has gone to the mountaintop. Head up the stairs and through the now accessible path to the side of the Cathedral. Make your way to the very top to meet up with the rest of the party where Bendictus will reveal his findings. Playing the flute doesn’t seem to have much effect but once the Hero holds it in his hands, it extends and becomes a fishing rod.
The legendary whale Cetacea is plucked out of the sky and you’ll obtain the Calamus Flute to use if you need to call her at any time. You’ll gain access to the skies at this point but before you go exploring, take the time to Zoom back to Arboria.


Check out the Item shop to discover some useful equipment you may wish to purchase, especially for Serena. Speak to the minstrel outside to accept Quest 43 - A Long-Lost Literary Love. You’ll have to wait until you head back to Gallopolis before finishing this quest so use the Calamus Flute from the Important Items section of your bag to access the skies.
Exploring the Skies
There are a few rules to take note of when using Cetacea to explore Erdrea’s skies. You can’t land anywhere you want, don’t think of Cetacea as a means to get around easier but more of a way to reach new areas. You can also call on Cetacea from anywhere, be it a dungeon or a town. When you’re ready, fly to the golden sparkle line to land at the Sniflheim Whale Way Station.
Sniflheim Whale Way Station
| Items | Area |
|---|---|
| An Album of Imperial Attire | Southwest, chest |
| Sparkly Spots | Area |
|---|---|
| Royal Ruby | Southern path |
| Ice Crystal, Ethereal Stone, Savvy Saphire | Ore gathering point |
| Monsters | HP |
|---|---|
| Vicious Otter Shambles | ~473 |
| Vicious Chihuawyrm | ~951 |
These Whale Way Stations that you can land on will have various items to loot along with monsters to fight. Head south along the path, nabbing the Royal Ruby from the Sparkly Spot along the way and keep to the left wall as the area opens up. You’ll find an Ore gathering point here containing an Ice Crystal, Ethereal Stone and a Savvy Saphire. Search to the west of this open area before leaving to find a chest containing a Recipe Book, An Album of Imperial Attire.
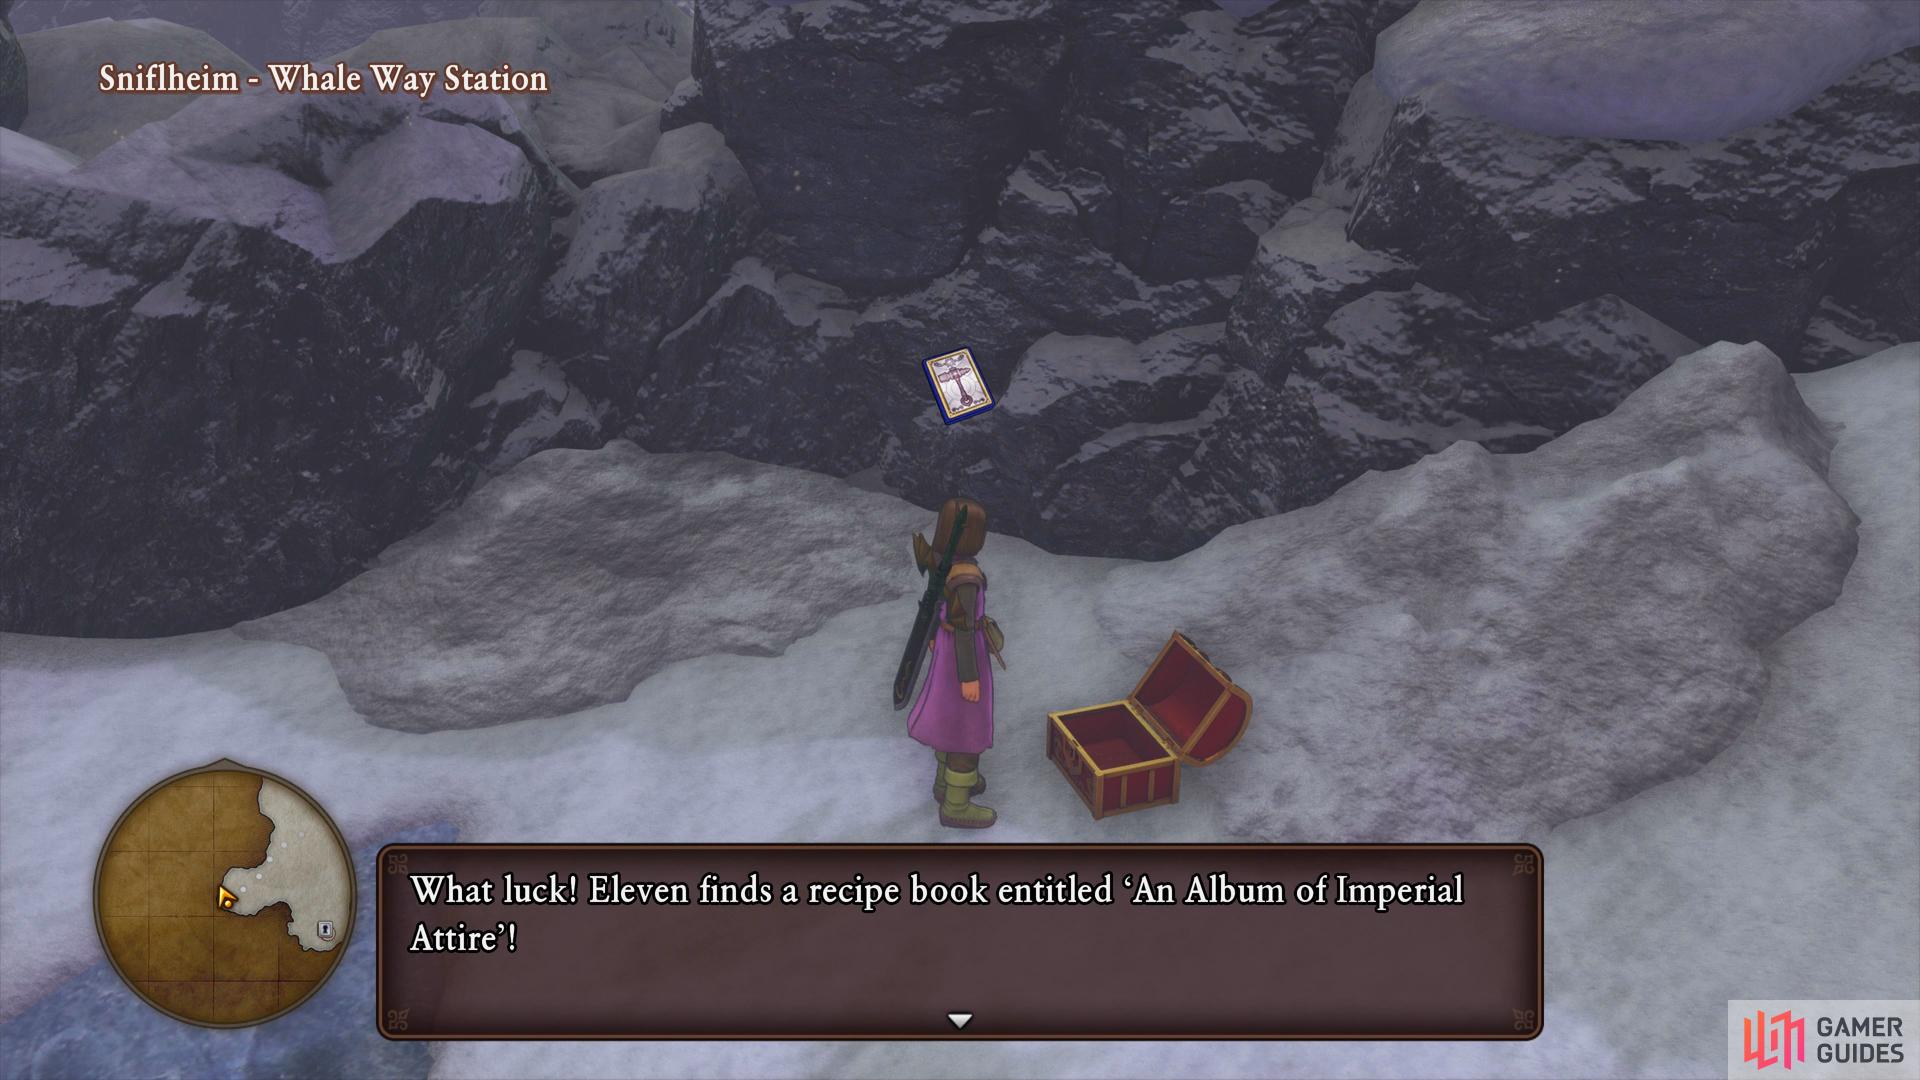
Nab yourself a new Recipe Book here.
Use the Calamus Flute and fly southwest to land at the Champs Sauvage Whale Way Station.
Champs Sauvage Whale Way Station
| Items | Area |
|---|---|
| An Earring for Every Element | North, chest |
| Sparkly Spots | Area |
|---|---|
| Lucida Shard | Southern path |
| Gold Nuglet | Along the stream |
| Monsters | HP |
|---|---|
| Vicious Goobonce | ~225 |
| Vicious Bloodbonnet | ~232 |
| Caped Caperer | ~218 |
| Vicious Very Devil | ~220 |
Follow the path south, looting the first Sparkly Spot containing a Lucida Shard along the way. As soon as the path opens up, search along the northern wall behind a tree to find a chest containing another Recipe Book, An Earring for Every Element. Finally, head down to the stream and follow it west to find the second Sparkly Spot containing a Gold Nuglet.
Call Cetacea again and this time fly directly south to the Laguna di Gondolia Whale Way Station.
Laguna di Gondolia Whale Way Station
| Sparkly Spots | Area |
|---|---|
| Wyrmwood | Northern path |
| Wyrmwood | Northern path |
| Colourful Cocoon x2, Silkblossom | Flower gathering point |
A rather lonely Whale Way Station at Laguna di Gondolia, head north along the path to find two Sparkly Spots both containing Wyrmwoods. Once you reach the centre you’ll find a Flower gathering point to the west containing a Silkblossom and two Colourful Cocoons.
That’s all there is to see here so return to Cetacea and fly southeast to the Manglegrove.
The Manglegrove Whale Way Station
| Items | Area |
|---|---|
| Meteorang | North, chest |
| Sparkly Spots | Area |
|---|---|
| Colourful Cocoon | Northern path |
| Equable Emerald | Northern path |
| Ethereal Stone | Southeast |
| Monsters | HP |
|---|---|
| Stone Guardian | ~594 |
| Cureslime | ~158 |
| Bloody Hand | ~180 |
| Vicious Walking Corpse | ~474 |
| Armful | ~554 |
| Hardy Hand | ~8 |
You’ll encounter Hardy Hands at this Whale Way Station, the metal variant of the Hand mosters that when defeated, will reward massive amounts of exp. Head along the northern path and grab the Sparkly Spots containing a Colourful Cocoon and an Equable Emerald. Once the area opens up, search north for a chest next to a stone column containing a Meteorang. Head southeast from here to find a Sparkly Spot containing an Ethereal Stone before calling Cetacea once more.
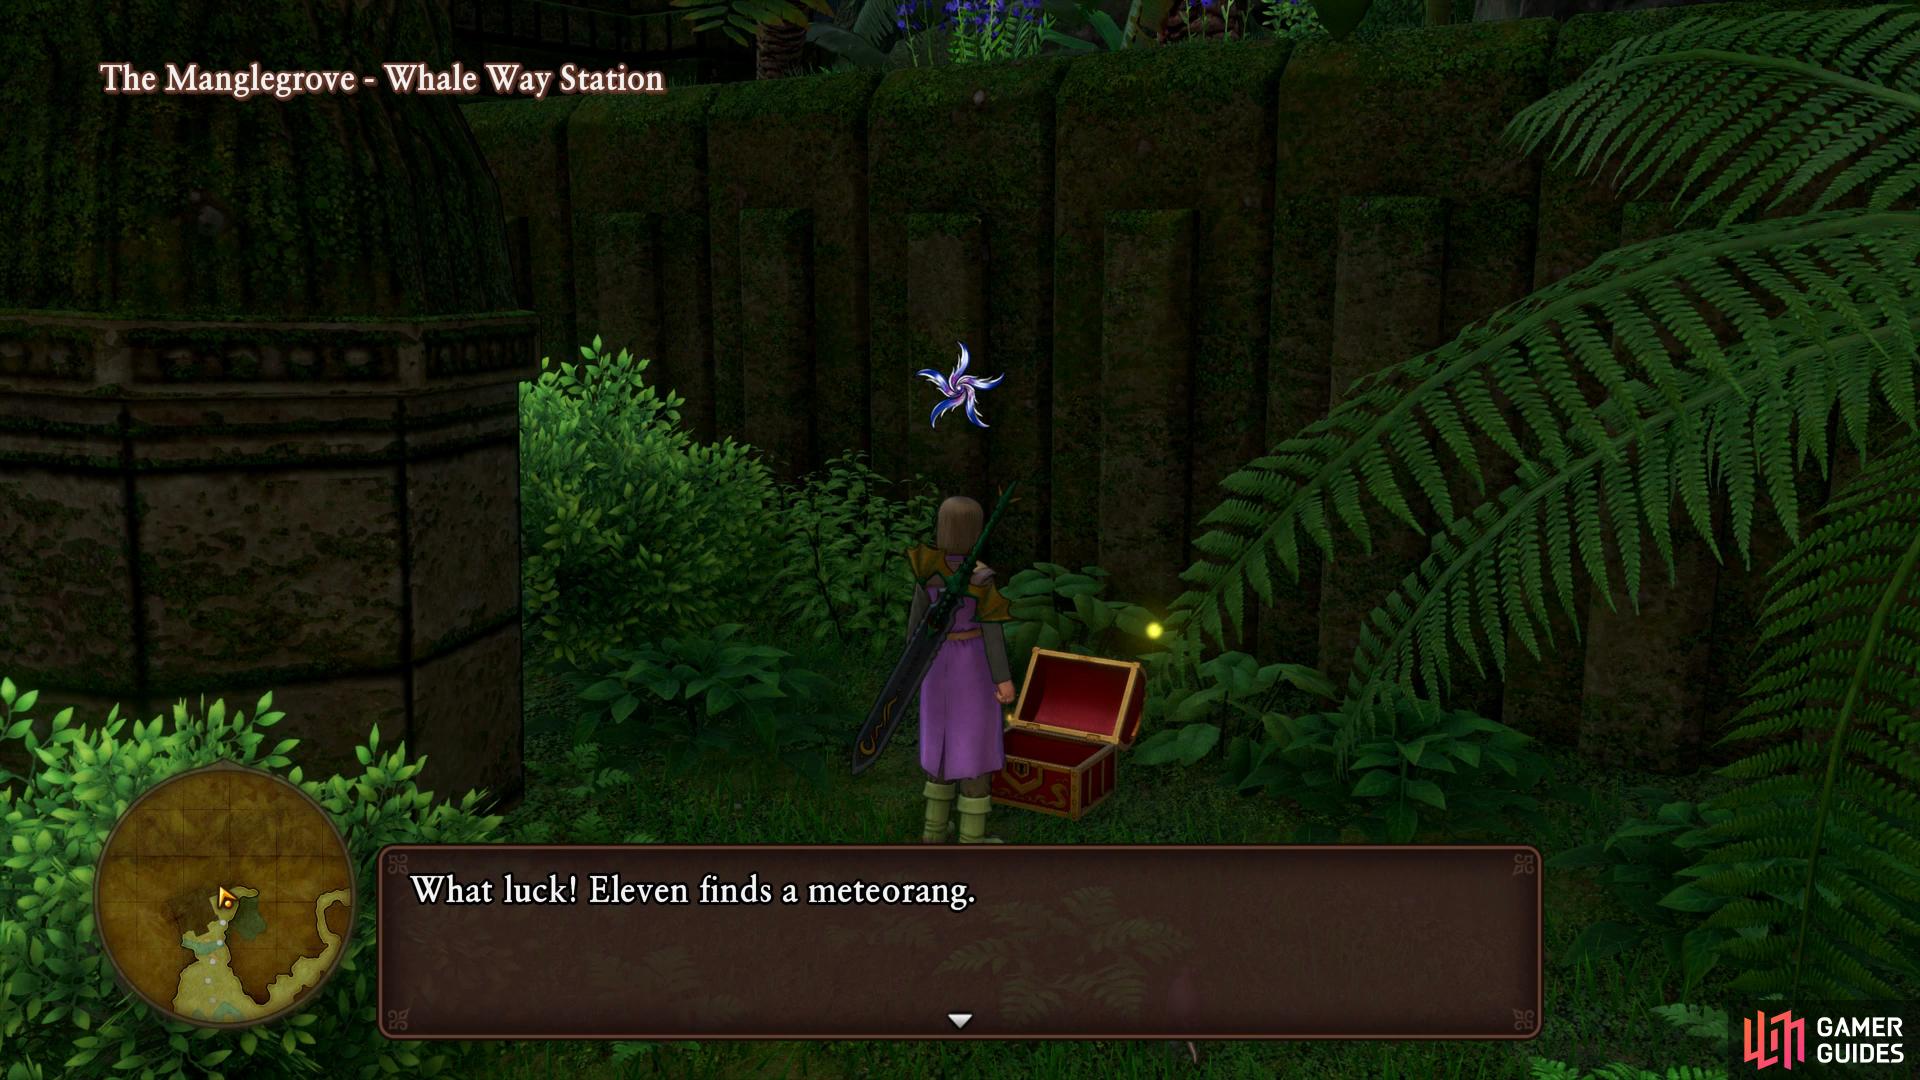
You’ll find a useful Boomerang behind the stone column to the north.
Your next destination lies southeast of the previous one, in Gallopolis.
Gallopolis Whale Way Station
| Sparkly Spots | Area |
|---|---|
| Brighten Rock | Southern path |
| Brighten Rock | Southern path |
| Wyrmwood x2, Spellbound Bough | East, Tree gathering point |
| Sainted Soma | Southeast water |
| Monster | HP |
|---|---|
| Penny Pincher | ~245 |
Another area with only one particular monster to fight, the Penny Pinchers. Follow the southern path and grab the two Sparkly Spots along the way containing two Brighten Rocks. Once the area opens up, search to the east to find a Tree gathering point containing a Spellbound Bough and two Wyrmwoods. Finally, search south of this tree to find the final Sparkly Spot containing a Sainted Soma in the water.
Call on Cetacea and this time fly east of the Gallopolis station to land in Hotto.
The Hotto Steppe - Southern Whale Way Station
| Item | Area |
|---|---|
| Technicolour Dreamcloth x3 | West, behind the fallen tree, chest |
| Sparkly Spots | Area |
|---|---|
| Densinium | Landing Area |
| Densinium | Western path |
| Sunny Citrine | West |
| Monster | HP |
|---|---|
| Balhib | ~566 |
Another relatively small Whale Way Station with a solitary monster, the Balhib. Search in the northeast corner from where you land to find the first Sparkly Spot containing a Densinium and then follow the path west to grab a Sparkly Spot containing some more Densinium. Once the area opens up, search northeast for a Sparkly Spot containing a Sunny Citrine while you’ll find a chest to the northwest of this spot containing three pieces of Technicolour Dreamcloth.
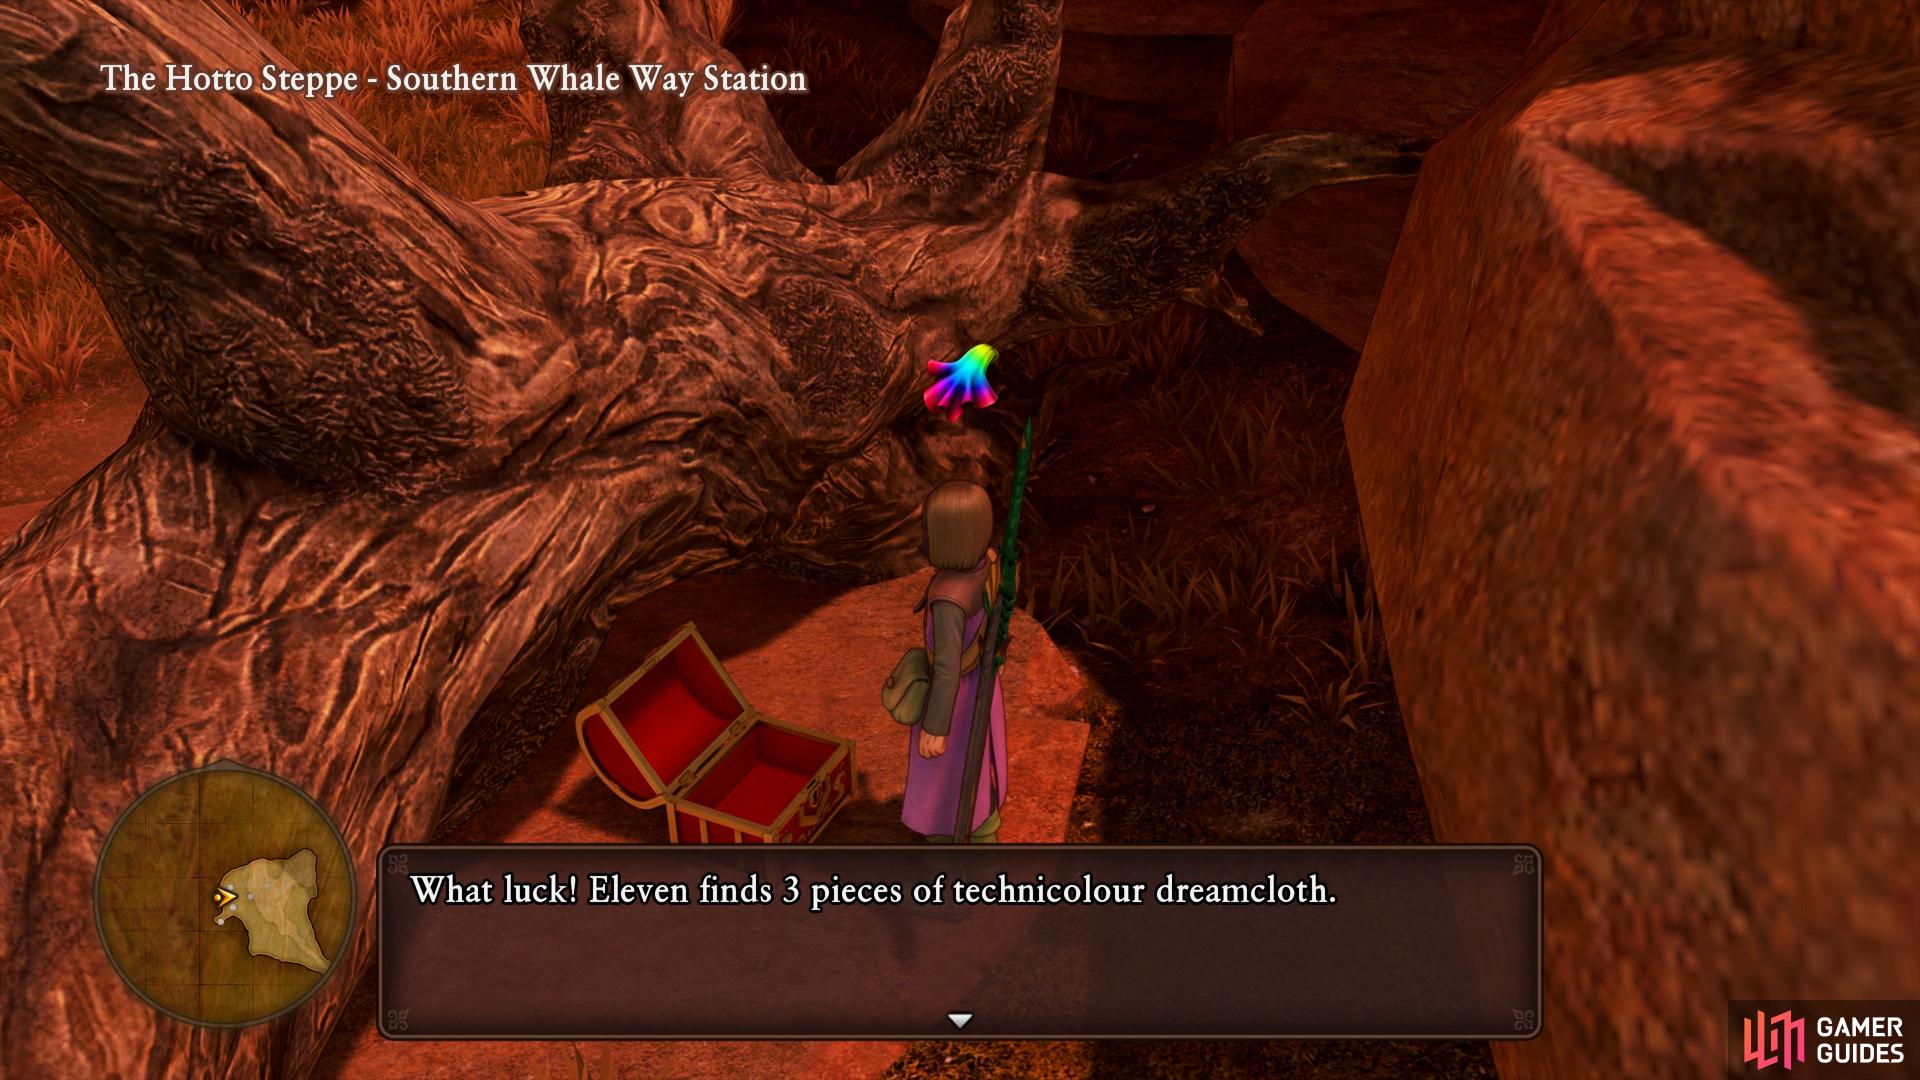
This chest is hidden behind the fallen tree.
Take to the skies once more and head to the eastern most whale Way Station.
The Hotto Steppe - Northern Whale Way Station
| Item | Area |
|---|---|
| Even More Dragony Designs | Southwest, behind locked door, chest |
| Sparkly Spots | Area |
|---|---|
| Dieamend | Landing Area |
| Lava Lump | Southern path |
| Dragon Horn | Southeast |
| Artful Amethyst | South |
| Monsters | HP |
|---|---|
| Liege Lizard | ~880 |
| Vicious Ethereal Serpent | ~833 |
| Evangelizard | ~460 |
Search behind the landing area to find the first Sparkly Spot containing a Dieamend and then follow the path south, looting the next Sparkly Spot along the way containing a Lava Lump. Once the area opens up, search in the water to the east to find a Sparkly Spot containing a Dragon Horn. Continue south along the edge and climb onto the rocks to find the final Sparkly Spot containing an Artful Amethyst. Before you leave, head to where the locked door is and search behind it to find a chest containing a Recipe Book, Even More Dragony Designs.
Call upon Cetacea once more and fly to the final Whale Way Station located to the northeast of Erdrea.
Zwaadrsrust Whale Way Station
| Sparkly Spots | Area |
|---|---|
| Wyrmwood | Northern path |
| Wyrmwood | Central |
| Artful Amethyst | North |
| Monster | HP |
|---|---|
| Dark Sabrecub | ~327 |
Head along the northern path and search by the first tree to find a Sparkly Spot containing a Wyrmwood. Continue along the path and climb on top of the arch to find the next Sparkly Spot containing another Wyrmwood before heading to the northern most point to locate the final Sparkly Spot containing an Artful Amethyst.
With all of the Whale Way Stations explored and looted, there’s only one place left to visit. Head Northeast to the floating island and land to reach a mysterious place.
No Comments